Simon Says Stamp Merry & Bright Snowflakes

Hello Crafty Friends and welcome back! Thanks so much for stopping by to check out today’s project featuring the new Falling Snowflakes Acetate Foil Transfer Sheets from Simon’s latest release, Festive Fun. Let’s go ahead and go through the details!

NOTE: all supplies are linked in the thumbnails at the end of this blog post.

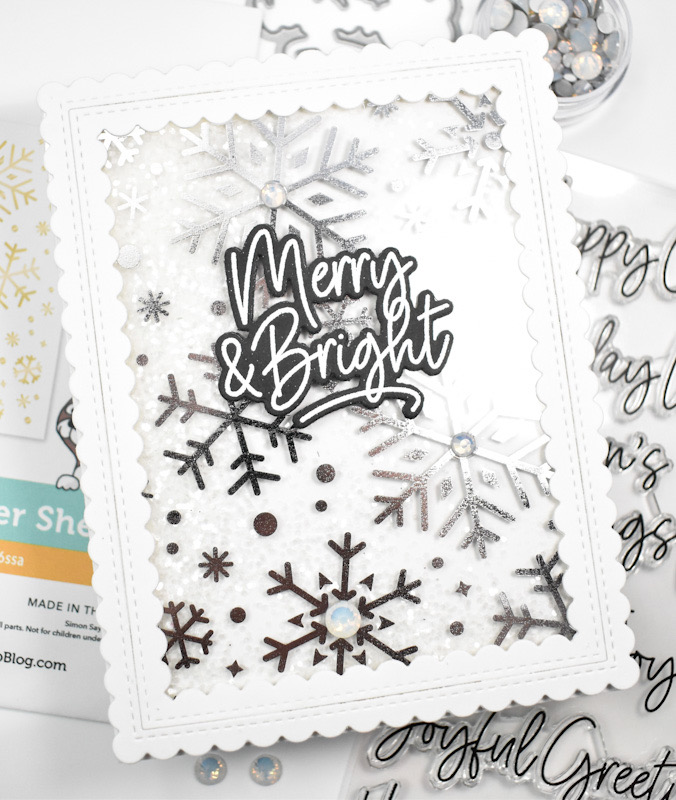
I began this project by silver foiling the acetate sheet to create a shaker card. To build the shaker, I used the PFS Stitched Scallop Rectangle to create a frame and applied glue around the edges and adhered the acetate sheet. I then added foam strips around the edges to create the well for my glitter shaker bits. A plain white panel was then adhered to that to contain everything. I did have some edges hanging out, because I don’t have the steadiest of hands, so I trimmed that off with scissors.
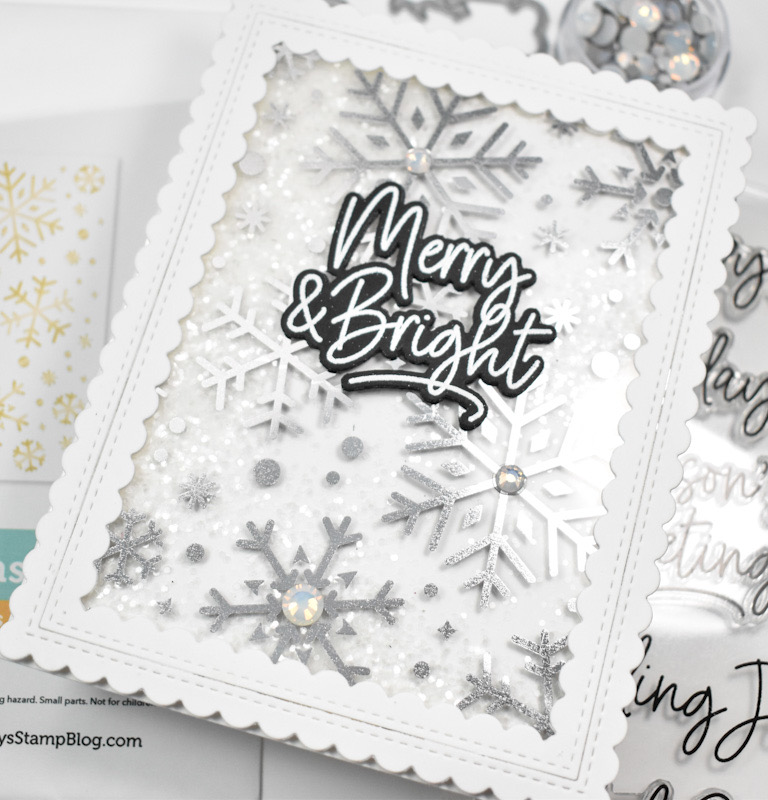
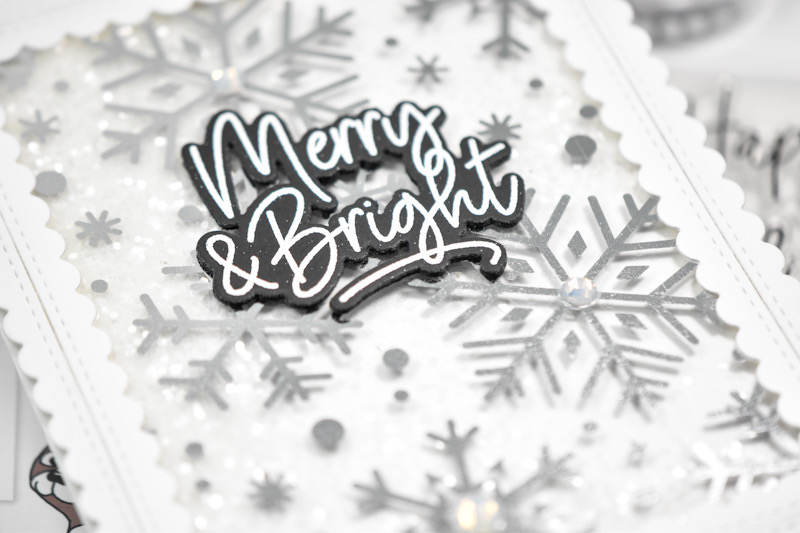
I stamped the Merry & Bright sentiment, which is from the Big Holiday Words set, using VersaMark ink onto black cardstock and heat set that using Detail White Embossing Powder. I trimmed it out using the coordinating die, along with two additional cuts, because I love that stacked sentiment look! The panel was adhered to the card base, the sentiment was glued in place and some Opal Dazzling Gems were added to finish up.

That does it for this project! I’m glad that I finally got the hang of making shaker cards, but I don’t even want to think about how many I messed up back in the day! Thanks for joining me, and I hope you have a fabulous day!
Supply List
Affiliate links used at no cost to you. What does this mean? If you use the links within this post to make a purchase, I receive a small commission, which allows me to continue to post crafty content for your enjoyment. I truly appreciate your support!
Latest Posts
- Simon Says Stamp Braided Greetings

- Together By Design Color Cube Floral

- Simon Says Stamp Cute Duckling

- Simon Says Stamp Watercolor Wild Rose

- Simon Says Stamp Striped Missing You