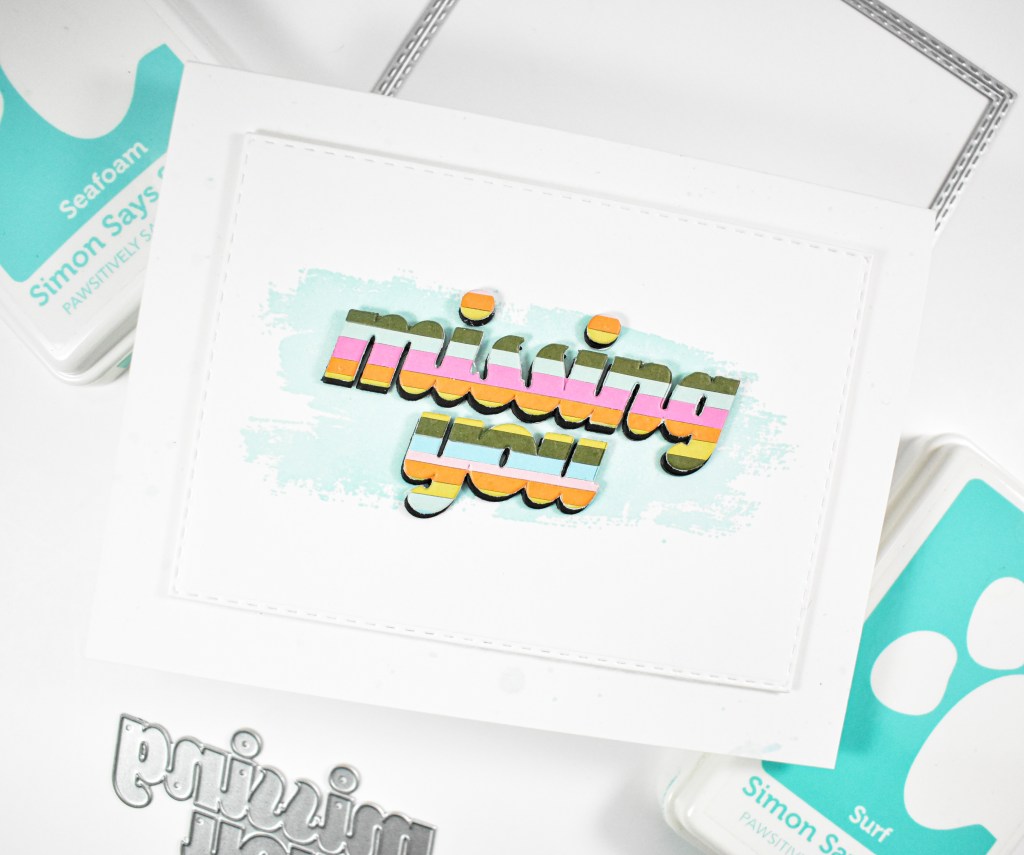
Simon Says Stamp Striped Missing You

Hey There! Thanks so much for swinging by! Today’s project is featuring the new Missing You die from Simon’s latest release, In My Heart. It’s a super quick one, so let’s go ahead and go through the deets!
NOTE: all supplies are linked in the thumbnails at the end of this blog post.
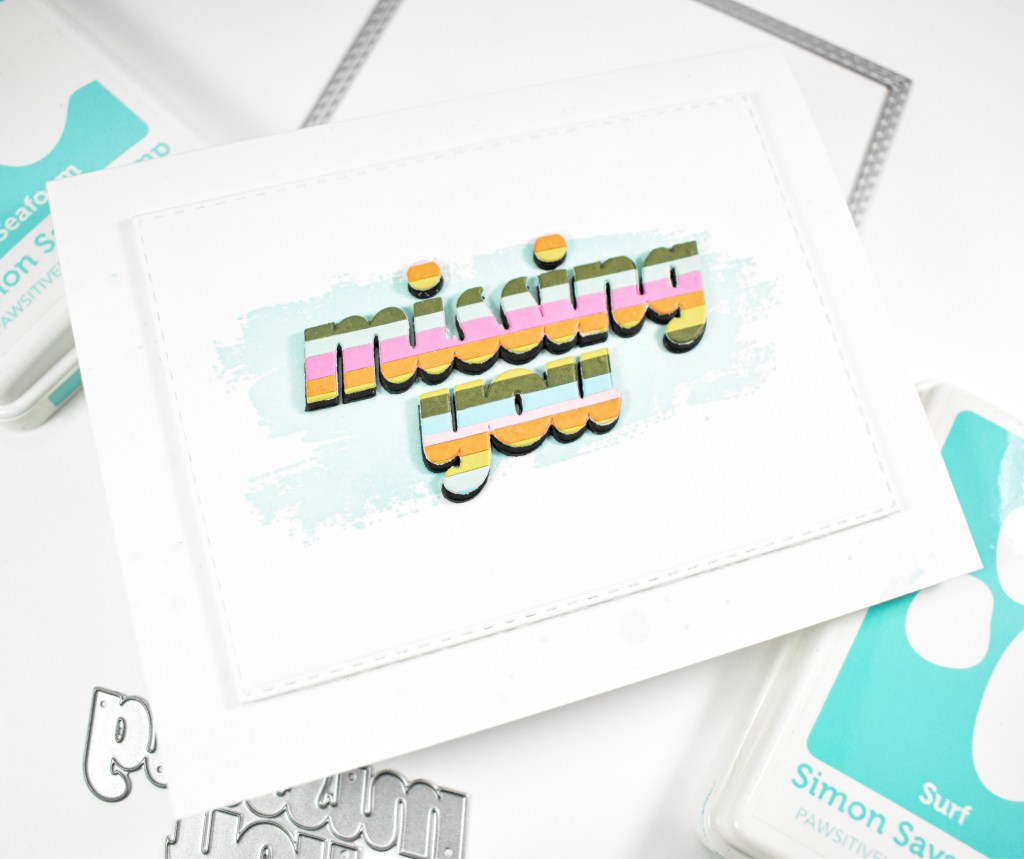
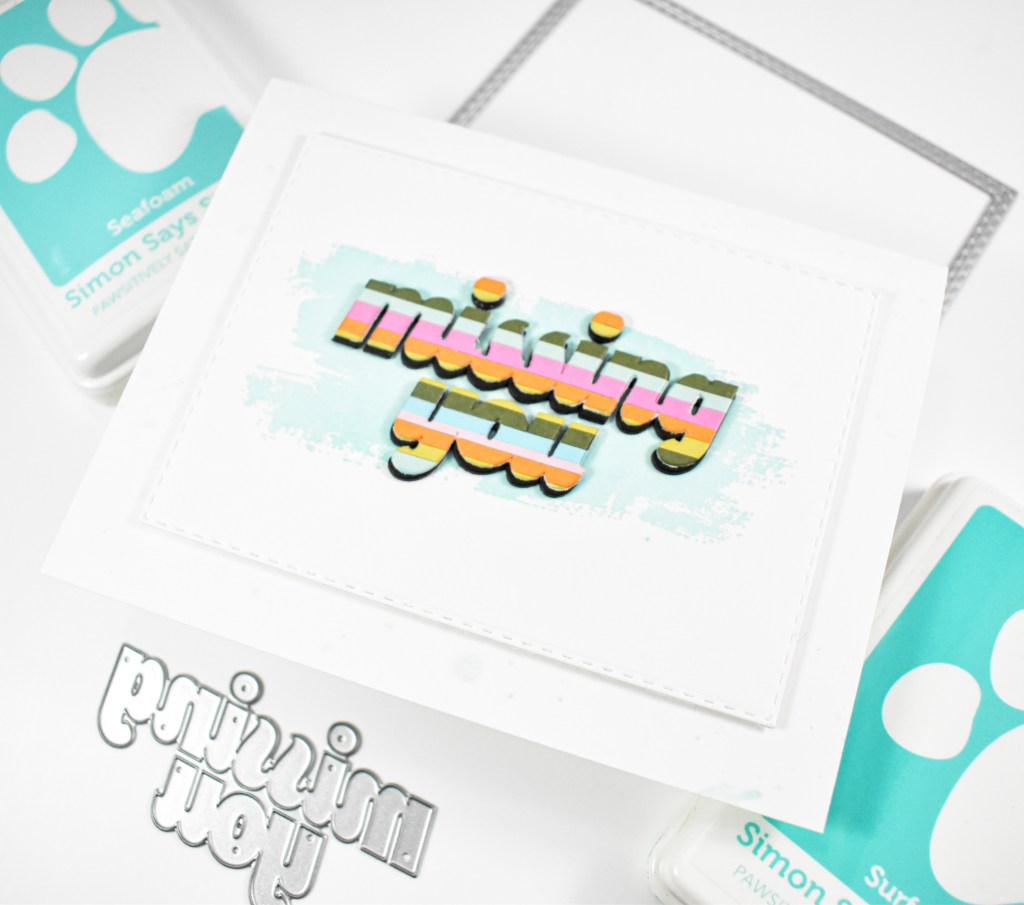
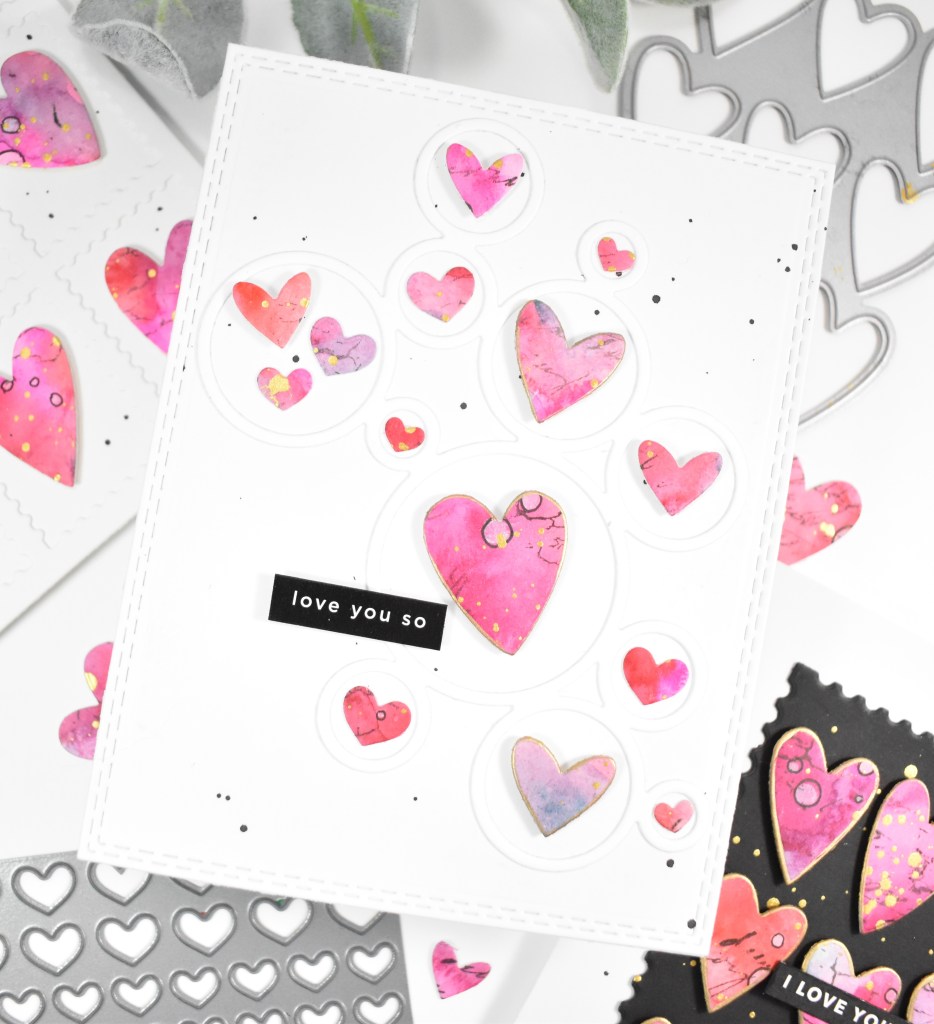
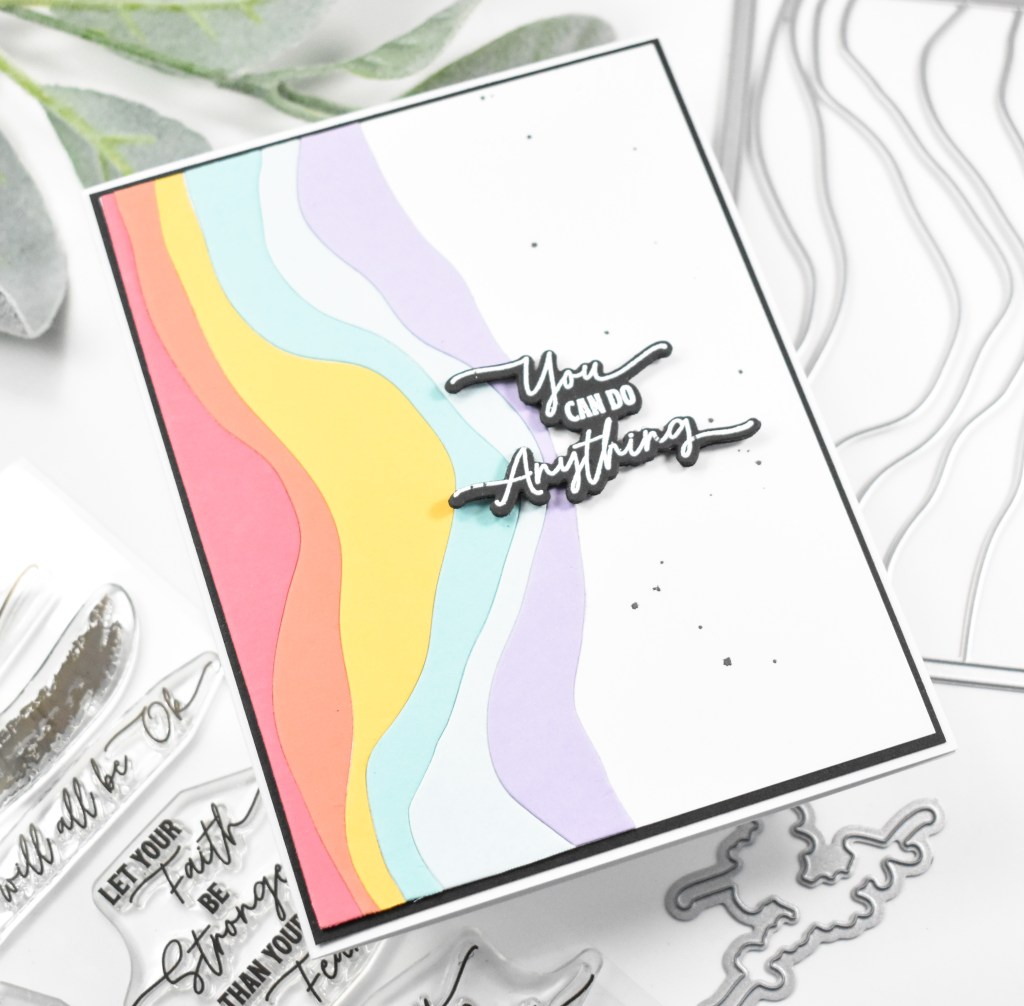
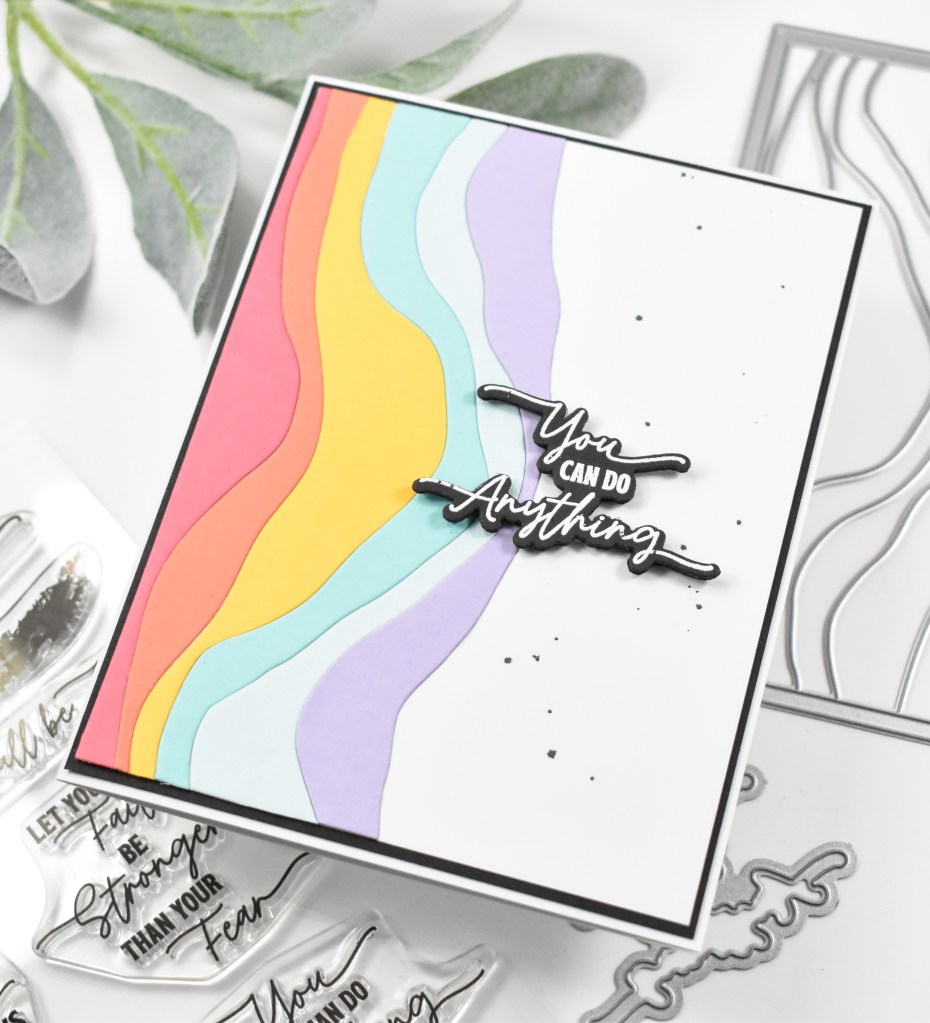
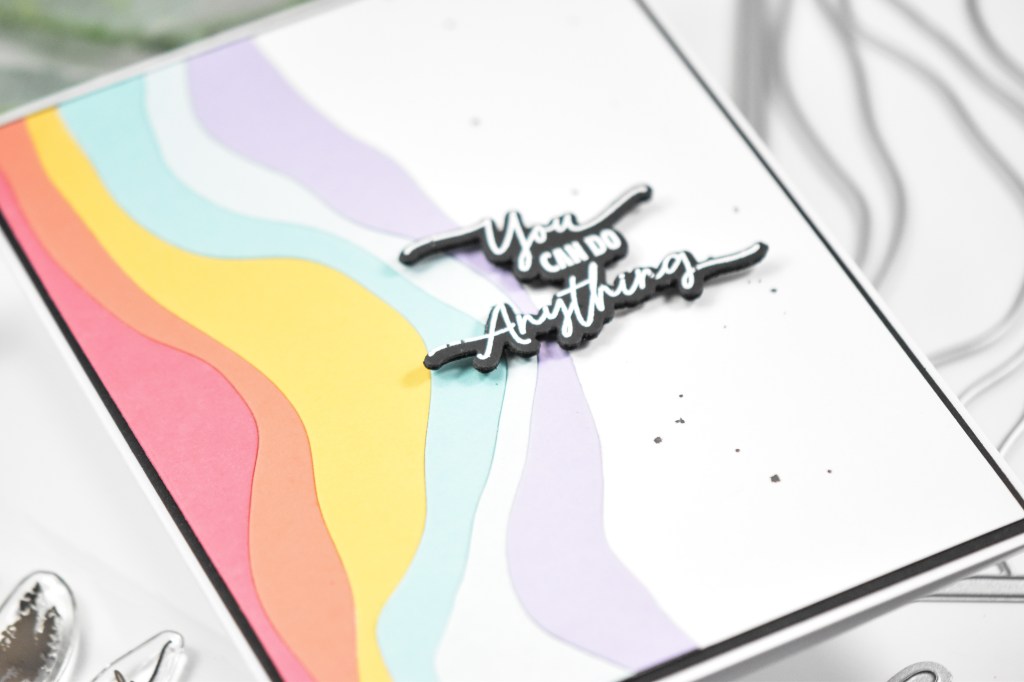
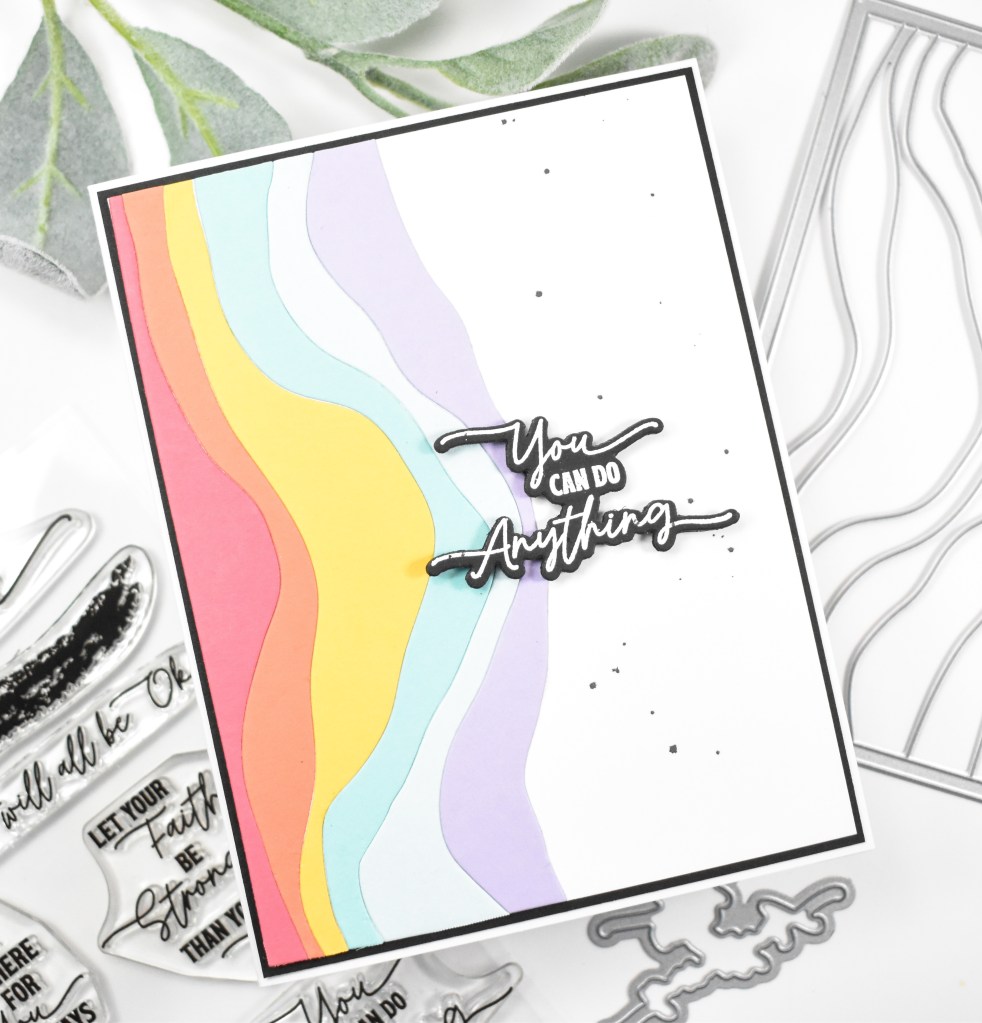
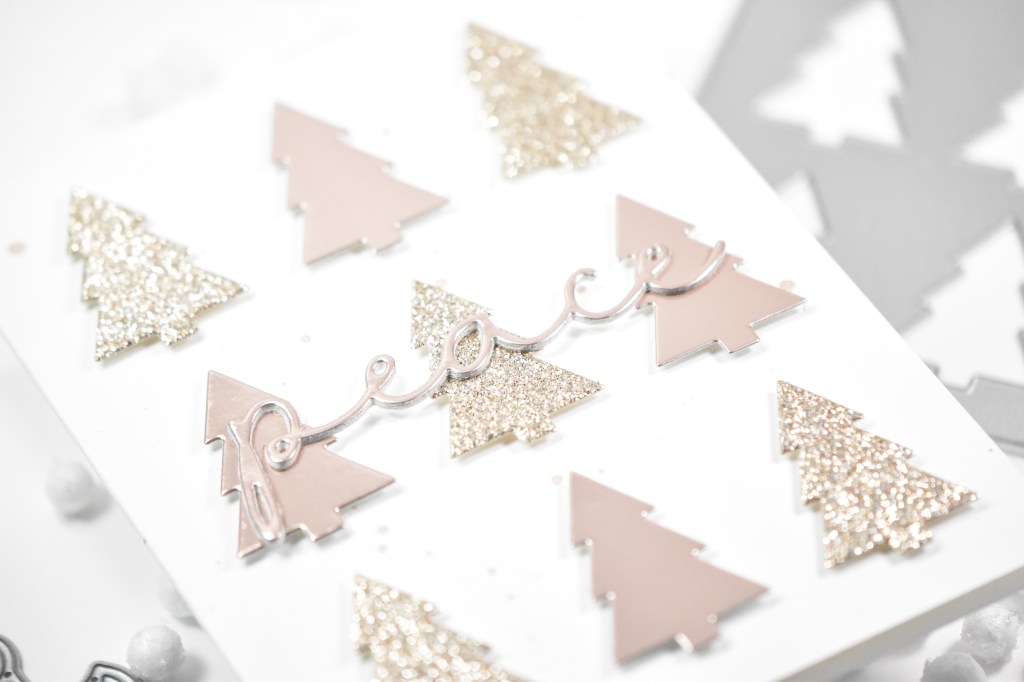
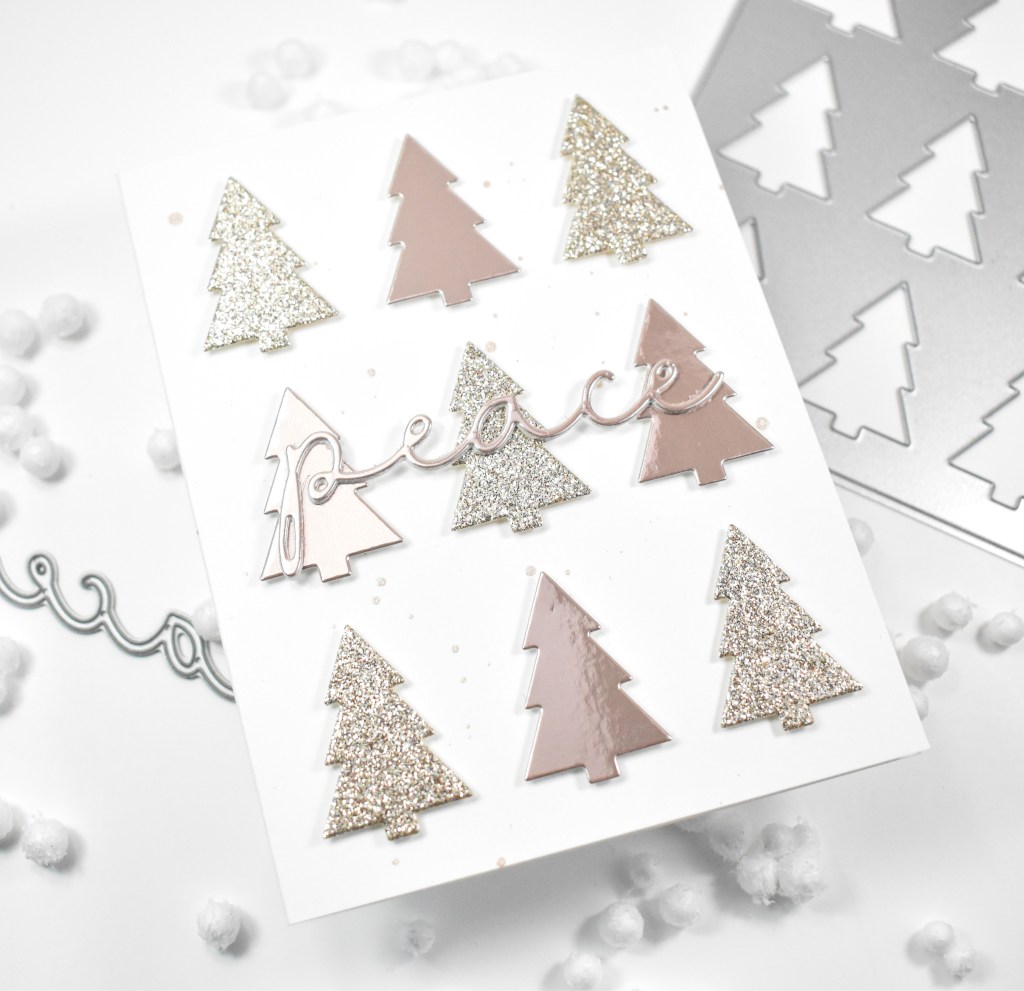
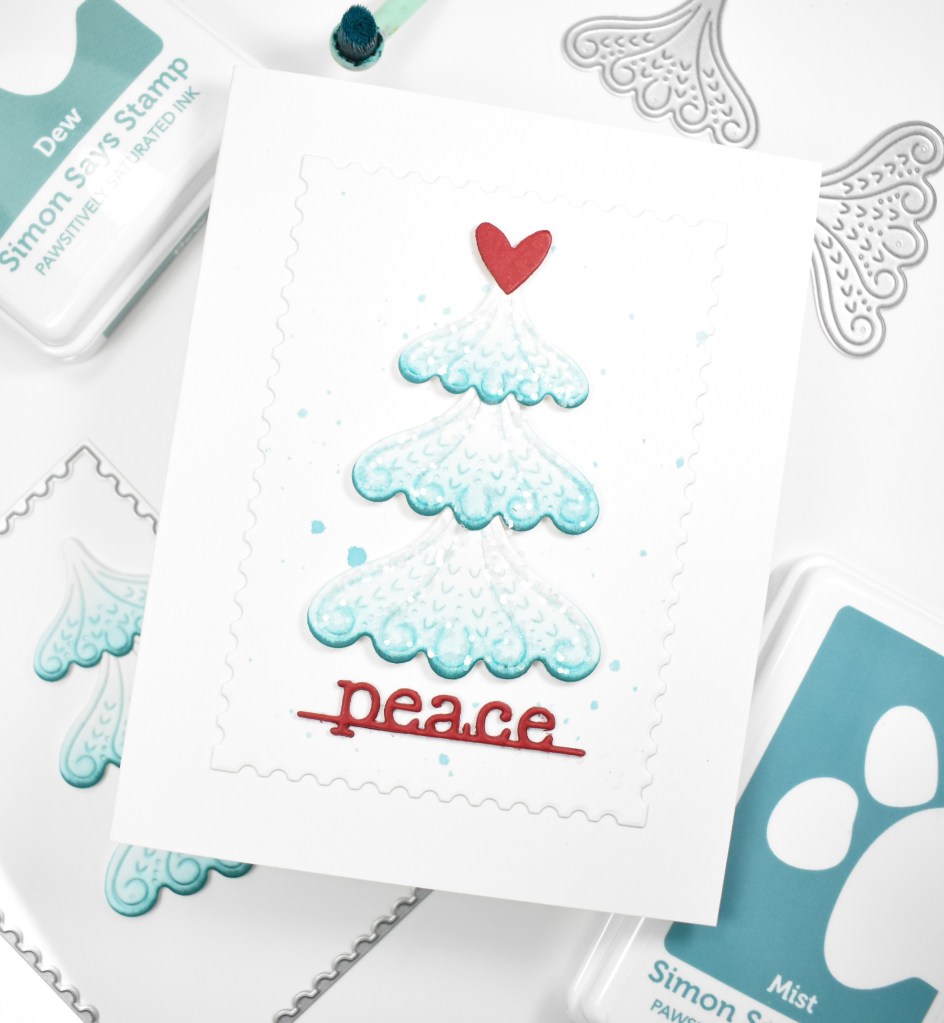
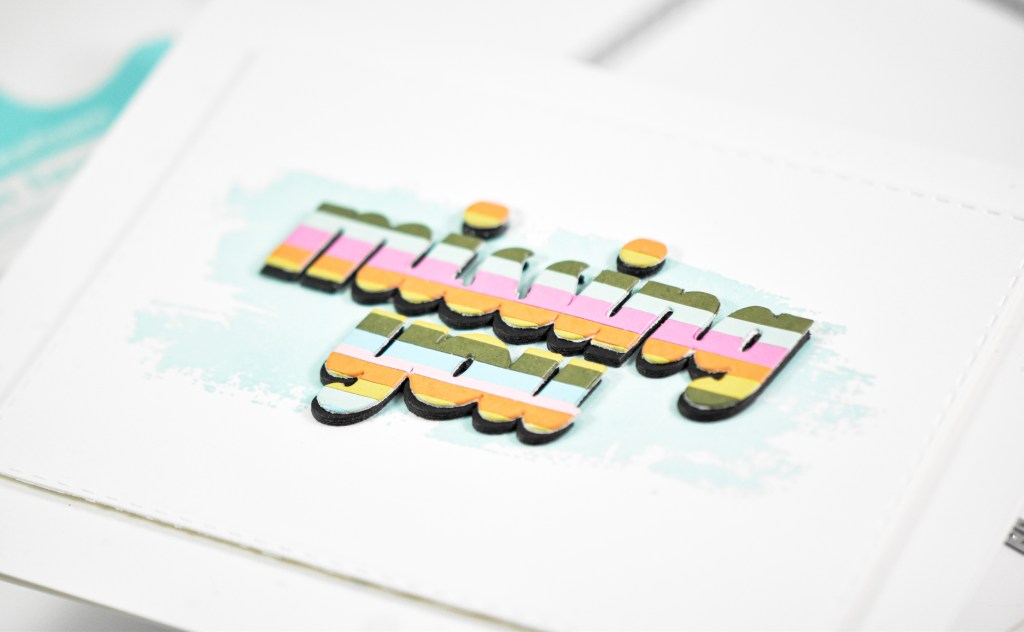
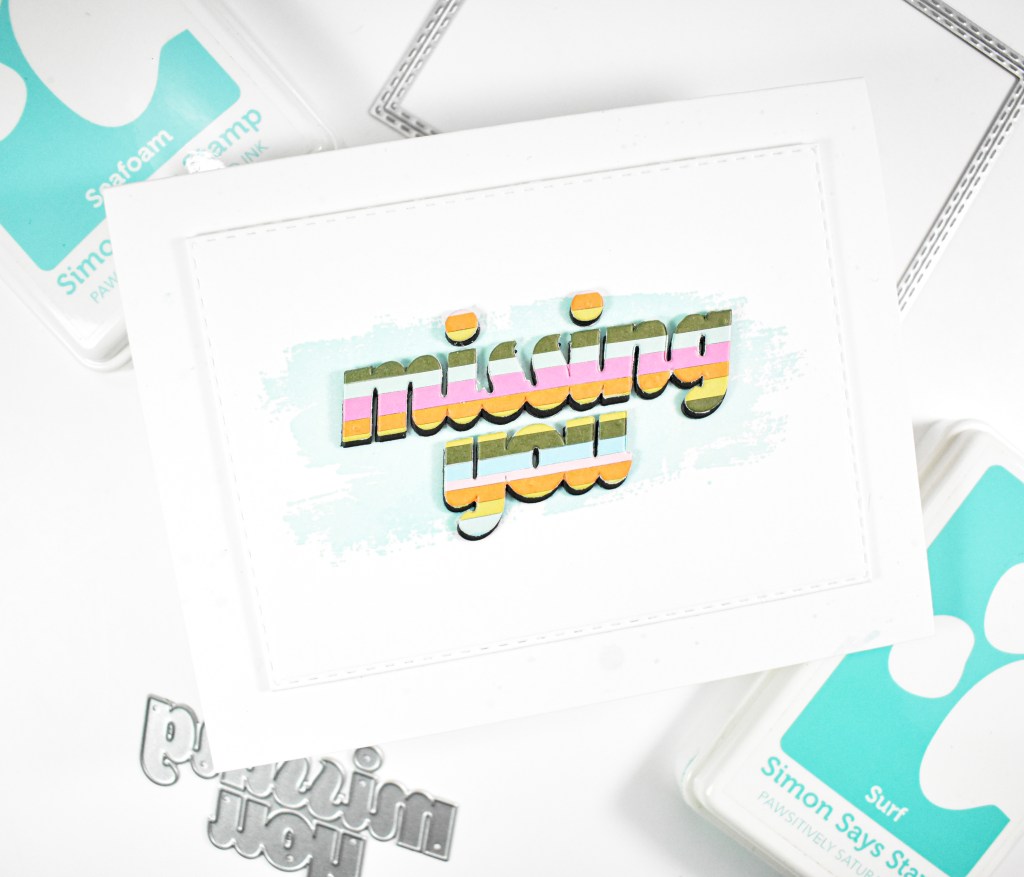
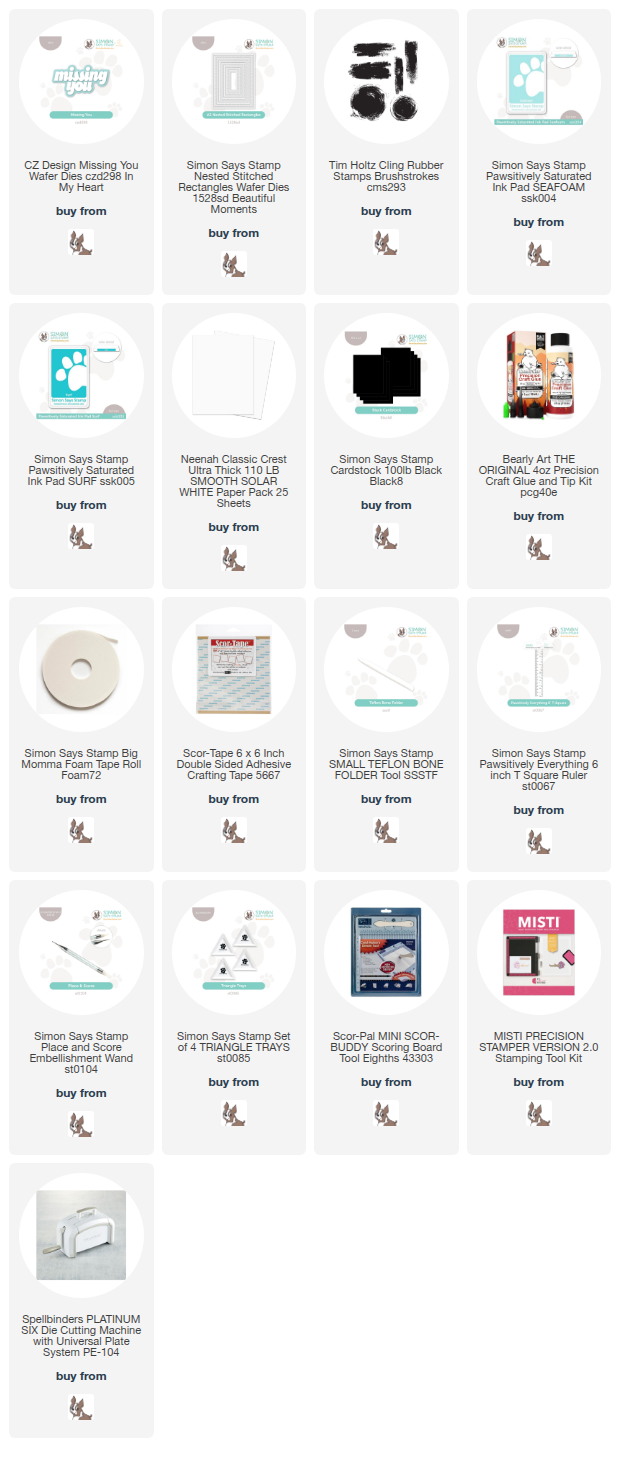
I already had a striped little panel in my stash that I had been saving for a card just like this! It was made using scrap cardstock and double sided tape. I went ahead and cut the Missing You from that little panel, cut it three times from black and adhered all of them together, offsetting the black ever so slightly.

My background panel was created using the A2 Nested Stitched Rectangles, a stamp from the Tim Holtz Brushstrokes set and Seafoam ink. The sentiment was adhered to the panel using liquid glue, and my card base was splattered with some Surf ink before the panel was adhered.
See, a super simple project for today! This was my first time using this Brushstrokes set, and I really kind of like it! It adds just the right amount of something behind a sentiment. Don’t forget to swing over to Simon’s website and check out the entire In My Heart release. Thanks again for swinging by, and I hope you have a fabulous day!
Supply List
Affiliate links used at no cost to you. What does this mean? If you use the links within this post to make a purchase, I receive a small commission, which allows me to continue to post crafty content for your enjoyment. I truly appreciate your support!
Latest Posts
- Simon Says Stamp Watercolor Wild Rose

- Simon Says Stamp Striped Missing You

- Simon Says Stamp Best Mom

- Simon Says Stamp Latte Birthday Wishes
- Simon Says Stamp Thinking of You Whirl Butterflies
Latest Instagram Posts