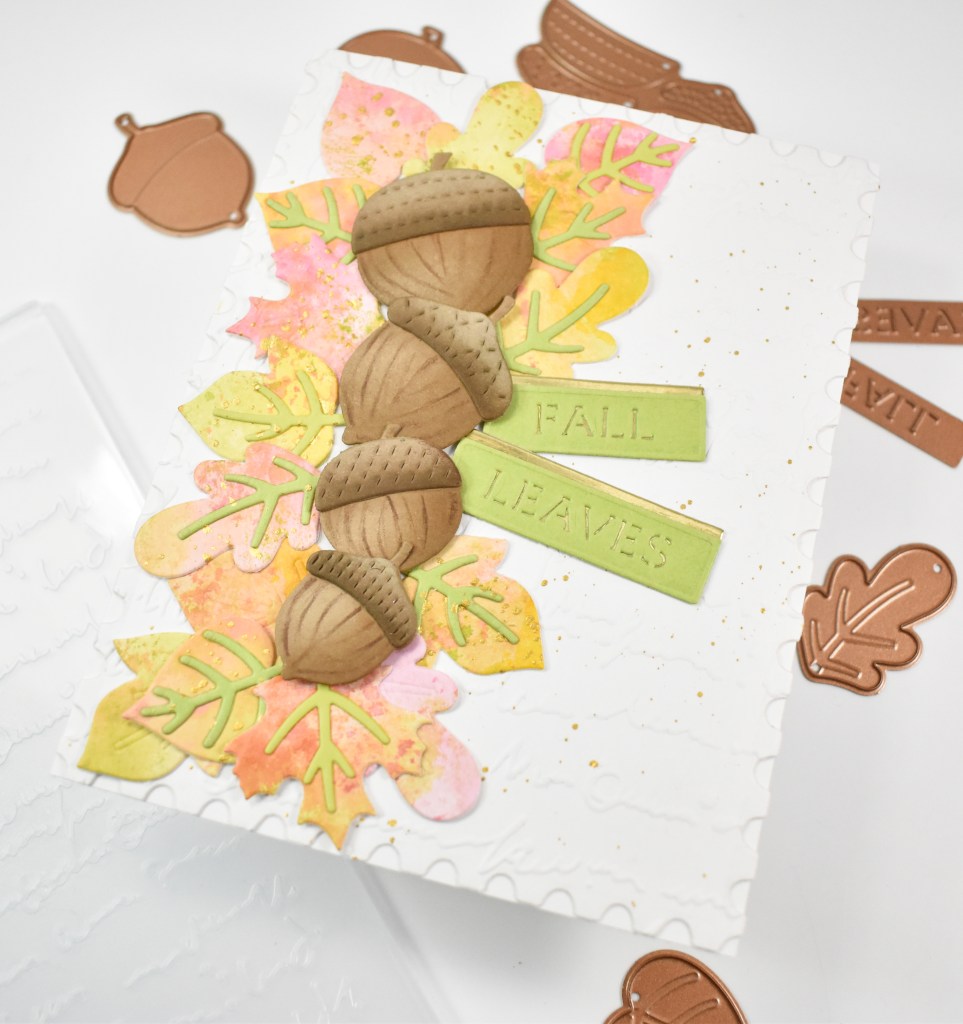
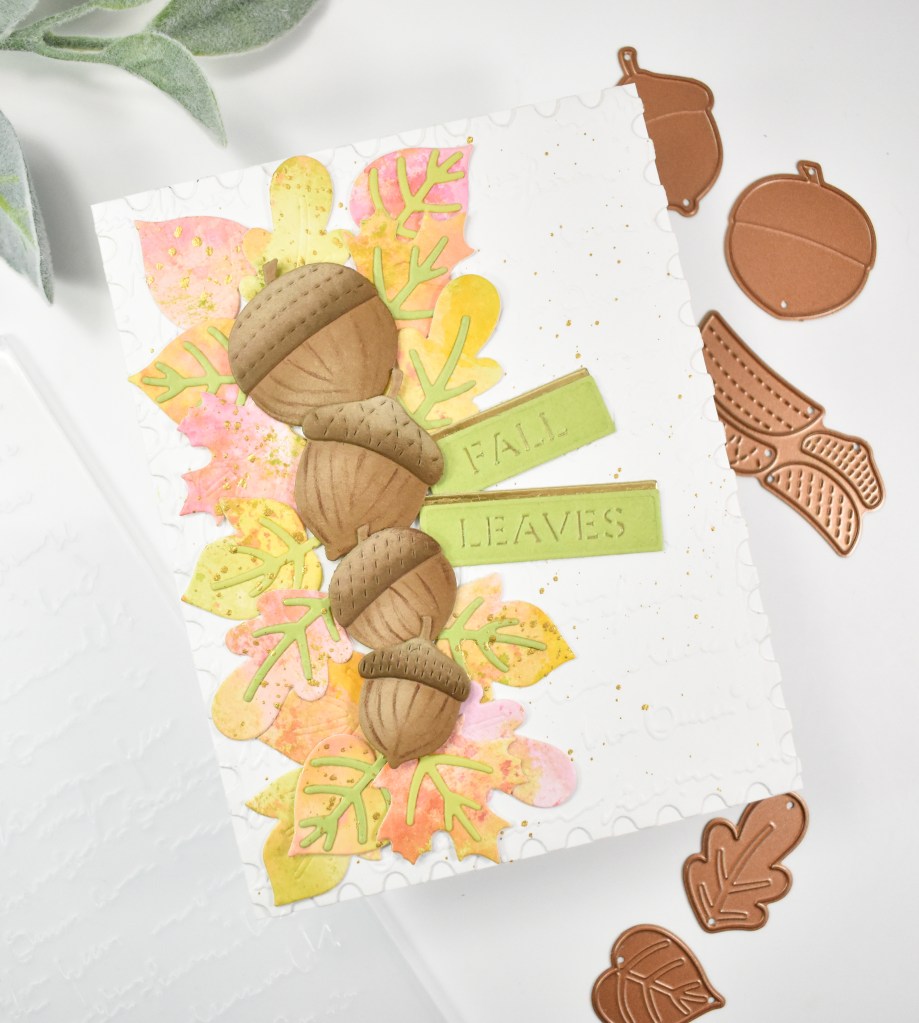
Simon Says Stamp Thanks Leaf Ring

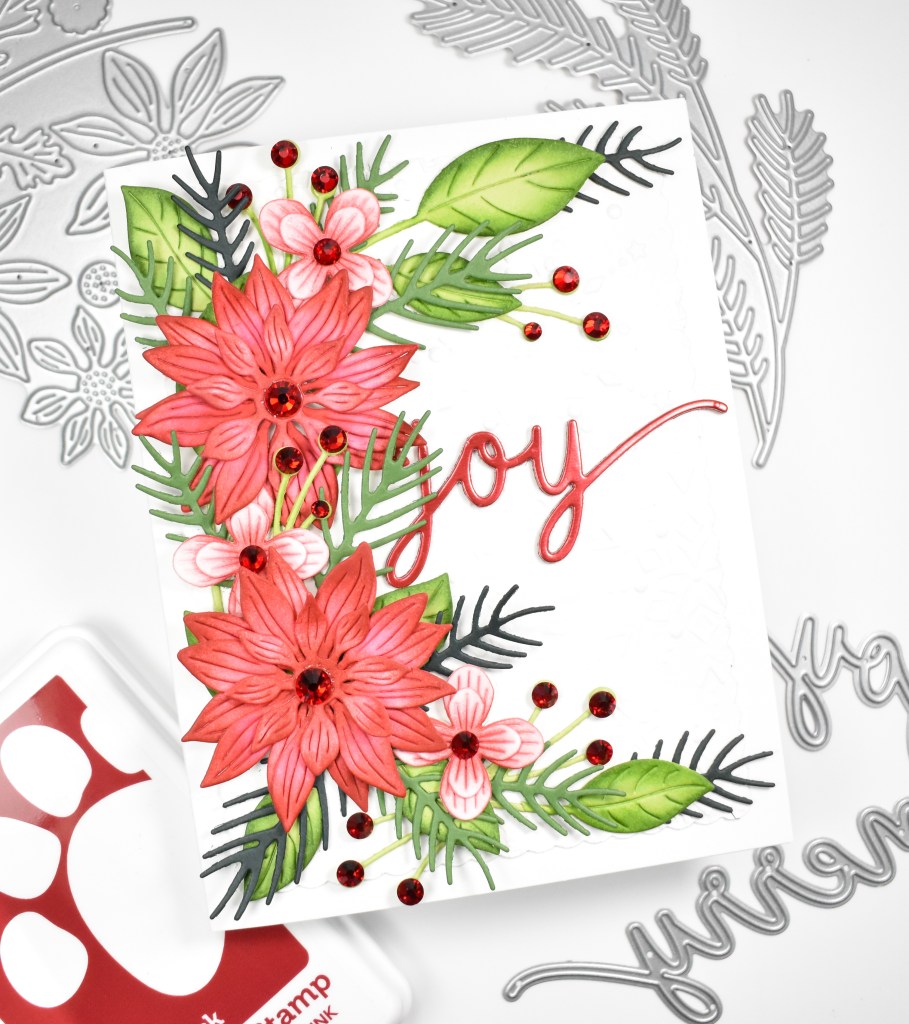
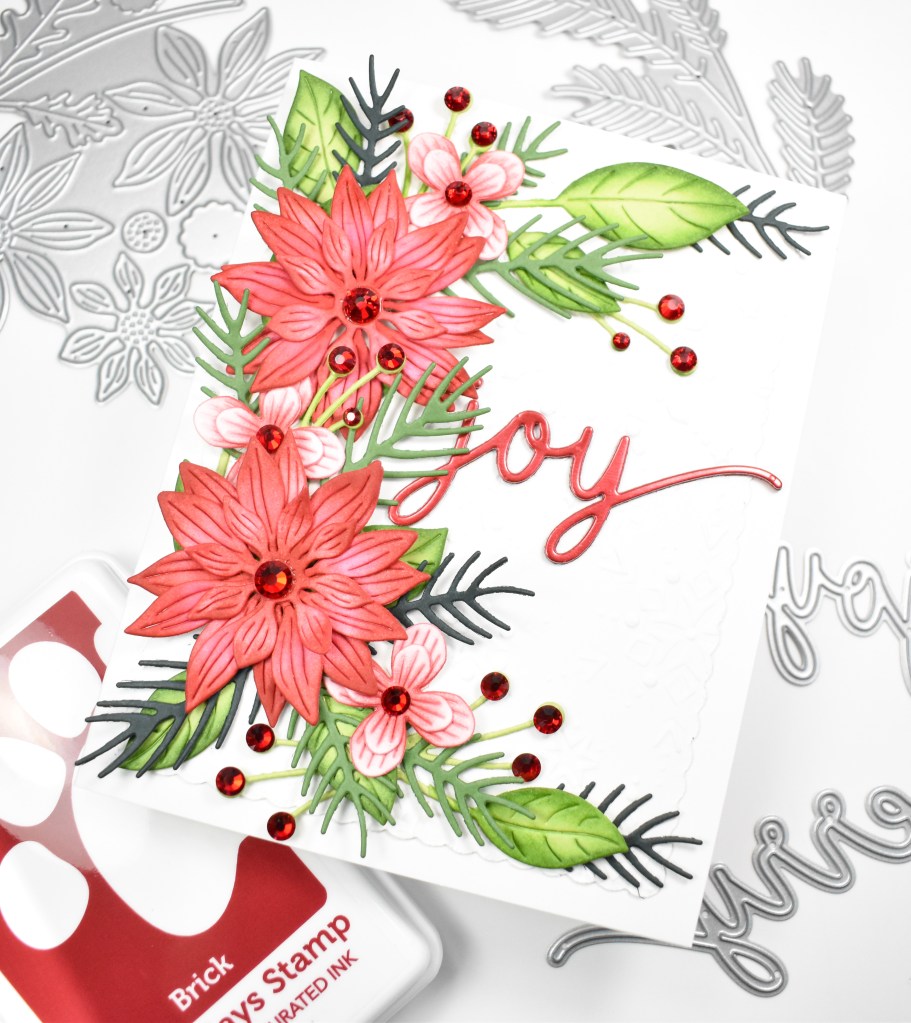
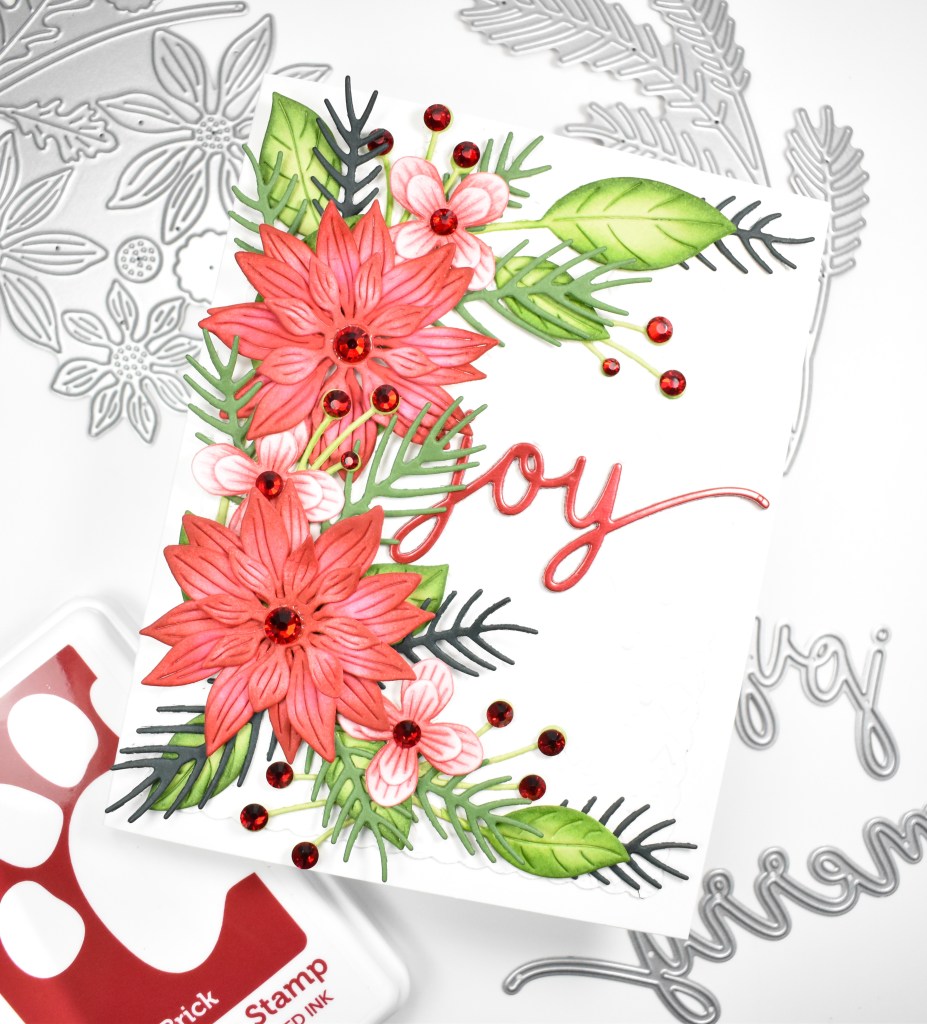
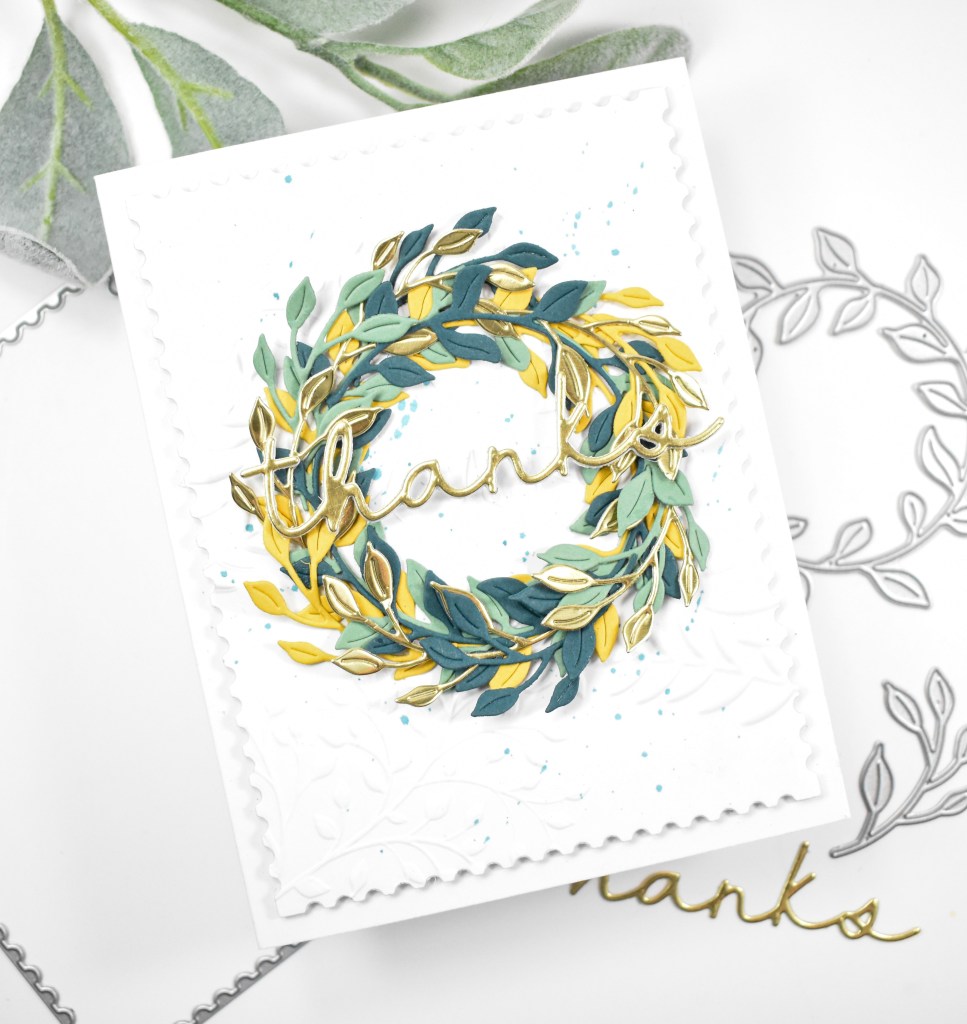
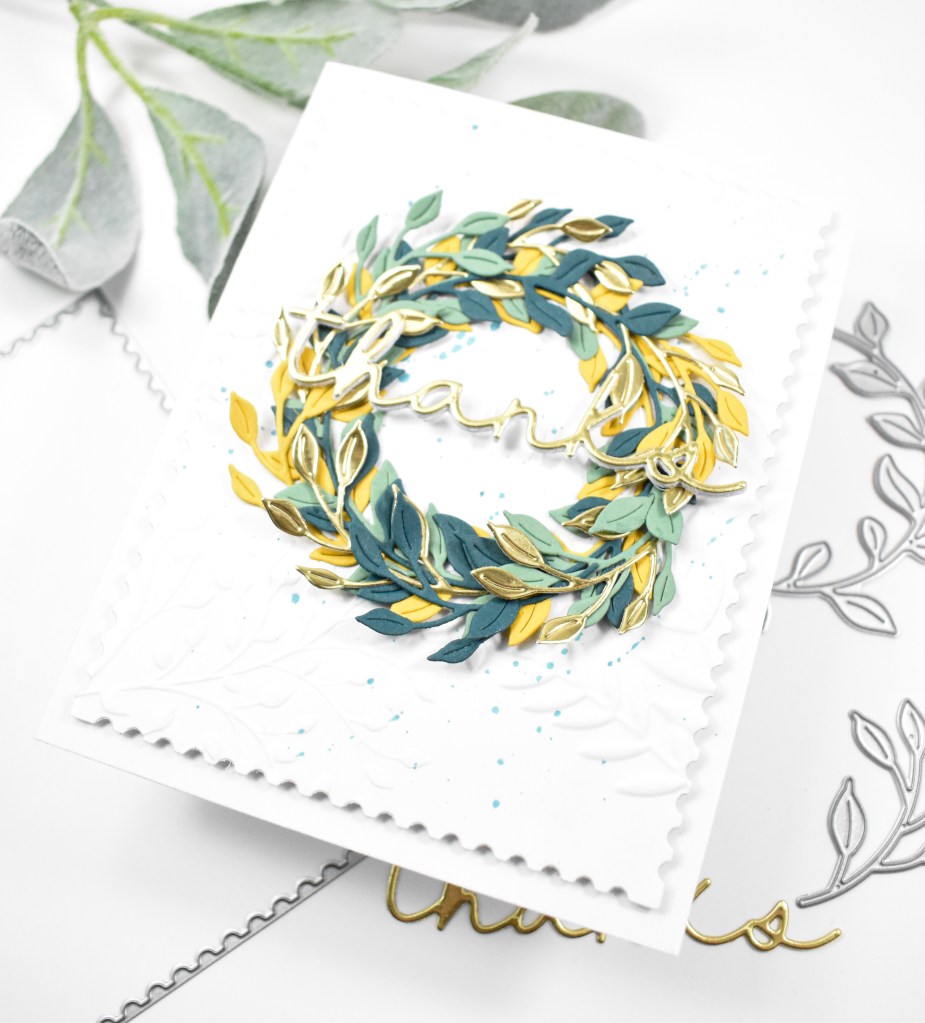
Hello Crafty Friends, and welcome to DieCember! It’s my favorite month after STAMPtember! Today’s project is featuring the new Classic Leaf Ring in super fun colors, so let’s go ahead and go through the details!
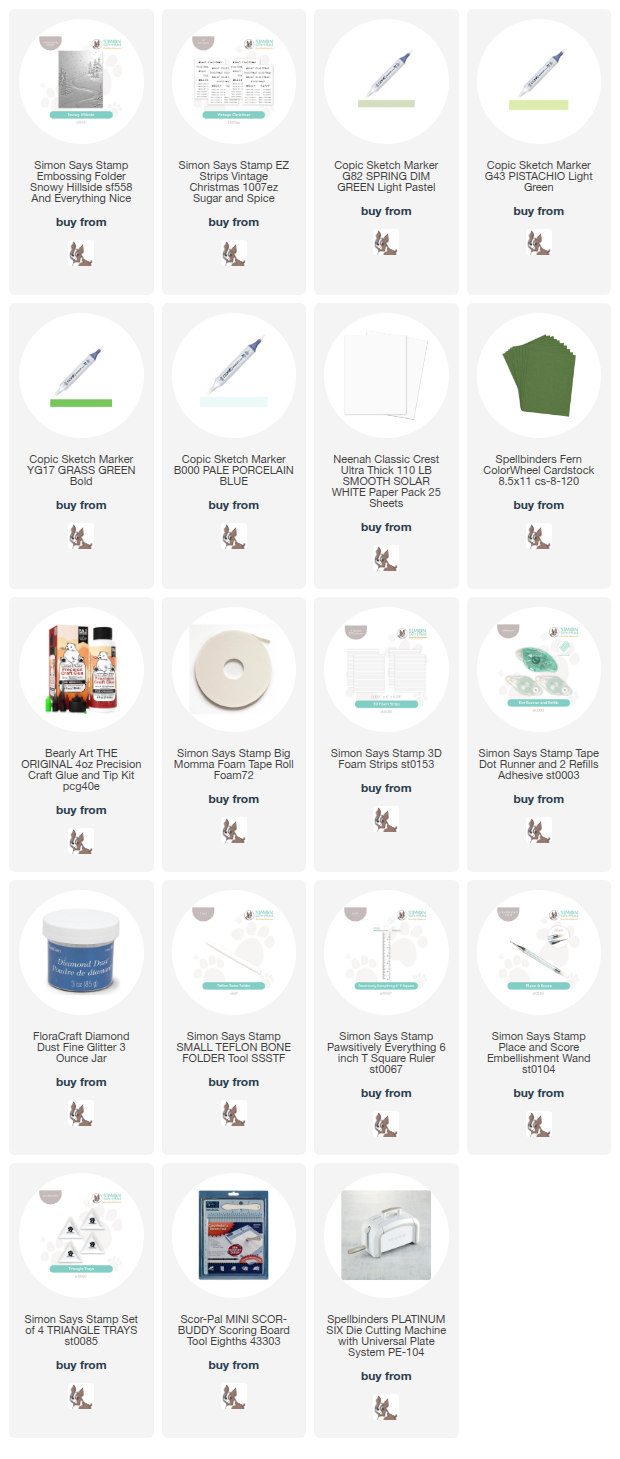
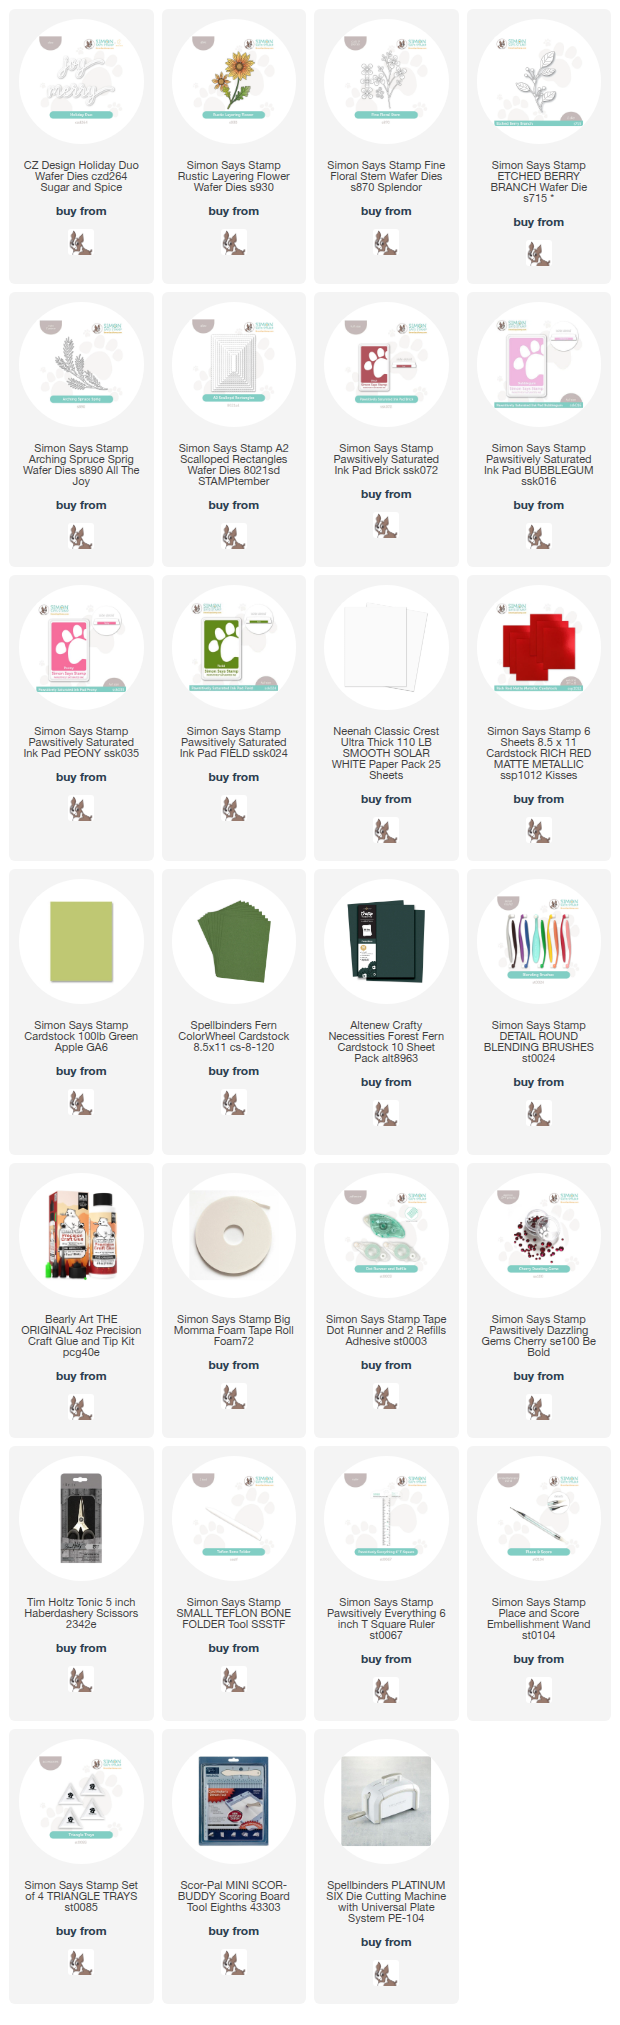
NOTE: all supplies are linked in the thumbnails at the end of this blog post.
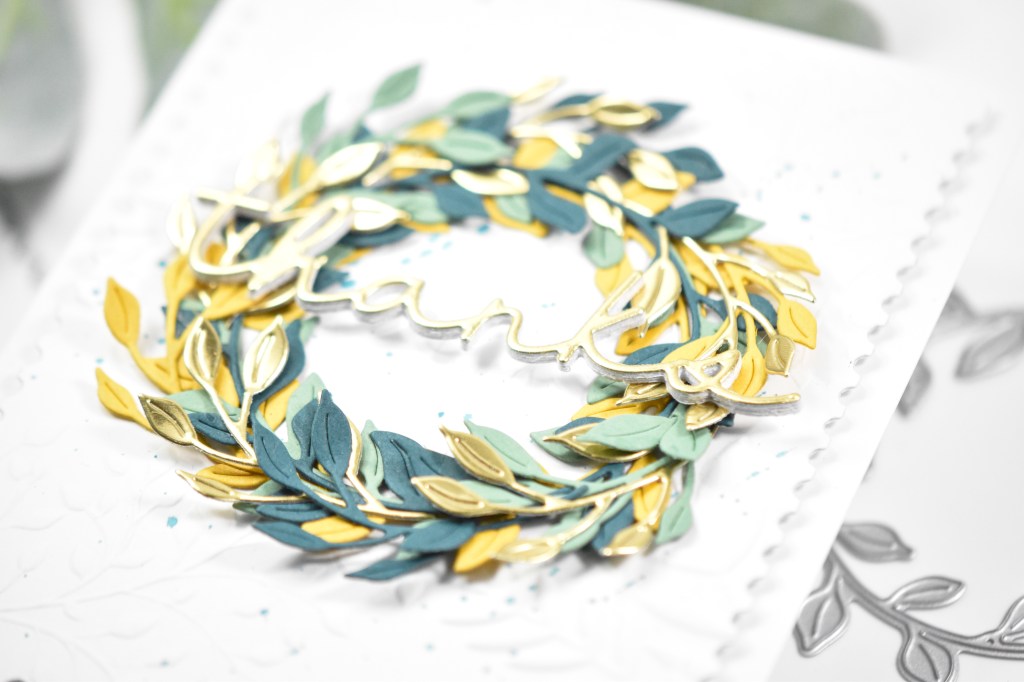
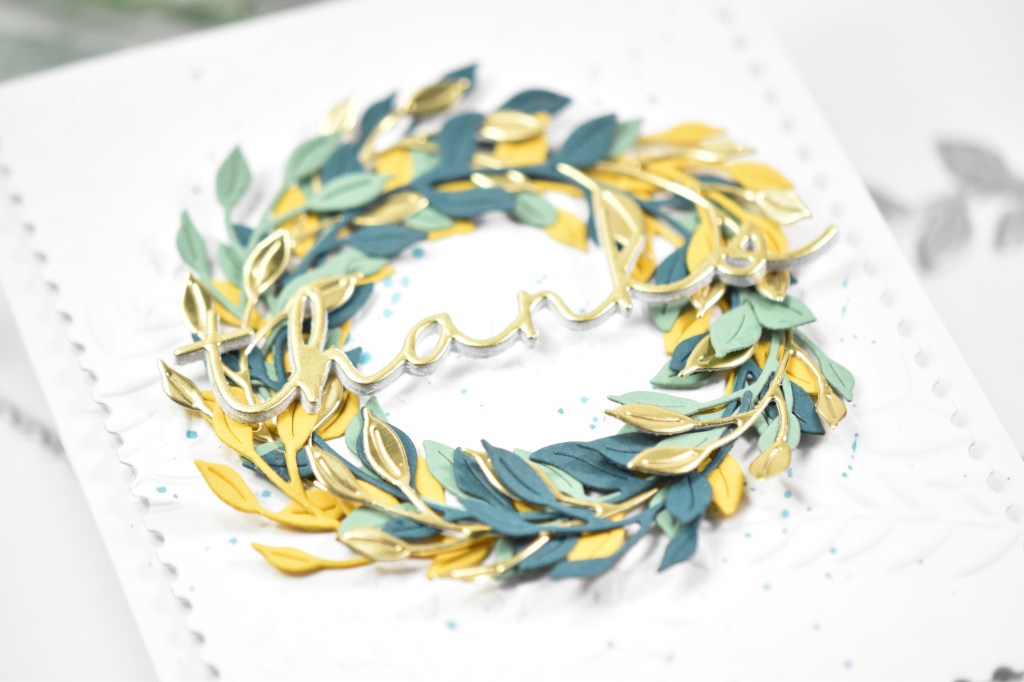
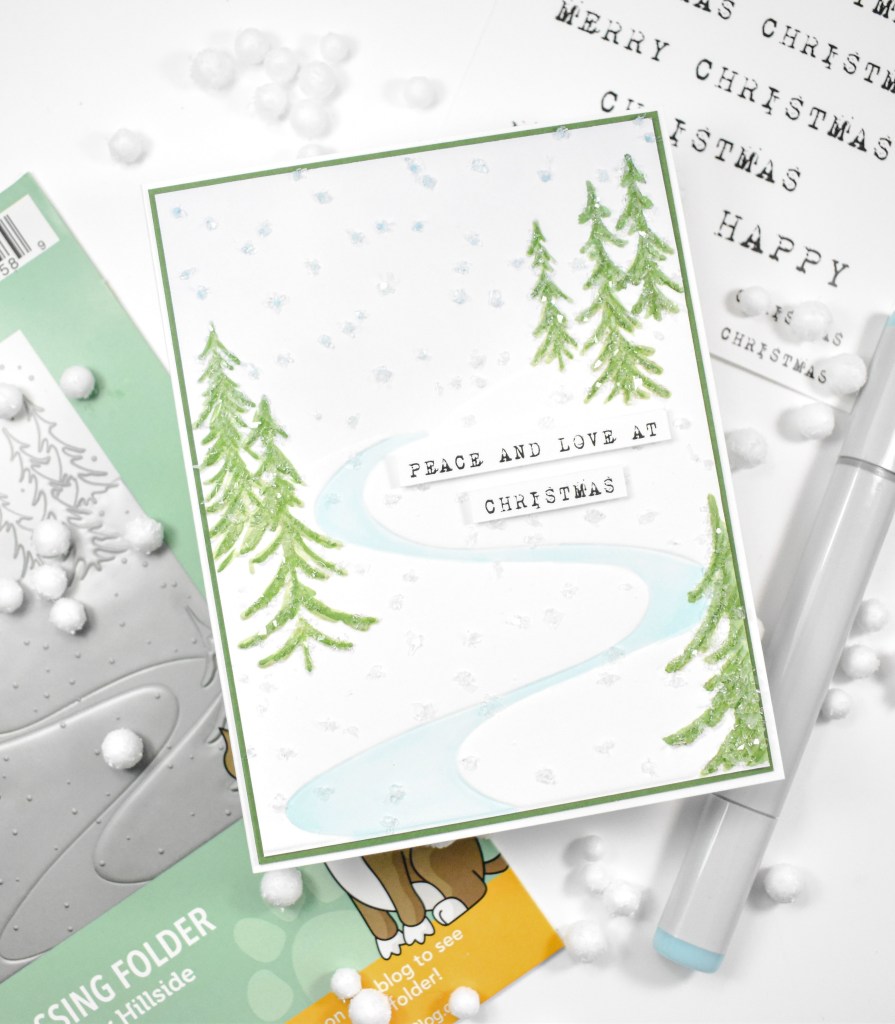
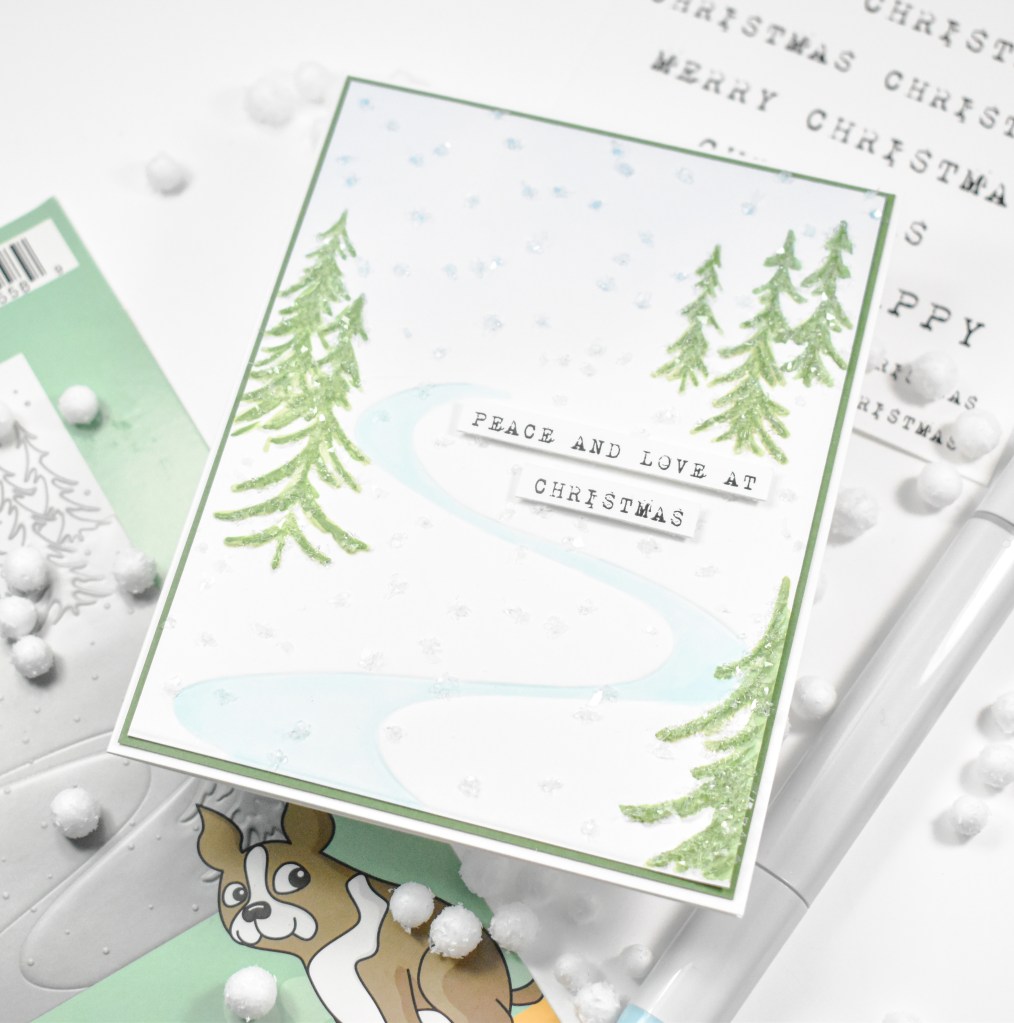
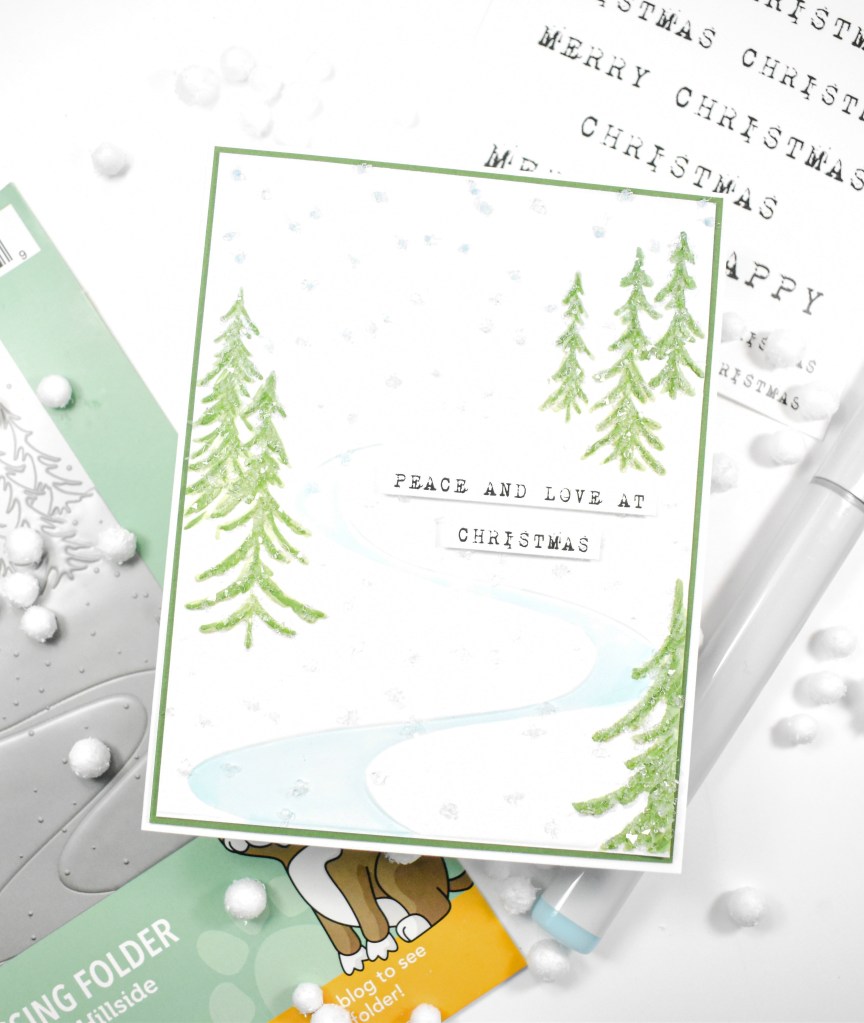
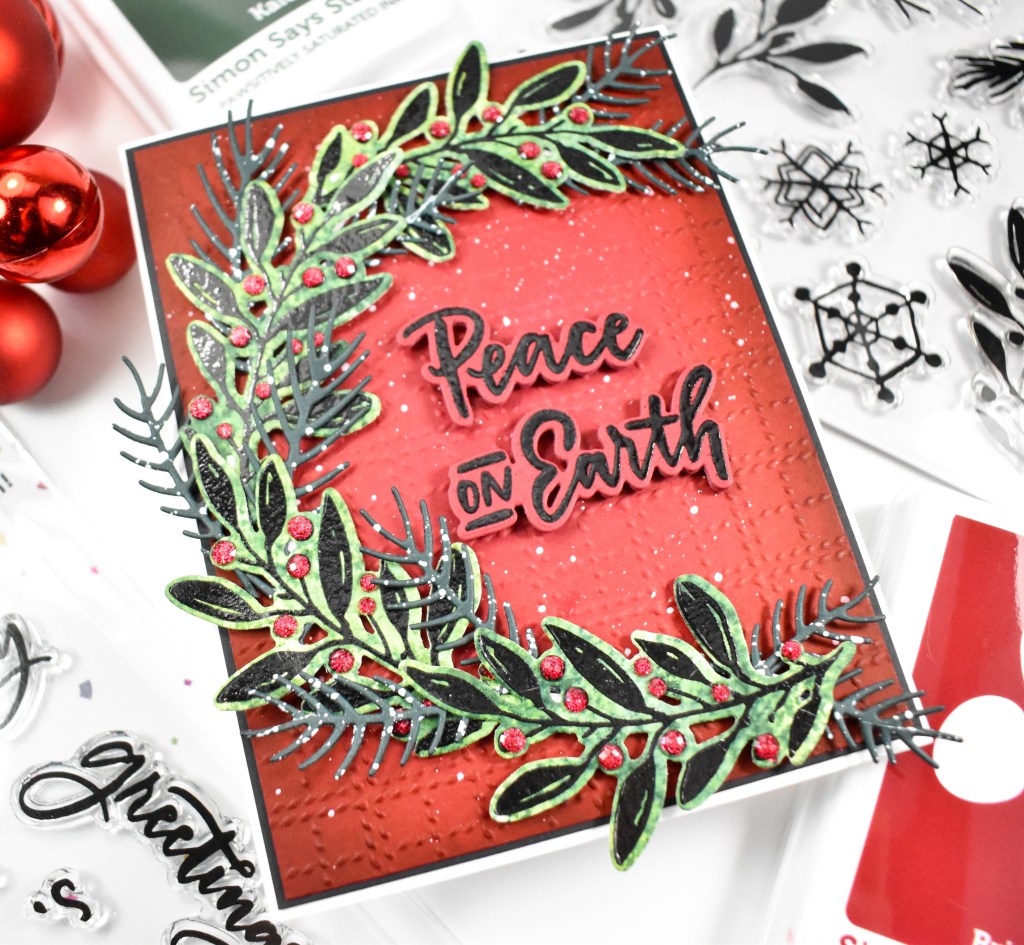
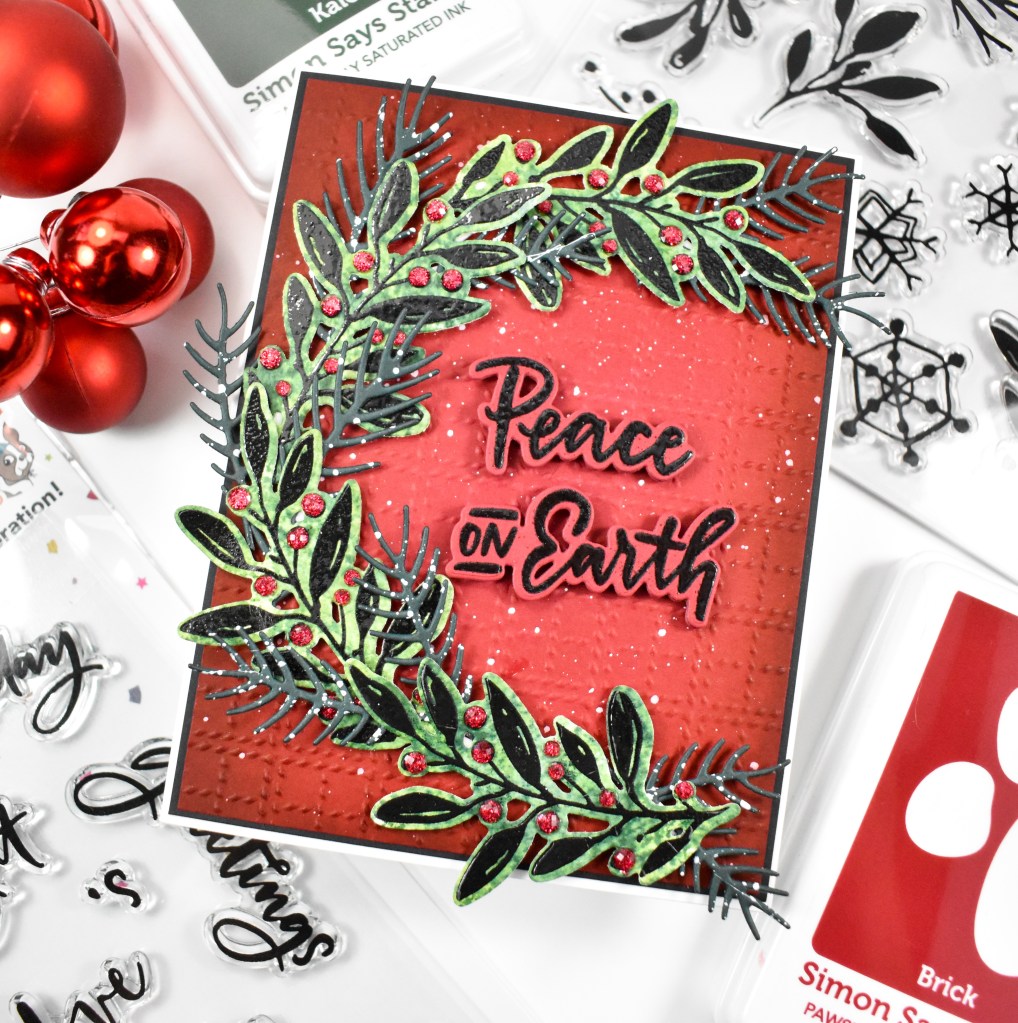
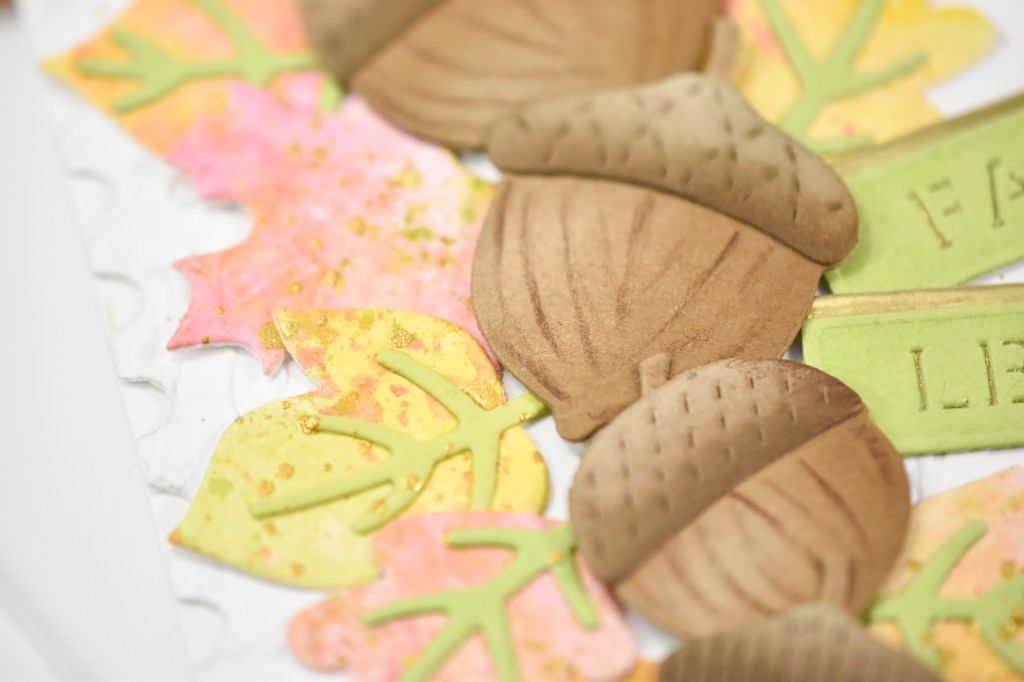
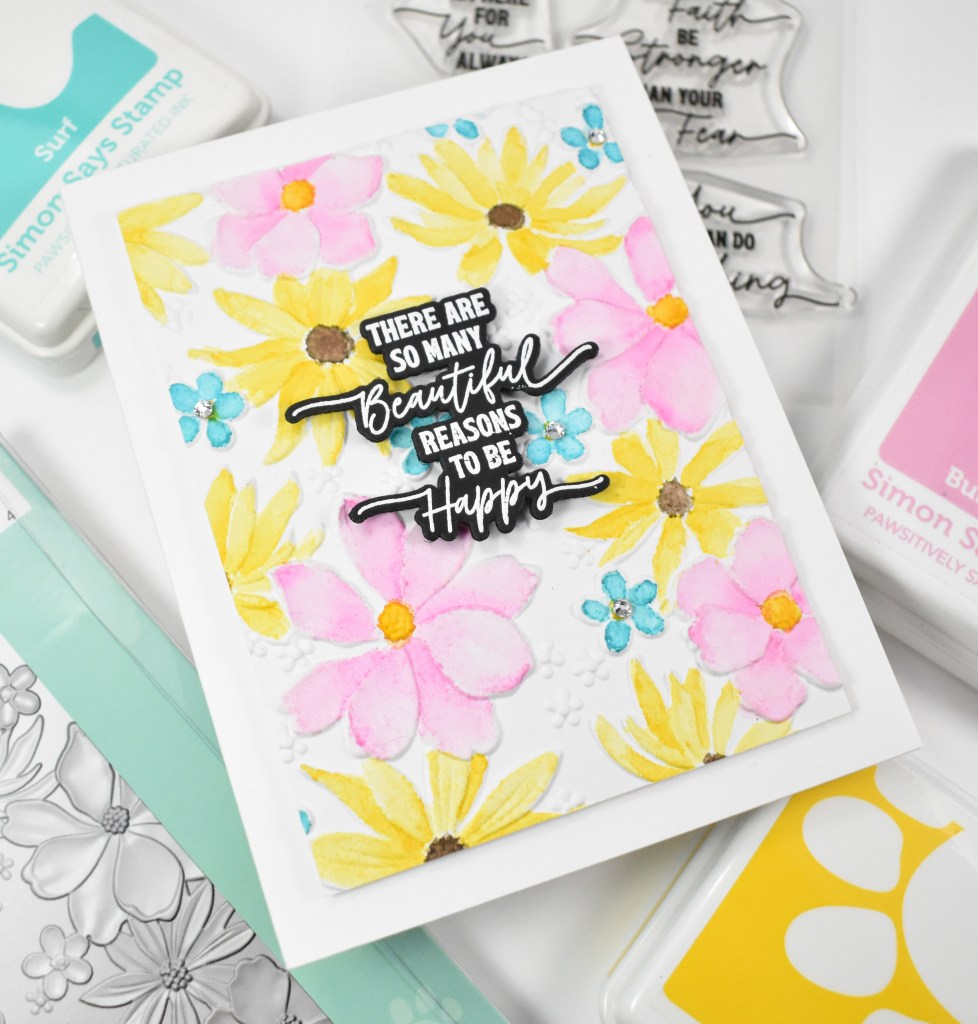
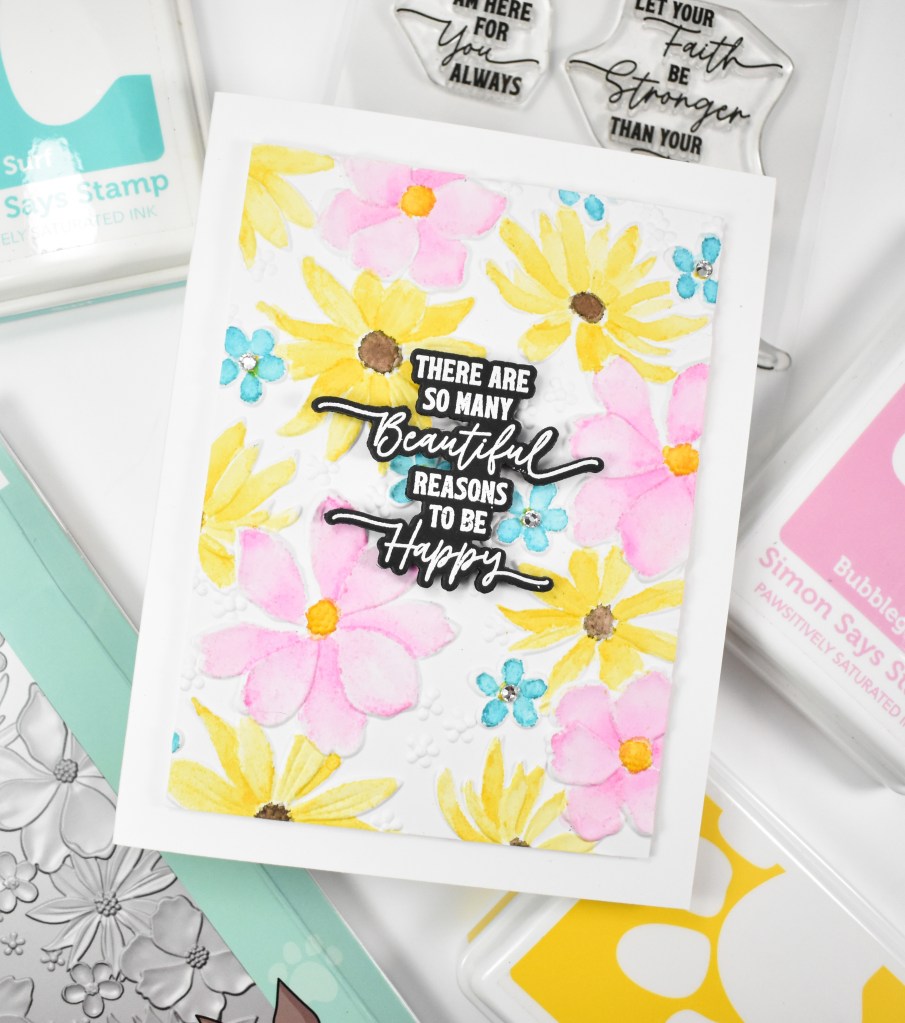
This die set contains the leaf ring along with a separate leaf die, so I cut the leaf ring once from Rainforest, Sage, Sunshine and gold cardstock. I also cut the separate leaves twice from all of those colors as well. My background was created using the Wistful Leaves Embossing Folder along with the A2 Postage Rectangles.
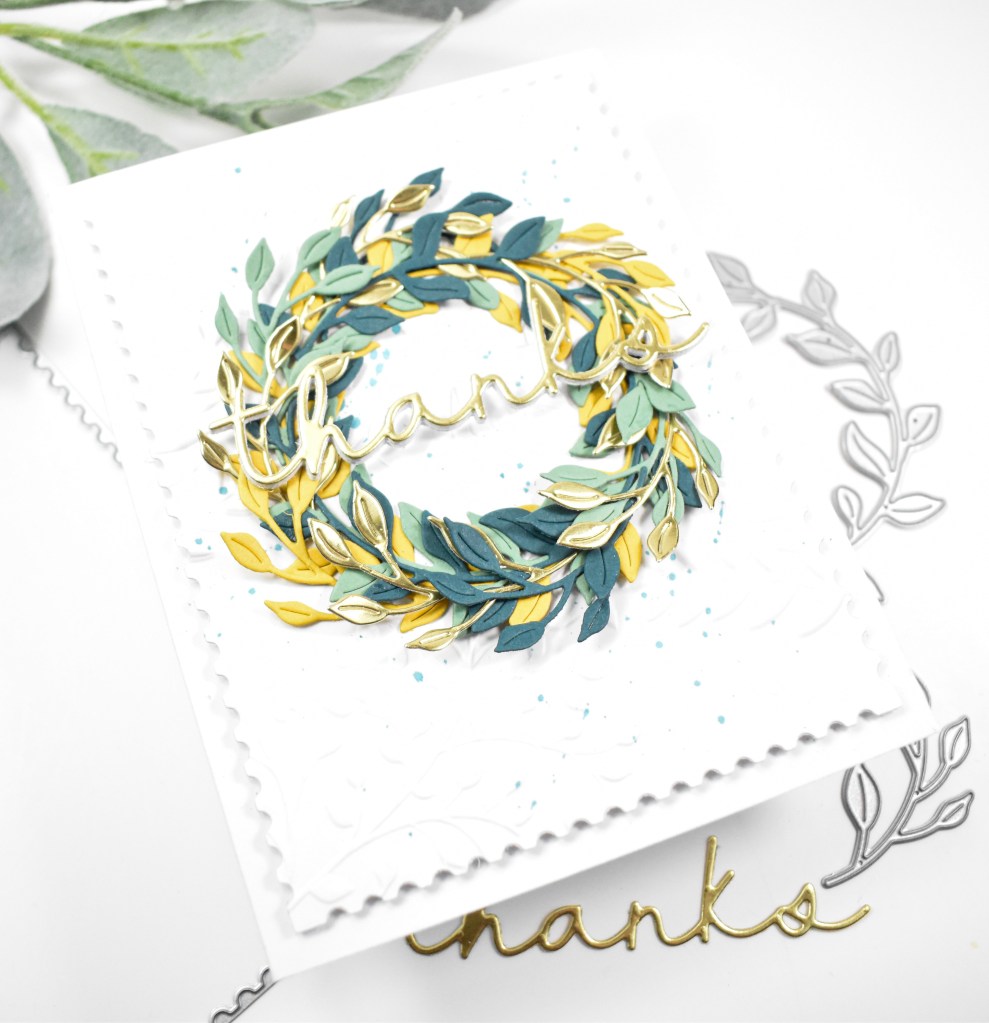
I wanted some interest on the background, so I splattered it with Raindrop ink before adhering the leaf rings. I adhered one ring down and adhered the next one offset slightly, until they were all adhered. I then went back and added the separate leaves around to make it fuller. I went ahead and adhered the panel to the card base using foam tape and then adhered the sentiment, which was cut once from gold cardstock and tree times from white cardstock.
That does it for this project! I hope you enjoyed it as much as I did! I always love creating projects with leaves, and this one was no exception. Don’t forget to check out the entire DieCember release over on Simon’s website. Thanks for stopping by, and I hope you have an awesome day!

Supply List
Affiliate links used at no cost to you. What does this mean? If you use the links within this post to make a purchase, I receive a small commission, which allows me to continue to post crafty content for your enjoyment. I truly appreciate your support!
Latest Posts
- Simon Says Stamp Striped Missing You

- Simon Says Stamp Best Mom

- Simon Says Stamp Latte Birthday Wishes
- Simon Says Stamp Thinking of You Whirl Butterflies

- Simon Says Stamp Groovy Birthday

Latest Instagram Posts