Simon Says Stamp Happy Vintage Blooms

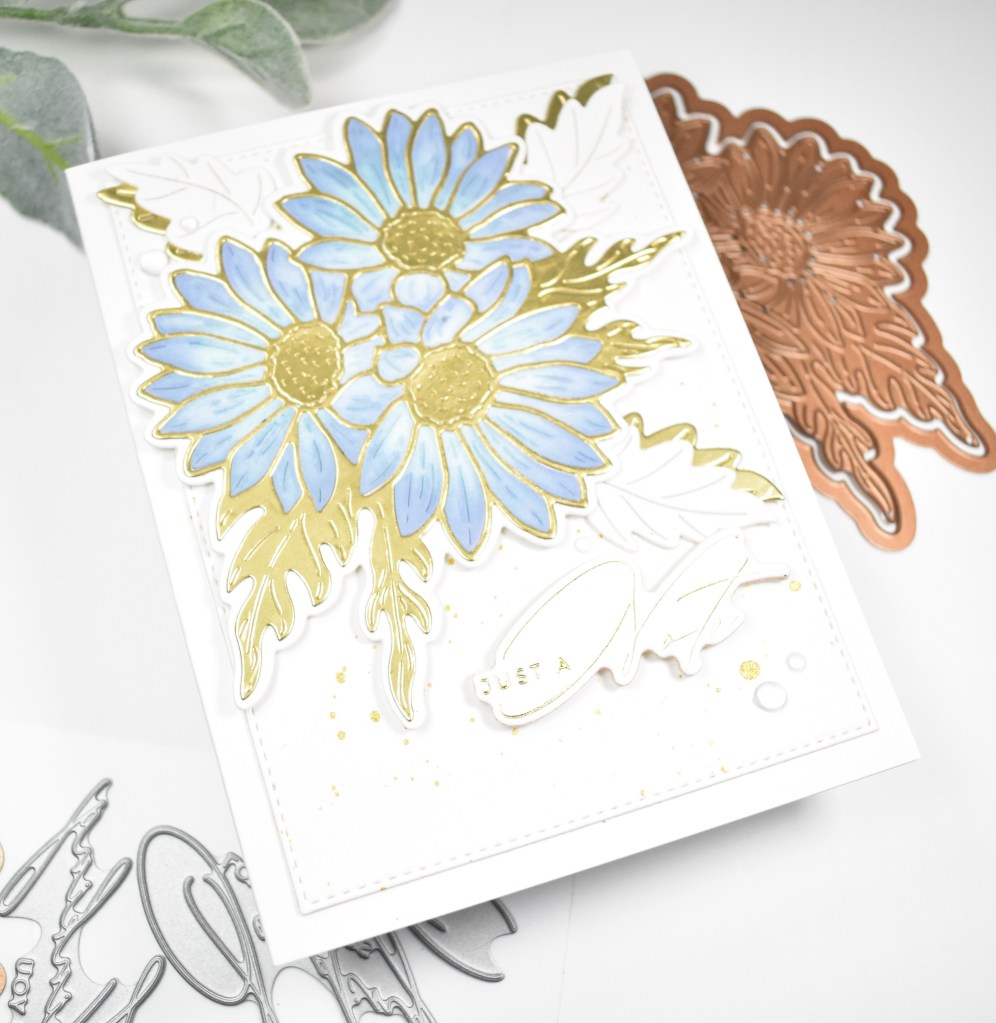
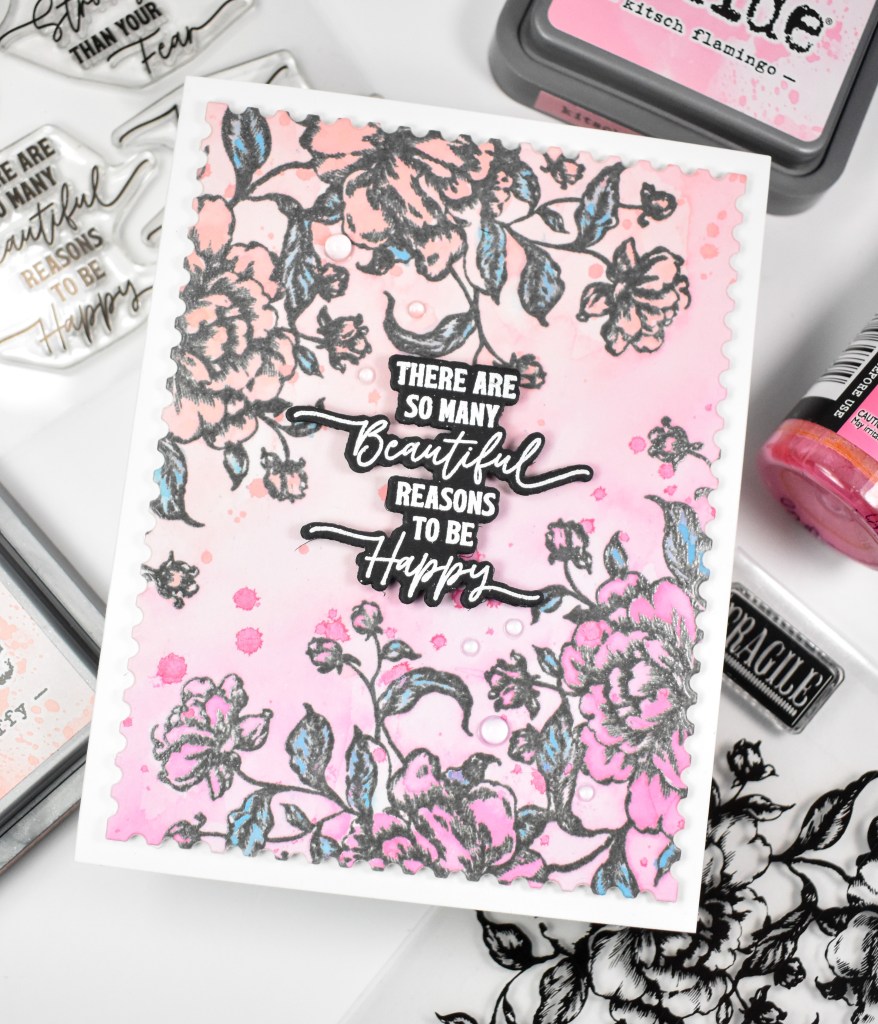
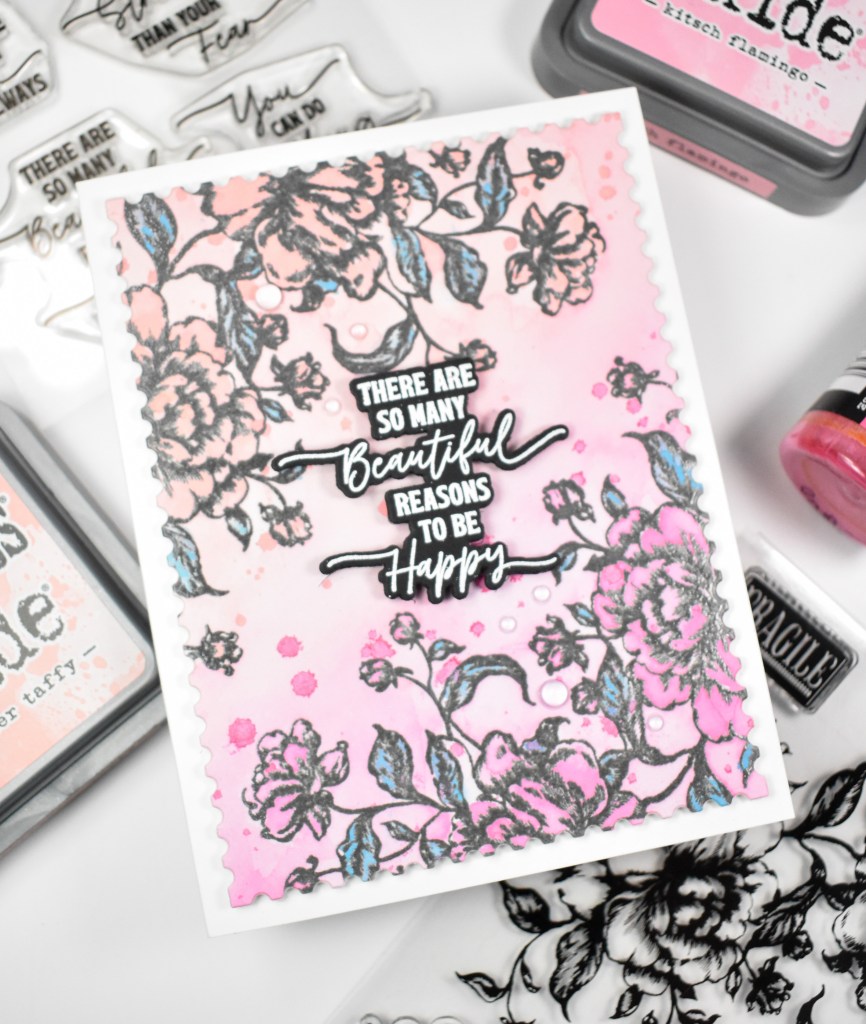
Hello and welcome back, Friends! Today’s project is featuring the new Vintage Blooms from Simon’s latest release, Moments In Time. This set has two larger blooms, but I opted to use just one for this project. Let’s run through the details!
NOTE: all supplies are linked in the thumbnails at the end of this blog post.

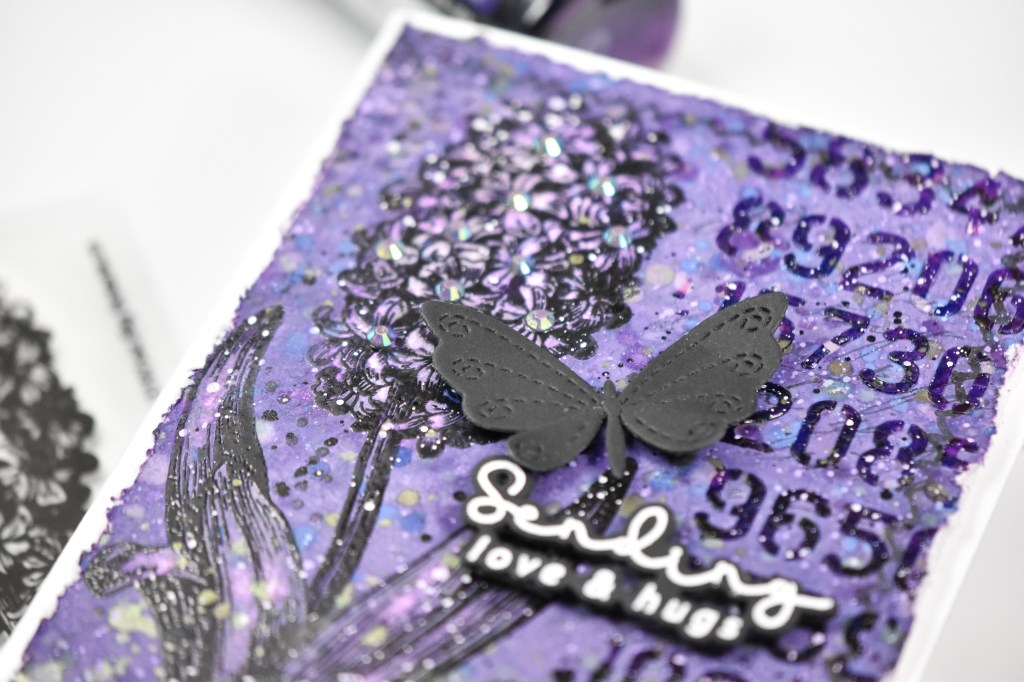
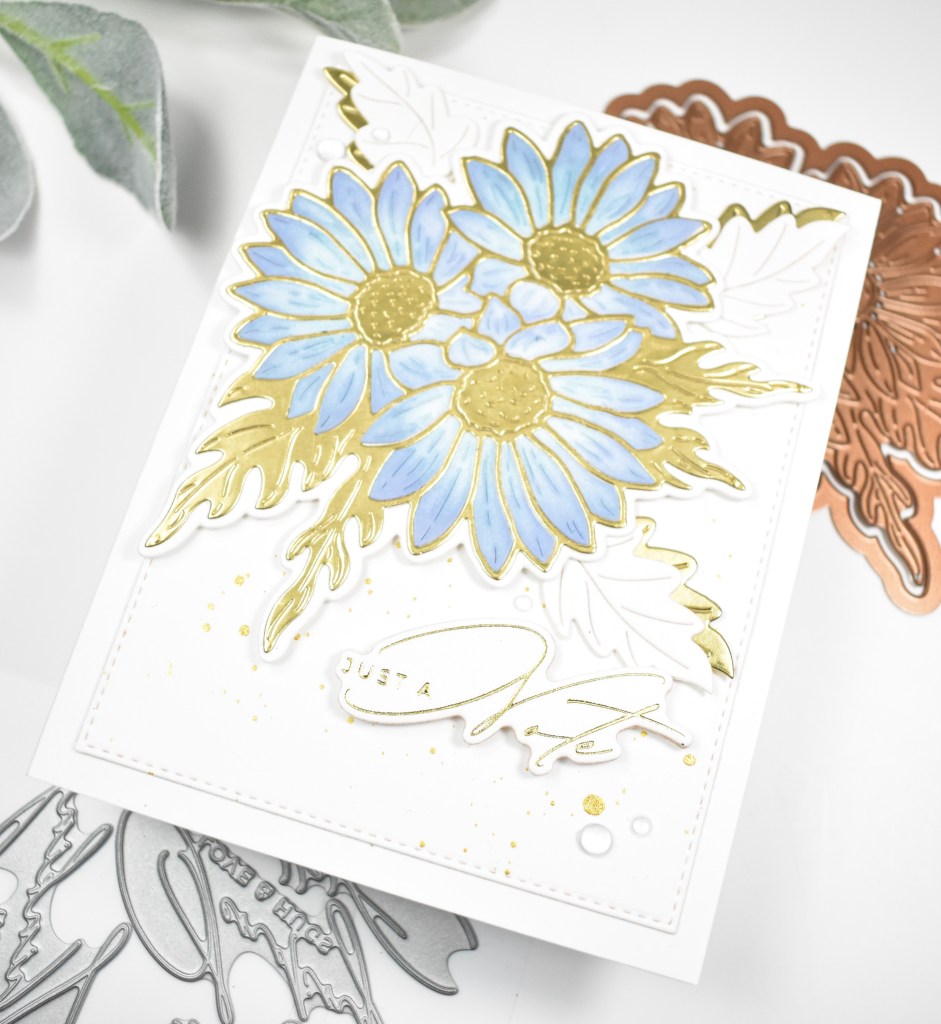
I began by gathering a panel of watercolor paper and the inks that I wanted to use. This background was created by smooshing the ink onto my glass mat and adding a touch of water and painting it onto the panel. I wanted a nice wash of color that blended from a peachy color to a pink color. The inks that I used were Distress Oxide Saltwater Taffy and Kitsch Flamingo. I worked one color at a time, drying between the layers.
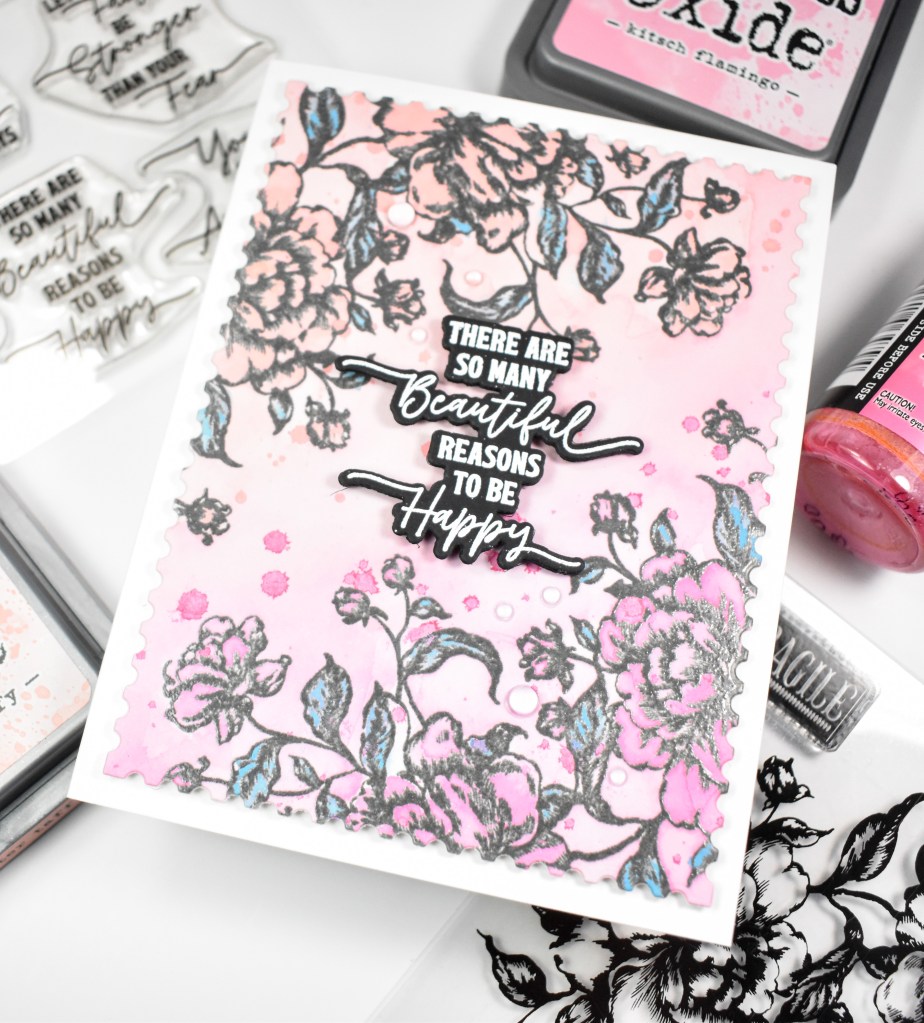
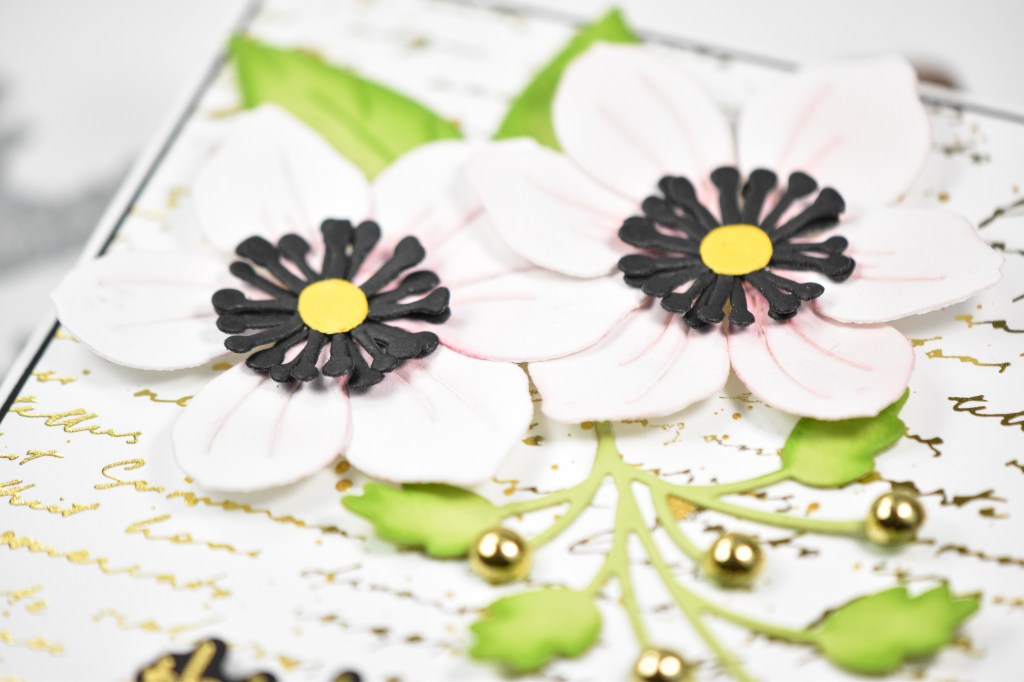
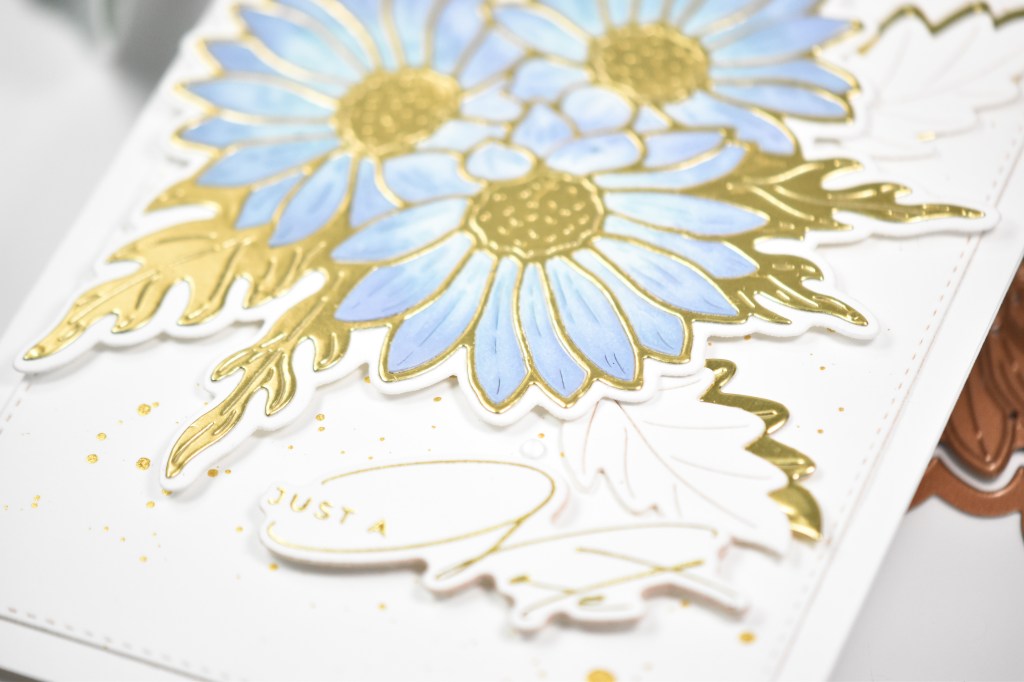
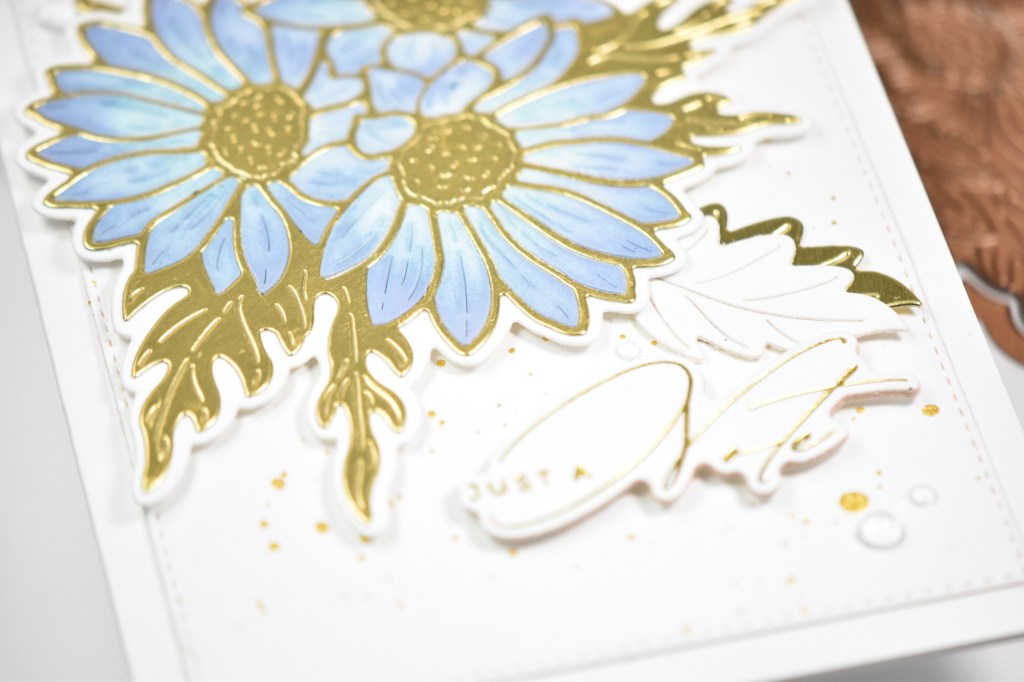
Once I was satisfied with the wash of color, I went ahead and stamped the florals onto the panel using VersaFine Clair Morning Mist. I really like this ink, because it’s dark, but not too dark like the Onyx Black. I heat set the images using Ranger Clear Embossing Powder and took the panel back to my work area. I wanted to darken the flowers and leaves so that they stood out a little more so I pulled out Distress Oxide Sprays in Broken China, Picked Raspberry, and Saltwater Taffy. I just put a few drops on my glass mat, and painted using a water brush this time. I also wanted some splatter so used the same sprays for that.

I dried the panel and trimmed it out using the Postage Stamp Edge Frames and adhered it to the card base using foam tape. The sentiment, which is from the Just Breathe set, was stamped onto black cardstock using VersaMark Ink and heat set using Detail White Embossing Powder. That was then trimmed out using the coordinating die, along with two more cuts. That was adhered with foam strips, and some clear drops were added to finish up.

That does it for this one! I don’t pull out my Tim Holtz inks too much, but I really enjoy it when I do! Maybe that should tell me something! Thanks for stopping by to check out this project, and I hope you have an amazing day! Don’t forget to stay awesome!
Supply List
Affiliate links used at no cost to you. What does this mean? If you use the links within this post to make a purchase, I receive a small commission, which allows me to continue to post crafty content for your enjoyment. I truly appreciate your support!
Latest Posts
- Simon Says Stamp Tattered Florals

- Simon Says Stamp Amazing Floral

- Simon Says Stamp Friendly Butterflies

- Simon Says Stamp Graceful Hugs

- Simon Says Stamp Hello Butterflies

Latest Instagram Posts