Simon Says Stamp Cherry Blossom Thanks

Hello and welcome back! Simon Says Stamp’s latest release, Be Bold, is live and my project today is featuring the new Cherry Blossom Embossing Folder. Let’s not waste time, and run through the details!
Main Products:

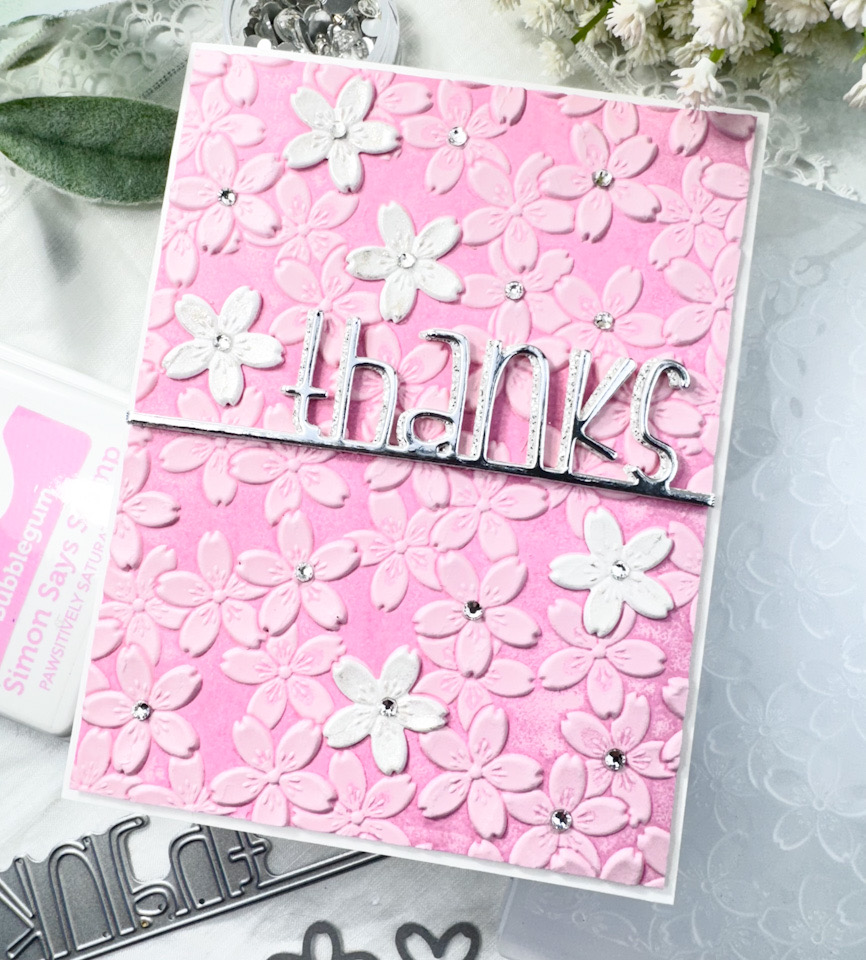
I began this project by inking up the embossing folder using Bubblegum Pawsitively Saturated Ink and placing a panel of pink cardstock into the folder and running it through the machine. I actually repeated this process twice for a darker, more even ink coverage on my panel. I used the included die to cut a few small flowers from Neenah 110lb cardstock, placed those in the folder, and ran it through to obtain the embossed texture on those.

Once the texture was added to the white flowers, I used the Wink of Stella pen to add some shimmer. I used the SSS Thanks on a Line and die cut that twice from Neenah 110lb cardstock, once from diamond glitter cardstock and once from silver cardstock. I adhered all of those together, offsetting the glitter and silver layers just slightly.
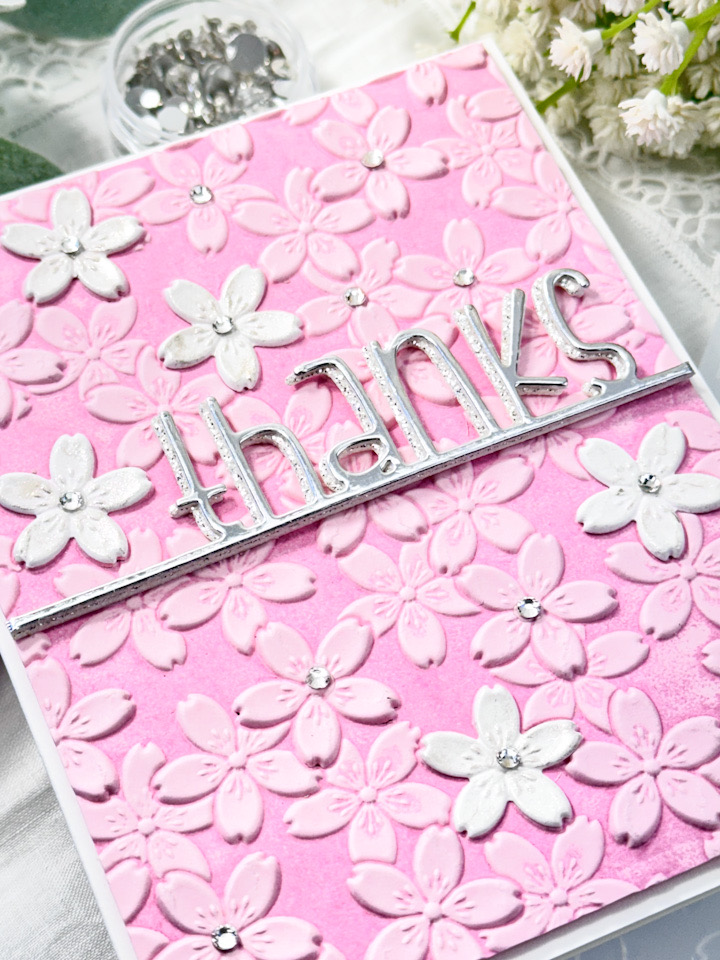
I adhered the white flowers and the sentiment to the pink panel using liquid glue, and added some clear SSS Dazzling Gems for some added bling. The panel was then adhered to the card base with foam tape.

That’s all for this one! I hope you enjoyed it, and I hope it inspires you to get crafty in your space. Thanks again for stopping by, and don’t forget to stay awesome, friend!
Other Products:
- SSS Pawsitively Saturated Ink: Bubblegum
- SSS Clear Pawsitively Dazzling Gems
- SSS Place and Score Embellishment Wand
- SSS Triangle Trays
- SSS Bone Folder
- SSS Foam Tape
- Zig Wink of Stella
- Tim Holtz Scissors
- Neenah Classic Crest Solar White 110lb Cardstock
- Pink Cardstock
- Diamond Glitter Cardstock
- Silver Cardstock
- Bearly Art Glue
- Scor-Buddy
- Spellbinders Platinum 6
* Affiliate links used at no cost to you. Thanks so much for your support!
Latest Posts
- Simon Says Stamp Grateful Heart

- Simon Says Stamp Braided Greetings

- Together By Design Color Cube Floral

- Simon Says Stamp Cute Duckling

- Simon Says Stamp Watercolor Wild Rose