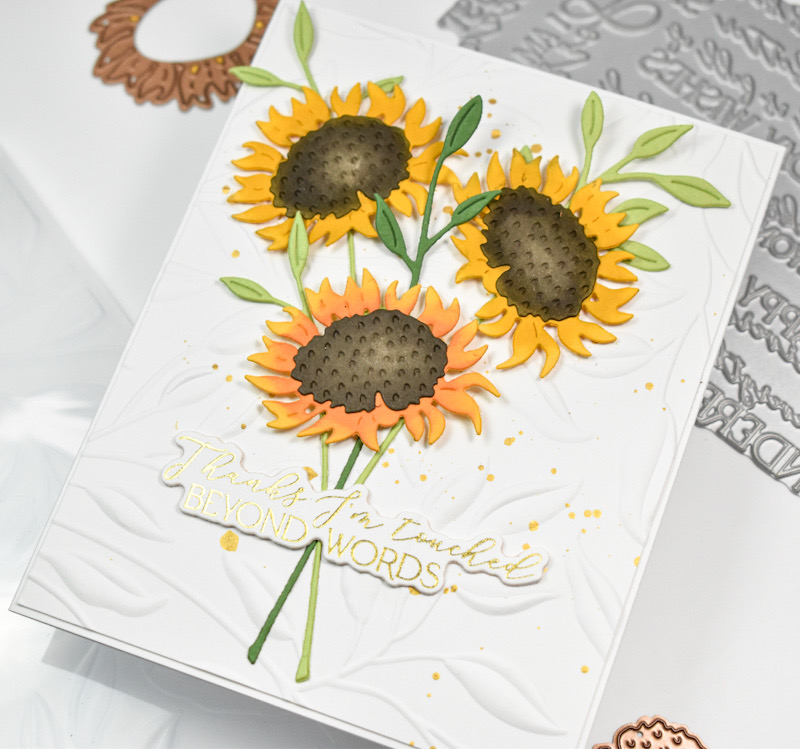
Spellbinders Sweeping Floral Hello

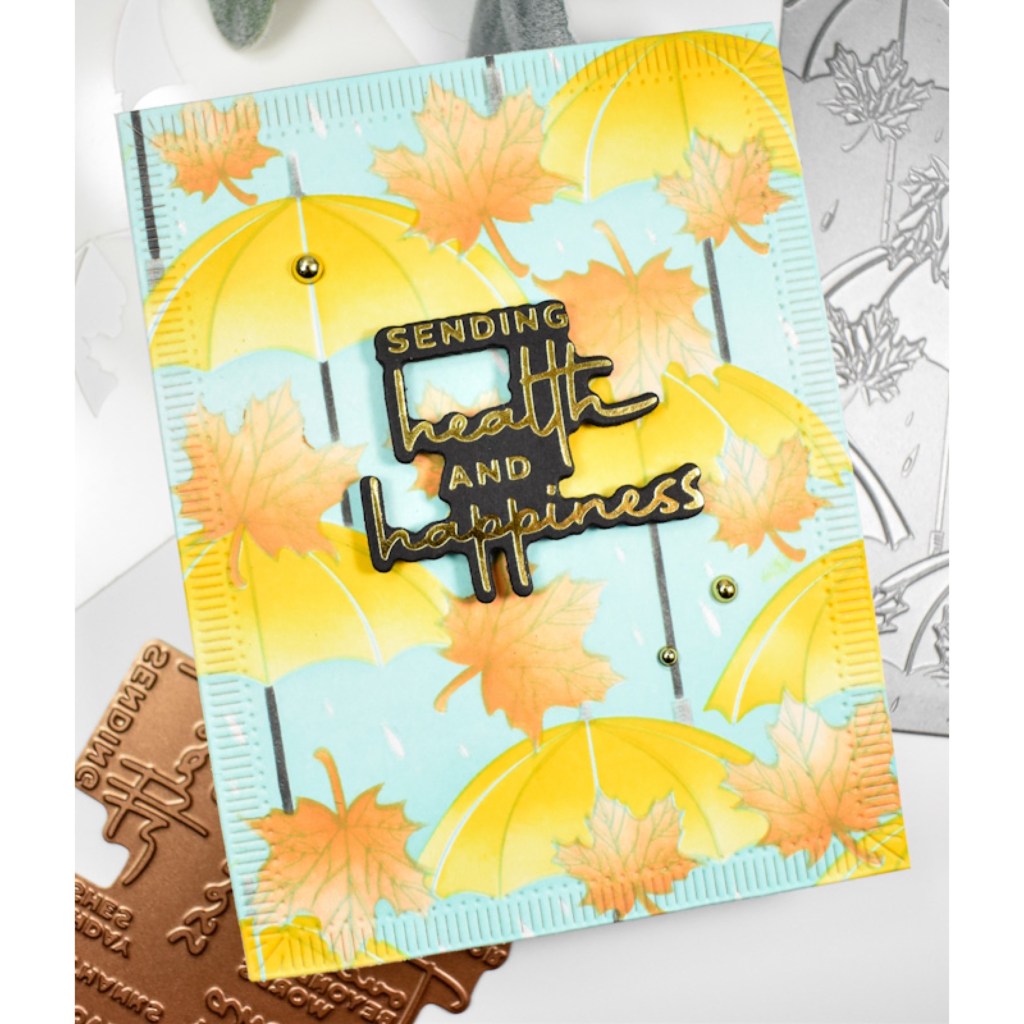
Hello Friends, and thanks so much for stopping by! I recently did a white on white card, and that prompted the idea for creating a black on black card. This project is using the Sweeping Script Sentiments BetterPress Plates and the Vivid Blooms from Spellbinders’ latest January releases. Let’s go ahead and go through the details!

NOTE: all supplies are linked to multiple sources in the thumbnails at the end of this blog post.

I began this project be gold foiling the hello, which is from the Sweeping Script Sentiments set, and then using the Fluted Classics Rectanlges to trim it out. I then splattered the panel with gold acrylic ink and set that aside to dry while I worked on the flowers.
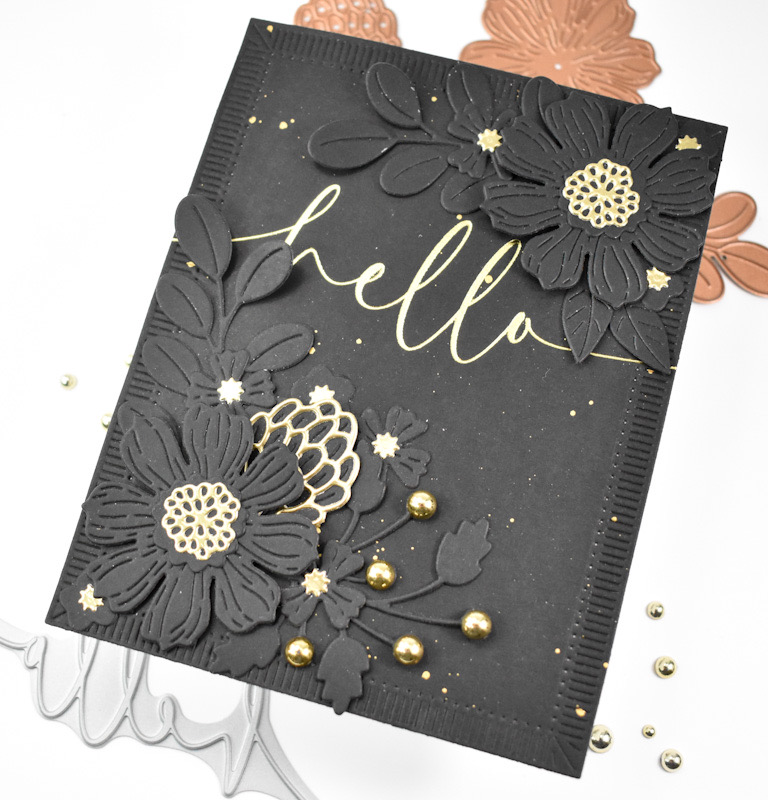
I die cut several flowers and leaves from the Vivid Blooms set from black cardstock and cut the centers of the flowers from gold cardstock. I went ahead and assembled the flowers using liquid glue and got started on the card layout.

The leaves were glued in place first and the larger flowers were adhered with foam tape for a little bid of added dimension. The smaller flowers were tucked in and around to fill in and secured with glue as well. I did add some gold metallic pearls to one of the leaves to bring it all together before adhering the panel to the card base to finish up.


That does it for this project! I hope you enjoyed it as much as I did! Black on black isn’t for everyone, but I do love tone on tone projects! Thanks again for stopping by, and I hope you have a fabulous day!

Supply List
Affiliate links used at no cost to you. What does this mean? If you use the links within this post to make a purchase, I receive a small commission, which allows me to continue to post crafty content for your enjoyment. I truly appreciate your support!
Latest Posts
- Simon Says Stamp Grateful Heart

- Simon Says Stamp Braided Greetings

- Together By Design Color Cube Floral

- Simon Says Stamp Cute Duckling

- Simon Says Stamp Watercolor Wild Rose

Latest Instagram Posts