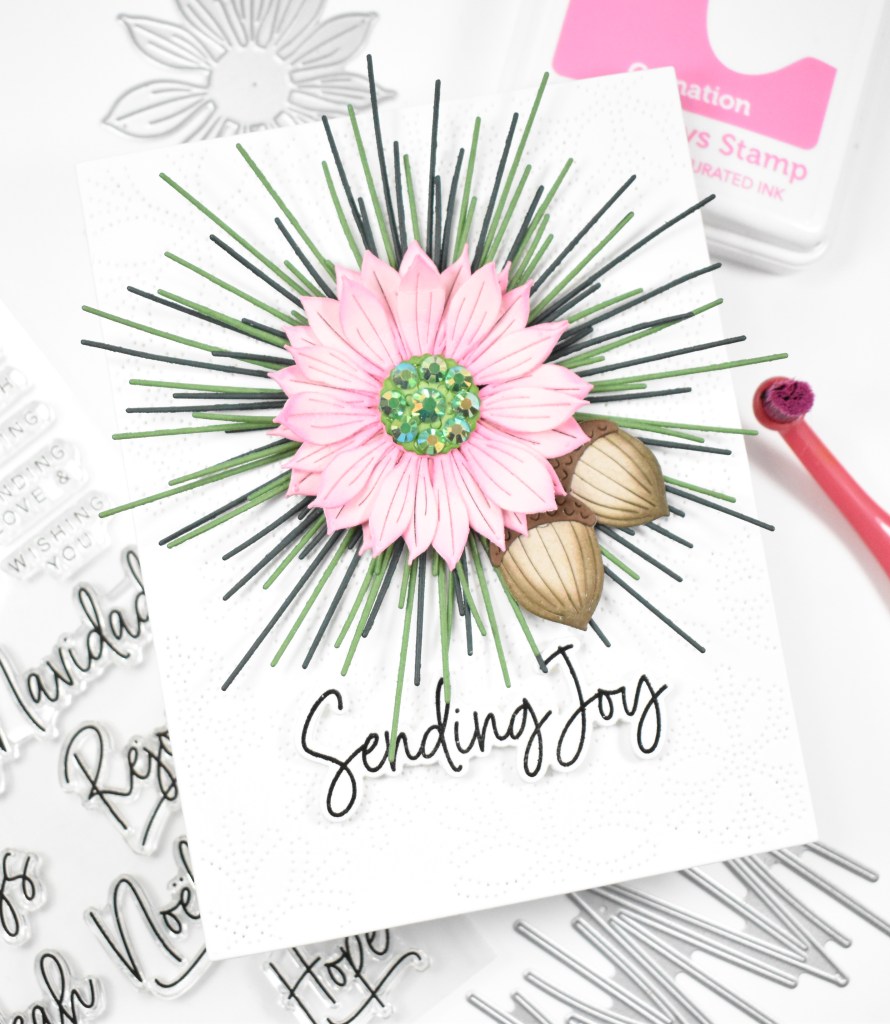
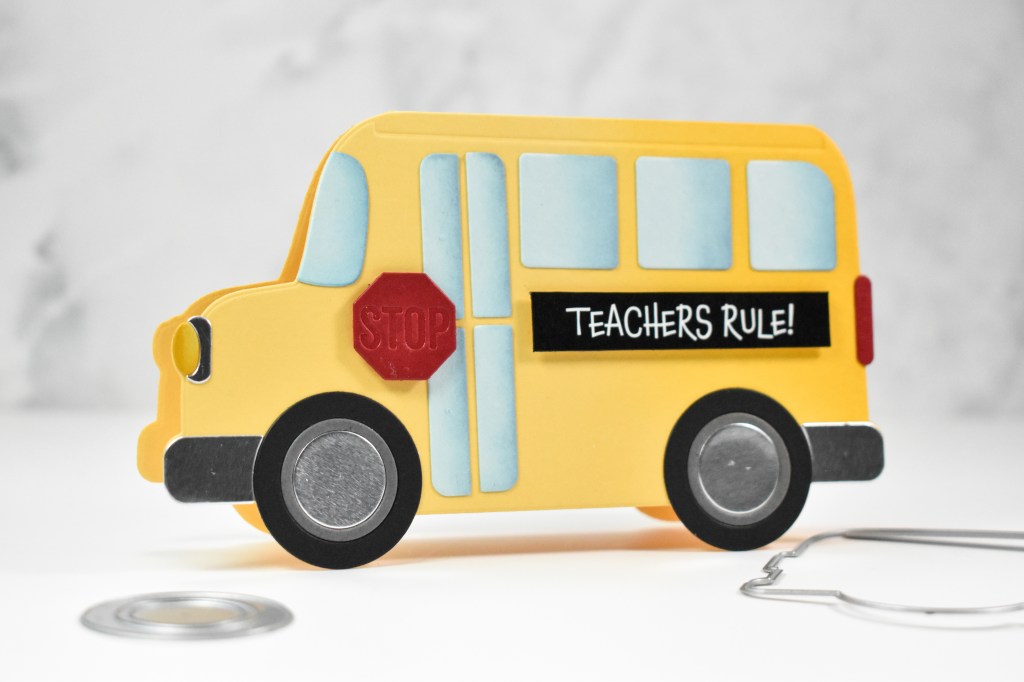
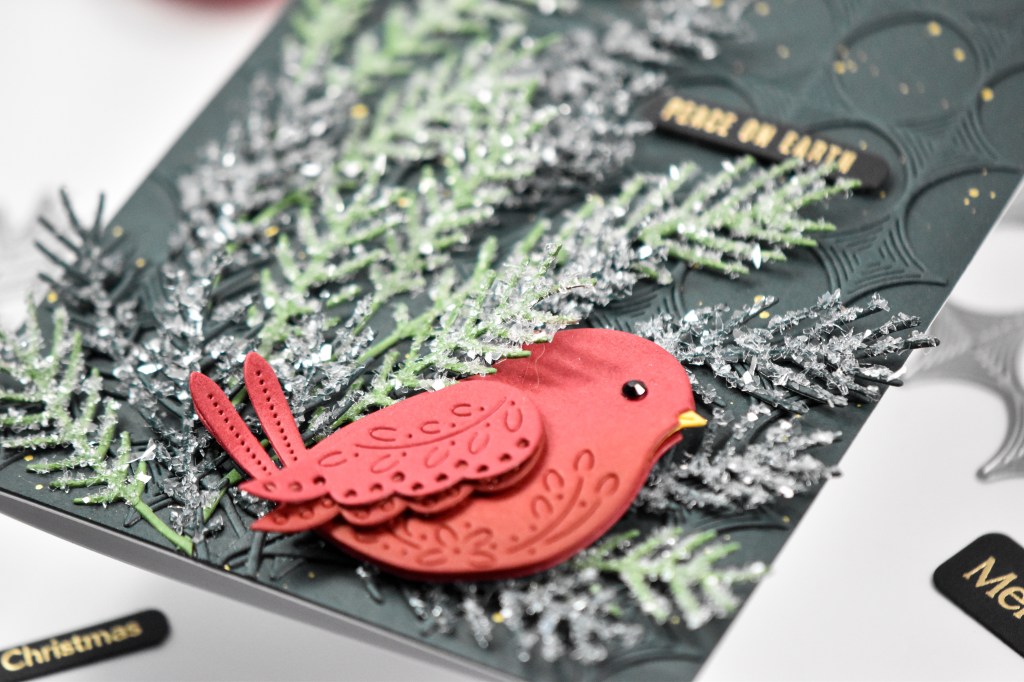
Simon Says Stamp Peaceful Bird

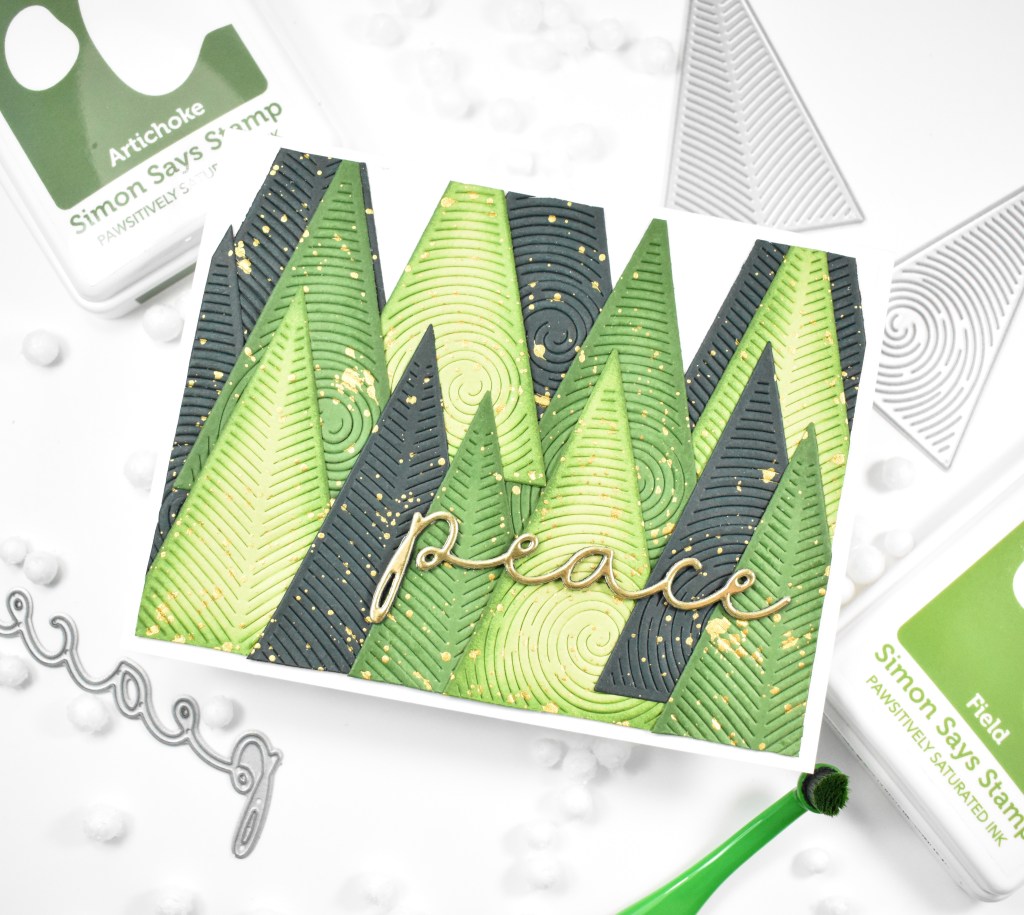
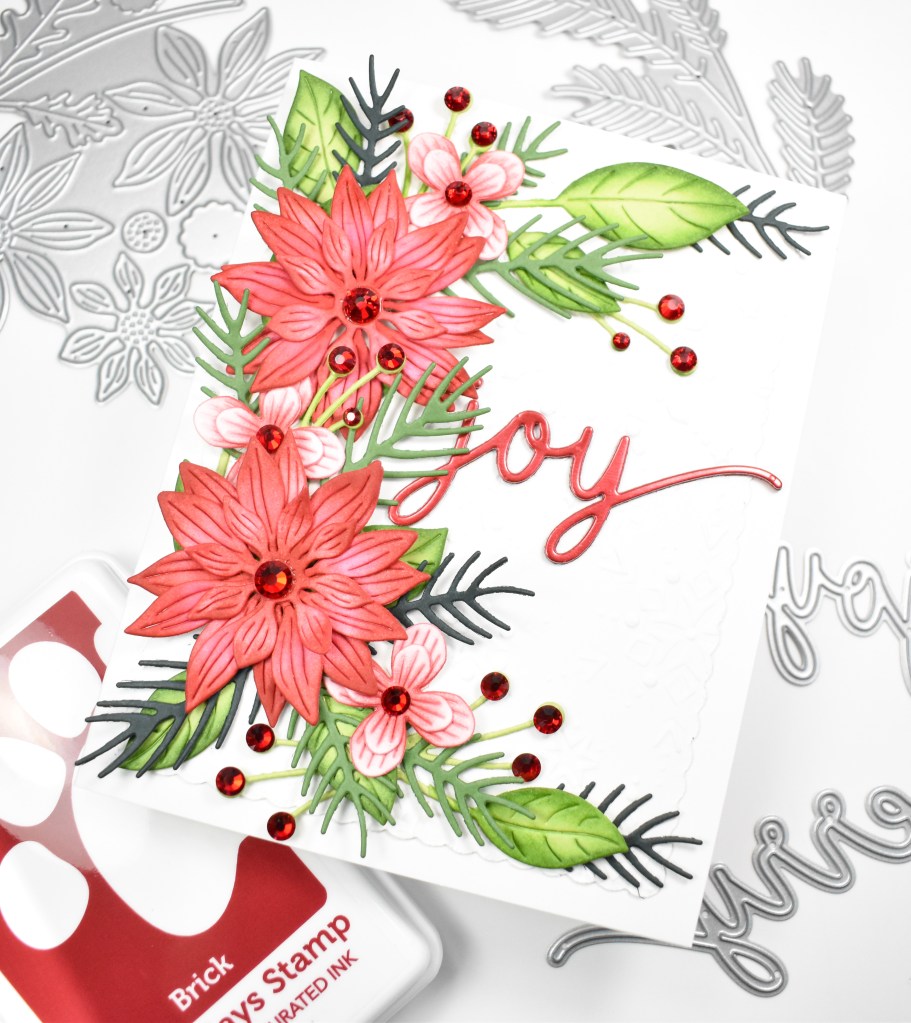
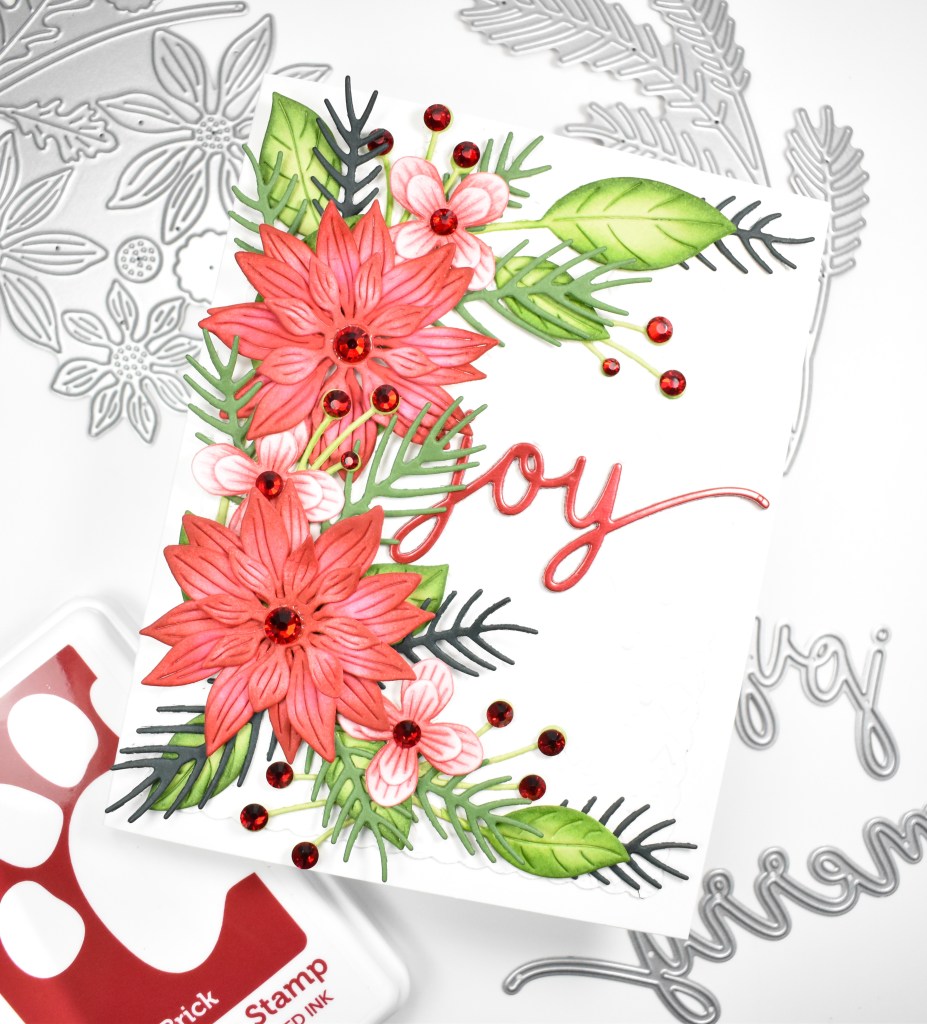
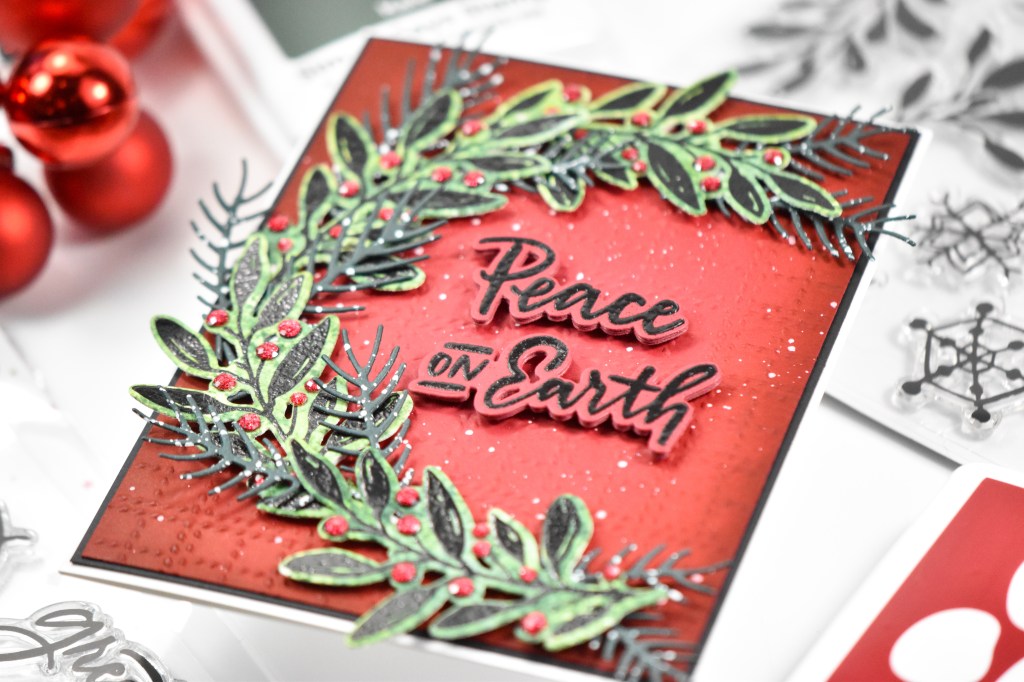
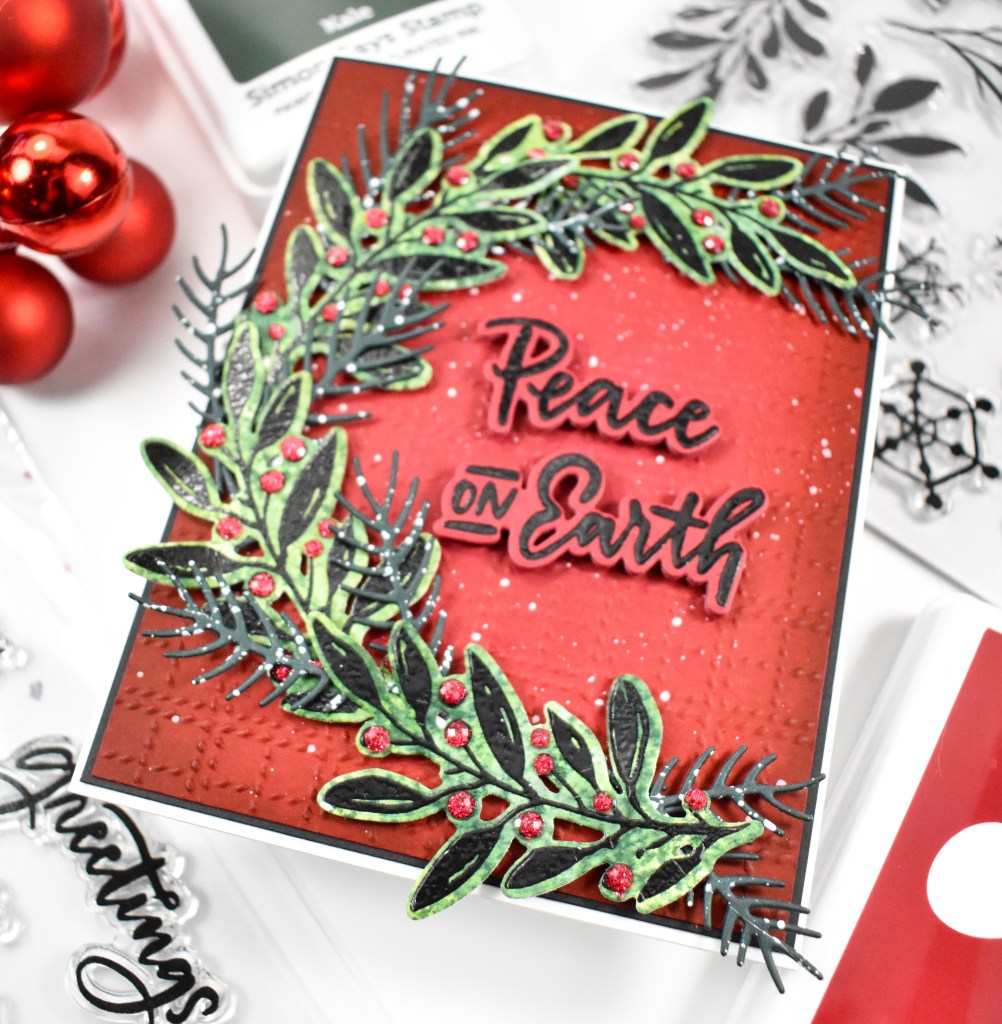
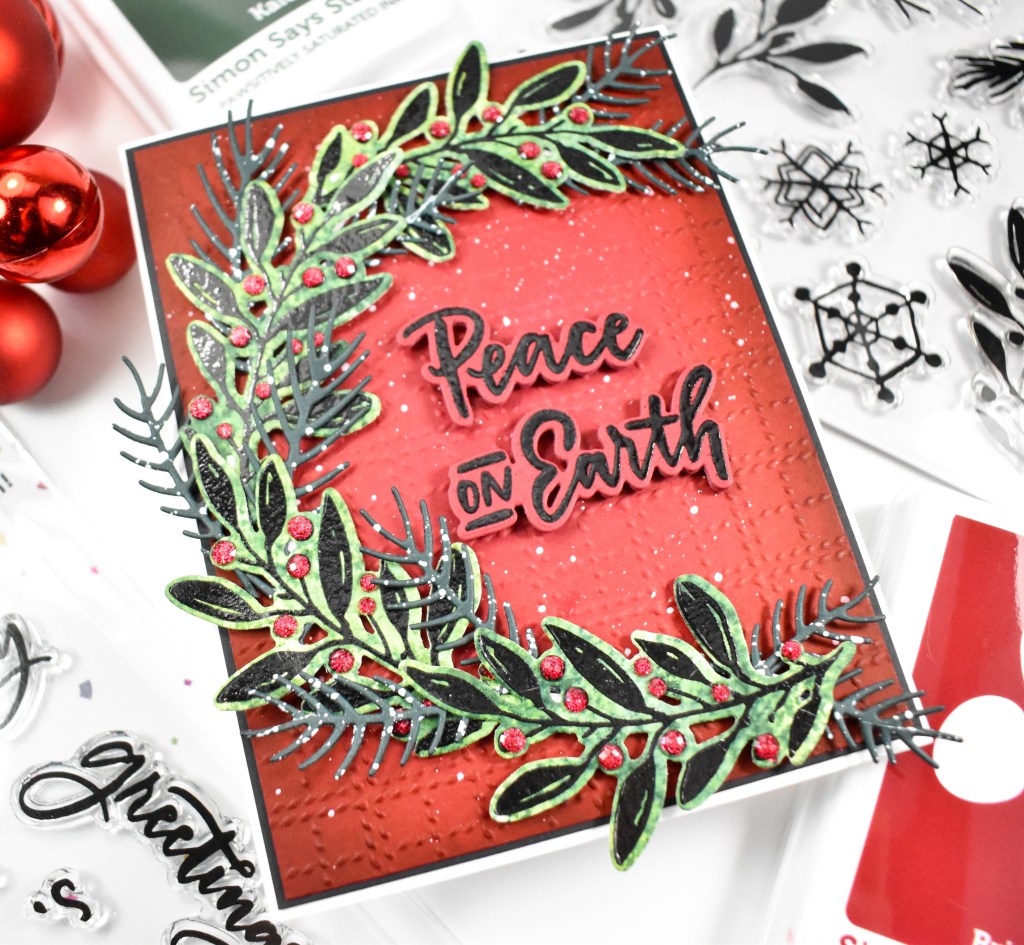
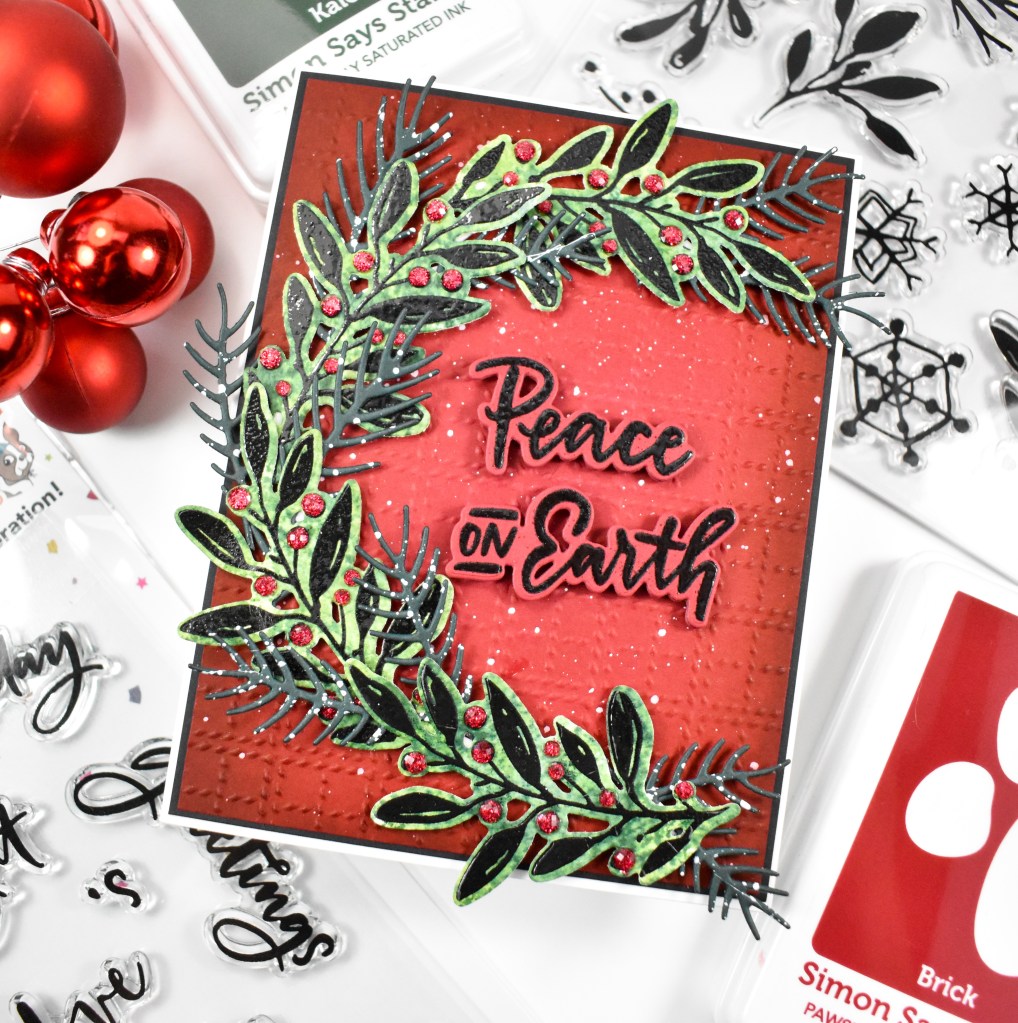
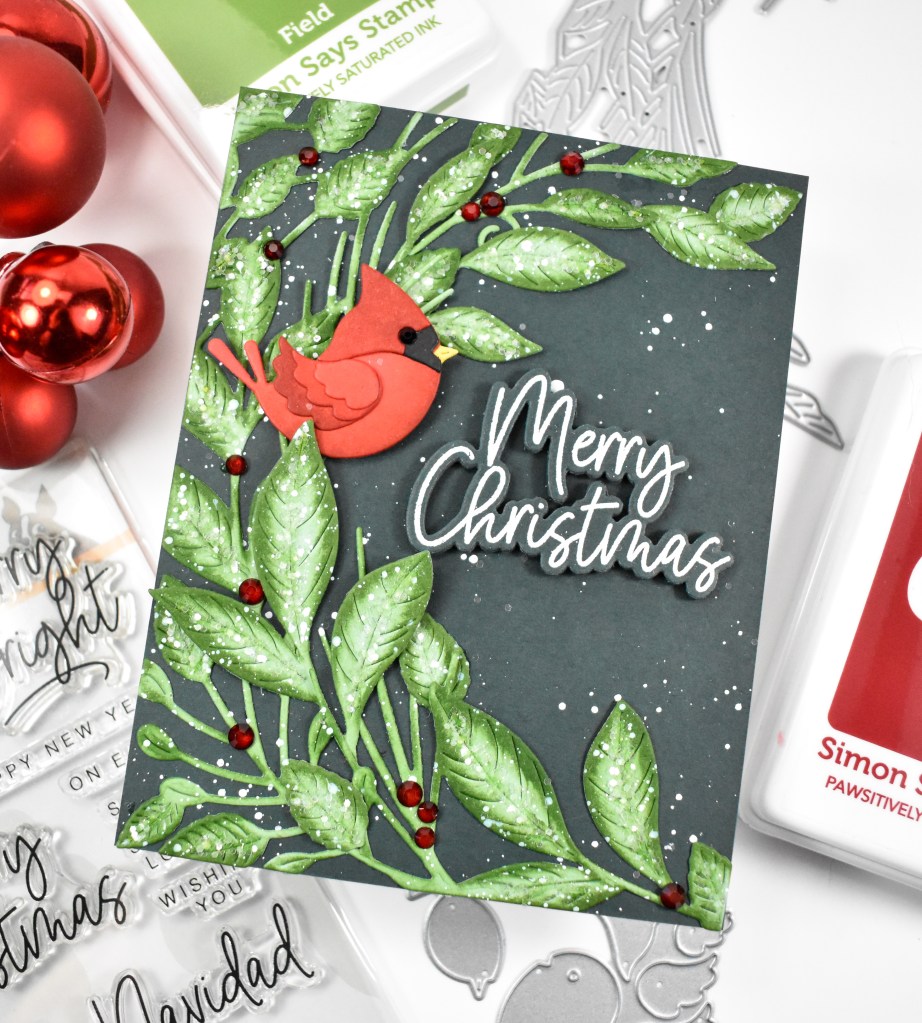
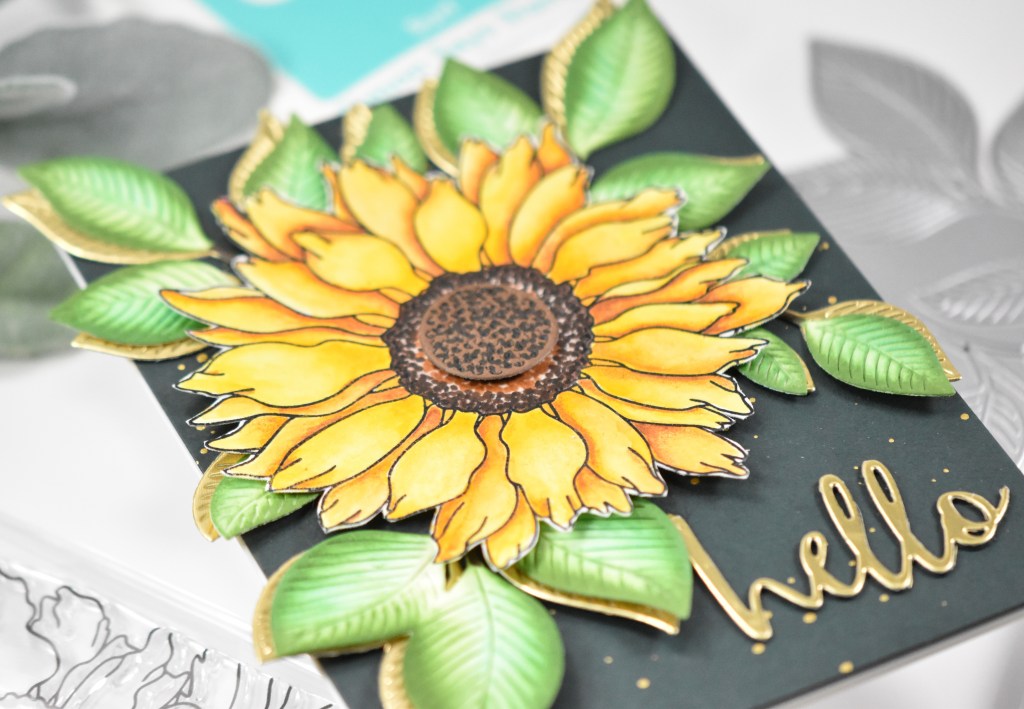
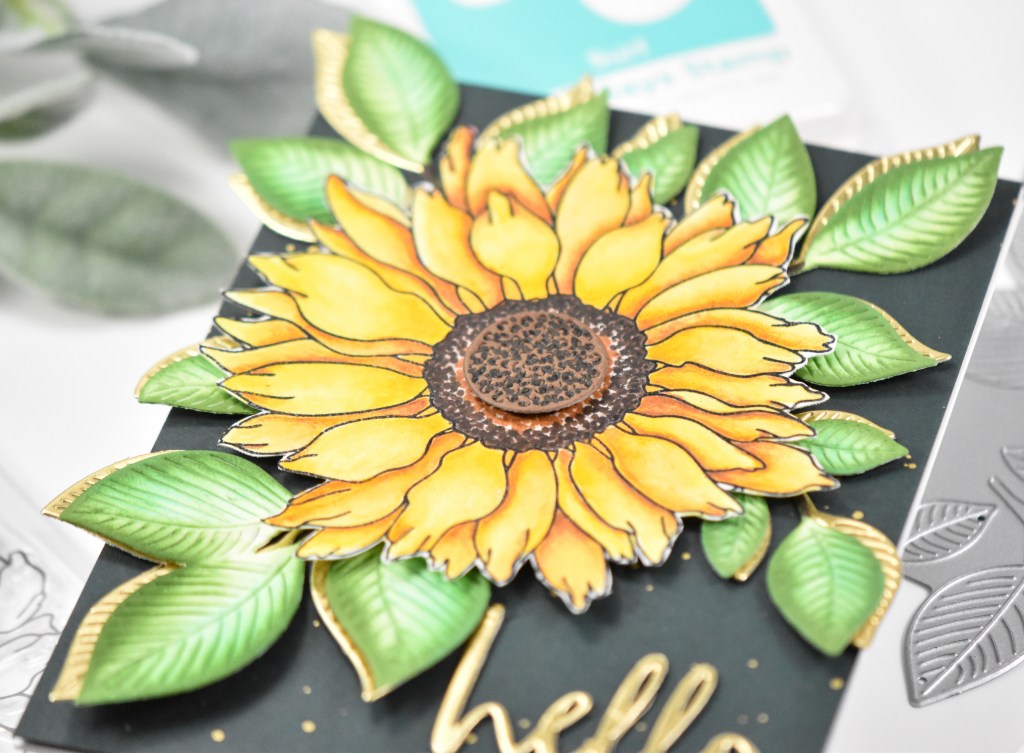
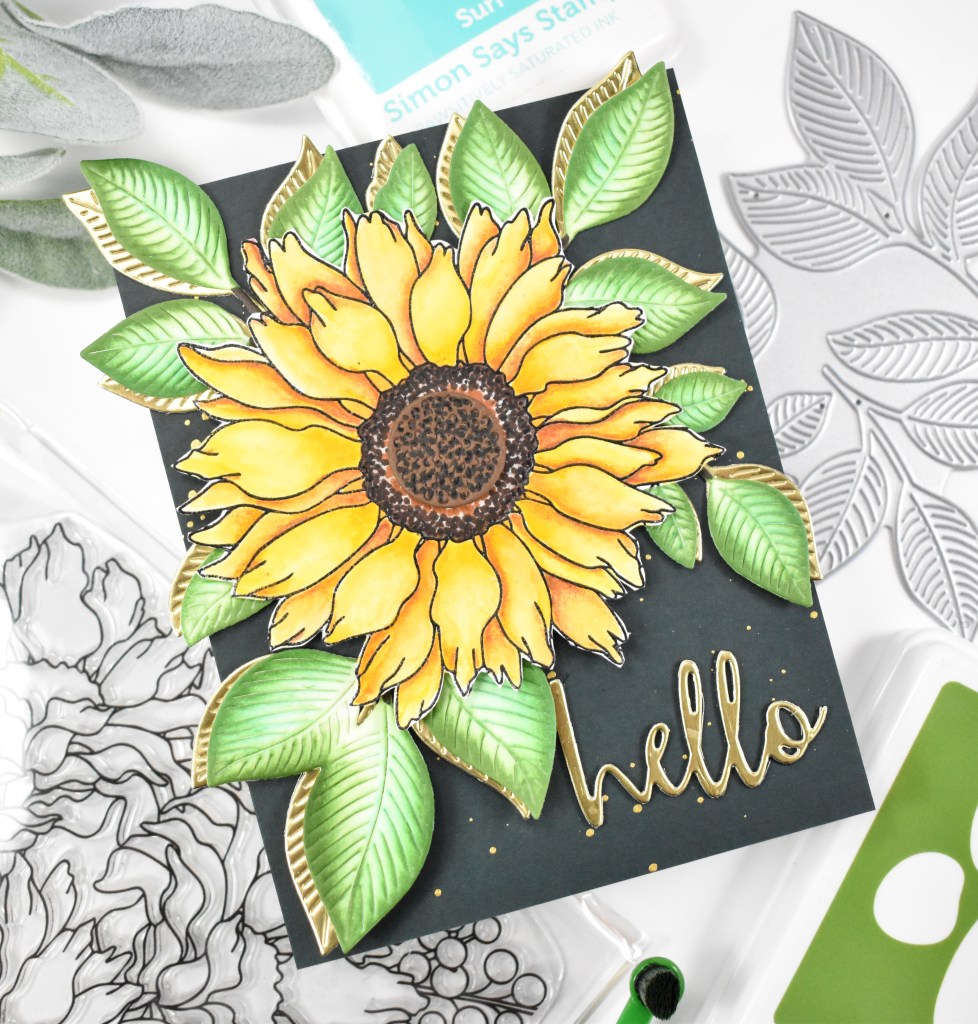
Hello Crafty Friends, and welcome back! We are celebrating the DieCember release with a super fun Instagram Hop, so be sure to check that out for your chance to win a gift card to the Simon’s website! Who doesn’t love winning gift cards, am I right?! Today’s project is featuring the new Flourish Bird in an icy surrounding along with the EZ Strips Christmas stamp, so let’s go ahead and get into the details!

NOTE: all supplies are linked in the thumbnails at the end of this blog post.

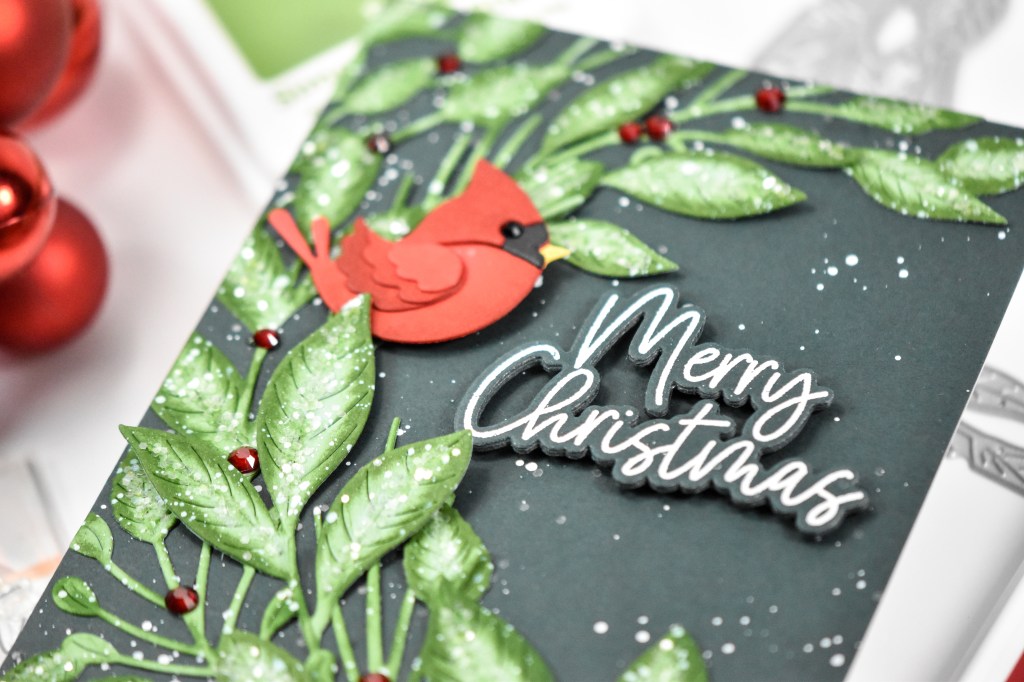
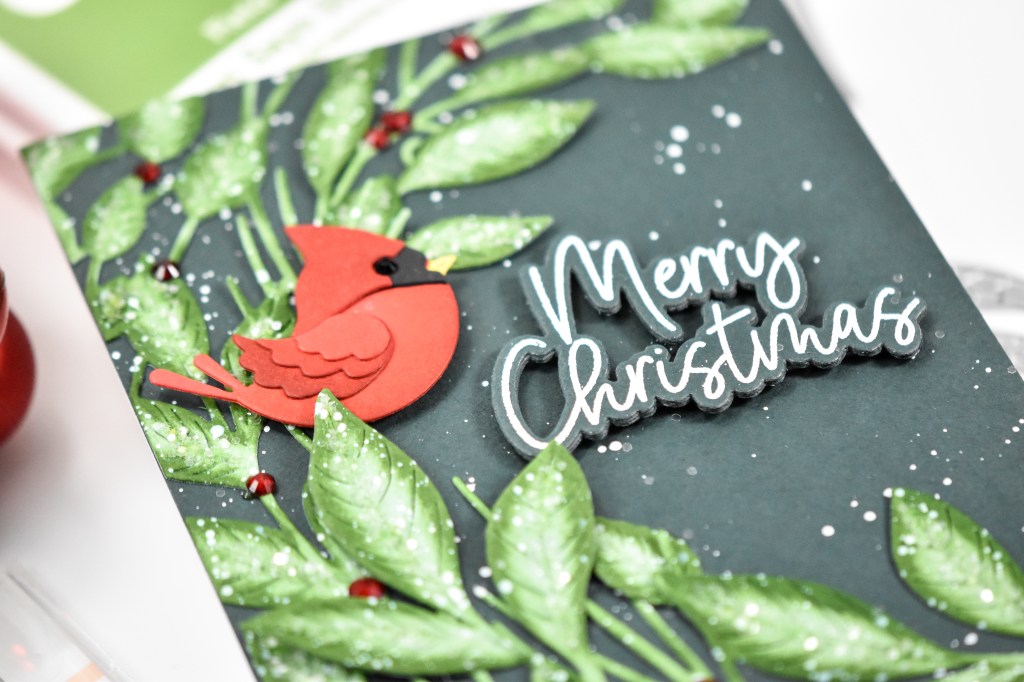
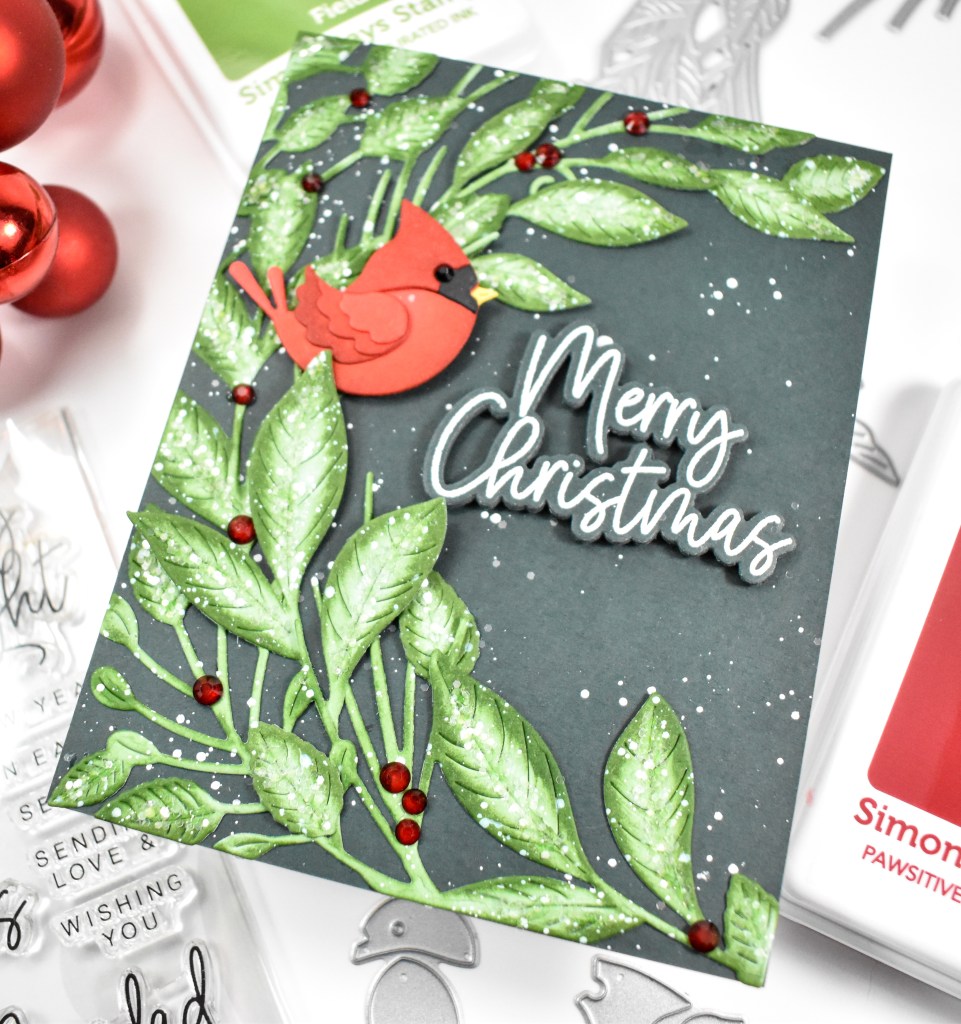
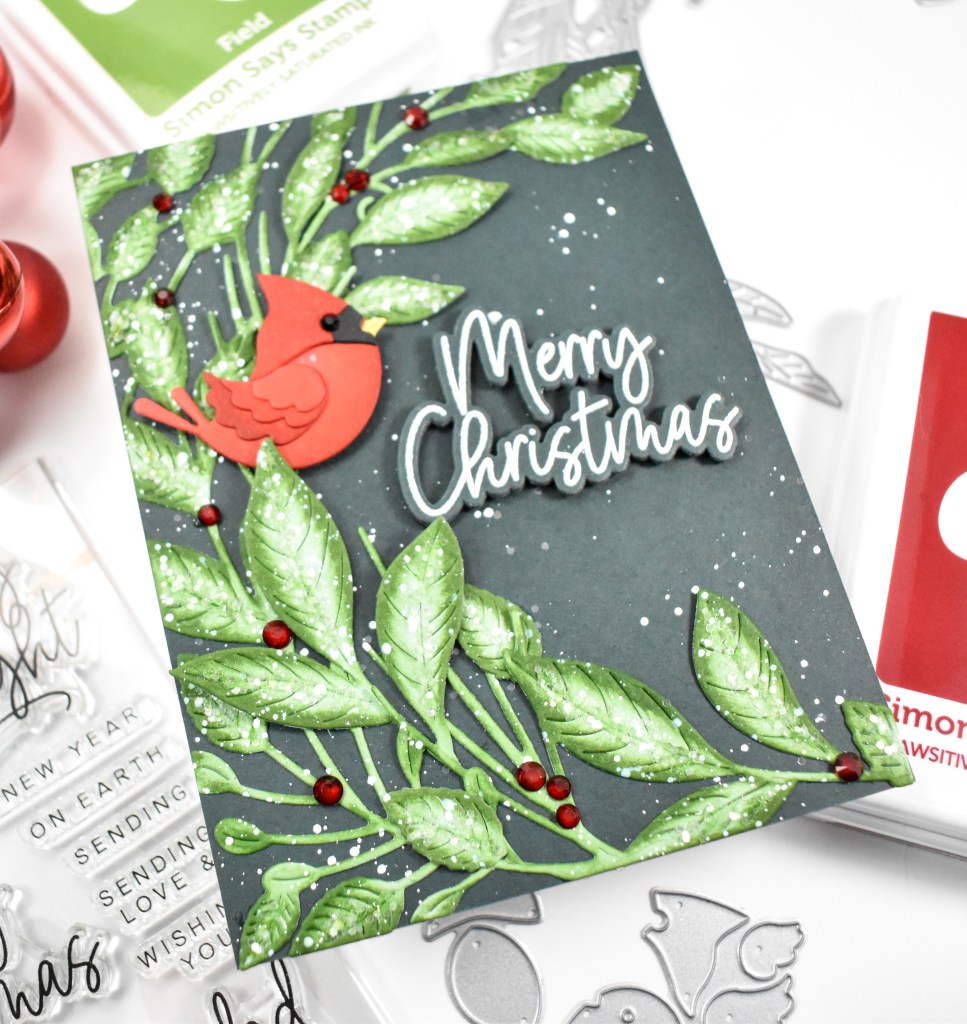
I began this project by die cutting the bird twice from red cardstock, and ink blended it using Brick ink. Once done with the ink blending, I assembled the bird with foam tape in between the two layers. I then got started on the spruce sprigs.

The greenery was cut several times from Fern and Forest cardstock, adding the Diamond Dust to them using liquid glue. Those were all set aside to dry while I worked on the rest of the card. The sentiment was stamped using VersaMark Ink, heat set using Princess Gold Embossing Powder and trimmed out using the EZ Strips Rounded Rectangles die.

The background was created using a panel of the forest cardstock that was gold splattered and the Whirl Diamond Plate cut from the same cardstock. That was adhered in place and I began adhering the sprigs in place as well. Some of the sprigs were trimmed off and tucked in different place for a more full appearance. The bird and sentiment were adhered using foam tape to finish up.
That does it for this one! Sorry if you guys are tired of the icy leaves, I’ve just been having so much fun making them! Don’t forget to join the Instagram Hop! Comment along the hop for your chance to win a gift card. Thanks so much for joining me, and I hope you have an awesome day!

Supply List
Affiliate links used at no cost to you. What does this mean? If you use the links within this post to make a purchase, I receive a small commission, which allows me to continue to post crafty content for your enjoyment. I truly appreciate your support!
Latest Posts
- Simon Says Stamp Braided Greetings

- Together By Design Color Cube Floral

- Simon Says Stamp Cute Duckling

- Simon Says Stamp Watercolor Wild Rose

- Simon Says Stamp Striped Missing You

Latest Instagram Posts