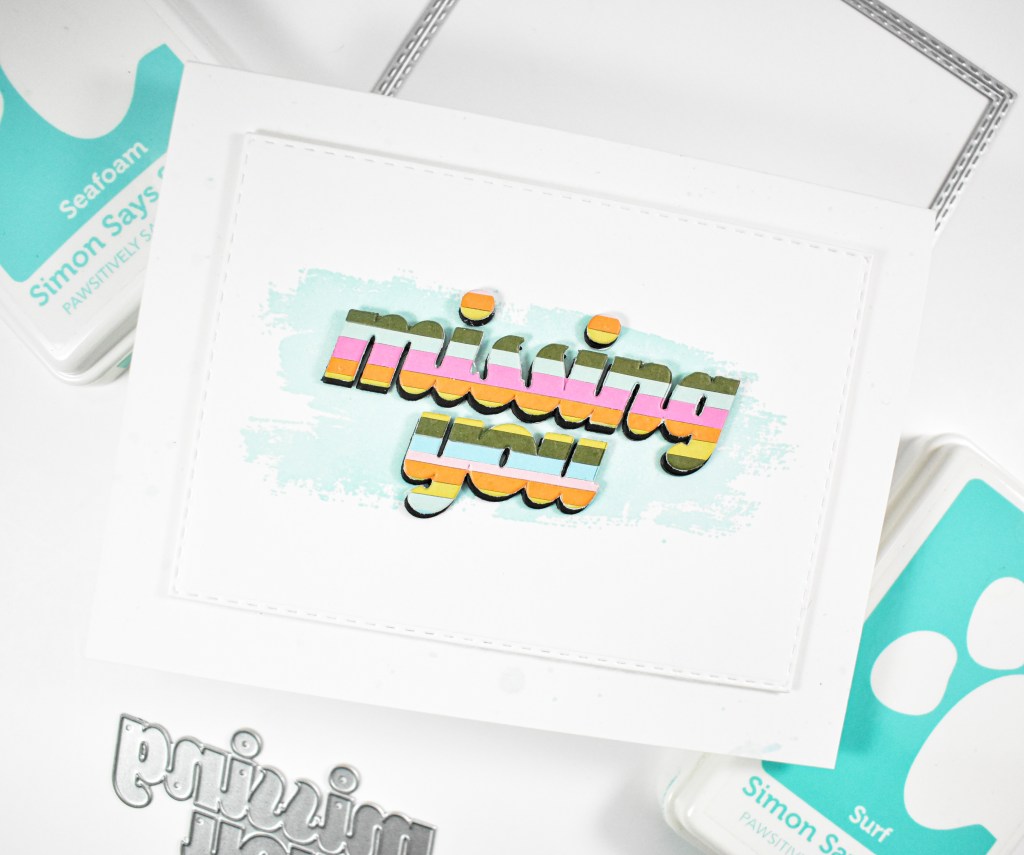
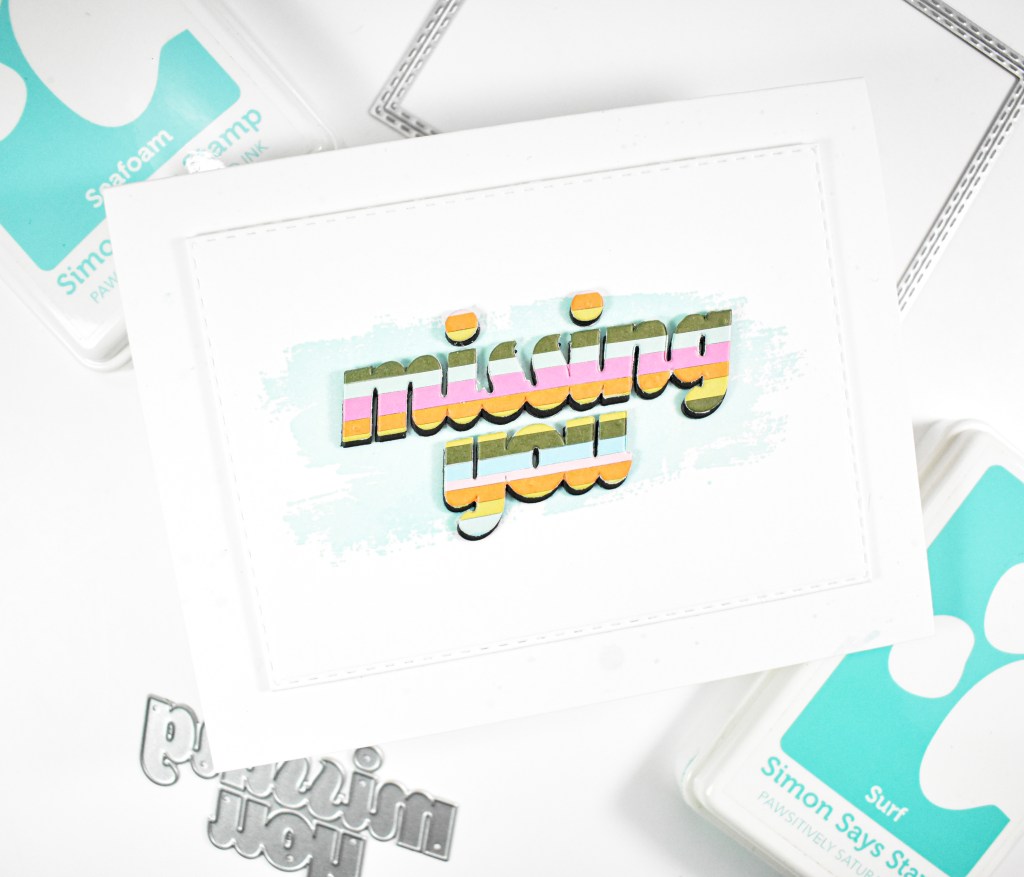
Hey There! Thanks so much for swinging by! Today’s project is featuring the new Missing You die from Simon’s latest release, In My Heart. It’s a super quick one, so let’s go ahead and go through the deets!
NOTE:all supplies are linked in the thumbnails at the end of this blog post.
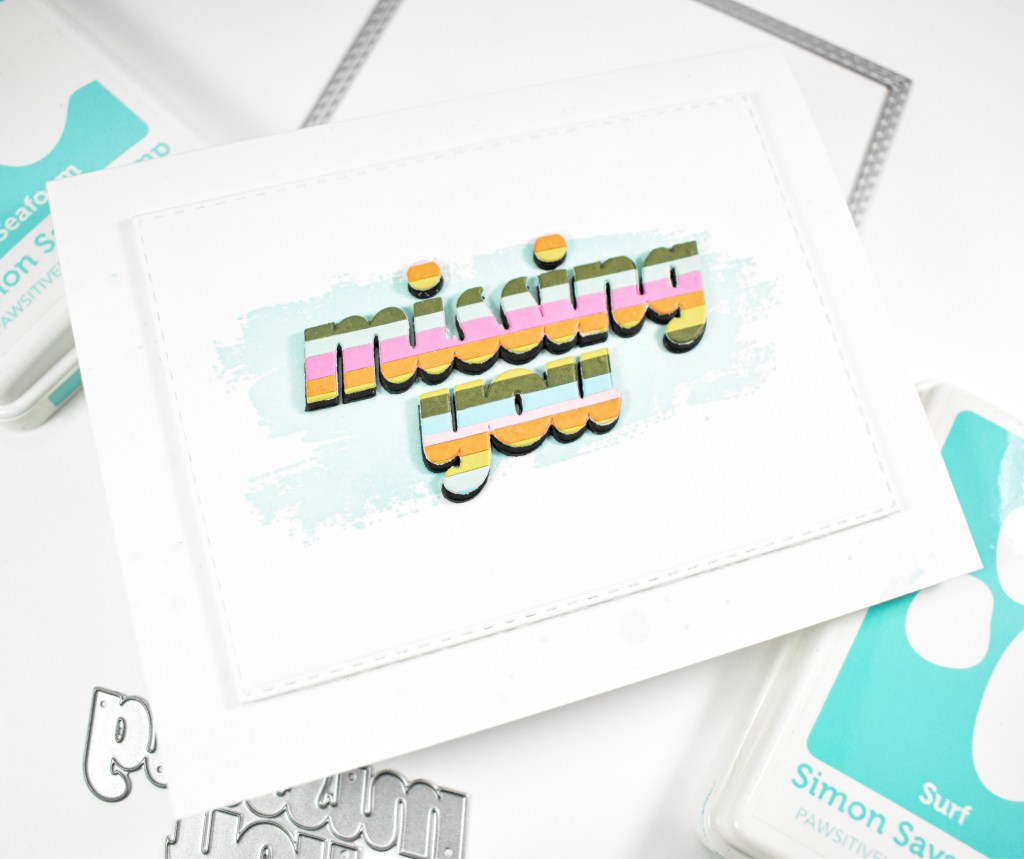
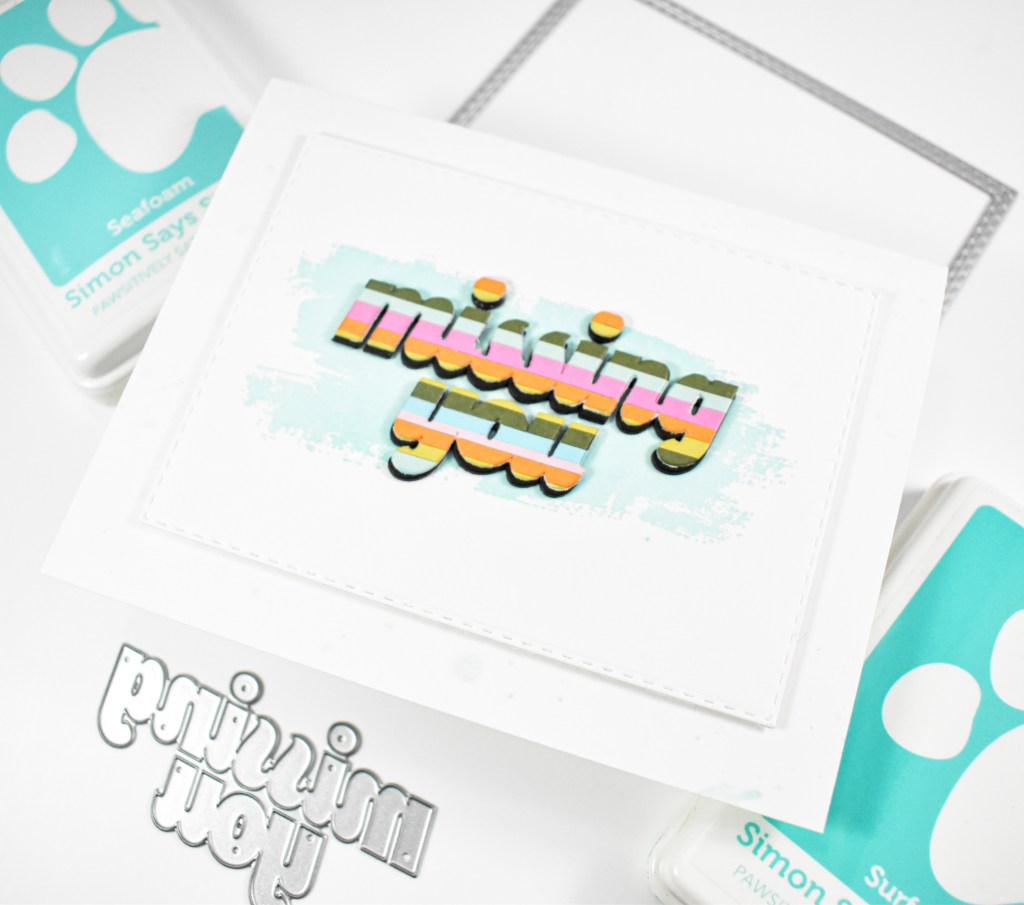
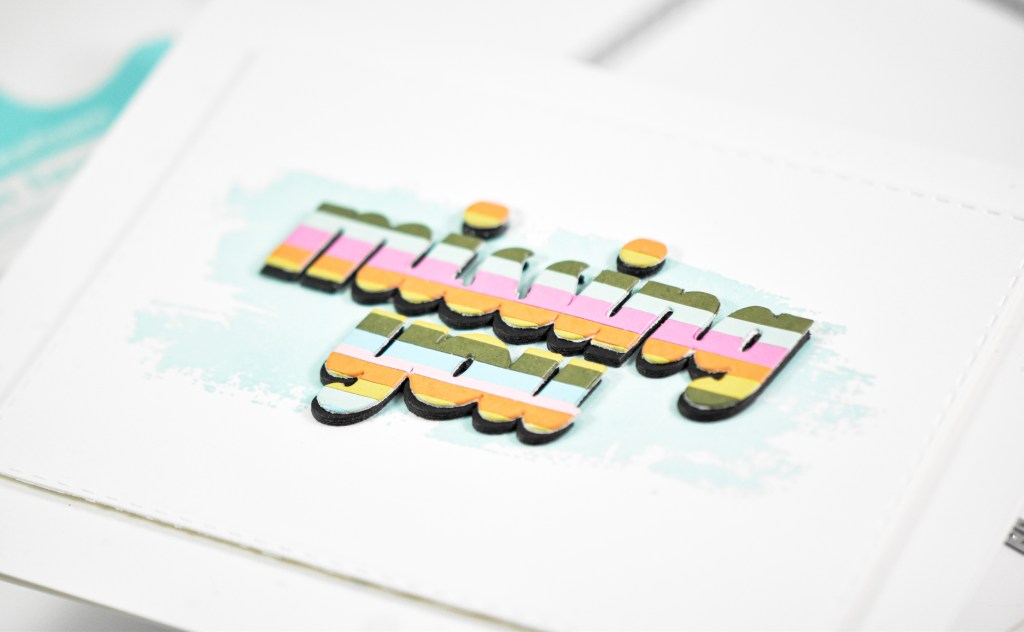
I already had a striped little panel in my stash that I had been saving for a card just like this! It was made using scrap cardstock and double sided tape. I went ahead and cut the Missing You from that little panel, cut it three times from black and adhered all of them together, offsetting the black ever so slightly.
My background panel was created using the A2 Nested Stitched Rectangles, a stamp from the Tim Holtz Brushstrokes set and Seafoam ink. The sentiment was adhered to the panel using liquid glue, and my card base was splattered with some Surf ink before the panel was adhered.
See, a super simple project for today! This was my first time using this Brushstrokes set, and I really kind of like it! It adds just the right amount of something behind a sentiment. Don’t forget to swing over to Simon’s website and check out the entire In My Heart release. Thanks again for swinging by, and I hope you have a fabulous day!
Supply List
Affiliate links used at no cost to you. What does this mean? If you use the links within this post to make a purchase, I receive a small commission, which allows me to continue to post crafty content for your enjoyment. I truly appreciate your support!
Hello Friends, and welcome back! Today’s card is featuring the new Little Banner Basics from Simon’s latest release, Sunny Vibes. Have you checked out the new release yet? I’d love to know your favorites in the comments! Let’s run through the deets for this one!
I used the miss you sentiment from the new SSS Little Banner Basics set, die cut the sentiment twice from Neenah 110lb cardstock, cut the shadow portion twice from black cardstock and adhered all of those pieces together with liquid glue. I adhered the black panel to the card base using foam tape, glued the flower pieces in place and adhered the sentiment atop that using SSS 3D Foam Strips.
That does it for today’s card! It’s a super simple one, but I like how the white over the background came out! Thanks again for stopping by, and I hope you have an amazing day! Stay awesome, friend!
* Affiliate links used at no cost to you. What does this mean? If you use the links within this post to make a purchase, I receive a small commission, which allow me to continue posting crafty content for your enjoyment. I truly appreciate your support!
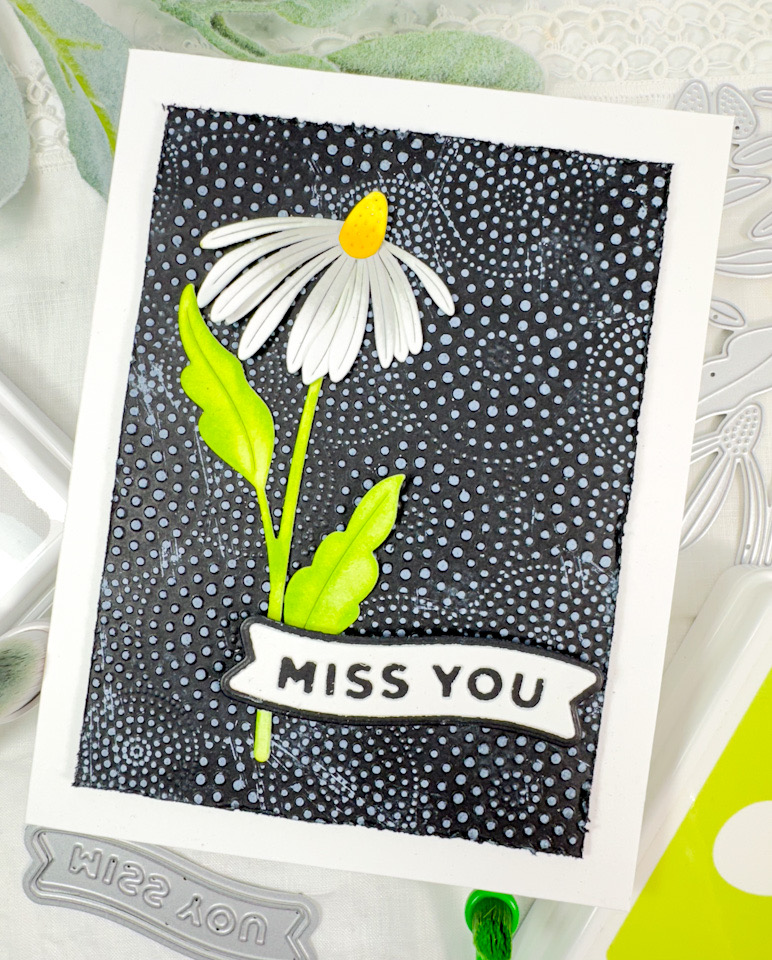
Hello Lovelies and thanks for joining me today! The newest Simon Says Stamp release, Hello Gorgeous, is gorgeous and I’ve loved playing with my goodies! Today’s project is featuring the Daisies and Leaves stencil in a combination of blue and yellow because I had the people from the Ukraine on my mind as I was making it. Let’s get into the details.
For the sentiment, I chose the SSS Missing You So Much and die cut that three times from Neenah 110lb cardstock. I ink blended one of the die cuts using the Cadette ink, and ink blended another using the Marine ink. I adhered the darker sentiment to the plain white sentiment using liquid glue, and adhered the lighter sentiment atop the darker one, offset just a tad. I also die cut the shadow once from the same Neenah 110lb cardstock and adhered the stacked sentiment to that using glue as well.
I felt like the card needed some leaves. I’ve noticed that I often feel that way, and find myself reaching for leaf dies of all varieties! Anyhoo, I used the SSS Detailed Leaf Cluster and cut that from Neenah 110lb and used the Aspen ink to do a light ink blending over those.
To assemble the card, I tucked the leaves behind the sentiment and glued those in place, and adhered the sentiment using foam tape for a little dimension. Everything was then adhered to the card base, after adding a little bling! Every card needs bling in my opinion! And it seems as though every card might need a leaf too!
That finishes up this project! I hope you enjoyed it, and I hope it inspires you to get crafty! What are your favorites from the new Simon Says Stamp release, Hello Gorgeous? I’d love to know in the comments! I ended up purchasing one of the sentiment sets, a sentiment die, and guess what, another leaf die! Anyhoo, have a wonderful day and don’t forget to stay awesome!
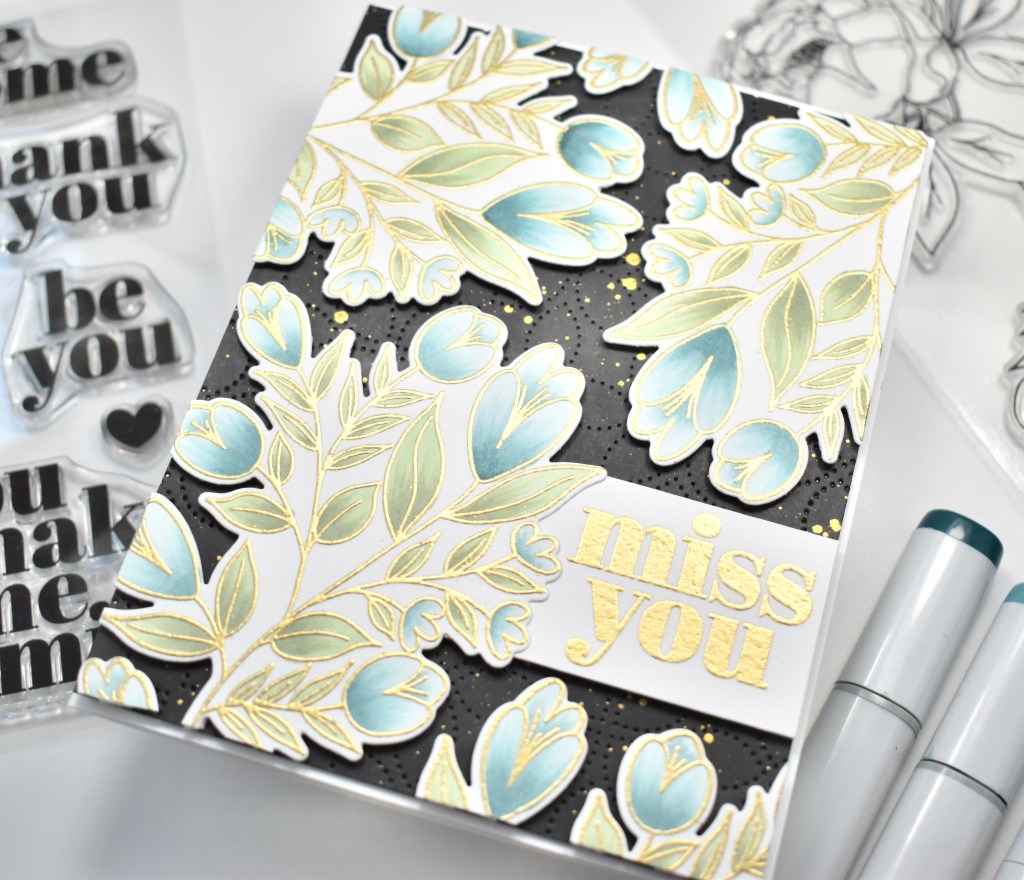
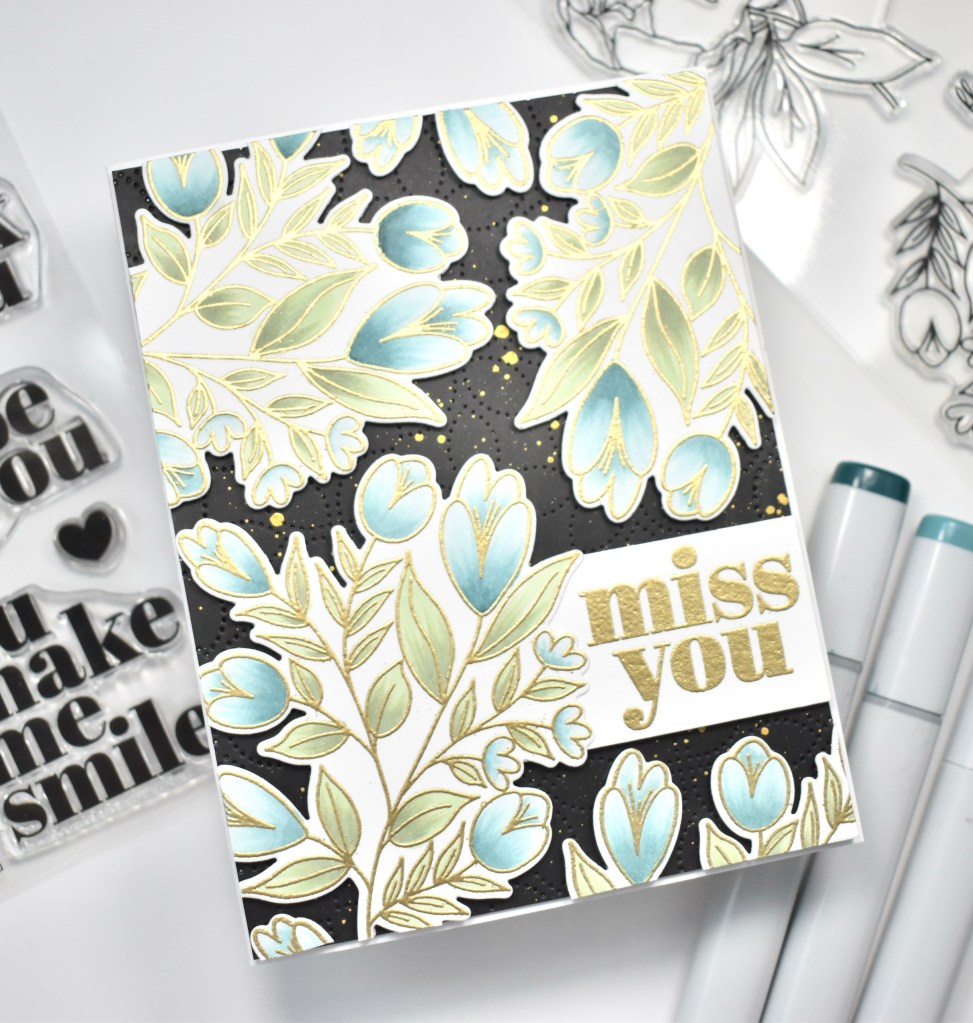
Hello! Hello! Hello! I hope you’re having a fabulous day! Thanks so much for stopping by today to take a peek at today’s card featuring the All About You Stamp set from the newest Simon Says Stamp release, Make Magic! This has been such a fun release to work with, and so many wonderful things in the release! Let’s get into the details of the project!
Once those were colored, I used the coordinating die to cut them out. I set those aside while I worked on the rest of the card. I chose the Miss You sentiment from the SSS All About You set and stamped it on Neenah 110lb using the same ink and embossing powder. I wanted a dramatic backdrop for the flowers, so I chose black! I used the SSS Detail Petal Plate and cut the black panel. It’s very hard to see, but there is some added detail under the flowers.
It still needed something, so I gold splattered the black panel using Royal Talens Amsterdam Light Gold Acrylic Ink, and that did the trick! I played around with the placement of the sentiment and flowers until I decided what I liked.
Once placement was decided, I adhered the sentiment and florals to the black panel using a combination of liquid glue and foam tape, trimming the excess. The black panel was then adhered to my card base, also Neenah 110lb, using SSS Dot Tape Runner.
That does it for this project! I love the blue flowers against the black backdrop! I hope you’ll stop by and check out the entire Make Magic release! Like i said earlier, there’s so many fun things to check out! Have a wonderful day and don’t forget to stay awesome!
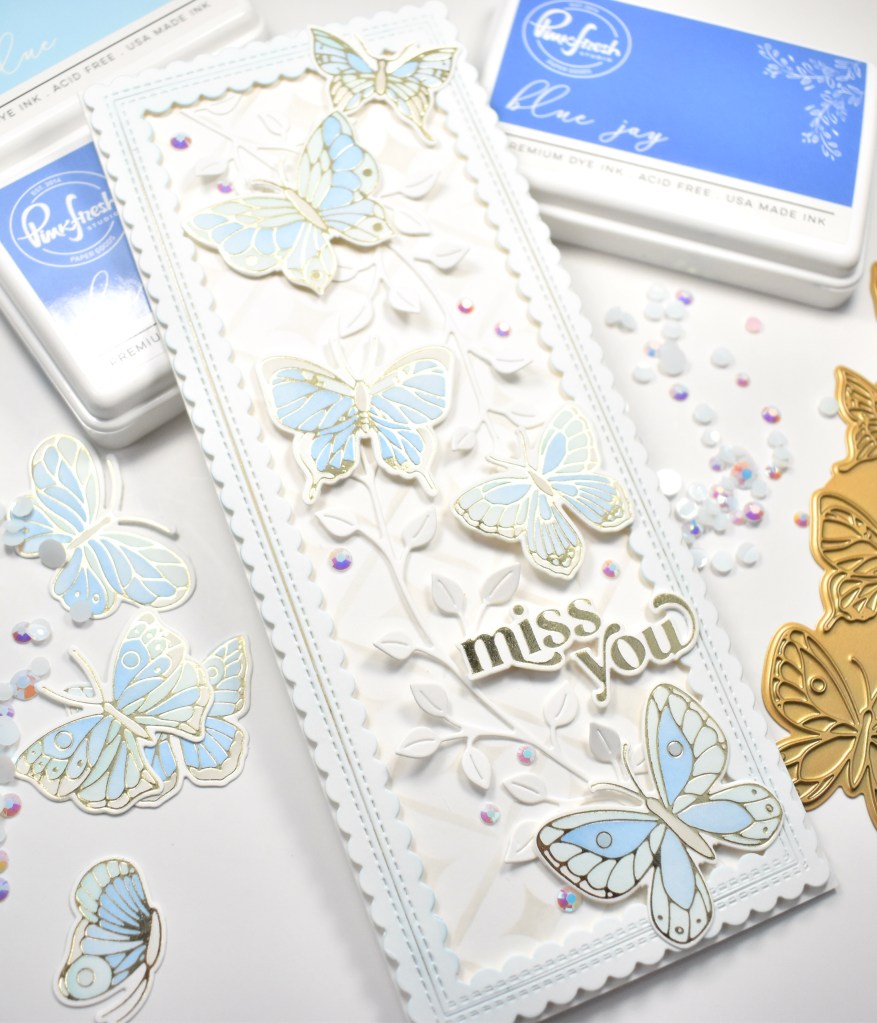
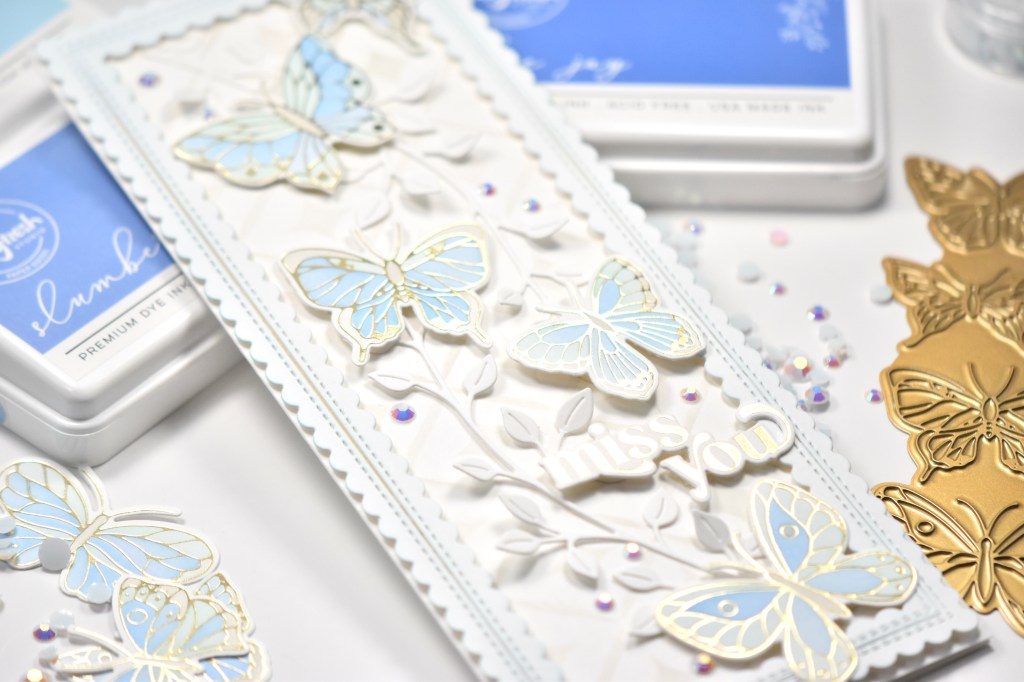
Hello Friends and Happy Friday! I hope you’ve had a great week! Thanks for stopping by to check out my new butterflies card featuring the new Small Butterflies combo from PinkFresh Studio! This is such a beautiful set! I can’t wait to try the butterflies again in different foil and ink combinations! Let’s jump right in, shall we?
While die cutting, I went ahead and cut a frame using the Slim Stitched Scalloped Rectangles, and also did a little ink blending on that as well, using the same Sky Blue ink. I cut another panel of Neenah 110lb and pulled out the Diamond Motif stencil and lightly ink blended some Misty Coast ink on that. I put foam tape on the back of the frame and adhered it to the Diamond Motif panel. I also cut a couple pieces of the Leafy Branch to add to the panel as well.
I glued only the base of the stems of the Leafy Branch to the Motif panel and added the butterflies using foam tape for dimension. I adhered this to my card base, which is also Neenah 110lb. To finish up the project, I added my Miss You sentiment from the Perfect Sentiments set using a combination of glue and foam tape. And .. no project is complete without some bling, so I added some PinkFresh Studio Jewels
That does it for this project! I might actually be in love with these butterflies! So much so, that I might have to order the larger ones! I hope you enjoyed this project and I hope you’re inspired to get crafty too! Stay awesome sweet friend!
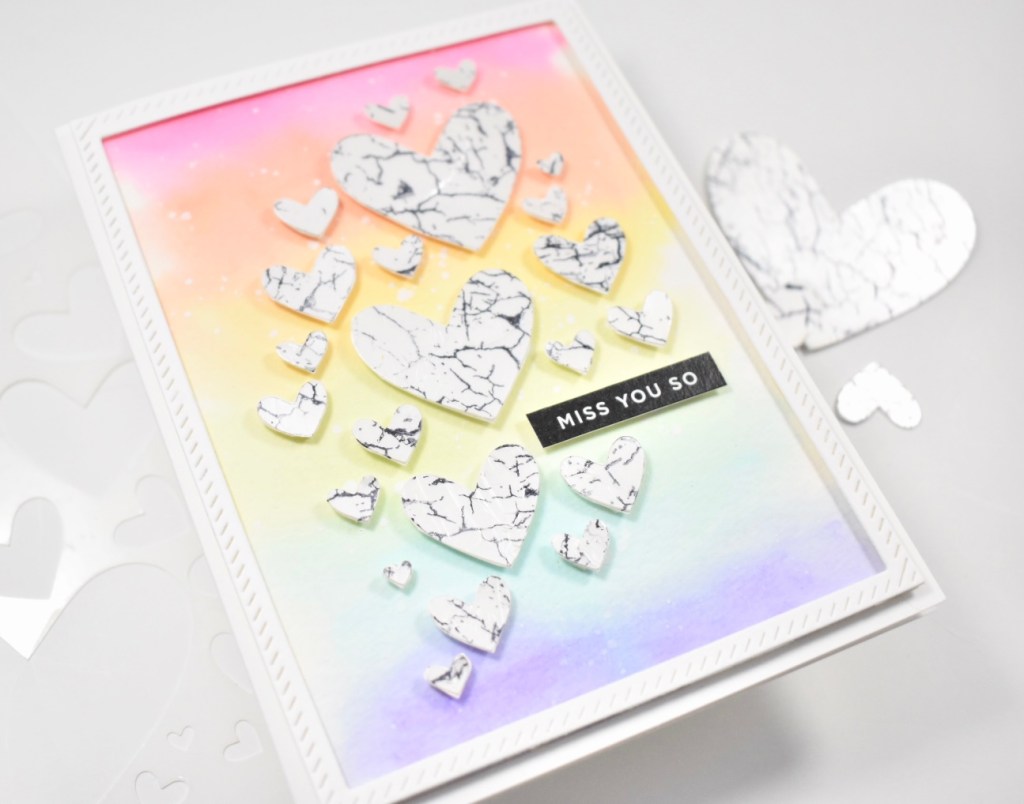
I’ve seriously had so much fun with the new Fading Hearts Stencil from the newest Rainbows release by Simon Says Stamp! This stencil has sparked a new love for stencils for me! The ink blending! The gels! The pastes! Oh my, so many awesome things to do with them! But .. for today’s project, I tried a little something different! Let’s take a look!
I’m loving this stencil so much, but I wanted to mix it up a bit and use it in an unexpected way! To begin my project, I pulled out a sheet of watercolor paper and taped it to my board using masking tape. My board happens to be a cheap clipboard from Target. But hey, it works like a charm! I also pulled out some rainbow colors from my set of Karin Brushmarkers. I started by saturating my watercolor panel with water and dropping in color using the markers. I moved the color around with my brush to get it just the way that I wanted it.
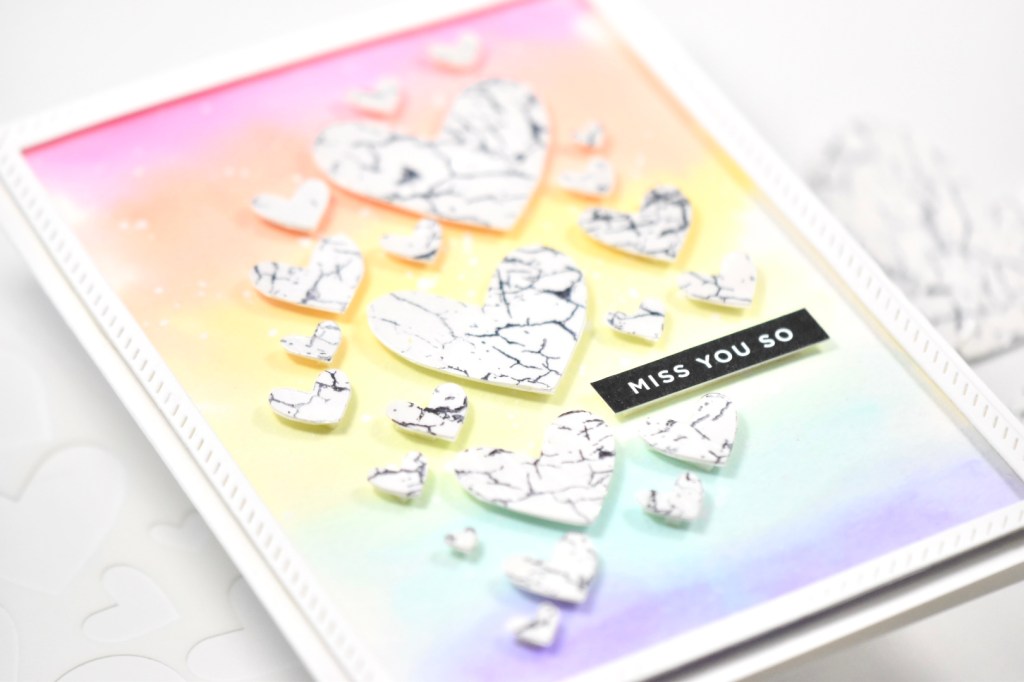
I set that panel aside to dry while I worked on the hearts. I began this portion of the project by adhering the stencil to a panel of Neenah Classic Crest 110lb cardstock using masking tape. I then used a palette knife to spread Picket Fence Studios Snowdrop Paper Glaze over the stencil. That also had to be set aside to dry. Don’t forget to wash your stencil and tools right away, so as not to ruin them. Once the watercolor panel was dry, I splattered it with some Royal Talens Amsterdam Titanium White Acrylic Ink. I love this ink because it’s the perfect consistency for splattering and it stays a nice bright white.
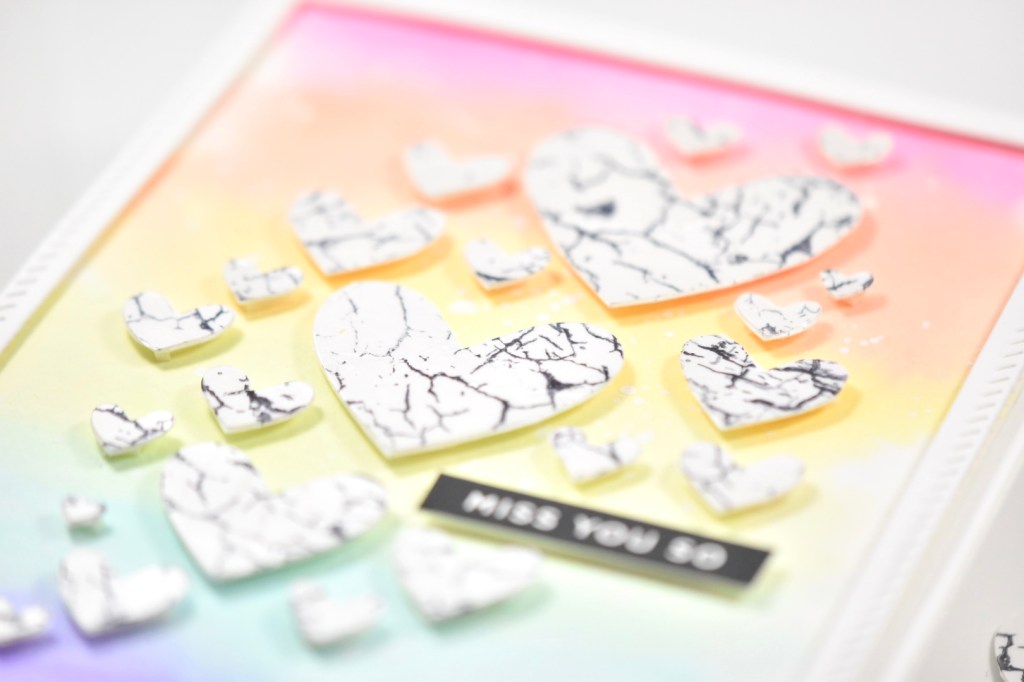
Now that the Paper Glaze panel was dry, I placed it in the Misti and proceeded to stamp the SSS Crackle Background over the glazed hearts using VersaFine Onyx Black Ink. I did run my heat tool over the stamped crackle just to heat set it so that it wouldn’t smear. Then … I fussy cut all of the hearts! Well, some were too tiny to cut, but I cut all the ones that I could, and put 3M Foam Tape on the back of them.
I used the PinkFresh Studio Stitched Rectangles Die to cut a frame and adhered that to my watercolor panel using foam tape as well. I then placed all of the hearts atop the watercolor panel along with the SSS Reverse Sentiment Strip Miss You So. This was then adhered to my card base, which is Neenah 110lb.
That finishes this project, and I love how it turned out! I love the idea of using your stencils in a different way by cutting the design out. It’s so unexpected! Anyhoo, I hope you enjoyed this project, and I hope it sparks some inspiration in you to look at your stencils in a new way! Don’t forget to check out the entire new Rainbows release from Simon Says Stamp!
Hello Crafters and welcome back to my blog! I was super excited when I was asked to create a few projects using the Spellbinders Truly Yours Collection! This is such an awesome collection because it features Glimmer plates, dies and even a great sentiment stamp set! So let’s get into today’s four projects!
I adhered the white circles to my card panel in a random pattern, and inlaid the small yellow circles into the big circles using glue. I then die cut the flowers and leaves from the Heart Swans Die set using blue, green and yellow cardstock, and adhered the centers of the flowers. The flowers were then adhered to the middle of the circles using a combination of glue and 3M Foam Tape.
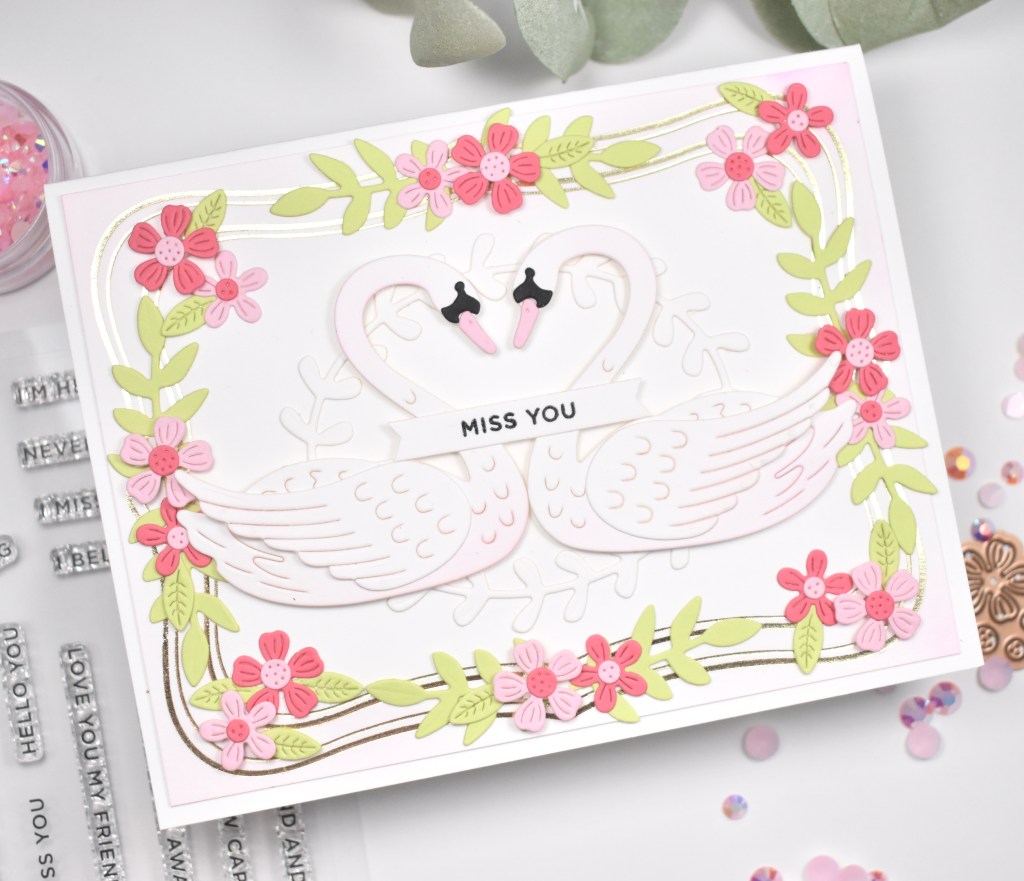
I die cut the flowers from the swan set using pinks and green cardstock and adhered the centers of the flowers. I then adhered the flowers around the the gold foil using glue and foam tape for dimension. I stamped the Miss You sentiment from the I’m Here for You Stamp and Die set using VersaFine Onyx Black Ink and heat embossed it using Ranger Clear Embossing Powder. I glued the sentiment directly to the swans in the center. My panel was then adhered to my card base.
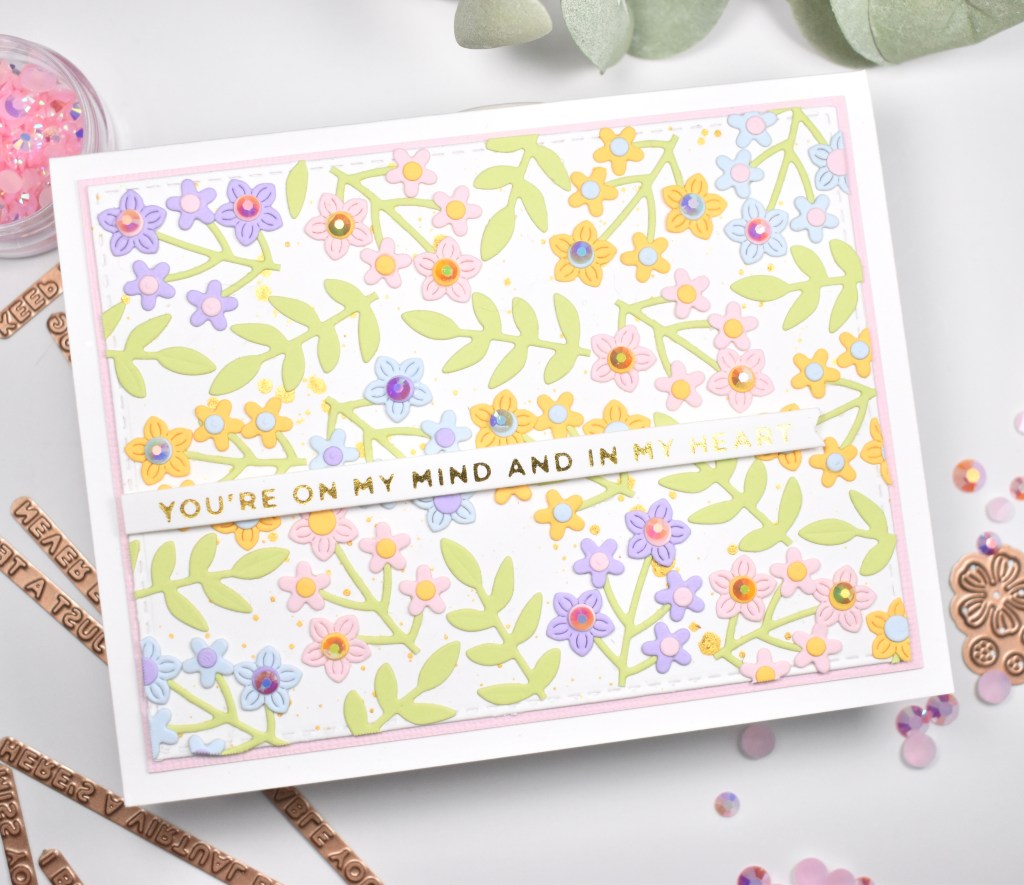
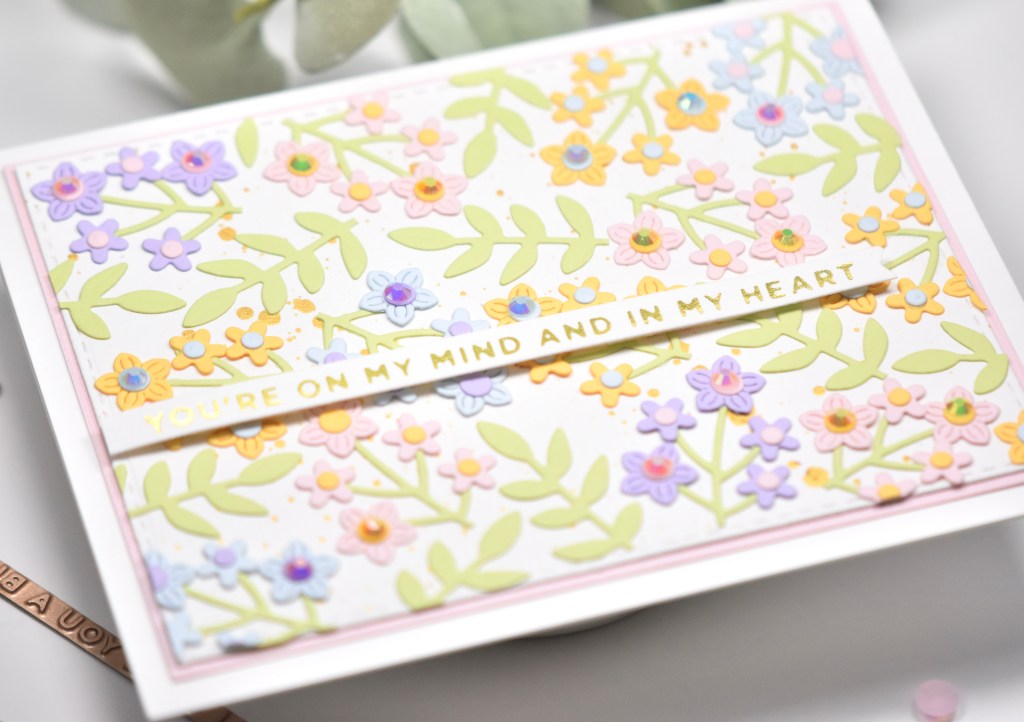
My third project, You’re on My Mind Floral, ended up being my favorite project of them all! I loved these little flowers so much that I decided to make my own background using them. For this one, I die cut a bunch of flowers and leaves from the Bouquet of Flowers Die set using blue, pink, purple, yellow and green cardstock and adhered the stems and flower centers using glue. I then arranged and glued them atop a gold splattered panel, trimming off the excess as needed.
I then adhered my panel to a pink panel, and then to my card base, which is 110lb cardstock. Using gold foil, I foiled the sentiment from the Mini Sincere Sentiments Glimmer Hot Foil Plate and Die set, trimmed it out, and adhered it to my card using foam tape for dimension. To finish up, I added some PinkFresh Studio Jewels Mix to the larger flowers, because I thought some bling was in order!
For my last project, I die cut the two largest Elliptical Ovals Dies from black and white cardstock and glued those together, and then glued those to a black splattered panel. I then die cut the dress portions of the Paper Coutour Dress Dies from black cardstock, and the bow and hanger portions using glitter cardstock, and adhered those together. I again used the flowers and leaves from the Heart Swans Die set to cut those out of white cardstock.
I adhered the dress to the ovals using foam tape, and adhered the white flowers around the ovals using a combination of glue and foam tape. I then attached my panel to a panel of black cardstock to pull all of the black elements together, and then to a card base. Using silver foil, I hot foiled the sentiment from the Mini Sincere Sentiments Glimmer Hot Foil Plate and Die set, trimmed it down and glued it to the bow of the dress. To finish this card, I added some silver embellishments to the flowers for some added bling.
That does it for my projects featuring the Truly Yours Collection from Spellbinders! I hope you enjoyed them, and I hope they inspire you to get crafty!
Hello Crafty Friends! Simon Says Stamp new release, All the Feels, release is live! I’m playing with the Floral Garden stamp set today, and this is such a beautiful stamp, and really, a beautiful release! I’ve had so much fun coloring and watercoloring different versions of this stamp!
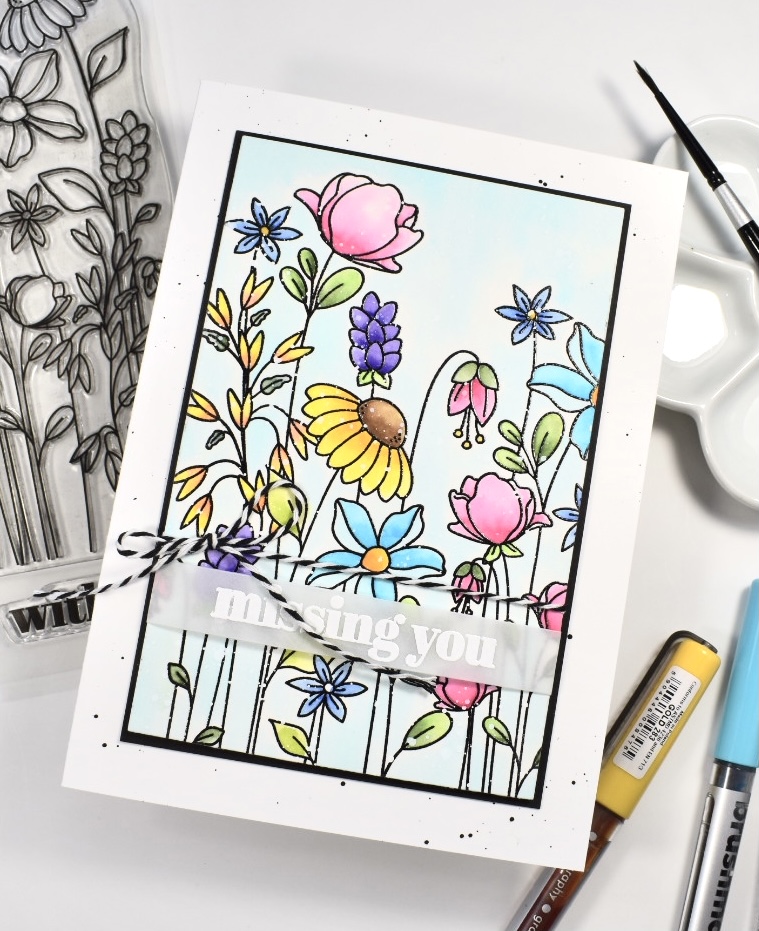
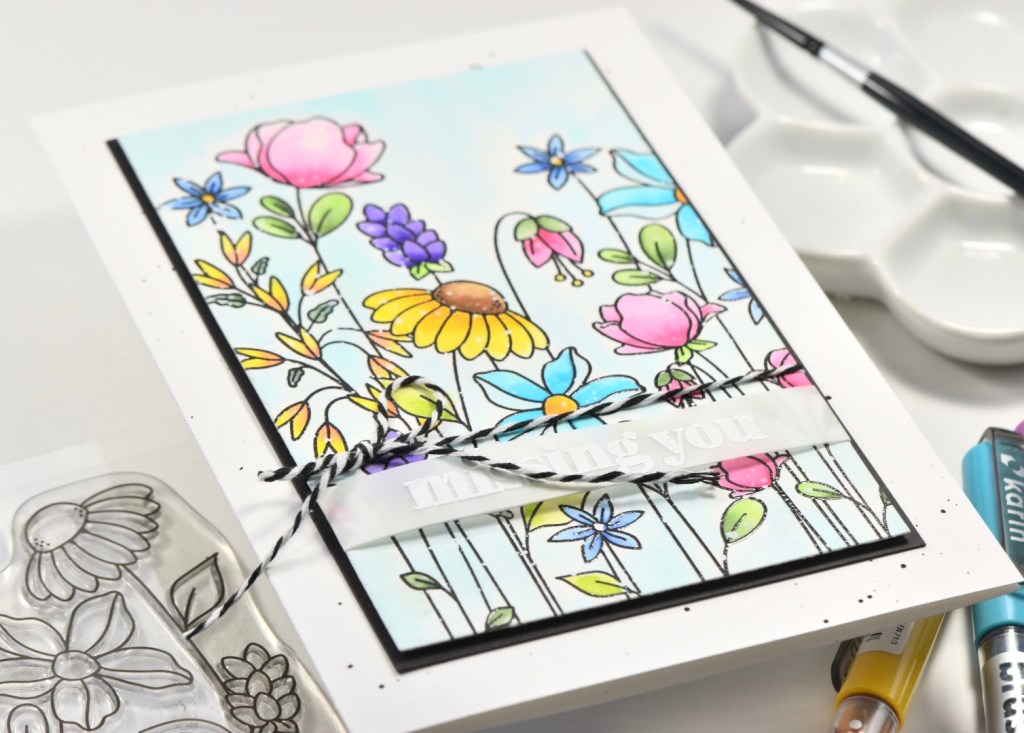
I have to be the world’s slowest colorer! It doesn’t matter if it’s markers or watercolors .. I’m SLOW! That’s just all there is to it. I got my Karin markers down off the shelf and brushed them off and got busy. I ended up using a Black Velvet Silver No. 2 brush for this project. The small brush helps me to have more control over the amount of water and ink .. and Mama needs control!
Once my image was completely dry, I trimmed it down and did some white splatter using Royal Talens Titanium White Acrylic Ink. I love this ink for splatter because the consistency is PERFECT! I have some in gold as well, and it’s pretty dang awesome too! Need to get some in black! While that was drying, I worked on my sentiment. I chose the Missing You sentiment from the Floral Garden stamp set and stamped that on vellum with VersaMark ink and heat embossed it using Simon Says Stamp Detail White Embossing Powder. I die cut the sentiment using the Simon Says Stamp Sentiment Labels Die. I actually die cut another piece of vellum so that I could double them up.
I wrapped my vellum sentiment around my floral panel and adhered it to the back using Craft Tacky Glue. I also tied a piece of black and white twine around the panel as well. I adhered my floral panel to a black cardstock panel using 3M Foam Tape, because I really like the contrast that it provides. I then adhered my panel to my card base, which is Neenah Classic Crest 110lb, that I had previously lightly splattered with thinned black acrylic paint.
I didn’t want to waste the leftover piece of my watercolor panel, so I decided to just make it into a super cute bookmark! I added an eyelet and some tassels, along with the word Read. I used the Simon Says Stamp Rounded Alphabet Small to die cut the letters three times from Neenah 110lb and adhered those together using glue. I think it turned out kind of cute!
That’s it for this project. I hope you enjoyed it, and I hope it inspires you to get crafty! You can check out the entire All the Feels release HERE. Thanks for stopping by!