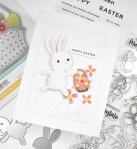
Spellbinders Thank You Botanical

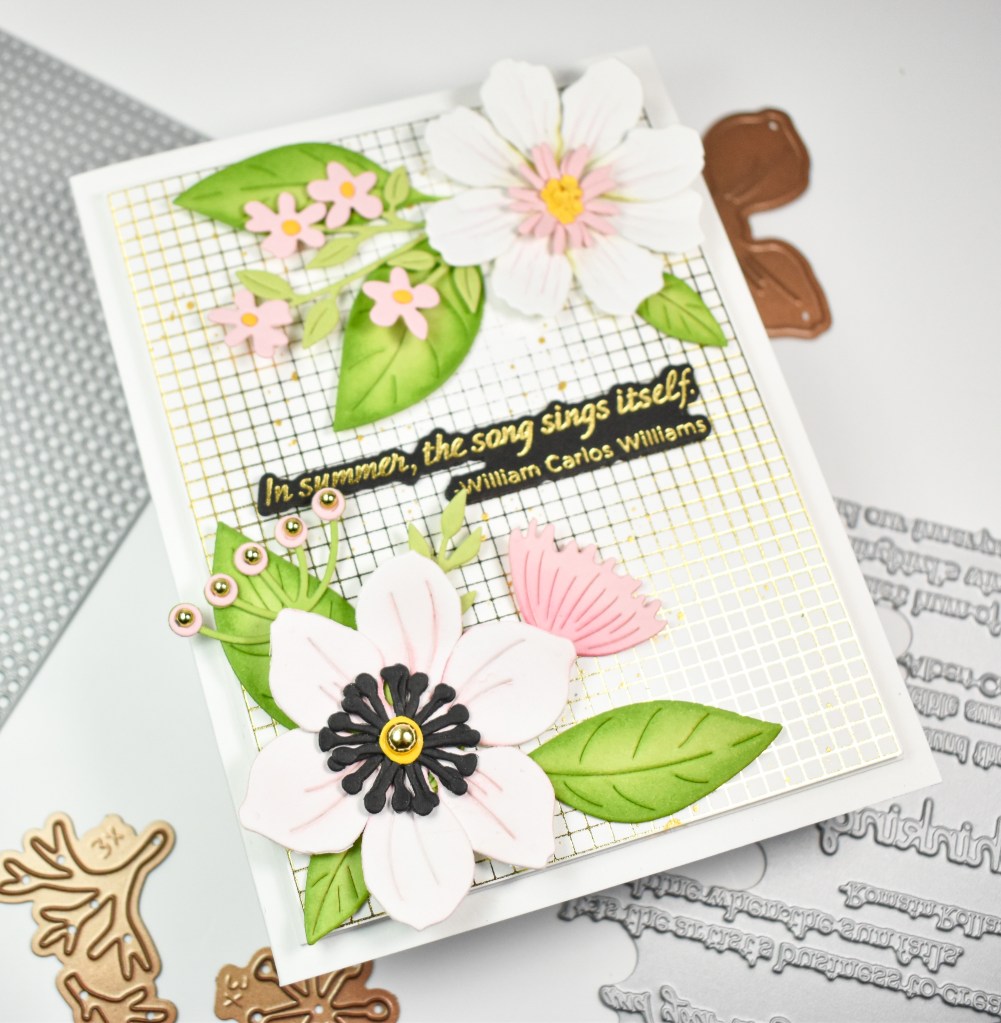
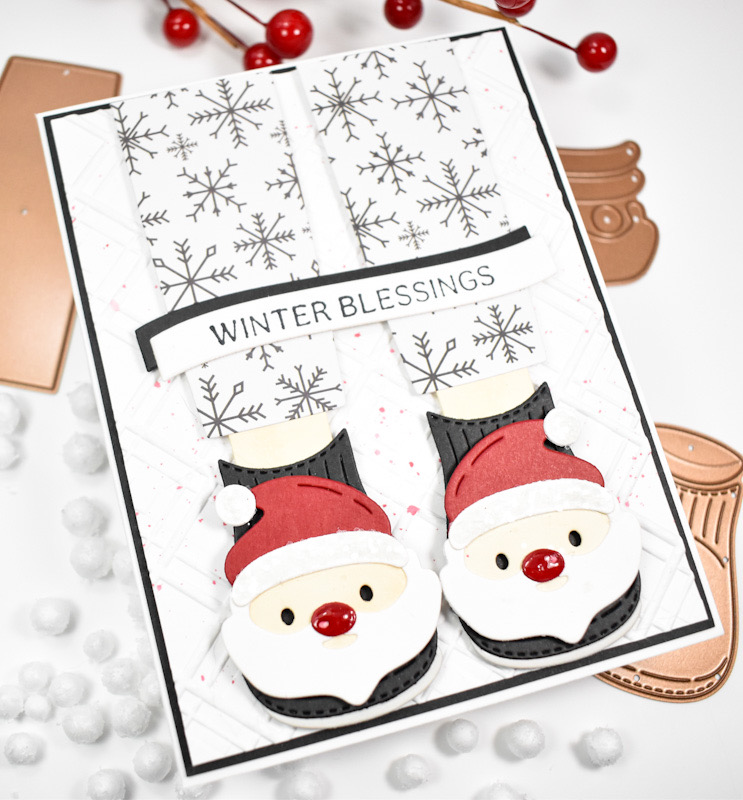
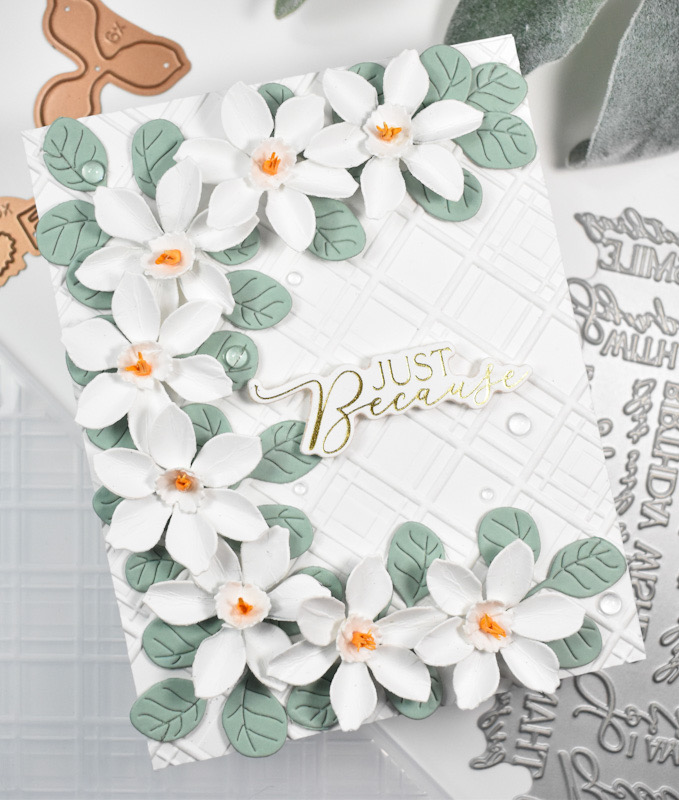
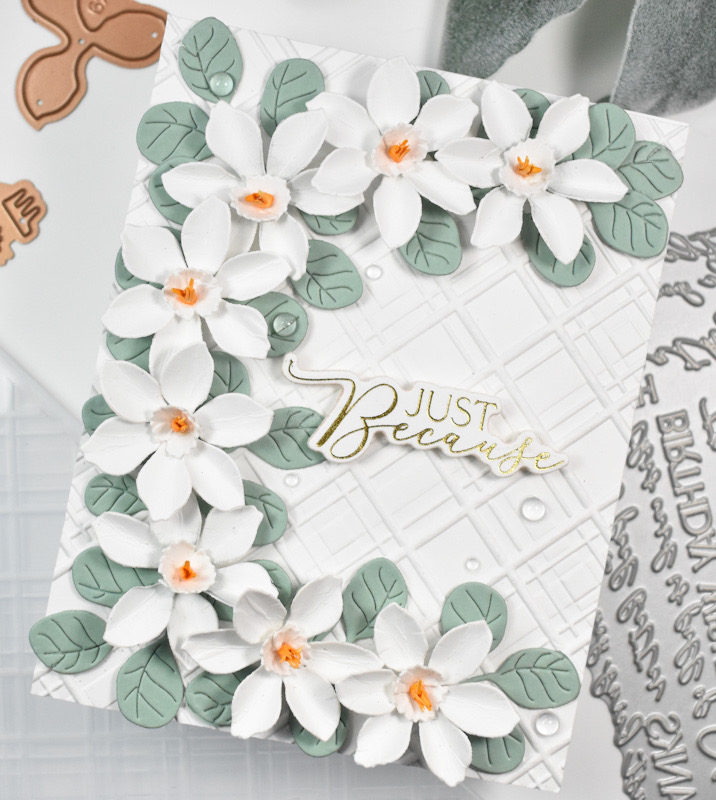
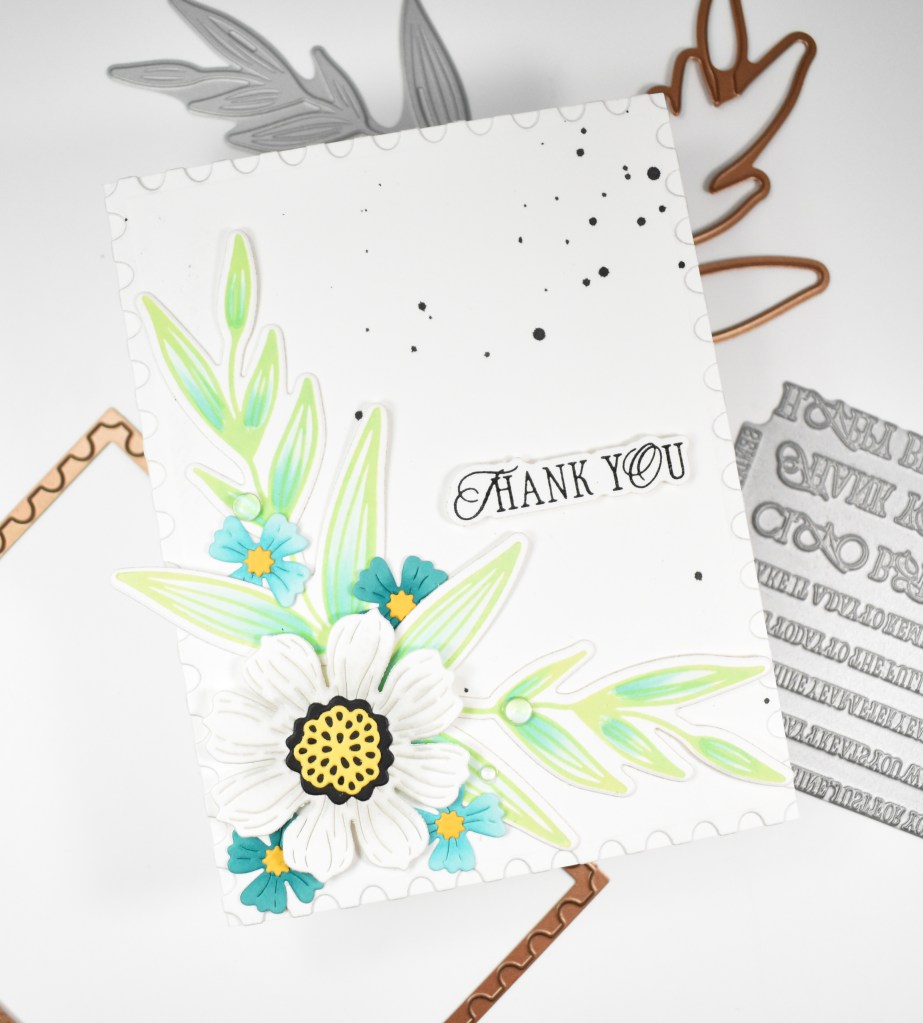
Hello Friends, and thanks for joining me! Today’s project is featuring the Modern Botanicals from Spellbinders and Dina Wakely. This set includes several elements, but I opted to just use the leaf for my project. Let’s go ahead and go through the details.

NOTE: all supplies are linked to multiple sources in the thumbnails at the end of this blog post.

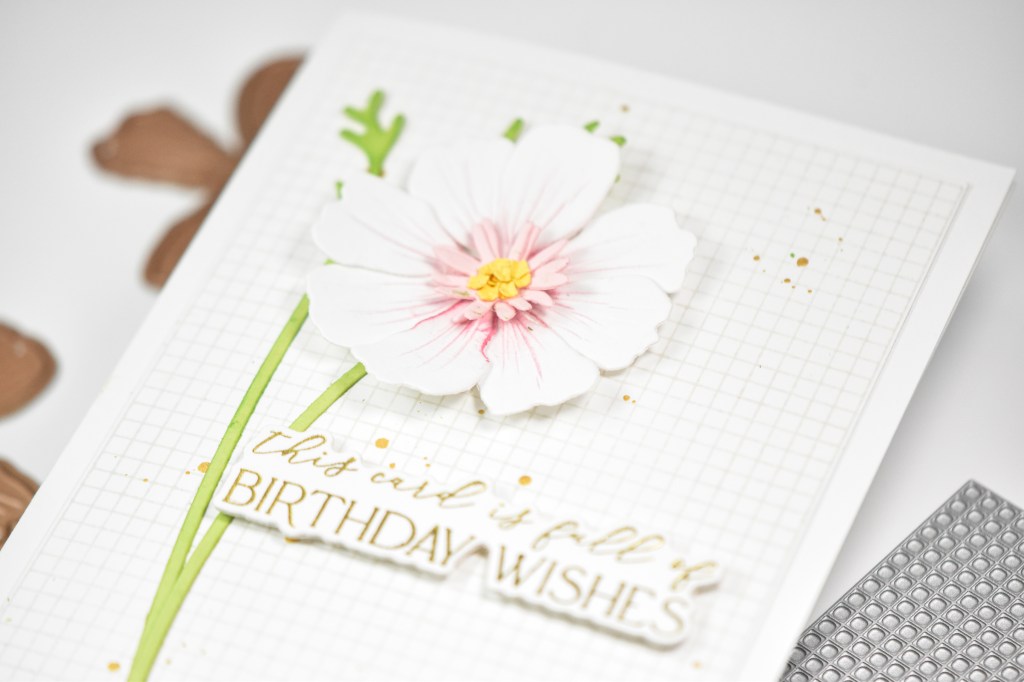
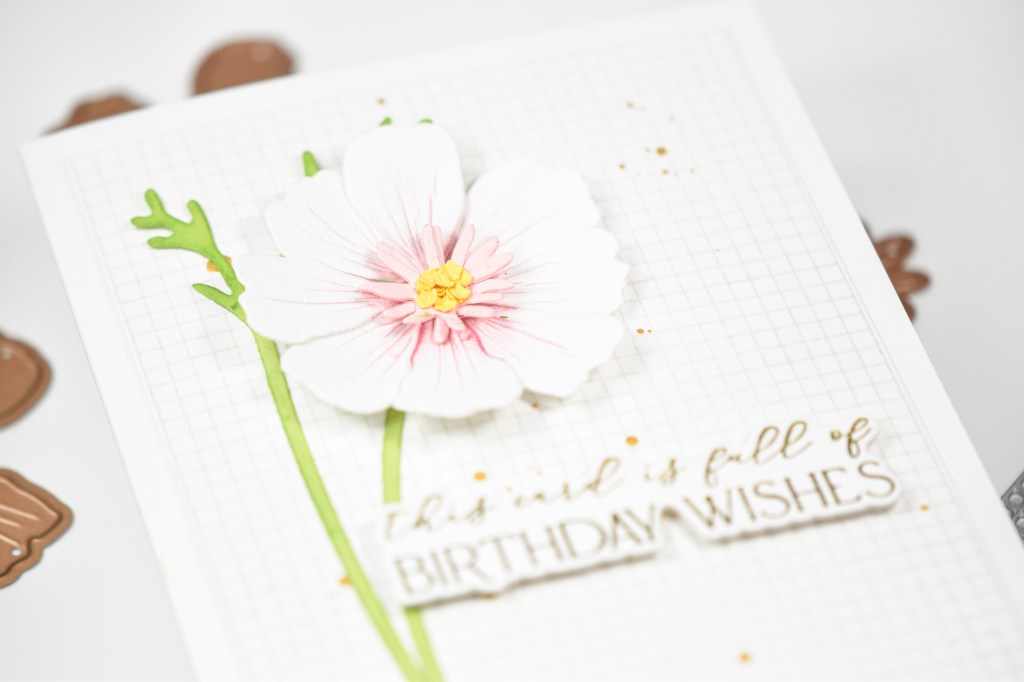
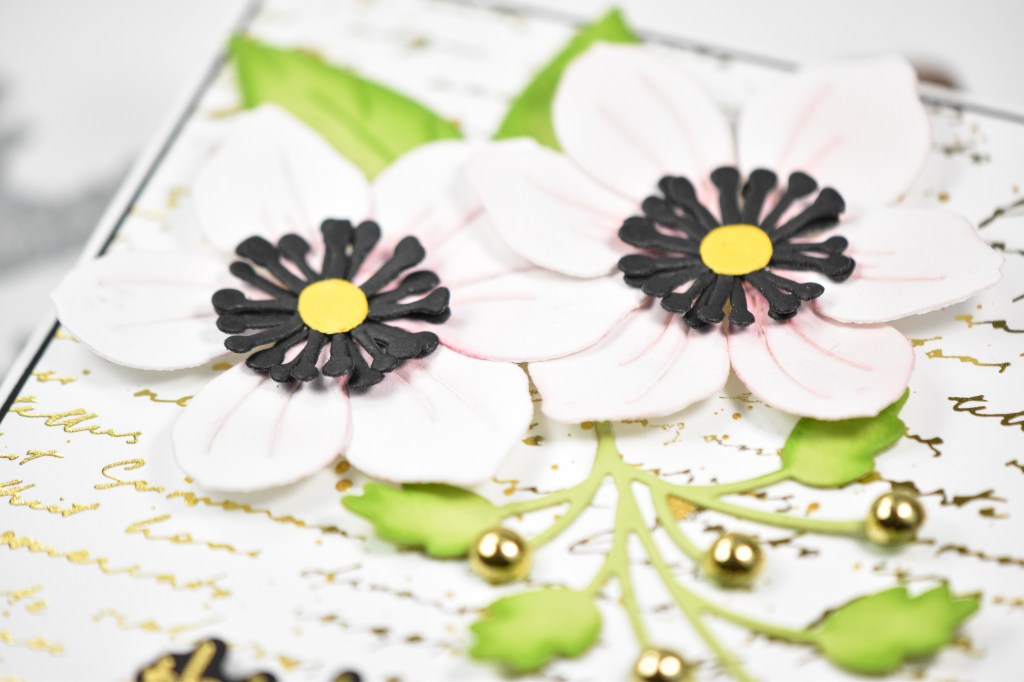
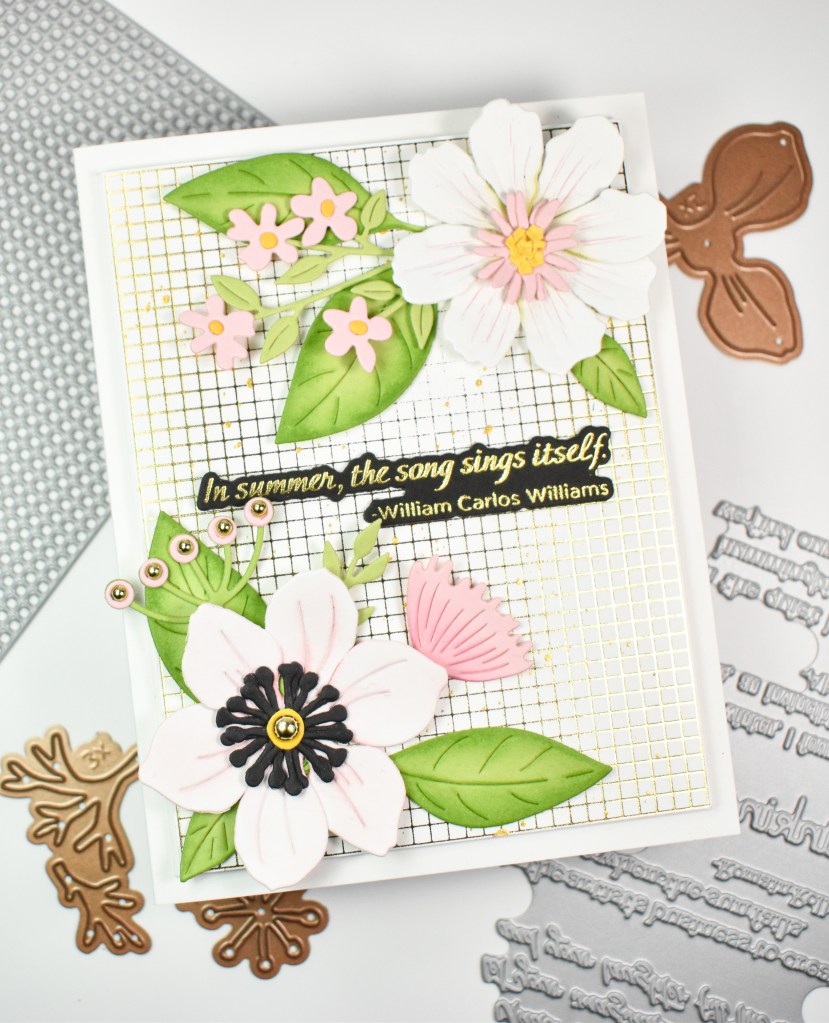
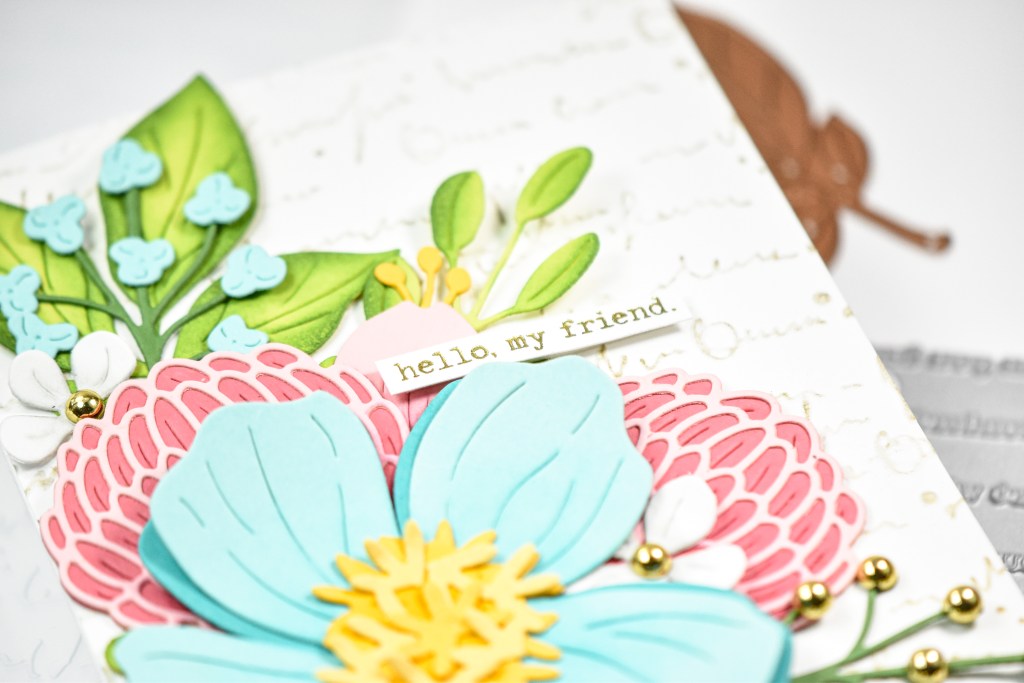
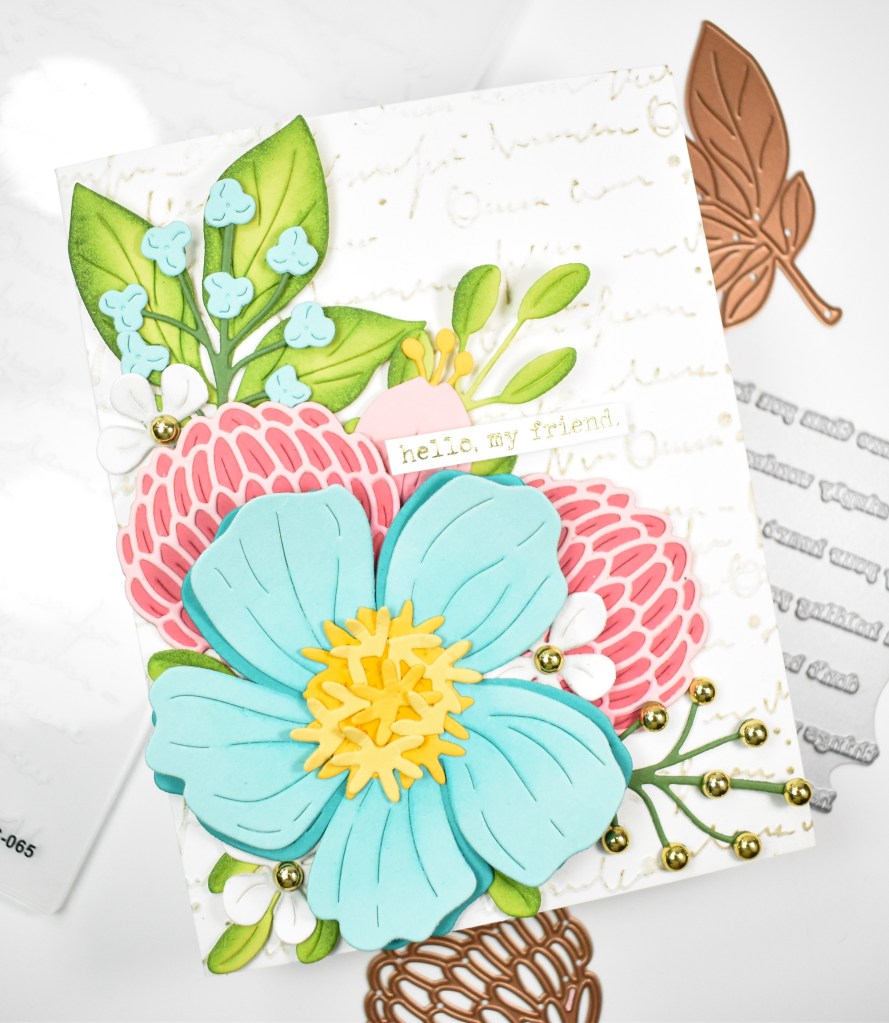
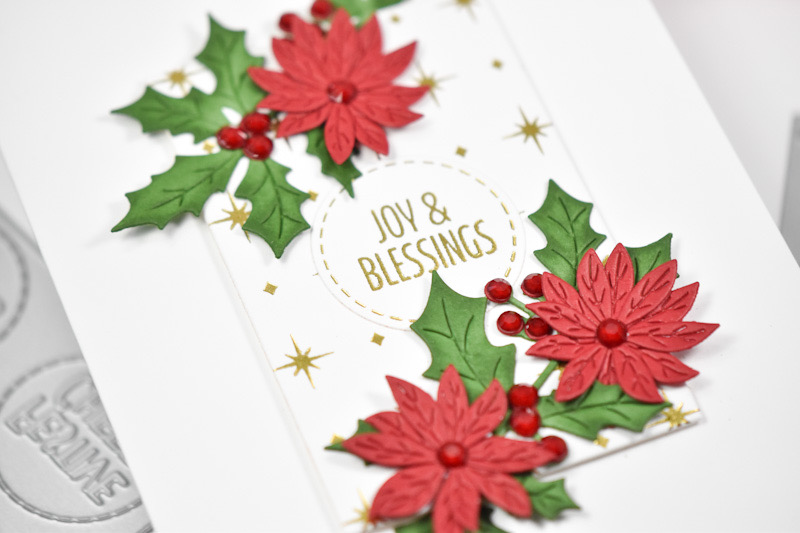
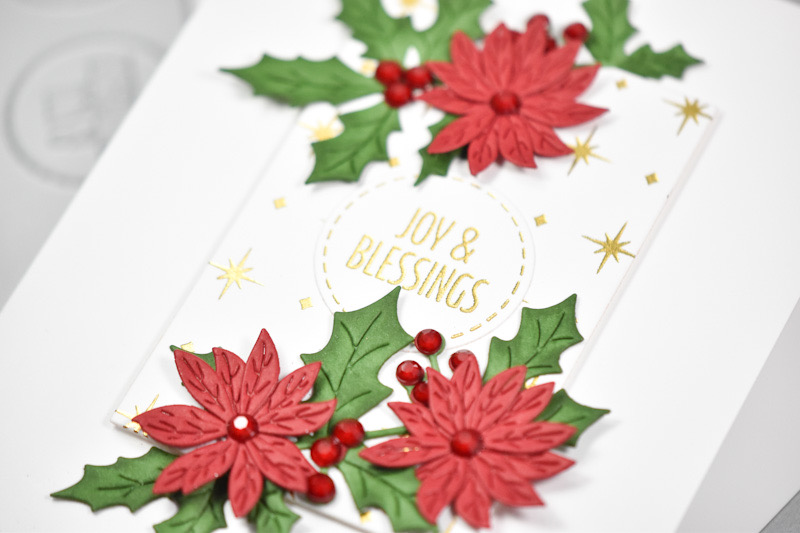
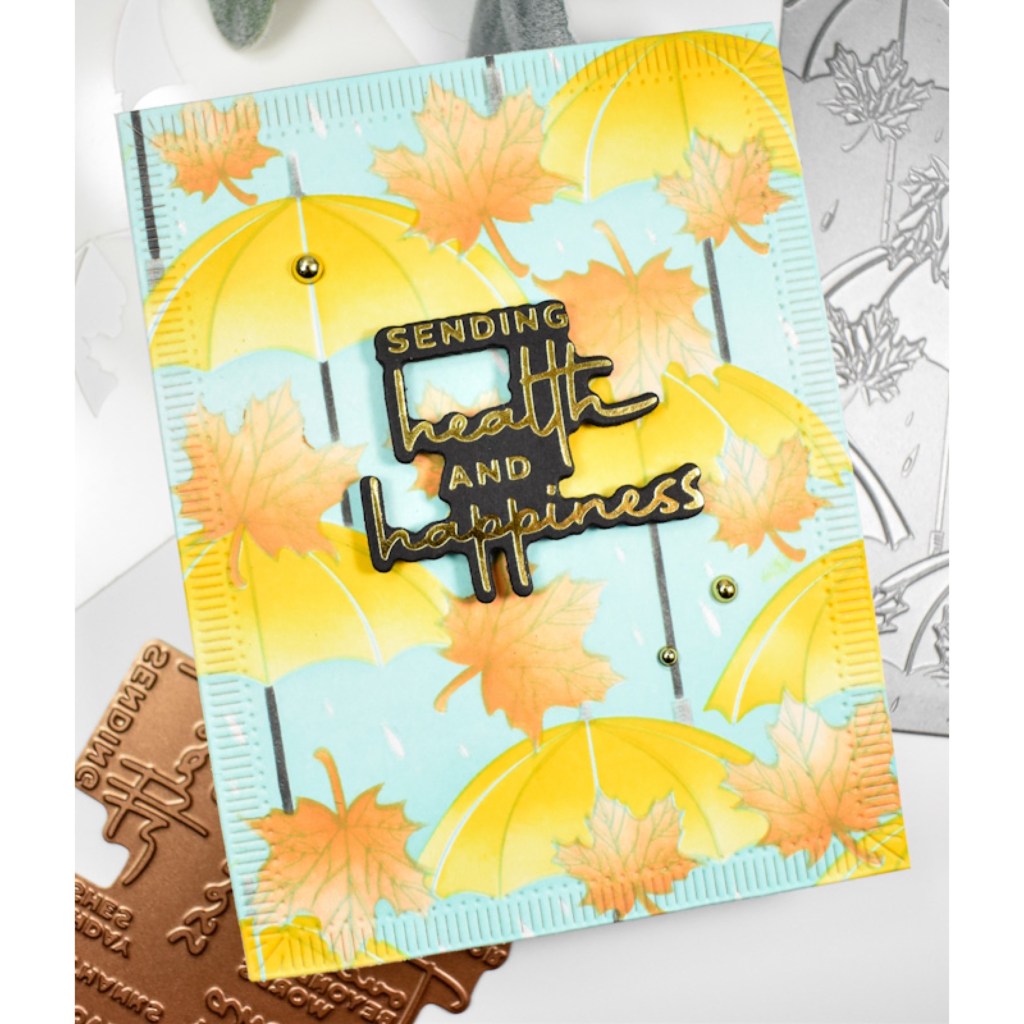
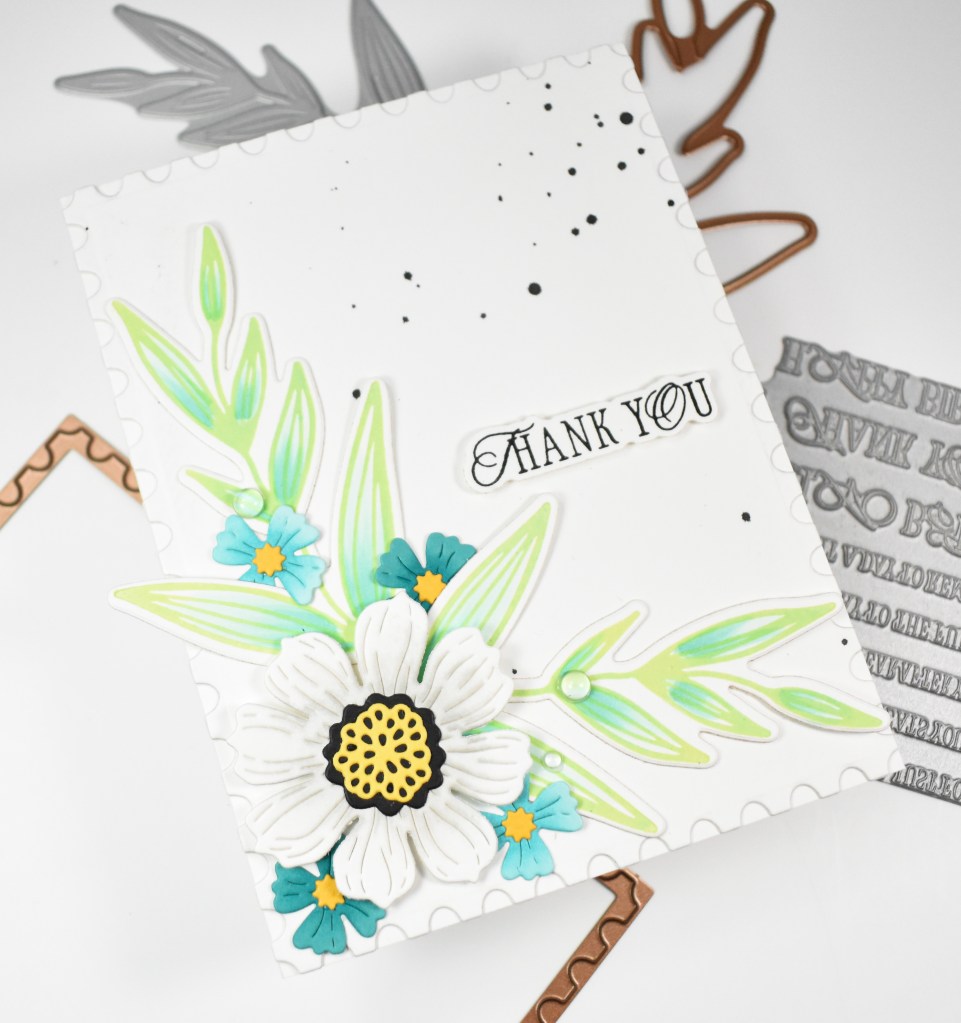
I began this project by inking up the leaf on the BetterPress system using Celery and Seafoam inks. I did this twice and then used the coordinating die to trim those out. While I was inking, I went ahead and inked up the La Dolce Vita Sentiments using VersaFine Onyx Black ink. I used clear embossing powder to heat set it. I wasn’t sure that this technique would work, but I went with it anyway. I used the coordinating die to trim that out as well. Before moving on, I added some color to the leaves using Copic Markers BG11 and BG32.

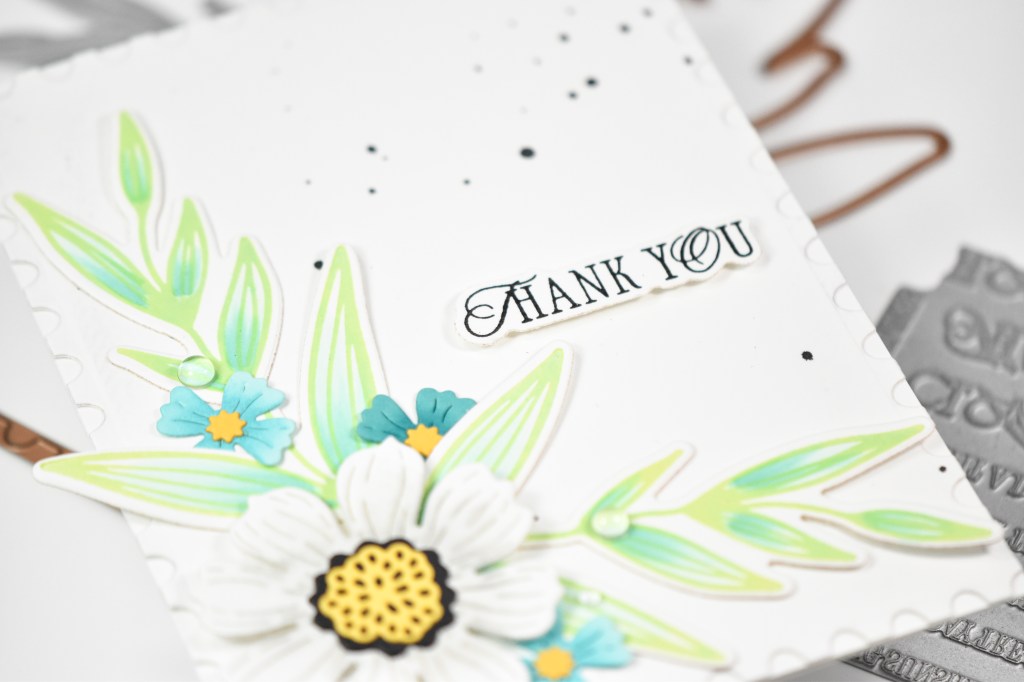
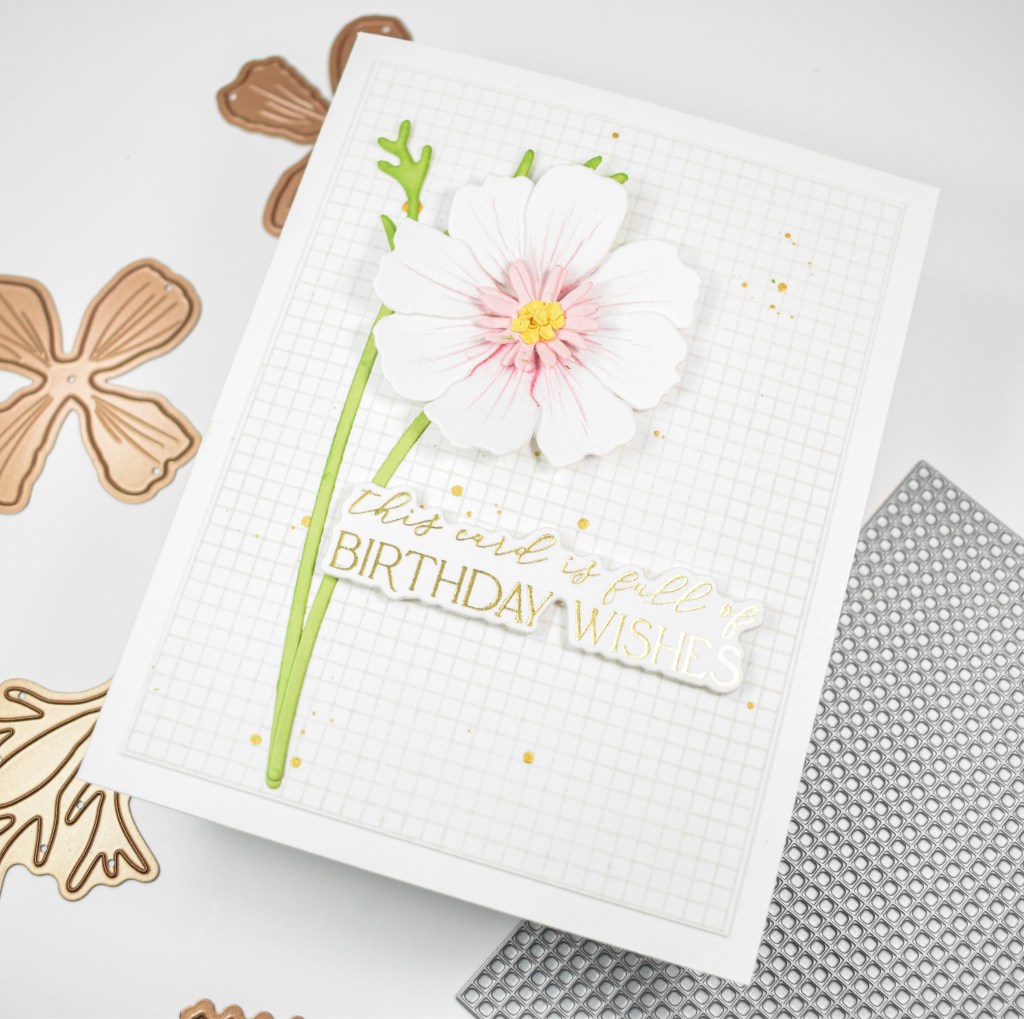
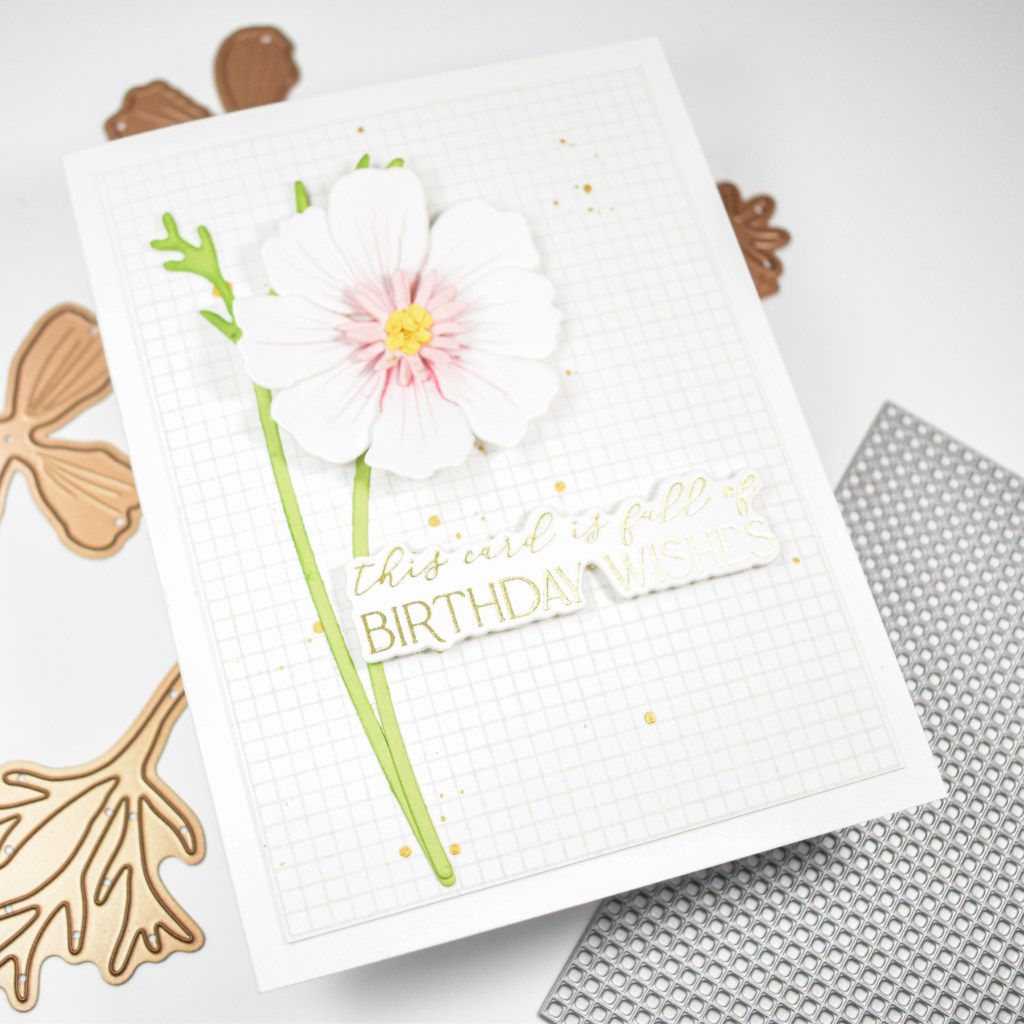
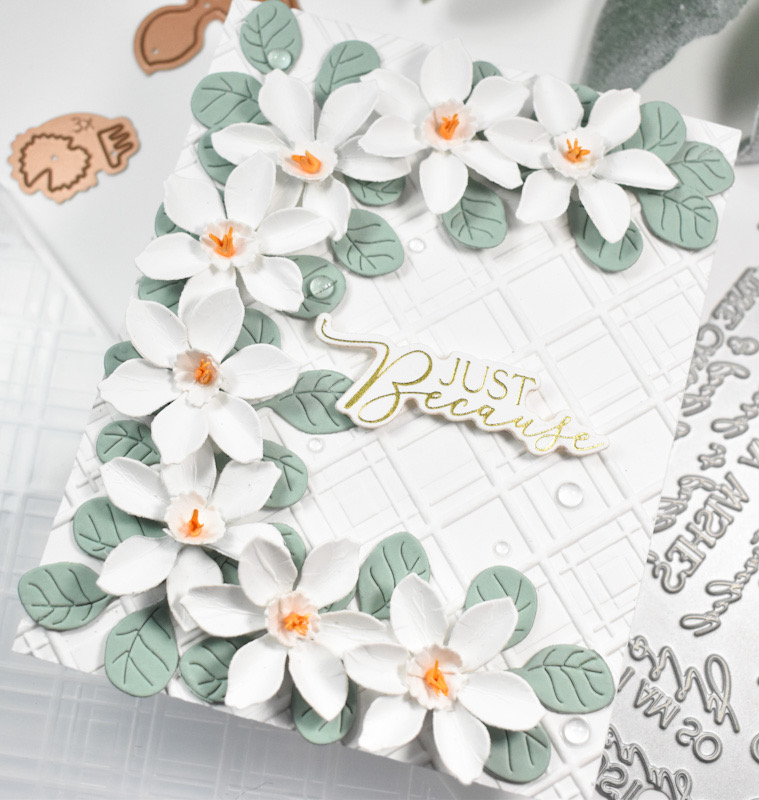
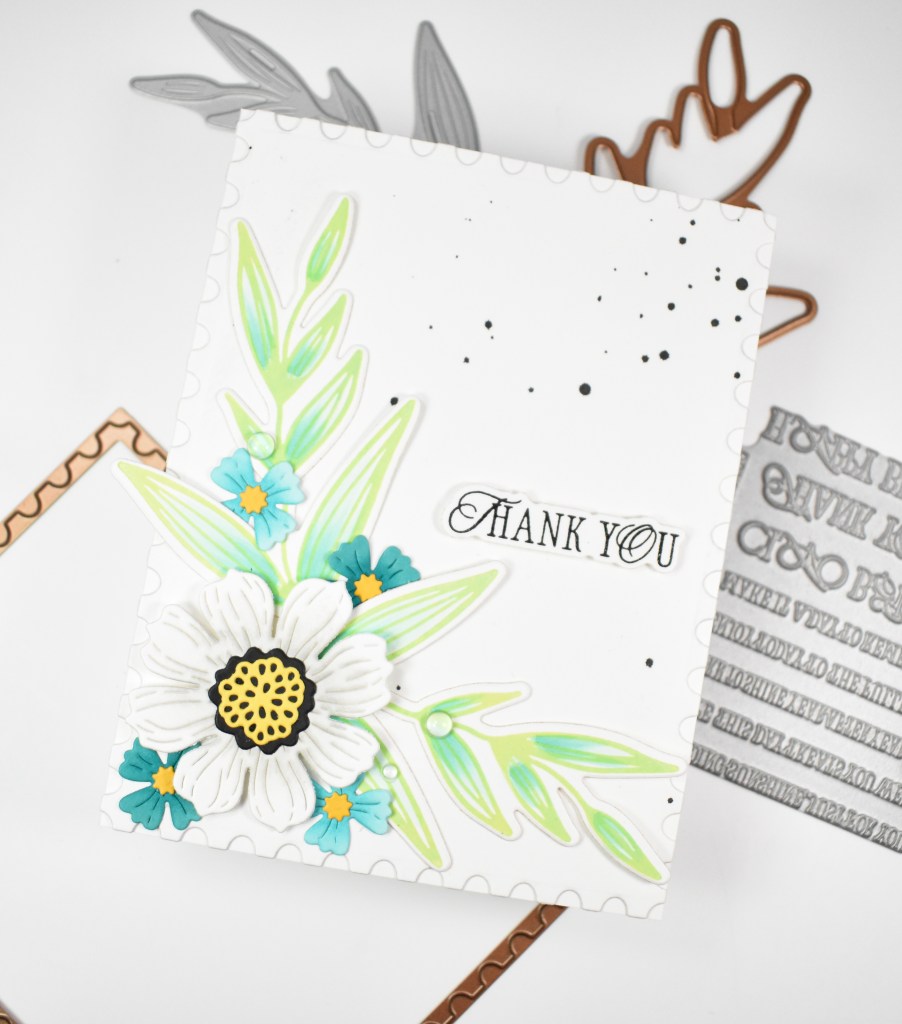
I then did some die cutting using the Vivid Blooms set from Neenah 110lb cardstock, as well as Waterfall, Teal Topaz, Beeswax and black. I did some light ink blending on the flowers before assembling them using the same Seafoam ink along with PFS Misty Coast ink. Before the assembly of the card, I cut a panel using the Nested Postage Labels & Tag and black splattered that.

The panel was secured to the card base, the leaves were glued in place, as was the smaller flowers, while the larger flower and the sentiment were adhered using foam tape. A few clear drops were added to finish up.

That does it for this project! I hope you enjoyed it, and I appreciate you stopping by. Have a wonderful day, and stay awesome, friend!
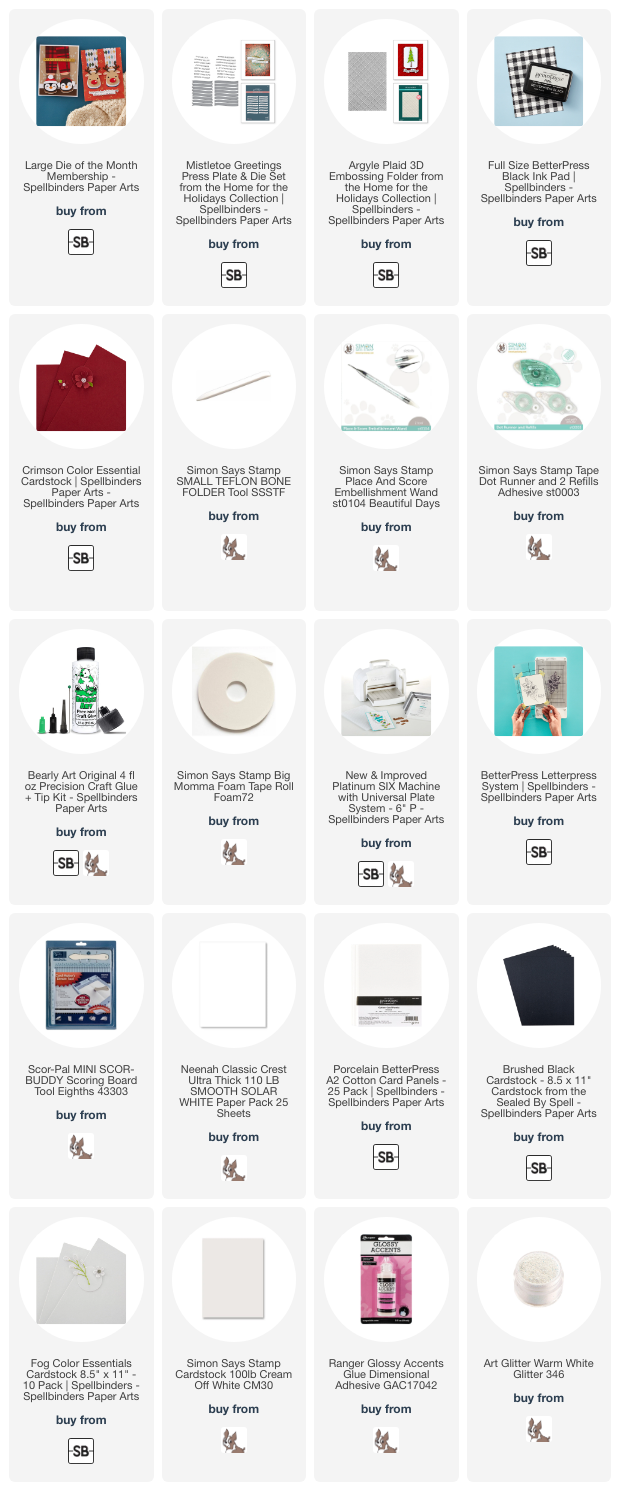
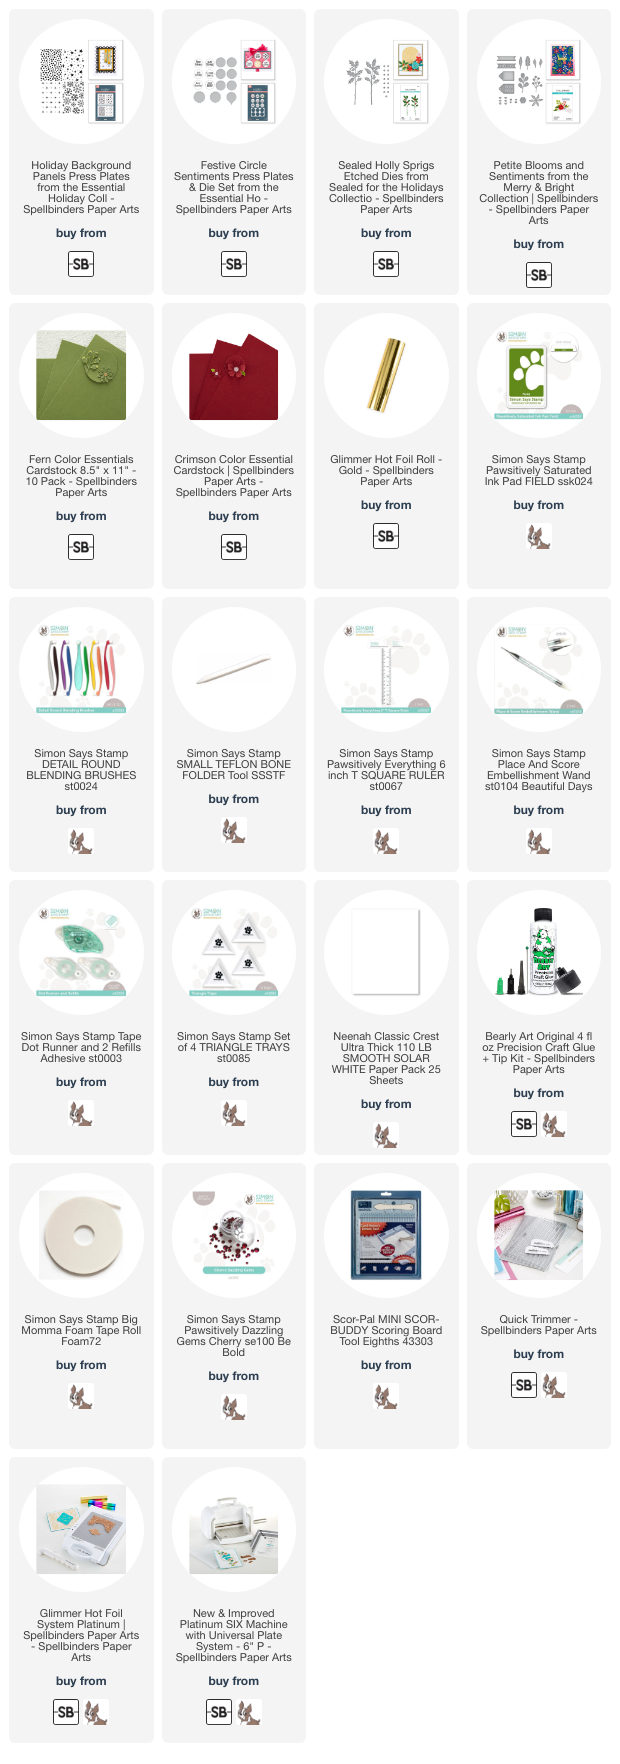
Supply List

Affiliate links used at no cost to you. What does this mean? If you use the links within this post to make a purchase, I receive a small commission, which allows me to continue to post crafty content for your enjoyment. I truly appreciate your support!

Latest Posts

Latest Instagram Posts

Spellbinders Birthday Cosmos

Hello Crafty Friends and welcome back! Today’s project is featuring the new Cosmos, as well as the Journal Grid in a clean and simple design. These products are from the May releases, and you should definitely check them out! Let’s go right into the details!

NOTE: all supplies are linked to multiple sources in the thumbnails at the end of this blog post.

I began this project by cutting the Cosmos from Neenah 110lb cardstock and the pieces from pink and yellow cardstocks. I did some light ink blending on the petals using Peony ink, drew some veins with a pink colored pencil and assembled the flower with liquid glue. I wanted this flower on a stem so I used the Layered Wildflowers set and cut that from Green Apple cardstock with some ink blending with Pearfection ink.

The Journal Grid BetterPress Plate was inked using Misty Coast ink, trimmed down and gold splattered for some additional interest. I chose the light grey ink because I wanted a subtle background for this card.

I gold foiled the You Are Everything Plate onto Neenah 110lb and trimmed it out with the coordinating die, along with two additional cuts because I love that stacked sentiment look. The background was adhered to the card base and the leaves and flower were glued in place while the sentiment were adhered using foam strips.

That finishes up this project! I hope you enjoyed it! Don’t forget to check out all of the May releases over on the Spellbinders website! Thanks again for joining me, and have a fabulous day!

Supply List

Affiliate links used at no cost to you. What does this mean? If you use the links within this post to make a purchase, I receive a small commission, which allows me to continue to post crafty content for your enjoyment. I truly appreciate your support!

Latest Posts

Latest Instagram Posts

Spellbinders Thinking of You Anemone

Hello Friends, and thanks for stopping by! The May Spellbinders releases are live, and I’m back today with a project featuring the Anemone, along with the Script Text BetterPress Plate and the Summer Solstice Garden Sentiments. Let’s go ahead and get into the details!

NOTE: all supplies are linked to multiple sources in the thumbnails at the end of this blog post.

I began this project by die cutting the Anemone from Neenah 110lb cardstock, along with black and yellow for the pieces. I did some light ink blending on the petals using Peony ink. I knew that I was going to want some leaves, so I cut those using the Vivid Blooms set from Green Apple cardstock and did some ink blending on those with Pearfection ink.

I gold foiled the Script Text plate onto Neenah 110lb cardstock, and gold foiled the sentiment onto black cardstock. I trimmed out the sentiment with the coordinating die, along with two additional cuts for a stacked sentiment. I trimmed the script background and gold splattered it before adhering it to a black panel.

The leaves were secured in place using liquid glue, while the flowers and the sentiment were adhered using foam strips. To finish up, everything was adhered to the card base, and I added some gold metallic pearls to one leaf.

That does it for this project! I hope you’ll take some time to check out all of the new May releases over on the Spellbinders website! There really is a lot of good stuff! Thanks again for joining me, and I hope you have a fabulous day!

Supply List

Affiliate links used at no cost to you. What does this mean? If you use the links within this post to make a purchase, I receive a small commission, which allows me to continue to post crafty content for your enjoyment. I truly appreciate your support!

Latest Posts

Latest Instagram Posts

Spellbinders Floral Birthday Grid

Hello Friends, and welcome back! The May Spellbinders releases are live today, and I’m back with a project featuring the new Journal Grid along with the Anemone and Cosmos florals. Let’s run through the details for this one!

NOTE: all supplies are linked to multiple sources in the thumbnails at the end of this blog post.

I began this project by die cutting the Anemone and Cosmos flowers from Neenah 110lb, pink, yellow and black cardstocks. I did some light ink blending on the flowers using Bubblegum ink. Once the ink blending was complete, I assembled the flowers using liquid glue and set those aside while I figured out the rest of the card.

I went ahead and gold foiled the Journal Grid onto a panel of Neenah 110lb and added some gold splatter for additional interest. While I was foiling, I gold foiled the Summer Solstice Garden Sentiments onto black cardstock and trimmed that out with the coordinating die, along with two additional cuts for a stacked look.

I adhered the grid to my card base using foam tape, and started playing around with placement. I decided that I need some other florals and leaves and cut those using Vivid Blooms and Sealed Wildflowers from pink, yellow and green cardstock. I did do some ink blending on one of the smaller flowers using Carnation ink and some Pearfection ink on the leaves.

I secured the leaves in place on the panel using liquid glue, followed by the smaller flowers and then the larger flowers. The sentiment was glued in place, and I added some Gold Metallic Pearls to finish up.

That does it for this project! Everyone knows that I love florals, so I really enjoyed this project! I think that I’m going to get a lot of use out of this Grid Journal Press Plate, as you can use it with inks and foils, which I love! Don’t forget to head over to the Spellbinders website to check out all of the new releases! Thanks again for joining me, and I hope you have an awesome day!

Supply List

Affiliate links used at no cost to you. What does this mean? If you use the links within this post to make a purchase, I receive a small commission, which allows me to continue to post crafty content for your enjoyment. I truly appreciate your support!

Latest Posts

Latest Instagram Posts

Spellbinders Floral Scribbled Letter

Hello Crafty Friends, and welcome back! The Spellbinders March releases are available, and I’m back today with a project featuring the new Scribbled Letter Embossing Folder, along with the Holding Your Heart Sentiments BetterPress Plates. Can I just say right away that I absolutely love this embossing folder?! I love something that gives just a hint of texture but adds to the project! Let’s go ahead and run through the details!

NOTE: all supplies are linked to multiple sources in the thumbnails at the end of this blog post.

I began this project by pulling cardstock colors that I wanted to use, which were Blush, Dahlia, Waterfall, Teal Topaz, Peridot, Fern, Beeswax and Saffron. I did use some Neenah for the white flowers as well. Once the papers were pulled, I went to work die cutting the flowers and leaves from the Colorful Expressions Blooms.

Those pieces were then ink blended using Carnation, Field, Honey, Surf and Gravel inks before being assembled. I created the background using the Scribbled Letter folder and then lightly rubbed a gold ink pad across the raised side of the panel. The sentiment, which is from the new Holding Your Heart Sentiments BetterPress Plates, was gold foiled and trimmed down.

I adhered the background panel to my card base first and then secured all of the other pieces with liquid glue, beginning with the underneath pieces. I added gold metallic pearls to the one branch and the three white flowers before adding the sentiment with foam strips.

That does it for this project! You all know that I love florals, so I really enjoyed this project, and I’m sure that I’m going to get lots of use from this embossing folder! Don’t forget to check out all of the new March releases over on Spellbinders’ website. Thanks again for joining me, and I hope you have a wonderful day!

Supply List

Affiliate links used at no cost to you. What does this mean? If you use the links within this post to make a purchase, I receive a small commission, which allows me to continue to post crafty content for your enjoyment. I truly appreciate your support!

Latest Posts

Latest Instagram Posts

Spellbinders October 2024 Large Die of the Month Cozy Toes Slippers

Hello Crafty Friends, and welcome back! Thanks so much for stopping by! The October Large Die of the Month from Spellbinders is titled Cozy Toes Slippers, and this is such a cute set! It includes elements to make slippers that feature a bunny, a reindeer, a penguin, Santa and even a monster! I chose to do the Santa slippers, so let’s go ahead and run through the details, shall we?

If you are not familiar with the Spellbinders Clubs, here’s a little bit about how it works ..

  • On the 6th of the month, Non-Club members can join the club and get this month’s Club product(s) at the reduced Club Member price with free shipping.
  • On the 27th of the month, registration for this month’s club products closes.
  • On the 10th of the next month, Club products become available to everyone without requiring a Club membership; however, they are available at regular price and there is no free shipping. If a product is sold out, it will be re-ordered.

NOTE: all supplies are linked to multiple sources in the thumbnails at the end of this blog post.

I began this project by sorting through the dies and identifying those that pertained to the Santa. I then began cutting from colors of cardstock that coordinated with the pieces. I cut the pajama pants from patterned paper from my stash, and cut the slippers from black, and so on. You get the idea!

Once all of the pieces were cut, I began assembling them. I’m not even going to lie, I do have to refer to the images on the website sometimes to figure out what I’m supposed to be doing with the pieces! I decided that I needed a background, so I used the Argyle Plaid 3D Embossing Folder for that.

I adhered the pants and slippers using foam tape for added dimension, and applied glue and glitter to Santa’s hat for some sparkly additions. I also decided to apply some Glossy Accents to Santa’s nose as well. The sentiment is from the Mistletoe Greetings BetterPress set, and that was created using BetterPress Black ink, and then glued directly atop the pajama pants to finish up.

That does it for this project! I hope you enjoyed it as much as I did! There are so many fun options with this set for some super, cute Christmas or wintery cards! Thanks again for stopping by, and have a wonderful day!

Supply List

Affiliate links used at no cost to you. What does this mean? If you use the links within this post to make a purchase, I receive a small commission, which allows me to continue to post crafty content for your enjoyment. I truly appreciate your support!

Latest Posts

Latest Instagram Posts

Spellbinders Holly Holiday Background

Hello Friends and thanks for joining me! Today’s project is featuring the new Holiday Background Panel, as well as the Festive Circle Sentiments from the Spellbinders September release! Let’s go ahead and go through the details, shall we?

NOTE: all supplies are linked to multiple sources in the thumbnails at the end of this blog post.

I began this project by gold foiling one of the panels from the Holiday Background Panels BetterPress set. There are four panels in this set, so you have lots of options for creating beautiful backgrounds. While I was foiling, I went ahead and gold foiled the Festive Circle Sentiments as well and used the coordinating die to trim those out.

I knew that I wanted some florals and some holly, so I used the Sealed Holly Sprigs and Petite Blooms and Sentiments for that and cut those from red and green cardstock. To add some depth to the leaves, I used Field ink and did some ink blending on the edges of those. The foiled panel was adhered to the card base using foam tape, and the sentiment was glued in the center of that.

The leaves and flowers were adhered with liquid glue as well, and I added some red jewels to add a bit more interest and shine for berries.

That does it for this project! It’s nice to be adding some holiday cards to my stash this early! When do you typically start on your holiday cards? I usually begin my personal Christmas cards in October, which is quickly approaching! Thanks again for joining me, and I hope you have a fabulous day!

Supply List

Affiliate links used at no cost to you. What does this mean? If you use the links within this post to make a purchase, I receive a small commission, which allows me to continue to post crafty content for your enjoyment. I truly appreciate your support!

Latest Posts

Latest Instagram Posts

Spellbinders Autumn Health & Happiness

Hello Crafty Friends and welcome back! Have you checked out the Spellbinders September releases? So many awesome things to feast your eyes upon! Today’s project is featuring the new Autumn Rain BetterPress Plate and coordinating stencil, in some warm fall colors. So, let’s get into it!

NOTE: all supplies are linked to multiple sources in the thumbnails at the end of this blog post.

I began this project by inking up the Autumn Rain plate with Seafoam ink and then using the stencil to add color to the leaves and umbrellas using Sunbeam, Citrine, Melon and Cantaloupe ink. Once the ink blending was complete, I trimmed the panel using Fluted Classic Rectangles. I should mention that the color added to the handles of the umbrellas was leftover ink on a grey blending brush.

The sentiment is from the Making Me Smile Sentiments set and that was gold foiled onto black cardstock. It was trimmed out several times and adhered together for a stacked look. I adhered the sentiment to the panel using foam strips, and the panel was then adhered to the card base. To finish up, I added some gold pearls for some bling and added some shimmer to the rain using a Wink of Stella brush.

That doe sit for this one! I hope you enjoyed it as much as I did! Don’t forget to check out all of the Spellbinders September releases! Thanks again for joining me, and I hope you have a fabulous day!

Supply List

Affiliate links used at no cost to you. What does this mean? If you use the links within this post to make a purchase, I receive a small commission, which allows me to continue to post crafty content for your enjoyment. I truly appreciate your support!

Latest Posts

Latest Instagram Posts

Spellbinders Argyle Paperwhites

Hello Crafty Friends and welcome back! The Spellbinders September releases are live, and I’m back today with a project featuring the new Paperwhites Glass Vase and Dies from Susan Tierney-Cockburn’s Winter’s Grace Garden Collection. Let’s go ahead and jump into the details!

NOTE: all supplies are linked to multiple sources in the thumbnails at the end of this blog post.

This was my first time working with Susan’s flowers, and I just have to say, they are absolutely wonderful to work with! I love that she provides a video on the product page and offers guidance on how to shape, color and assemble the elements. This set does include a vase and a bulb, but I opted to use only the flower dies for my card today. I die cut eight flowers from Neenah 110lb cardstock and used the Sizzix Shaping Kit to soften and curl the petals. For the stamen, I used Copic Marker Y38 to color those a golden yellow before assembling.

I assembled all of my flowers and began working on the rest of the card. I used the Argyle Plaid 3D Embossing Folder for the background, and I used Sealed Blooming Stems for the leaves, which were cut from Sage cardstock. The sentiment is from the You Are Everything Sentiments BetterPress set, and that was gold foiled.

The background panel was adhered to the card base, and I began securing the leaves with liquid glue, while adhering the flowers with a foam square. The sentiment was adhered with foam strips, not that this card needed any more dimension! To finish up, I added some clear drops for a little bit of shine.

Like I said earlier, this is the first time that I’ve used Susan’s flowers, and I’m blown away by the dimension! This is definitely a hand deliver type of card!

That does it for this project. I hope you enjoyed it as much as I did! Head on over to the Spellbinders site to check out all of the new items in the September release. Lots of fun things! Thanks again for joining me, and I hope you have a wonderful day!

Supply List

Affiliate links used at no cost to you. What does this mean? If you use the links within this post to make a purchase, I receive a small commission, which allows me to continue to post crafty content for your enjoyment. I truly appreciate your support!

Latest Posts

Latest Instagram Posts

Spellbinders Rainy Birthday Wishes

Hello Crafty Friends, and welcome back to my blog! I appreciate you joining me for today’s project featuring the new Spellbinders Autumn Rain BetterPress Plate. How fun is this plate?!?!? I mean for real! Let’s not waste any time and get into the details!

NOTE: all supplies are linked to multiple sources in the thumbnails at the end of this blog post.

For this project, I wanted a dreary grey background with brighter umbrellas, so I inked the Autumn Rain plate with VersaFine Clair Morning Mist ink. If you’re looking for a great grey ink, then you should definitely check this one out! I did ink the plate a couple times and run it through the machine for better coverage.

Once the background was complete, I used the Autumn Rain stencils to add color to the leaves and umbrellas. The ink that i used was SSS Pawsitively Saturated Inks in Bubblegum, Carnation, Sweets, Celery and Melon. I also used a Zig Wink of Stella pen to add a touch of shimmer to the raindrops, although it’s hard to see that in the pictures.

The panel was then trimmed down using the Nested Postage Labels & Tag set and then adhered to the card base. I gold foiled the sentiment, which is from the You Are Everything Sentiments BetterPress Plate set, onto black cardstock and trimmed it with the coordinating die. I did cut it three times for a stacked look and adhered the sentiment to the panel using foam strips to finish up.

That does it for this project! I hope you enjoyed it as much as I did! Head on over to the Spellbinders website to check out all of the new September releases. There’s so much awesome stuff in this release! Thanks again for joining me, and have a wonderful day!

Supply List

Affiliate links used at no cost to you. What does this mean? If you use the links within this post to make a purchase, I receive a small commission, which allows me to continue to post crafty content for your enjoyment. I truly appreciate your support!

Latest Posts

Latest Instagram Posts