Pinkfresh Leafy Butterfly Bliss

Hello Friends, and thanks so much for joining me! I recently received a few new goodies from Pinkfresh and wanted to play! After creating my dark navy and gold card, I wanted to give a dark card another go! The Pinkfresh vibe is usually pastel, but you can create some serious gorgeousness using dark colors as well. This card is a combination of pastel and dark, and I hope you like it!

NOTE: all supplies are linked to multiple sources in the thumbnails at the end of this blog post.
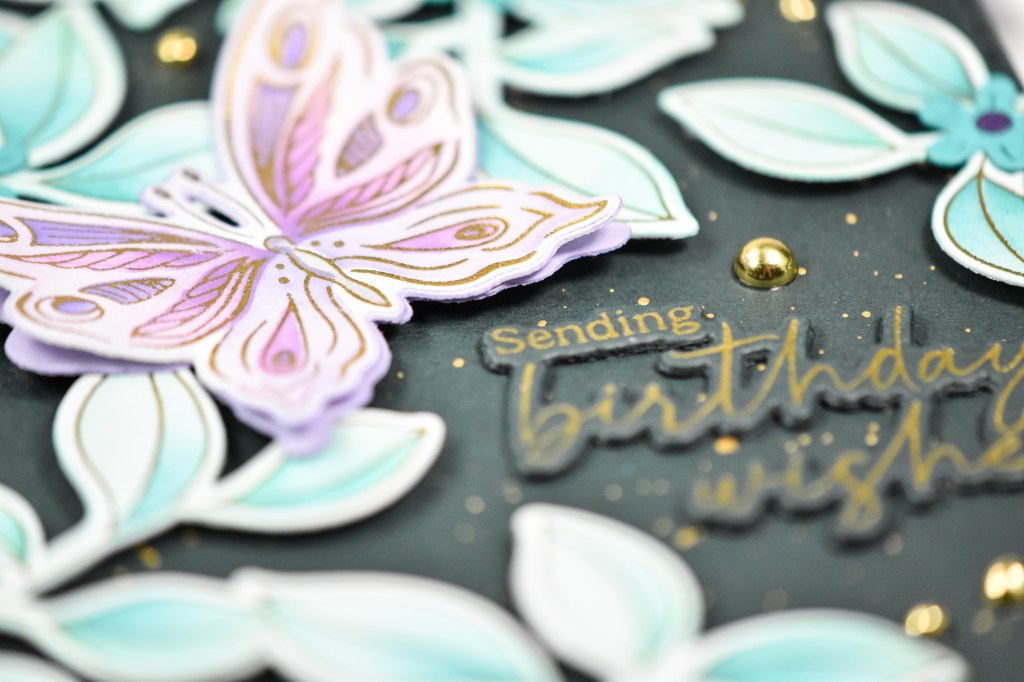
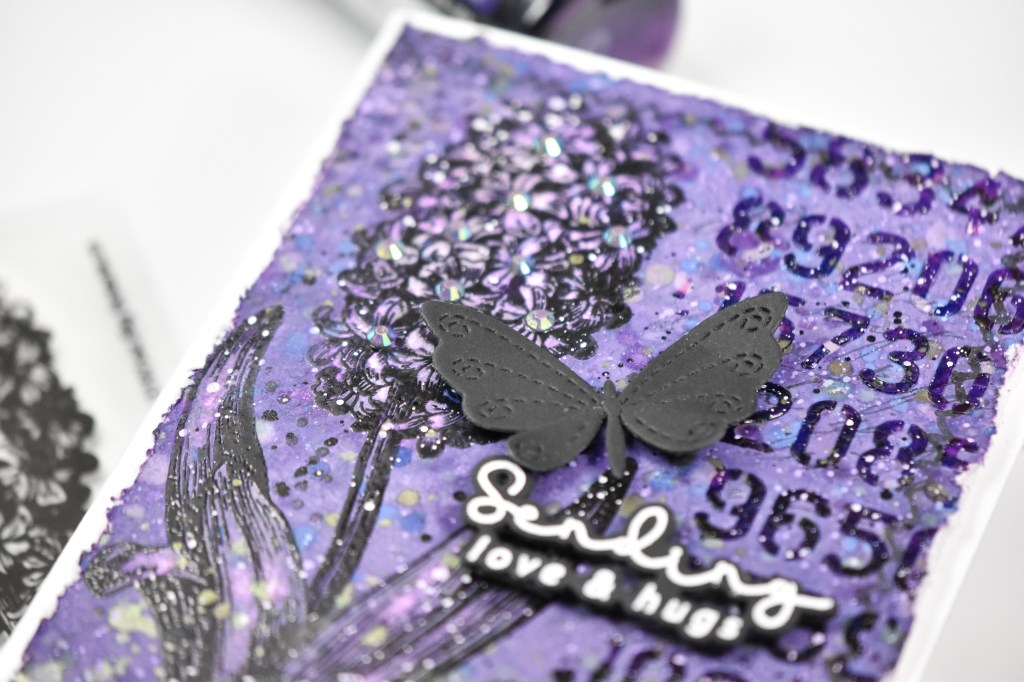
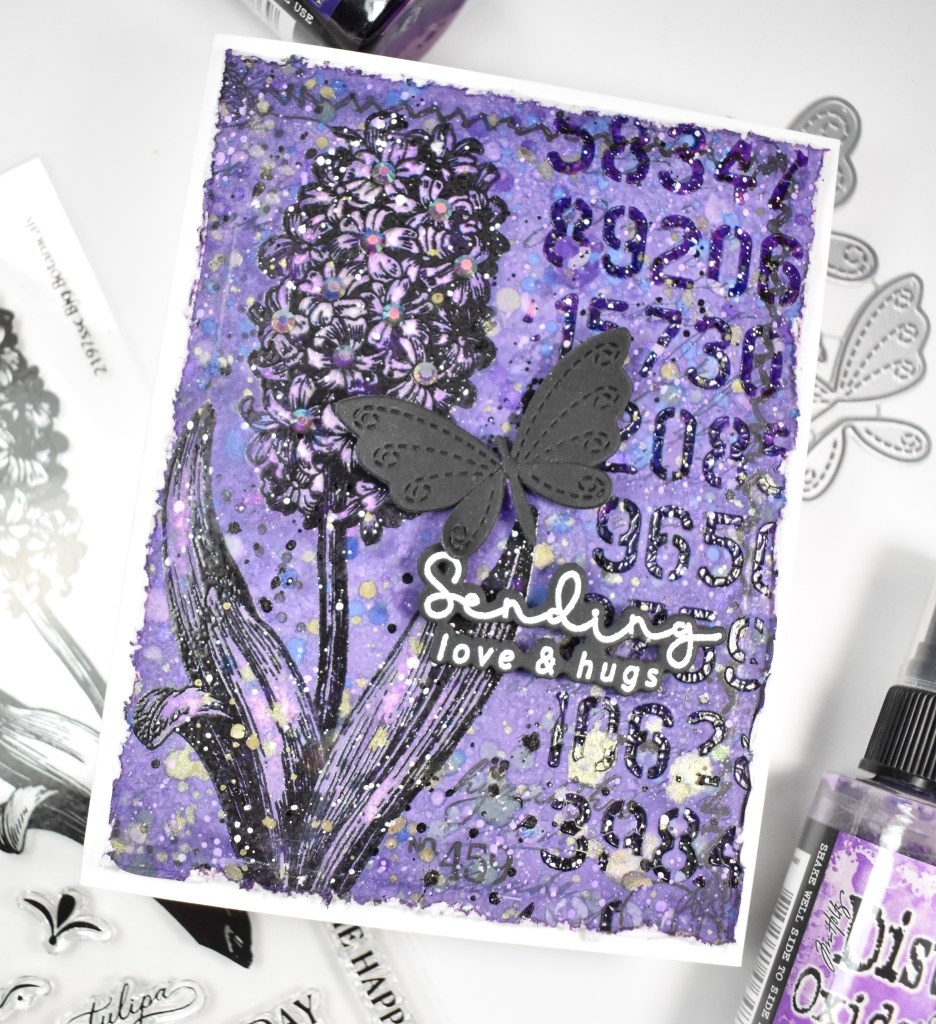
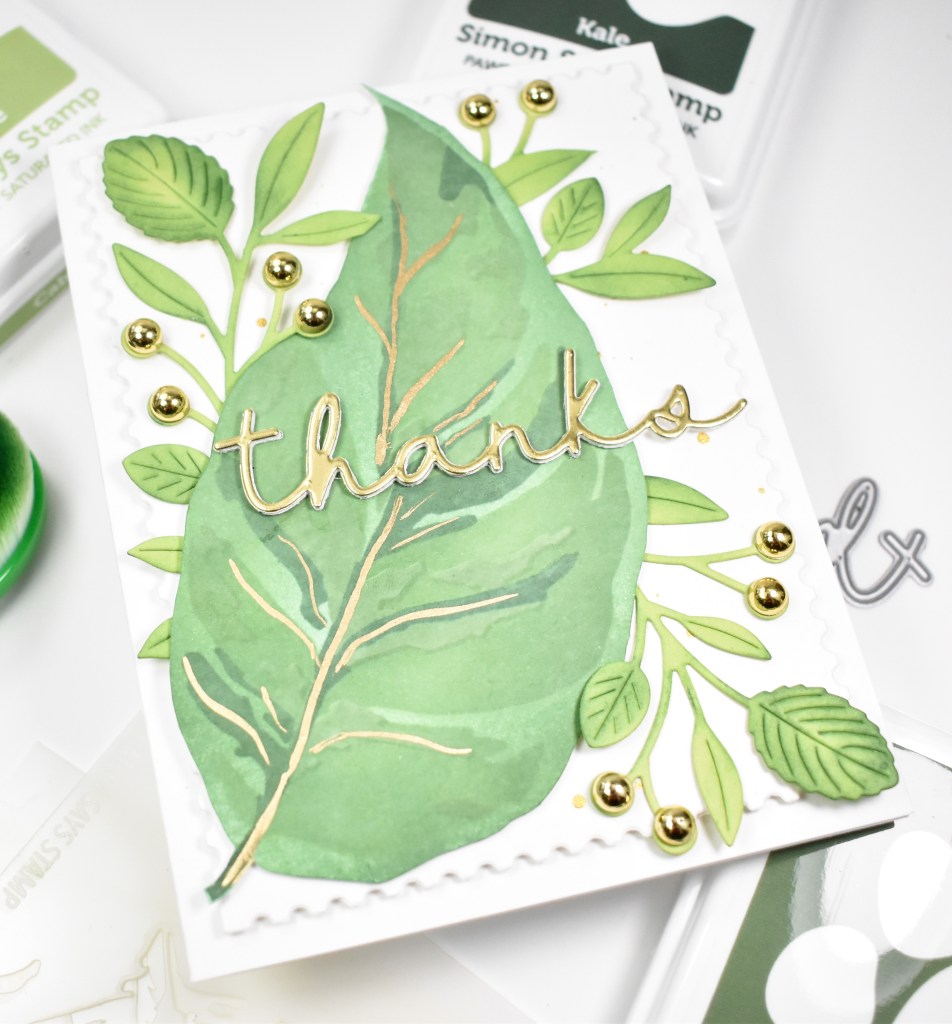
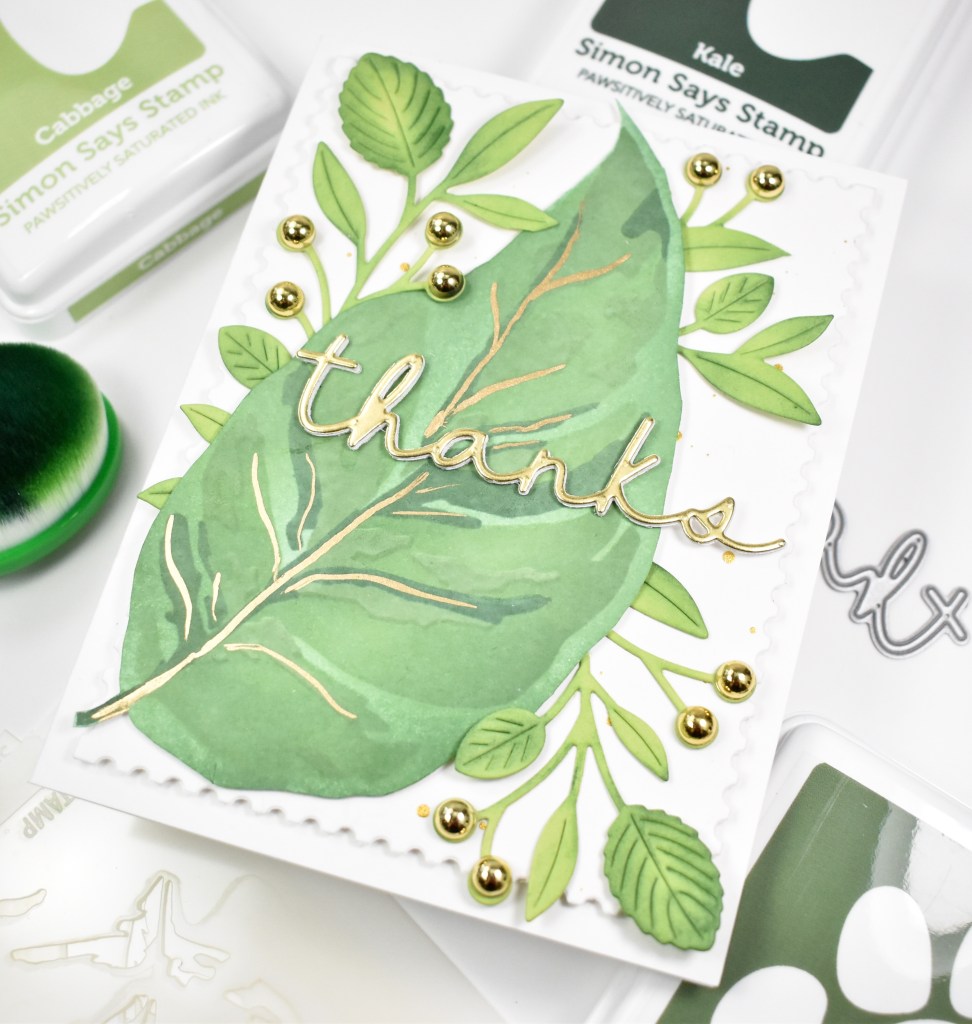
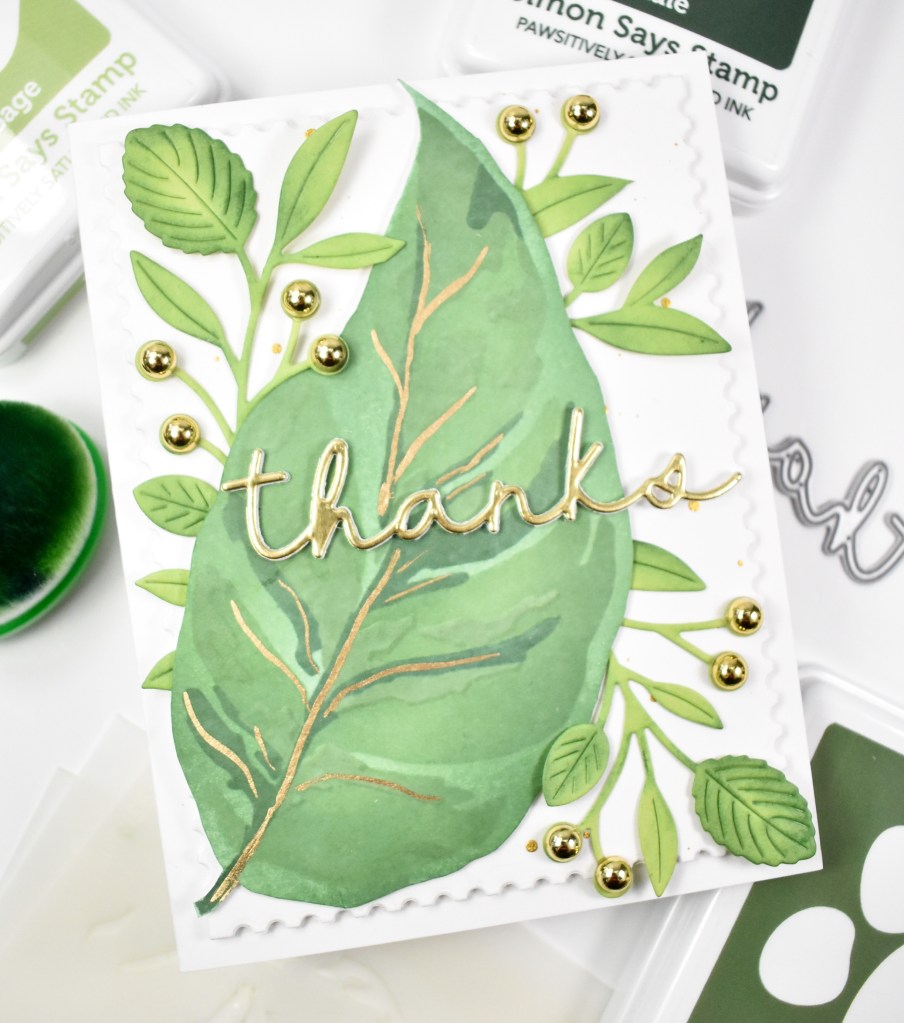
I began this project by gold foiling the Joyful Day Press Plate twice onto Neenah 110lb cardstock. I then used the coordinating stencils to add color using Aquamarine and Tidal Pond inks. Once that was done, I used the coordinating die cut to trim them out. I did go back and add some very light ink blending to the edges of the leaves, because I did not want the stark white edges against my dark background.
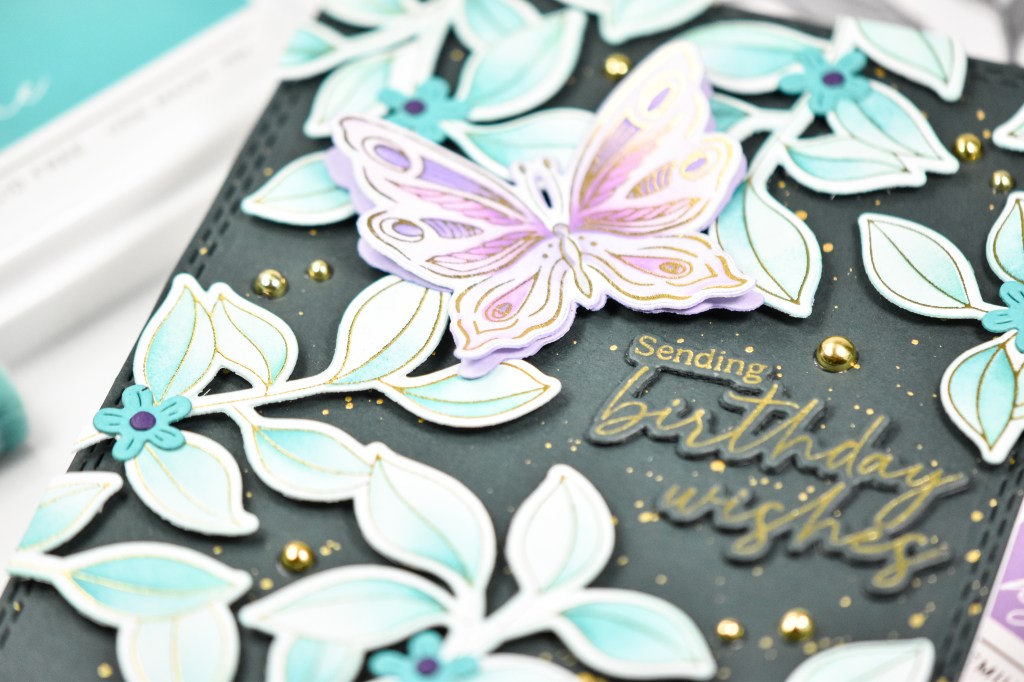
I then gold foiled the new Butterfly Bliss Press Plate onto Neenah and ink blended those using Soft Lilac, Sheer Freesia, Hydrangea, Lavender and Licorice inks. I die cut the butterflies using the coordinating dies along with a purple layer as well. Those two were adhered together and set aside.
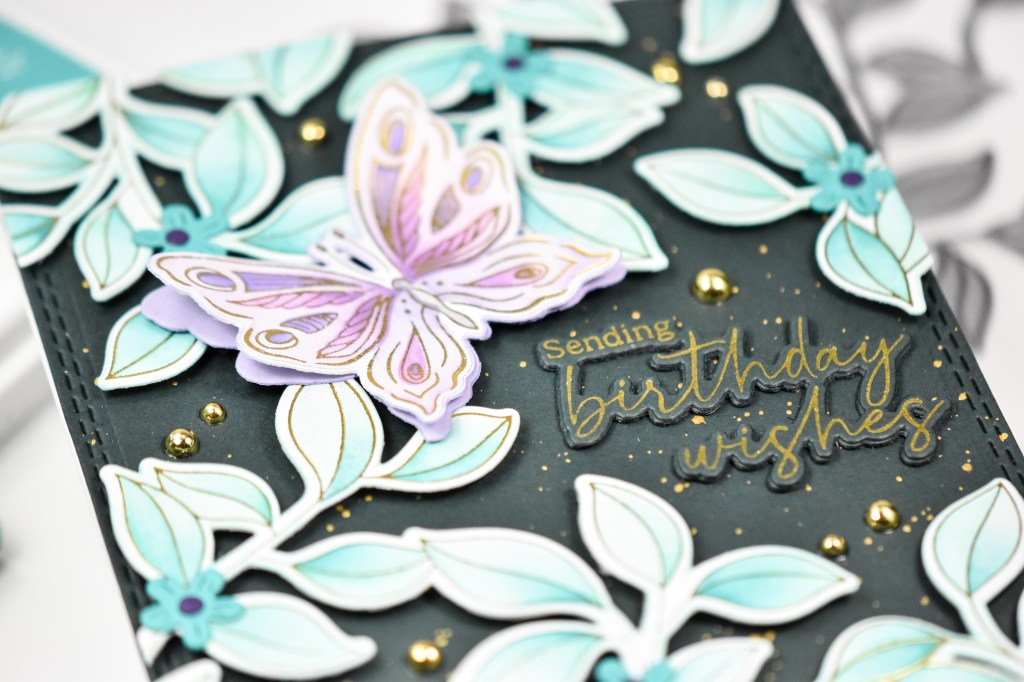
The background was cut using the Double Stitched Rectangles from Forest cardstock and then gold splattered for some added interest. The sentiment, which is from the Joyful Day set, was gold foiled onto the same Forest cardstock and trimmed out along with two additional cuts for a stacked sentiment.

I adhered the green panel to the card base and I placed pieces of foam strips on the back of the ink blended leaves and adhered those in place, along with the butterfly, trimming off the excess. The sentiment was secured in place using liquid glue, as were the gold metallic pearls. I decided that I wanted some tiny flowers to adorn the leaves, so I cut some of those using Spellbinders Floral Spray from Teal Topaz and Plum cardstocks.

That does it for this project! I hope you enjoyed it! I really do love incorporating dark colors into a Pinkfresh project just to give it a different feel! Thanks again for stopping by, and I hope you have a wonderful day!

Supply List
Affiliate links used at no cost to you. What does this mean? If you use the links within this post to make a purchase, I receive a small commission, which allows me to continue to post crafty content for your enjoyment. I truly appreciate your support!
Latest Posts
- Simon Says Stamp Braided Greetings

- Together By Design Color Cube Floral

- Simon Says Stamp Cute Duckling

- Simon Says Stamp Watercolor Wild Rose

- Simon Says Stamp Striped Missing You

Latest Instagram Posts