Simon Says Stamp The Best Organic Leaves

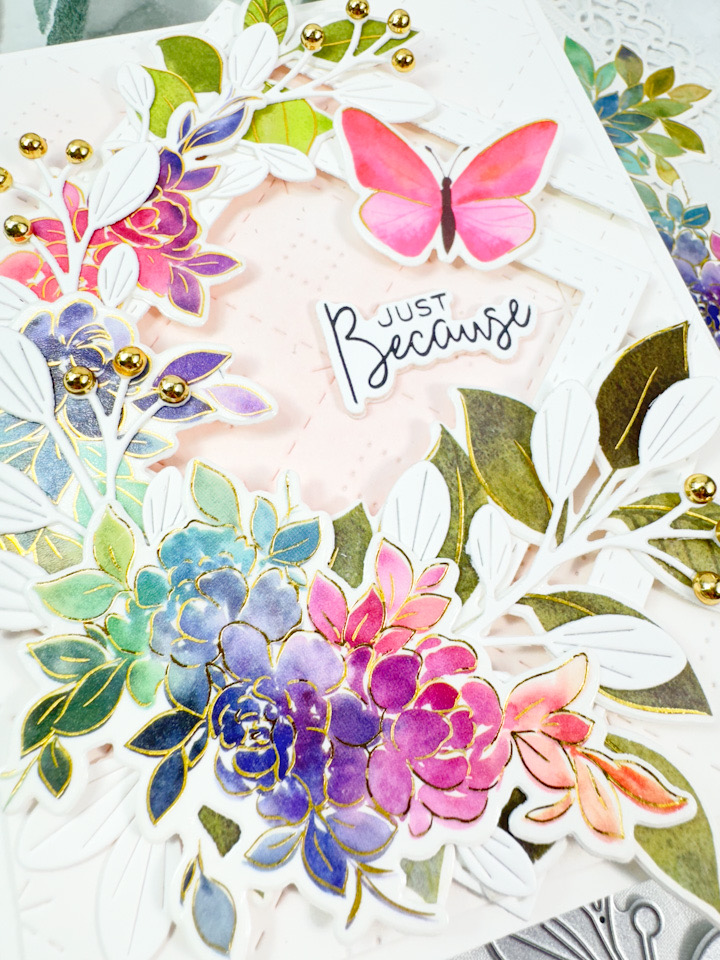
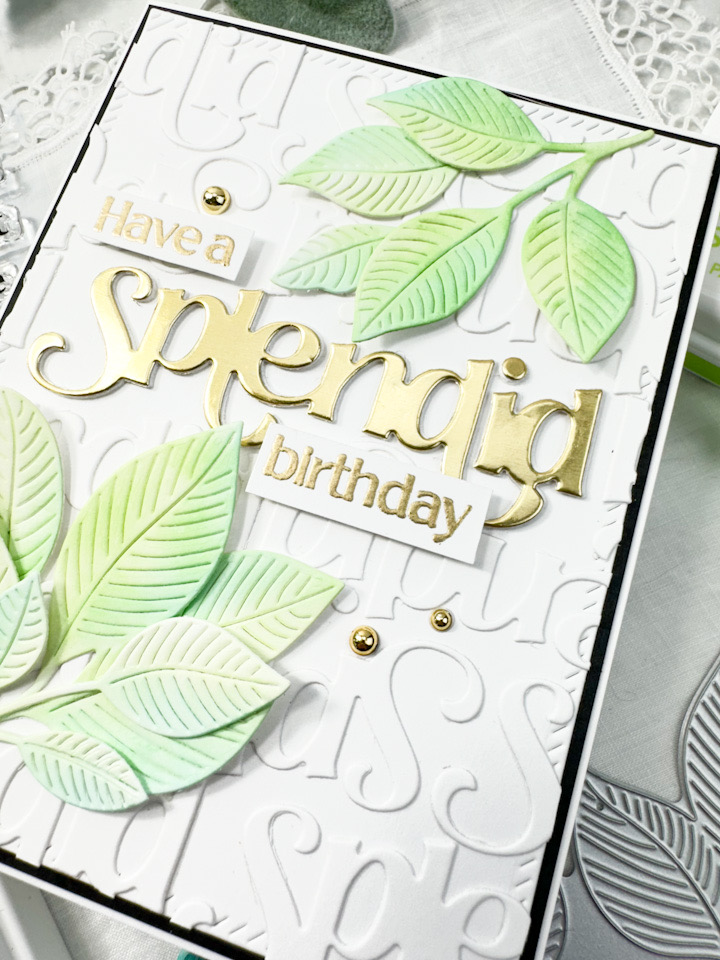
Hello Crafty Friends, and thanks so much for stopping by! The latest Simon Says Stamp release, Celebrate, is live, and I’ve had a blast playing with all of my goodies! Today’s card is featuring the new Organic Leaves stamp, so let’s go through the details!

Main Products:
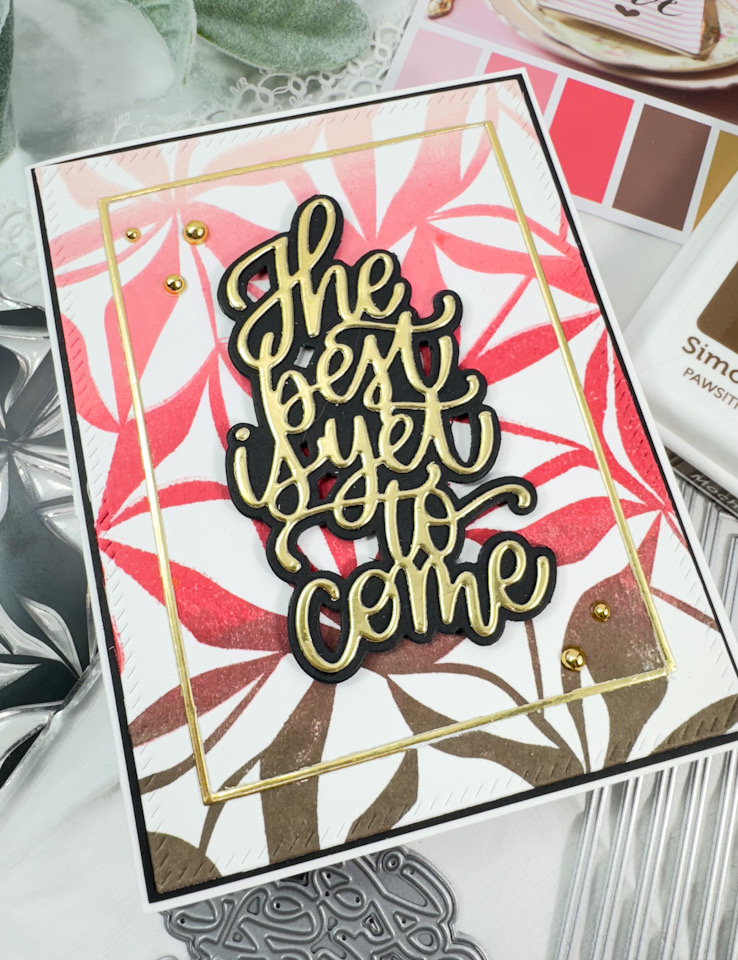
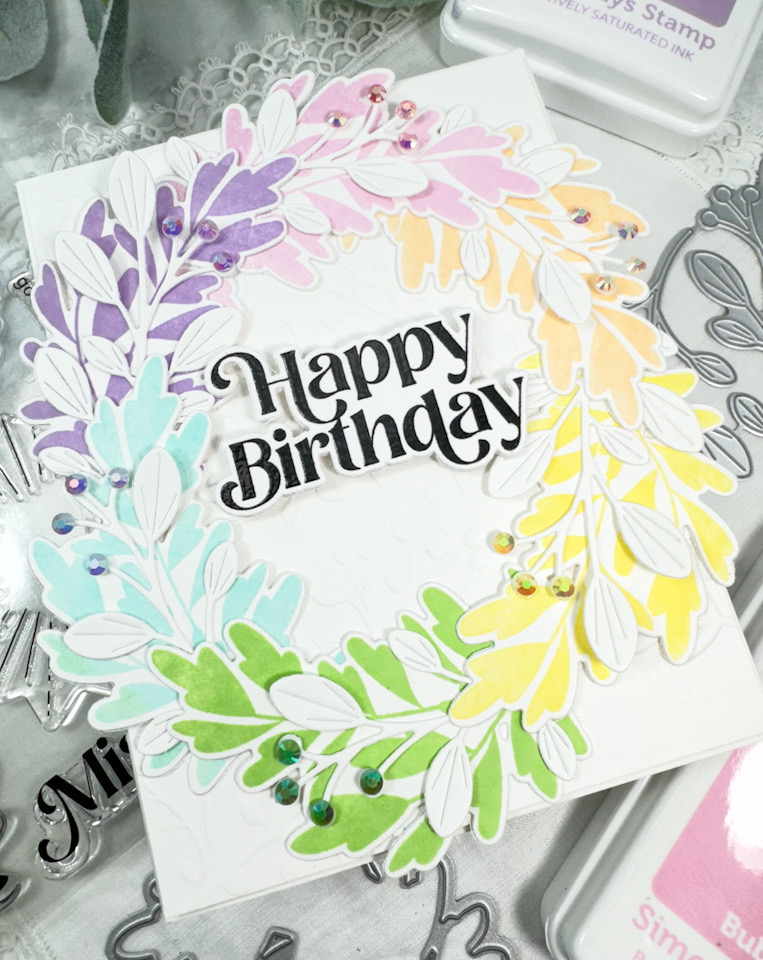
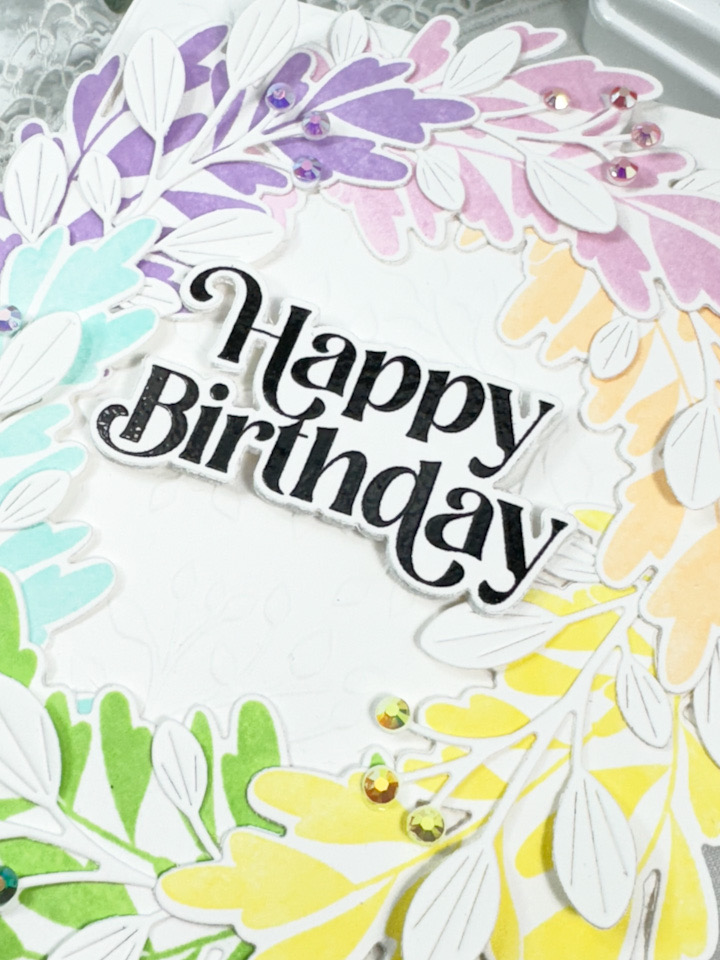
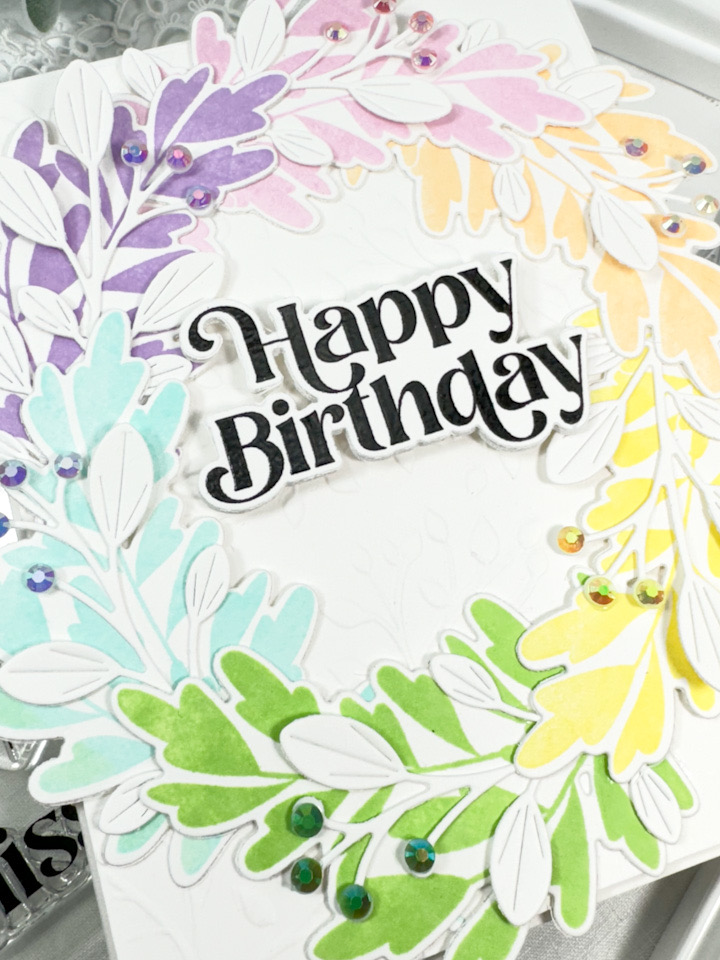
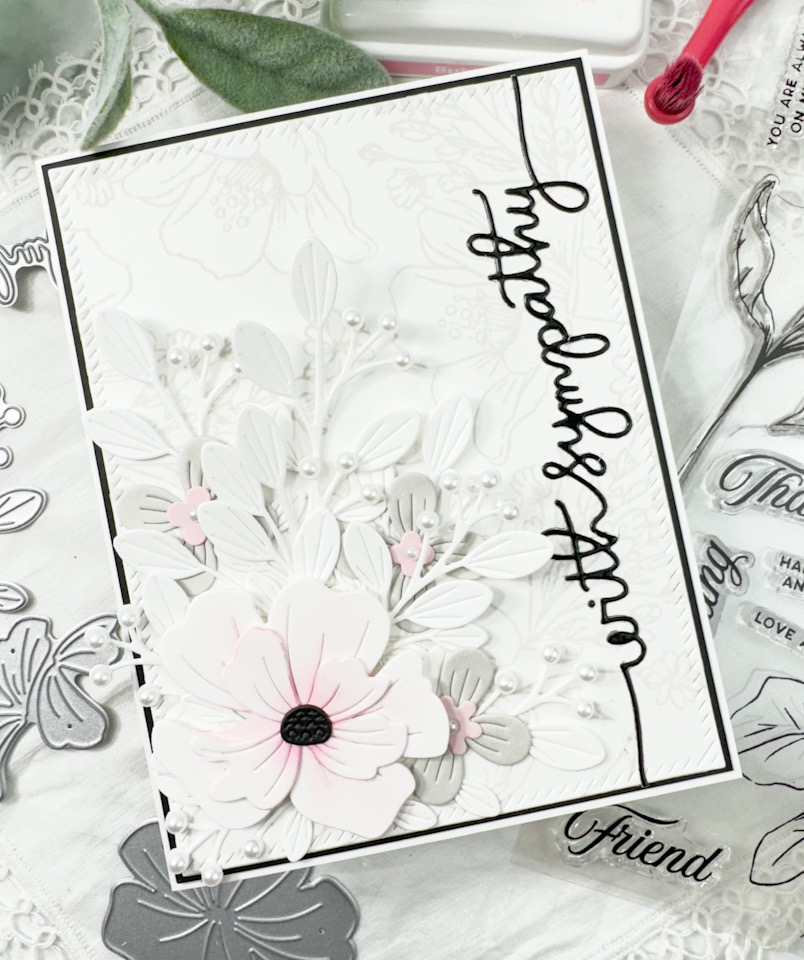
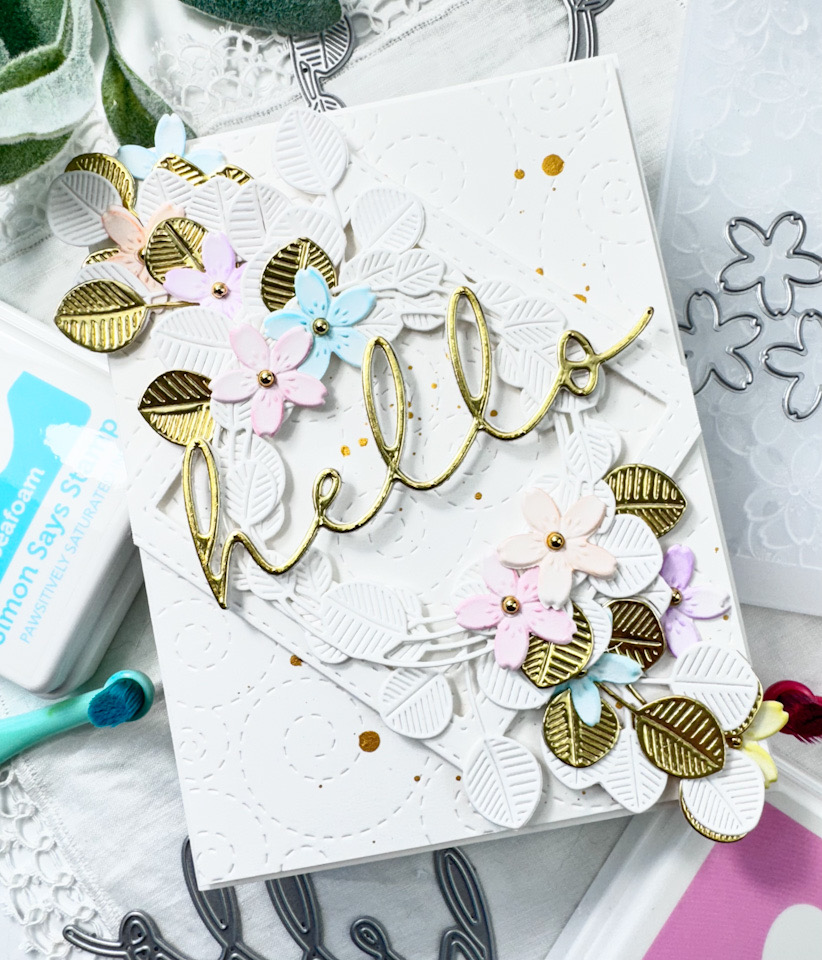
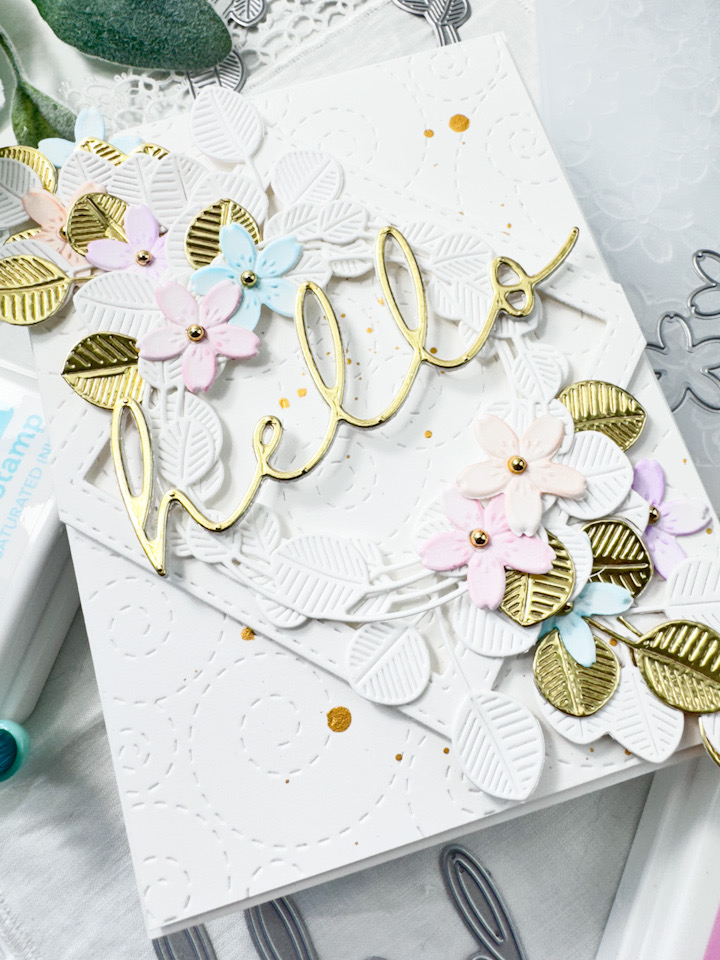
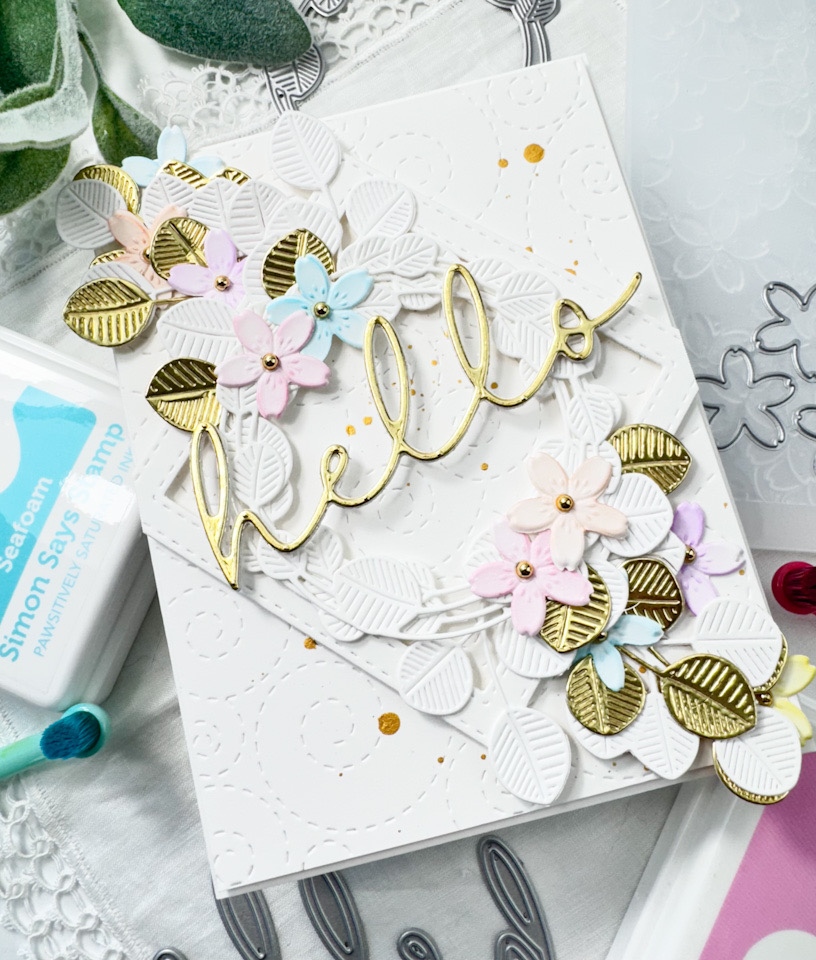
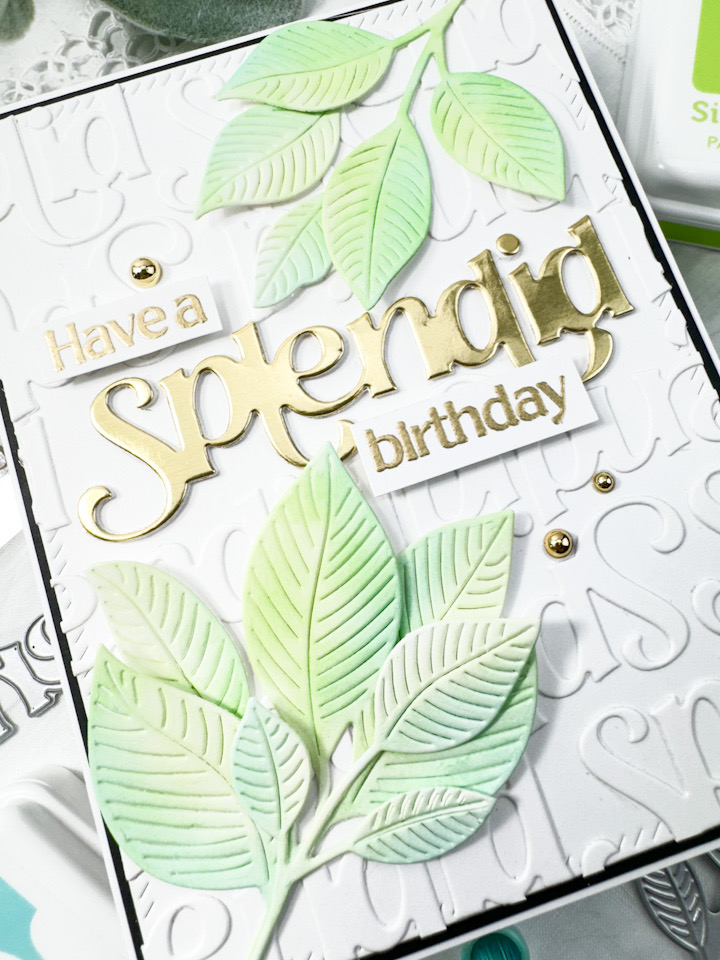
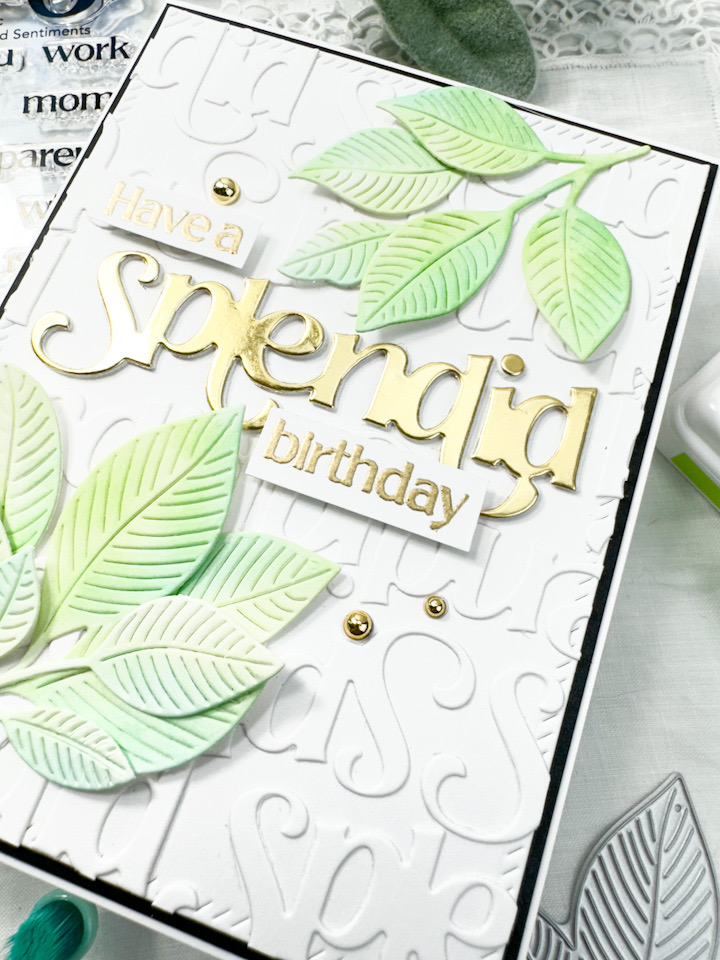
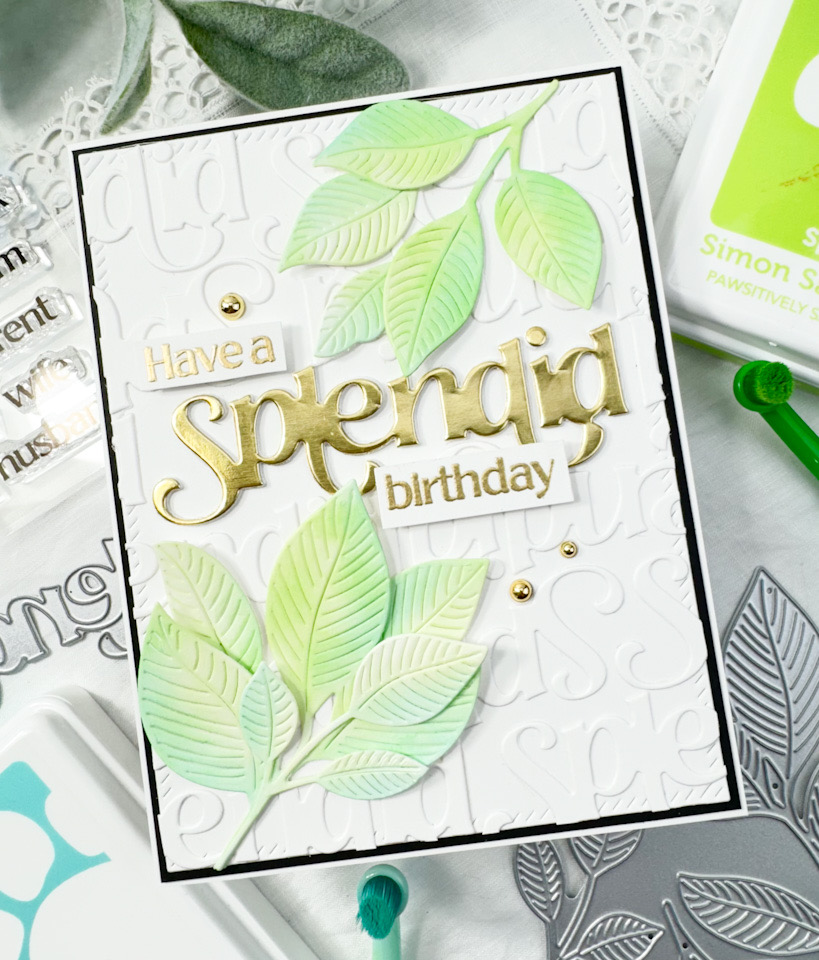
I began this project by pulling a card from The Color Cubes and then pulling ink pads that matched, or matched as close as I could get them. The inks used were SSS Pawsitively Saturated Ink in Mocha, as well as PFS inks in Ballet Slipper, Peony and Berrylicious. I cut a panel of Neenah 110lb cardstock and placed it in the Misti and began stamping the SSS Organic Leaves. I started with the lightest color at the top, and worked my way through the colors. When I was done adding each ink, I did use a blender brush to soften the edges of the ink, so that I didn’t have any harsh lines on the panel. Once everything was stamped, I used the PFS Diagonal Stitched Rectangles to trim it down.

For some added interest to the card, I used the SSS A2 Thin Frames and cut one of those from gold cardstock and adhered it to the panel using liquid glue. I used the SSS The Best is Yet to Come for the sentiment and cut that from the same gold cardstock, along with two additional black layers. The shadow portion of the die was also cut twice from black cardstock, and all of these layers were glued together for a stacked look.
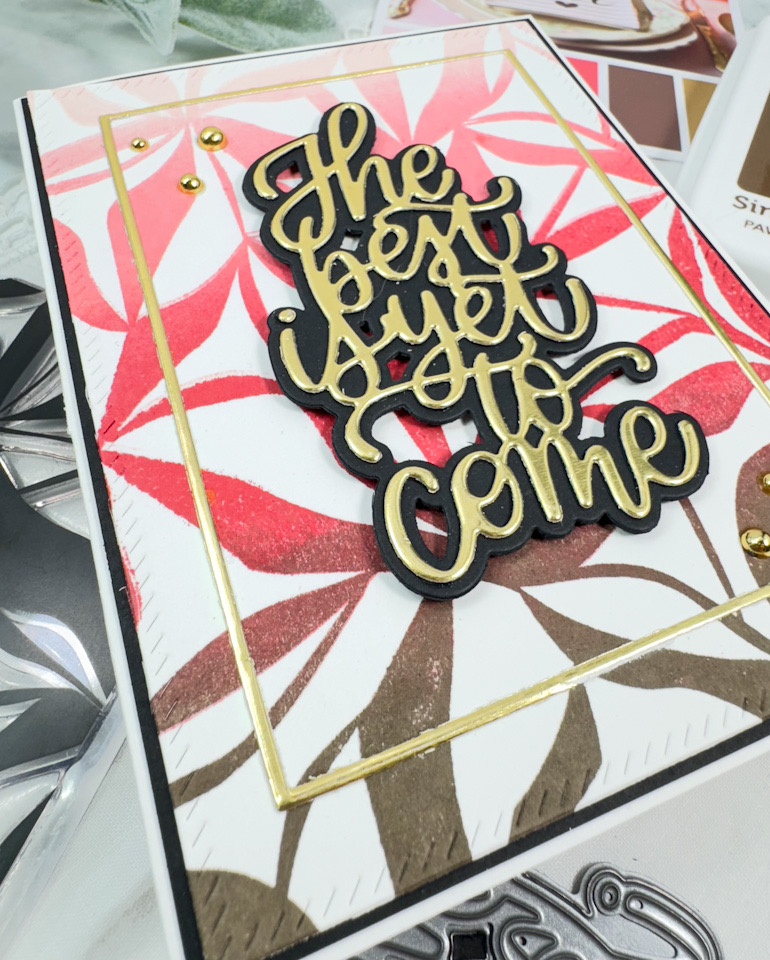
The sentiment was adhered to the panel using SSS 3D Foam Strips and the panel was then adhered to a black panel, for contrast, using SSS Dot Tape Runner, before being adhered to the card base. For a little added bling, I added some PFS Gold Metallic Pearls.

That does it for this one! I hope you enjoyed it! Have you checked out the entire Celebrate release yet? I’d love to know your favorites in the comments! Thanks again for stopping by, and have a wonderful day!
Other Products:
- SSS Pawsitively Saturated Ink: Mocha
- SSS Place and Score Embellishment Wand
- SSS Blender Brushes
- SSS 3D Foam Strips
- SSS Triangle Trays
- SSS Bone Folder
- SSS Dot Tape Runner
- PFS Inks: Ballet Slipper, Peony, Berrylicious
- PFS Diagonal Stitched Rectangles
- PFS Gold Metallic Pearls
- Neenah Classic Crest Solar White 110lb Cardstock
- Black Cardstock
- Gold Cardstock
- Bearly Art Glue
- Scor-Buddy
- Tim Holtz Craft Pick
- Misti
- Spellbinders Platinum 6
- The Color Cubes
* Affiliate links used at no cost to you. Thank you so much for your support!
Latest Posts
- Simon Says Stamp Grateful Heart

- Simon Says Stamp Braided Greetings

- Together By Design Color Cube Floral

- Simon Says Stamp Cute Duckling

- Simon Says Stamp Watercolor Wild Rose