Simon Says Stamp Merry Everything Stylized Tree

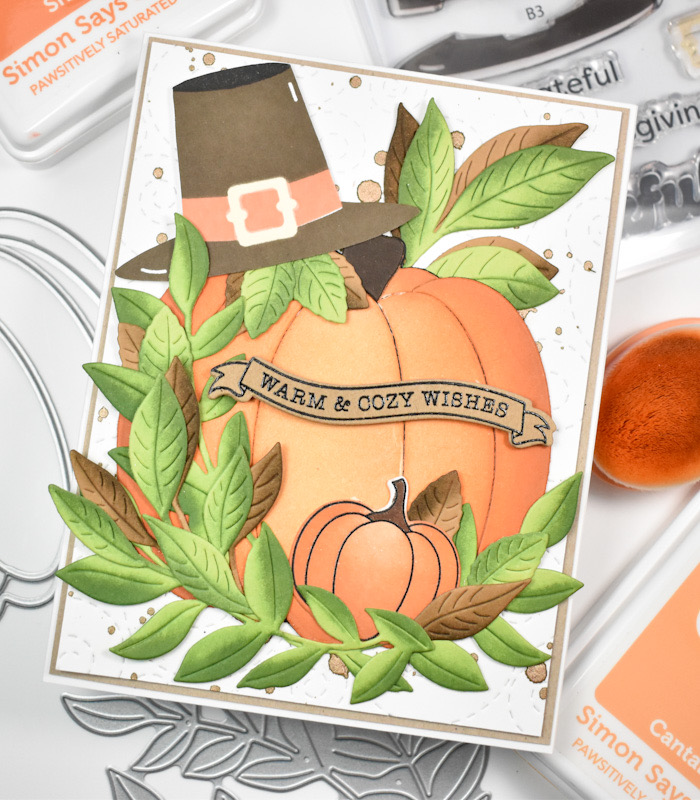
Hello Crafty Friends, and welcome back! The latest release from Simon, Sweet Wishes, is live, and it has some amazing things in it! My project for today is featuring a couple of new items, so let’s go ahead and get into the details!

NOTE: all supplies are linked in the thumbnails at the end of this blog post.
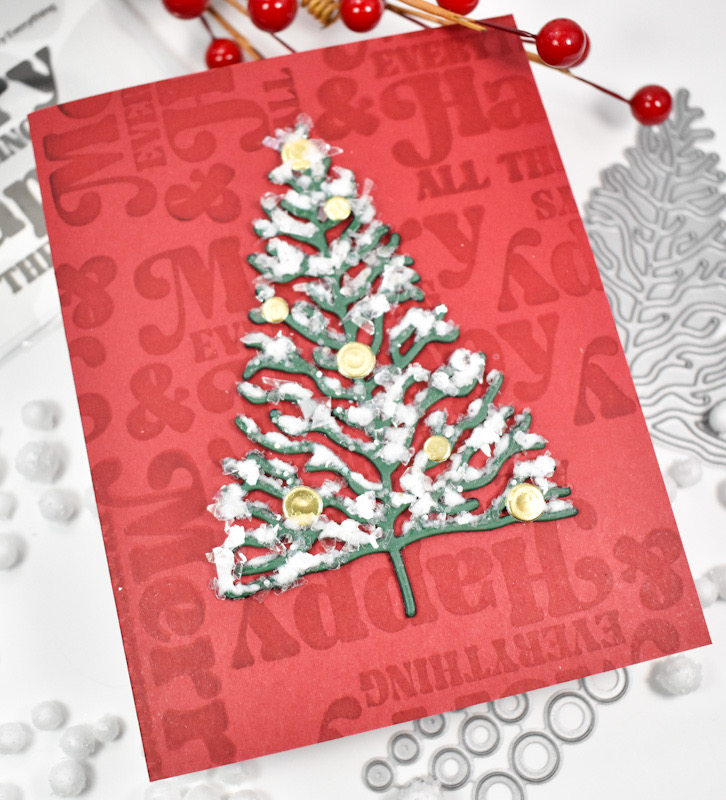
The new products that I’m using for this project are the Merry Everything stamp, the Stylized Tree die and the Schoolhouse Red Pre-Scored Cards. I began this project by putting one of the cards in the Misti and repeatedly stamping the Merry Everything stamp using VersaMark Ink. I love creating background with words, whether it’s a stamp or a die!
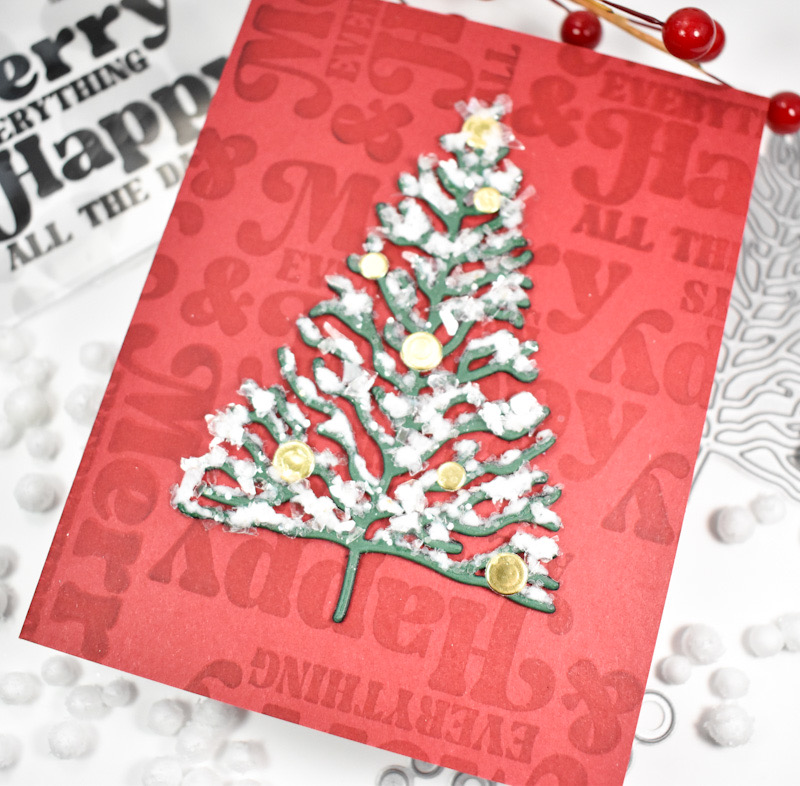
While the background was drying, I cut the Stylized Tree once from green cardstock and twice from black cardstock and adhered all of those together with liquid glue. I also cut the baubles from gold cardstock and adhered those as well. I added a bunch of glue to the branches of the tree and added glitter atop that. The glitter wasn’t giving quite the definition that I was looking for, so I repeated the process a second time, but I added Mica Flakes for that go around.
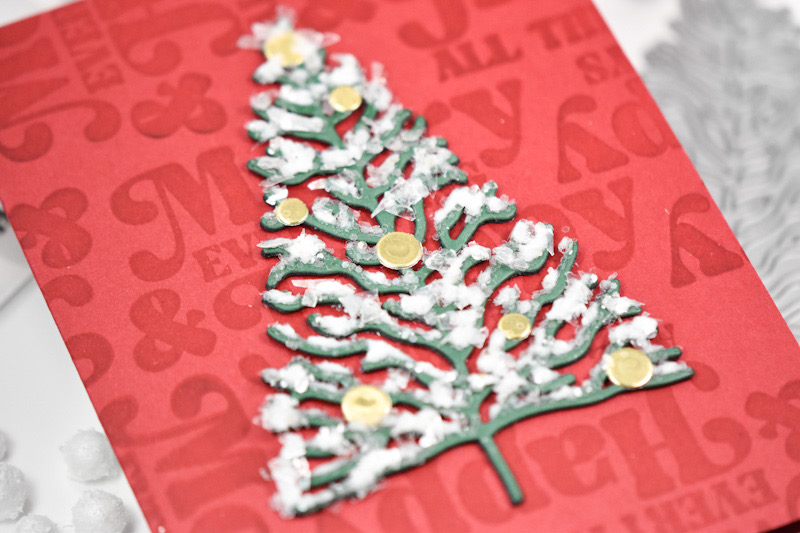

To finish up, the snow laden tree was glued directly to the card base. This was a relatively quick and simple card, but I love how it turned out! Don’t forget to head on over to Simon’s website to check out the entire Sweet Wishes release! Thanks again for joining me, and I hope you have a wonderful day!

Supply List
Affiliate links used at no cost to you. What does this mean? If you use the links within this post to make a purchase, I receive a small commission, which allows me to continue to post crafty content for your enjoyment. I truly appreciate your support!
Latest Posts
- Spellbinders Trailside Birthday Raccoon

- Simon Says Stamp Grateful Heart

- Simon Says Stamp Braided Greetings

- Together By Design Color Cube Floral

- Simon Says Stamp Cute Duckling