Simon Says Stamp Mother’s Leafy Cluster

Hello and welcome back crafty friends! I’m so glad that you stopped by to take a look at today’s project featuring the new Mother die from Simon’s latest release, Be Bold. Let’s go ahead and run through the deets for this one, shall we?

Main Products:

I began this card by selecting a color combo from The Color Cubes and stamping the SSS Leafy Cluster onto a panel of Neenah 110lb cardstock using VersaFine Onyx Black ink and heat setting that with Ranger Clear Embossing Powder. I then used the coordinating stencils to do the ink blending using SSS Pawsitively Saturated Inks in Blush, Petunia and Watermelon, along with Pinkfresh inks in Atlantis and Metropolis. Once the ink blending was complete, I used the coordinating dies to cut them out.

I cut the SSS Mother die once from SSS Matte Silver cardstock and twice from Neenah 110lb cardstock, and I also cut the shadow portion of the die twice and well. All of those pieces were adhered together using liquid glue and set aside while I worked on the remaining elements of the card. I always seem to need more leaves on my cards, so I opted to use the SSS Etched Meadow Flower and Leaves, along with the SSS Flower Bundle and cut some of those using the same matte silver cardstock.

For the background, I used the PFS Diagonal Stitched Rectangles to cut a panel of black cardstock, and splattered it using white acrylic ink. I then used the SSS A2 Thin Frames to cut a frame from the same silver cardstock. Now for the assembly! I glued the silver frame in place, glued the silver leaves in place and then glued the Leafy Clusters in place.

The sentiment was also glued in place. I chose a sub-sentiment from the SSS Reverse Love Sentiments Strips and adhered that using SSS 3D Foam Strips so that it would match the height of the main sentiment. I added a few PFS Matte Silver Pearls before adhering the panel to the card base using foam tape.

That does it for this one! I really like this color combo, and am enjoying The Color Cubes, especially when I get stuck on putting colors together. I hope you enjoyed this project too! Head on over to Simon’s website to check out the entire Be Bold release! I’d love to know your favorites! Thanks again for stopping by, and don’t forget to stay awesome, friend! Have a wonderful day!

Other Products:

* Affiliate links used at no cost to you. Thanks so much for your support!

Latest Posts

Latest Instagram Posts

Simon Says Stamp Be Still Flower

Hello Crafty Friends, and welcome back! I’m so glad that you’re here! Today’s project is featuring the new Wild & Free Flowers set from Simon’s latest release, Be Bold. Let’s not waste any time, and get to it!

Main Products:

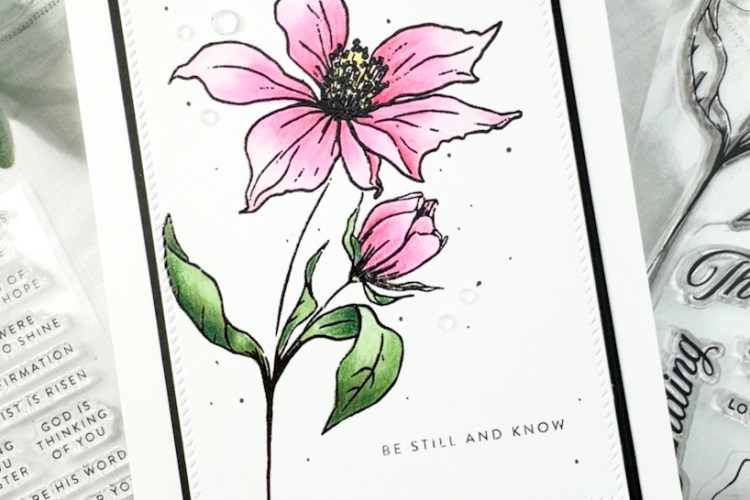
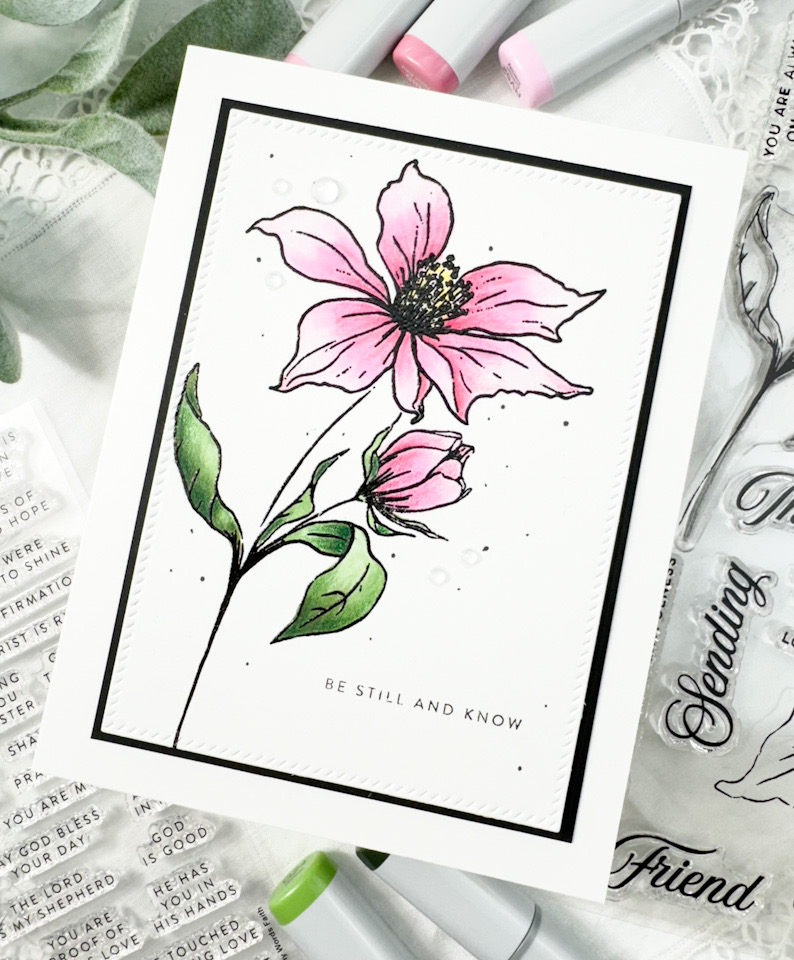
I began this card by stamping one of the florals from the SSS Wild & Free Flowers onto a panel of Neenah 110lb cardstock, using VersaFine Onyx Black ink and heat setting it using Ranger Clear Embossing Powder. I then colored the image using Copic Markers in G24, G85, G94, R83, R85, RV52 and Y18, along with PrismaColor Pencils for some extra shading.

Once the coloring was complete, I used the PFS Diagonal Stitched Rectangles to trim the panel down, before adhering it to a black panel with foam tape. I stamped the sentiment, which is from the SSS Tiny Words Faith set, using the same black ink.

I added some clear drops and “fake” black splatter using Copic Multiliner pens. Normally, I add real splatter, but I wanted control of where the black dots were placed, hence the use of pens. This panel was then adhered to the card base.

A pretty simple card for today. I hope you enjoyed this project, and I hope it inspires you to get crafty in your space. Don’t forget to head over to Simon’s website to check out the entire Be Bold release! Thanks again for stopping by, and I hope you have a fabulous day!

Other Products:

* Affiliate links used at no cost to you. Thanks so much for your support!

Latest Posts

Latest Instagram Posts

Simon Says Stamp Lucky to Know You

Hello Crafty Friends and welcome back! I’m still playing with goodies from Simon Says Stamp’s latest release, Splendor, and today I’m featuring a card using the new Fancy Lucky die, along with the Lucky Sentiment Strips. Let’s run through the details for this one!

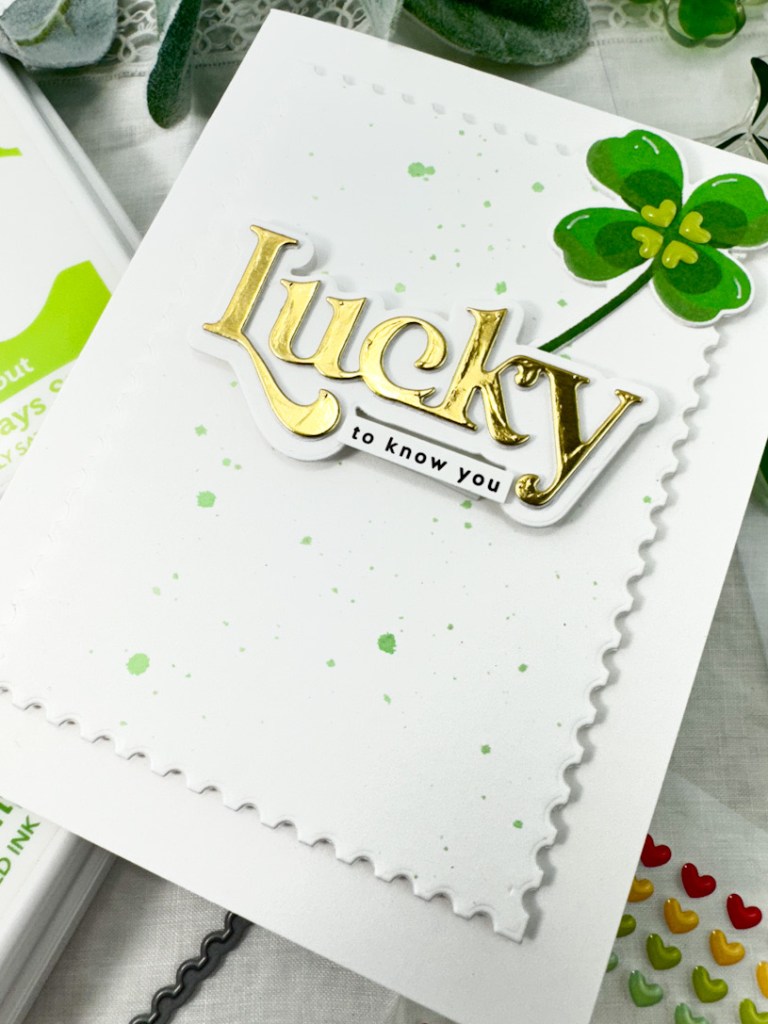
To begin this card, I cut a panel of Neenah 110lb cardstock using the SSS Postage Stamp Edge Frames and splattered it using the Grass colored Karin Marker. I just scribbled on a piece of plastic and spritzed it with water and used a paint brush to add the splatter.

I stamped the largest clover from the SSS Lots of Luck stamp set using SSS Pawsitively Saturated Inks in Sprout and Fairway. This is a layered stamp set, so I stamped the first layer with the lightest ink, and the next layer with the darker ink. I then used the coordinating die to trim it out. I die cut an extra and adhered those together with liquid glue.

To add a little more detail to the clover, I added some green Tiny Hearts from Doodlebug Designs. Moving on to the sentiment, I die cut the SSS Fancy Lucky die from gold cardstock once and twice from Neenah 110lb cardstock and glued all of those layers together. I also die cut the shadow twice, and adhered all of the pieces together for a stacked sentiment. Once that was complete, I settled on a sub-sentiment from the SSS Lucky Sentiment Strips and added a SSS 3D Foam Strip to the back of that.

To assemble the card, I adhered the splattered panel to the card base using foam tape and positioned the clover atop that and adhered with liquid glue. The Lucky sentiment was also adhered with Foam Strips and the sub-sentiment was nestled right underneath.

That does it for this one! A relatively simple card, but sometimes, those are all that you need! I hope you enjoyed this card, and I hope it inspires you to get crafty in your space. Head on over to check out the entire Splendor release, and let me know your favorites! I hope you have a wonderful day, and don’t forget to stay awesome friend!

Supply List:

* Affiliate links used at no cost to you. Thanks so much for your support!

Latest Posts

Latest Instagram Posts

Simon Says Stamp Just Because Cosmos

Hello Friends, and thanks for joining me! The newest Simon release, Splendor, is live, and I’m back today with a card featuring the new Lots of Luck Stamp and Die set. Let’s not waste and time, and go through the details for this one!

I began this card by die cutting a bunch of petals from colored cardstock and a few centers from Neenah 110lb cardstock using the SSS Cosmo Flower Petals. Once those were cut, I did some ink blending using SSS Pawsitively Saturated Inks in Sweets, Cantaloupe, Sunbeam, Surf, Marine and Lilac. While ink blending, I did concentrate more color towards the centers of the flowers for added depth and dimension. To assemble the flowers, I adhered the petals to the back of a die cut center using liquid glue, and then adhered the solid center behind that.

All floral cards need some type of leaves in my opinion, so I die cut a few leaves from gold cardstock using the SSS Privet Branch. I then used the SSS Stitched Rectangles to create a frame from Neenah 110lb cardstock as well.

The sentiment is from the new SSS Lots of Luck set and was stamped using VersaMark Ink and heat set using Ranger Princess Gold Embossing Powder. I used the coordinating die to trim it out, along with two additional cuts and adhered all of those together using liquid glue.

Let’s assemble this card! First thing’s first, the card base needed some gold splatter! Once that was dry, I adhered the frame using SSS 3D Foam Strips. I positioned the flowers atop the card, secured the leaves with glue, and then secured the flowers with foam tape. The sentiment was then adhered with the foam strips. I felt this card had enough going on and did not add any additional bling.

That’s it for this card! I hope you enjoyed it! Don’t forget to stop by and check out the entire Splendor release! It has a lot of fun things to consider. Thank you again for swinging by, and I hope you have a fabulous day! Stay awesome friend!

Supply List:

* Affiliate links used at no cost to you. Thanks so much for your support!

Latest Posts

Latest Instagram Posts

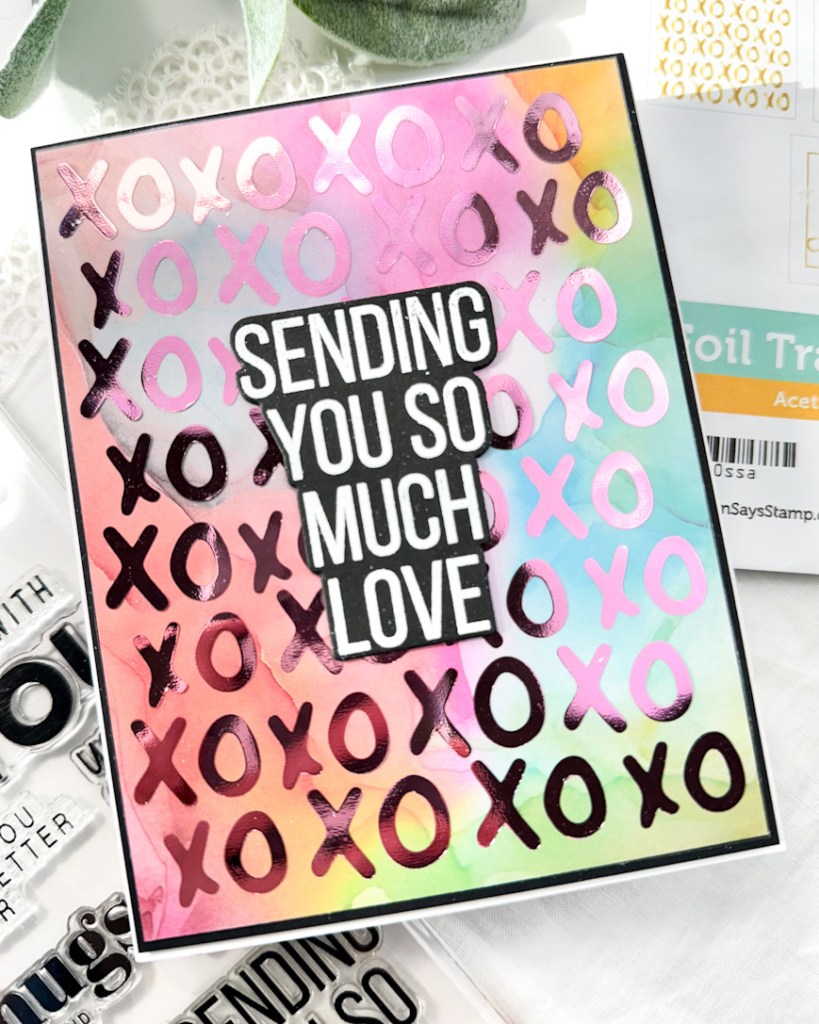
Simon Says Stamp Sending Love XO

Hello Crafty Friends, and thanks so much for stopping by! I’m back today with a card featuring the new Acetate Hearts Foil Transfer Cards from Simon Says Stamp’s latest release, Sweetheart. This card is so simple, but I love the results that I got! Let’s run through the details!

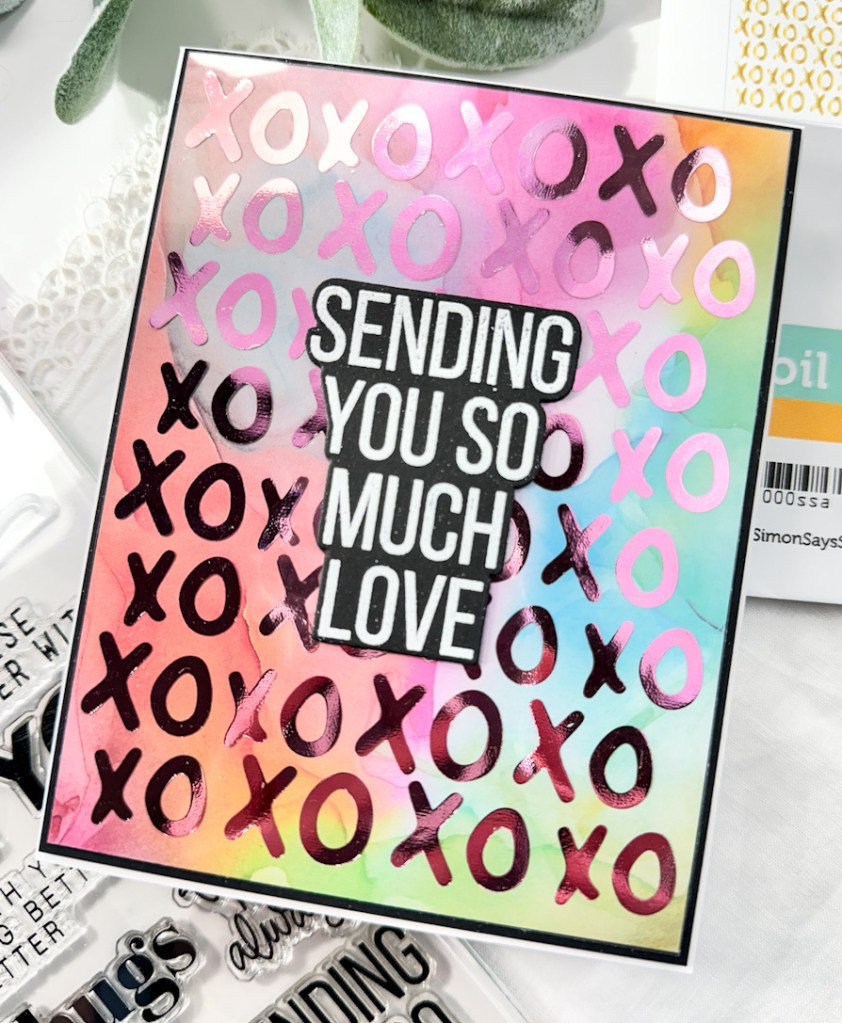
To begin, I pulled out the Minc Mini and some pink foil. I cut a panel of foil while the Minc was heating up, and placed the acetate panel and the foil inside the transfer envelope and fed it through when the machine was heated and ready. I ended up using heat setting four because this yielded better results for me.

I trimmed a panel of patterned paper and applied small dots of glue on the back side of the Xs and Os, and then adhered that to the paper. This was then adhered to a panel of black cardstock for contrast.

I stamped the sentiment, which is from the SSS XL Love Greetings set, onto black cardstock using VersaMark Ink and heat set that using SSS Detail White Embossing Powder. I used the coordinating die to trim that out, along with two additional cuts and adhered all of those together using liquid glue.

The sentiment was adhered atop the acetate with glue and everything was then adhered to the card base using foam tape.

That does it for this card! Like I said, super simple! Using patterned paper can yield some amazing results and make it look like you spend hours on a project, when you really only spent a few minutes! I hope you like this project, and I hope it inspires you to get crafty, maybe even with some of your patterned paper! Thanks again for stopping by, and have a wonderful day!

Supply List:

* Affiliate links used at no cost to you. Thanks so much for your support!

Latest Posts

Latest Instagram Posts