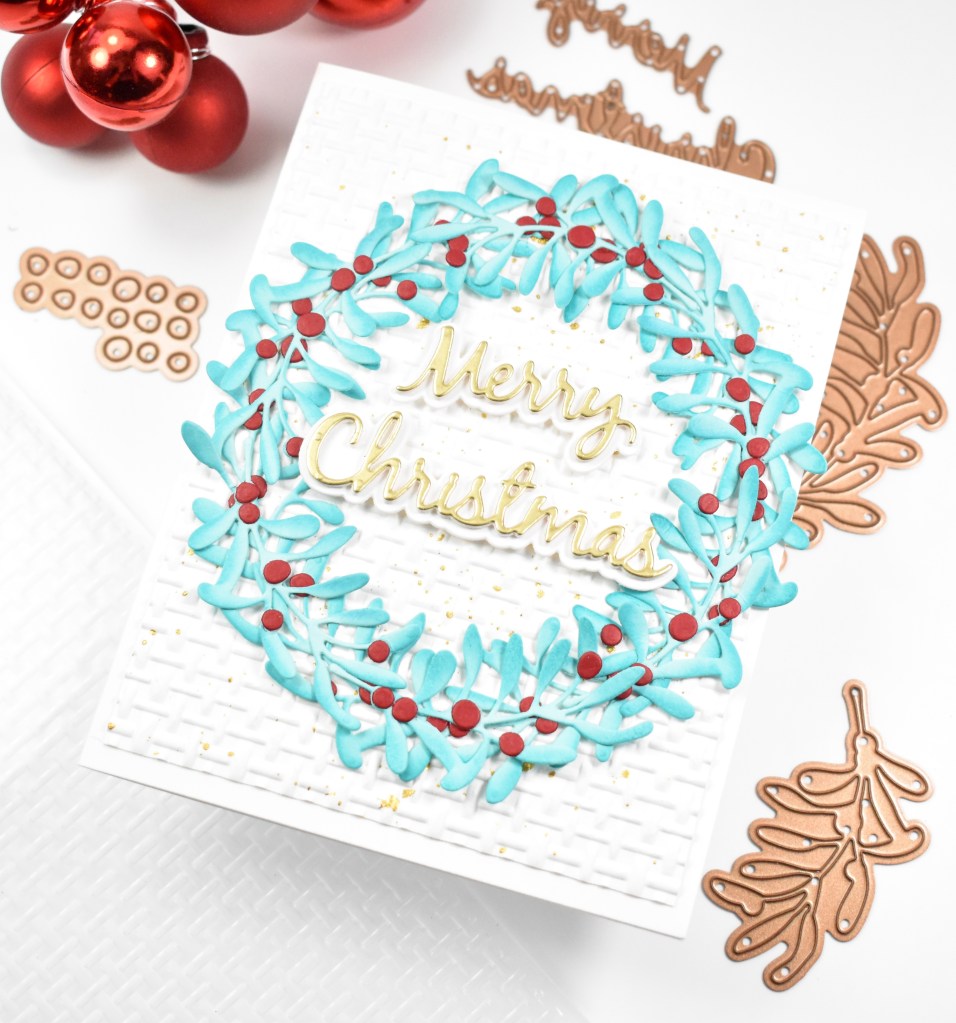
Simon Says Stamp Christmas Cardinal

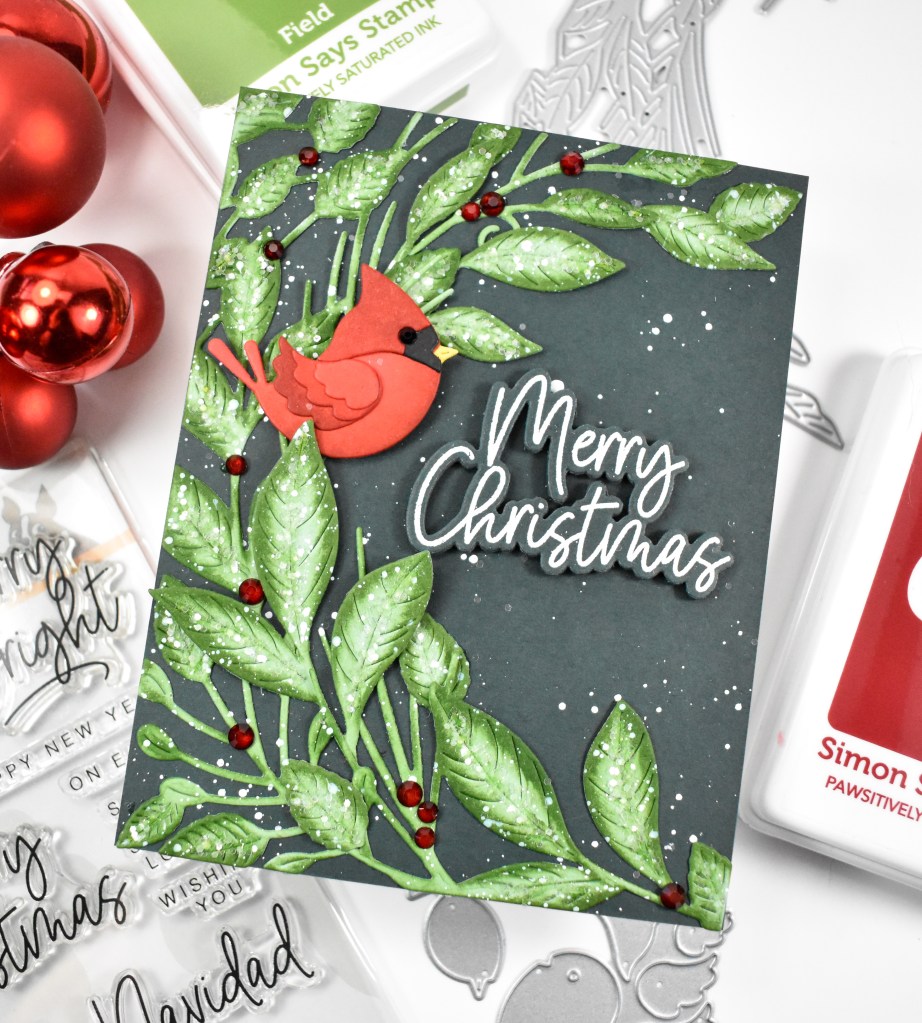
Hello Friends, and welcome back to my blog! Hope you’re having a great STAMPtember so far! Today’s project is featuring the new Cute Cardinal along with some older products. Let’s get into the details!

NOTE: all supplies are linked in the thumbnails at the end of this blog post.
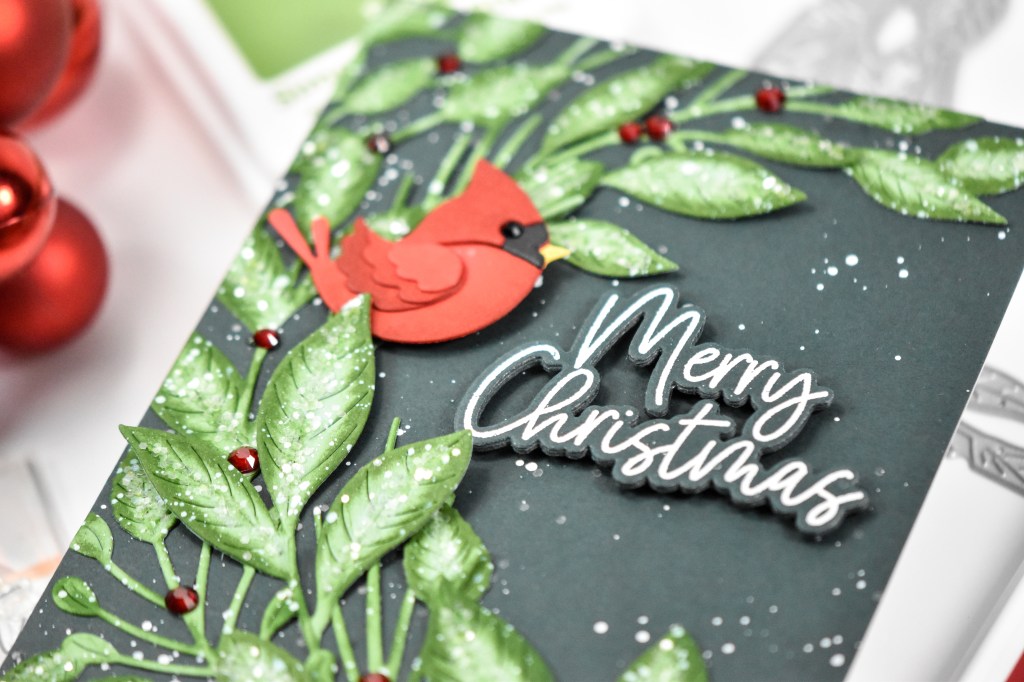
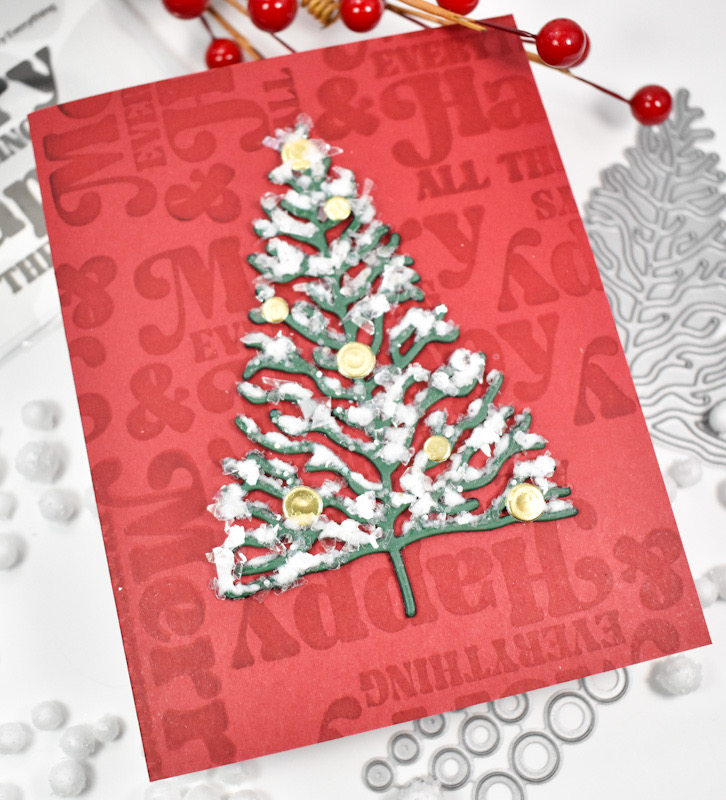
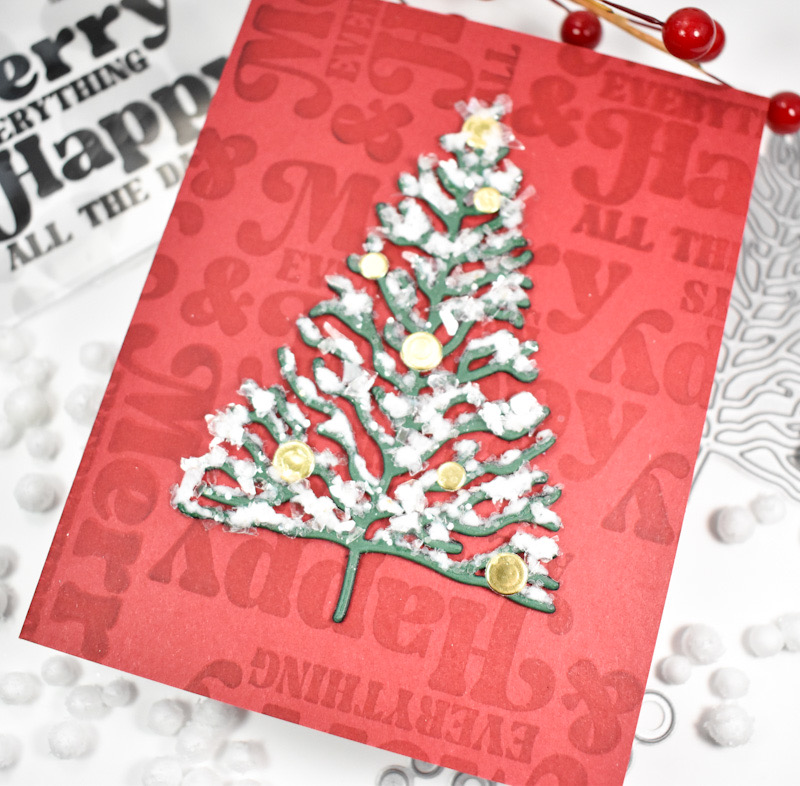
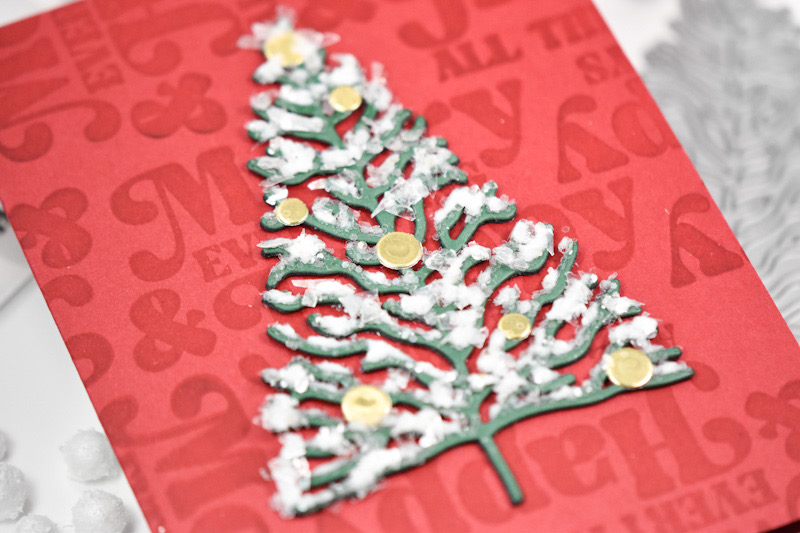
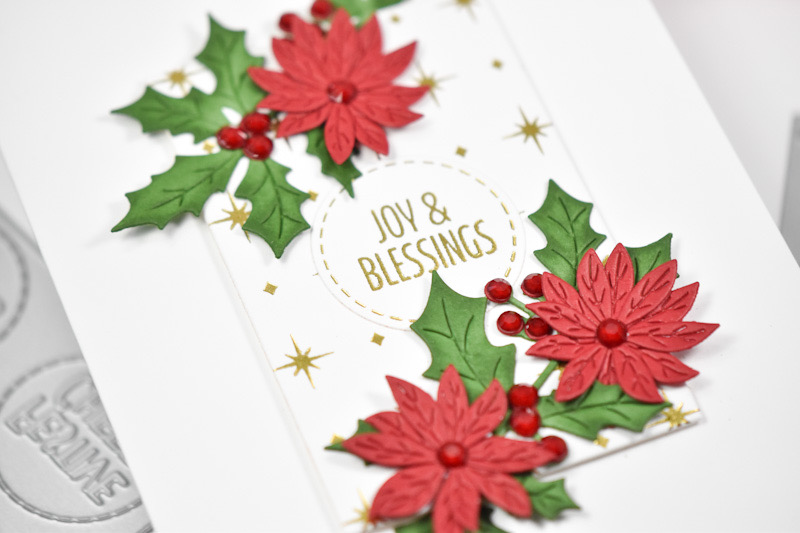
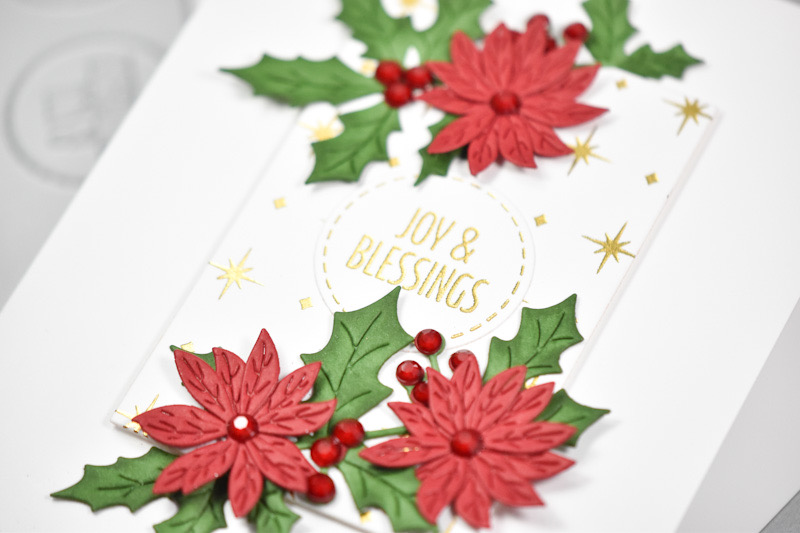
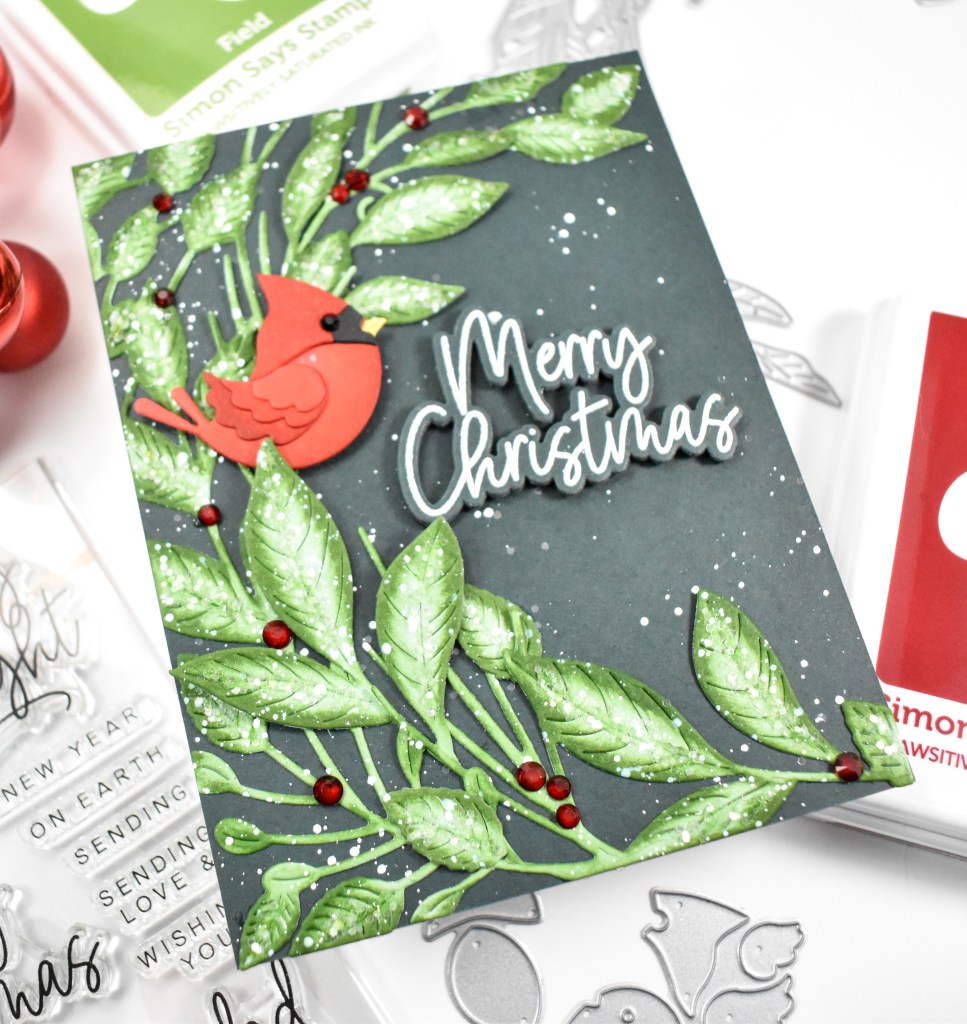
I began this project by die cutting the cardinal from Poppy, Black and Beeswax cardstock and ink blending using Brick ink. I also cut the Arching Leaf Border from Sage cardstock and used Field for the ink blending on that. Once I was done ink blending the leaves, I gave them a good splatter of white, along with my forest green background. When the splatter was dry, I applied some liquid glue down the centers of the leaves and added some glitter for an icy look.
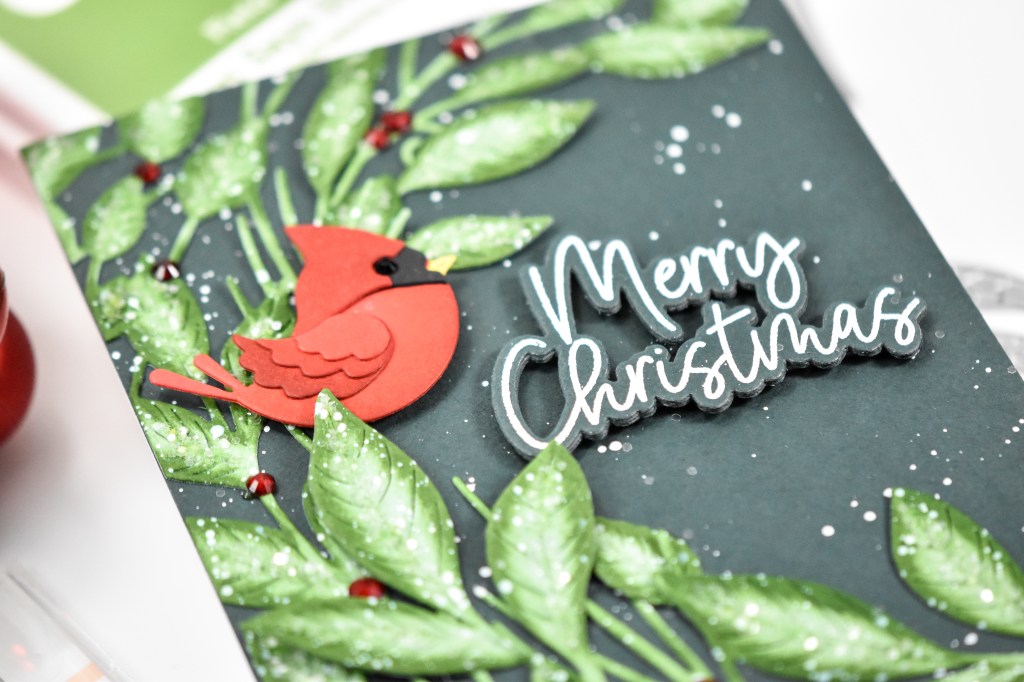
The sentiment was stamped onto that same green cardstock using VersaMark Ink and heat set using white embossing powder. It was trimmed out three times for that stacked sentiment look. When my glitter was dry, I started the assembly process.
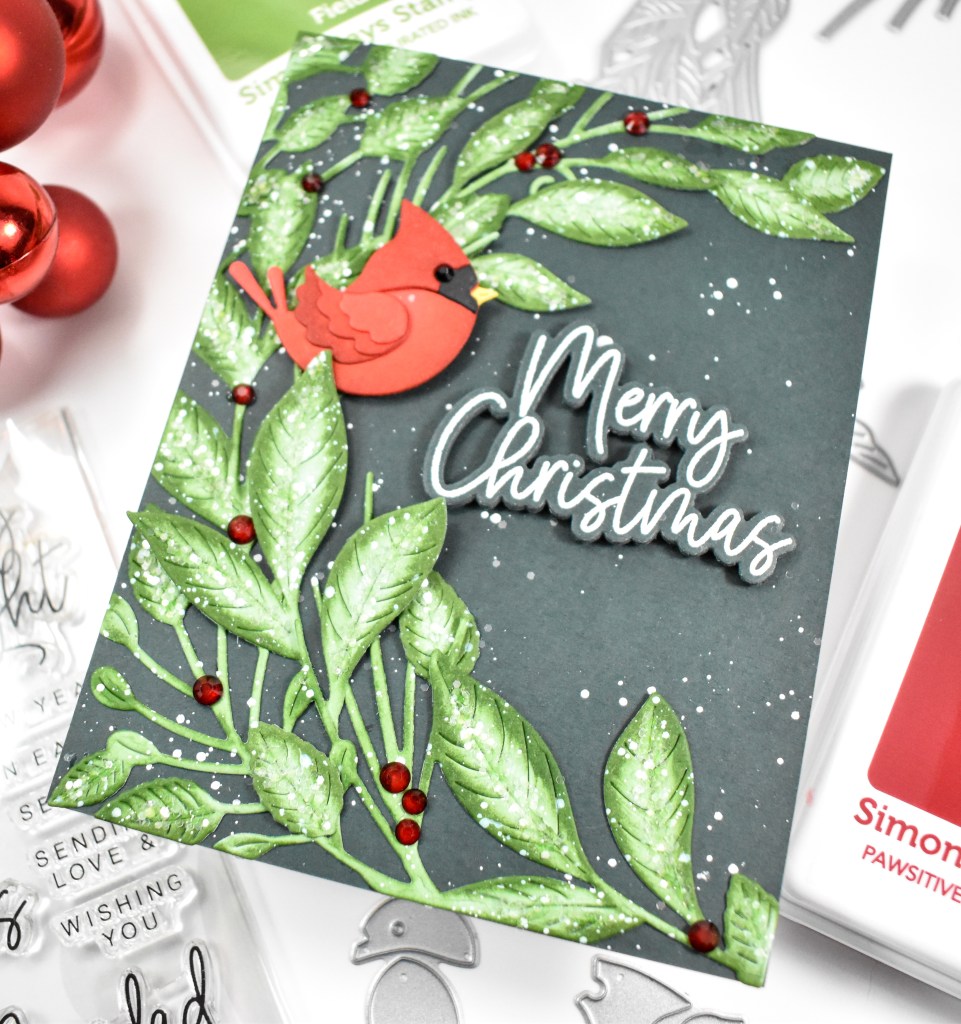
I arranged the leaves and secured those in place using liquid glue, tucking in the extra leaves from the die cut set. I also added red gems in random places for the appearance of berries. The cardinal and sentiment were secured with foam tape, and the panel was adhered to the card base to finish up.
That does it for this project! I’m really loving that snowy, icy look on my holiday cards, so I’m thinking that I might have to incorporate it into my personal Christmas cards for this year. Don’t forget to head over to Simon’s website to check out the entire release. Thanks again for joining me, and I hope you have an awesome day!
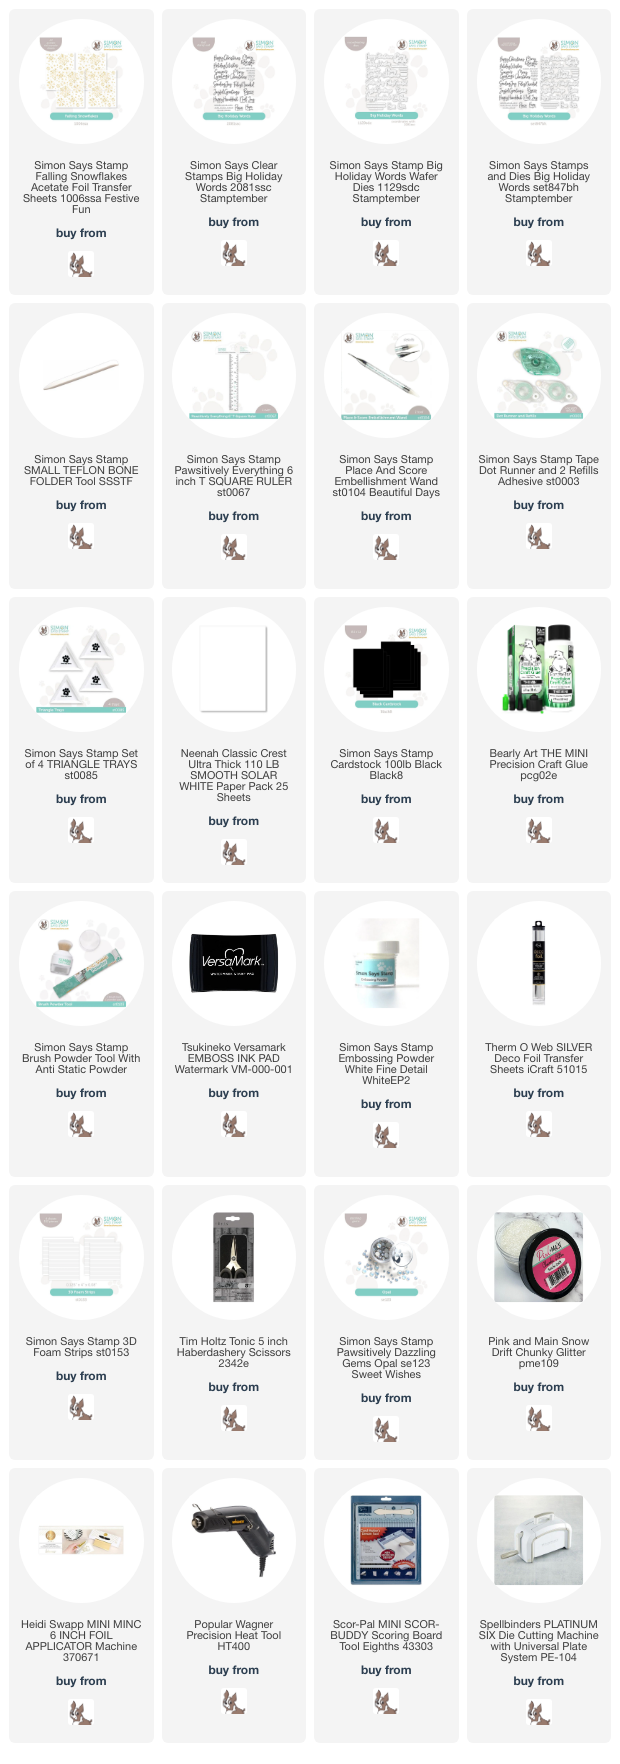
Supply List
Affiliate links used at no cost to you. What does this mean? If you use the links within this post to make a purchase, I receive a small commission, which allows me to continue to post crafty content for your enjoyment. I truly appreciate your support!
Latest Posts
- Simon Says Stamp Groovy Birthday

- Simon Says Stamp Amazing Scattered Leaves

- Simon Says Stamp Beautiful Friend Floral

- Together by Design Featuring Pinkfresh Studio

- Simon Says Stamp Basket Bunny
Latest Instagram Posts