Simon Says Stamp Grungy Dewdrop Daisy

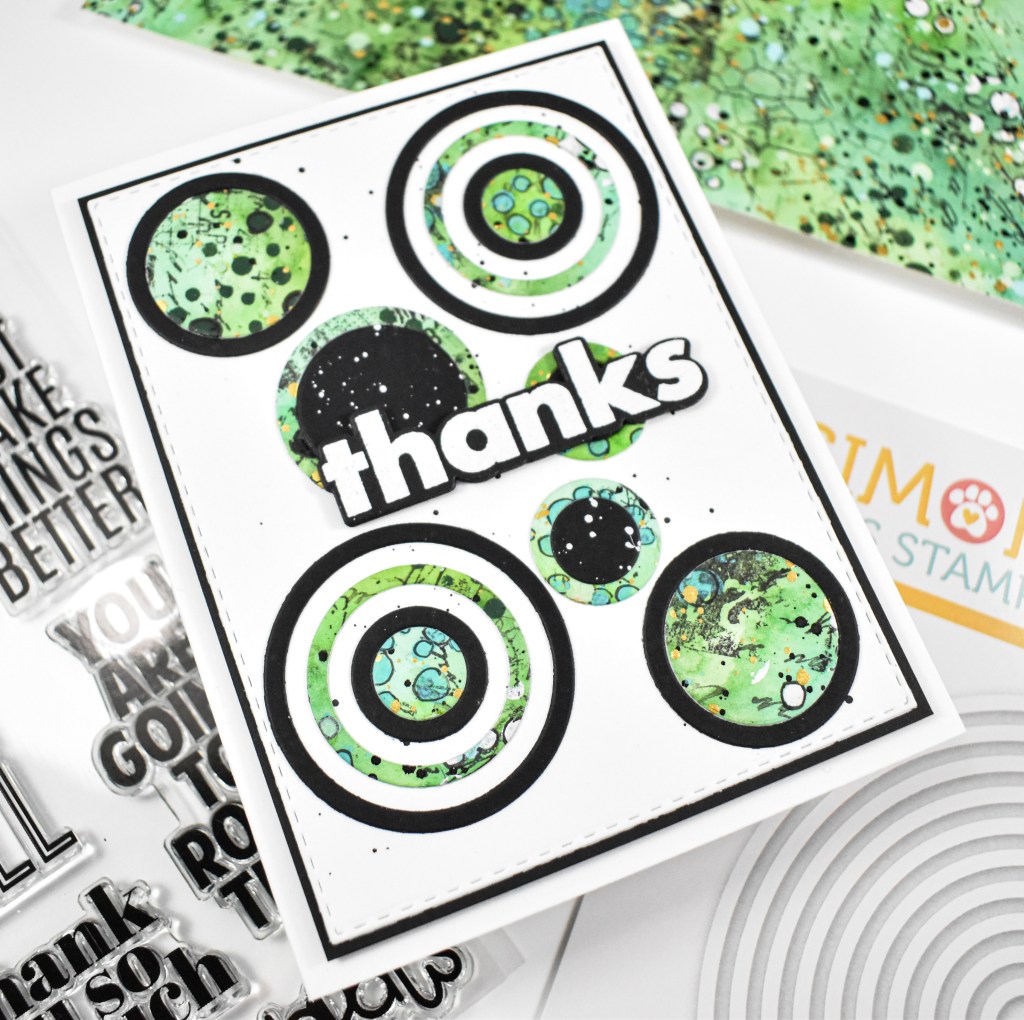
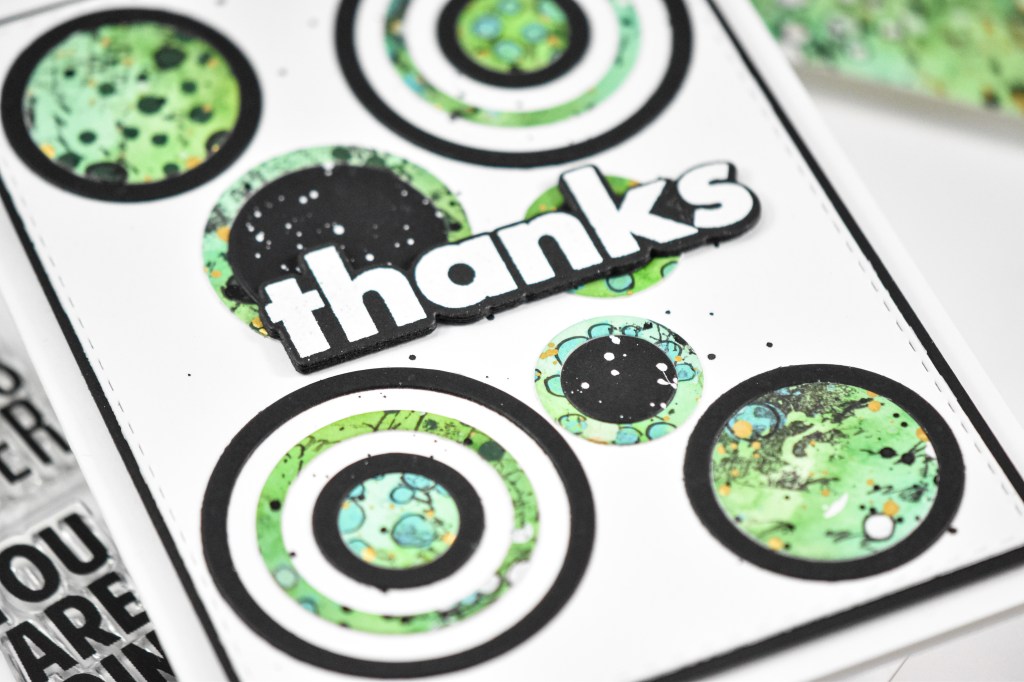
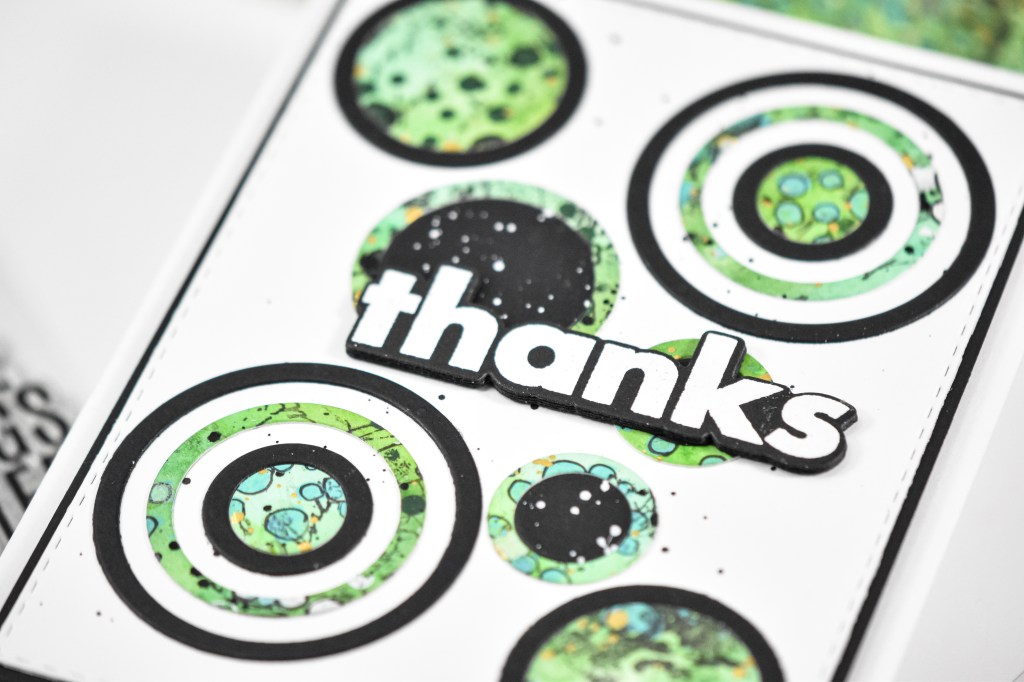
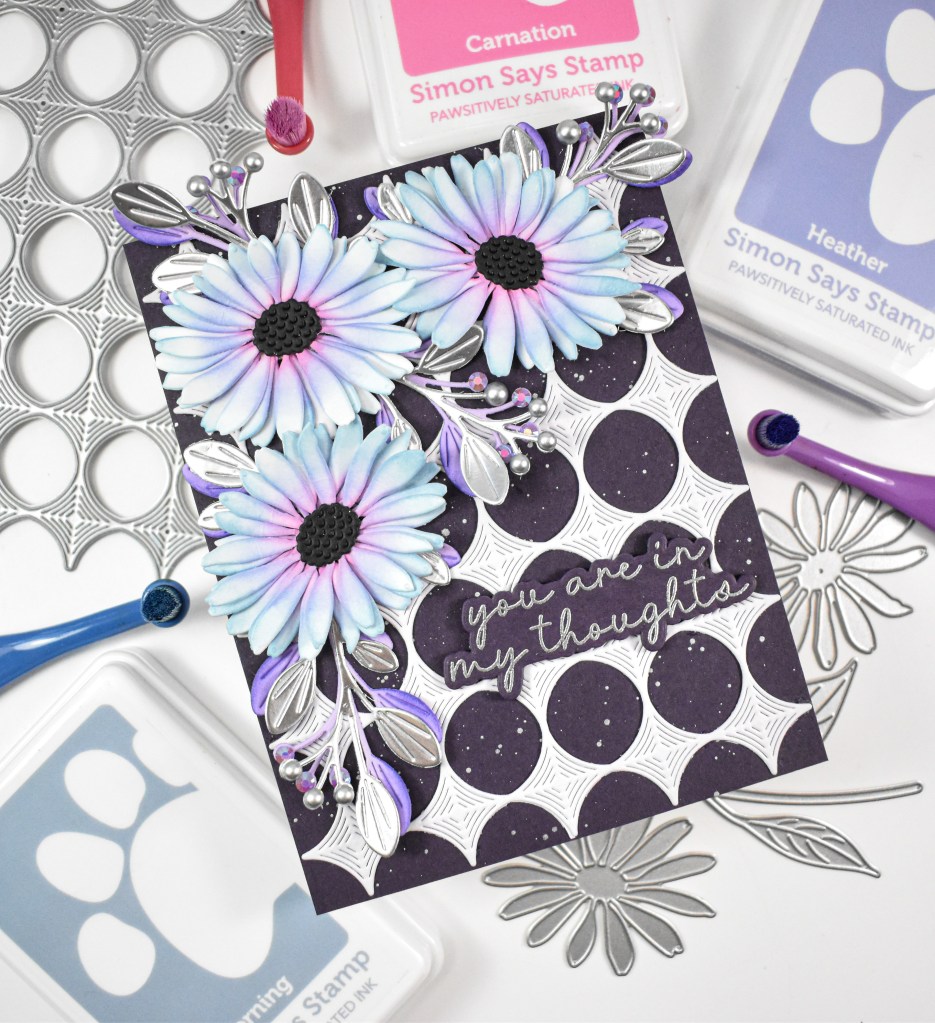
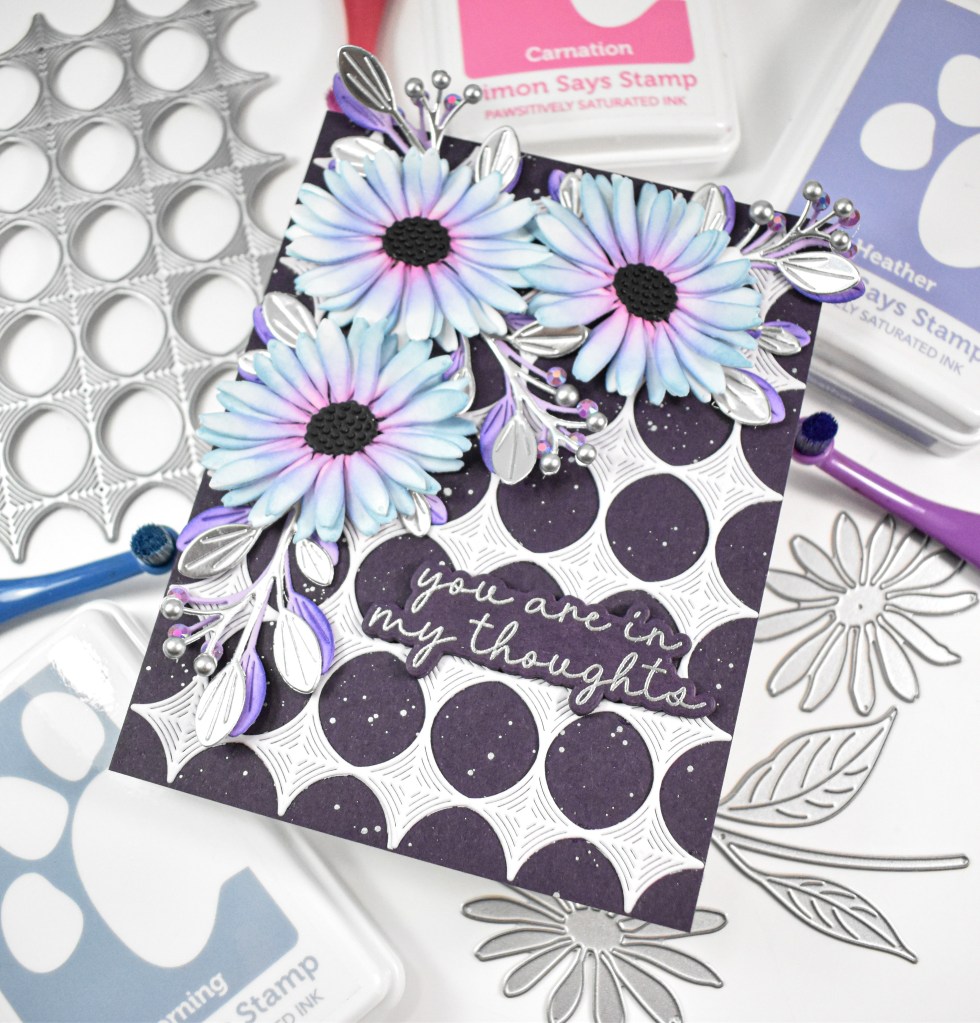
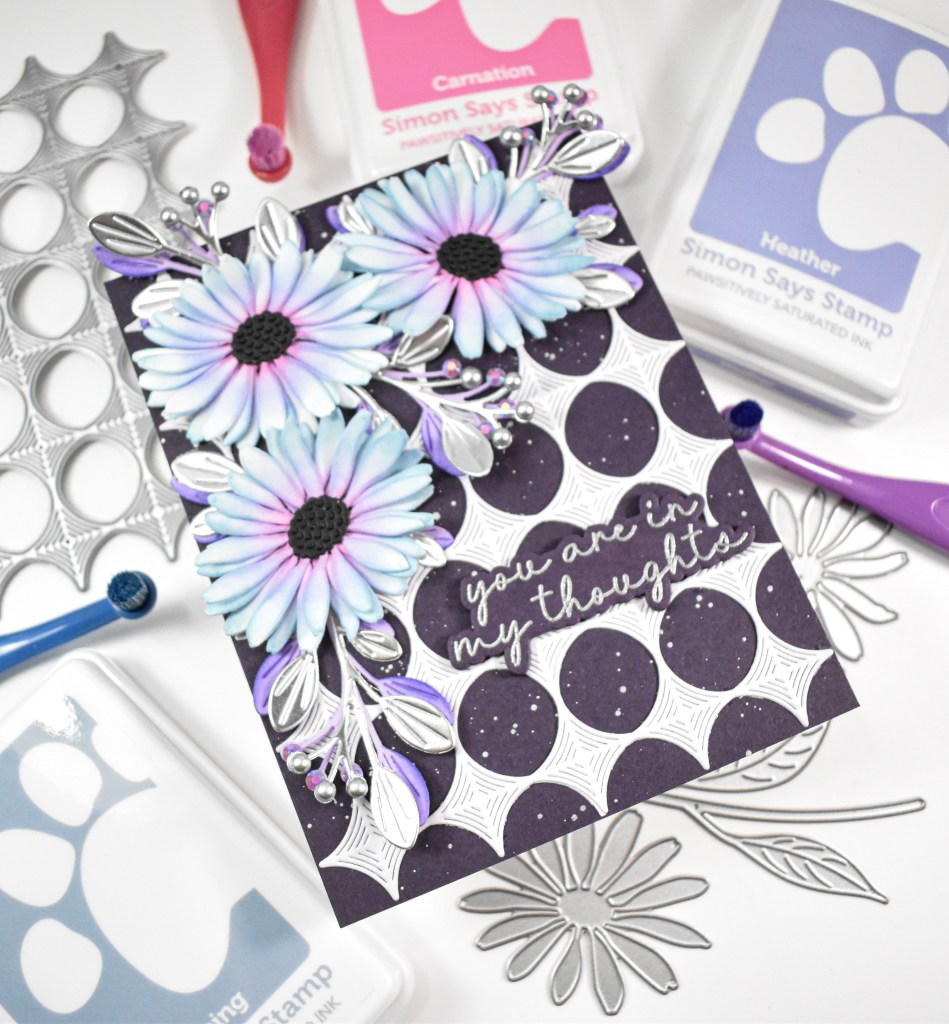
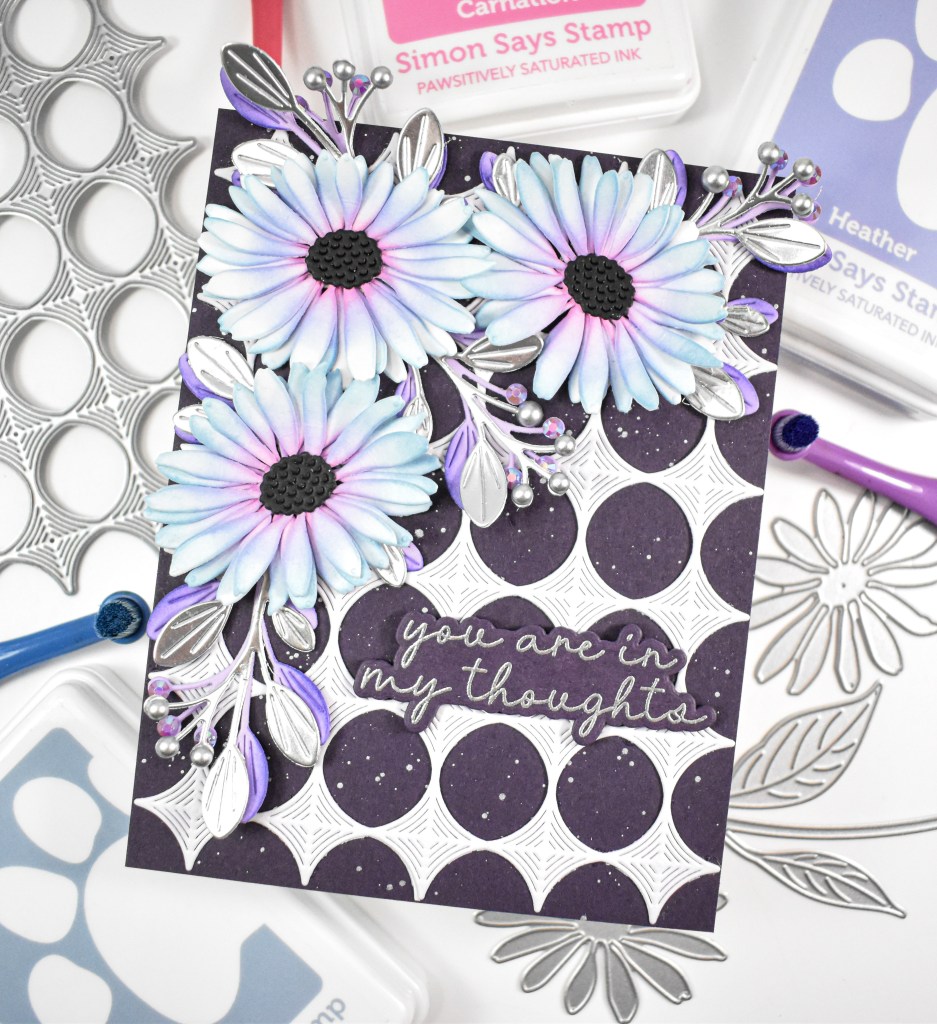
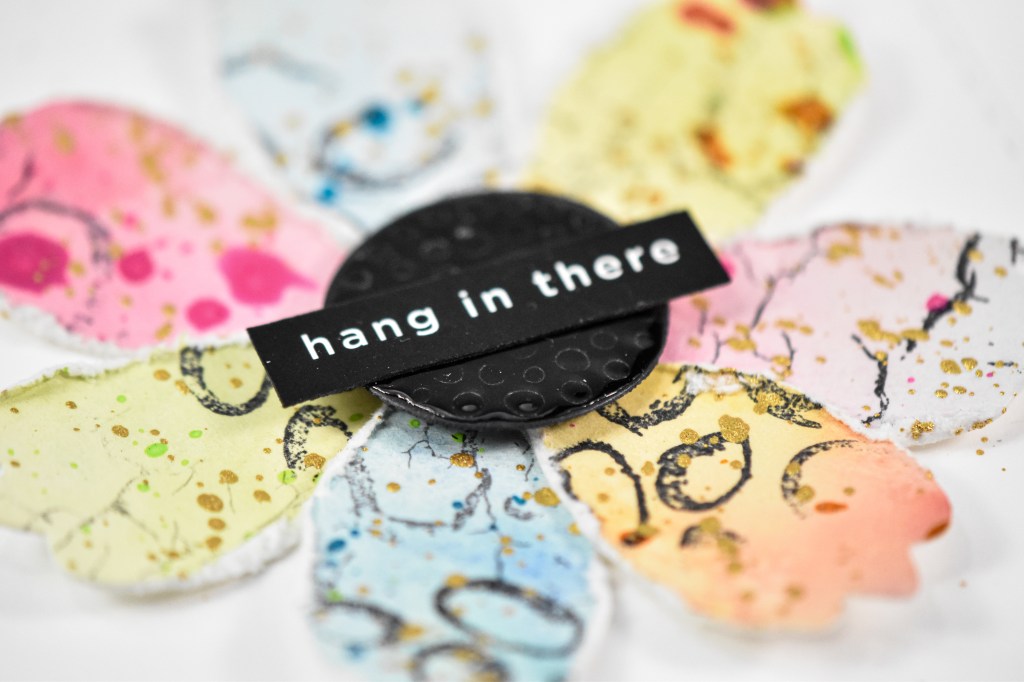
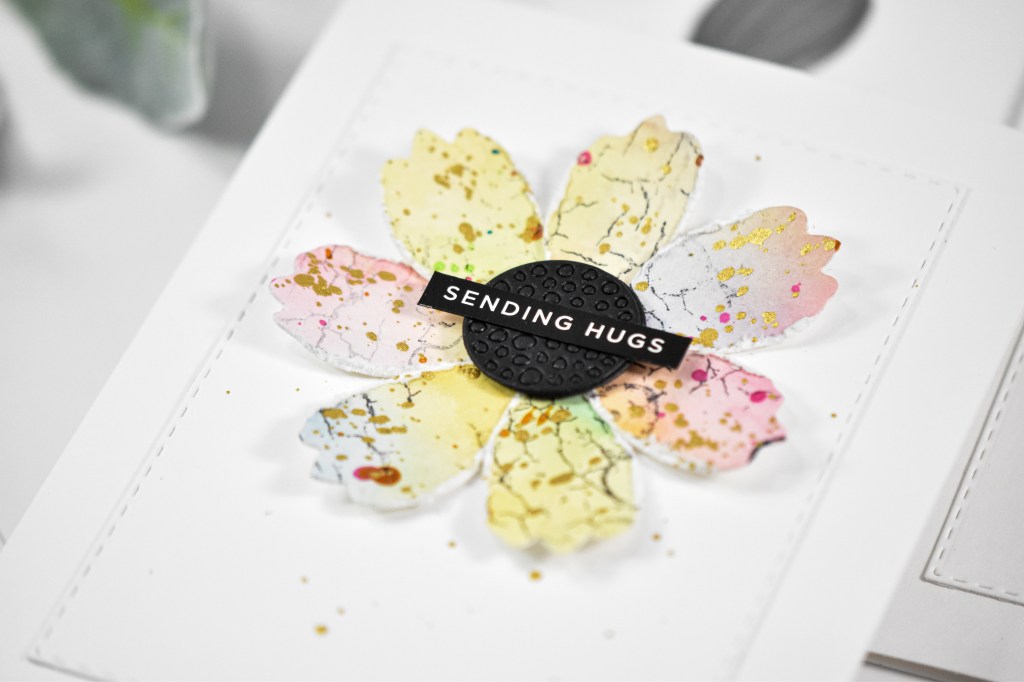
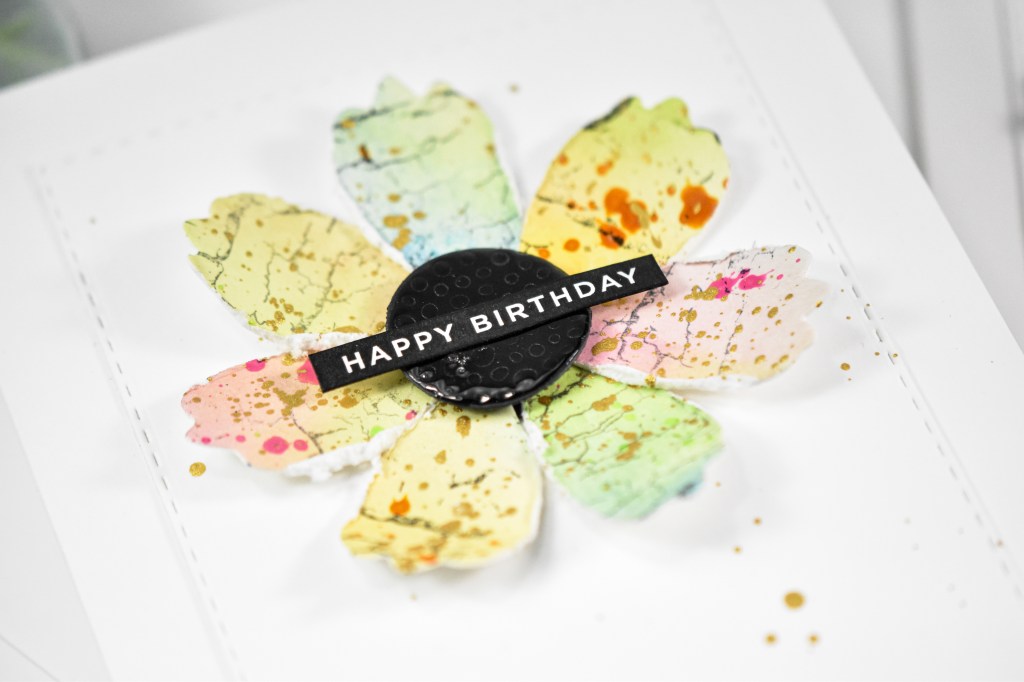
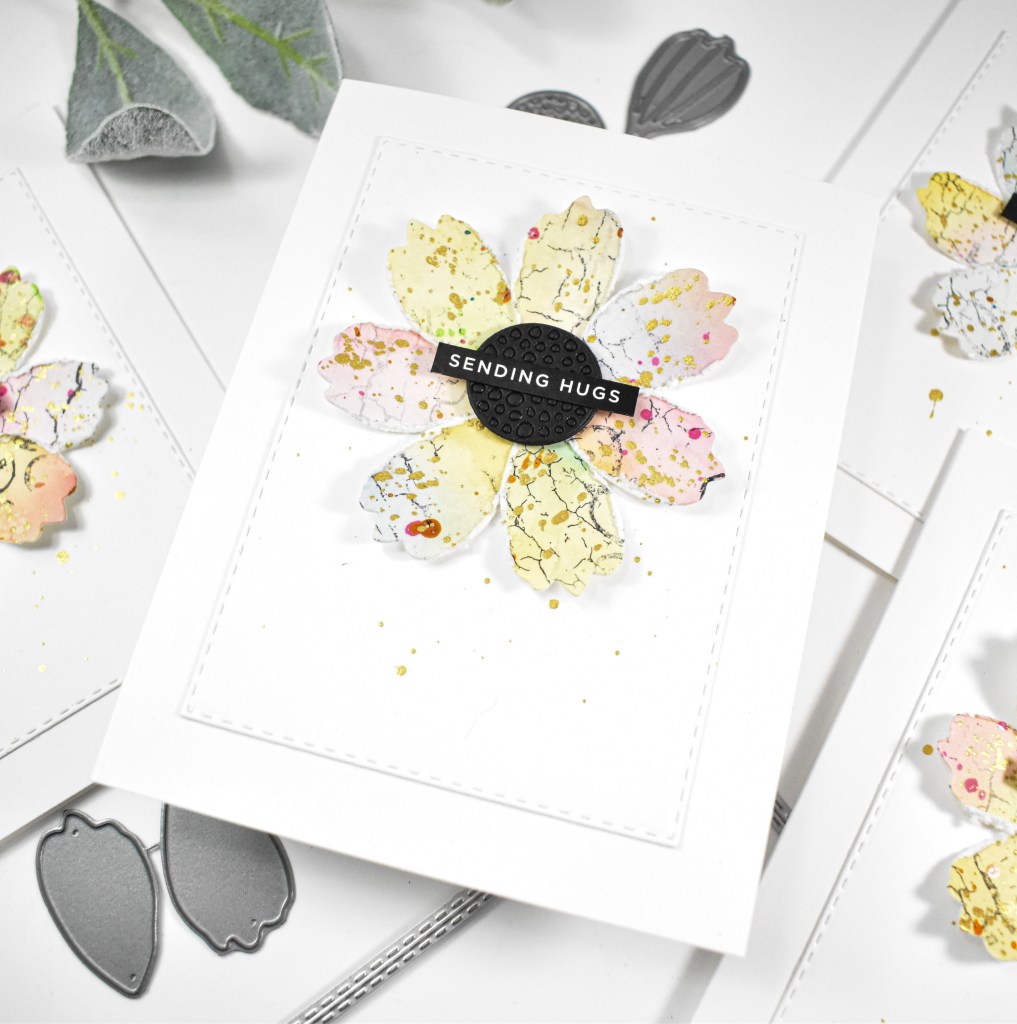
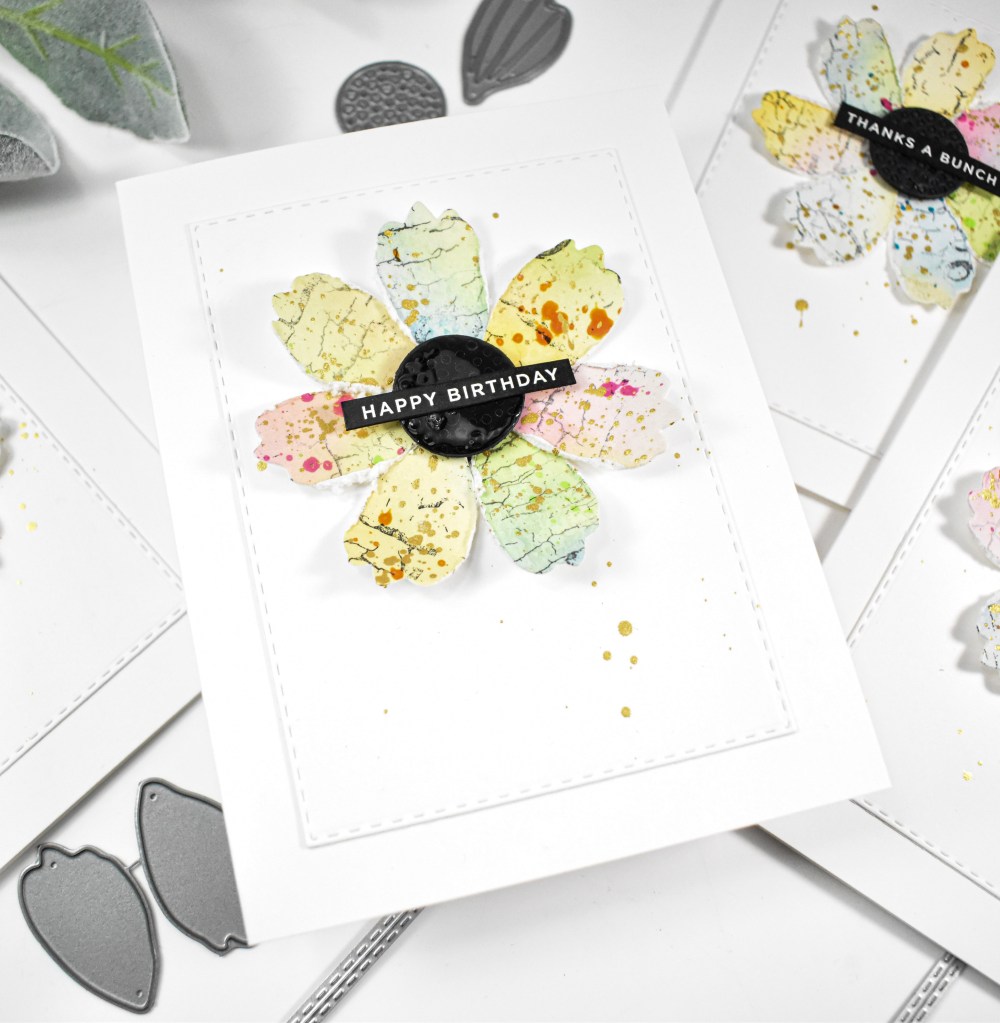
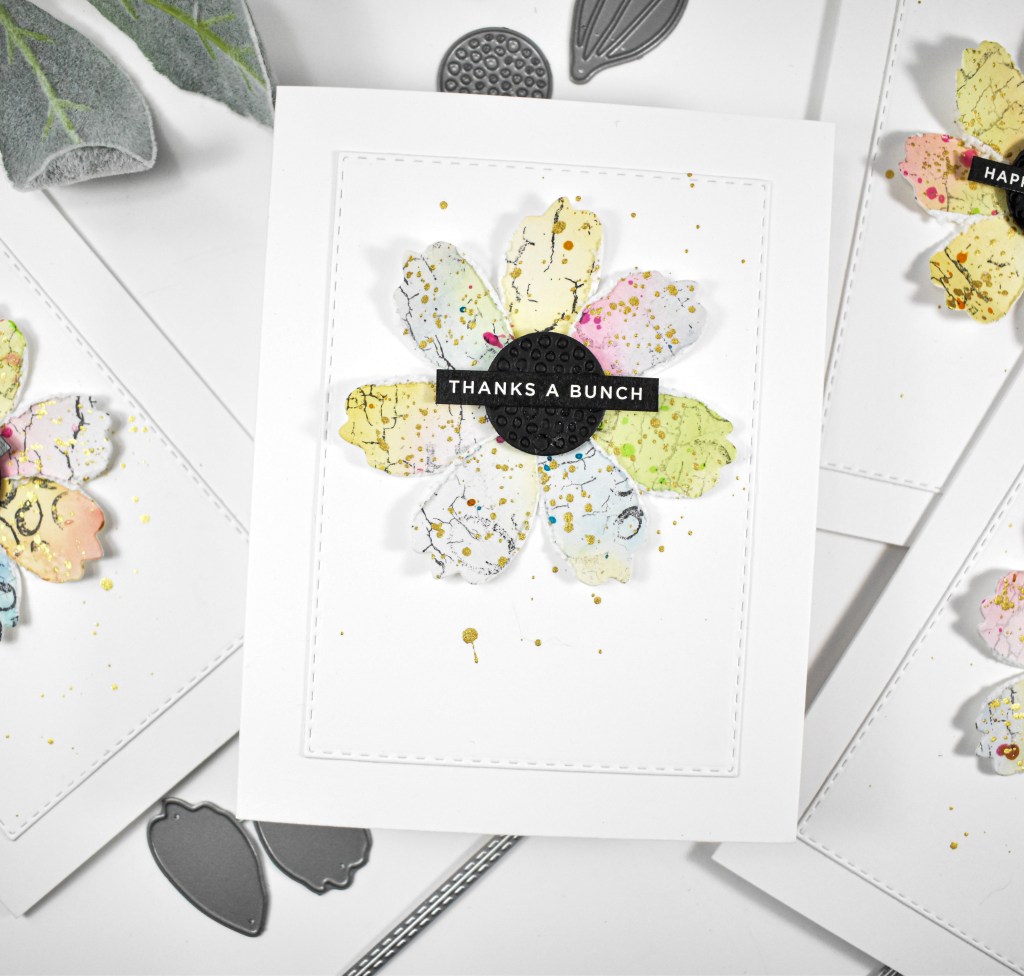
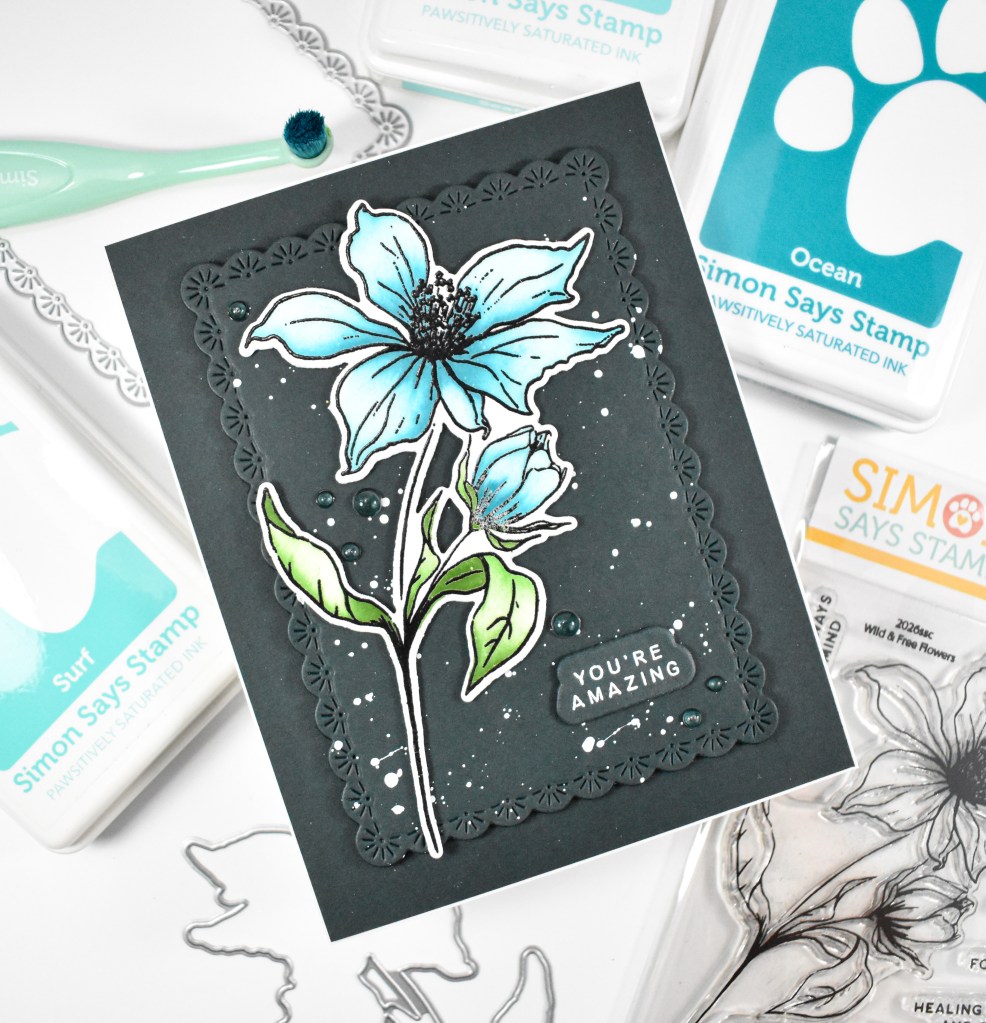
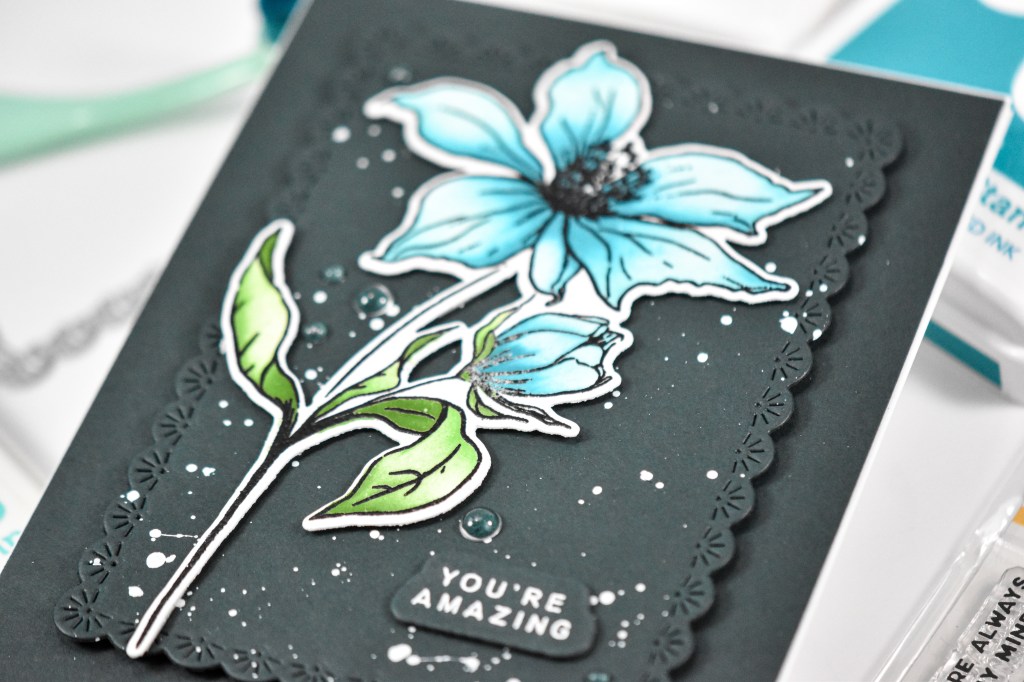
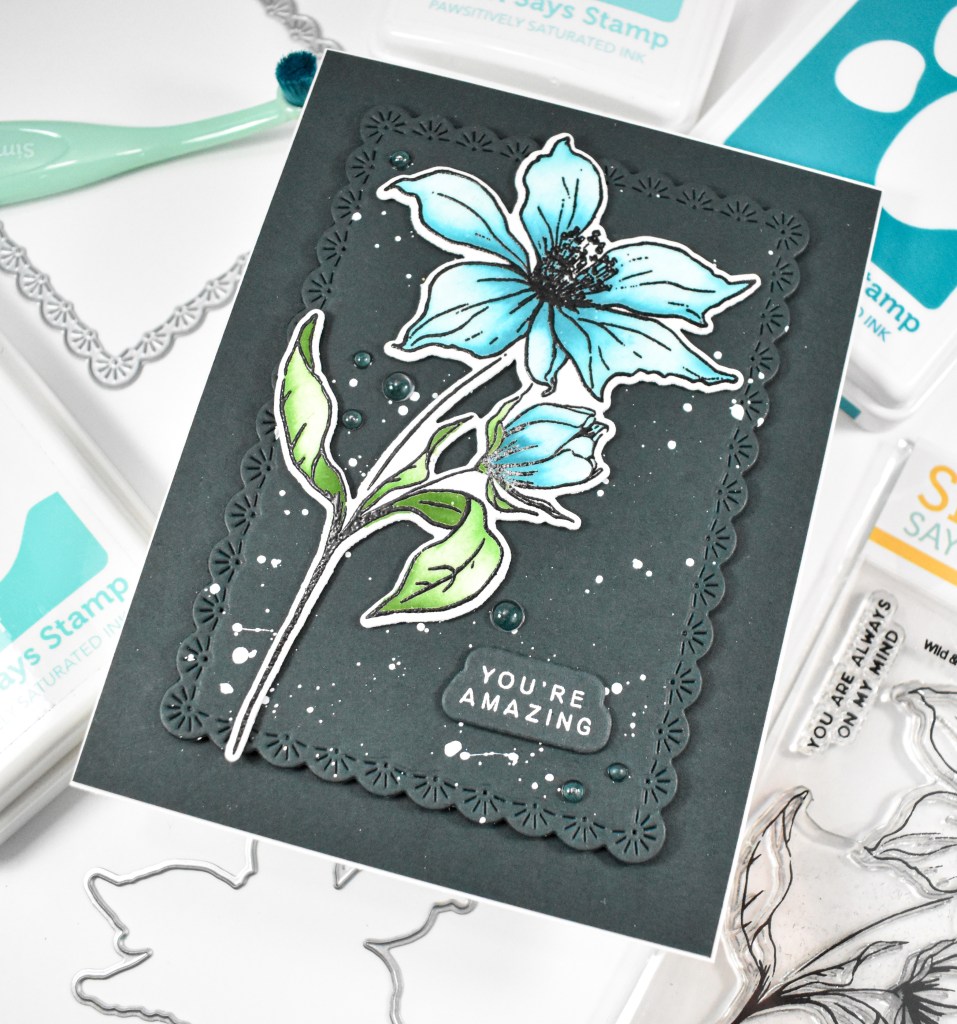
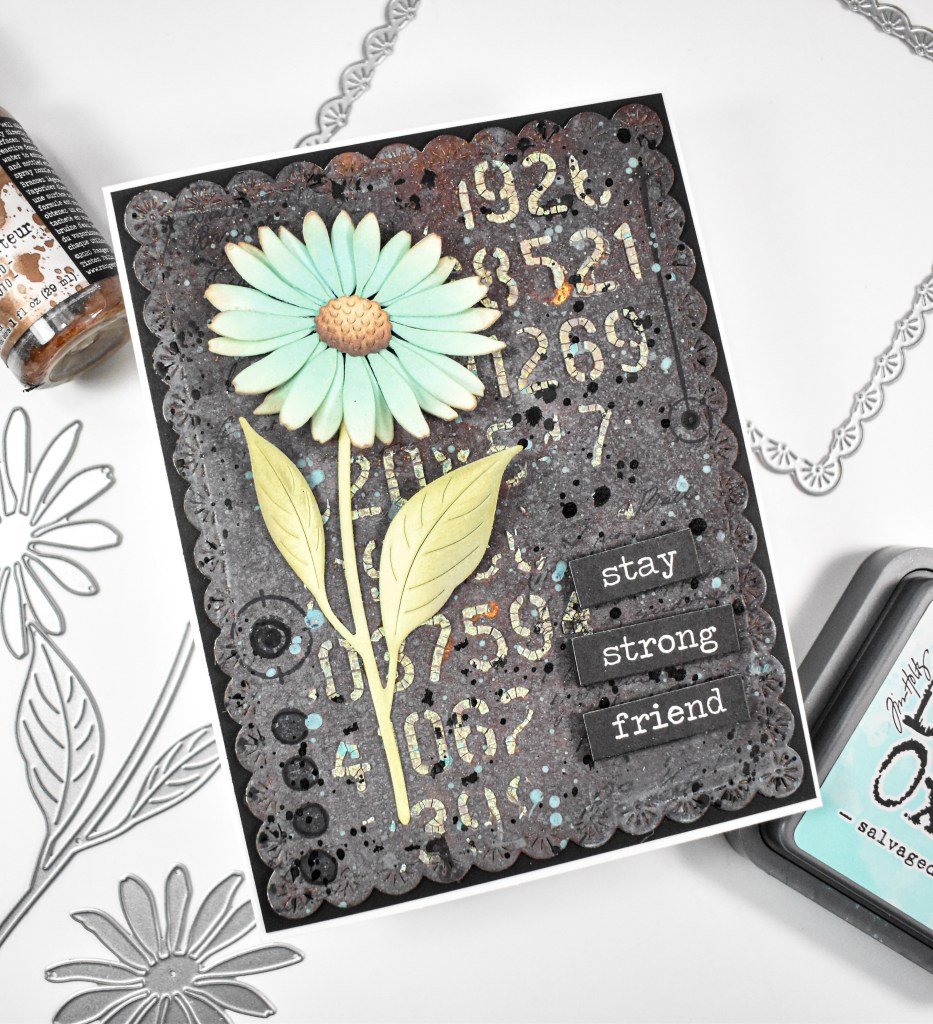
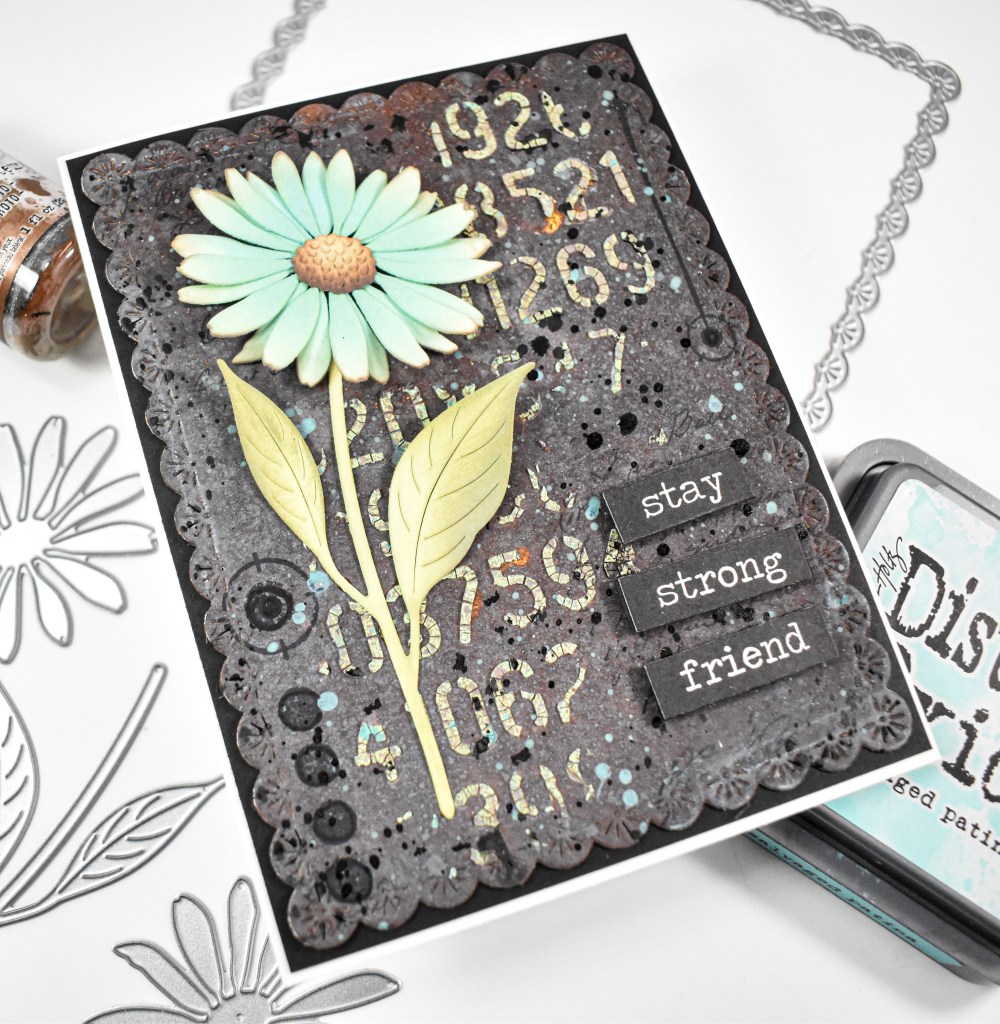
Hi Friends! Thanks for joining me! Today’s project is featuring the new Dewdrop Daisy from Simon’s latest release, Shine On. I had this background lying around from a previous project, and I thought that I could give the daisy a grungy feel for all of these components to work together! Let’s go through the deets!
NOTE: all supplies are linked in the thumbnails at the end of this blog post.
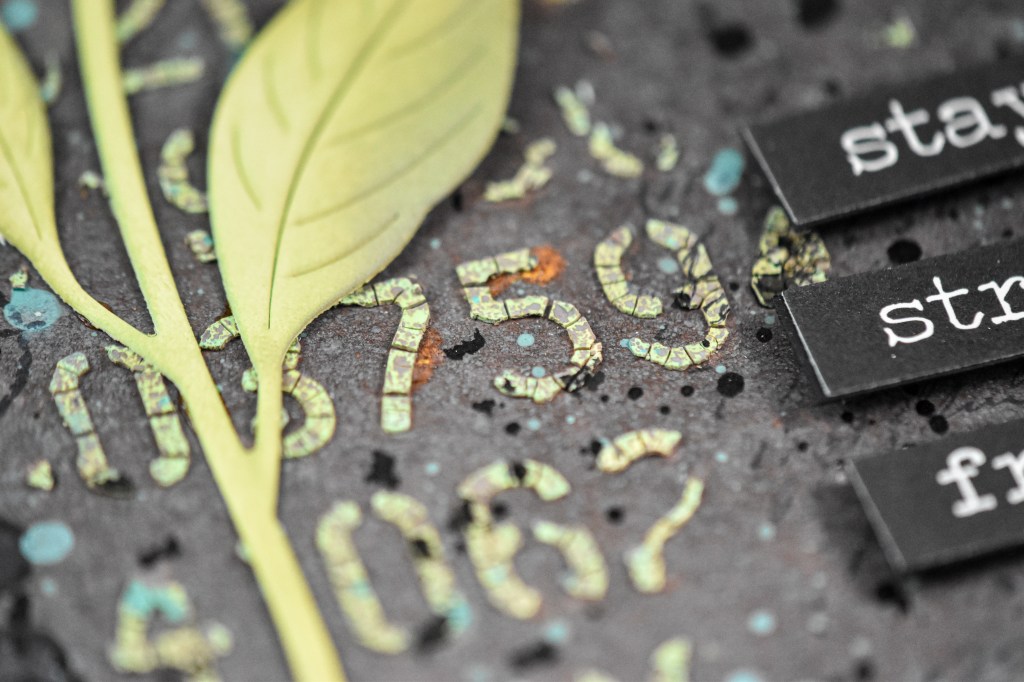
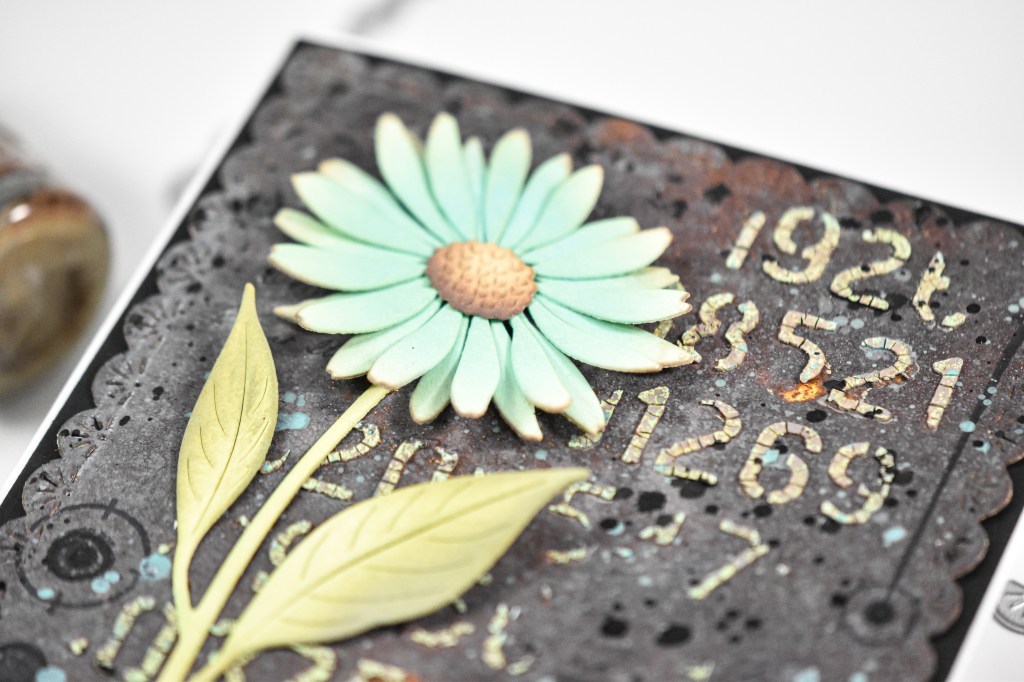
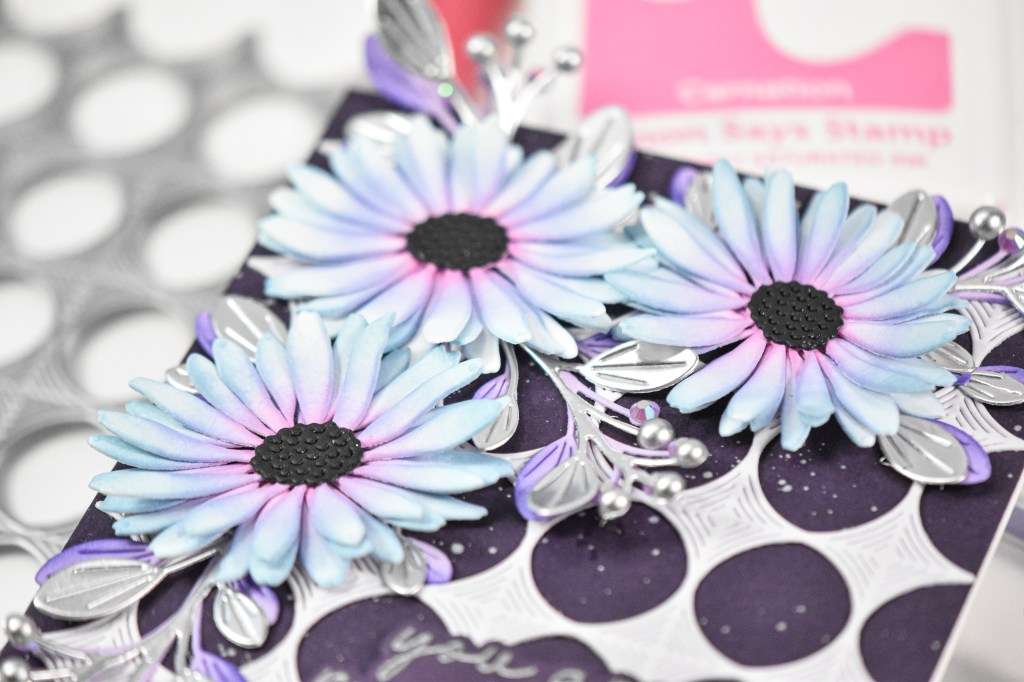
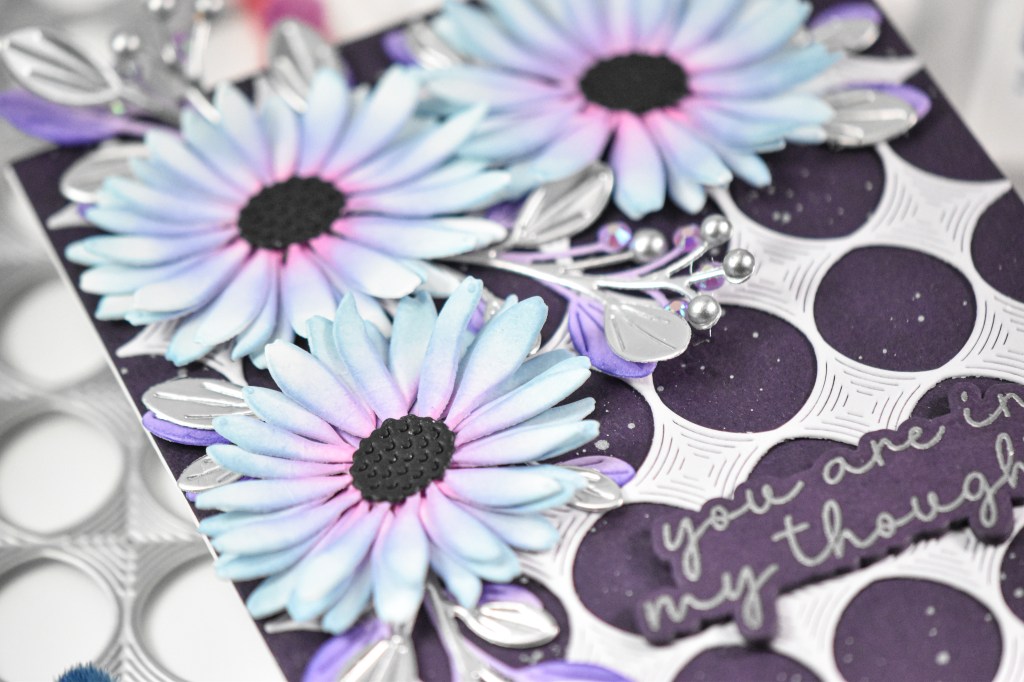
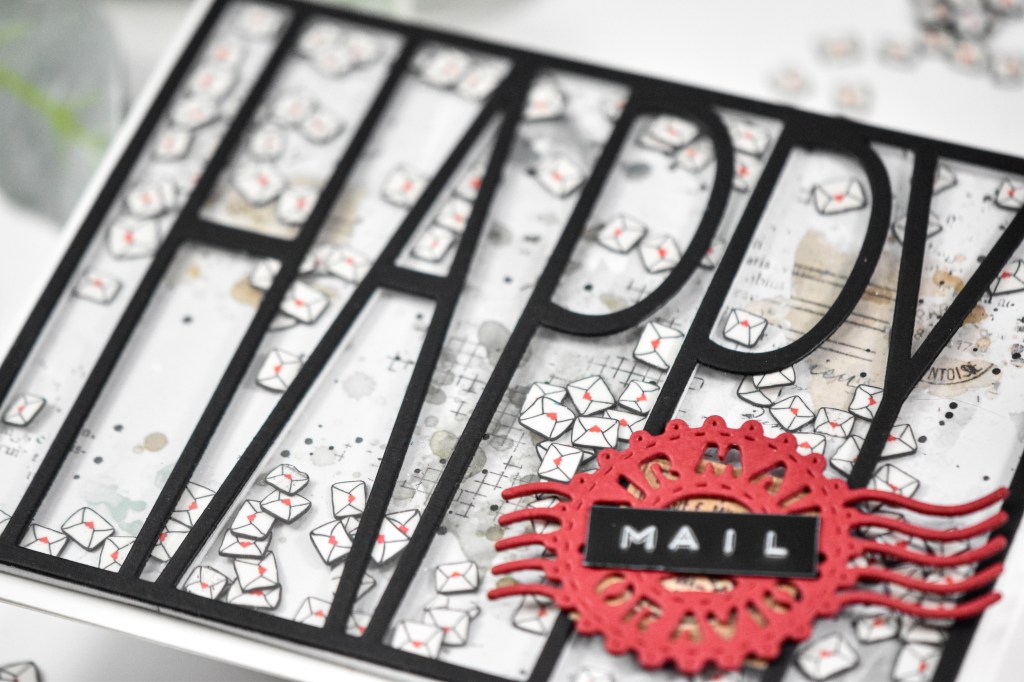
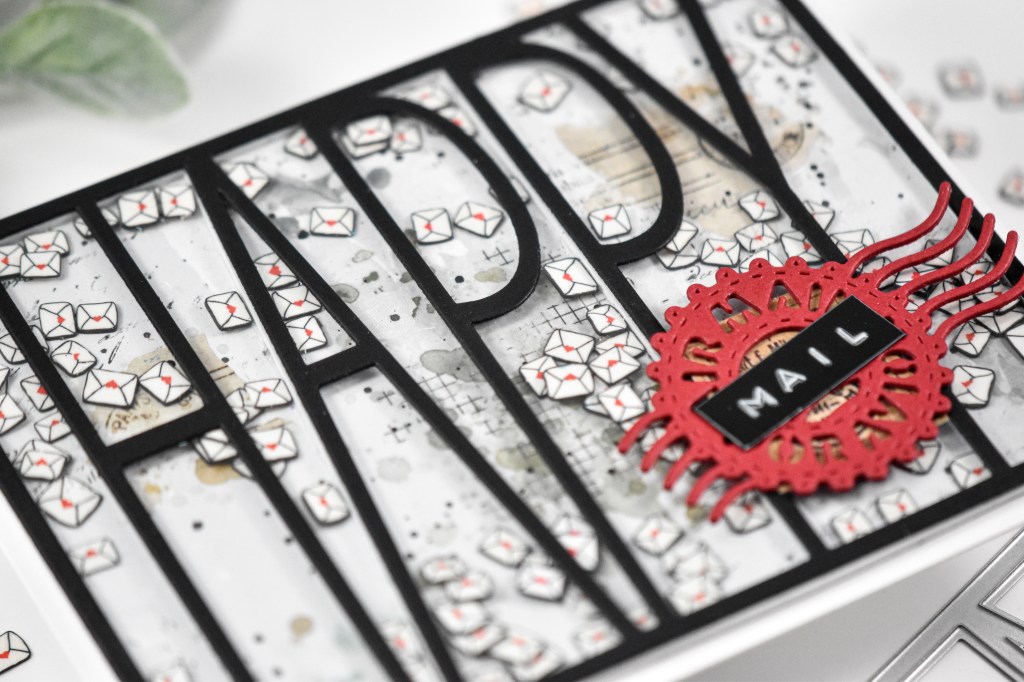
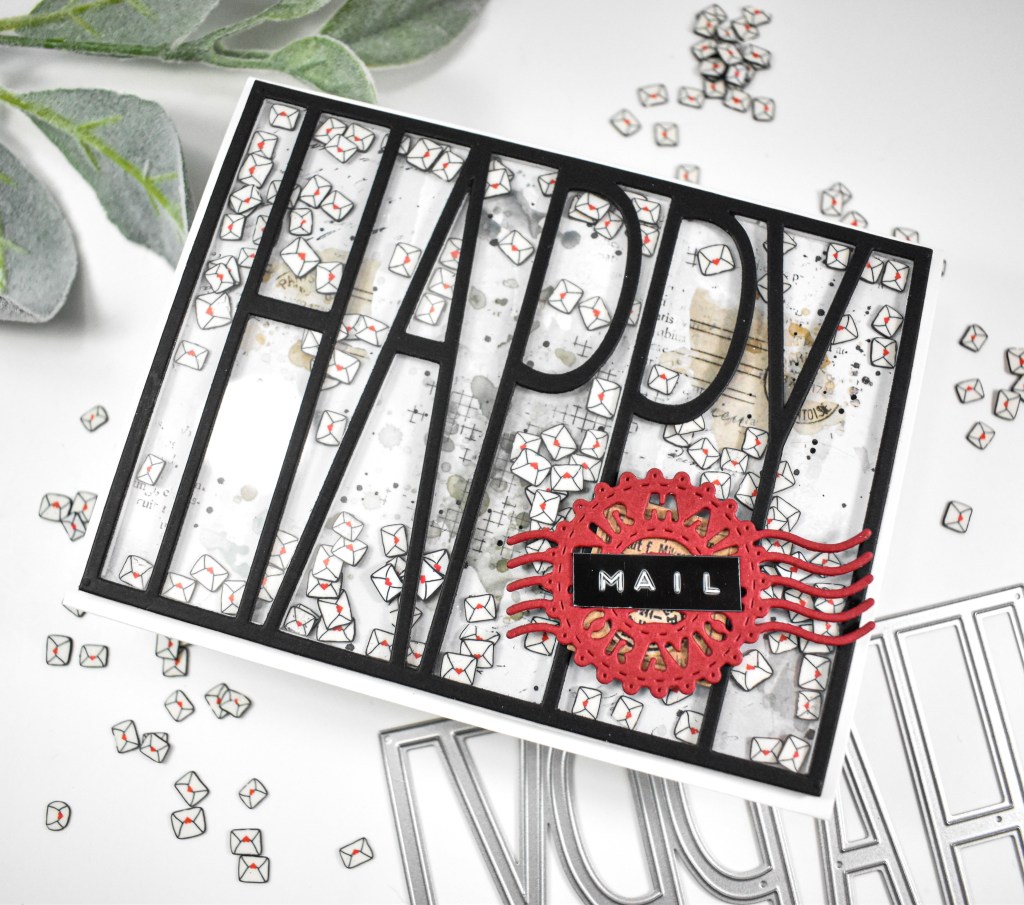
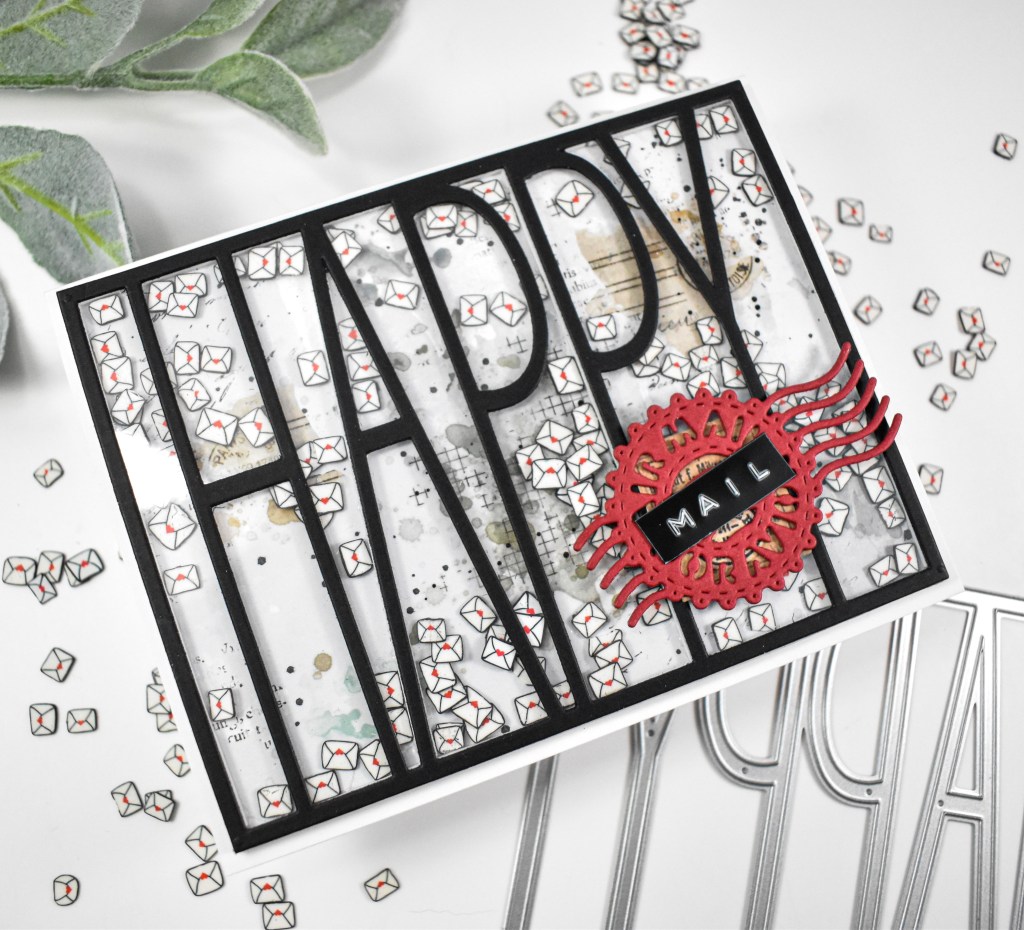
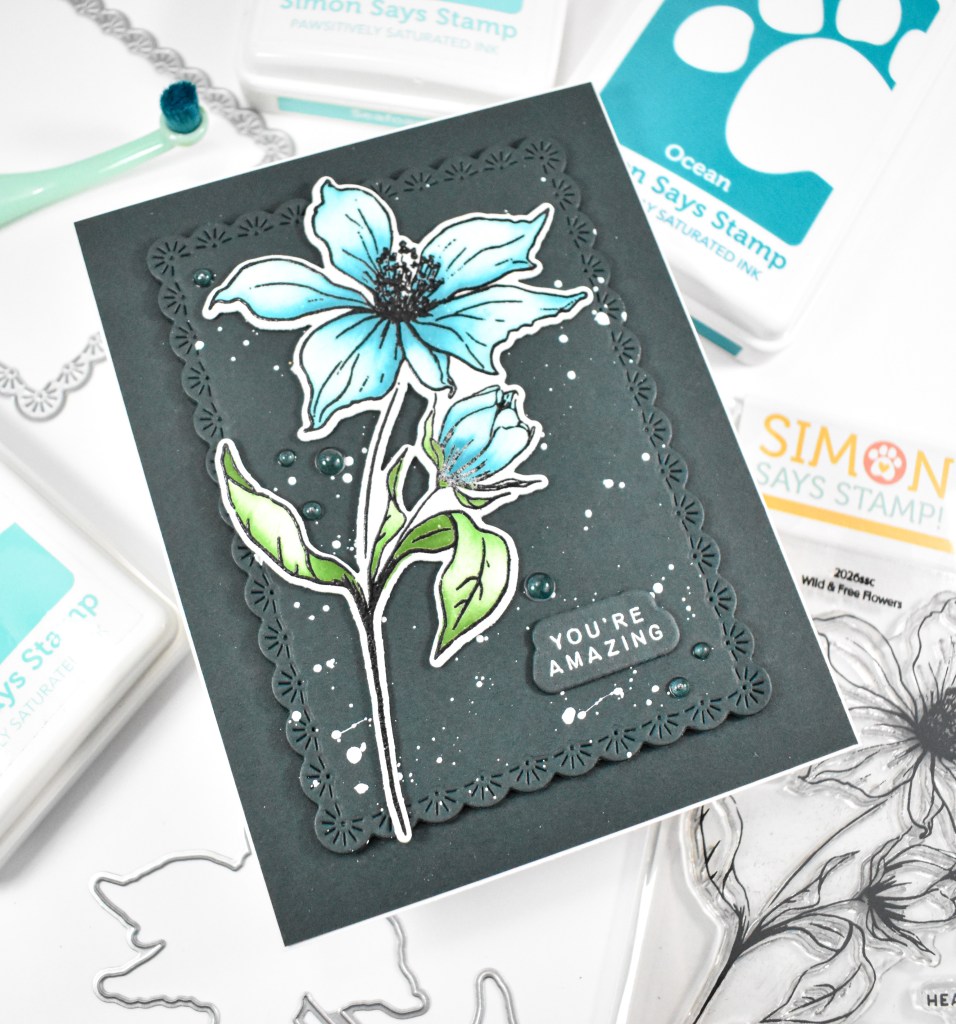
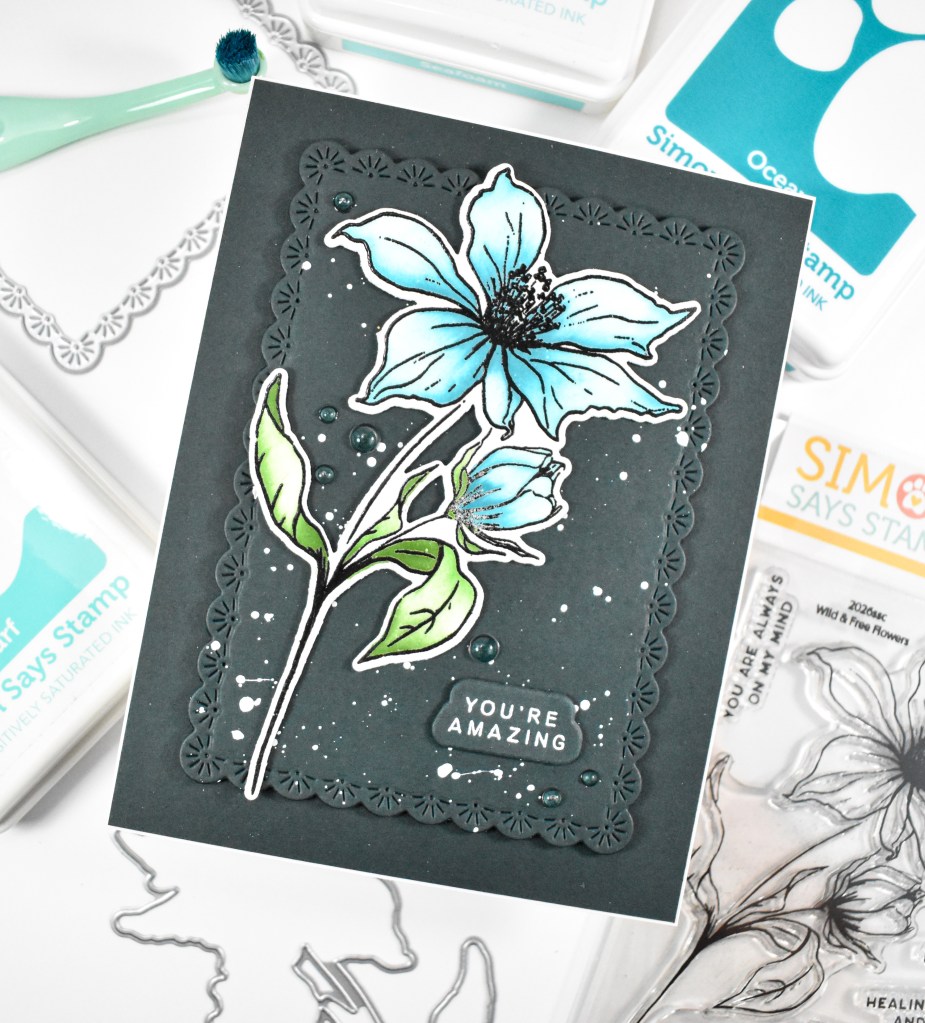
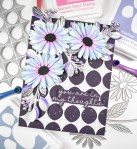
As I said, I already had this background panel, which was created using Distress Oxide Sprays, inks and paint. I die cut the panel using the Sparkler Scallop Frames and did some stamping, stenciling and splattering on it. The daisy was die cut from cream cardstock and ink blended using Distress Oxide Salvaged Patina, Walnut Stain and Peeled Paint.
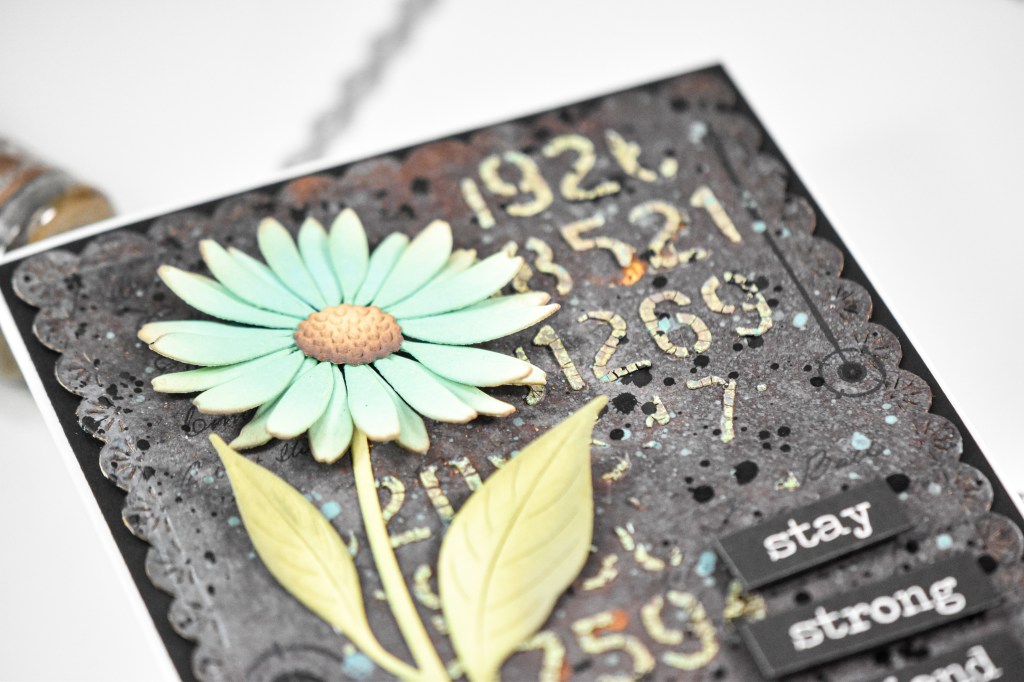
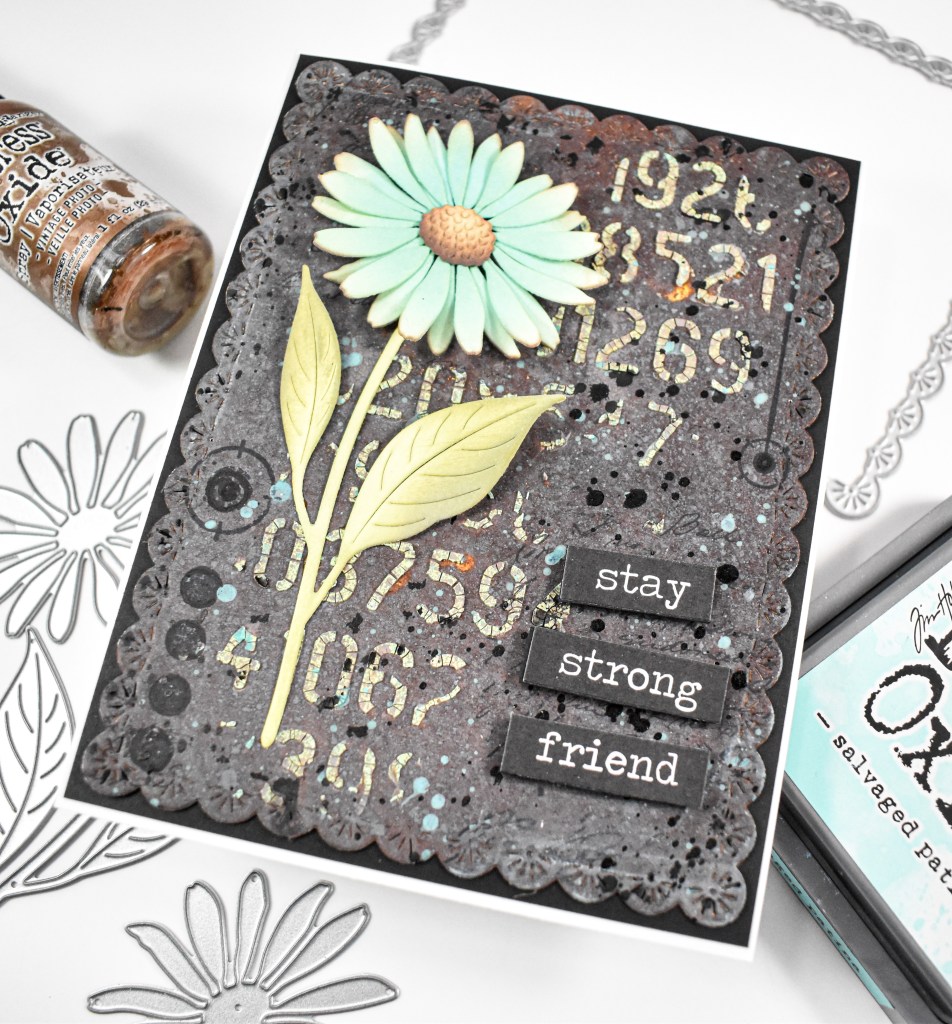
My background panel was adhered to a black panel for contrast, the stem was glued in place, while the flower and sentiment were adhered with foam tape to finish up.
That’s it for this one! I hope you enjoyed it as much as I did! Make sure to check out the entire Shine On release for a look at all of the new goodies! Thanks for stopping by, and I hope you have an amazing day!

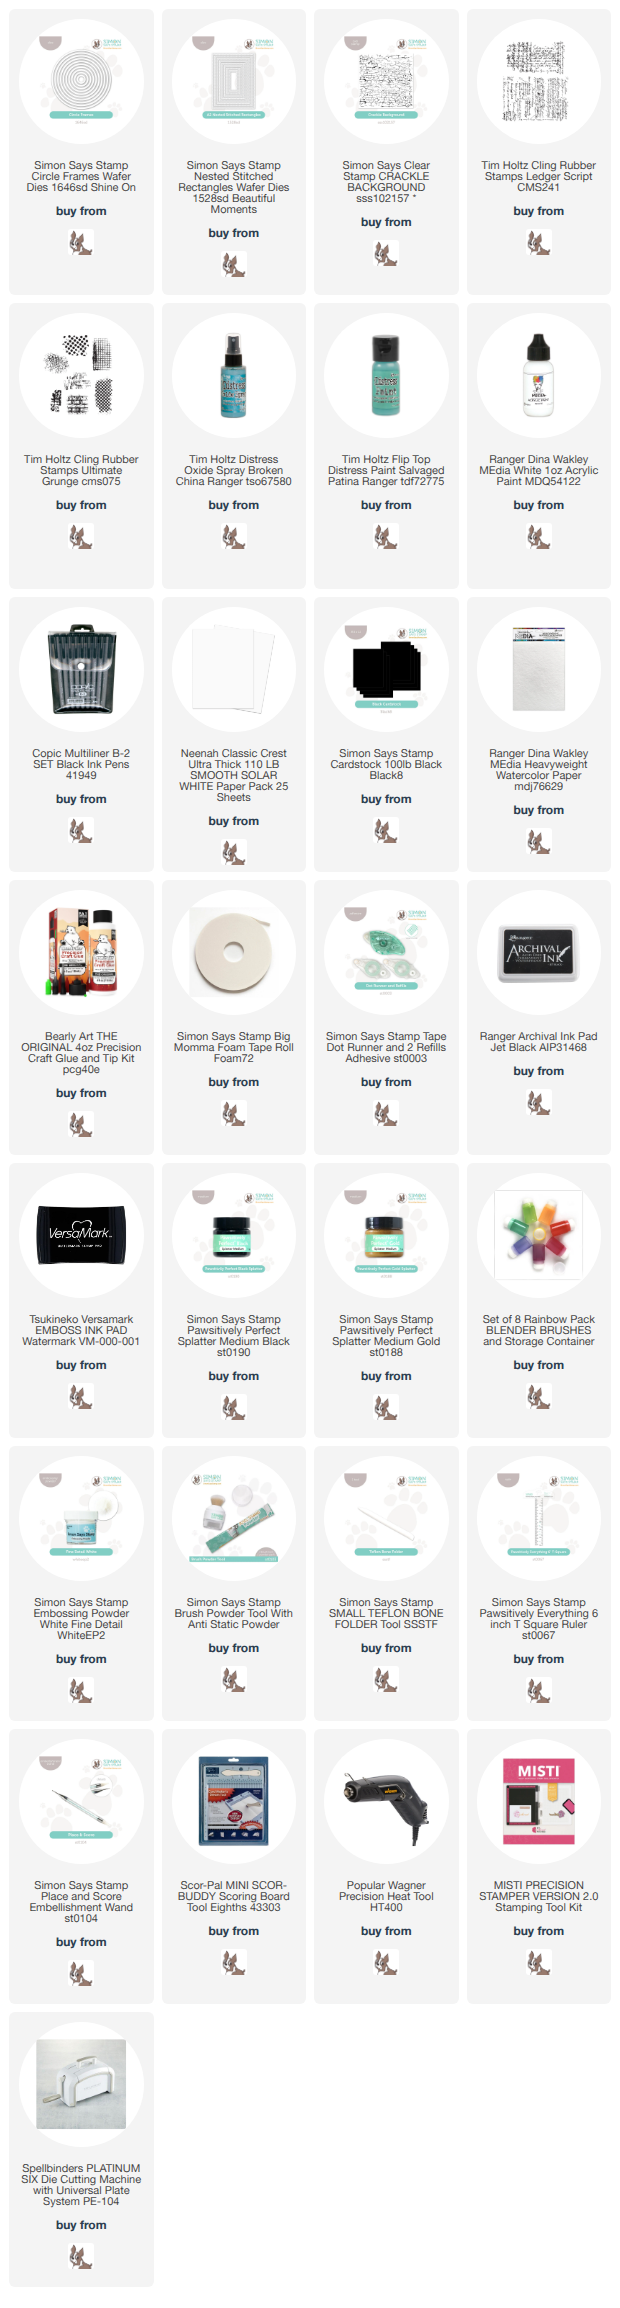
Supply List
Affiliate links used at no cost to you. What does this mean? If you use the links within this post to make a purchase, I receive a small commission, which allows me to continue to post crafty content for your enjoyment. I truly appreciate your support!
Latest Posts
- Simon Says Stamp Grungy Dewdrop Daisy

- Simon Says Stamp Pastel Birthday Wishes

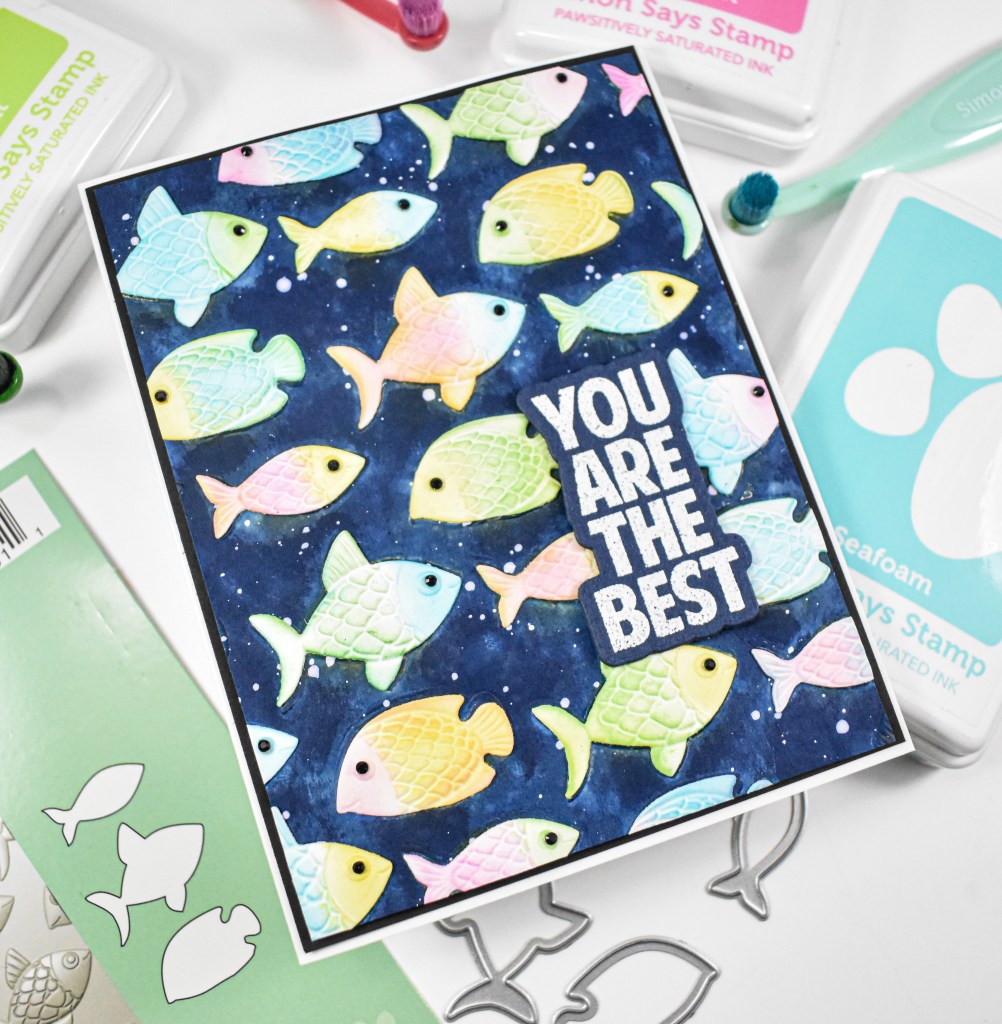
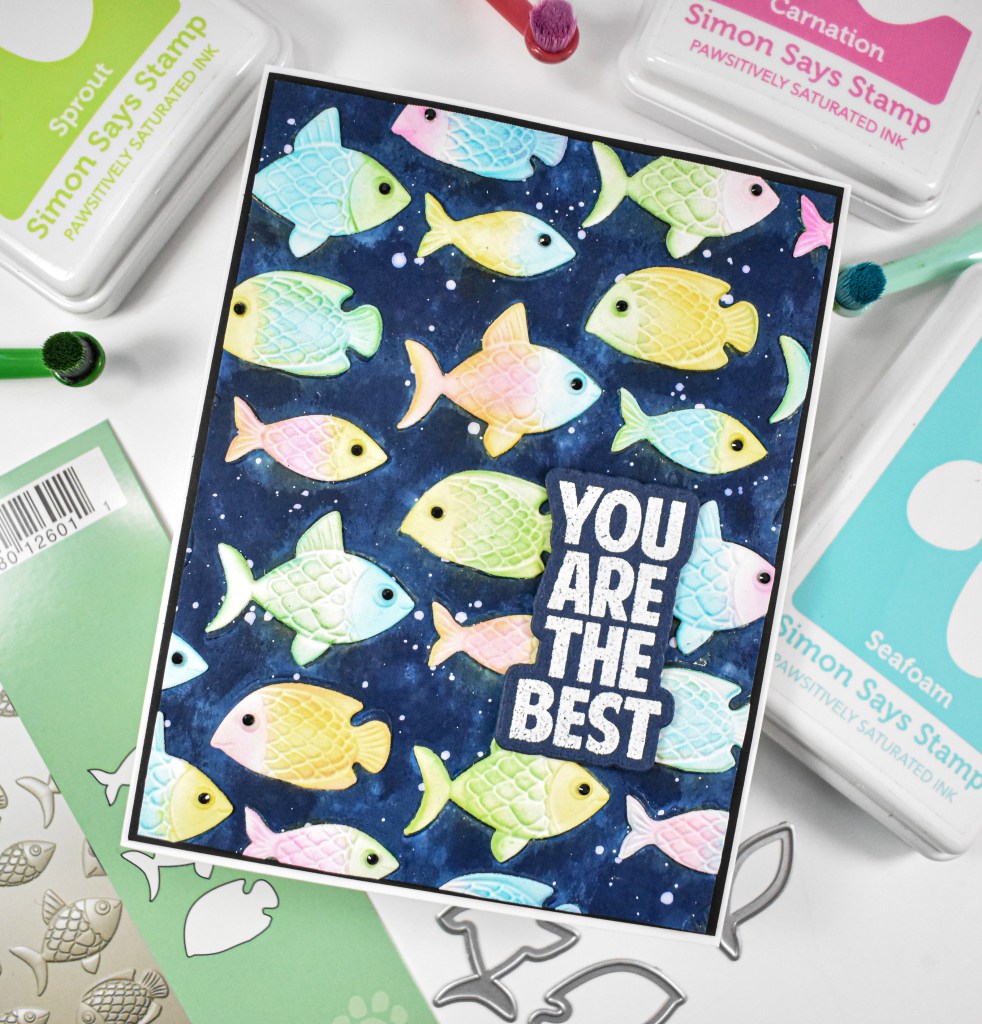
- Simon Says Stamp Best Fish

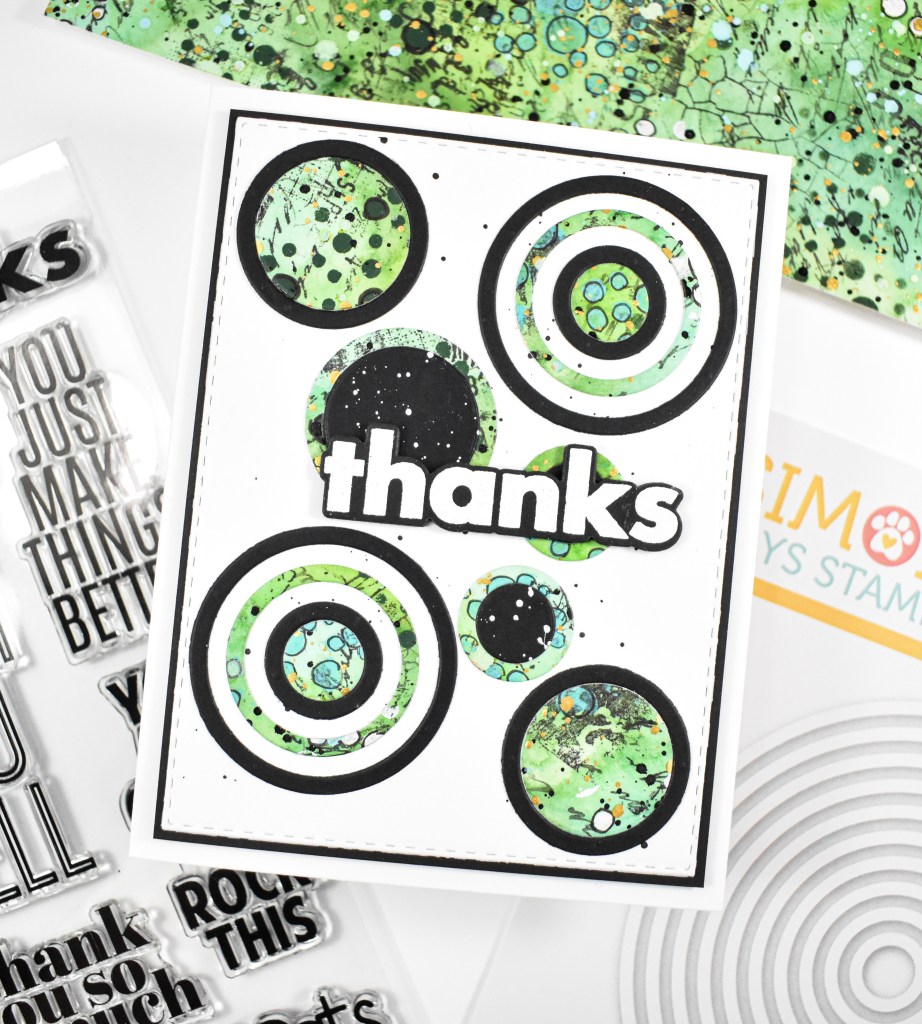
- Simon Says Stamp Circle Thanks

- Simon Says Stamp Glowing Daisies
Latest Instagram Posts