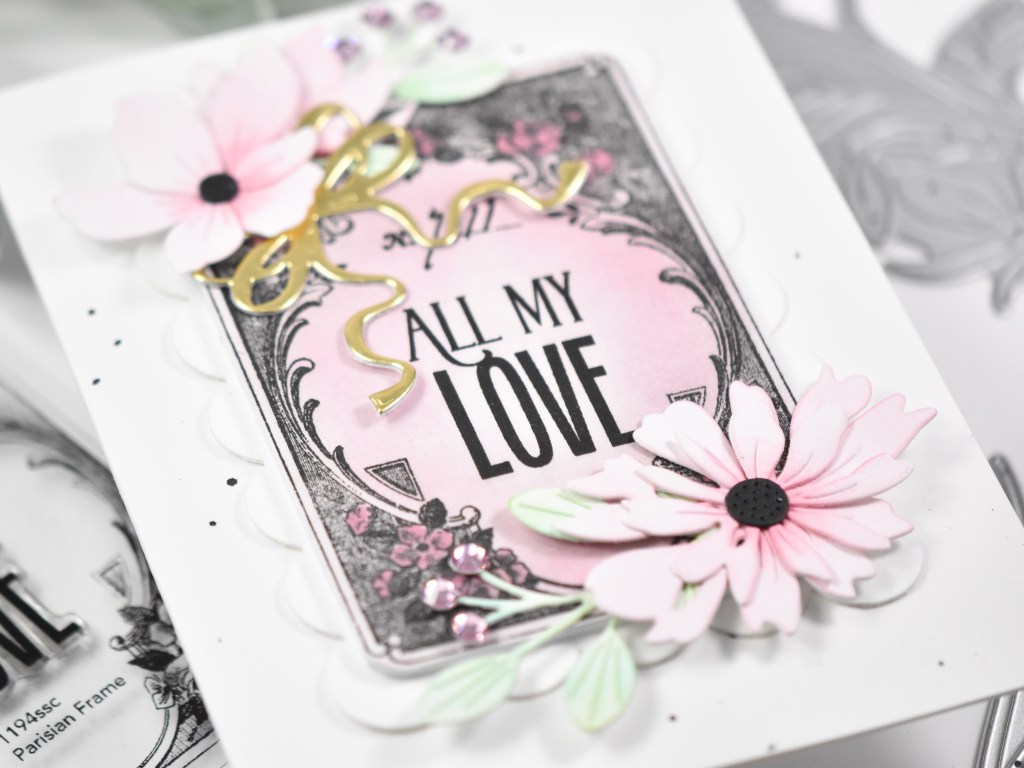
Spellbinders Floral Scribbled Letter

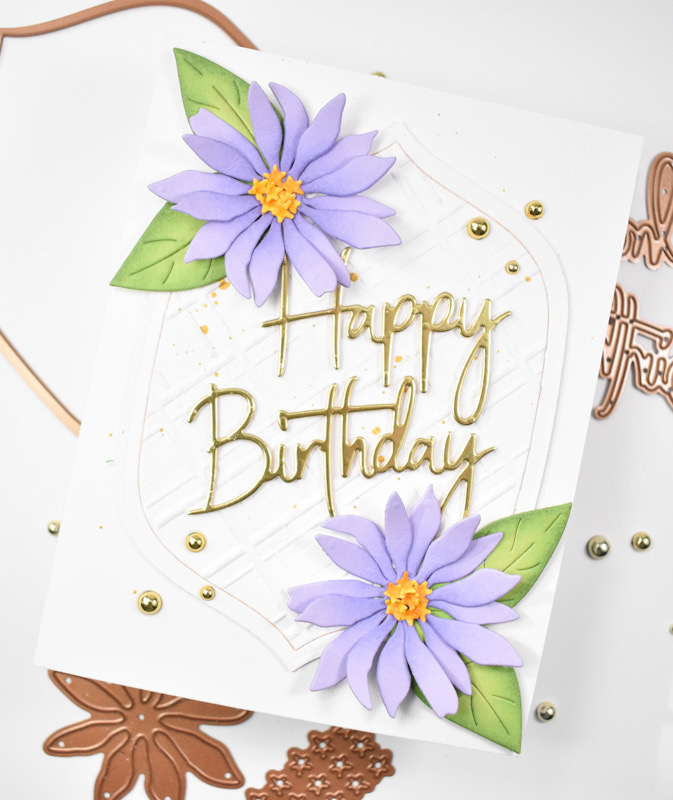
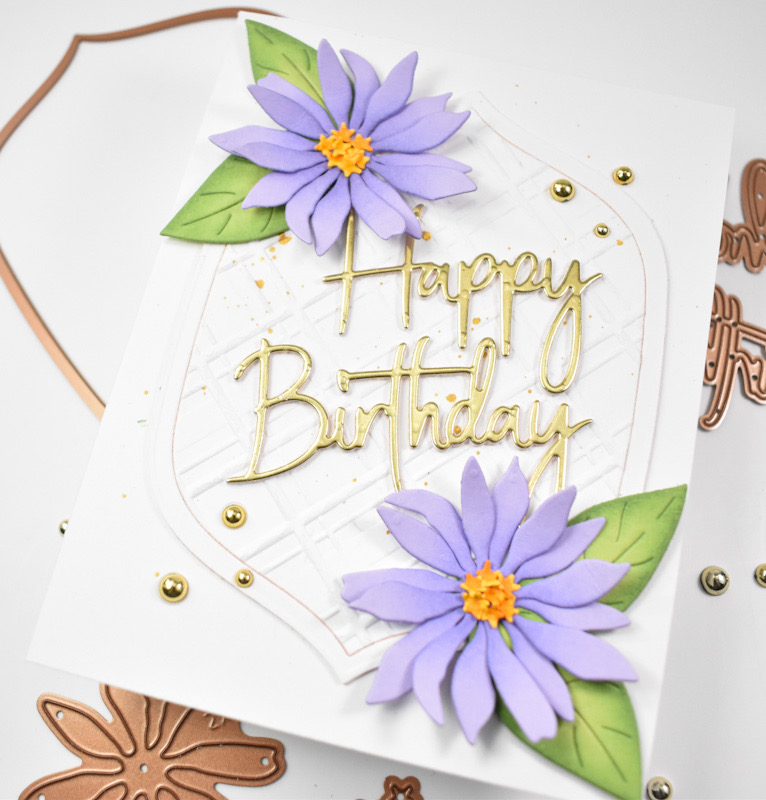
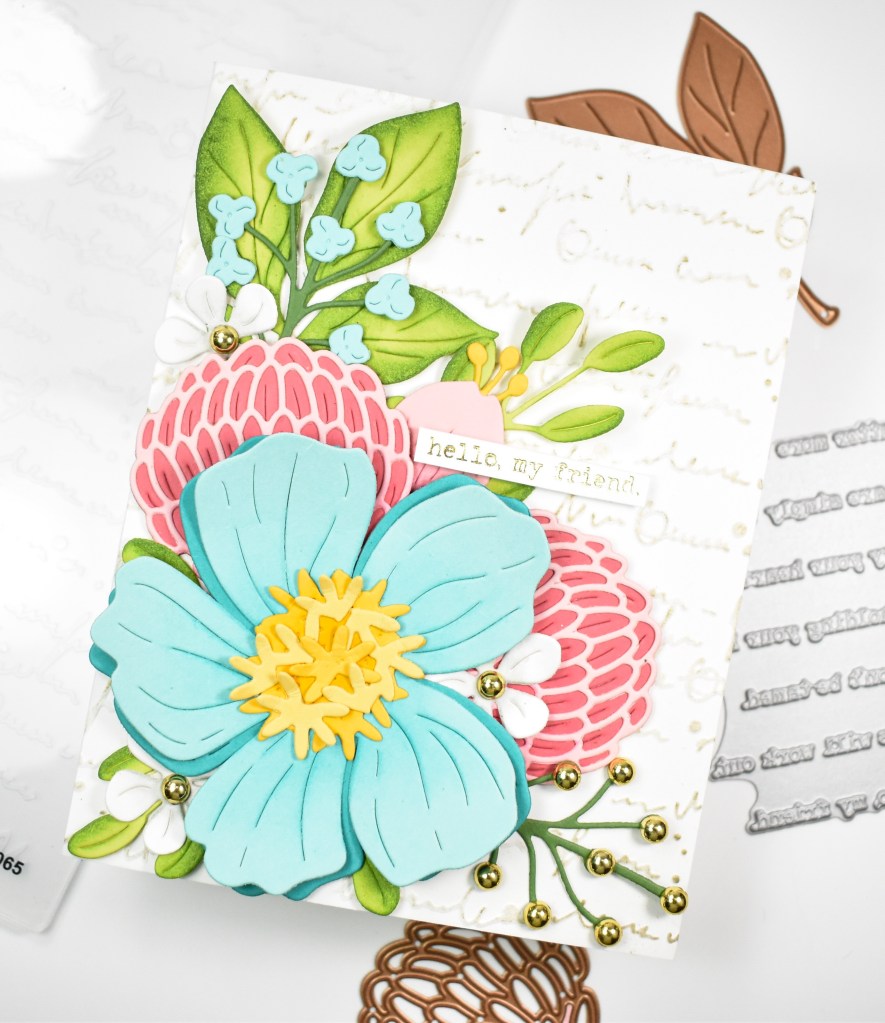
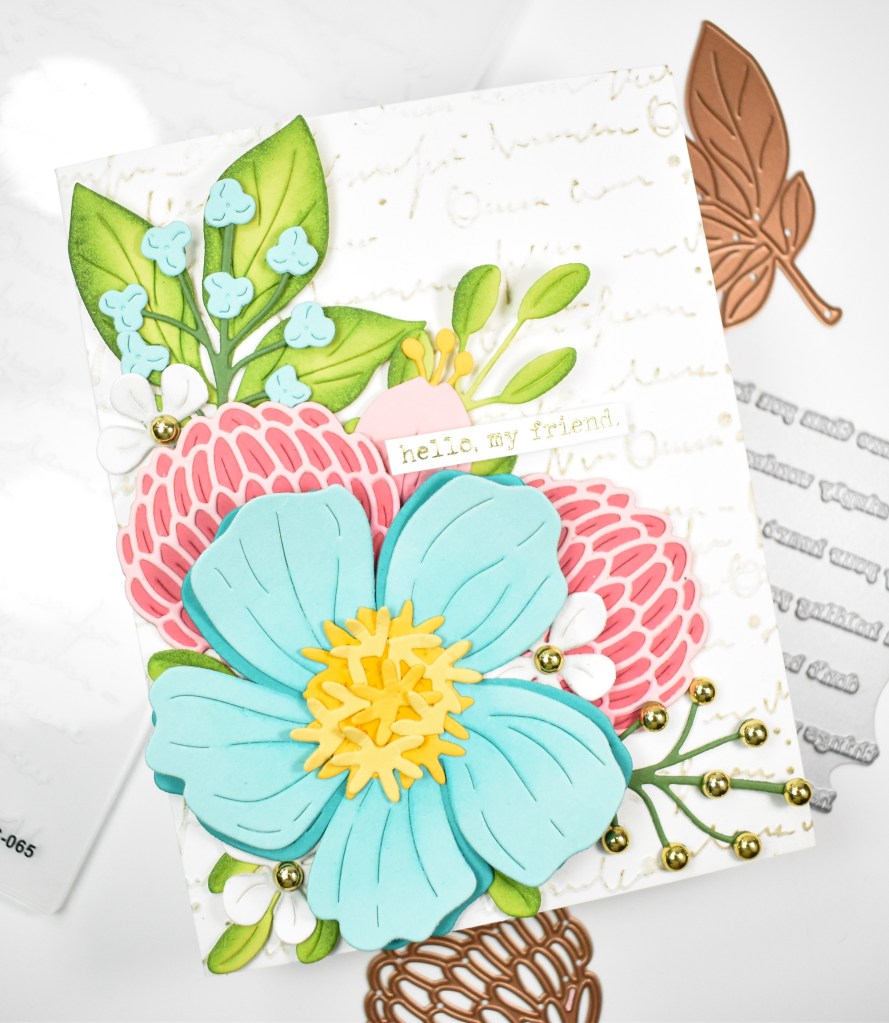
Hello Crafty Friends, and welcome back! The Spellbinders March releases are available, and I’m back today with a project featuring the new Scribbled Letter Embossing Folder, along with the Holding Your Heart Sentiments BetterPress Plates. Can I just say right away that I absolutely love this embossing folder?! I love something that gives just a hint of texture but adds to the project! Let’s go ahead and run through the details!
NOTE: all supplies are linked to multiple sources in the thumbnails at the end of this blog post.

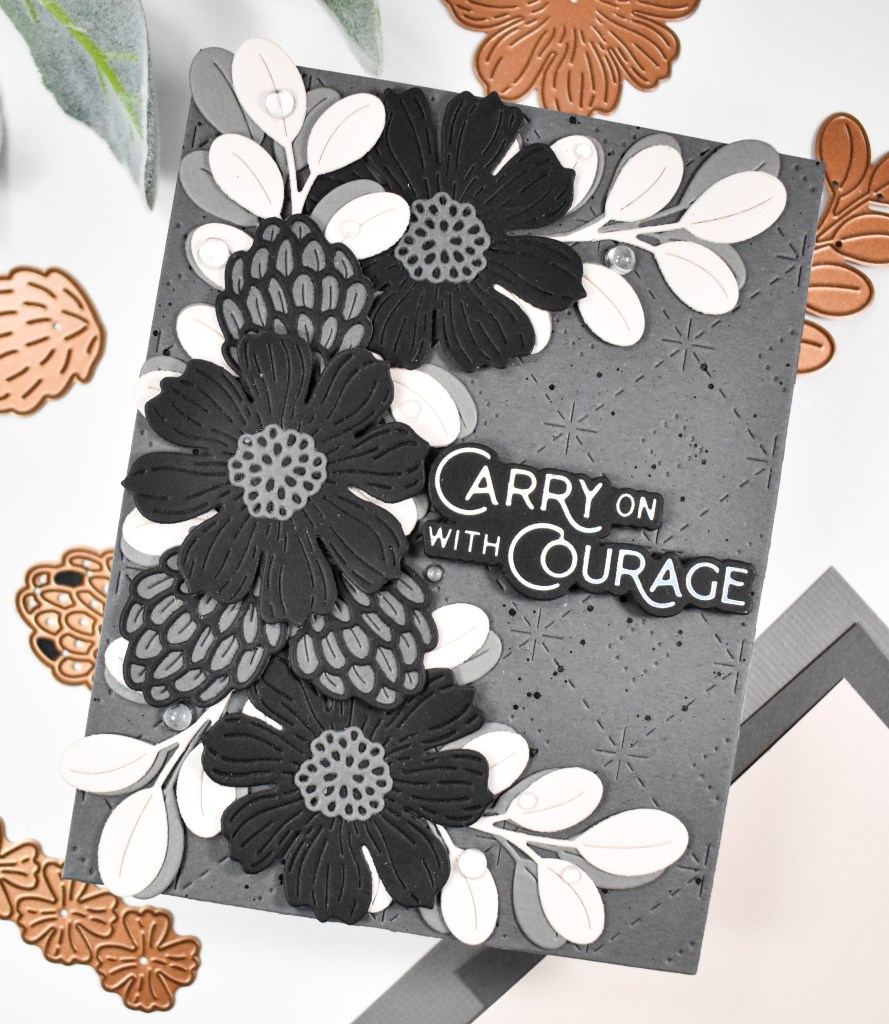
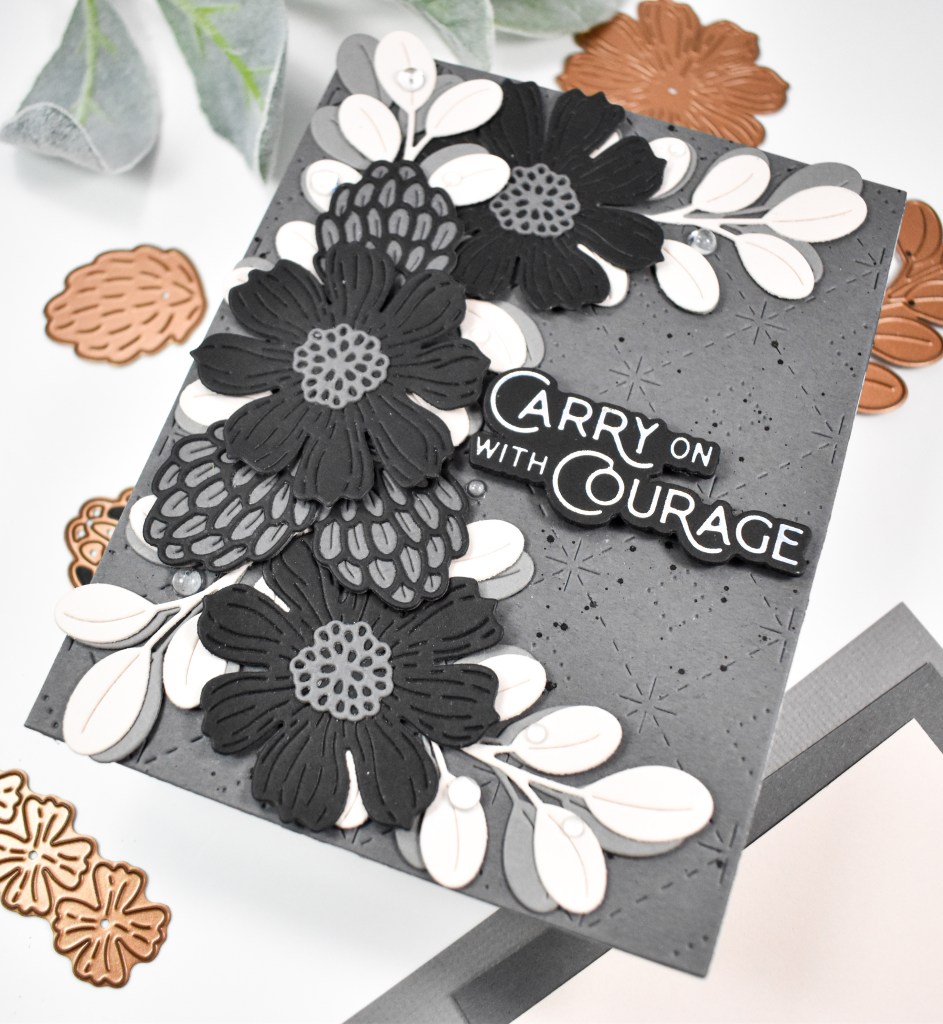
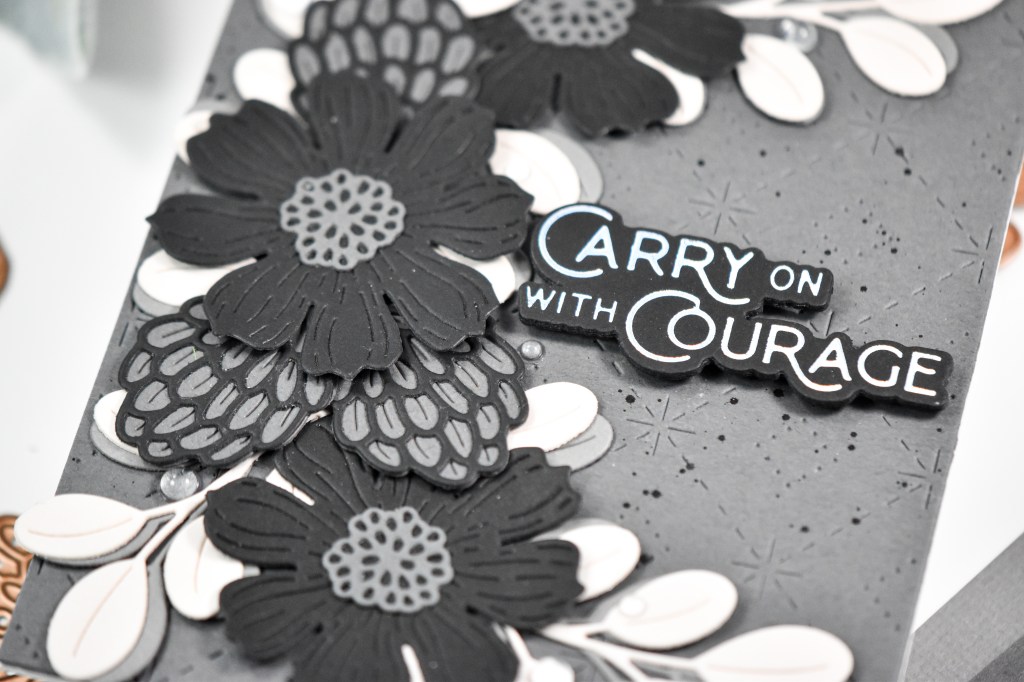
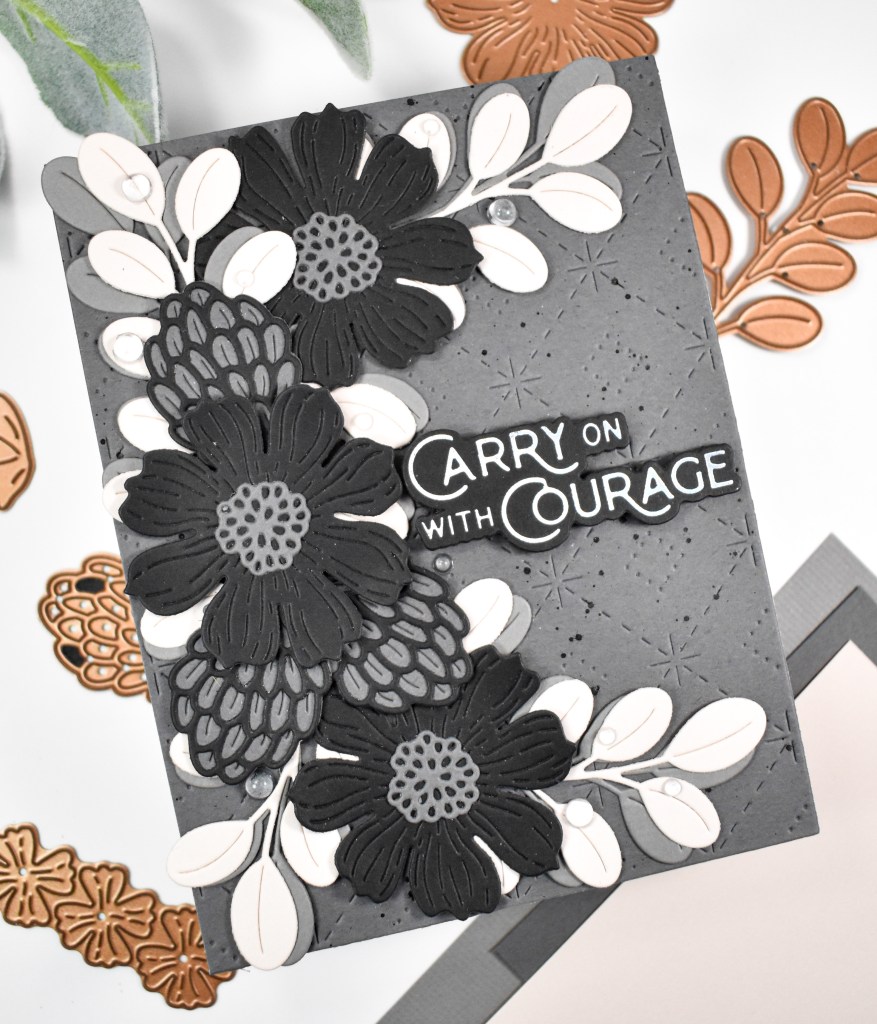
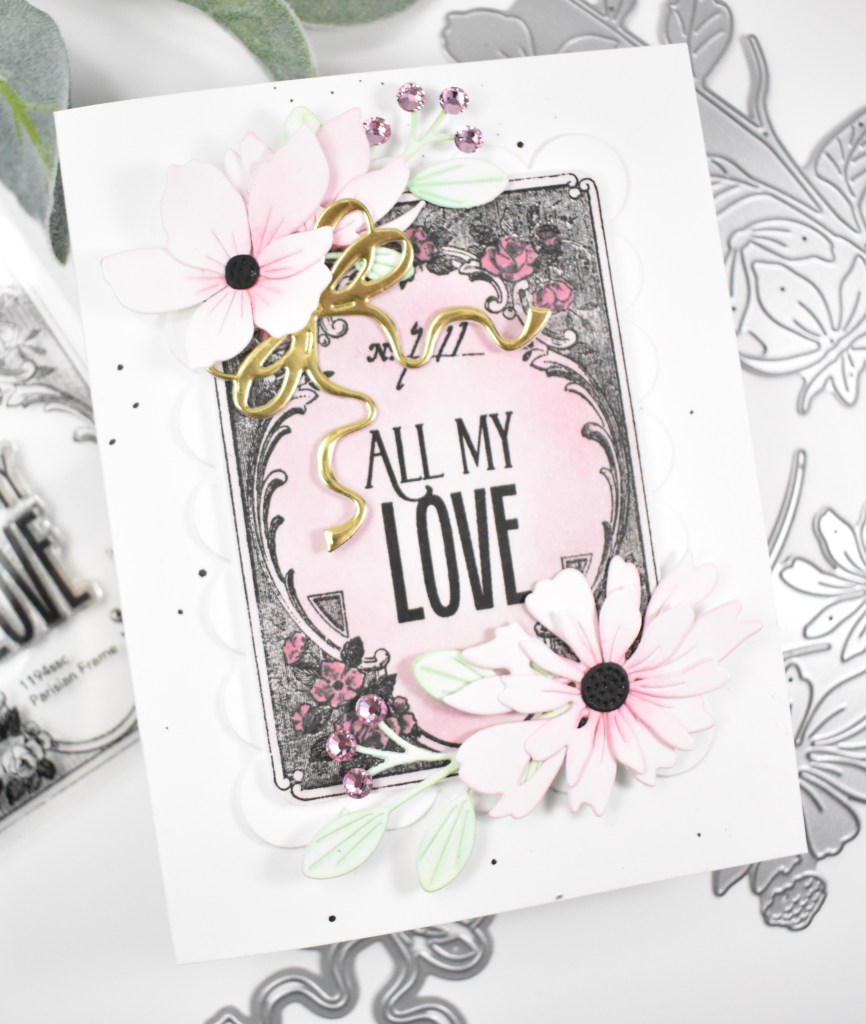
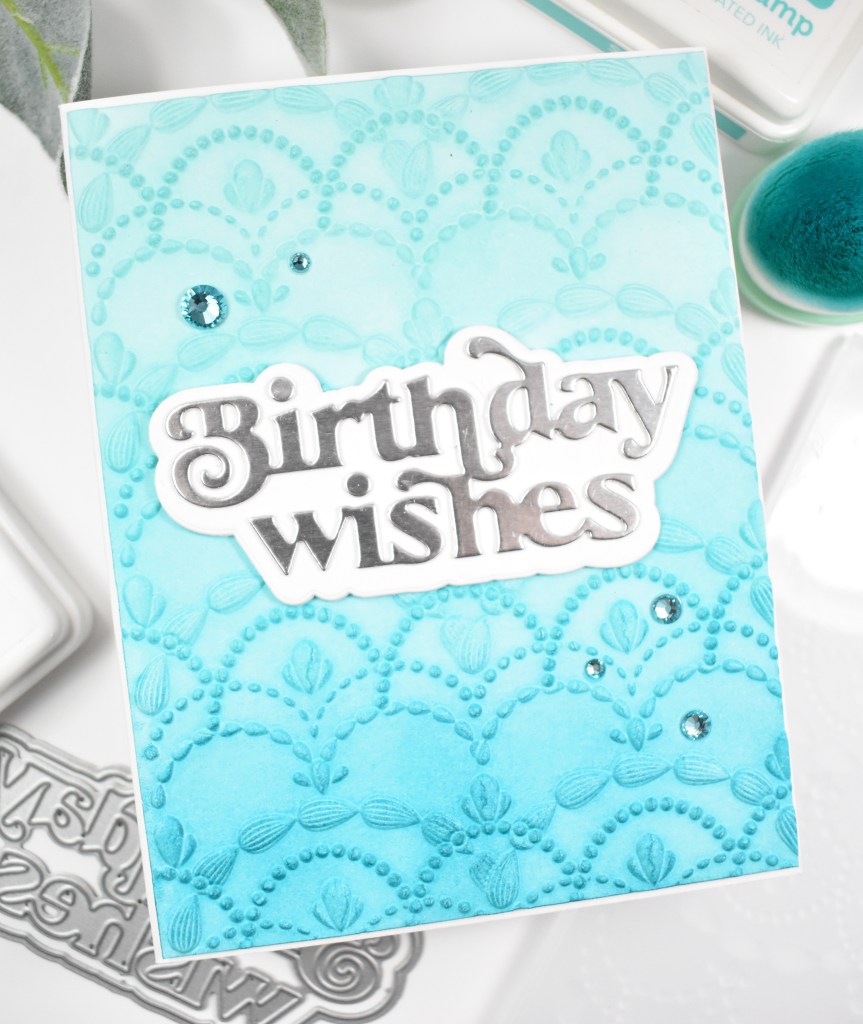
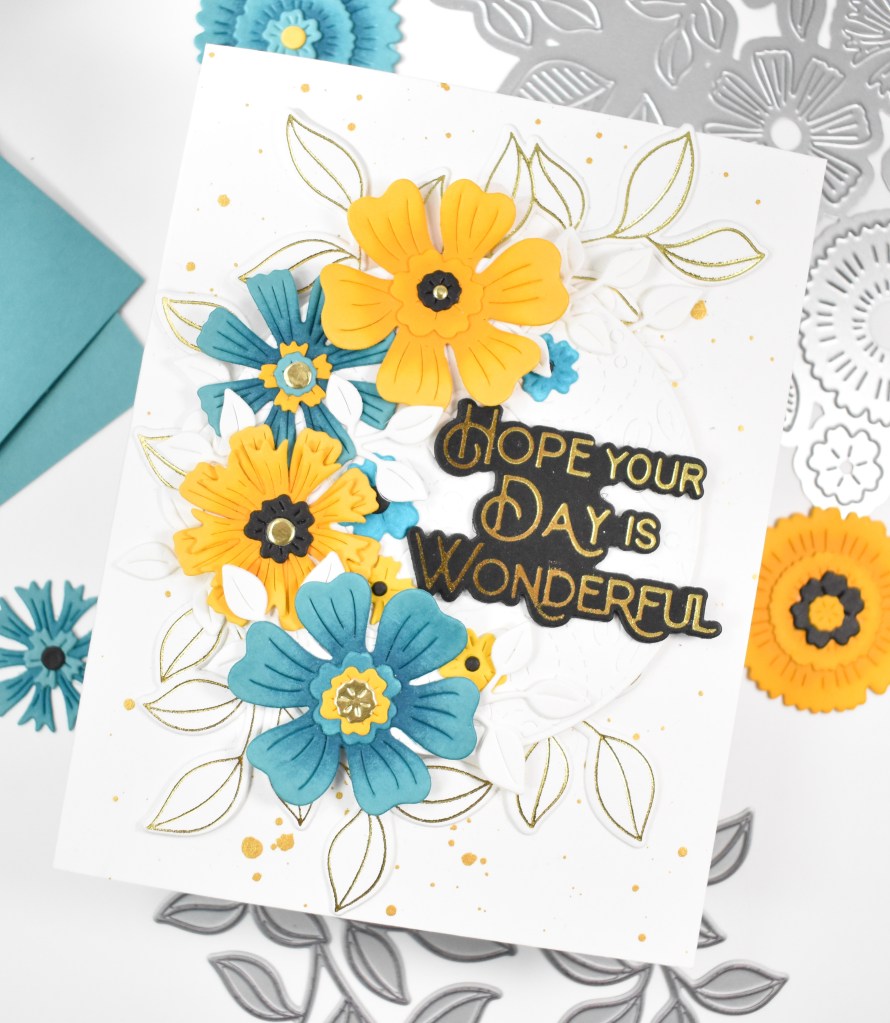
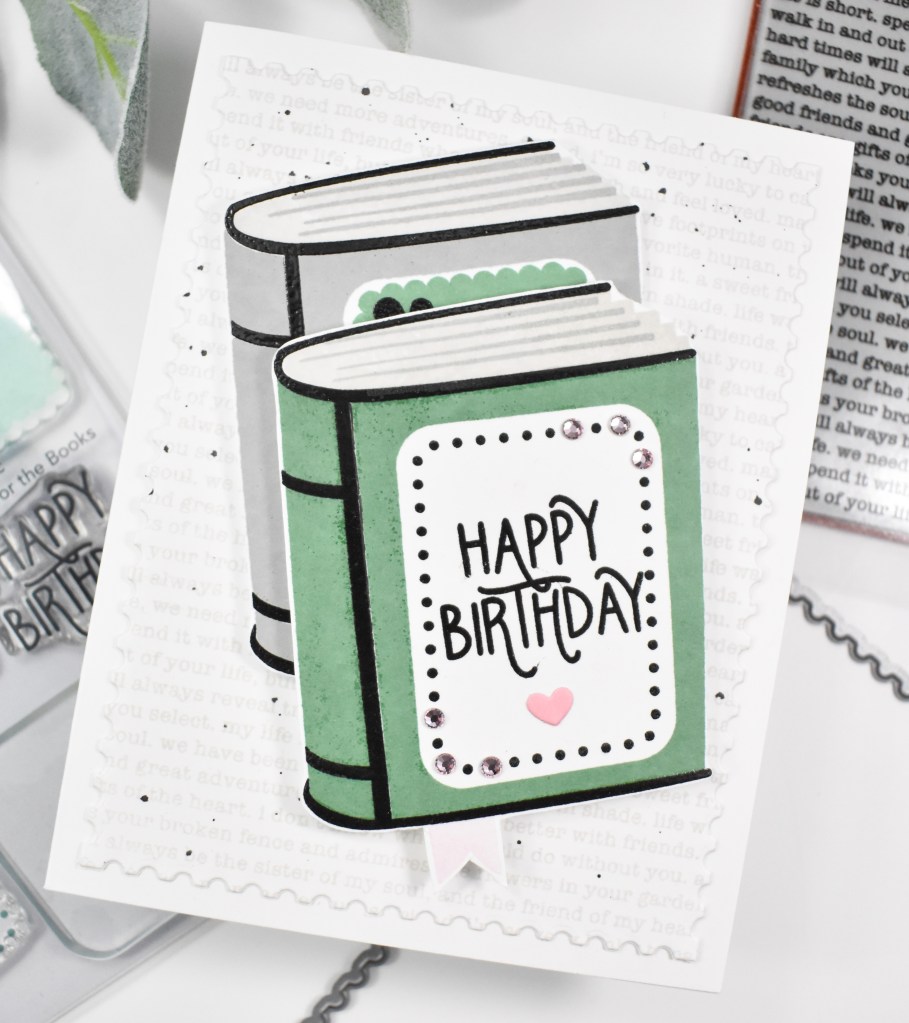
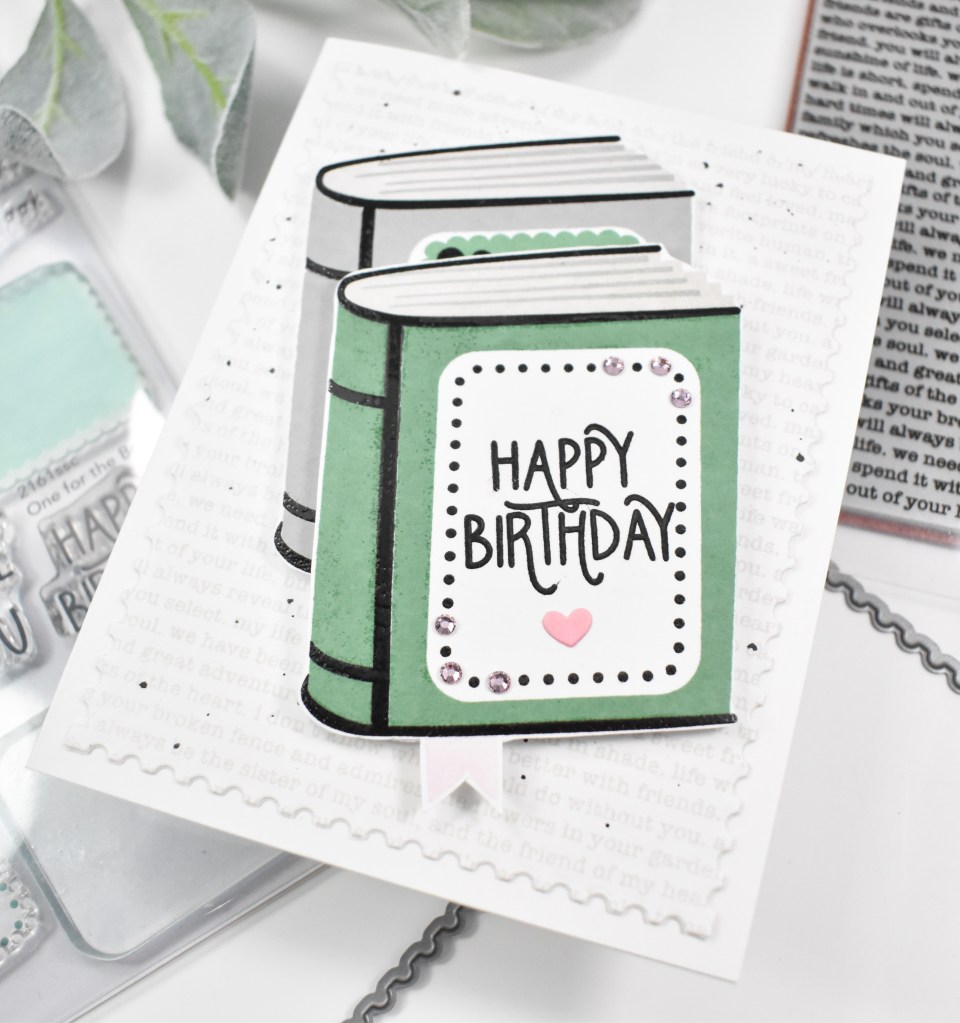
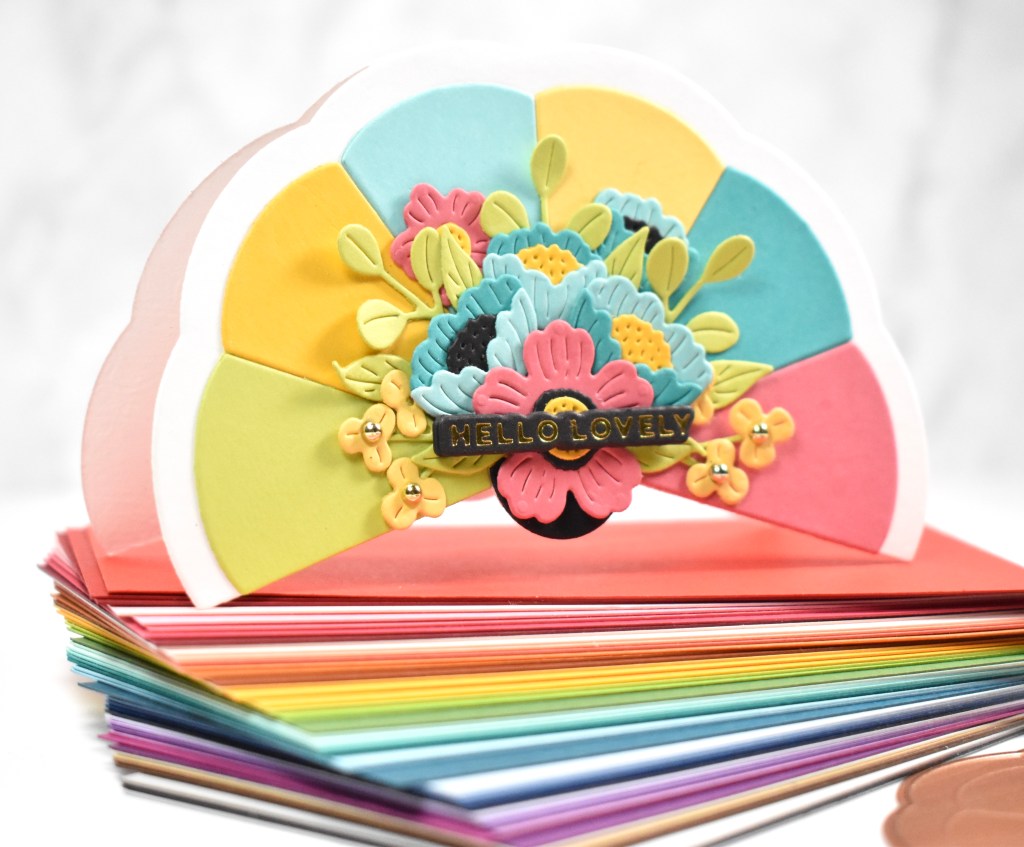
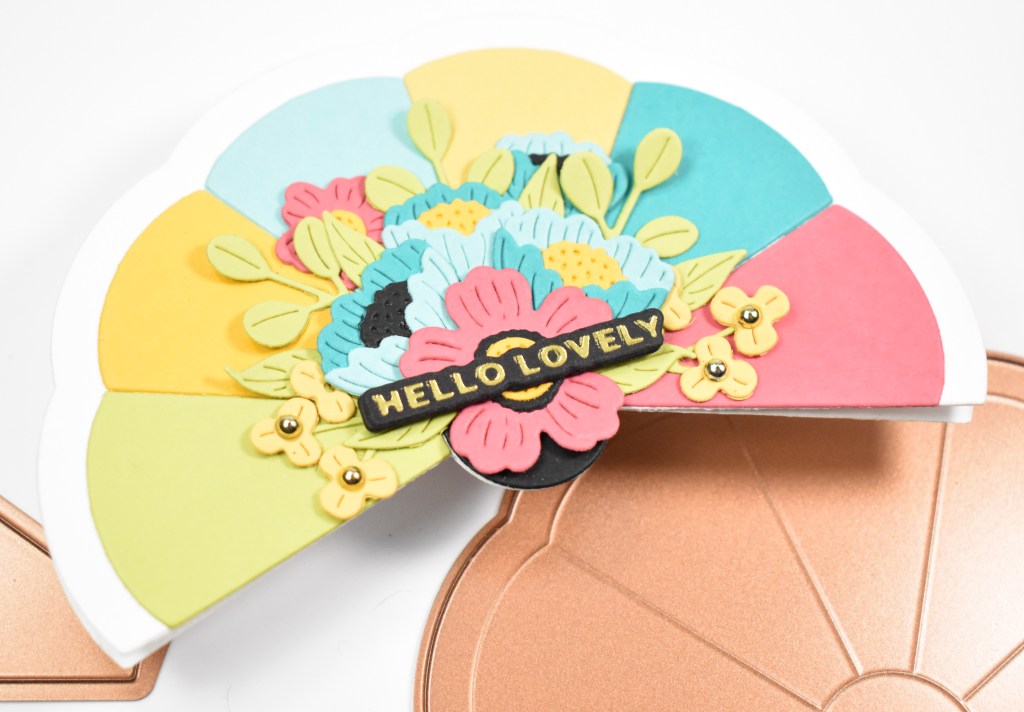
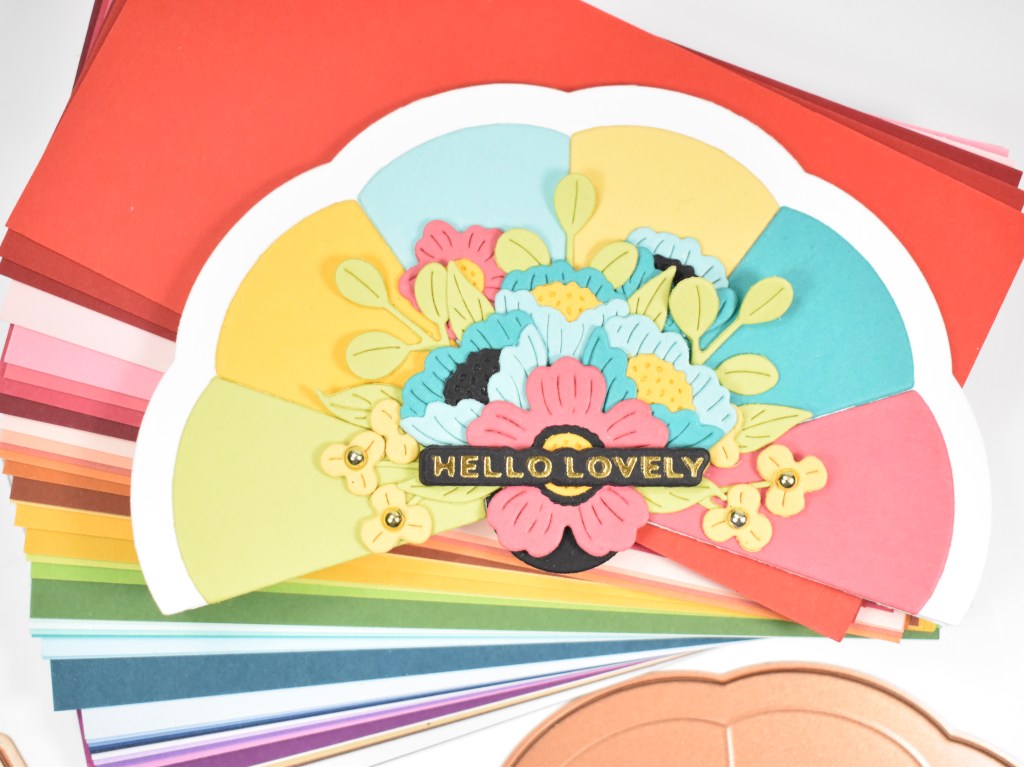
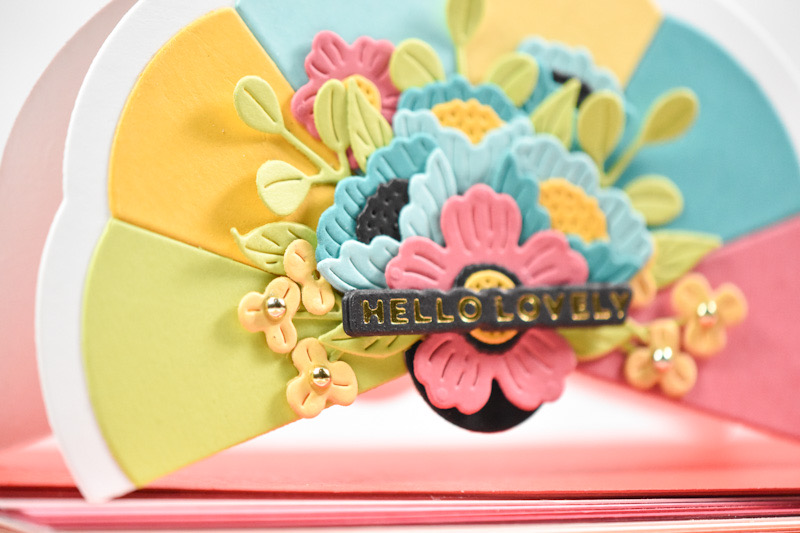
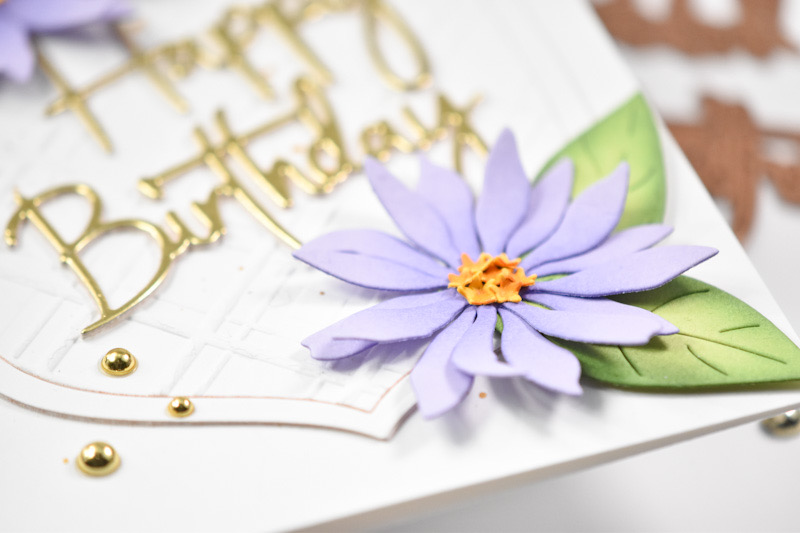
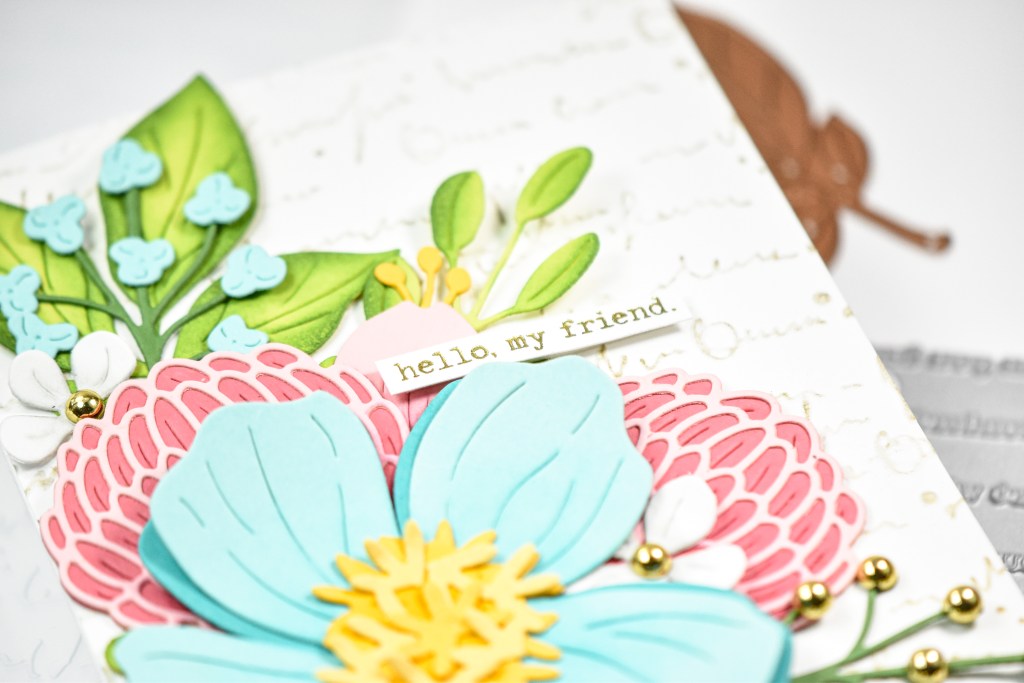
I began this project by pulling cardstock colors that I wanted to use, which were Blush, Dahlia, Waterfall, Teal Topaz, Peridot, Fern, Beeswax and Saffron. I did use some Neenah for the white flowers as well. Once the papers were pulled, I went to work die cutting the flowers and leaves from the Colorful Expressions Blooms.
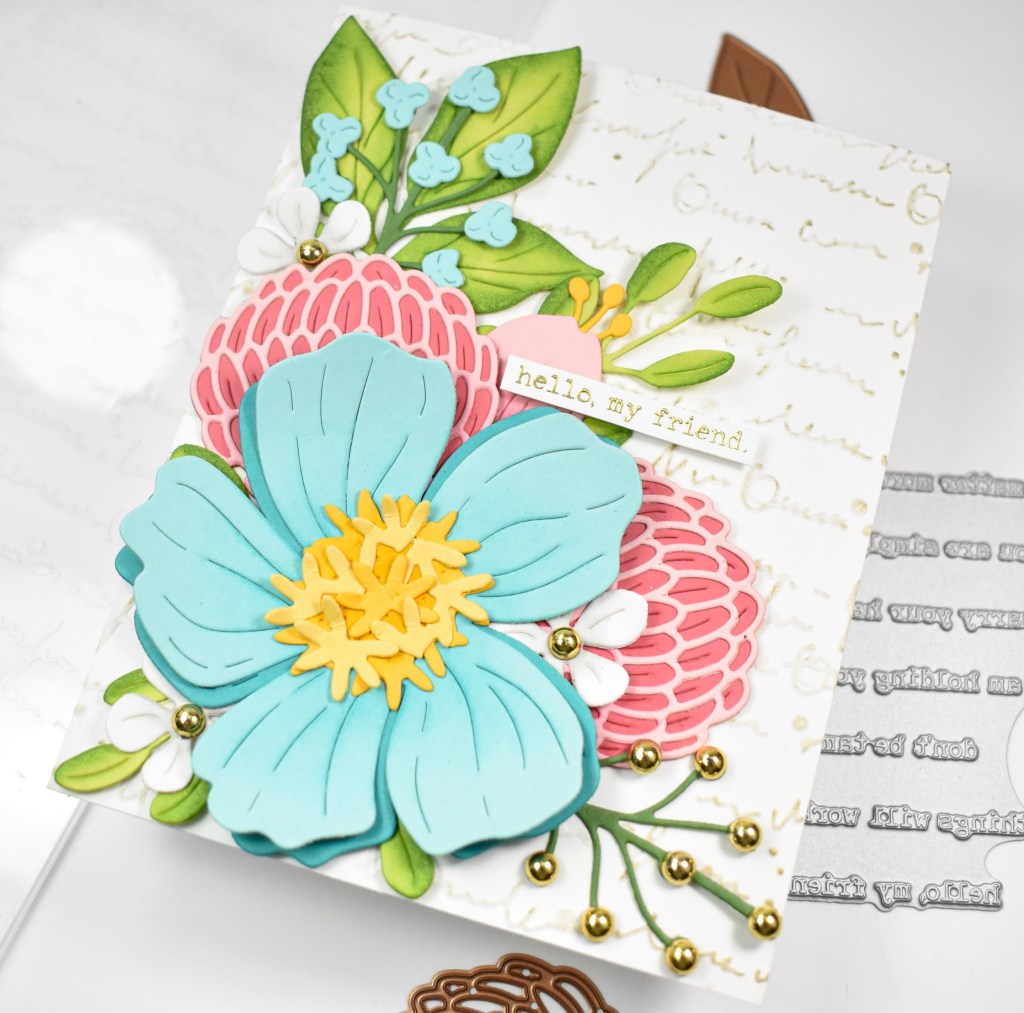

Those pieces were then ink blended using Carnation, Field, Honey, Surf and Gravel inks before being assembled. I created the background using the Scribbled Letter folder and then lightly rubbed a gold ink pad across the raised side of the panel. The sentiment, which is from the new Holding Your Heart Sentiments BetterPress Plates, was gold foiled and trimmed down.

I adhered the background panel to my card base first and then secured all of the other pieces with liquid glue, beginning with the underneath pieces. I added gold metallic pearls to the one branch and the three white flowers before adding the sentiment with foam strips.
That does it for this project! You all know that I love florals, so I really enjoyed this project, and I’m sure that I’m going to get lots of use from this embossing folder! Don’t forget to check out all of the new March releases over on Spellbinders’ website. Thanks again for joining me, and I hope you have a wonderful day!
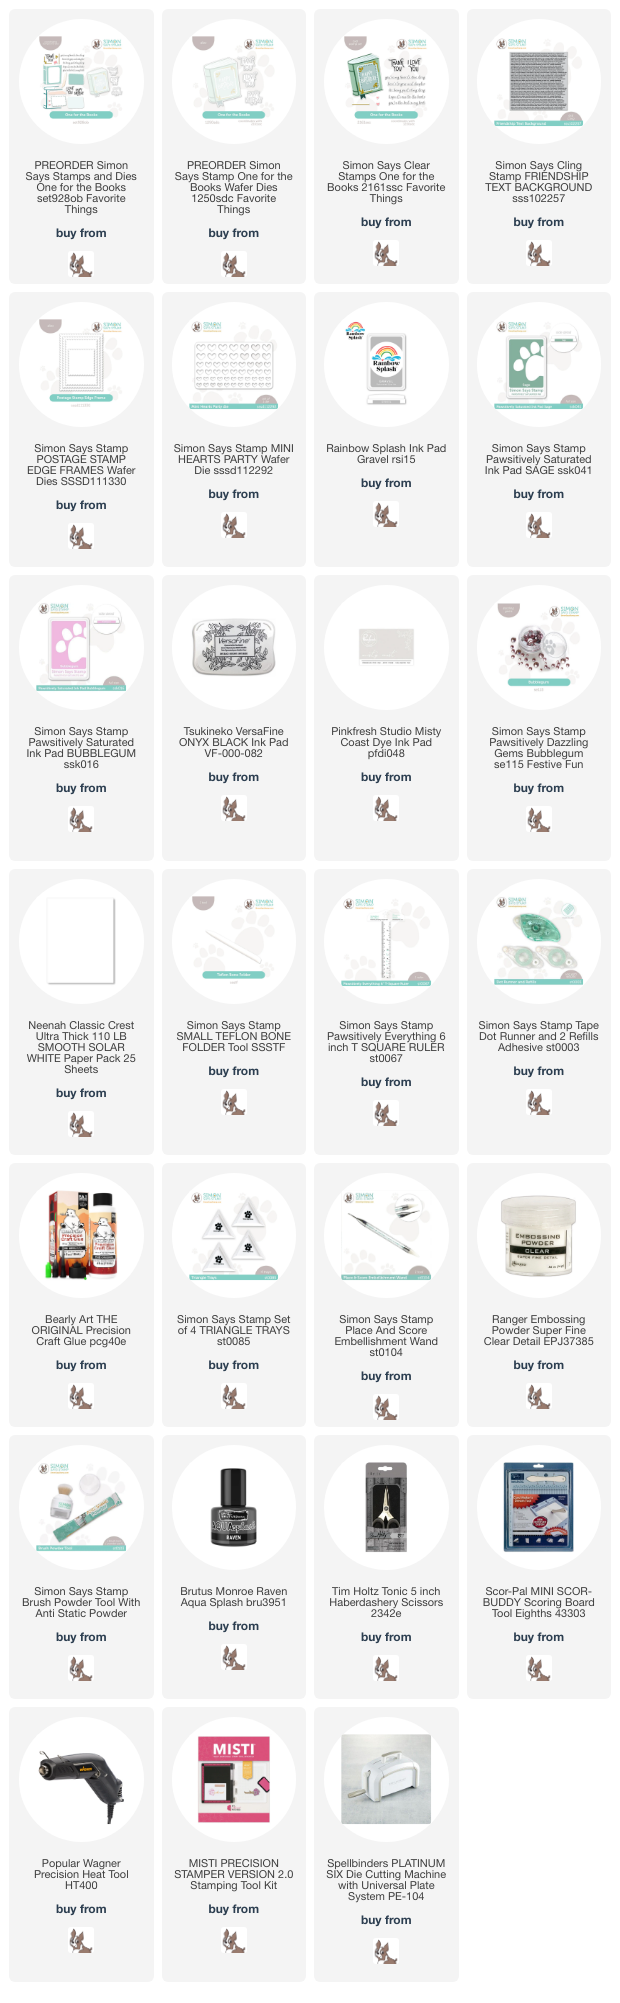
Supply List
Affiliate links used at no cost to you. What does this mean? If you use the links within this post to make a purchase, I receive a small commission, which allows me to continue to post crafty content for your enjoyment. I truly appreciate your support!
Latest Posts
- Spellbinders Trailside Birthday Raccoon

- Simon Says Stamp Grateful Heart

- Simon Says Stamp Braided Greetings

- Together By Design Color Cube Floral

- Simon Says Stamp Cute Duckling

Latest Instagram Posts