Golden Butterfly Hello

Hello Crafty Friends! I hope you are doing well! Thank you so much for stopping by to check out today’s card featuring a couple of new items from Simon Says Stamp’s latest release, Splendor, plus a few older favorites as well. Let’s run through the details.

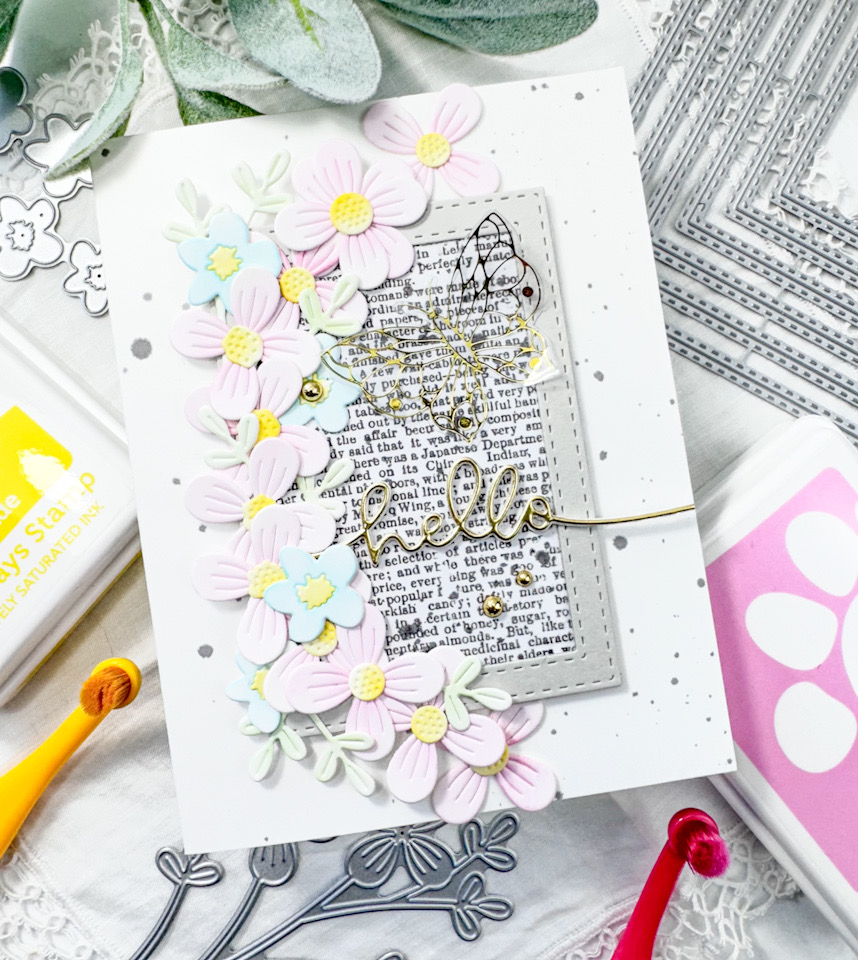
I began this card by cutting a frame using the SSS Stitched Rectangles die and SSS Fog cardstock. I then trimmed a panel of patterned paper to fit behind the frame. I used the SSS Fine Floral Stem and the SSS Simple Flowers to cut those from Neenah 110lb cardstock. I did end up cutting the Fine Floral twice so that I would have enough flowers to curve around the frame.

For the ink blending on the flowers, I used SSS Pawsitively Saturated Ink in Bubblegum, Seafoam, Celery and Lemonade. Once the ink blending was complete, I assembled the flowers using liquid glue. I also ended up cutting apart the Fine Florals so that I could place the flowers where I needed them to go. I used the SSS Handlettered Greetings and die cut the hello sentiment once from gold cardstock and three times from Neenah 110lb cardstock, adhering all of those together with liquid glue.
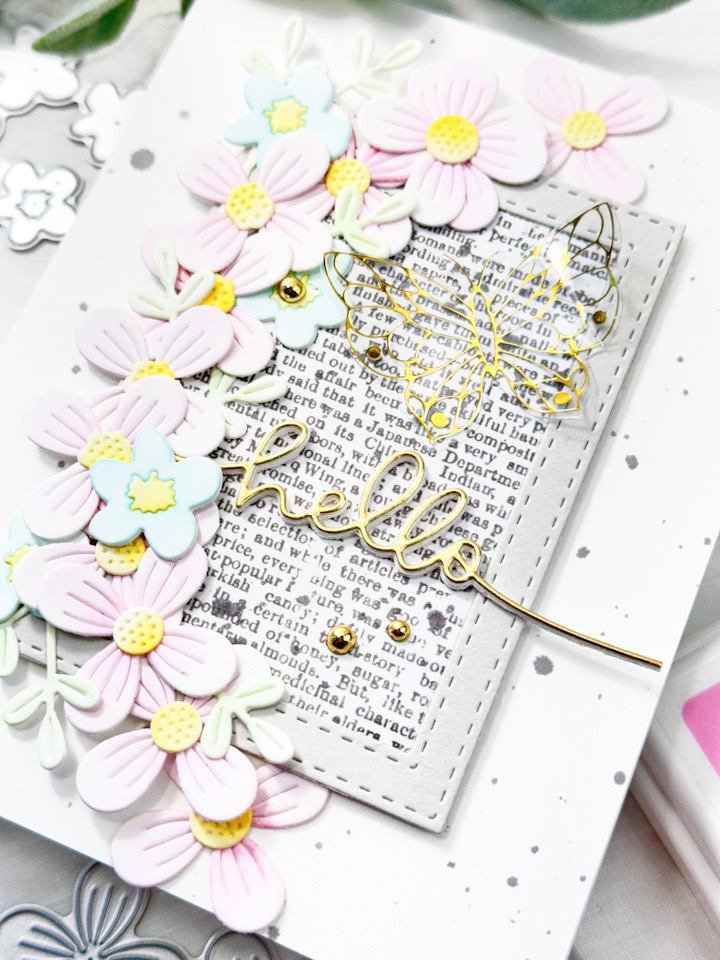
The butterfly is from the PFS Small Butterflies Foil Plate, and I foiled that using gold foil onto acetate and used the coordinating die to trim it out. I splattered the patterned paper and the card base with Hickory Smoke Distress Spray Stain for a little bit of added interest.
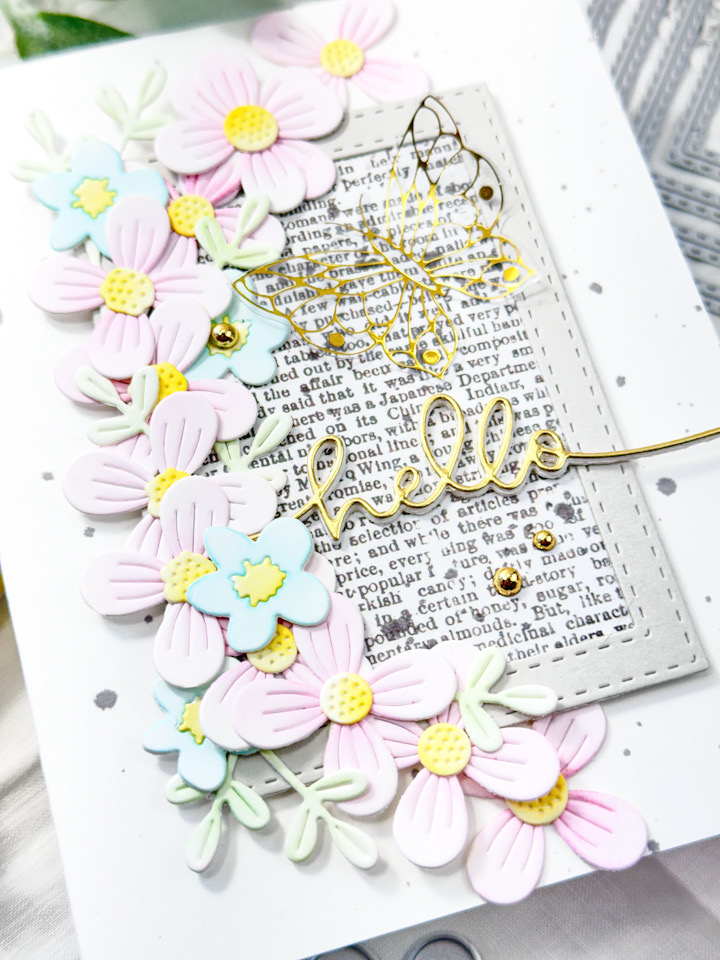
To assemble the card, I adhered the frame to the card base using foam tape and arranged the flowers along the left edge of the frame, adhering those with glue. I tucked in the leaves where needed, and glued the butterfly and sentiment in place before adding some PFS Gold Metallic Pearls.
That finishes up this one! I hope you found some inspiration from this project! I really like all of the elements of this one, and thought that it came together quite nicely. Thanks again for stopping by. I hope you have an amazing day, and don’t forget to stay awesome!
Supply List:
- SSS Fine Floral Stem
- SSS Simple Flowers
- SSS Stitched Rectangles
- SSS Handlettered Greetings
- SSS Pawsitively Saturated Ink: Bubblegum, Seafoam, Celery, Lemonade
- SSS Blender Brushes
- SSS Fog Cardstock
- SSS Bone Folder
- SSS Foam Tape
- SSS Place and Score Embellishment Wand
- SSS Triangle Trays
- PFS Small Butterflies Hot Foil Plate, Die
- PFS Gold Metallic Pearls
- Distress Spray Stain Hickory Smoke
- Neenah Solar White Classic Crest 110lb Cardstock
- Patterned Paper
- Spellbinders Gold Hot Foil
- Spellbinders Glimmer Hot Foil System
- Spellbinders Platinum 6
- Gold Cardstock
- Acetate
- Bearly Art Glue
- Tim Holtz Scissors
- Scor-Buddy
* Affiliate links used at no cost to you. Thanks so much for your support!
Latest Posts
- Spellbinders Trailside Birthday Raccoon

- Simon Says Stamp Grateful Heart

- Simon Says Stamp Braided Greetings

- Together By Design Color Cube Floral

- Simon Says Stamp Cute Duckling