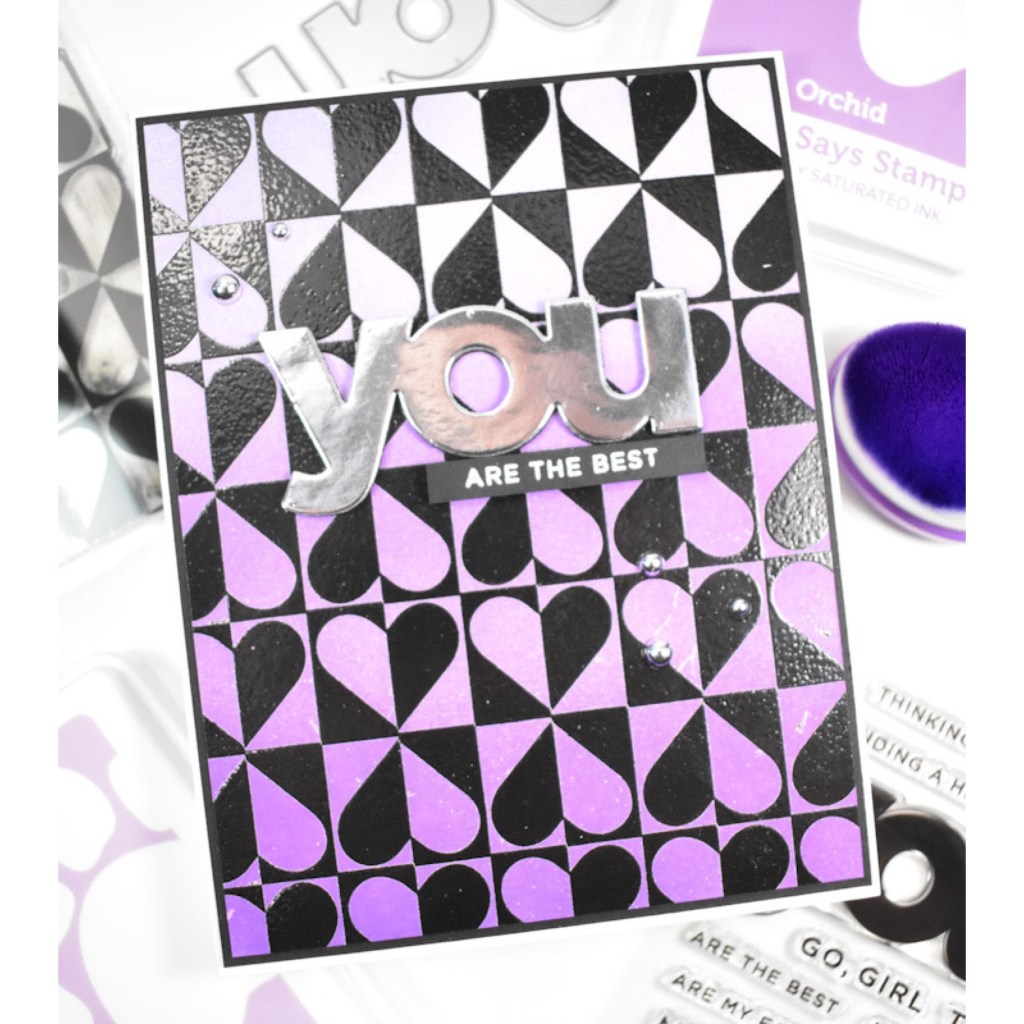
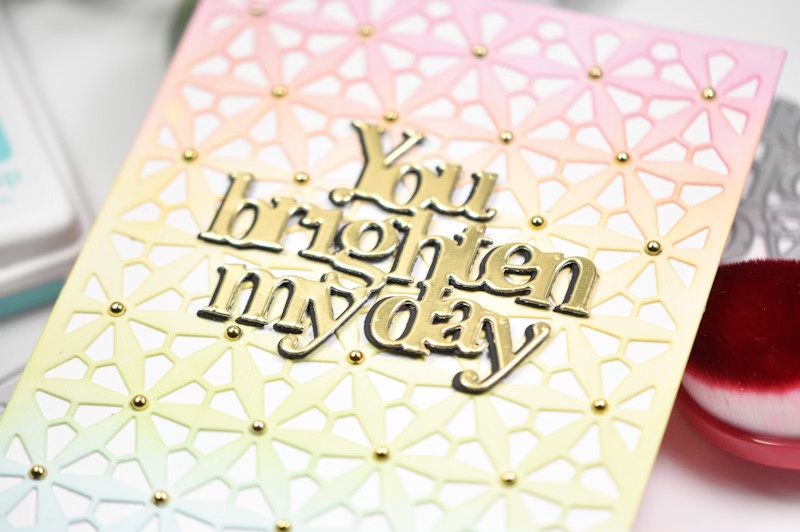
Simon Says Stamp Sending You Love

Hello and welcome back! I’m so thrilled that you stopped by to hang out with me for a few minutes! Today’s project is featuring the new Pixie Dust Stamp set from Simon’s latest release To Be Loved. Let’s go ahead and get right into it!

NOTE: all supplies are linked in the thumbnails at the end of this blog post.

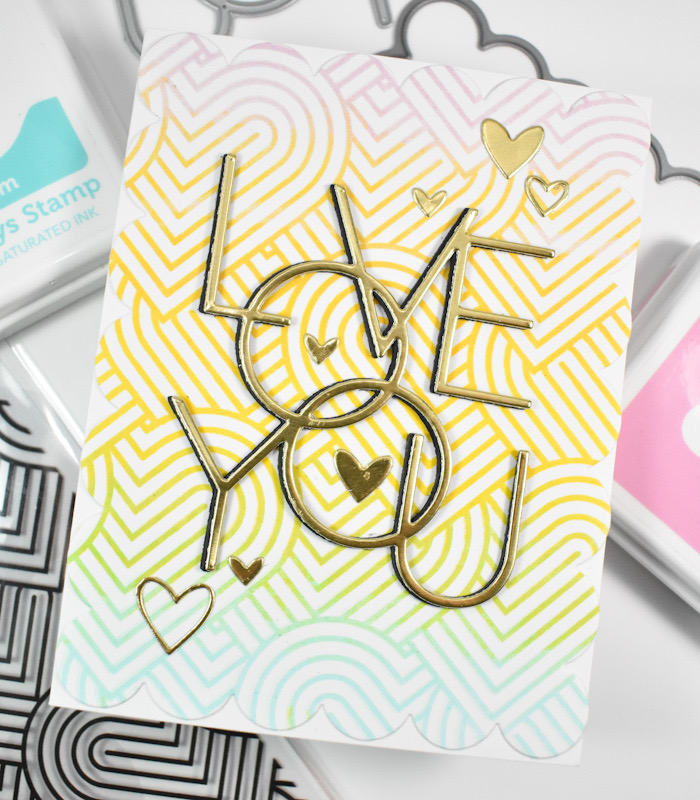
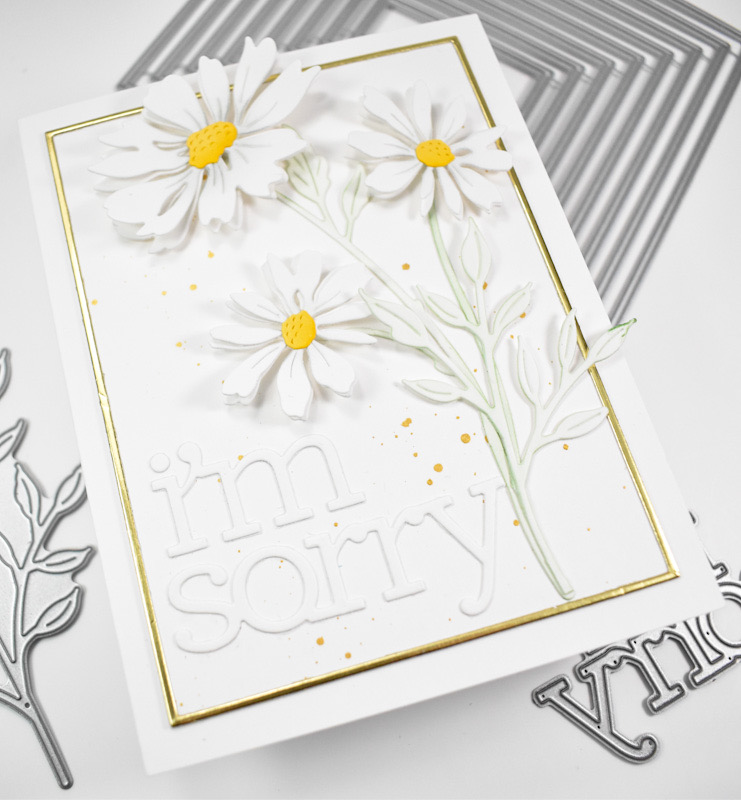
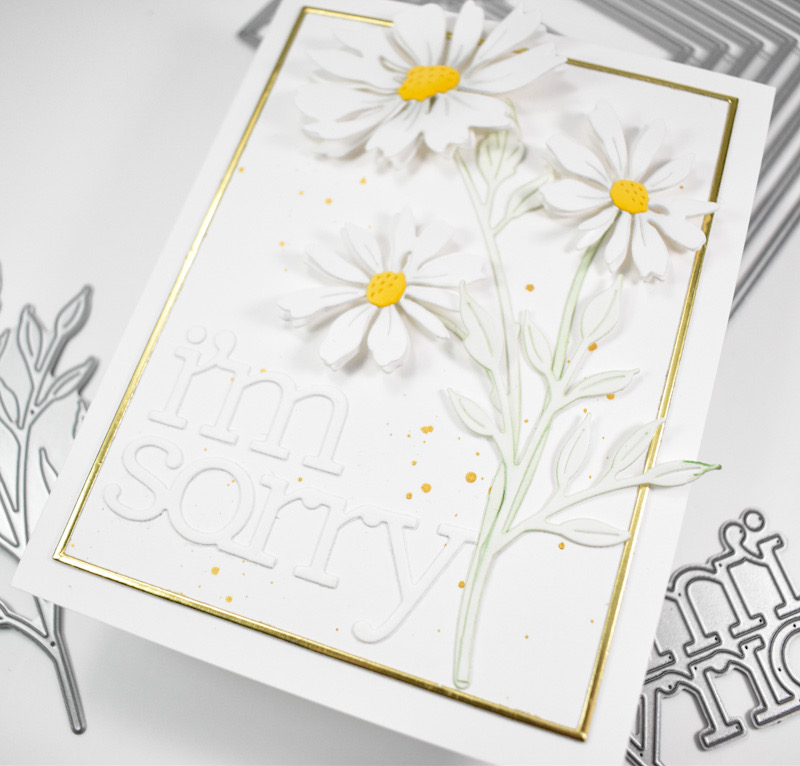
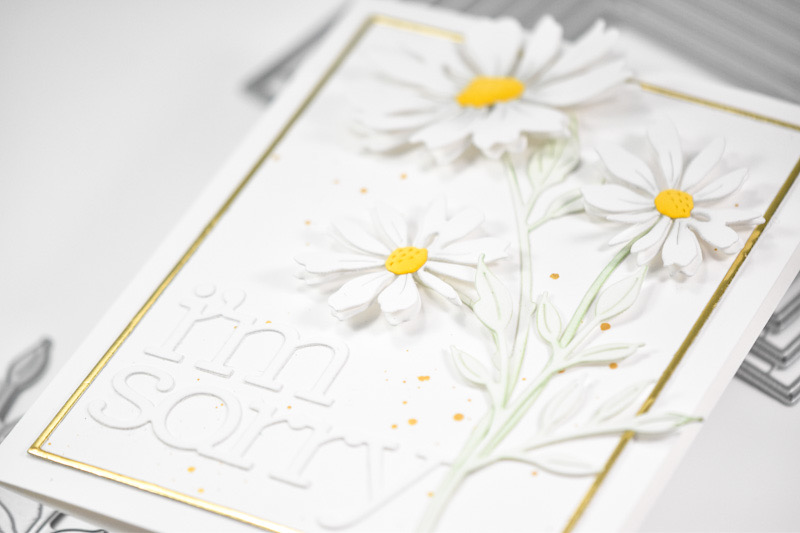
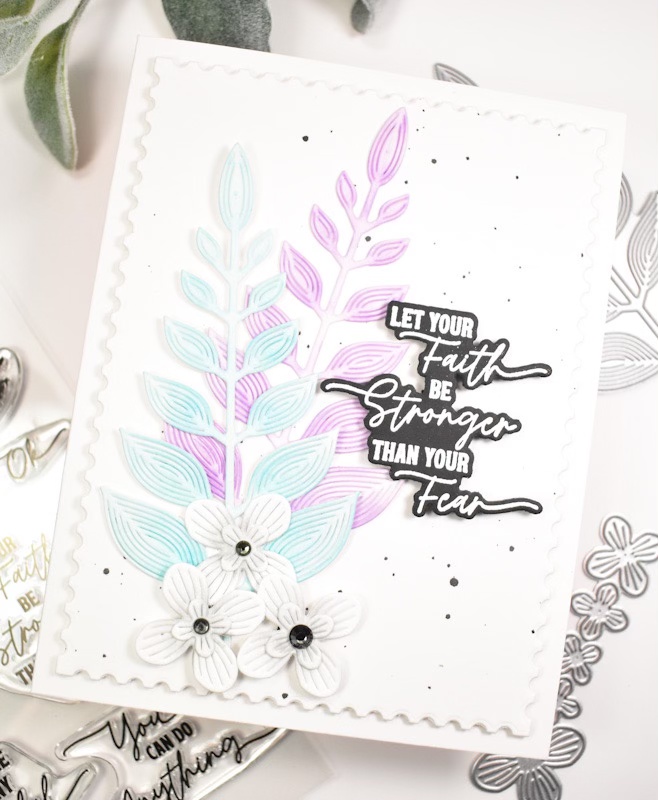
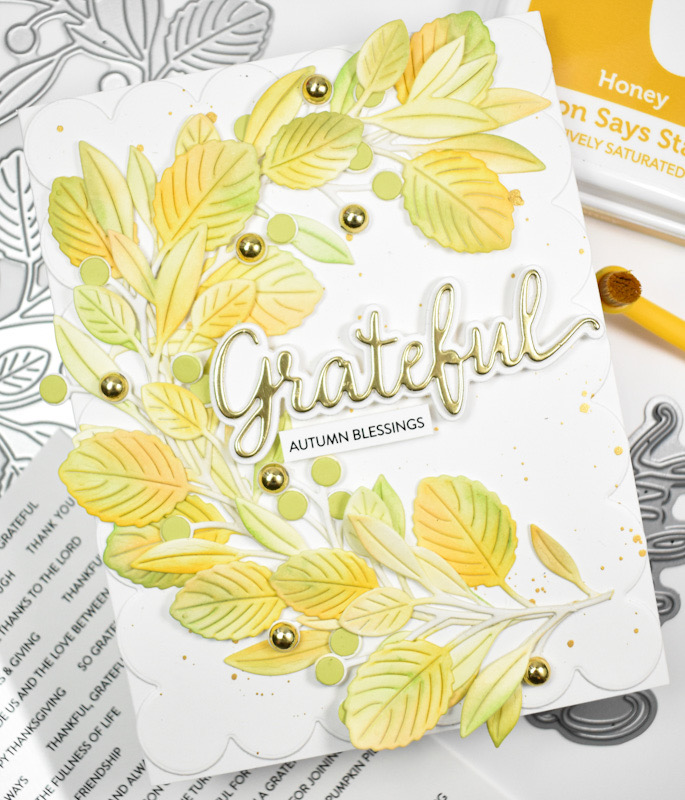
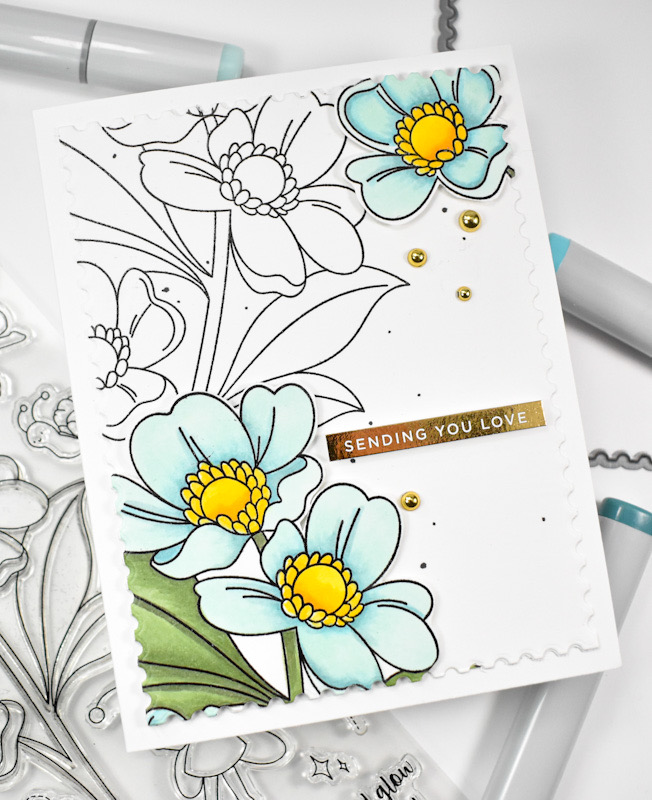
I began this project by stamping the floral image from this set twice onto a panel of Neenah 110lb cardstock using VersaFine Onyx Black ink and heat setting that with Ranger Clear Embossing Powder. I then colored one of the images using Copic Markers in BG96, BG10, BG53, BG72, G94, YG63, Y08, Y18 and Y38.

When I stamped the floral image twice, I was not sure at this point what I was doing with the card. It was a, “I’m going to start and see what happens” kind of project! Once I finished coloring the one image, I cut it out, and decided that I would use the other stamped image as a background of sorts. I used the Postage Stamp Edge Frames to determine placement and went ahead and trimmed it down.
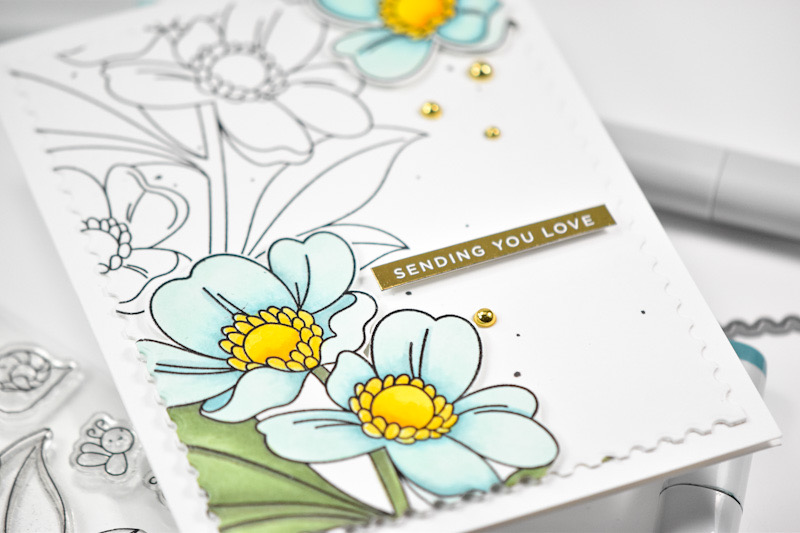
I then added some “black splatter” using a Copic Multiliner, because I wanted to control where the splatter landed. I adhered the colored portions of the flowers atop the panel using foam squares and then ran it back through the die cutting machine with the postage edge again so that both layers had the pattern.

This is a left over gold foiled sentiment that I had in my stash, which is from the Reverse Bad Day Good Vibes Sentiment Strip set, that I added with foam strips. The panel was added to the card base and along with some gold metallic pearls to finish up.
Another project in the books! I hope you enjoyed it! I used to enjoy using my Copic Markers a great deal, but have kind of gotten out of the habit, so it was nice to pick them up again for a relatively quick project. Don’t forget to check out the entire To Be Loved release over on Simon’s website! Thanks again for stopping by, and I hope you have an amazing day!
Supply List
Affiliate links used at no cost to you. What does this mean? If you use the links within this post to make a purchase, I receive a small commission, which allows me to continue to post crafty content for your enjoyment. I truly appreciate your support!
Latest Posts
- Simon Says Stamp Grateful Heart

- Simon Says Stamp Braided Greetings

- Together By Design Color Cube Floral

- Simon Says Stamp Cute Duckling

- Simon Says Stamp Watercolor Wild Rose

Latest Instagram Posts