Simon Says Stamp Striped Just a Note

Hello Crafty Friends, and thanks for stopping by! I’m back today with a card featuring the new Just a Note 2 from Simon’s latest release, Celebrate. Let’s not waste time, and jump right in to it!

Main Products:

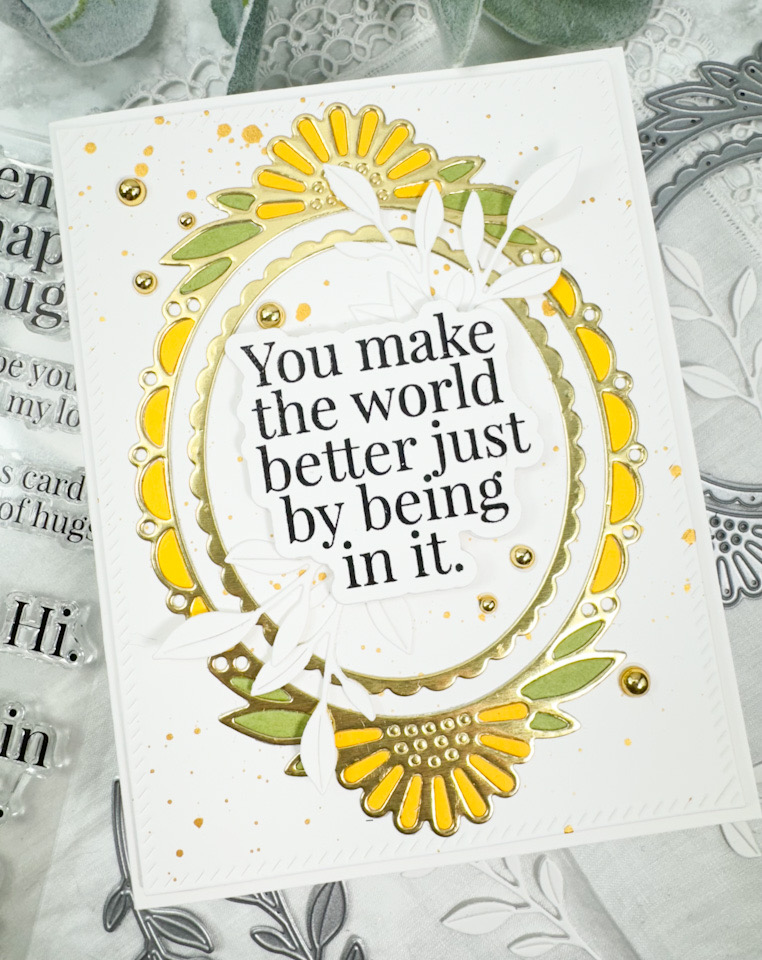
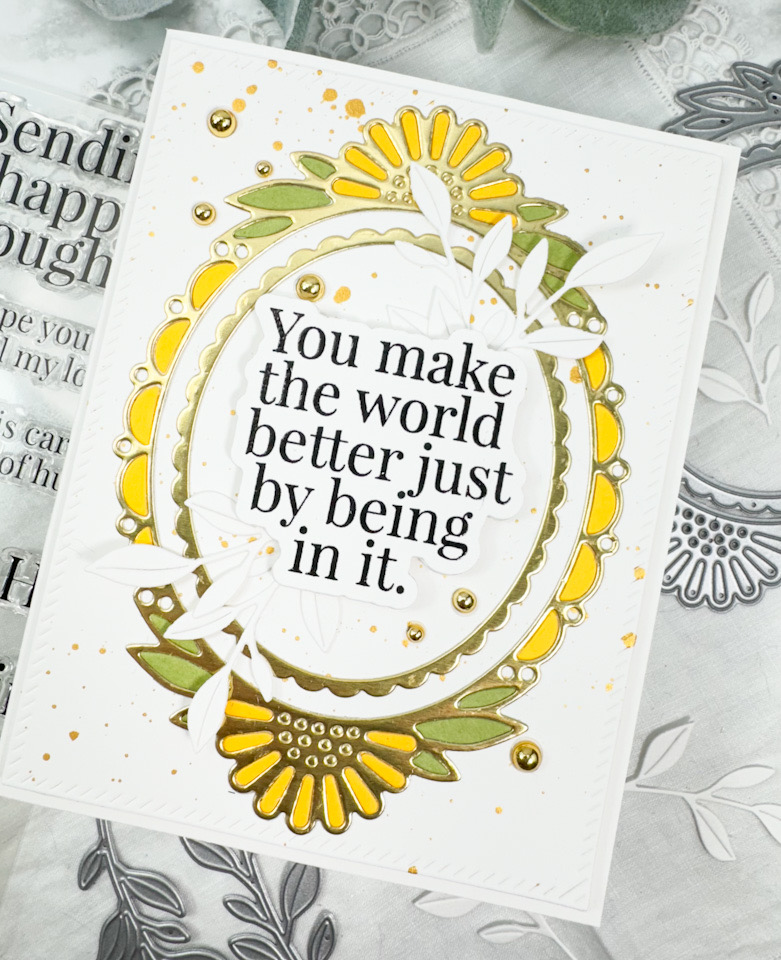
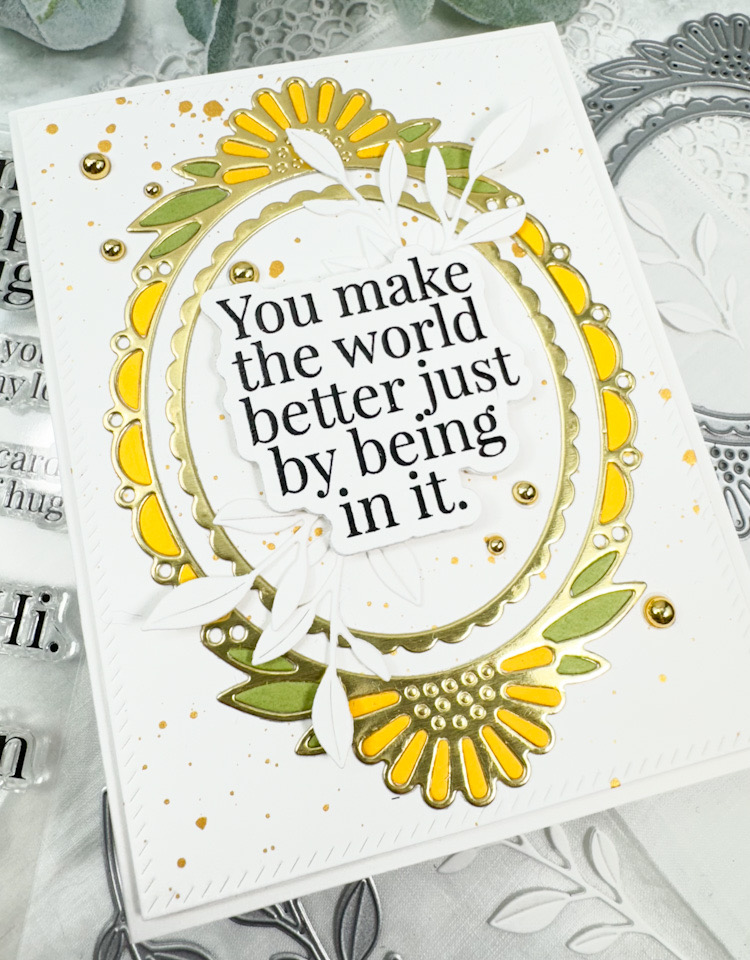
I began this project by making a striped panel using scraps from my stash and die cutting the SSS Just a Note 2 from this panel. I also die cut it twice from Neenah 110lb cardstock, along with the shadow and adhered all of those pieces together using liquid glue.
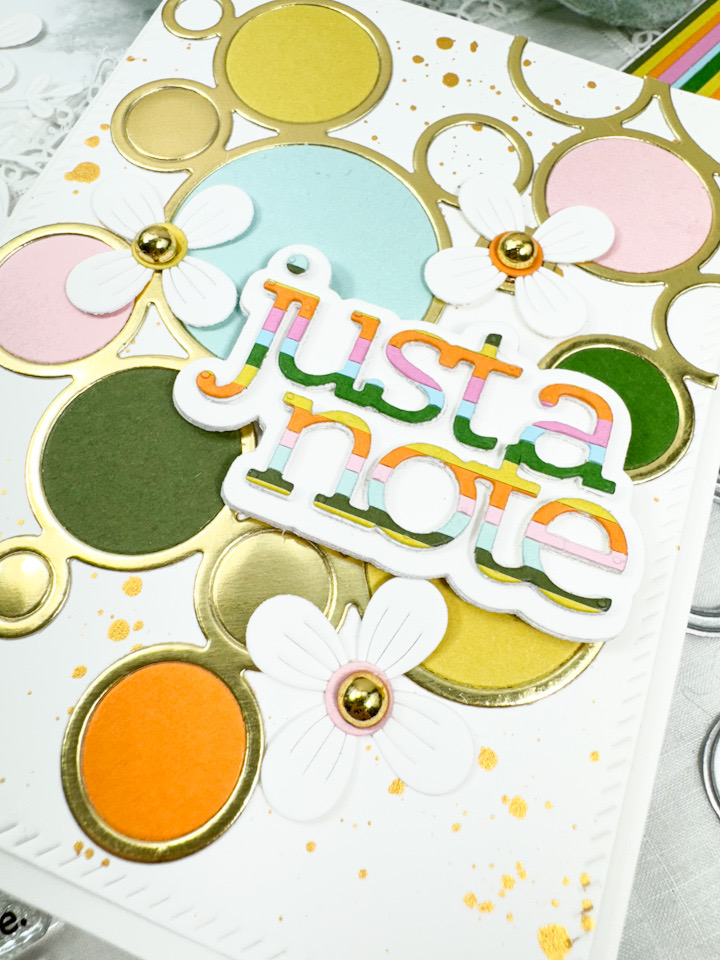
My background panel was cut using the PFS Diagonal Stitched Rectangles and splattered with gold acrylic ink for added texture and interest. While that was drying, I went ahead and used the SSS Ring Frame and cut two of those from gold cardstock, and also cut it from the same colors as my striped panel.

When my splattered panel was dry, I adhered the ring frame using liquid glue and inlaid some of the colored circles in place. I did end up leaving some of the gold circles as well. I used a portion of the second ring frame to fill the panel a little bit more, and trimmed off the excess. The sentiment was adhered to the panel using SSS 3D Foam Strips, and I also added a few flowers using the SSS Fine Floral Stem. To finish up, I added some PFS Gold Metallic Pearls to the flowers, and stamped the inside greeting using the SSS Just a Note Notes with VersaFine Onyx Black ink.

That does it for this one! I hope you enjoyed it! Don’t forget to check out the entire Celebrate release over on Simon’s website. Thanks again for stopping by, and have yourself a wonderful day!

Other Products:
- SSS Place and Score Embellishment Wand
- SSS Bone Folder
- SSS T-Ruler
- SSS Triangle Trays
- SSS 3D Foam Strips
- SSS Foam Tape
- PFS Diagonal Stitched Rectangles
- PFS Gold Metallic Pearls
- Neenah Classic Crest Solar White 110lb Cardstock
- Colored Cardstock
- Gold Cardstock
- Gold Acrylic Ink
- VersaFine Onyx Black Ink
- Bearly Art Glue
- Tim Holtz Craft Pick
- Tim Holtz Scissors
- Misti
- Scor-Buddy
- Spellbinders Platinum 6
* Affiliate links used at no cost to you. Thanks so much for your support!
Latest Posts
- Simon Says Stamp Grateful Heart

- Simon Says Stamp Braided Greetings

- Together By Design Color Cube Floral

- Simon Says Stamp Cute Duckling

- Simon Says Stamp Watercolor Wild Rose