Simon Says Stamp Cosmo Halftone Square Background

All the Feels Release
Hello there! I’m still playing with goodies from the new Simon Says Stamp All the Feels release, and having a blast doing so! You can check out the full release HERE. There’s so many awesome things to choose from!
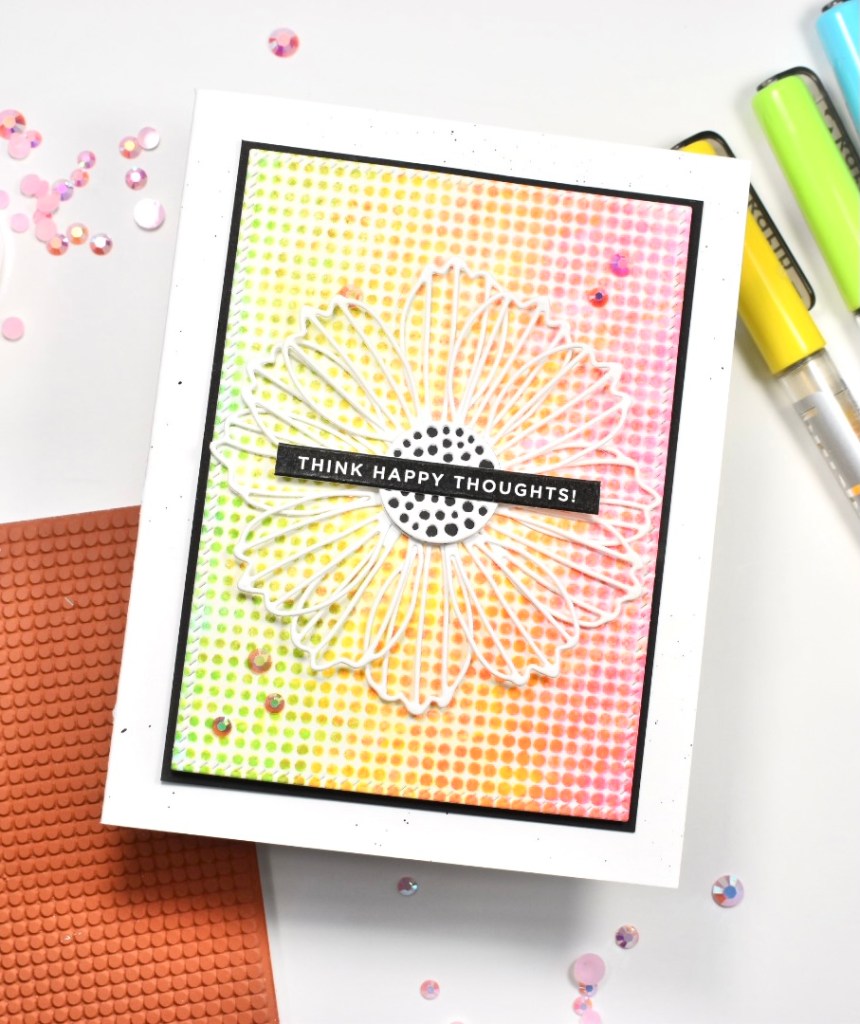
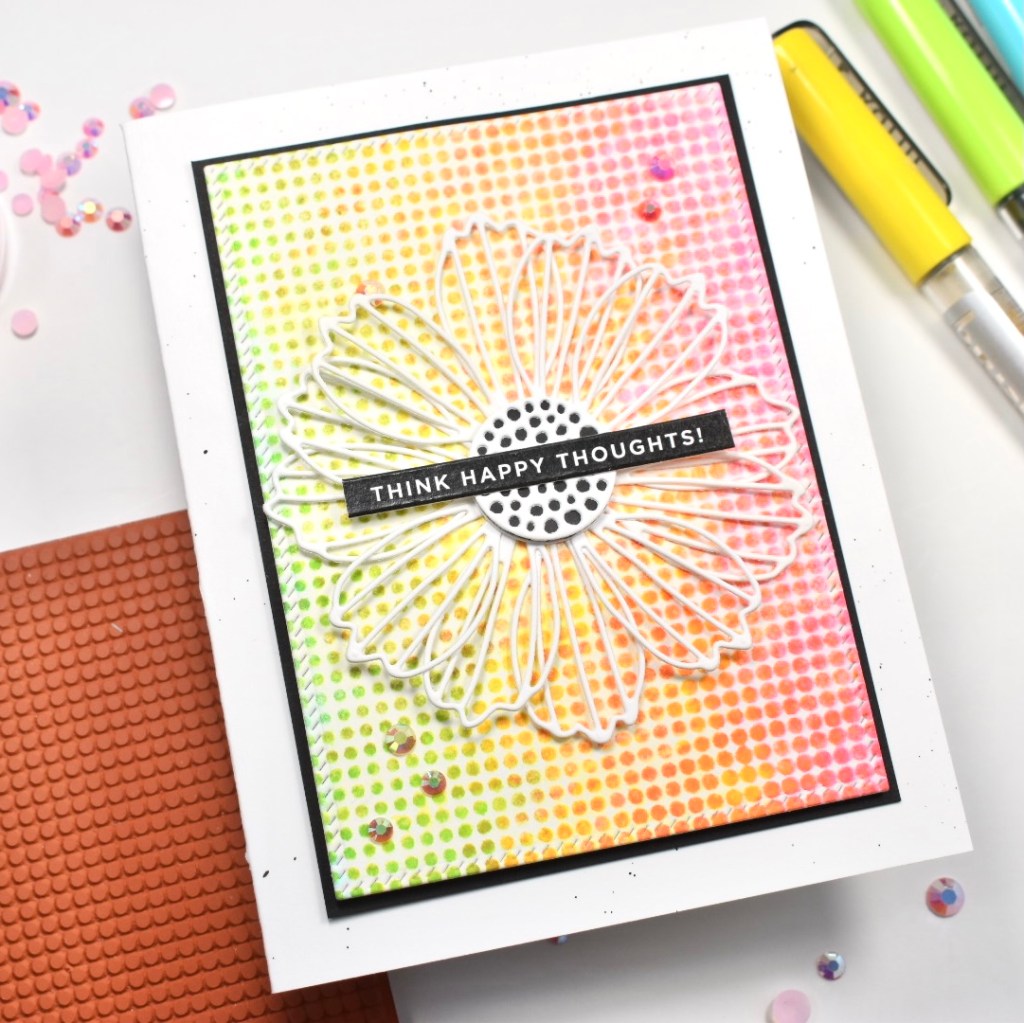
For today’s project, I’m featuring the new Halftone Square Background stamp. I honestly have so many Simon backgrounds, but I love them all! They are always my go-to when I’m needing a background of some sort. Anyhoo, let’s get into it.

To begin, I put a piece of Fluid Hot Press Watercolor paper in my Misti and positioned my stamp. I chose some rainbow colors from my set of Karin Brushmarkers and scribbled on one color at a time on the stamp, spritzed it with water, and then stamped it. I repeated this process with the remaining colors. I think that I ended up using five colors. You don’t see that many colors in this project because I cut it apart for multiple projects, and you’ll see the other project later on.

I left my watercolor panel to dry overnight before moving on. I used the PinkFresh Studio Diagonal Stitched Rectangles die to cut my panel down to size. For my focal point, I cut a bunch of petals using the Simon Says Stamp Cosmo Flower Petals from Neenah Classic Crest 110lb cardstock. I stacked a few of the solid flower centers together, along with a black one using Craft Tacky Glue and put one of the detailed flower centers on top of that pile.
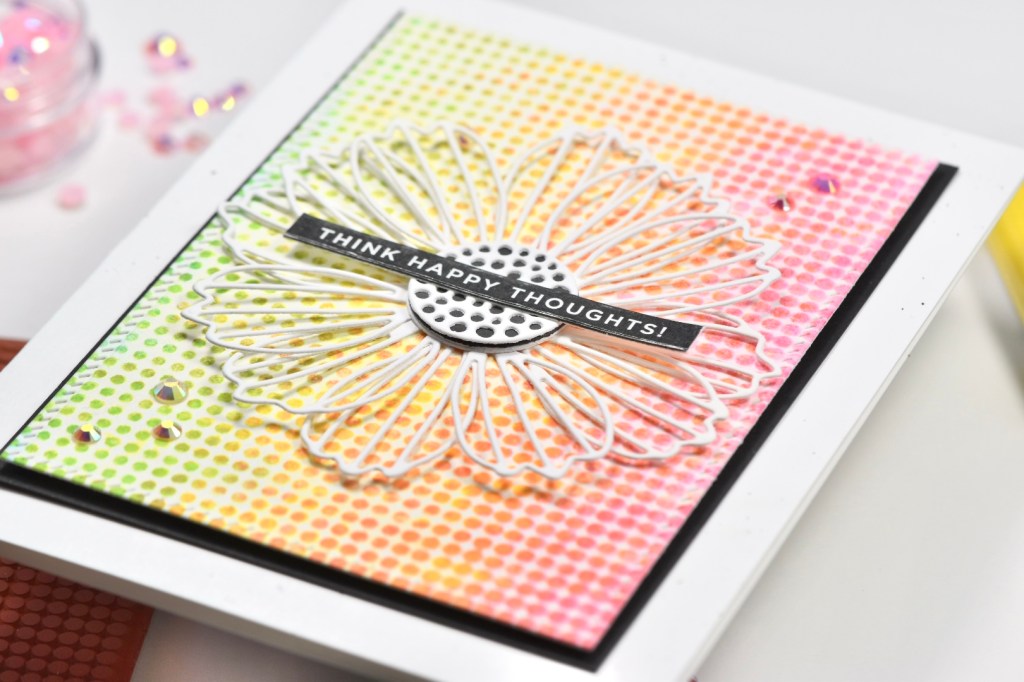
I then positioned my flower center in the middle of my panel, without adhering it! I held it there while I glued my flower petals underneath it. Once I got all of those adhered, I then glued my flower center over those. In all, I used twelve flower petals for this project.

I chose a Reverse Sentiment Strip, trimmed it down using the Simon Says Stamp Sentiment Labels Die and glued that to the center of my flower. As we all know, no project is complete without bling! I used the PinkFresh Studio Jewels Mix to add that needed bling. I adhered my card panel to a black cardstock panel using 3M Foam Tape. I then adhered those panels to my previously black splattered card base. For my splatter, I used Royal Talens Amsterdam Oxide Black Acrylic Ink.
Alright, that does it for today’s project! I hope you enjoyed it, and I hope it gives you a spark of creativity! Don’t forget to check out the full release HERE! Thanks so much for stopping by.
Don’t forget to stay AWESOME!
Supply List:
- Simon Says Stamp Halftone Square Background stamp
- Simon Says Stamp Cosmo Flower Petals
- Simon Says Stamp Sentiment Labels die
- Simon Says Stamp Reverse Sentiment Strip
- Fluid Hot Press Watercolor Paper
- Karin Brushmarkers
- PinkFresh Studio Diagonal Stitched Rectangles
- Neenah Classic Crest 110lb Cardstock
- Black Cardstock
- PinkFresh Studio Jewels Mix
- Craft Tacky Glue
- Royal Talens Amersterdam Oxide Black Acrylic Ink
- 3M Foam Tape
- Gemini Jr.
- Misti
*Affiliate links used at no cost to you. Thank you for your support!
- Simon Says Stamp Tattered Florals

- Simon Says Stamp Amazing Floral

- Simon Says Stamp Friendly Butterflies

- Simon Says Stamp Graceful Hugs

- Simon Says Stamp Hello Butterflies

