Spellbinders Bold Daisy Trio

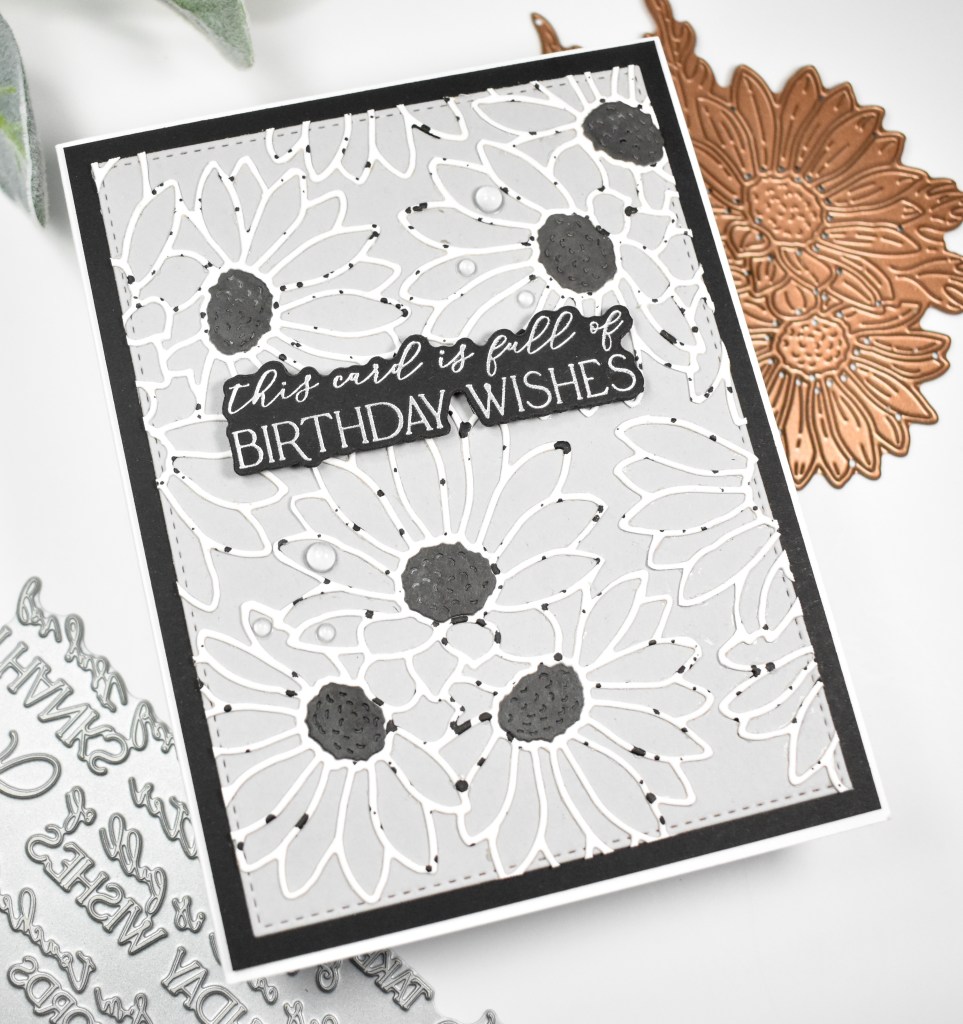
Hello Friends and welcome back! Today’s project is featuring the new Daisy Trio and Crafty Hugs Sentiments from the Spellbinders April releases! Let’s not waste time and go ahead and go through the details!
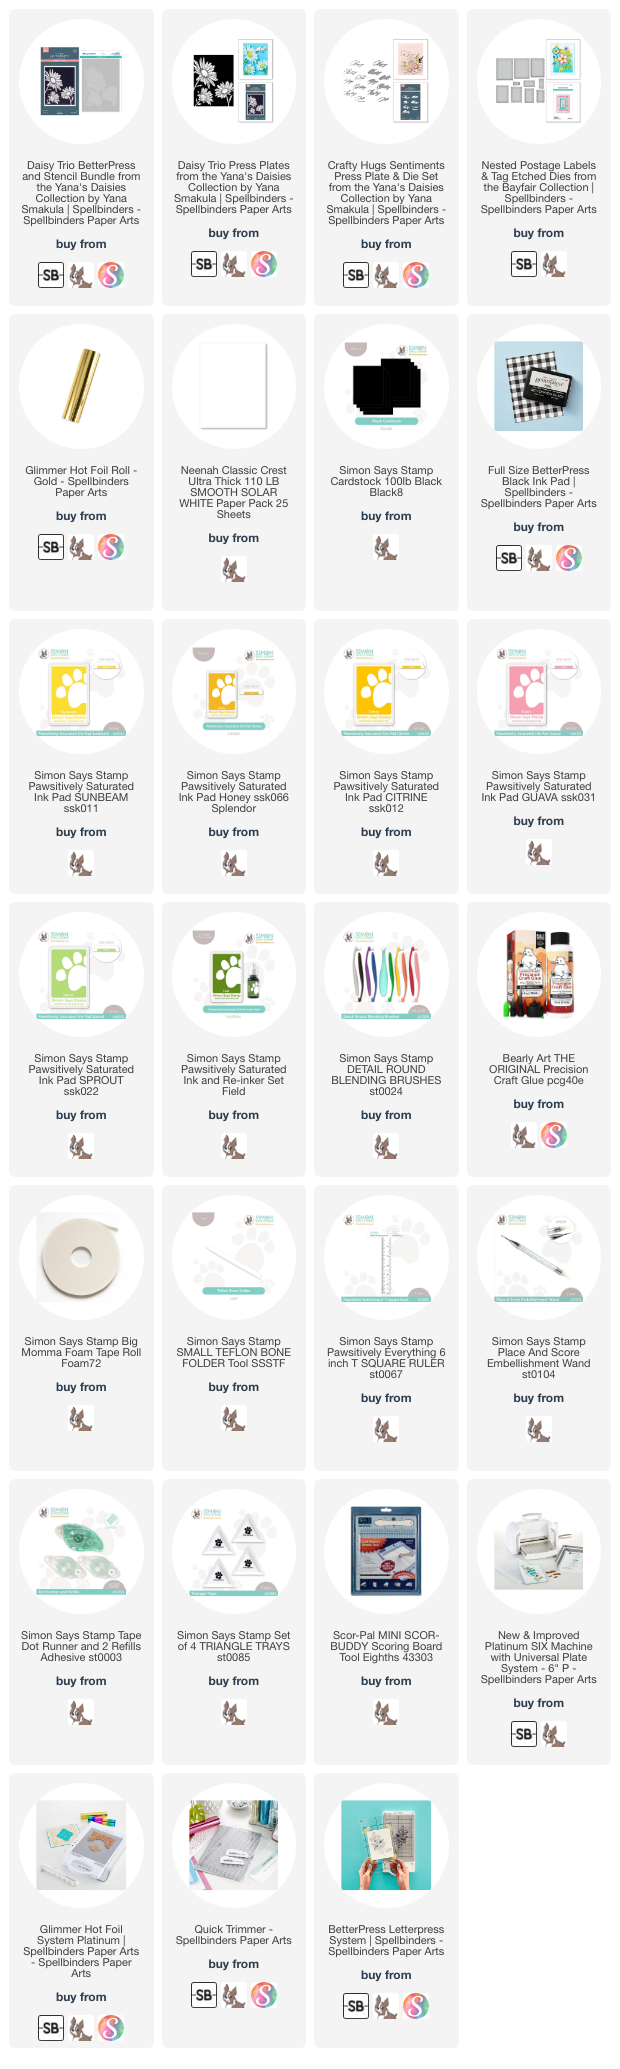
NOTE: all supplies are linked to multiple sources in the thumbnails at the end of this blog post.

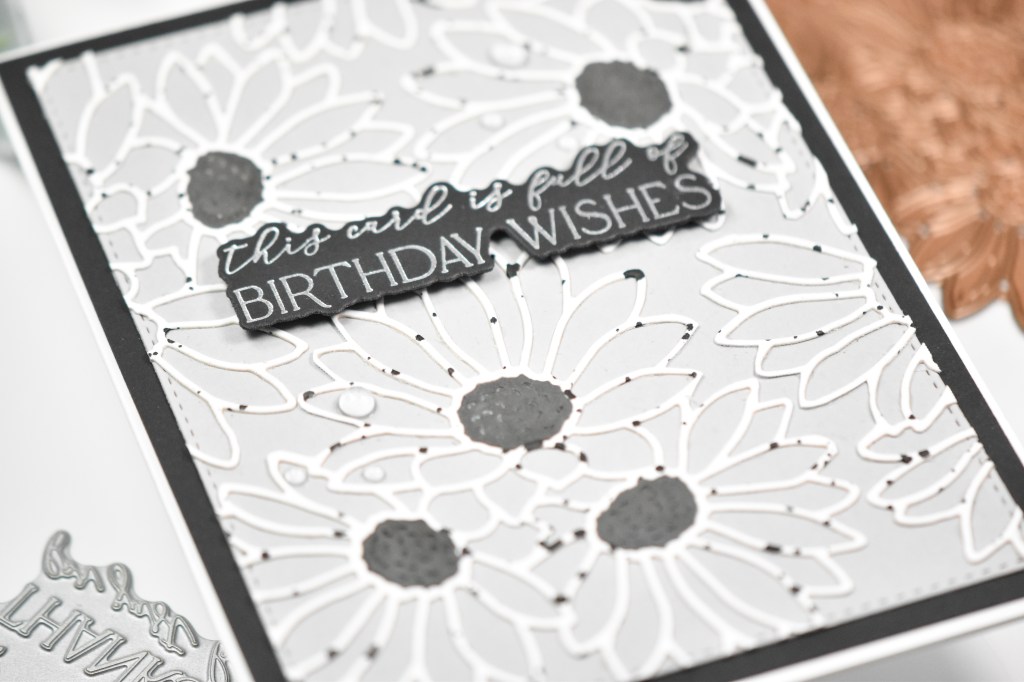
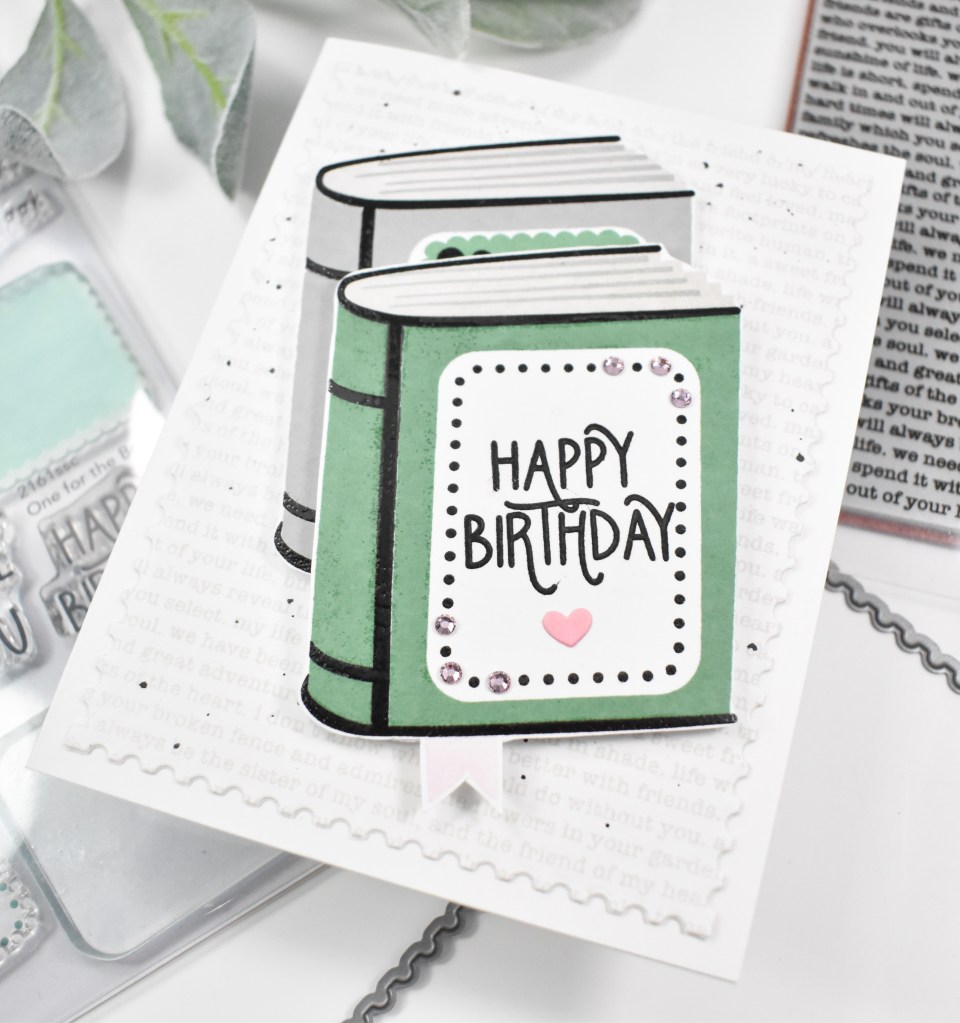
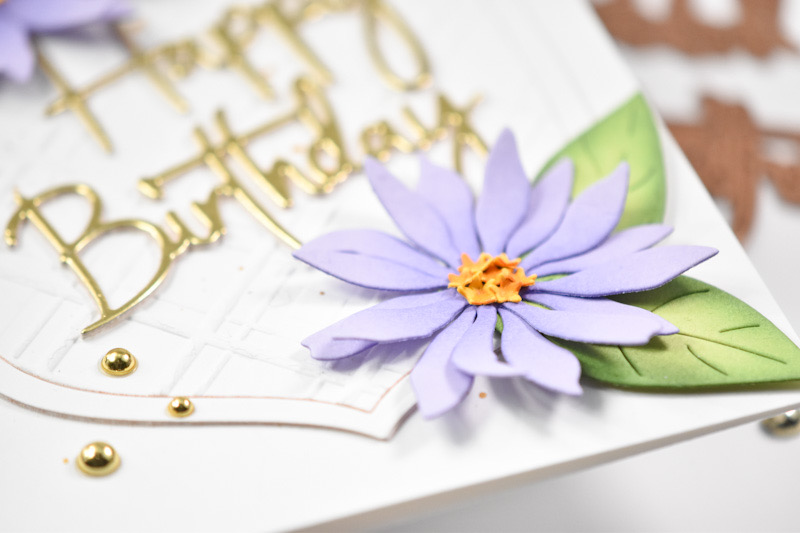
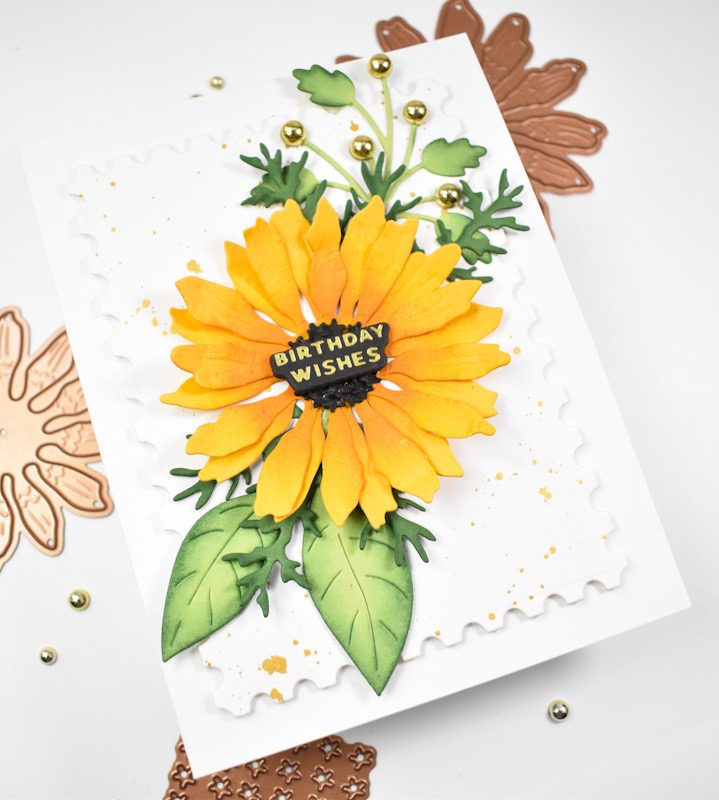
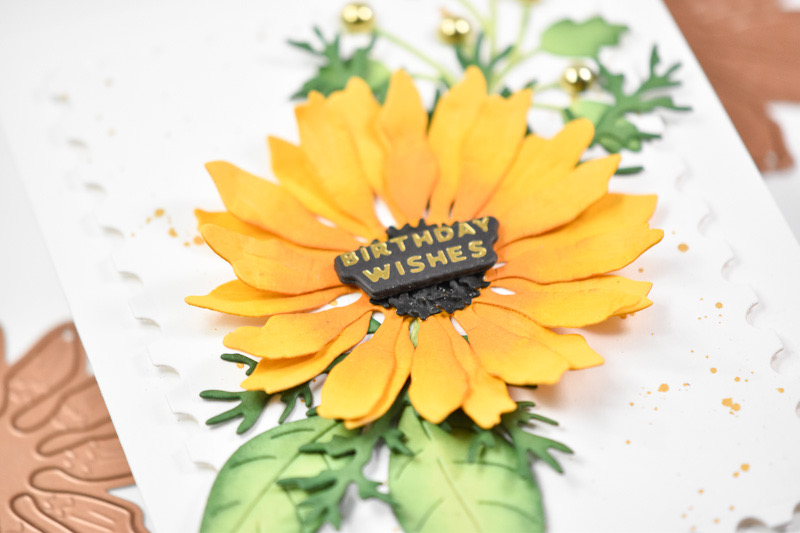
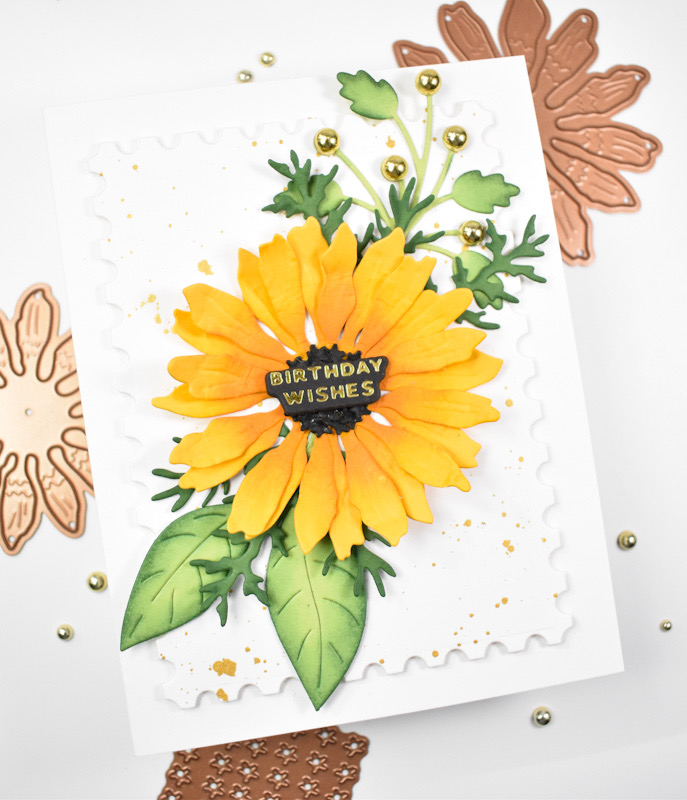
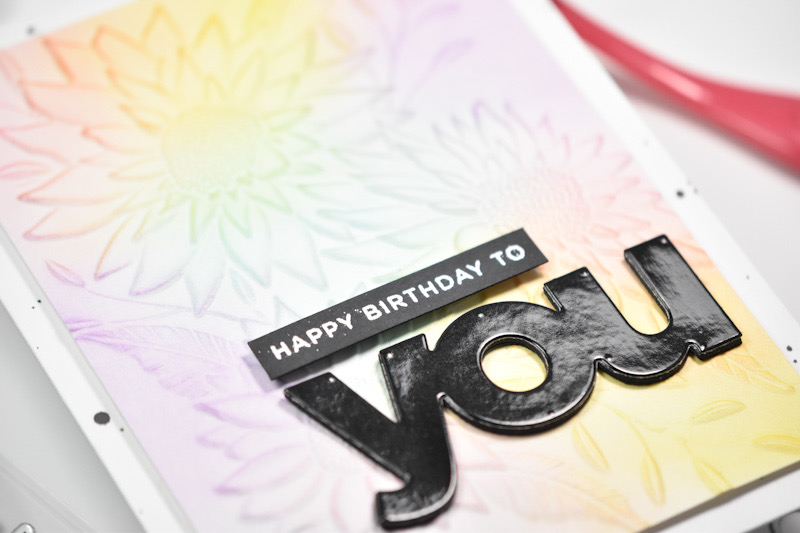
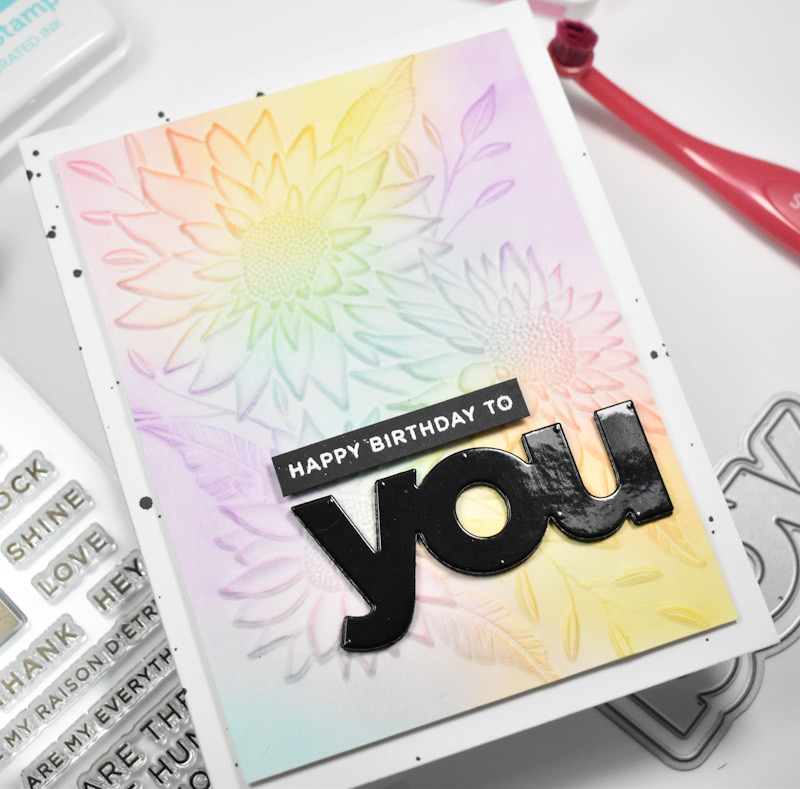
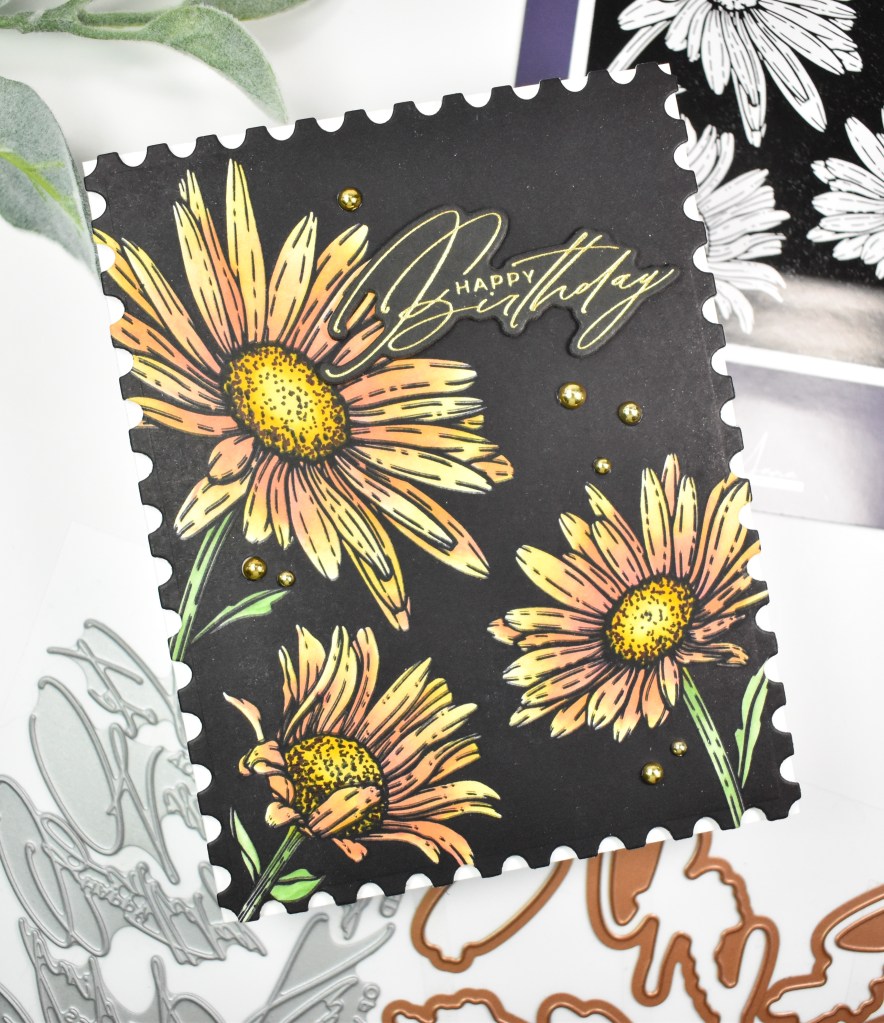
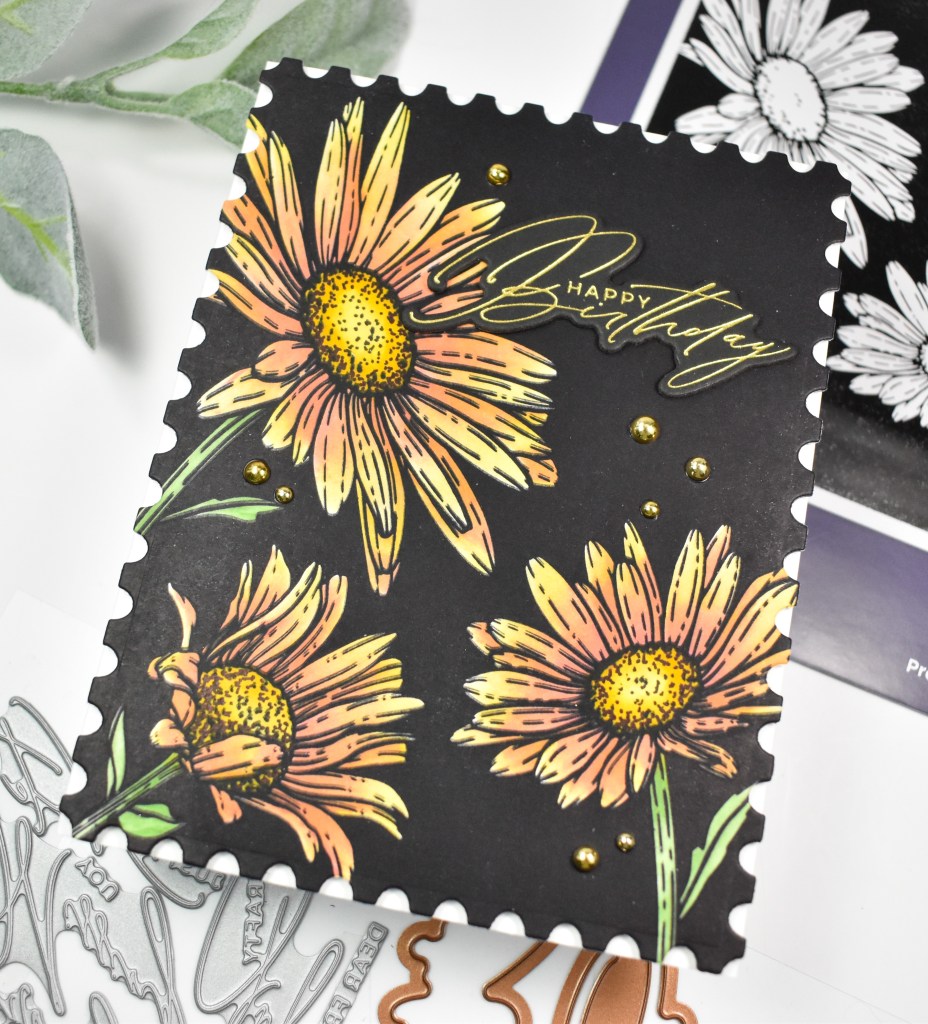
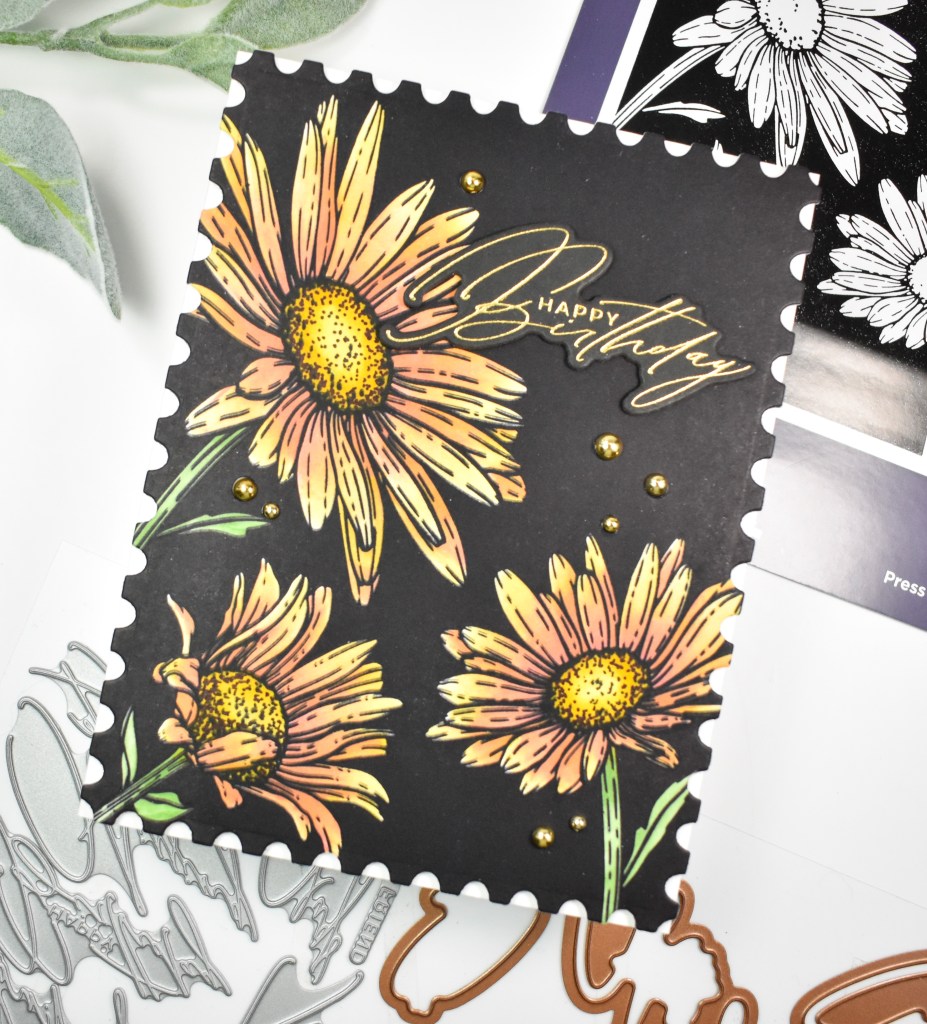
I began this project by adding BetterPress Black ink to the Daisy Trio BetterPress Plate and running that through the Platinum Six. I did have to repeat this process several times to get a good dark impression. Once satisfied with the black, I used the coordinating stencils to add color to the daisies using Honey, Citrine, Guava, Sprout and Field inks.

This panel was then trimmed down using the Nested Postage Labels & Tag set, and adhered to the card base using foam tape. The sentiment, which is from the new Crafty Hugs Sentiments set, was gold foiled onto black cardstock and trimmed out several times for a stacked sentiment. This was secured with liquid glue, along with some Gold Metallic Pearls for a little bit of shine.

That does it for this project! I do love a dark card sometimes! I hope you enjoyed this project! Thanks for stopping by, and don’t forget to stay awesome!
Supply List
Affiliate links used at no cost to you. What does this mean? If you use the links within this post to make a purchase, I receive a small commission, which allows me to continue to post crafty content for your enjoyment. I truly appreciate your support!
Latest Posts
- Simon Says Stamp Thinking of You Whirl Butterflies
- Simon Says Stamp Groovy Birthday

- Simon Says Stamp Amazing Scattered Leaves

- Simon Says Stamp Beautiful Friend Floral

- Together by Design Featuring Pinkfresh Studio

Latest Instagram Posts