Simon Says Stamp Miss You Fading Hearts

I’ve seriously had so much fun with the new Fading Hearts Stencil from the newest Rainbows release by Simon Says Stamp! This stencil has sparked a new love for stencils for me! The ink blending! The gels! The pastes! Oh my, so many awesome things to do with them! But .. for today’s project, I tried a little something different! Let’s take a look!

I’m loving this stencil so much, but I wanted to mix it up a bit and use it in an unexpected way! To begin my project, I pulled out a sheet of watercolor paper and taped it to my board using masking tape. My board happens to be a cheap clipboard from Target. But hey, it works like a charm! I also pulled out some rainbow colors from my set of Karin Brushmarkers. I started by saturating my watercolor panel with water and dropping in color using the markers. I moved the color around with my brush to get it just the way that I wanted it.
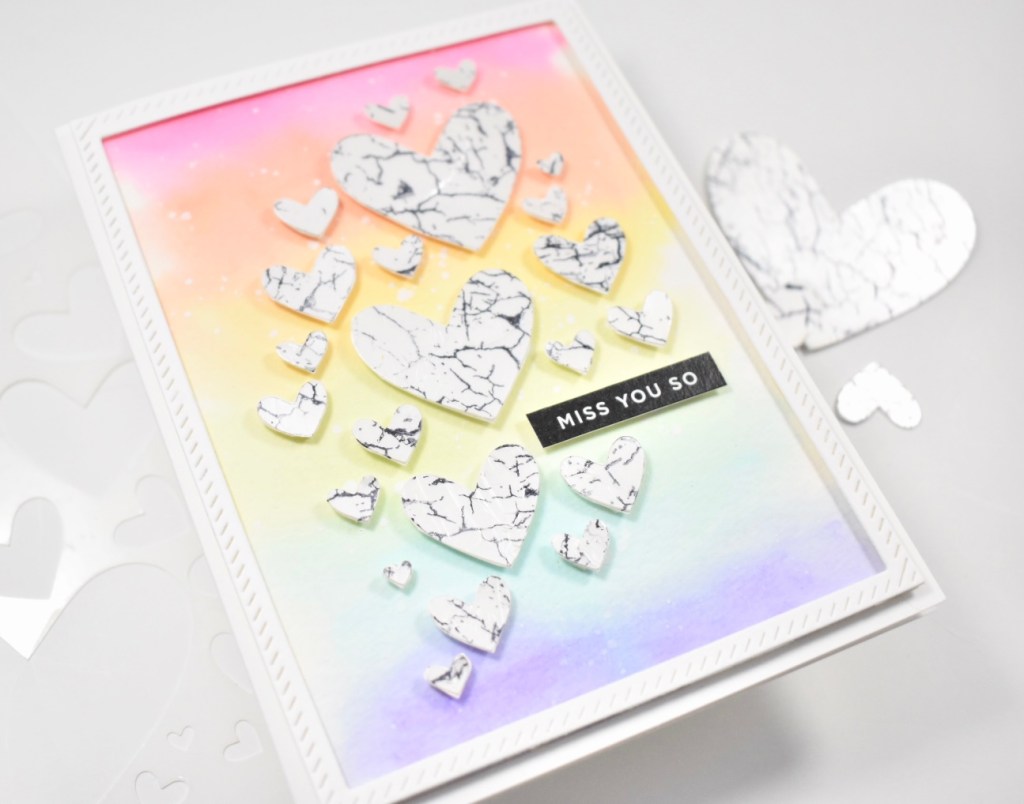
I set that panel aside to dry while I worked on the hearts. I began this portion of the project by adhering the stencil to a panel of Neenah Classic Crest 110lb cardstock using masking tape. I then used a palette knife to spread Picket Fence Studios Snowdrop Paper Glaze over the stencil. That also had to be set aside to dry. Don’t forget to wash your stencil and tools right away, so as not to ruin them. Once the watercolor panel was dry, I splattered it with some Royal Talens Amsterdam Titanium White Acrylic Ink. I love this ink because it’s the perfect consistency for splattering and it stays a nice bright white.

Now that the Paper Glaze panel was dry, I placed it in the Misti and proceeded to stamp the SSS Crackle Background over the glazed hearts using VersaFine Onyx Black Ink. I did run my heat tool over the stamped crackle just to heat set it so that it wouldn’t smear. Then … I fussy cut all of the hearts! Well, some were too tiny to cut, but I cut all the ones that I could, and put 3M Foam Tape on the back of them.
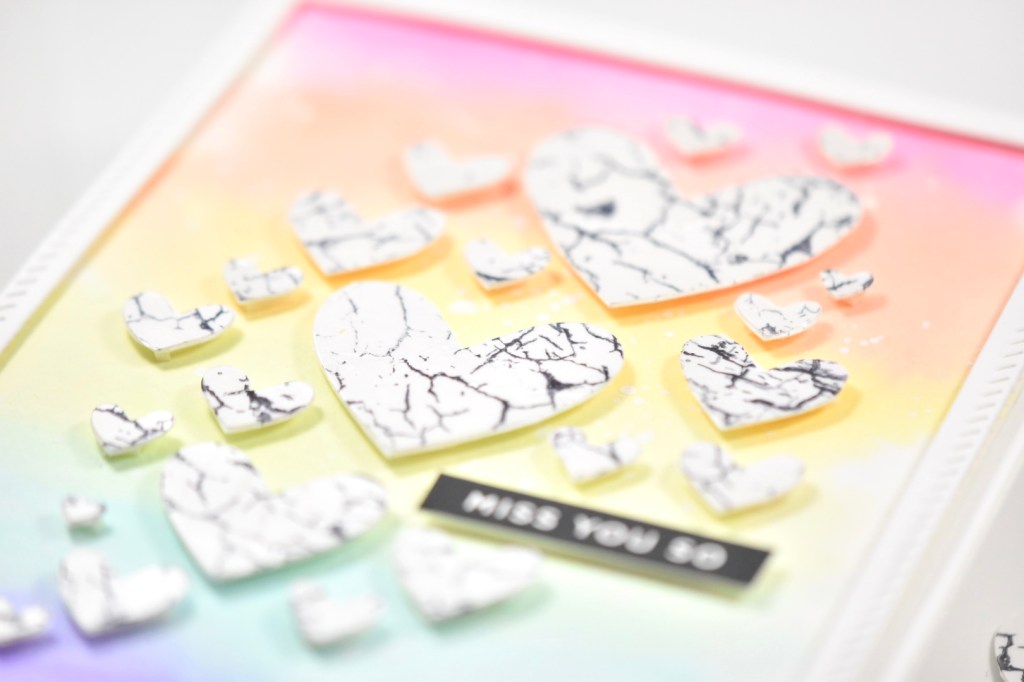
I used the PinkFresh Studio Stitched Rectangles Die to cut a frame and adhered that to my watercolor panel using foam tape as well. I then placed all of the hearts atop the watercolor panel along with the SSS Reverse Sentiment Strip Miss You So. This was then adhered to my card base, which is Neenah 110lb.

That finishes this project, and I love how it turned out! I love the idea of using your stencils in a different way by cutting the design out. It’s so unexpected! Anyhoo, I hope you enjoyed this project, and I hope it sparks some inspiration in you to look at your stencils in a new way! Don’t forget to check out the entire new Rainbows release from Simon Says Stamp!
Stay awesome friends!
Supply List:
- SSS Fading Hearts Stencil
- SSS Crackle Background Stamp
- SSS Reverse Sentiment Strip
- SSS Sentiment Label Dies
- Picket Fence Studios Snowdrop Paper Glaze
- PinkFresh Studio Stitched Rectangles Die
- Karin Brushmarkers
- Watercolor Paper
- Neenah Classic Crest 110lb Cardstock
- VersaFine Onyx Black Ink
- Heat Tool
- Palette Knife
- Princeton Watercolor Brush
- Misti
- Tim Holtz Scissors
- 3M Foam Tape
- Clipboard
- Royal Talens Amsterdam Titanium White Acrylic Ink
- Masking Tape
*Affiliate links used at no cost to you. Thank you for your support!
- Simon Says Stamp Tattered Florals

- Simon Says Stamp Amazing Floral

- Simon Says Stamp Friendly Butterflies

- Simon Says Stamp Graceful Hugs

- Simon Says Stamp Hello Butterflies