Simon Says Stamp Just A Note Zinnias

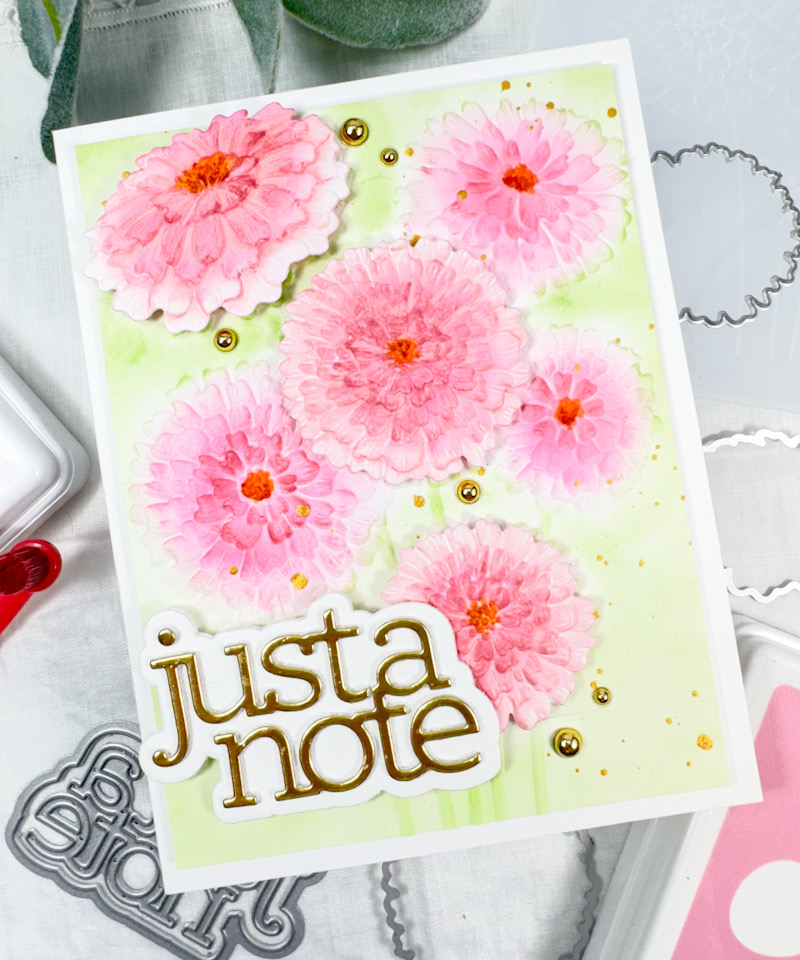
Hello Crafty Friends, and welcome back to my blog! I hope you all are doing well and that your summer is off to a great start! The latest Simon release, Sunny Vibes, in live and I’m back today with a card featuring the new Zippy Zinnias Embossing Folder with Cutting Die. Let’s jump right into the details, shall we?

Main Products:

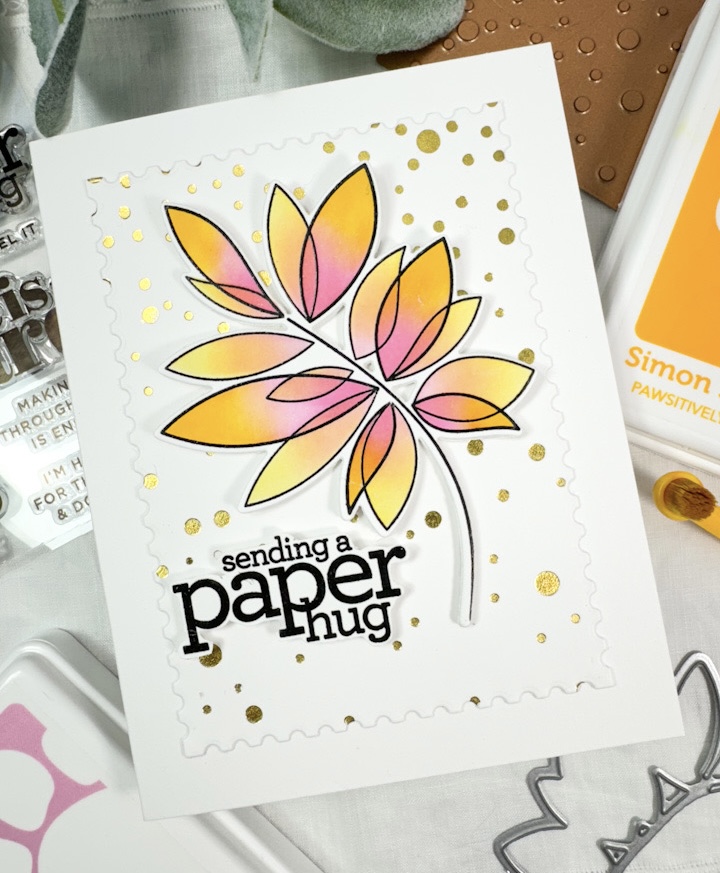
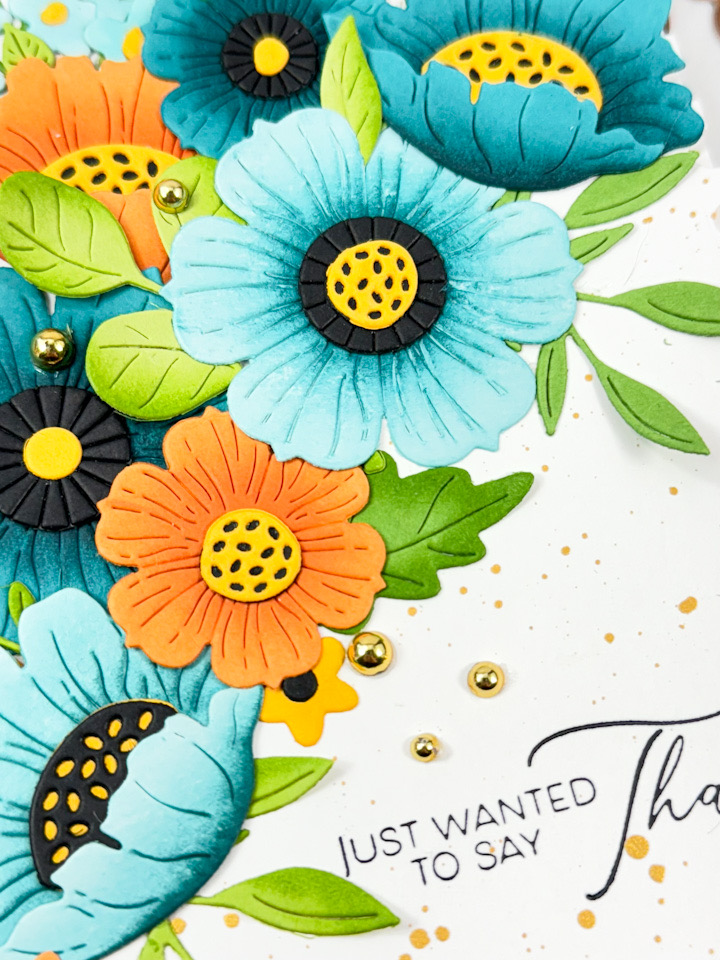
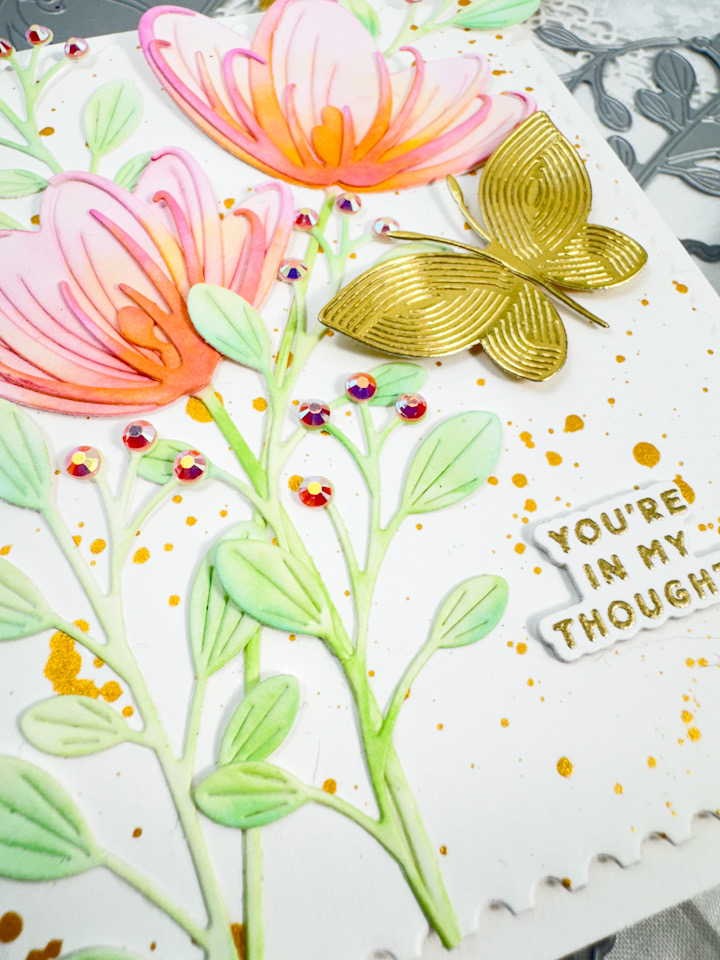
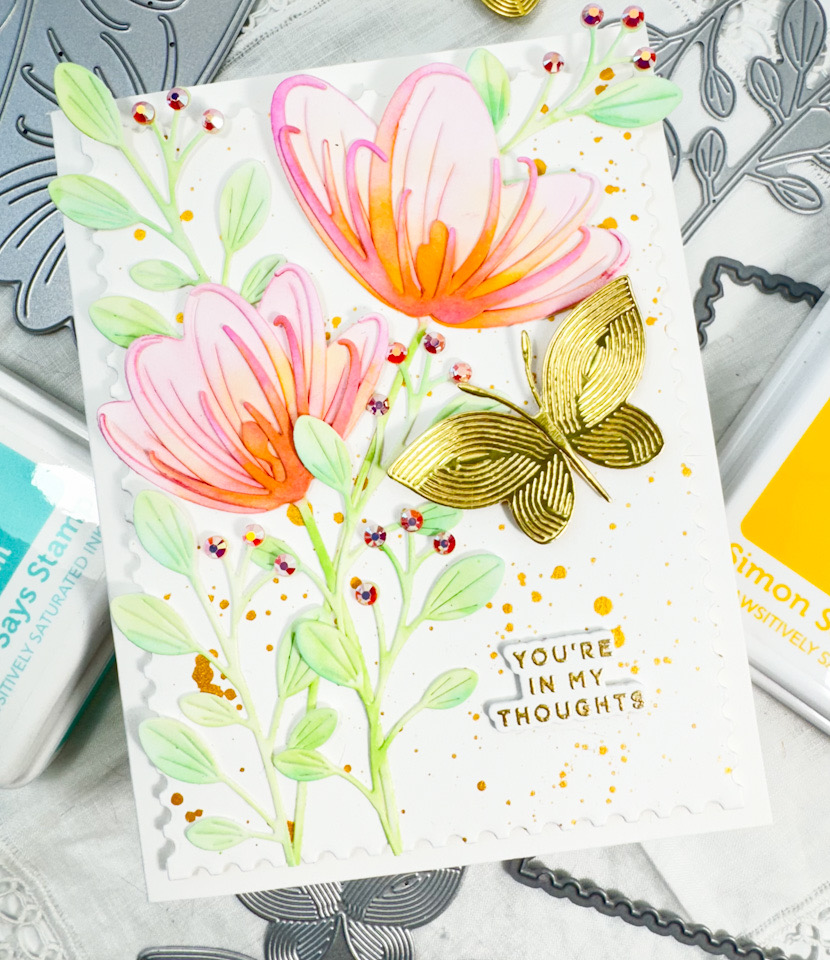
I began this project by embossing a panel of Neenah 110lb cardstock using the new SSS Zippy Zinnias Embossing Folder. I then embossed another panel and using the included dies to cut out the corresponding flowers. I colored the die cut flowers with a light pink colored pencil, and then decided that some ink blending would be better.

The inks used for the ink blending were SSS Pawsitively Saturated Inks in Bubblegum and Carnation. I also used Sprout on the background for the embossed panel. The centers of the flowers were colored using Copic Markers Y38 and YR27 to achieve the orange and brownish colors. Before adhering the die cut flowers to the panel using SSS 3D Foam Strips, I splattered the panel with some gold acrylic ink for some added interest.

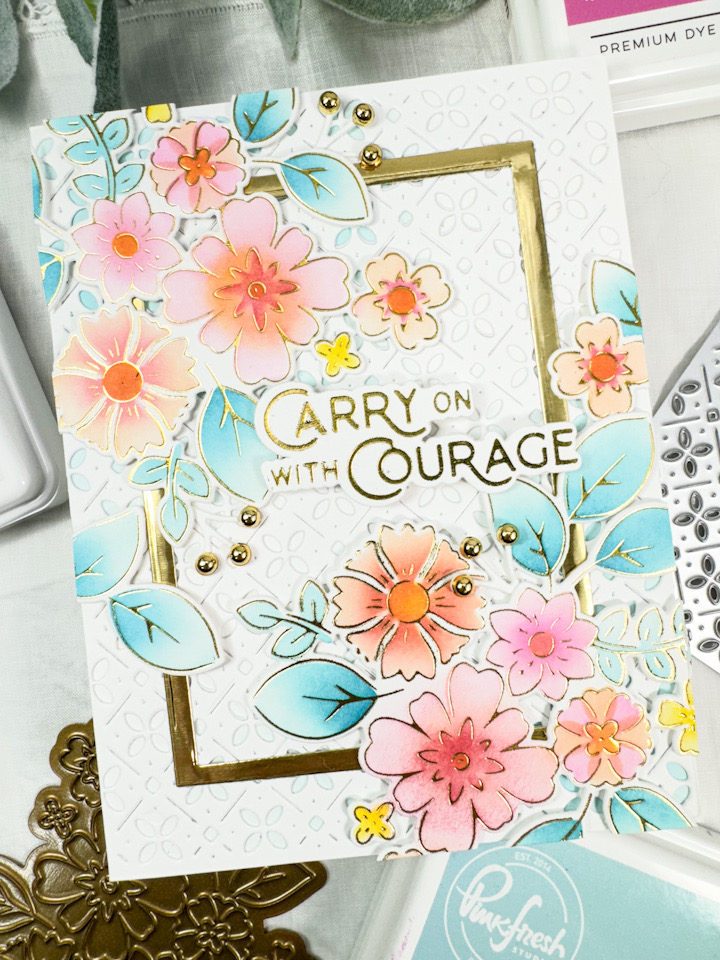
I used the SSS Just a Note 2 for the sentiment and cut that once from gold cardstock and once from Neenah 110lb cardstock. I also die cut the shadow twice using the same cardstock, and adhered all of those pieces together using liquid glue. The sentiment was then adhered using foam strips, and the panel was adhered to the card base with foam tape as well for added dimension. To finish up, I added some PFS Gold Metallic Pearls, because every card needs a little bling, in my opinion.

That does it for this one! I hope you enjoyed it, and I hope it inspires you to get creative in your space! Don’t forget to check out the entire Sunny Vibes release over on Simon’s website! I’d love to know your favorites in the comments! Thanks again for stopping by, and I hope you have a wonderful day!

Other Products:

* Affiliate links used at no cost to you. What does this mean? If you use the links within this post to make a purchase, I receive a small commission, which helps me to continue to post crafty content for your enjoyment. I truly appreciate your support!

Latest Posts

Latest Instagram Posts

Simon Says Stamp Sunny Vibes Blog Hop Day One

Hello Friends, and welcome back! Today I’m participating in Day One of a Simon Says Stamp Blog Hop to celebrate the latest release, Sunny Vibes! Be sure to follow along the hop and comment along the way for your chance to win a $25 SSS gift card! Who doesn’t love gift cards, am I right?! There’s also a free gift with any $50 purchase. Just enter the code HELLO during checkout to receive this freebie! I’ll list the Blog Hop order at the end of my post so that you can follow along. And don’t forget, there will be a Day Two of the Blog Hop happening as well! Even more chances to win! My card today is featuring the new Gentle Layers Floral Wreath, along with the new Little Banners Basics. So, let’s run through the details!

Main Products:

I began this project by die cutting all of the pieces of the wreath from Neenah 110lb cardstock and doing some ink blending using SSS Pawsitively Saturated Inks in Sprout, Seafoam, Lilac, Sunbeam, Honey, Dew and Aspen. Once all of the ink blending was complete, I adhered the pieces together with liquid glue and adhered those to the wreath.

For my background panel, I used the SSS Wistful Leaves Embossing Folder and embossed a panel of Neenah 110lb cardstock and then splattered it with gold acrylic ink for added interest. I always say this, but I felt like I needed more leaves, so I used the SSS Winsome Branch and cut some of those from white and gold cardstock. The wreath was glued to the embossed panel and I tucked the extra leaves in place and secured those with a bit more glue.

I used the Hello sentiment from the new SSS Little Banners Basics set and cut the banner from Neenah cardstock and cut the shadow portion from gold cardstock, adhering those with glue and then adhering it to the panel with SSS 3D Foam Strips. To finish up, I adhered the panel to the card base with foam tape before adding some PFS Gold Metallic Pearls.

That does it for this one! I hope you enjoyed it, and don’t forget to join in the Blog Hop for your chance to win! Thanks again for stopping by, and I hope you have an amazing day! You can follow along the Hop below.

Hop Order:

Simon Says Stamp Blog 

Nina-Marie Trapani

Caly Person

Jennifer McGuire

Suzy Plantamura

Amy Rysavy

Debby Hughes

Lisa Addesa

Alberto Gava

Barb Engler

Kath Stewart

Karin Åkesdotter

Jean Doeringsfeld

Tracy Ware

Daniel West

Other Products:

* Affiliate links used at no cost to you. What does this mean? If you use the links within this post to make a purchase, I receive a small commission, which helps me to continue to post crafty content for your enjoyment. I truly appreciate your support!

Latest Posts

Latest Instagram Posts

Simon Says Stamp Paper Hug Leafy Cluster

Hello Crafty Friends, and welcome back to my blog! I appreciate you stopping by to check out today’s project featuring the new Bad Day, Good Vibes stamp set, from Simon’s latest release, Sunny Vibes. I’m pairing it with the Friendship Leafy Cluster product suite, which is a favorite of mine. Let’s go ahead and get to the details!

Main Products:

I began this project by stamping the leaves from the SSS Friendship Leafy Cluster set onto a panel of Neenah 110lb cardstock using VersaFiny Onyx Black ink and heat setting it using Ranger Clear Embossing Powder. I did stamp several leaves, because I really wasn’t sure where this card was going. Once the stamping was done, I used the coordinating stencil to add color using SSS Pawsitively Saturated Inks in Bubblegum, Carnation, Lemonade and Citrine.

Once satisfied with the ink blending, I used the coordinating die to trim out the leaves. I did cut five more leaves from Neenah 80lb cardstock and adhered all of those together with the ink blended leaf with liquid glue for LOTS of dimension! Next, I took a panel of Neenah 110lb cardstock and foiled the SSS Mini Slimline Falling Dots Foil Plate. Unfortunately, I believe Simon must have discontinued this plate, because I was unable to locate it on their website. My apologies for that .. I will link to a similar product. I did have to foil the panel twice to cover the size of panel that I wanted. I then used the SSS Postage Stamp Edge Frames to trim it down.

I stamped this super cute sentiment from the new SSS Bad Day, Good Vibes set using the same Onyx black ink and the same embossing powder and used my Brother Scan n Cut to trim it out. I adhered the foil panel to the card base using SSS Dot Tape Runner, and the leaf was glued directly to the panel, while the sentiment was adhered using SSS 3D Foam Strips to match the thickness of the leaf.

That does it for this one! I love this leaf, and I love the colors along with the cute foiled dots! Like I said, this set is a definite favorite of mine. I hope you enjoyed this project too, and I hope it inspires you to get crafty in your space. Thanks again for stopping by, and I hope you have a fabulous day!

Other Products:

* Affiliate links used at no cost to you. What does this mean? If you use the links within this post to make a purchase, I receive a small commission, which allows me to continue to post crafty content for your enjoyment. I truly appreciate your support!

Latest Posts

Latest Instagram Posts

Spellbinders Floral Thanks

Hello Crafty Friends, and thank you so much for stopping by! I’m back today with a project featuring some Spellbinders products from the May 2024 release, along with an older floral set. Let’s go ahead and run through the details, shall we?

Main Products:

I recently created another card using this same color palette, and I loved it so much that I wanted to create another one! I began this card by using the Spellbinders Club Blooms Large Die of the Month from January 2023 and cutting the flowers and leaves from different shades of aqua, orange, green, yellow and black cardstock. I made quite a few flowers, and probably have enough to make one more card with those. Once the pieces were cut, I did some ink blending and assembled the flowers using liquid glue. These are great flowers, because you can assemble them in various ways.

For the background panel, I used the Spellbinders Nested Postage Labels and Tag set to trim that down, and then added some gold splatter for some added interest. Once the splatter was dry, I used the Spellbinders New Beginnings Timeless Sentiments Press Plates to add the sentiment directly to the panel using BetterPress Black ink. I arranged the florals atop the panel at an angle and then used some Press N Seal to lift them off so that I could apply some glue to the back and then adhere them to the panel.

The panel was then adhered to the card base using foam tape, and I added some Spellbinders Fashion Gold Embellishments for some additional shine.

That finishes up this project! I hope you enjoyed it, and I hope it inspires you to get crafty in your space! I thoroughly enjoy assembling flowers and floral sprays like this, so this card was right up my alley! Thanks again for stopping by! Stay awesome friend, and have a wonderful day!

Other Products:

* Affiliate links used at no cost to you. What does this mean? If you use the links within this post to make a purchase, I will receive a small commission, which allows me to be able to continue posting crafty content for your enjoyment. I truly appreciate your support!

Latest Posts

Latest Instagram Posts

Floral Happy Thoughts

Hello Friend, and welcome back to my blog! I’m so glad that you stopped by to check out today’s project featuring the Fantasy Flowers from Alex Syberia Designs. I picked up this set while I was at CREATE, and couldn’t wait to make something with it! Let’s go ahead and run through the details!

Main Products:

I began this card by die cutting a bunch of flowers, leaves and a few stems using the Fantasy Flowers set from Neenah 110lb cardstock. Once those were cut, I did some ink blending using SSS Pawsitively Saturated Inks in Seafoam, Mist, Raindrop, Melon, Cantalope, Sherbet, Honey and Aspen. I did decide to go back and cut one of the center portions of the flowers from black cardstock, before adhering all of the pieces together using liquid glue.

The background panel is the PFS Sparking Diamonds, which was cut from Peacock cardstock, and the frame is the PFS Simply Diamonds. I thought these two paired well together, and added some nice texture and interest. The sentiment is from the SSS XL Greetings 2 set, and this is definitely one of my favorites! It was stamped on black cardstock and heat embossed using SSS Detail White Embossing Powder. It was cut two additional times and adhered together for a stacked sentiment.

Once I began playing around with the placement of the flowers and leaves, I thought some black leaves would look pretty good, so I cut some of those using the Classic Foliage, also from Alex Syberia Designs. I glued the panels together, and then glued the leaves and orange flowers in place. The teal flowers were then adhered using SSS Foam Squares, and the sentiment was adhered using SSS 3D Foam Strips to finish up.

That does it for this one! I hope you enjoyed it as much as I did! This color combination is going to become a favorite of mine! Thanks again for stopping by, and I hope you have a wonderful day!

Other Products:

* Affiliate links used at no cost to you. Thanks so much for your support!

Latest Posts

Latest Instagram Posts

Simon Says Stamp Spindle Birthday

Hello Crafty Friend, and thanks for stopping by! I’m back today with a project featuring the Birthday Wishes die from Simon’s June 2024 Card Kit, along with the beautiful Spindle Flower. Let’s get into the details.

Main Products:

I began this card by creating the background panel using a black panel and the SSS Circle Hoops Embossing Folder. Once embossed, I applied some Snow and Ice Lustre Polish over the top to give it the shine that you see. When that dried, I ink blended SSS Rainbow Splash Black ink over that, mainly to tone down the shine.

I die cut the SSS Spindle Flower from Neenah 110lb cardstock and did some light ink blending on the pieces using Concord & 9th Dove ink for the flowers. The stems were ink blended using SSS Pawsitively Saturated Ink in Fairway and Seafoam. The yellow portion of the flower just used left over ink from the blending brush. The flowers were then assembled using liquid glue. Of course, I needed some leaves! For that, I used the SSS Privet Branch and used the same colors for the ink blending.

The SSS Birthday Wishes die was cut once from silver cardstock and once from black cardstock, and those were adhered together using liquid glue. The sentiment was adhered in the bottom right corner of the black panel, so that I could determine the placement of the flowers and leaves. Those were then glued in place and the panel was adhered to the card base using foam tape.

That does it for this one! I hope you enjoyed it, and I hope it inspires you to get crafty in your space! Thanks again for stopping by and don’t forget to stay awesome, friend!

Other Products:

* Affiliate links used at no cost to you. Thanks so much for your support!

Latest Posts

Latest Instagram Posts

PinkFresh Studio May Challenge – Flower Power

Hello Crafty Friends, and welcome back to my blog! I rarely participate in challenges, but decided that I would give the PFS May Challenge a go. The theme is Flower Power, and flowers are always up my alley, so why not?! Let’s run through the details, shall we?

Main Products:

I began this project by foiling the PFS Simplest Gestures florals onto a panel of Neenah 110lb cardstock, using gold foil. I then used the coordinating stencils to do some ink blending using PFS inks in Bubble Gum, Sunkissed, Citron, Ocean Breeze and Atlantis. Once all of the ink blending was complete, I used the coordinating die to trim them out.

I went back to foiling for the sentiment using the PFS Wonderful Sentiment Foil Plate and coordinating die. I cut three and adhered all of the together using liquid glue for a stacked sentiment. Now to pull everything together! I did some light ink blending on my card base using leftover ink on the blending brush and glued the PFS Floral and Diamond Tiles panel atop that.

The card was needing a little something else, so I added a gold frame using the SSS A2 Thin Frames, and then adhered the florals using SSS Foam Squares. The sentiment was adhered amongst the flowers using SSS 3D Foam Strips for a little added dimension. I also used the SSS Budding Branches and cut a few of the ‘buds’, glued those in place and added some PFS Gold Metallic Pearls. I did trim off the excess flowers and added a few back in around the edges of the card to finish up.

That does it for this project! I hope you enjoyed it, and I hope it inspires you to get crafty in your space! Thanks again for joining me, and don’t forget to stay awesome!

Other Products:

* Affiliate links used at no cost to you. Thanks so much for your support!

Latest Posts

Latest Instagram Posts

Simon Says Stamp In My Thoughts Butterfly

Hello and welcome back to my blog! I appreciate you stopping by! Today I’m participating in a Simon Says Stamp Instagram Hop to celebrate the CELEBRATE release. Be sure to check that out and comment along the hop for your chance to win a $25 gift card to Simon’s website. Who doesn’t love gift cards, am I right?! Today’s card is once again featuring the new Whirl Butterflies, and I had much fun with these butterflies, and probably made too many projects with them, but at least they’ve gotten some good use! Let’s run through the details for this one, shall we?

Main Products:

I began this card by die cutting the SSS Spindle Flower from Neenah 110lb cardstock, and doing some ink blending using SSS Pawsitively Saturated Inks in Bubblegum, Carnation and Zest. I chose this flower because I had never used it before, and now I’m wondering why I haven’t used it before!! It’s such a great flower! Once the flowers were colored, I assembled the pieces together using liquid glue.

The flowers were going to need leaves, because all of my flowers always need leaves! I used the SSS Budding Branches for this and did some ink blending using Seafoam and Sprout for these. I also went ahead and cut the SSS Whirl Butterflies from gold cardstock and set that aside. My panel was cut using the SSS Postage Stamp Edge Frames and then splattered with gold acrylic ink for added texture and interest.

I glued some of the leaves to the panel and then glued the florals atop those. The rest of the leaves were then glued in place, filling in the gaps, while the gold butterfly was adhered using SSS 3D Foam Strips. The butterfly doesn’t come with a body, and I wanted mine to have one so I used the body from the SSS Layered Cosmic Butterfly and secured that in place.

For added interest, I love adhering jewels to the ‘bud’ portion of these leaves, and did that using PFS Ballet Slipper jewels. I stamped the sentiment from the SSS Checking In set using VersaMark Ink, heat set that using Ranger Princess Gold Embossing Powder, and used the coordinating die to trim it out, along with two additional cuts. Those were all adhered together before being adhered to the panel using foam strips. The entire panel was then adhered to the card base using foam tape for added dimension to finish up.

That does it for this one! I hope you enjoyed it, and I hope it inspires you to get crafty in your space! Don’t forget to check out the entire Celebrate release over on Simon’s website, and join the hop over on Instagram for your chance to win! Thanks again for stopping by, and have a wonderful day!

Other Products:

* Affiliate links used at no cost to you. Thanks so much for your support!

Latest Posts

Latest Instagram Posts

Simon Says Stamp Birthday Organic Leaves

Hello Crafty Friends, and welcome back to my blog! I’m so glad that you stopped by to check out today’s project featuring the new Organic Leaves stamp from Simon’s latest release, Celebrate. This is such a great stamp because there’s so many different things and mediums to use with it. For example, ink blending over it, watercoloring around it, or even using some of the pigment powders and water with it. I have some other ideas that I want to try, but need to find the time! Anyhoo, let’s go through the details for this one!

Main Products:

I began by stamping the SSS Organic Leaves onto a panel of Neenah 110lb cardstock using VersaFine Onyx Black ink and heat setting it using Ranger Clear Embossing Powder. I then did some ink blending over the panel using SSS Pawsitively Saturated Inks in Bubblegum, Lemonade, Celery, Seafoam and Lilac. Once the ink blending was done, I took a cloth and wiped over the stamped leaves to remove the ink sitting on top.

I love decorative edges, so I used the SSS Postage Stamp Edge Frames to trim the panel down. The SSS Oh Expletive was cut once from silver cardstock and once from aqua cardstock, while the shadow portion was cut twice from black cardstock. Before adhering all of these pieces together with liquid glue, I did some ink blending on the aqua portion using Ocean ink, and then glued this directly to the stamped panel.

The sub-sentiments are from the SSS Reverse Sassy Birthday Sentiment Strips. The smaller sentiment was glued directly atop the main sentiment and the larger strip was adhered with SSS 3D Foam Strips for a little added dimension. The finish panel was then adhered to the card base to finish up.

I have a sassy personality and a sassy sense of humor, so this main sentiment is right up my alley! Don’t forget to check out the entire Celebrate release over on Simon’s website. Thanks again for stopping by, and I hope you have a wonderful day!

Other Products:

* Affiliate links used at no cost to you. Thanks so much for your support!

Latest Posts

Latest Instagram Posts

Simon Says Stamp Floral Diamond Circles

Hello Crafty Friends, and welcome back! I’m so glad that you stopped by! I’m back today with a project featuring the new Diamond Circles
Foil Transfer Cards
from Simon’s latest release, Celebrate. Let’s get right in to it!

Main Products:

I began this card by foiling a SSS Diamond Circles Foil Transfer Card using gold foil and the Minc Mini. Once my foiling was done, I trimmed the panel down slightly, and went to work on all of the florals. I pulled a card from The Color Cubes for inspiration, and I loved the oranges and aqua together, so I went with that color palette. The florals that I used were SSS Etched Meadow Flower and Leaves, SSS Etched Magnolia Blossom, SSS Charming Daisy, SSS Sunrise Stem and the SSS Whirl Blossom.

Most of the flowers were cut from Neenah 110lb cardstock, while two of them were cut from orange cardstock. Once those were cut, I did some ink blending using SSS Pawsitively Saturated Inks in Cantalope, Melon, Peachy and Sherbet, along with C&9 ink in Grapefruit. The added leaves were cut from aqua and light blue cardstock, while the centers of some of the flowers were cut from gold cardstock. I assembled the flowers with liquid glue and added a gold gem to one of the flowers as well.

The background needed something else in my opinion, so I opted to use the SSS Stitched Squares for this. I ended up using two of the squares and adhered those to the foiled panel using SSS 3D Foam Strips and arranged my flowers and leaves around the left side, tucking in leaves between the flowers for added fullness.

I used the SSS Greetings Trio for the sentiment, and cut the Thanks from gold cardstock, along with two additional cuts and the shadow, adhering all of those together with liquid glue. The sentiment was adhered to the panel using foam strips. The entire panel was adhered to the card base using foam tape, and I added some PFS Gold Metallic Pearls to finish up.

That does it for this one! I absolutely love this color combo, and I’m so thrilled with The Color Cubes for those times when I need a little extra color inspiration! Thanks again for joining me, and don’t forget to check out the entire Celebrate release over on Simon’s website. Have a fabulous day and stay awesome, friends!

Other Products:

* Affiliate links used at no cost to you. Thanks so much for your support!

Latest Posts

Latest Instagram Posts