Simon Says Stamp Big Birthday Butterflies

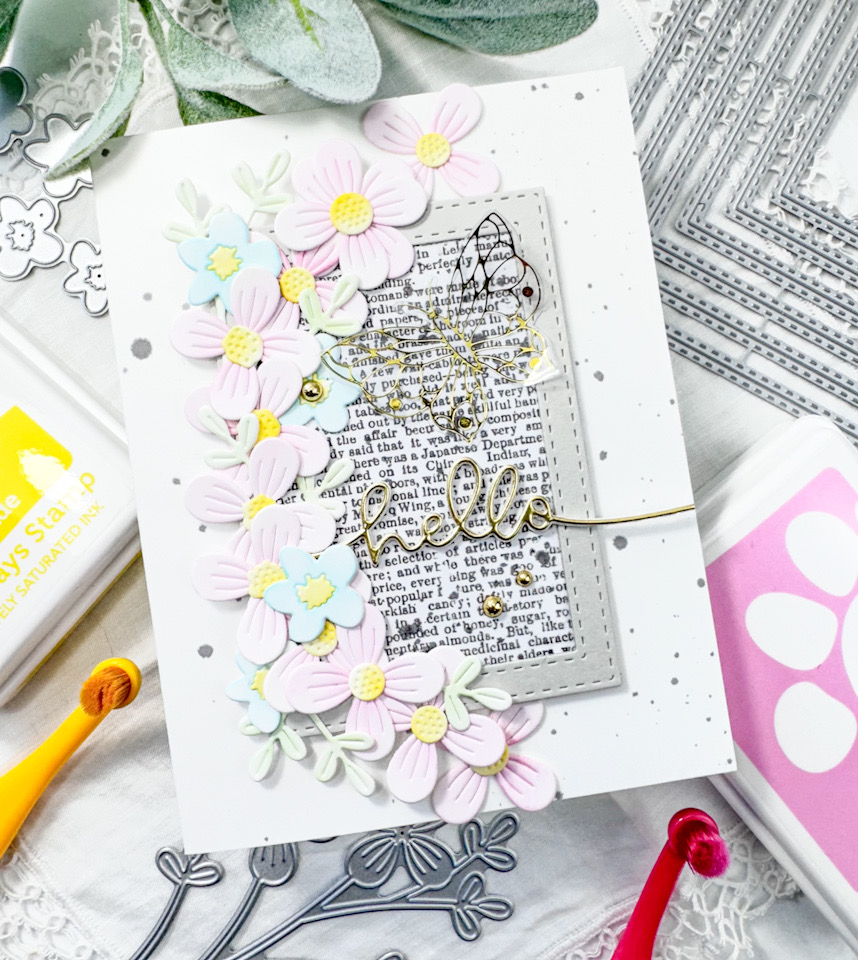
Hello Crafty Friends, and thanks so much for stopping by! I’m back today with a project featuring the new Whirl Butterflies from Simon Says Stamp’s latest release, Celebrate. Let’s jump right in to it, shall we?

Main Products:

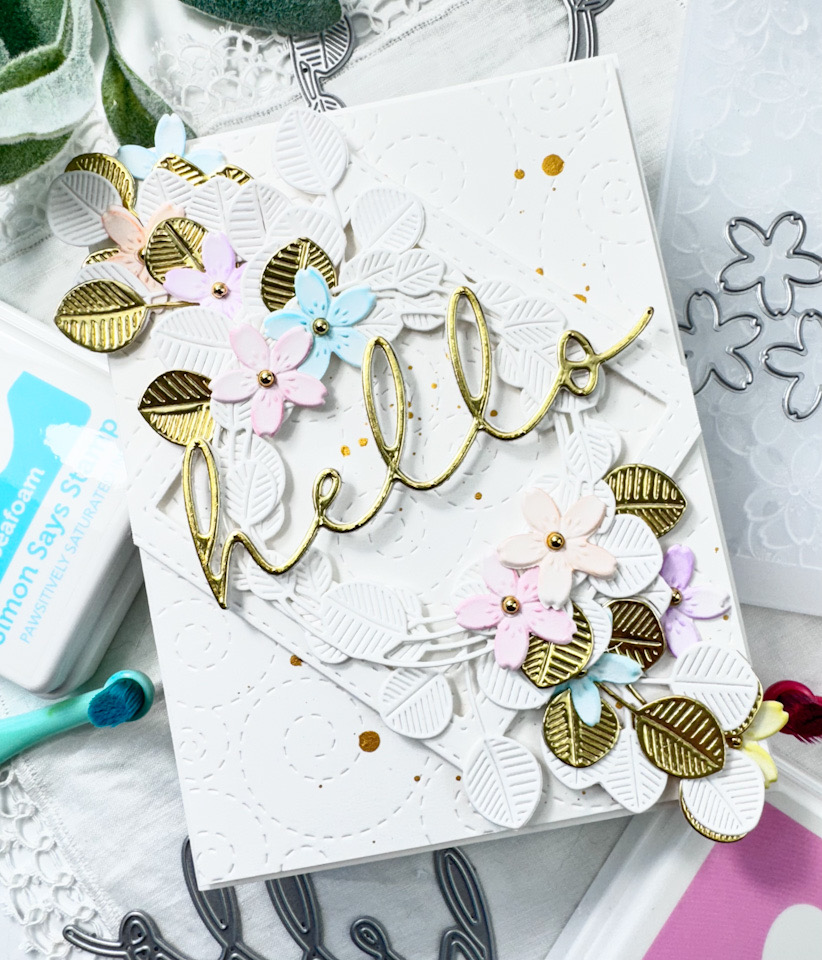
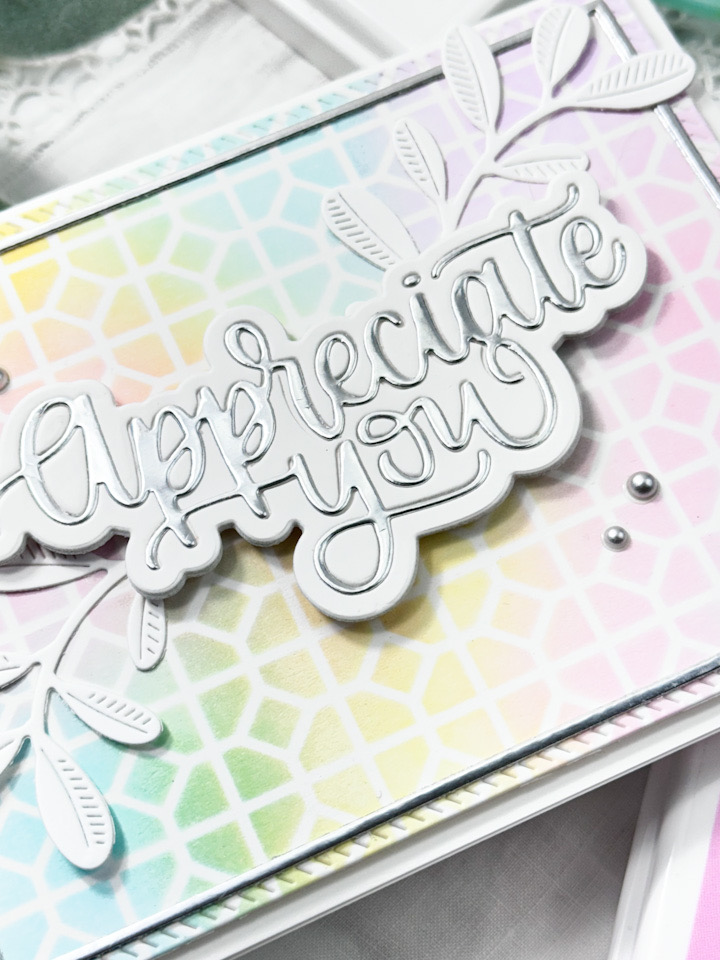
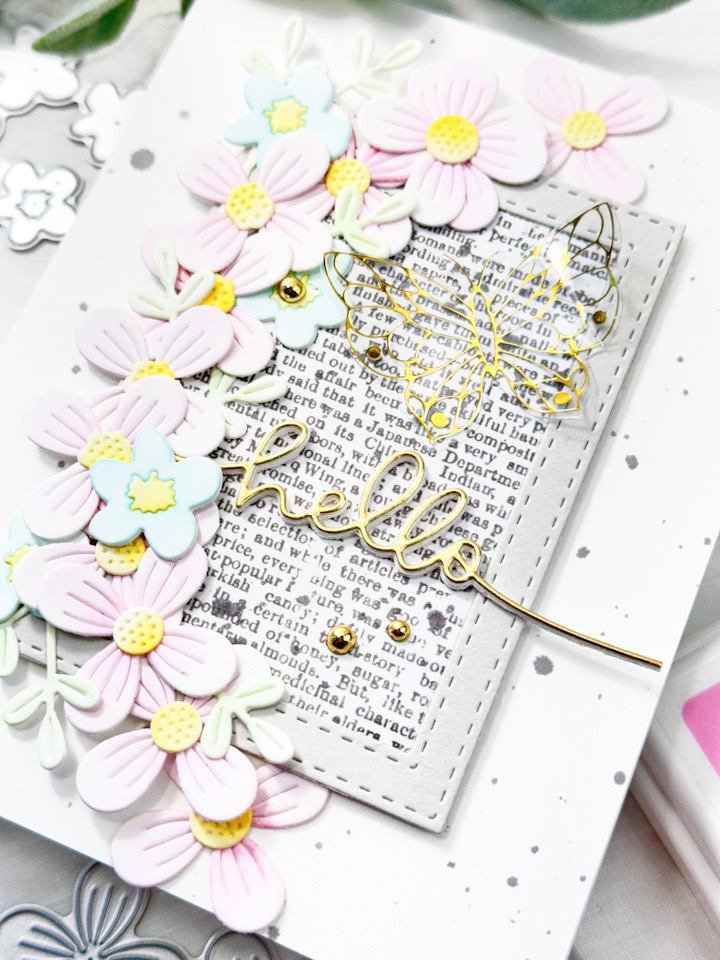
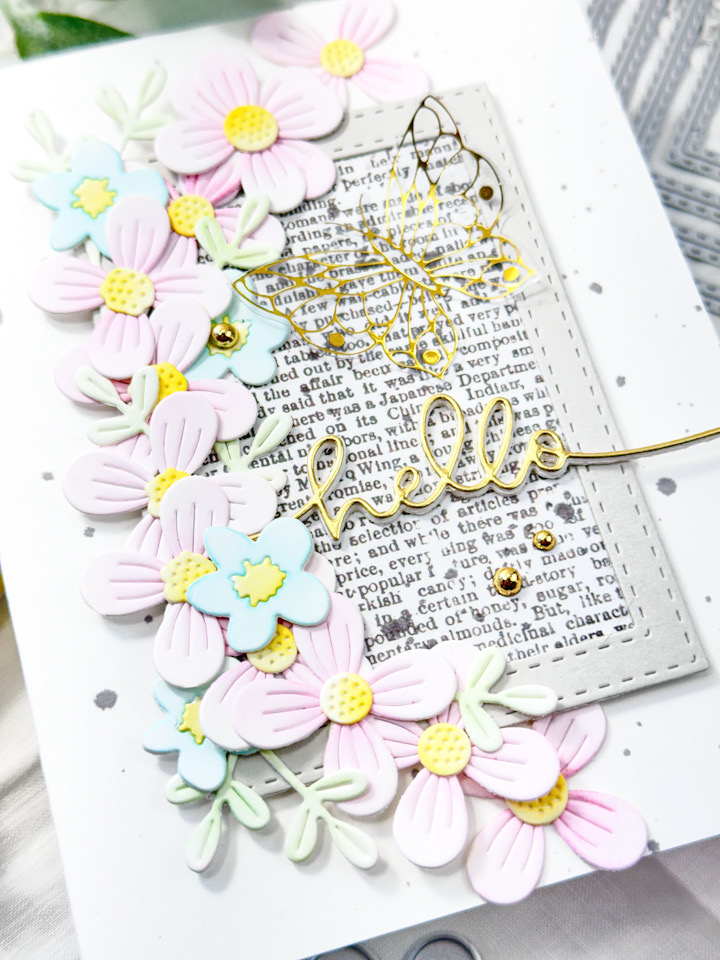
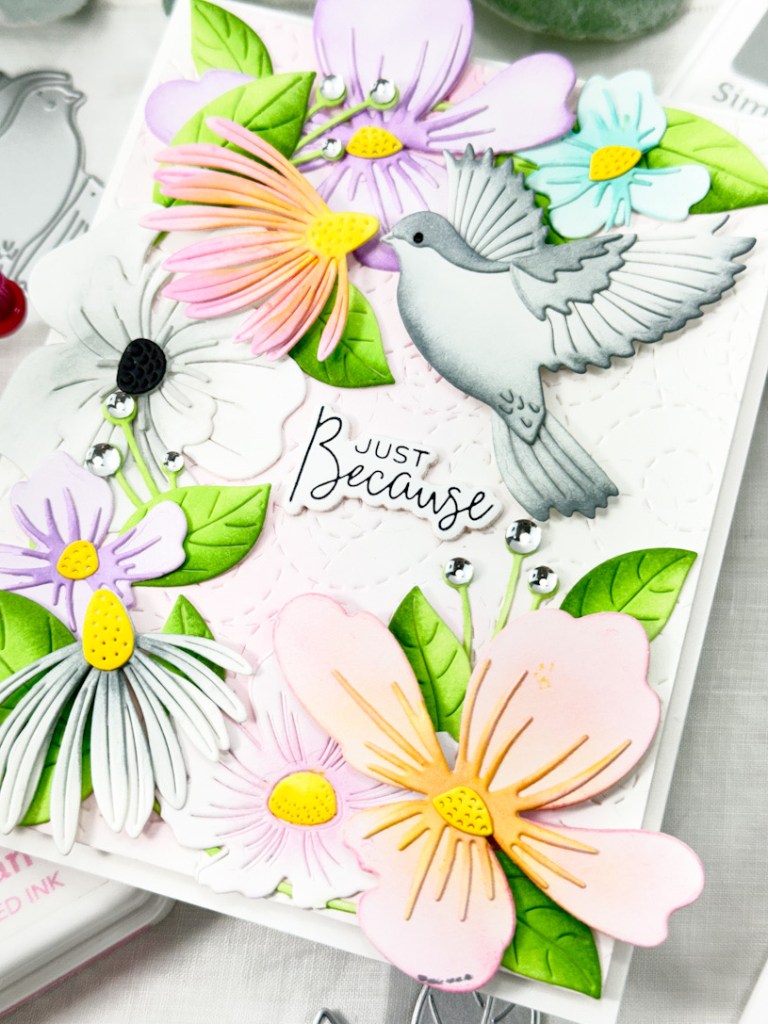
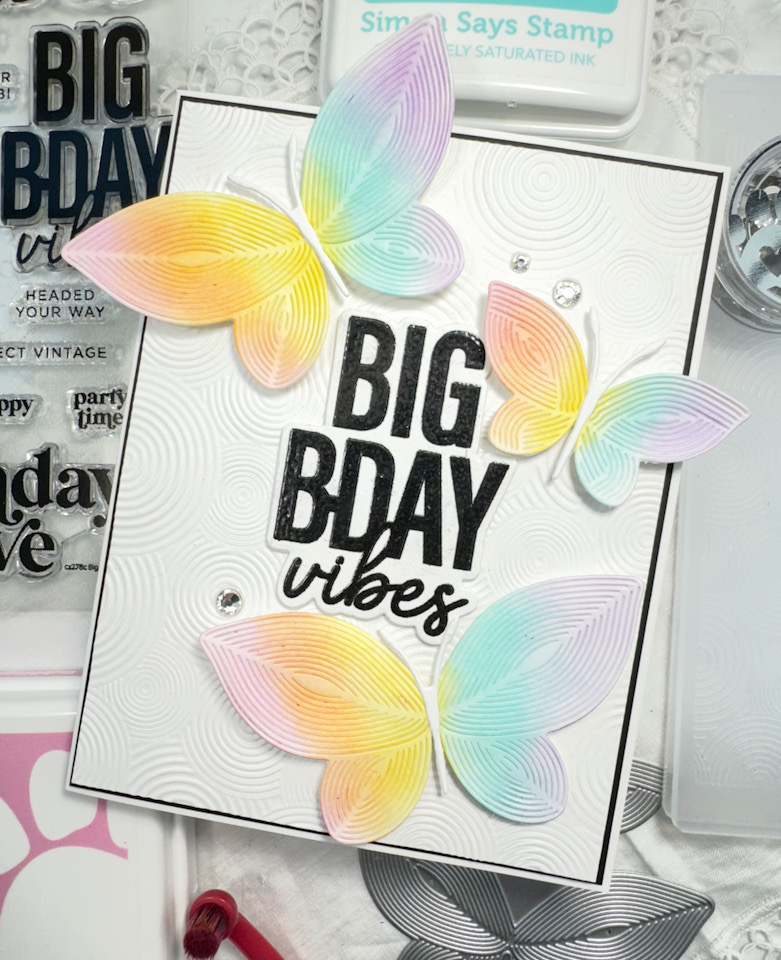
I began this card by die cutting the SSS Whirl Butterflies from scraps of Neenah 110lb cardstock and did some light ink blending on them using SSS Pawsitively Saturated Inks in Bubblegum, Sunbeam, Seafoam and Lilac. This die doesn’t come with a body for the butterflies, but I wanted mine to have a body, so I used just the body portion from the SSS Layered Cosmic Butterfly set, and secured it with liquid glue.

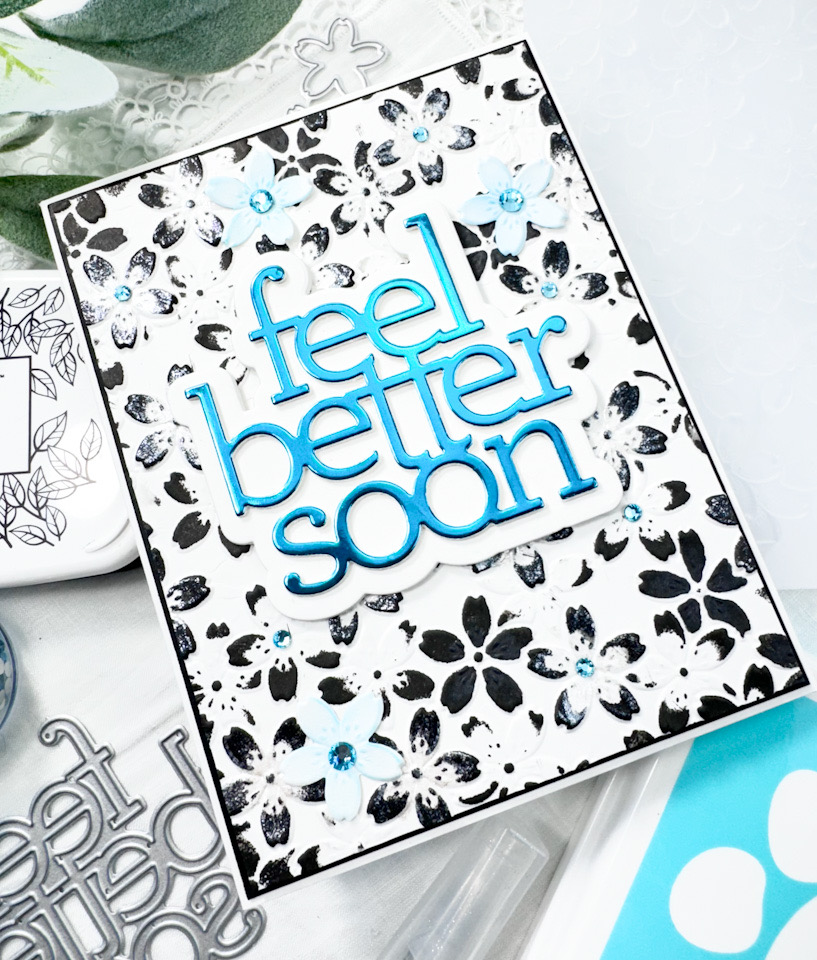
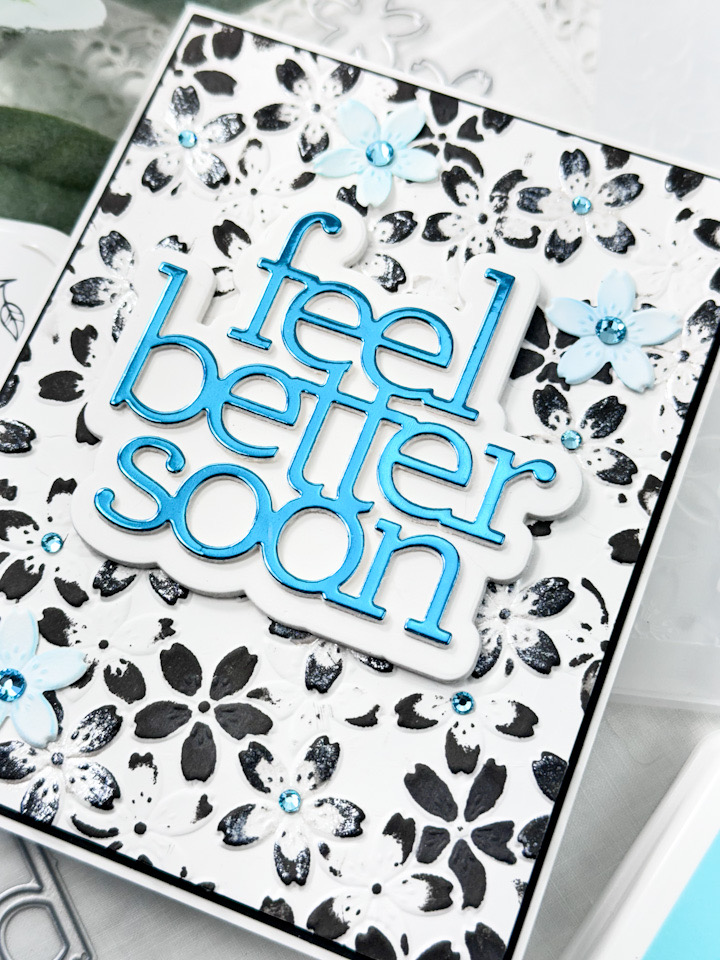
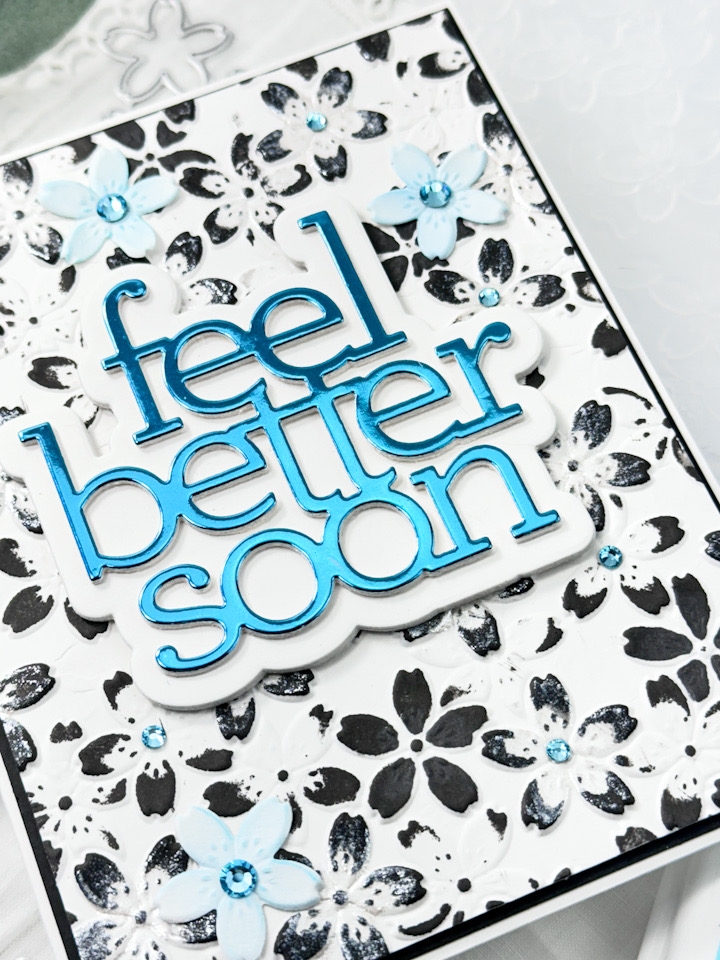
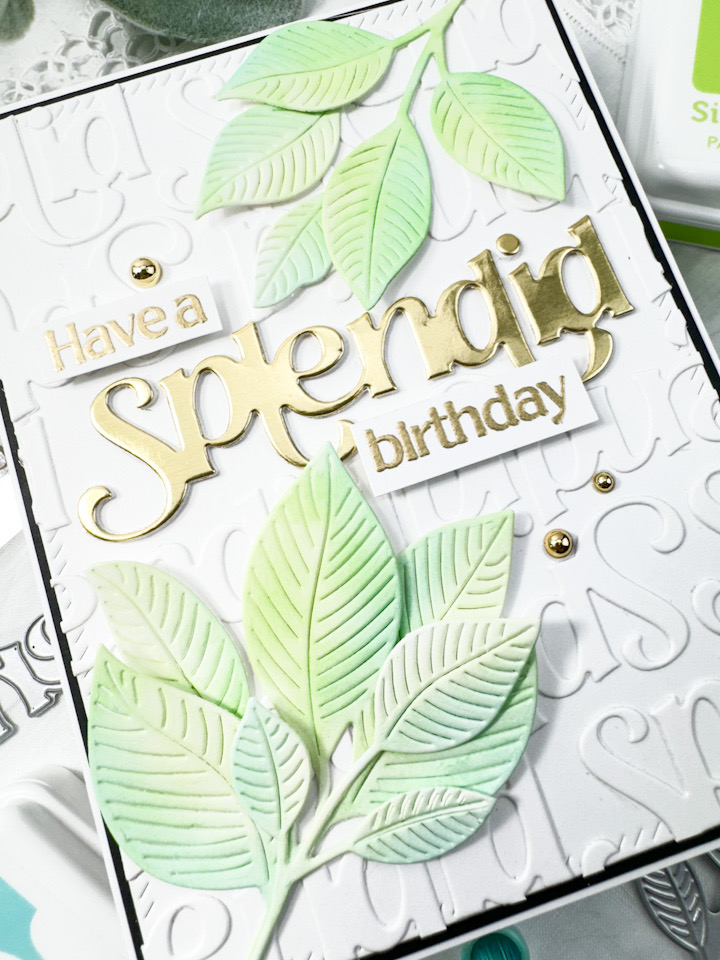
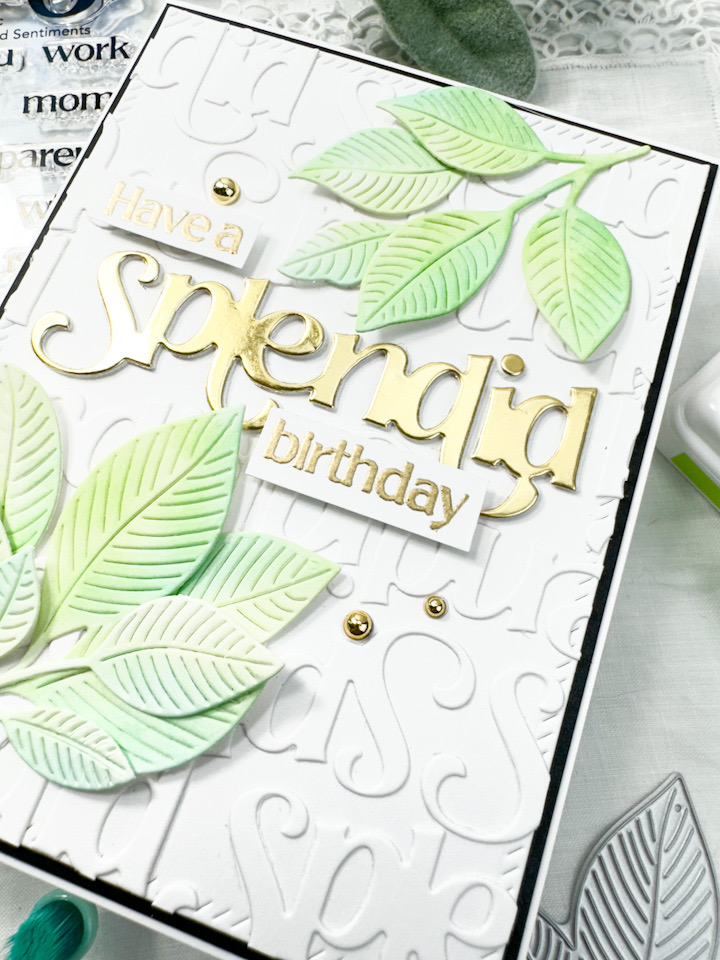
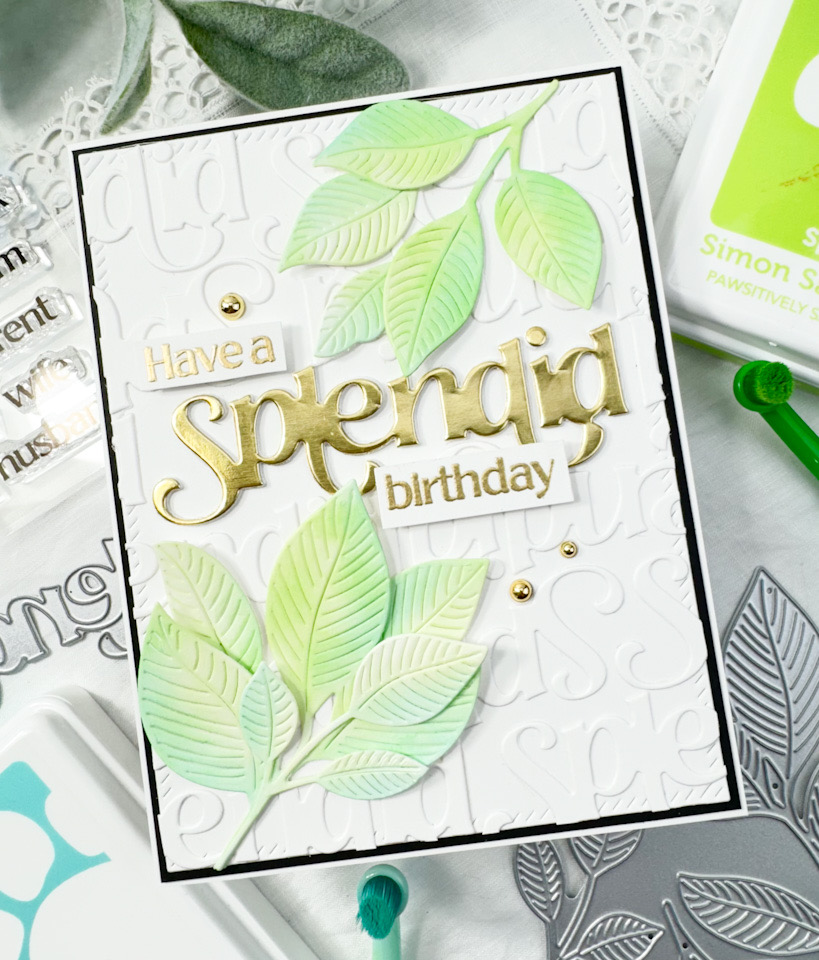
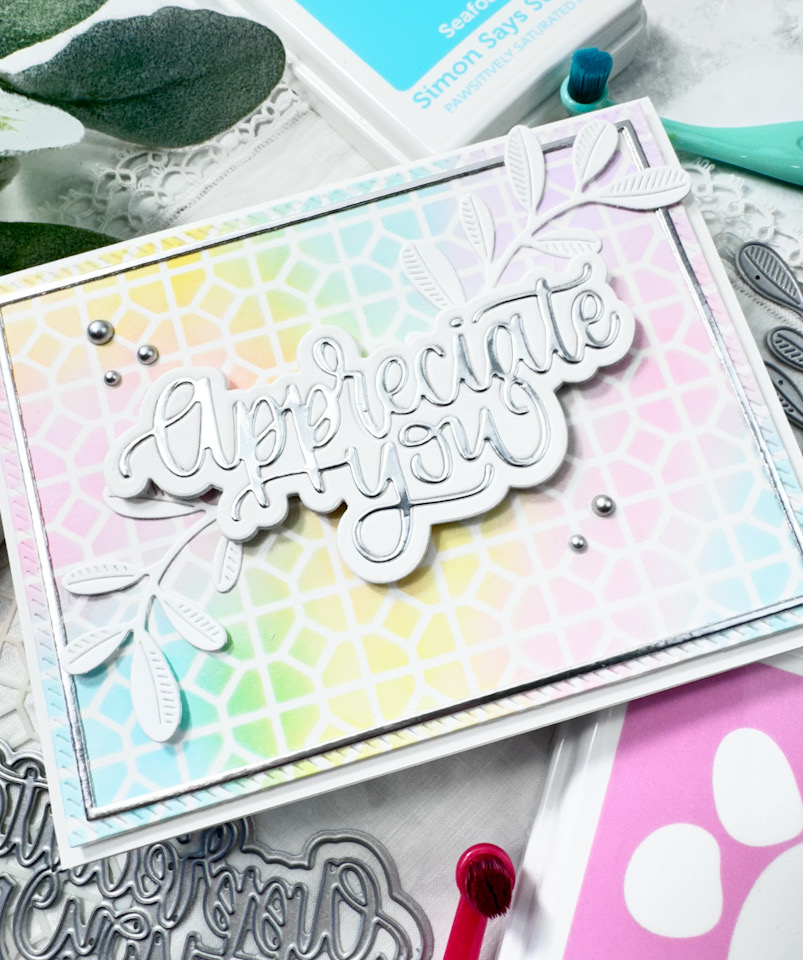
The background needed some interest so I embossed a panel of Neenah 110lb cardstock using the SSS Circle Hoops Embossing Folder, trimmed it down slightly and adhered it to a black panel for contrast using foam tape. I stamped the sentiment, which is from the SSS Big Old Birthday set, using VersaFine Onyx Black ink and heat set it using Ranger Clear Embossing Powder and repeated that process for a second time for a smoother heat embossed image. I then used the coordinating die to cut it out, along with three additional pieces and adhered all of those together using liquid glue.

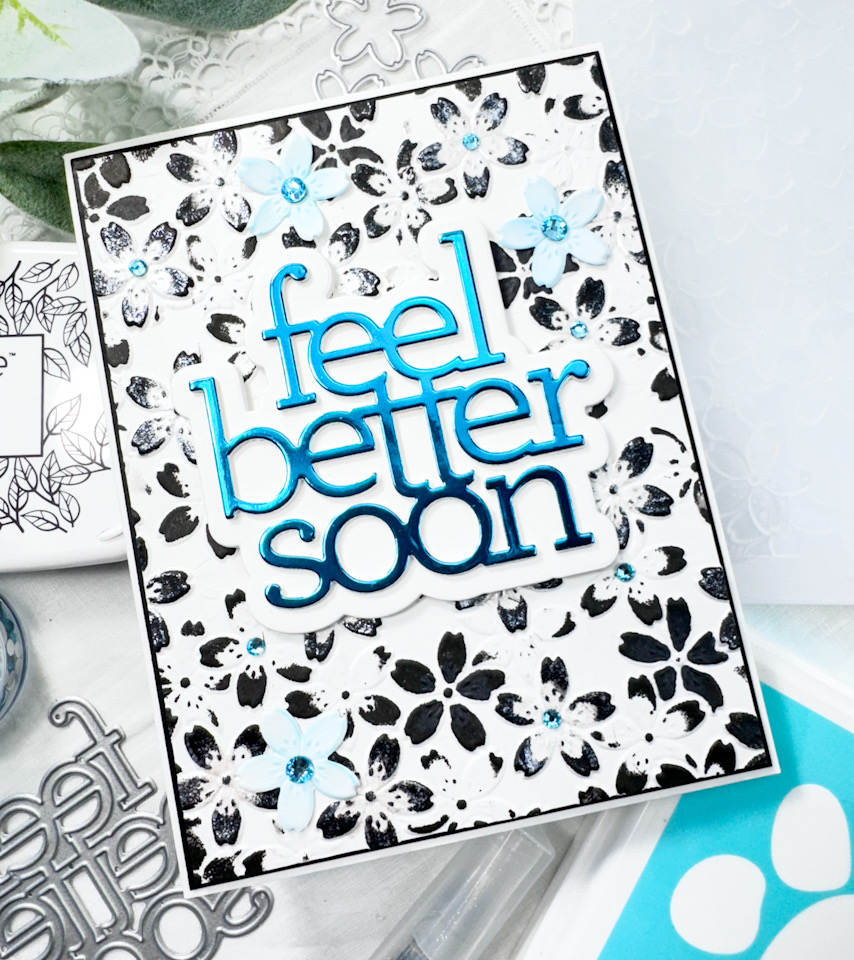
I glued the sentiment to the background panel and secured the butterflies with SSS 3D Foam Strips, before adding some SSS Clear Dazzling Gems to finish this one up.

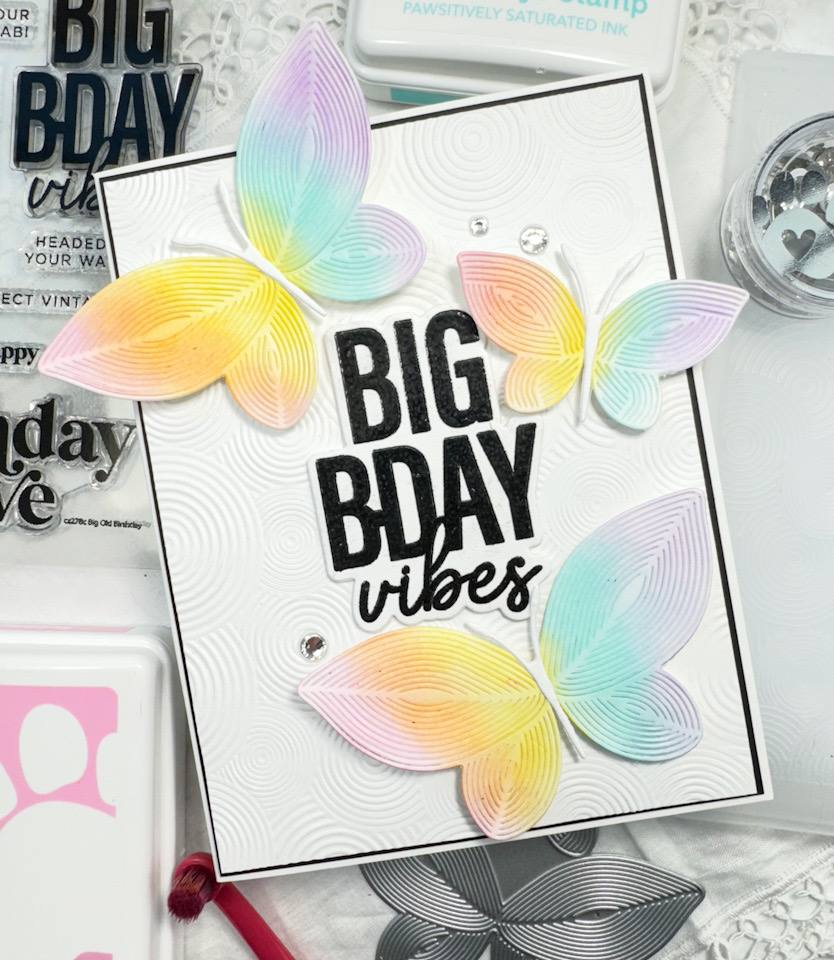
This is a pretty simple card for today, but I love the rainbow butterflies! Don’t forget to check out the entire Celebrate release over on Simon’s website! I appreciate you stopping by today, and I hope you have a wonderful day!

Other Products:

* Affiliate links used at no cost to you. Thanks so much for your support!

Latest Posts

Latest Instagram Posts

Simon Says Stamp Feel Better Blossoms

Hello Friends and welcome back! Thanks so much for stopping by to check out today’s project featuring the new Cherry Blossom Embossing Folder from Simon’s latest release, Be Bold. Let’s run through the deets for this one!

Main Products:

I began this project by spritzing a panel of Neenah 110lb cardstock with water and placing it in the SSS Cherry Blossom Embossing Folder and running it through the machine. I also used the included die cut and cut a few white flowers and ink blended those using SSS Pawsitively Saturated Ink in Seafoam.

To add the black to the flowers, I used the TH Brayer and a VersaFine Onyx Black ink pad, and just rolled the black onto the raised portions of the panel. I also used a Copic 110 marker to touch up some of the black flowers as well. Once that was dry, I used Cosmic Shimmer Snow and Ice Lustre Polish to add some shine to some of the black flowers using my finger.

I used the SSS Feel Better Soon sentiment and cut that once from Aqua Mirror cardstock and twice from Neenah 110lb cardstock. I also cut the shadow portion twice and adhered all of those pieces together using liquid glue. The sentiment was glued directly to the panel, and I glued the ink blended flowers in place also.

To finish up, I added some SSS Dazzling Gems in Surf to some of the flowers before adhering the floral panel to a black panel with foam tape.

That does it for this one! I hope you enjoyed this project, and I hope it inspires you to experiment and play around with your embossing folders. Don’t forget to check out the entire Be Bold release over on Simon’s website. Thanks again for stopping by, and have yourself a wonderful day!

Other Products:

* Affiliate links used at no cost to you. Thanks so much for your support!

Latest Posts

Latest Instagram Posts

Simon Says Stamp Sympathy Flowers

Hello Crafty Friends, and thanks for stopping by! I’ve been busy working on projects for Simon’s latest release, Be Bold. Have you checked it out yet? I’d love to know your favorites from this release! Today’s project is featuring a new floral stamp set called Wild & Free Flowers. While this is a gorgeous set, it will not be the focal point for this project. I opted to use it as a background instead. Let’s run through the details, shall we?

Main Products:

I began this project by stamping one of the florals from the SSS Wild & Free Flowers onto a panel of Neenah 110lb cardstock using PFS Misty Coast ink. I then used the PFS Stitched Rectangles to trim it down. Then, I went to work on the focal point for this card.

I die cut the SSS Etched Magnolia Blossom and a few SSS Budding Branches from scraps of Neenah 110lb cardstock, and did some very light ink blending on the magnolia using SSS Pawsitively Saturated Ink in Bubblegum. Once the ink blending was complete, I adhered the pieces together with liquid glue, after cutting the center of the flower from black cardstock.

I also used SSS Fog cardstock to cut a few flowers using the SSS Fine Floral Stem, and used some pink cardstock to cut a few flowers using the SSS Mini Flowers & Leaves set. Those were adhered together and set aside while I continued to work on the remaining pieces of the card. I die cut the sentiment from the SSS Handlettered Greetings set using SSS Black Glossy cardstock, and adhered that directly to the stamped panel.

Next, I played around with the placement of the flowers and leaves and began gluing the leaves in place first, then the grey flowers were next, and the magnolia was adhered atop all of that using SSS 3D Foam Strips. Some of the leaves were cut and tucked in where needed, and I glued white pearls to all of the areas with a little stem. The panel was then adhered to a black panel before being adhered to the card base.

That finishes up this project! I hope you enjoyed it, and I hope it inspires you to get crafty in your space! Don’t forget to check out the entire Be Bold release! Thanks again for stopping by, and have a wonderful day!

Other Products Used:

* Affiliate links used at no cost to you! Thanks so much for your support.

Latest Posts

Latest Instagram Posts

Simon Says Stamp Hello Cherry Blossoms

Hello Crafty Friends, and thanks so much for joining me! I’m back today with a project featuring the new Cherry Blossom Embossing Folder from Simon Says Stamp’s latest release, Be Bold. There’s a lot going on with this card, so let’s get to the details!

Main Products:

This card begins with cutting some white flowers using the included die from the SSS Cherry Blossom Embossing Folder. Once I had quite a few cut, I placed them inside the folder and ran them through the machine to add the embossed texture to them. I then did some light ink blending on them using SSS Pawsitively Saturated Inks in Bubblegum, Lilac, Lemonade, Marine, Seafoam, and Melon.

I then used the SSS Etched Eucalyptus Wreath and cut three of those from Neenah 110lb cardstock. While I was cutting, I went ahead and cut a bunch of leaves using the SSS Eucalyptus Leaves die from Neenah 110lb cardstock and gold cardstock, and I used the SSS Stitched Squares to cut one of those.

The background was created using the SSS Stitched Whirl Background and some gold acrylic ink splatter. As you can imagine, there was a lot of playing around with placement on this card! I adhered the three eucalyptus wreaths together using liquid glue and set that aside. I placed SSS 3D Foam Strips on the back of the square and decided placement of the leaves, and began gluing those in place. Some leaves had to be trimmed, and I reserved those to tuck back in where needed.

The square was then adhered to the panel and the wreaths were adhered atop that using a combination of liquid glue and foam strips for support. I glued a few flowers to the wreath and tucked in the remaining flowers here and there, along with the reserved white and gold leaves. I die cut the SSS Simple Hello once from gold cardstock and four times from Neenah 110lb cardstock and glued all of those together with liquid glue. I don’t normally make my sentiments that thick, but I knew it was going to need additional support, because it was going to be adhered atop the wreath with very few connect points.

I glued the Hello in place, and added some PFS Gold Metallic Pearls to the flower centers for added interest. The entire panel was then adhered to the card base using foam tape. Needless to say, this card is quite thick, but I love how it turned out!

Don’t forget to check out the entire Be Bold release over on Simon’s website! Thanks again for joining me, and I hope you have a fabulous day!

Other Products:

* Affiliate links used at no cost to you. Thanks so much for your support!

Latest Posts

Latest Instagram Posts

Simon Says Stamp Splendid Leafy Birthday

Hello Crafty Friends, and welcome back! I’m so glad that you’re here! Today’s project is featuring the new Splendid die, and the Splendid Sentiments Stamp set from Simon’s latest release, Be Bold. Let’s get right in to it!

Main Products:

Check out my very first You Tube Short!

I always say, Die Cutting is My Jam, so maybe this should become a series! I like creating backgrounds with unexpected dies, and today’s card does just that! I took the SSS Splendid die and cut a bunch of those from Neenah 110lb cardstock, and cut it once from gold cardstock. I also cut a panel using the PFS Diagonal Stitched Rectangles to use as the background. I had to play around with the placement before committing to adhering the words onto the panel with liquid glue.

Once all of the white words were adhered to the panel, I trimmed off the excess and glued the gold sentiment in place. I used the SSS Splendid Sentiments and stamped the additional sentiment using VersaMark Ink and heat set those using Ranger Princess Gold Embossing Powder. I trimmed those down and adhered them to the panel using SSS 3D Foam Strips.

I used the SSS Abundant Leaves to cut those from Neenah 110lb cardstock and did some ink blending using SSS Pawsitively Saturated Inks in Sprout and Seafoam. Those were then adhered to the panel with liquid glue as well. The panel was adhered to a black panel for contrast before being added to the card base. For some additional bling, I added some PFS Gold Metallic Pearls to finish up.

That does it for this installment of Die Cutting is My Jam! I like the sound of that! Anyhoo, I hope you enjoyed this project, and I hope it inspires you to get crafty in your space. Thanks again for joining me today, and don’t forget to stay awesome, friend!

Other Products:

* Affiliate links used at no cost to you. Thanks so much for your support!

Latest Posts

Latest Instagram Posts

Simon Says Stamp Mother’s Leafy Cluster

Hello and welcome back crafty friends! I’m so glad that you stopped by to take a look at today’s project featuring the new Mother die from Simon’s latest release, Be Bold. Let’s go ahead and run through the deets for this one, shall we?

Main Products:

I began this card by selecting a color combo from The Color Cubes and stamping the SSS Leafy Cluster onto a panel of Neenah 110lb cardstock using VersaFine Onyx Black ink and heat setting that with Ranger Clear Embossing Powder. I then used the coordinating stencils to do the ink blending using SSS Pawsitively Saturated Inks in Blush, Petunia and Watermelon, along with Pinkfresh inks in Atlantis and Metropolis. Once the ink blending was complete, I used the coordinating dies to cut them out.

I cut the SSS Mother die once from SSS Matte Silver cardstock and twice from Neenah 110lb cardstock, and I also cut the shadow portion of the die twice and well. All of those pieces were adhered together using liquid glue and set aside while I worked on the remaining elements of the card. I always seem to need more leaves on my cards, so I opted to use the SSS Etched Meadow Flower and Leaves, along with the SSS Flower Bundle and cut some of those using the same matte silver cardstock.

For the background, I used the PFS Diagonal Stitched Rectangles to cut a panel of black cardstock, and splattered it using white acrylic ink. I then used the SSS A2 Thin Frames to cut a frame from the same silver cardstock. Now for the assembly! I glued the silver frame in place, glued the silver leaves in place and then glued the Leafy Clusters in place.

The sentiment was also glued in place. I chose a sub-sentiment from the SSS Reverse Love Sentiments Strips and adhered that using SSS 3D Foam Strips so that it would match the height of the main sentiment. I added a few PFS Matte Silver Pearls before adhering the panel to the card base using foam tape.

That does it for this one! I really like this color combo, and am enjoying The Color Cubes, especially when I get stuck on putting colors together. I hope you enjoyed this project too! Head on over to Simon’s website to check out the entire Be Bold release! I’d love to know your favorites! Thanks again for stopping by, and don’t forget to stay awesome, friend! Have a wonderful day!

Other Products:

* Affiliate links used at no cost to you. Thanks so much for your support!

Latest Posts

Latest Instagram Posts

Simon Says Stamp Appreciate You Lattice

Hello Friends, and welcome back! I’m so glad that you stopped by today! Simon Says Stamp’s latest release, Be Bold, is live, and today’s project is featuring a couple of new products! So, let’s run through the deets for this one!

Main Products:

I began this project by taping down the SSS Lattice Tile Stencil to a panel of Neenah 110lb cardstock, and did some light ink blending using SSS Pawsitively Saturated Ink in Bubblegum, Lilac, Seafoam and Sunbeam. Once the ink blending was complete, I used the PFS Diagonal Stitched Rectangles to trim it down. I also used the SSS A2 Thin Frames to cut a frame from matte silver cardstock. The frame was glued to the panel and set aside while I worked on the sentiment.

I die cut the SSS Appreciate You once from SSS Matte Silver cardstock, and I die cut the shadow three times from Neenah 110lb cardstock. I die cut the actual sentiment from one of the shadow pieces, and adhered all of those together using liquid glue. I then used glue and inset the silver sentiment into the shadow. I also used the SSS Olive Leaves to cut those for some added interest.

The leaves were adhered to the ink blended panel and the sentiment was adhered atop those using SSS 3D Foam Strips. I added some PFS Matte Silver Pearls to match the Matte Silver cardstock. This panel was then adhered to the card base using foam tape.

That does it for this one! Head on over and check out the entire Be Bold release! Thanks for stopping by, and don’t forget to stay awesome! Have a wonderful day!

Other Products:

* Affiliate links used at no cost to you. Thanks so much for your support!

Latest Posts

Latest Instagram Posts

Golden Butterfly Hello

Hello Crafty Friends! I hope you are doing well! Thank you so much for stopping by to check out today’s card featuring a couple of new items from Simon Says Stamp’s latest release, Splendor, plus a few older favorites as well. Let’s run through the details.

I began this card by cutting a frame using the SSS Stitched Rectangles die and SSS Fog cardstock. I then trimmed a panel of patterned paper to fit behind the frame. I used the SSS Fine Floral Stem and the SSS Simple Flowers to cut those from Neenah 110lb cardstock. I did end up cutting the Fine Floral twice so that I would have enough flowers to curve around the frame.

For the ink blending on the flowers, I used SSS Pawsitively Saturated Ink in Bubblegum, Seafoam, Celery and Lemonade. Once the ink blending was complete, I assembled the flowers using liquid glue. I also ended up cutting apart the Fine Florals so that I could place the flowers where I needed them to go. I used the SSS Handlettered Greetings and die cut the hello sentiment once from gold cardstock and three times from Neenah 110lb cardstock, adhering all of those together with liquid glue.

The butterfly is from the PFS Small Butterflies Foil Plate, and I foiled that using gold foil onto acetate and used the coordinating die to trim it out. I splattered the patterned paper and the card base with Hickory Smoke Distress Spray Stain for a little bit of added interest.

To assemble the card, I adhered the frame to the card base using foam tape and arranged the flowers along the left edge of the frame, adhering those with glue. I tucked in the leaves where needed, and glued the butterfly and sentiment in place before adding some PFS Gold Metallic Pearls.

That finishes up this one! I hope you found some inspiration from this project! I really like all of the elements of this one, and thought that it came together quite nicely. Thanks again for stopping by. I hope you have an amazing day, and don’t forget to stay awesome!

Supply List:

* Affiliate links used at no cost to you. Thanks so much for your support!

Latest Posts

Latest Instagram Posts

Simon Says Stamp Thanks Daisy

Hello, and welcome back! I’m so glad that you stopped by! I’m back today with a card featuring the new Beautiful Dove from Simon Says Stamp’s latest release, Splendor. This has been a fun release, and I’ve thoroughly enjoyed playing with the products that I received. Let’s run through the details, shall we?

To begin this card, I die cut the SSS Beautiful Dove from Neenah 110lb cardstock and pulled out some inks to do some ink blending. I settled on using SSS Pawsitively Saturated Inks in Lilac, Morning and Surf. Once the ink blending was completed, I adhered all of the pieces together using liquid glue, and went back over with the brushes to enhance the colors just a little bit more.

I set the dove aside, and began working on the flowers. For these, I die cut the SSS Charming Daisy three times from Neenah 110lb cardstock and ink blended those pieces using Sprout, Fairway and Citrine, along with C&9th Dove ink. The pieces of the flowers were then glued together. I did end up cutting off the leaves, because I wanted to add them back in where I had open spaces.

For the background, I stamped the SSS Crackle Background onto a panel of Neenah 110lb cardstock using PFS Misty Coast ink and trimmed it down using SSS Postage Stamp Edge Frames. The sentiment is from the BetterPress A Little Message Sentiments set, and I used BetterPress Black Ink to make the impression onto a BetterPress A2 Card Panel. I then used the included die to trim it out, along with two additional pieces and adhered those together using liquid glue.

To assemble the card, I determined the placement of the flowers and glued the stems down and then adhered the floral sections with SSS 3D Foam Strips. I then adhered the dove with Foam Strips, glued the sentiment in place, and then glued the leaves where I had space. The panel was then adhered to the card base with foam tape, and clear drops were added for additional interest.

That finishes up this one! I played around with so many doves and colors and finally decided that a colorful dove needed muted florals, otherwise, it was just too much. I’m an over thinker, and this is a classic example of my over thinking! Anyhoo, I like how this one turned out, and I hope that you do too. Don’t forget to stop by and check out the entire Splendor release over on the Simon website. Thanks again for stopping by, and I hope you have a wonderful day!

Supply List:

* Affiliate links used at no cost to you. Thanks so much for your support!

Latest Posts

Latest Instagram Posts

Simon Says Stamp Just Because Flower Bunch

Hello Crafty Friends! I appreciate you stopping by! Today, I’m participating in an Instagram Hop to celebrate Simon Says Stamp’s latest release, Splendor, so you’ll want to head on over there to comment along the hop for your chance to win a $25 gift card. Today’s project is featuring the new Beautiful Dove die, and I knew that I wanted to pair it with a bunch of flowers. So, let’s run through all the details for this one!

To begin, I went to work on all of the flowers. I die cut the flowers from Neenah 110lb cardstock using SSS Etched Magnolia Blossom, SSS Charming Daisy, SSS Layered Dandy Flower and SSS Cosmos Stem. All florals need leaves, so I used the SSS Etched Berry Branch for those. Once everything was cut, I got started on all of the ink blending.

For the ink blending, I used SSS Pawsitively Saturated Inks in Bubblegum, Lilac, Lemonade, Sunbeam, Seafoam, Sprout and Field. I sat the florals and leaves aside, and die cut the SSS Beautiful Dove from Neenah 110lb cardstock and did some ink blending of that using Earl ink. Once all of the components for the card were assembled and complete, I got to work on the rest of the card.

I used the SSS Stitched Whirl Background and cut that from a panel Mixed Media paper. I then saturated the paper and added some light pink watercolor to it, and dried it with the heat tool. Once it was dry, I did place the panel under something heavy to flatten it out a bit. When I was ready to assemble, I did run it back through using the Whirl plate to get the die cut definition back. I’m not even going to lie, I putzed around with the placement of the flowers and leaves for WAY too long! Way too much over-thinking going on!

In all of the playing around with placement, I did trim off some of the leaves and “berry clusters,” and reserved those for adding back in later. I adhered the leaves first using liquid glue, and adhered some of the flowers with glue and some with foam strips. The dove was then adhered to the panel with foam strips as well. Next, I added back in the trimmed leaves and “berry clusters” where I had room to do so.

Because this card is so involved, and not a whole lot of space for a sentiment, I opted for a tiny sentiment. I used the BetterPress A Little Message Sentiments using BetterPress Black Ink and trimmed it out using the coordinating die. I did die cut it several times and adhered those layers together using liquid glue for a stacked look. The sentiment was then glued directly to the panel.

My panel was then adhered to the card base using foam tape. Lots of layers and dimension on this one, but I absolutely love dimension, so I’m good with that! For some bling, I added some PFS Iridescent Drops to the “berry clusters” to finish it up.

That does it for this one! I hope you enjoyed it, and I hope it inspires you to get crafty in your space! Head on over to Simon to check out the entire Splendor release! You won’t be disappointed! And don’t forget to check out the Instagram Hop for your chance to win a $25 gift card. Thank you again for stopping by, have a wonderful day and stay awesome!

Supply List:

* Affiliate links used at no cost to you. Thanks so much for your support!

Latest Posts

Latest Instagram Posts