Simon Says Stamp Double Plaid Floral

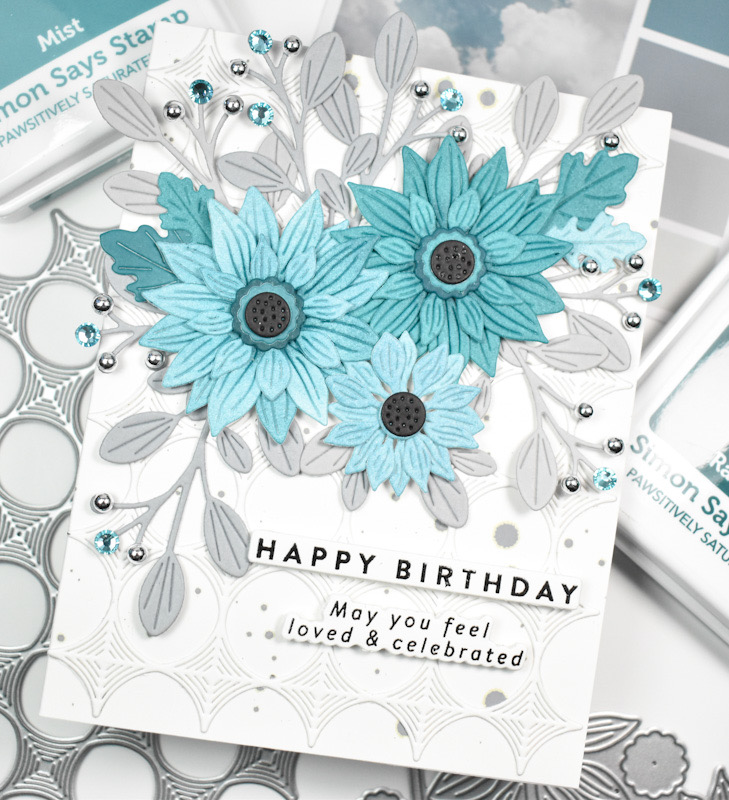
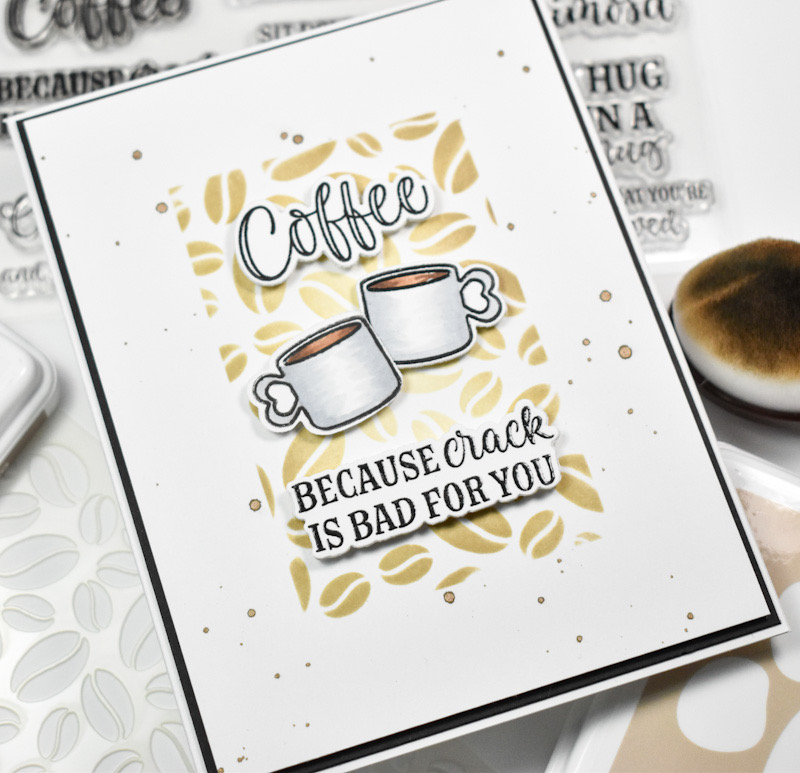
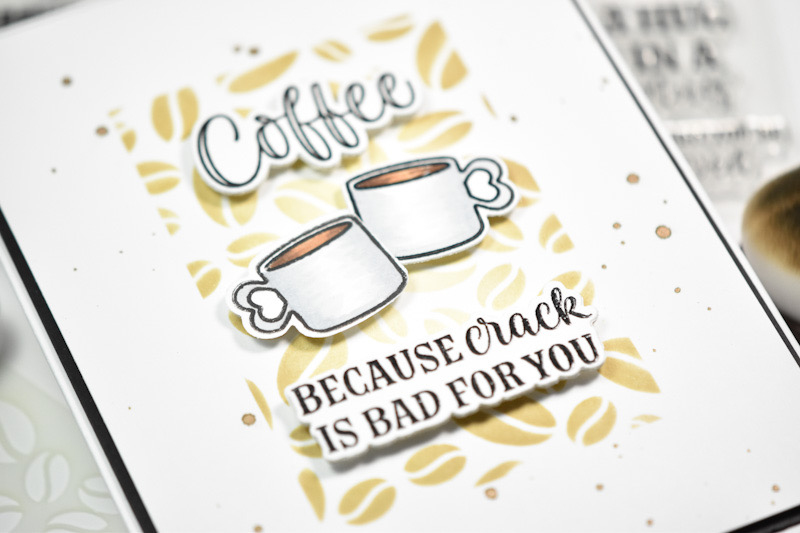
Hello Crafty Friends, and welcome back to my blog! I’m so glad that you stopped by to check out today’s project featuring the new Double Plaid Cover, as well as the new Rustic Layering Flower. These new products are from the STAMPtember release, and I had a blast making this card, so let’s get into the details!
NOTE: all supplies are linked in the thumbnails at the end of this blog post.

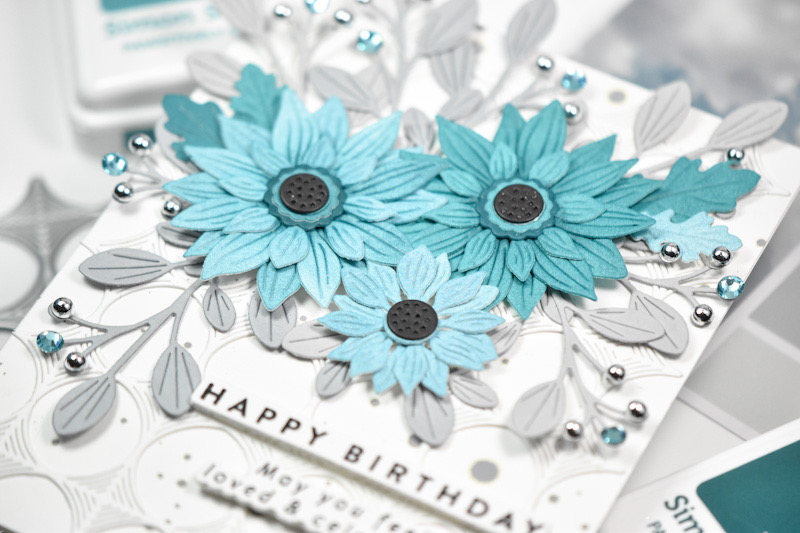
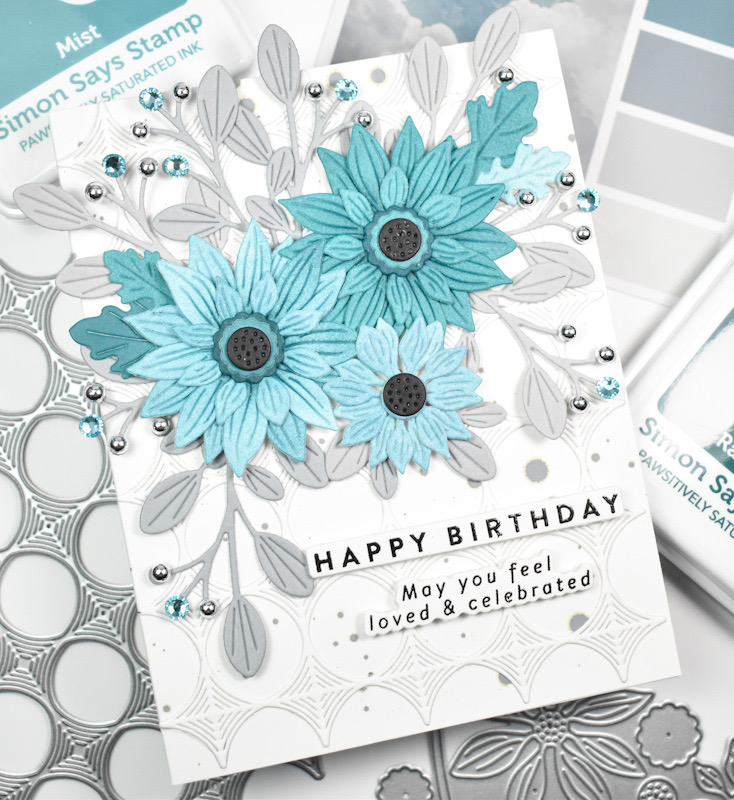
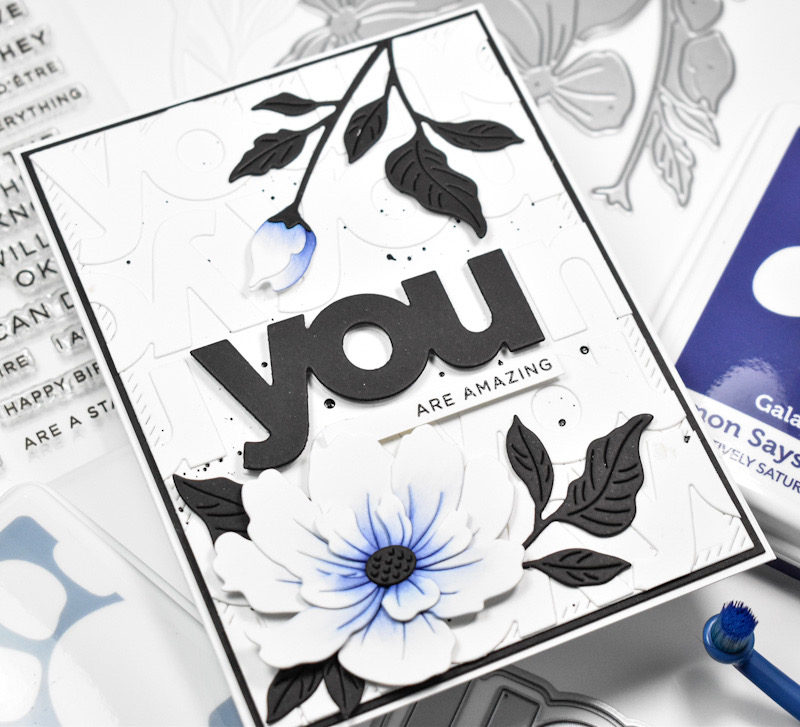
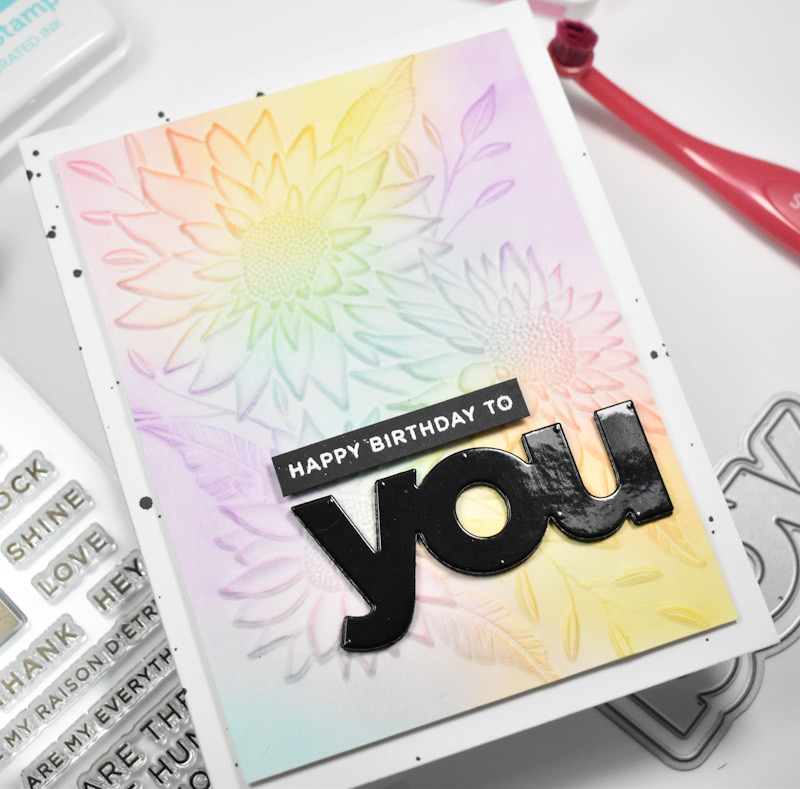
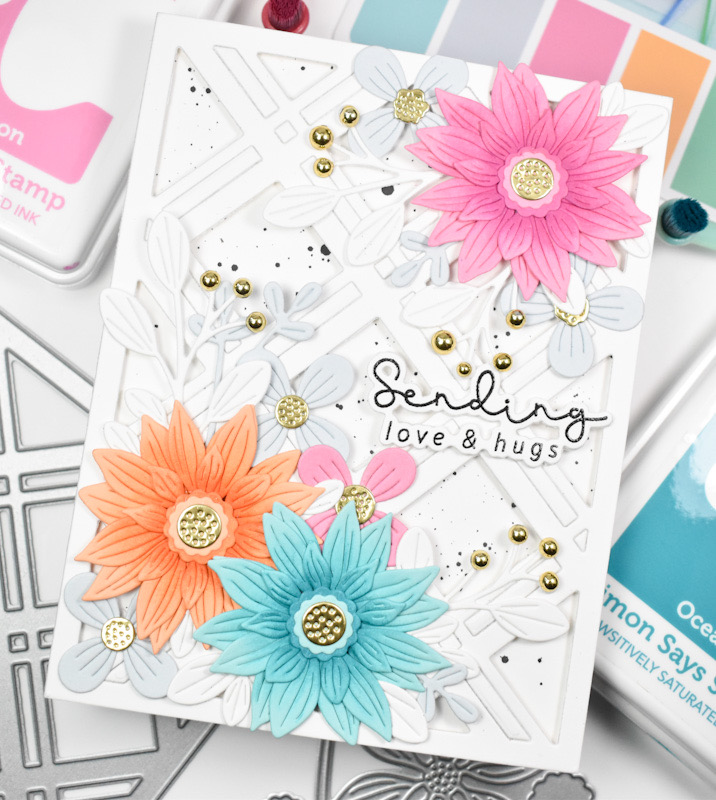
I began this project by pulling an inspiration card from the Color Cubes, just to get some color variety going on. Once I decided on a color combo that I liked, I die cut the Rustic Layering Flower three times from aqua, orange and pink cardstock. This flower has several pieces so I did some ink blending on those pieces before assembling them. The ink colors that I used were Carnation, Sweets, Ocean, Cantaloupe and Sherbet.

For some additional flowers and leaves, I used the Fine Floral Stem for some light blue flowers, as well as the Budding Branches for some white leaves. I have to say that the Budding Branches is by far my most used leaf set from Simon! I did die cut the centers of the flowers from gold cardstock to pull the elements together.

Moving on to assembly .. I splattered my card base using black acrylic ink before adhering the Double Plaid Cover with foam strips. I arranged the flowers and leaves and adhered those using a combination of liquid glue and foam strips to provide support where necessary. I always have to add embellishments to the “buds” of the leaves, because I just think it’s so awesome and so pretty!
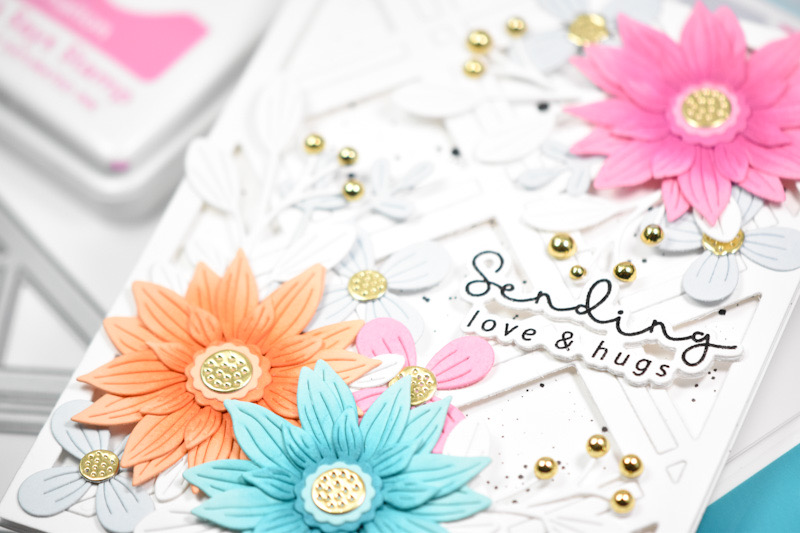
I stamped the sentiment, which is from the Mix & Match Butterflies set, using VersaFine Onyx Black ink and heat set that using Ranger Clear Embossing Powder. I used the coordinating die to cut it several times for a stacked look. The sentiment was glued directly to the panel to finish up.

That does it for this project! I’m sorry if you’re sick of florals, but I literally can’t help myself! Florals and leaves are my jam! Don’t forget to check out the entire STAMPtember release, as well as all of the collaboration sets happening all month long! Thanks again for joining me, and have yourself a wonderful day!
Supply List
Affiliate links used at no cost to you. What does this mean? If you use the links within this post to make a purchase, I receive a small commission, which allows me to continue to post crafty content for your enjoyment. I truly appreciate your support!
Latest Posts
- Spellbinders Trailside Birthday Raccoon

- Simon Says Stamp Grateful Heart

- Simon Says Stamp Braided Greetings

- Together By Design Color Cube Floral

- Simon Says Stamp Cute Duckling