Floral Happy Thoughts

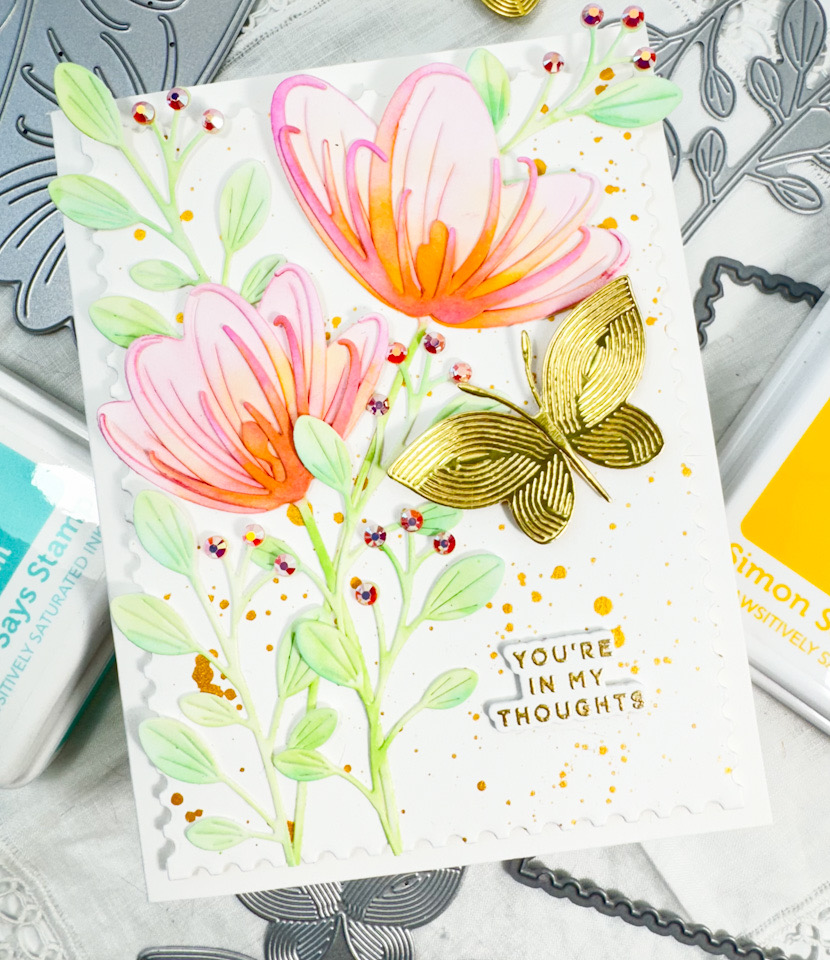
Hello Friend, and welcome back to my blog! I’m so glad that you stopped by to check out today’s project featuring the Fantasy Flowers from Alex Syberia Designs. I picked up this set while I was at CREATE, and couldn’t wait to make something with it! Let’s go ahead and run through the details!

Main Products:
- Alex Syberia Designs Fantasy Flowers
- Alex Syberia Designs Classic Foliage
- SSS XL Greetings 2 Stamp, Die, Bundle
- PFS Sparkling Diamonds
- PFS Simply Diamonds

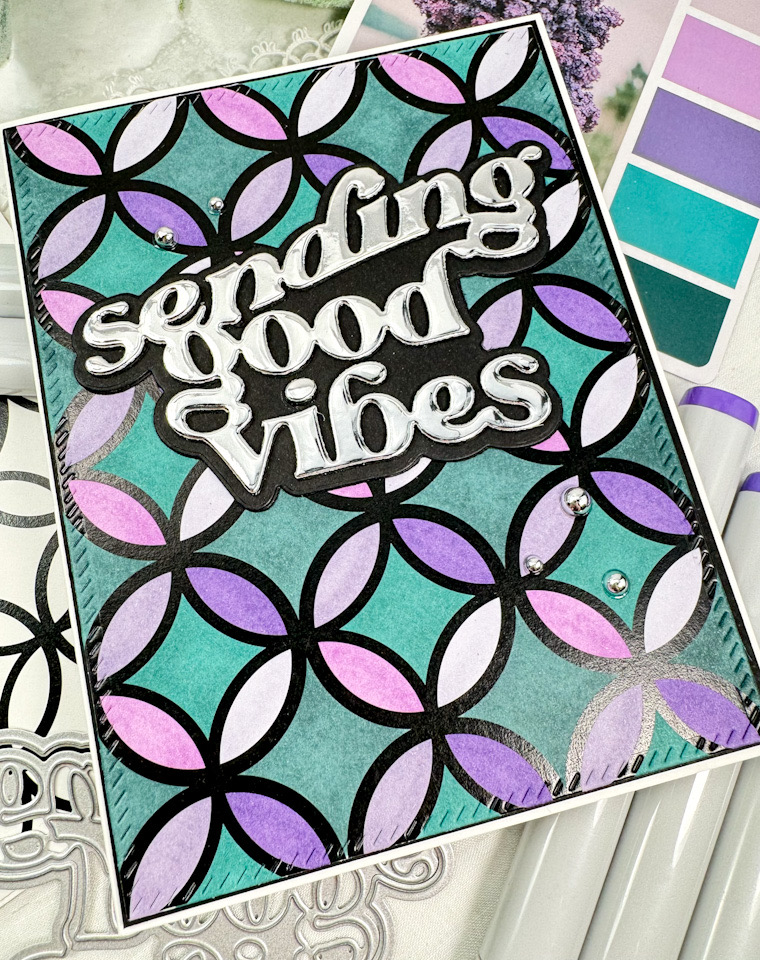
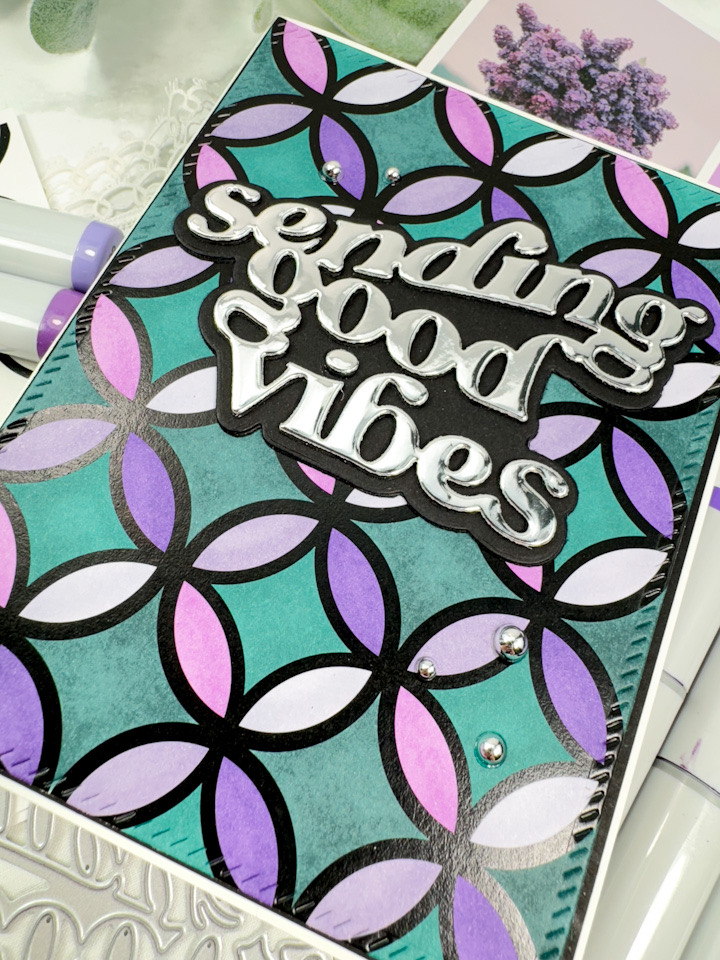
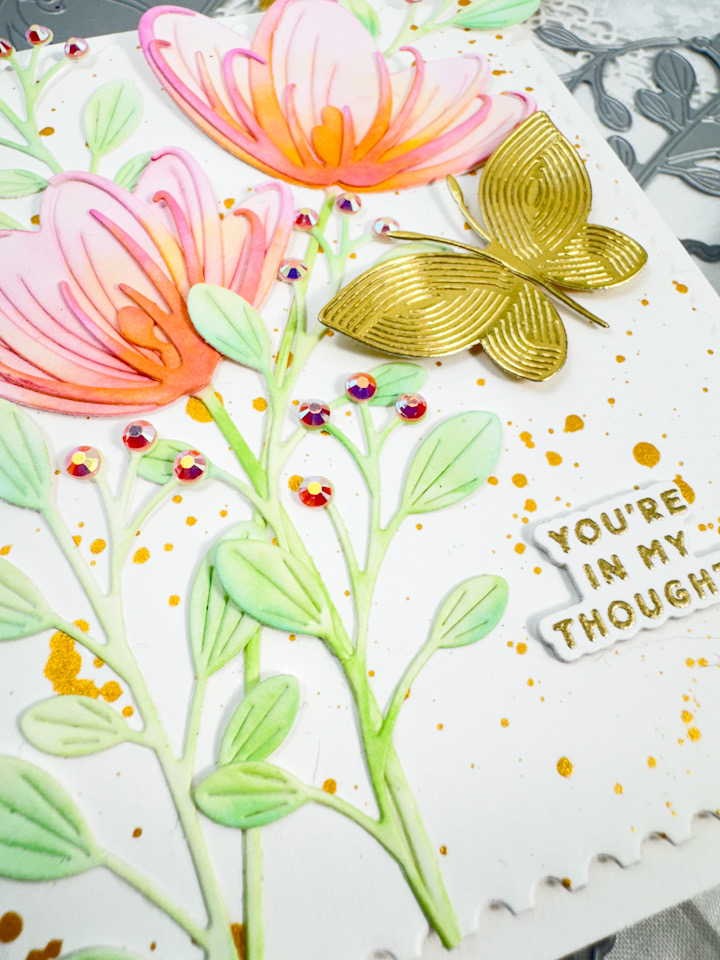
I began this card by die cutting a bunch of flowers, leaves and a few stems using the Fantasy Flowers set from Neenah 110lb cardstock. Once those were cut, I did some ink blending using SSS Pawsitively Saturated Inks in Seafoam, Mist, Raindrop, Melon, Cantalope, Sherbet, Honey and Aspen. I did decide to go back and cut one of the center portions of the flowers from black cardstock, before adhering all of the pieces together using liquid glue.
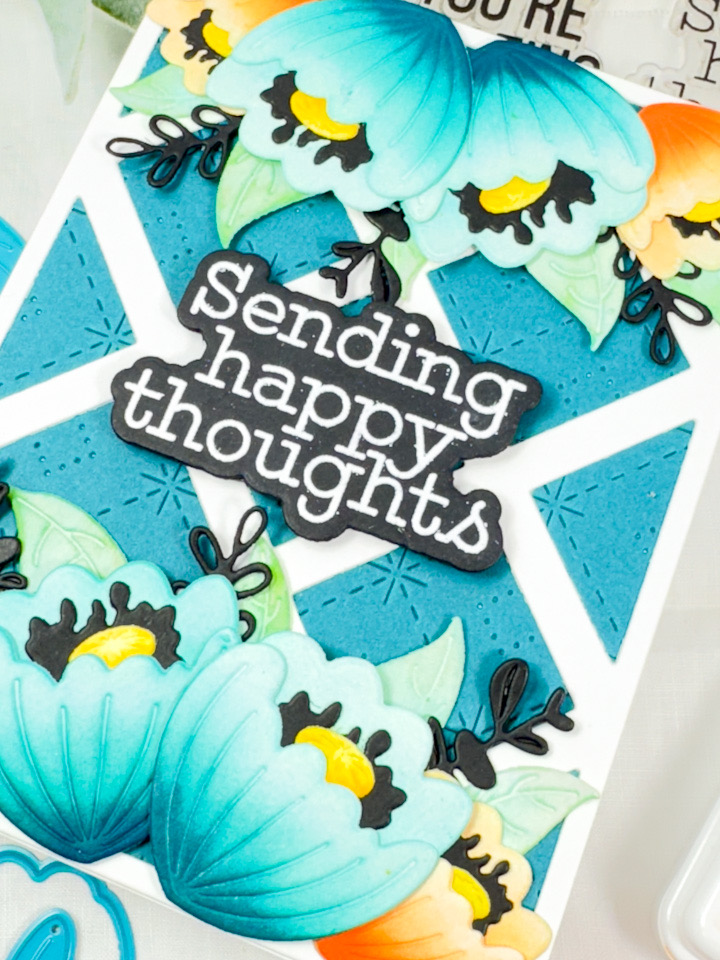
The background panel is the PFS Sparking Diamonds, which was cut from Peacock cardstock, and the frame is the PFS Simply Diamonds. I thought these two paired well together, and added some nice texture and interest. The sentiment is from the SSS XL Greetings 2 set, and this is definitely one of my favorites! It was stamped on black cardstock and heat embossed using SSS Detail White Embossing Powder. It was cut two additional times and adhered together for a stacked sentiment.

Once I began playing around with the placement of the flowers and leaves, I thought some black leaves would look pretty good, so I cut some of those using the Classic Foliage, also from Alex Syberia Designs. I glued the panels together, and then glued the leaves and orange flowers in place. The teal flowers were then adhered using SSS Foam Squares, and the sentiment was adhered using SSS 3D Foam Strips to finish up.

That does it for this one! I hope you enjoyed it as much as I did! This color combination is going to become a favorite of mine! Thanks again for stopping by, and I hope you have a wonderful day!
Other Products:
- SSS Pawsitively Saturated Inks: Seafoam, Mist, Raindrop, Melon, Cantalope, Sherbet, Honey, Aspen
- SSS Blender Brushes
- SSS Place and Score Embellishment Wand
- SSS Bone Folder
- SSS Dot Tape Runner
- SSS Foam Squares
- SSS 3D Foam Strips
- SSS Detail White Embossing Powder
- SSS Anti-Static Brush Powder Tool
- Neenah Classic Crest Solar White 110lb Cardstock
- Black Cardstock
- Peacock Cardstock
- VersaMark Ink
- Tim Holtz Scissors
- Tim Holtz Craft Pick
- Bearly Art Glue
- Wagner Heat Tool
- Scor-Buddy
- Misti
- Spellbinders Platinum 6
* Affiliate links used at no cost to you. Thanks so much for your support!
Latest Posts
- Spellbinders Trailside Birthday Raccoon

- Simon Says Stamp Grateful Heart

- Simon Says Stamp Braided Greetings

- Together By Design Color Cube Floral

- Simon Says Stamp Cute Duckling