Spellbinders October 2024 Large Die of the Month Cozy Toes Slippers

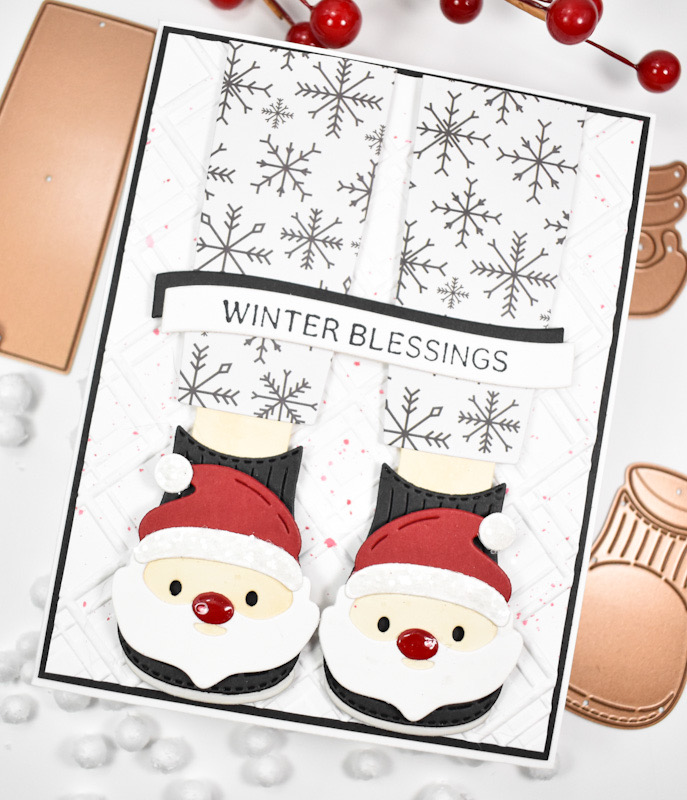
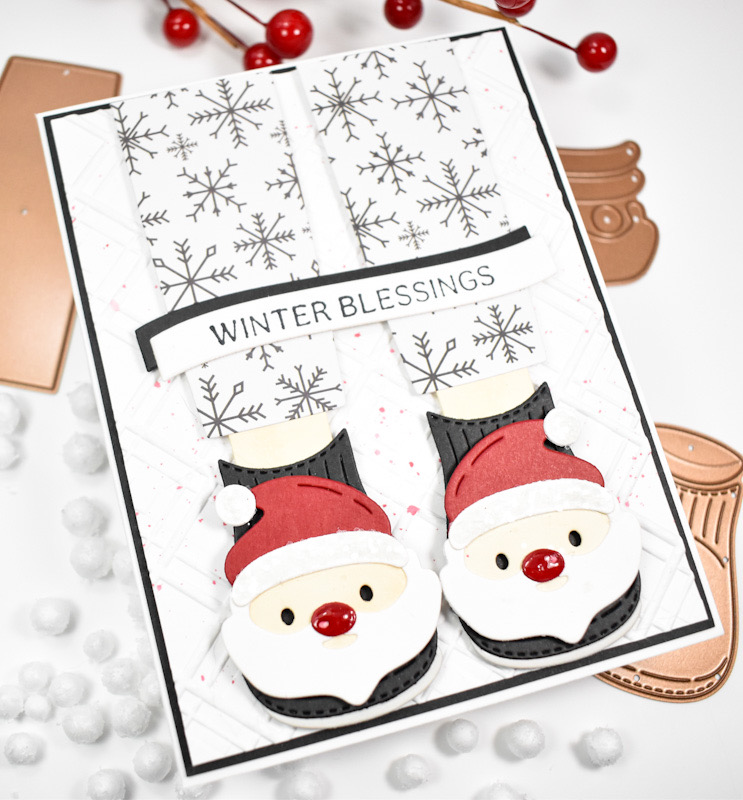
Hello Crafty Friends, and welcome back! Thanks so much for stopping by! The October Large Die of the Month from Spellbinders is titled Cozy Toes Slippers, and this is such a cute set! It includes elements to make slippers that feature a bunny, a reindeer, a penguin, Santa and even a monster! I chose to do the Santa slippers, so let’s go ahead and run through the details, shall we?
If you are not familiar with the Spellbinders Clubs, here’s a little bit about how it works ..
- On the 6th of the month, Non-Club members can join the club and get this month’s Club product(s) at the reduced Club Member price with free shipping.
- On the 27th of the month, registration for this month’s club products closes.
- On the 10th of the next month, Club products become available to everyone without requiring a Club membership; however, they are available at regular price and there is no free shipping. If a product is sold out, it will be re-ordered.
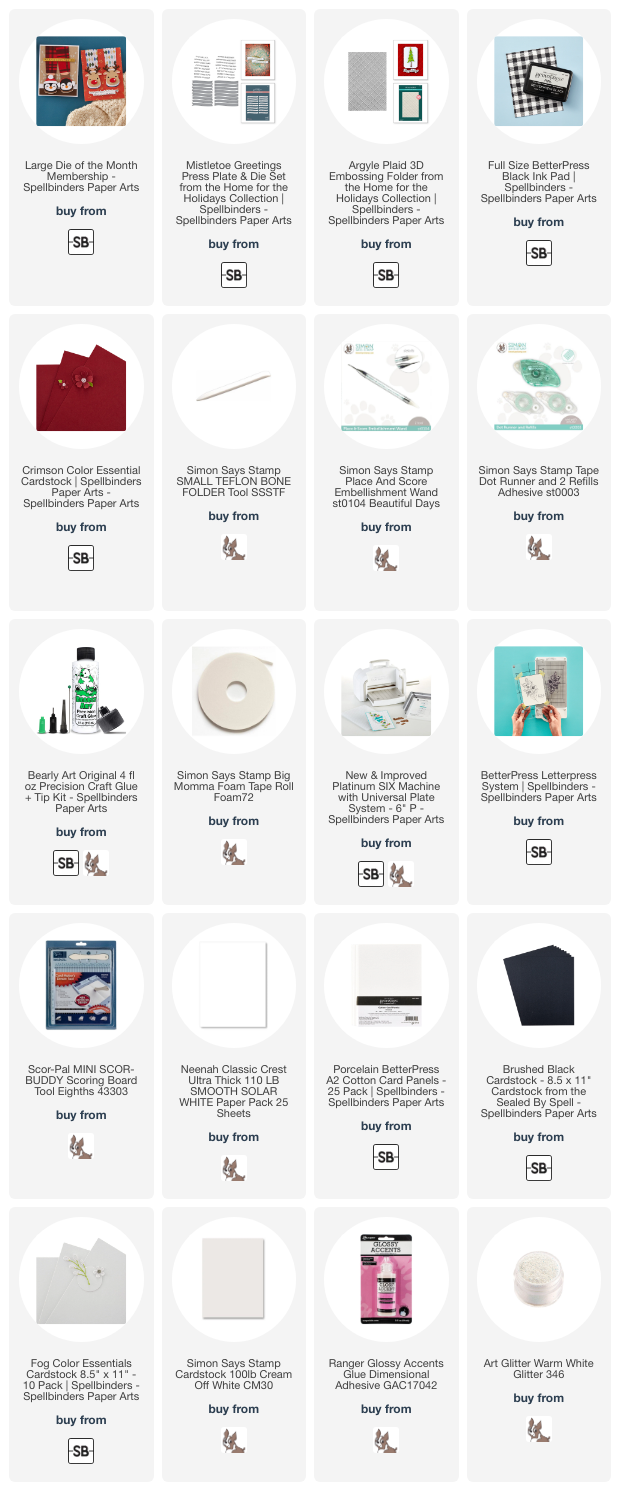
NOTE: all supplies are linked to multiple sources in the thumbnails at the end of this blog post.

I began this project by sorting through the dies and identifying those that pertained to the Santa. I then began cutting from colors of cardstock that coordinated with the pieces. I cut the pajama pants from patterned paper from my stash, and cut the slippers from black, and so on. You get the idea!
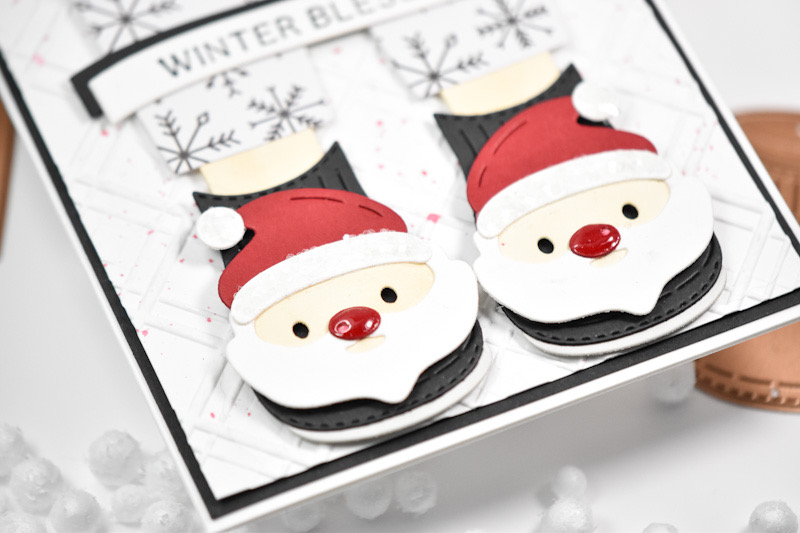
Once all of the pieces were cut, I began assembling them. I’m not even going to lie, I do have to refer to the images on the website sometimes to figure out what I’m supposed to be doing with the pieces! I decided that I needed a background, so I used the Argyle Plaid 3D Embossing Folder for that.
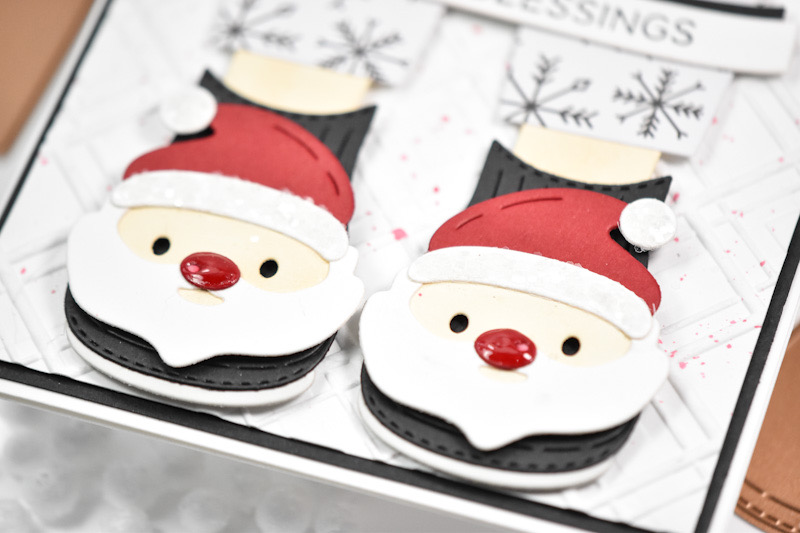
I adhered the pants and slippers using foam tape for added dimension, and applied glue and glitter to Santa’s hat for some sparkly additions. I also decided to apply some Glossy Accents to Santa’s nose as well. The sentiment is from the Mistletoe Greetings BetterPress set, and that was created using BetterPress Black ink, and then glued directly atop the pajama pants to finish up.

That does it for this project! I hope you enjoyed it as much as I did! There are so many fun options with this set for some super, cute Christmas or wintery cards! Thanks again for stopping by, and have a wonderful day!
Supply List
Affiliate links used at no cost to you. What does this mean? If you use the links within this post to make a purchase, I receive a small commission, which allows me to continue to post crafty content for your enjoyment. I truly appreciate your support!
Latest Posts
- Simon Says Stamp Tattered Florals

- Simon Says Stamp Amazing Floral

- Simon Says Stamp Friendly Butterflies

- Simon Says Stamp Graceful Hugs

- Simon Says Stamp Hello Butterflies