Simon Says Stamp Diamond Circle Good Vibes

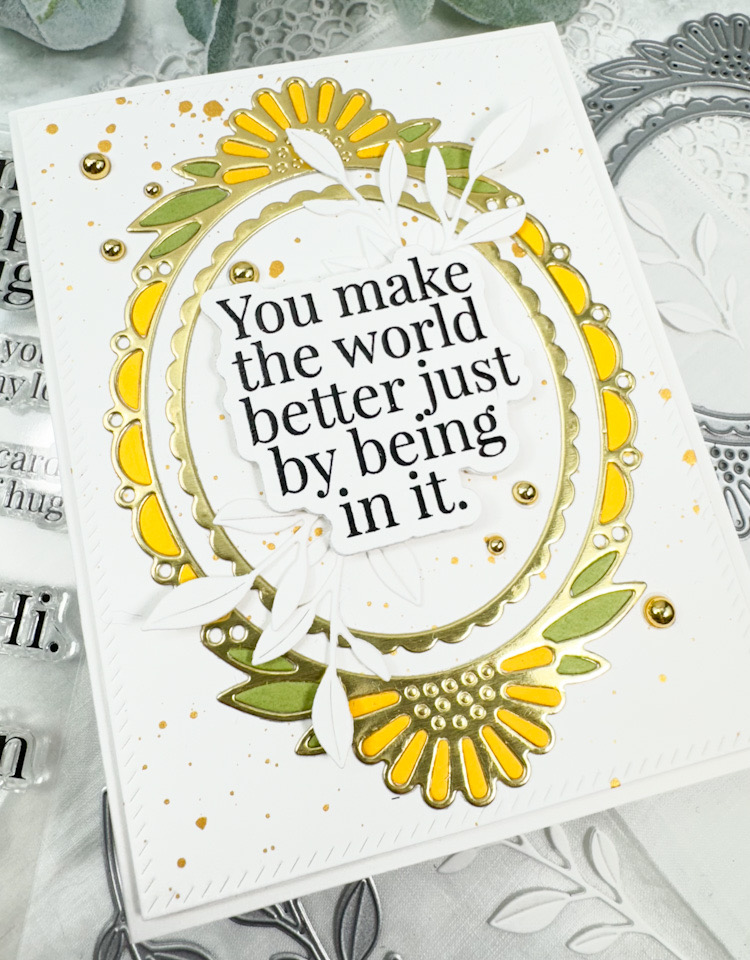
Hello Crafty Friends, and welcome back! I’m so glad that you stopped by for today’s project! It’s featuring the new Diamond Circles Foil Transfer Cards from Simon’s latest release, Celebrate. Let’s jump right in to the details!

Main Products:

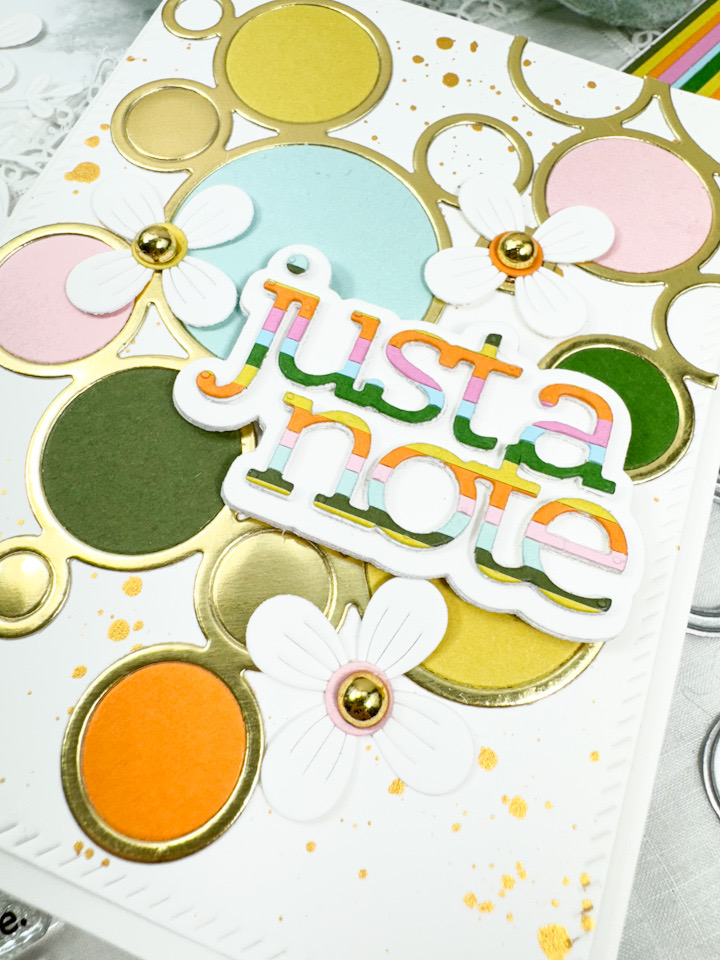
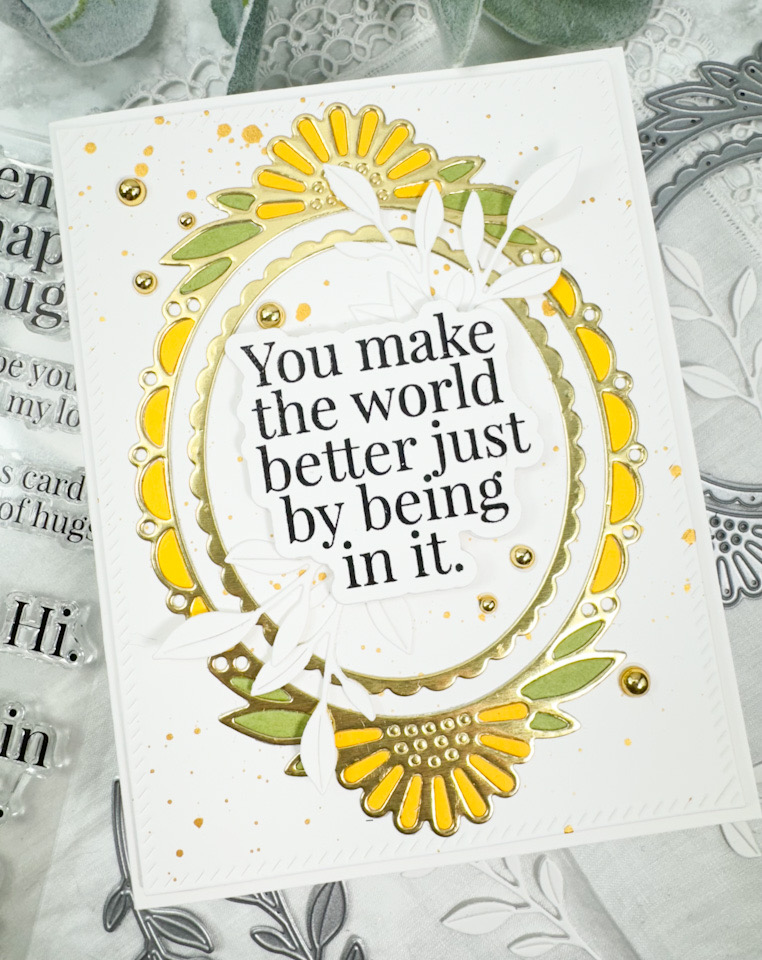
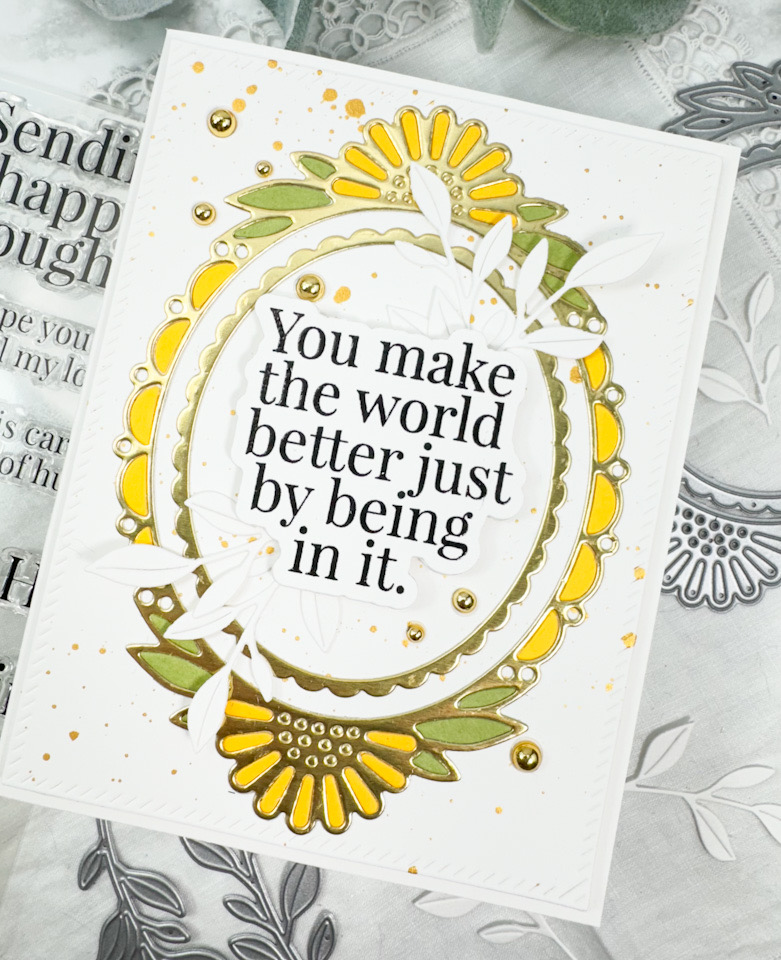
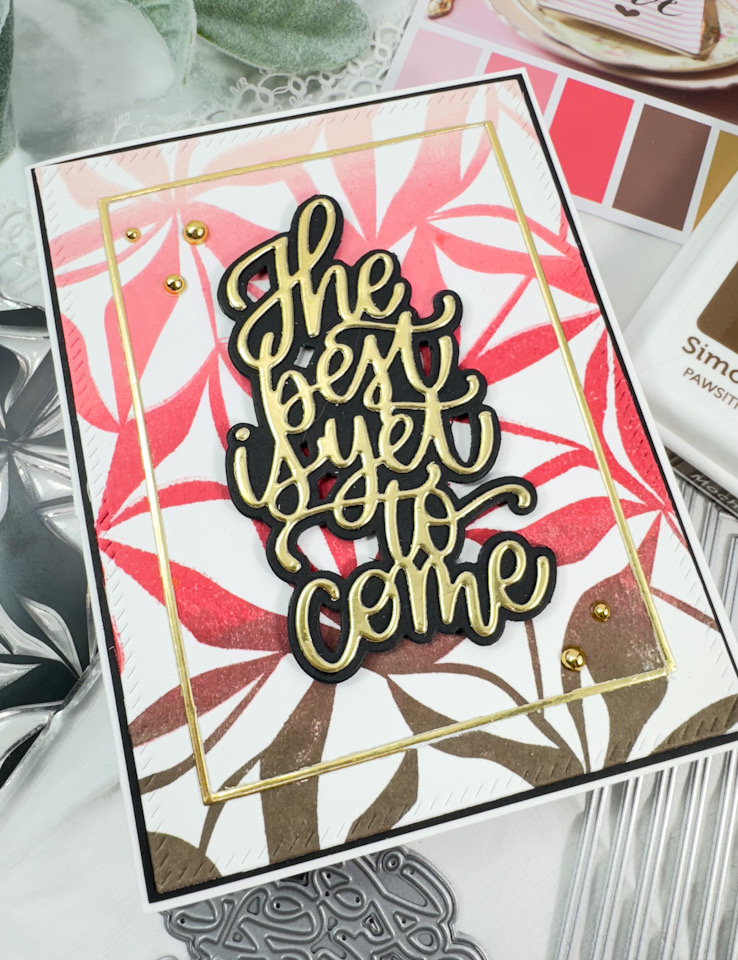
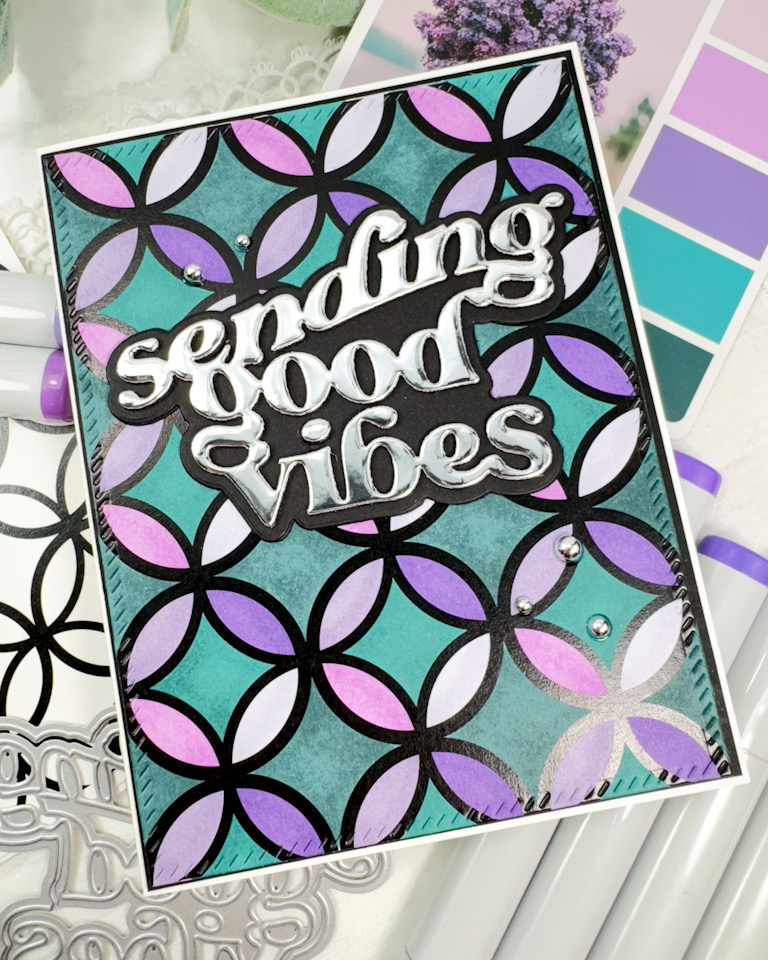
So, when I see foil transfer cards, I always feel like they HAVE to be foiled, but guess what? They don’t! I decided to just color this one for a completely different look! To begin, I pulled a card from The Color Cubes for some color inspiration. Once I decided on the colors, I pulled Copic Markers that matched and began coloring the different portions of the circles. The markers that I used were V22, V15, V17, V25, BG18 and BG78.

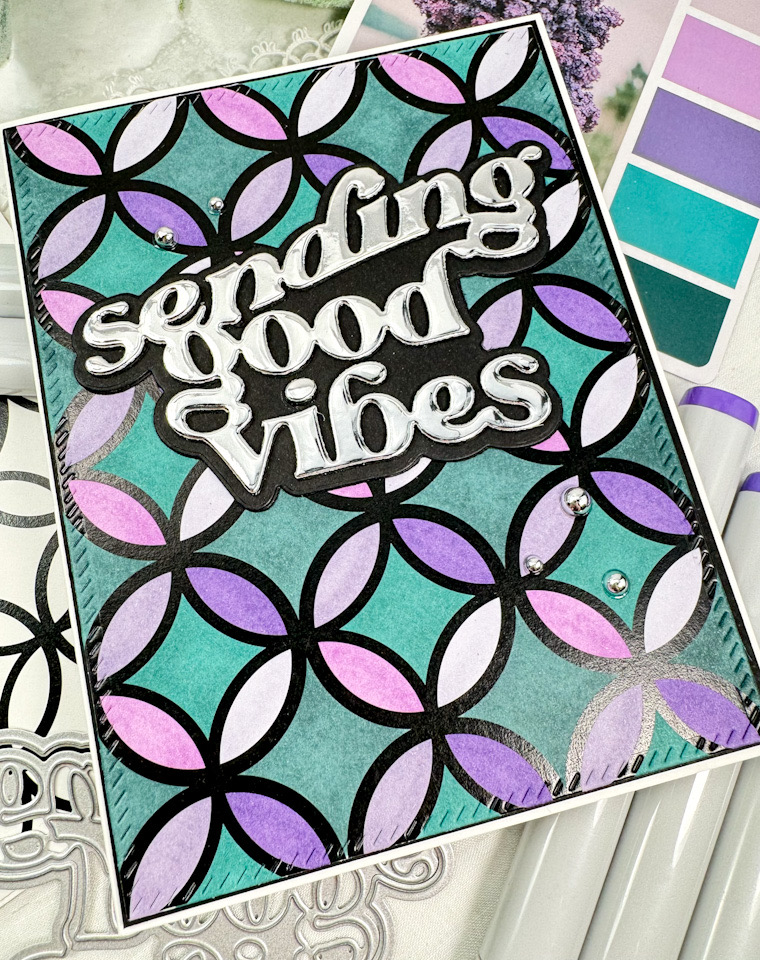
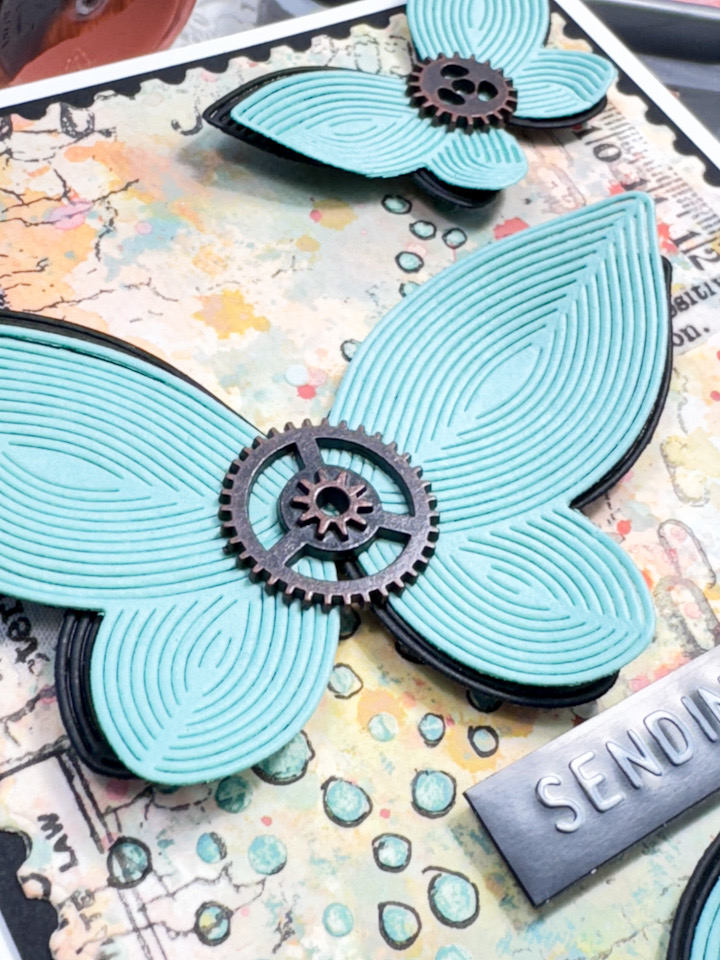
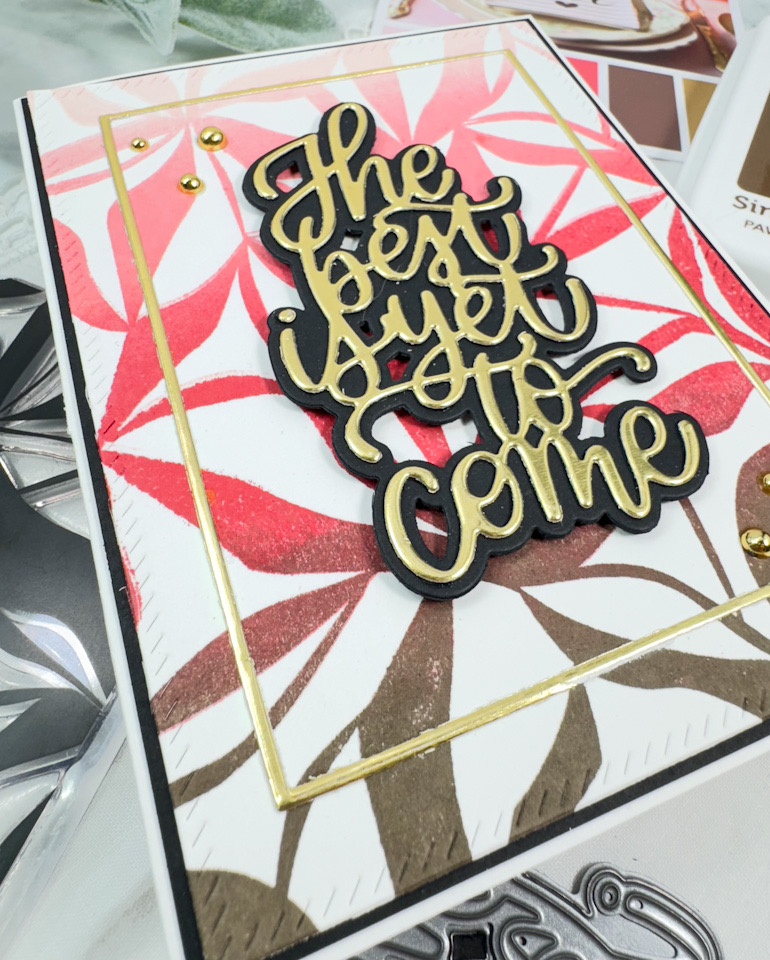
Once the panel was done, I used the PFS Diagonal Stitched Rectangles to trim it down. I die cut the SSS Sending Good Vibes once from silver cardstock, twice from black cardstock and cut the shadow twice from black cardstock as well. All of those were adhered together using liquid glue and then glued directly to my panel.

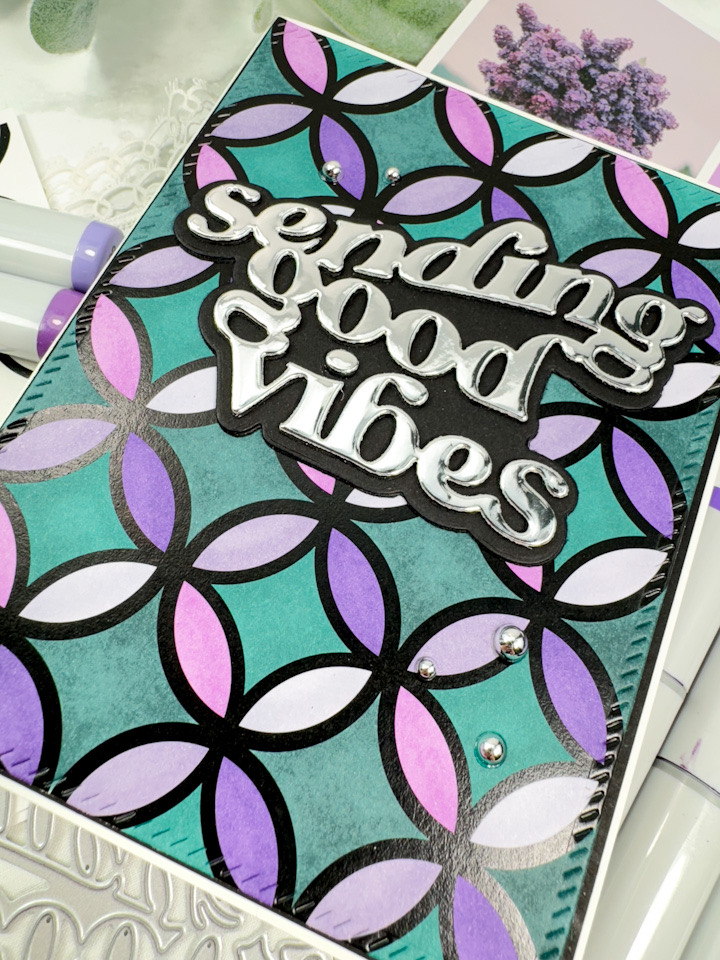
Everything was then adhered to the card base before adding some PFS Silver Metallic Pearls to finish up.

Super simple card for today, but this is a good reminder that even though this card can be foiled, you don’t have to foil it! By not foiling, I think it gives it a completely different look! Thanks again for stopping by, and I hope you have a wonderful day!

Other Products:

* Affiliate links used at no cost to you. Thanks so much for your support!

Latest Posts

Latest Instagram Posts

Simon Says Stamp Sending Thanks Butterflies

Hello and welcome back! Thanks so much for stopping by. Today’s card is a mixed media project featuring the new Whirl Butterflies from Simon’s latest release, Celebrate. I rarely make mixed media cards, even though I love the look of them. There’s a lot going on for this one, so let’s get right in to the details.

Main Products:

I began this project by pulling out a card from The Color Cubes for a bit of inspiration, a piece of mixed media paper, and Distress Oxide ink pads in Saltwater Taffy, Crackling Campfire, Spiced Marmalade, Fossilized Amber and Evergreen Bough. I worked one color at a time by smooshing the ink pad onto my silicone mat, spritzing with water and swiping or dabbing my paper into the ink. I made my way through the colors, drying the paper in between each addition, so that the colors didn’t get muddled.

Once I was satisfied with the additions of color, I took the panel to my splat box and splattered it with Distress Oxide Sprays in Saltwater Taffy, Crackling Campfire and Fossilized Amber. I let the panel dry before proceeding with adding some texture paste through the SSS Fading Tiny Dots Stencil. When the paste was dry, I outlined the circles using a Copic Multiliner pen. I also did some stamping on the panel using SSS Crackle Background, TH The Professor, TH The Professor 2 and TH Ultimate Grunge using VersaFine Onyx Black ink.

When the ink was dry, I used the SSS Postage Stamp Edge Frames to trim it down. I used the SSS Whirl Butterflies and cut those from aqua and black cardstock and glued those together offset just slightly. I wanted something different in the centers of the butterflies, so I opted to use gears for that. It’s a little weird, but I thought it added interest.

My panel was still missing something, in my opinion, so I used some 49 and Market Fabric Washi Tape and put a few pieces here and there on the panel. The butterflies and the sentiment were adhered to the panel using SSS 3D Foam Strips, and the panel was then adhered to a black panel for some added contrast.

That finishes up this project! I hope you enjoyed it, and I hope it inspires you to get crafty in your space! Like I said, I never make mixed media projects, but always enjoy the process! Don’t forget to stop by Simon’s website to check out the entire Celebrate release. Thanks again for stopping by, and I hope you have a wonderful day!

Other Products:

* Affiliate links used at no cost to you. Thanks so much for your support!

Latest Posts

Latest Instagram Posts

Simon Says Stamp Striped Just a Note

Hello Crafty Friends, and thanks for stopping by! I’m back today with a card featuring the new Just a Note 2 from Simon’s latest release, Celebrate. Let’s not waste time, and jump right in to it!

Main Products:

Check out my YouTube Short Video here!

I began this project by making a striped panel using scraps from my stash and die cutting the SSS Just a Note 2 from this panel. I also die cut it twice from Neenah 110lb cardstock, along with the shadow and adhered all of those pieces together using liquid glue.

My background panel was cut using the PFS Diagonal Stitched Rectangles and splattered with gold acrylic ink for added texture and interest. While that was drying, I went ahead and used the SSS Ring Frame and cut two of those from gold cardstock, and also cut it from the same colors as my striped panel.

When my splattered panel was dry, I adhered the ring frame using liquid glue and inlaid some of the colored circles in place. I did end up leaving some of the gold circles as well. I used a portion of the second ring frame to fill the panel a little bit more, and trimmed off the excess. The sentiment was adhered to the panel using SSS 3D Foam Strips, and I also added a few flowers using the SSS Fine Floral Stem. To finish up, I added some PFS Gold Metallic Pearls to the flowers, and stamped the inside greeting using the SSS Just a Note Notes with VersaFine Onyx Black ink.

That does it for this one! I hope you enjoyed it! Don’t forget to check out the entire Celebrate release over on Simon’s website. Thanks again for stopping by, and have yourself a wonderful day!

Other Products:

* Affiliate links used at no cost to you. Thanks so much for your support!

Latest Posts

Latest Instagram Posts

Simon Says Stamp In My Thoughts Butterfly

Hello and welcome back to my blog! I appreciate you stopping by! Today I’m participating in a Simon Says Stamp Instagram Hop to celebrate the CELEBRATE release. Be sure to check that out and comment along the hop for your chance to win a $25 gift card to Simon’s website. Who doesn’t love gift cards, am I right?! Today’s card is once again featuring the new Whirl Butterflies, and I had much fun with these butterflies, and probably made too many projects with them, but at least they’ve gotten some good use! Let’s run through the details for this one, shall we?

Main Products:

I began this card by die cutting the SSS Spindle Flower from Neenah 110lb cardstock, and doing some ink blending using SSS Pawsitively Saturated Inks in Bubblegum, Carnation and Zest. I chose this flower because I had never used it before, and now I’m wondering why I haven’t used it before!! It’s such a great flower! Once the flowers were colored, I assembled the pieces together using liquid glue.

The flowers were going to need leaves, because all of my flowers always need leaves! I used the SSS Budding Branches for this and did some ink blending using Seafoam and Sprout for these. I also went ahead and cut the SSS Whirl Butterflies from gold cardstock and set that aside. My panel was cut using the SSS Postage Stamp Edge Frames and then splattered with gold acrylic ink for added texture and interest.

I glued some of the leaves to the panel and then glued the florals atop those. The rest of the leaves were then glued in place, filling in the gaps, while the gold butterfly was adhered using SSS 3D Foam Strips. The butterfly doesn’t come with a body, and I wanted mine to have one so I used the body from the SSS Layered Cosmic Butterfly and secured that in place.

For added interest, I love adhering jewels to the ‘bud’ portion of these leaves, and did that using PFS Ballet Slipper jewels. I stamped the sentiment from the SSS Checking In set using VersaMark Ink, heat set that using Ranger Princess Gold Embossing Powder, and used the coordinating die to trim it out, along with two additional cuts. Those were all adhered together before being adhered to the panel using foam strips. The entire panel was then adhered to the card base using foam tape for added dimension to finish up.

That does it for this one! I hope you enjoyed it, and I hope it inspires you to get crafty in your space! Don’t forget to check out the entire Celebrate release over on Simon’s website, and join the hop over on Instagram for your chance to win! Thanks again for stopping by, and have a wonderful day!

Other Products:

* Affiliate links used at no cost to you. Thanks so much for your support!

Latest Posts

Latest Instagram Posts

Simon Says Stamp Birthday Organic Leaves

Hello Crafty Friends, and welcome back to my blog! I’m so glad that you stopped by to check out today’s project featuring the new Organic Leaves stamp from Simon’s latest release, Celebrate. This is such a great stamp because there’s so many different things and mediums to use with it. For example, ink blending over it, watercoloring around it, or even using some of the pigment powders and water with it. I have some other ideas that I want to try, but need to find the time! Anyhoo, let’s go through the details for this one!

Main Products:

I began by stamping the SSS Organic Leaves onto a panel of Neenah 110lb cardstock using VersaFine Onyx Black ink and heat setting it using Ranger Clear Embossing Powder. I then did some ink blending over the panel using SSS Pawsitively Saturated Inks in Bubblegum, Lemonade, Celery, Seafoam and Lilac. Once the ink blending was done, I took a cloth and wiped over the stamped leaves to remove the ink sitting on top.

I love decorative edges, so I used the SSS Postage Stamp Edge Frames to trim the panel down. The SSS Oh Expletive was cut once from silver cardstock and once from aqua cardstock, while the shadow portion was cut twice from black cardstock. Before adhering all of these pieces together with liquid glue, I did some ink blending on the aqua portion using Ocean ink, and then glued this directly to the stamped panel.

The sub-sentiments are from the SSS Reverse Sassy Birthday Sentiment Strips. The smaller sentiment was glued directly atop the main sentiment and the larger strip was adhered with SSS 3D Foam Strips for a little added dimension. The finish panel was then adhered to the card base to finish up.

I have a sassy personality and a sassy sense of humor, so this main sentiment is right up my alley! Don’t forget to check out the entire Celebrate release over on Simon’s website. Thanks again for stopping by, and I hope you have a wonderful day!

Other Products:

* Affiliate links used at no cost to you. Thanks so much for your support!

Latest Posts

Latest Instagram Posts

Simon Says Stamp Floral Diamond Circles

Hello Crafty Friends, and welcome back! I’m so glad that you stopped by! I’m back today with a project featuring the new Diamond Circles
Foil Transfer Cards
from Simon’s latest release, Celebrate. Let’s get right in to it!

Main Products:

I began this card by foiling a SSS Diamond Circles Foil Transfer Card using gold foil and the Minc Mini. Once my foiling was done, I trimmed the panel down slightly, and went to work on all of the florals. I pulled a card from The Color Cubes for inspiration, and I loved the oranges and aqua together, so I went with that color palette. The florals that I used were SSS Etched Meadow Flower and Leaves, SSS Etched Magnolia Blossom, SSS Charming Daisy, SSS Sunrise Stem and the SSS Whirl Blossom.

Most of the flowers were cut from Neenah 110lb cardstock, while two of them were cut from orange cardstock. Once those were cut, I did some ink blending using SSS Pawsitively Saturated Inks in Cantalope, Melon, Peachy and Sherbet, along with C&9 ink in Grapefruit. The added leaves were cut from aqua and light blue cardstock, while the centers of some of the flowers were cut from gold cardstock. I assembled the flowers with liquid glue and added a gold gem to one of the flowers as well.

The background needed something else in my opinion, so I opted to use the SSS Stitched Squares for this. I ended up using two of the squares and adhered those to the foiled panel using SSS 3D Foam Strips and arranged my flowers and leaves around the left side, tucking in leaves between the flowers for added fullness.

I used the SSS Greetings Trio for the sentiment, and cut the Thanks from gold cardstock, along with two additional cuts and the shadow, adhering all of those together with liquid glue. The sentiment was adhered to the panel using foam strips. The entire panel was adhered to the card base using foam tape, and I added some PFS Gold Metallic Pearls to finish up.

That does it for this one! I absolutely love this color combo, and I’m so thrilled with The Color Cubes for those times when I need a little extra color inspiration! Thanks again for joining me, and don’t forget to check out the entire Celebrate release over on Simon’s website. Have a fabulous day and stay awesome, friends!

Other Products:

* Affiliate links used at no cost to you. Thanks so much for your support!

Latest Posts

Latest Instagram Posts

Simon Says Stamp Big Birthday Butterflies

Hello Crafty Friends, and thanks so much for stopping by! I’m back today with a project featuring the new Whirl Butterflies from Simon Says Stamp’s latest release, Celebrate. Let’s jump right in to it, shall we?

Main Products:

I began this card by die cutting the SSS Whirl Butterflies from scraps of Neenah 110lb cardstock and did some light ink blending on them using SSS Pawsitively Saturated Inks in Bubblegum, Sunbeam, Seafoam and Lilac. This die doesn’t come with a body for the butterflies, but I wanted mine to have a body, so I used just the body portion from the SSS Layered Cosmic Butterfly set, and secured it with liquid glue.

The background needed some interest so I embossed a panel of Neenah 110lb cardstock using the SSS Circle Hoops Embossing Folder, trimmed it down slightly and adhered it to a black panel for contrast using foam tape. I stamped the sentiment, which is from the SSS Big Old Birthday set, using VersaFine Onyx Black ink and heat set it using Ranger Clear Embossing Powder and repeated that process for a second time for a smoother heat embossed image. I then used the coordinating die to cut it out, along with three additional pieces and adhered all of those together using liquid glue.

I glued the sentiment to the background panel and secured the butterflies with SSS 3D Foam Strips, before adding some SSS Clear Dazzling Gems to finish this one up.

This is a pretty simple card for today, but I love the rainbow butterflies! Don’t forget to check out the entire Celebrate release over on Simon’s website! I appreciate you stopping by today, and I hope you have a wonderful day!

Other Products:

* Affiliate links used at no cost to you. Thanks so much for your support!

Latest Posts

Latest Instagram Posts

Simon Says Stamp Daisy Oval Frame

Hello Friends and welcome back! I’ve been busy playing with goodies from Simon’s latest release, Celebrate! Today’s card is featuring the new Daisy Oval Frame set, so let’s jump right in to the details!

Main Products:

I began this card by die cutting the SSS Daisy Oval Frame from gold cardstock, along with the inner frame as well. I also cut it from yellow and green cardstock, because I wanted to inlay those pieces into the gold.

I pulled a panel of Neenah 110lb cardstock and die cut it using the PFS Diagonal Stitched Rectangles, and splattering it with some gold ink. I removed all of the gold pieces before adhering the frames to the panel using liquid glue, and then began gluing in the colored pieces for a finished look.

The sentiment is from the SSS Extra Talkative set and that was stamped using VersaFine Onyx Black ink and heat set using Ranger Clear Embossing Powder. I cut that out using the coordinating die, along with two more cuts and adhered all of those together. As always, I felt like I needed more leaves, so I used the SSS Etched Meadow Flowers and Leaves for that.

I glued the white leaves in place and adhered the sentiment atop those using SSS 3D Foam Strips for some dimension. The panel was then adhered to the card base using foam tape, and some PFS Gold Metallic Pearls were added to finish up.

I hope you enjoyed this project, because I sure did! There’s something so satisfying about the inlay process. Don’t forget to check out the entire Celebrate release over on Simon’s website! Thanks again for stopping by, and have a wonderful day, friend!

Other Products:

* Affiliate links used at no cost to you. Thanks so much for your support!

Latest Posts

Latest Instagram Posts

Simon Says Stamp The Best Organic Leaves

Hello Crafty Friends, and thanks so much for stopping by! The latest Simon Says Stamp release, Celebrate, is live, and I’ve had a blast playing with all of my goodies! Today’s card is featuring the new Organic Leaves stamp, so let’s go through the details!

Main Products:

I began this project by pulling a card from The Color Cubes and then pulling ink pads that matched, or matched as close as I could get them. The inks used were SSS Pawsitively Saturated Ink in Mocha, as well as PFS inks in Ballet Slipper, Peony and Berrylicious. I cut a panel of Neenah 110lb cardstock and placed it in the Misti and began stamping the SSS Organic Leaves. I started with the lightest color at the top, and worked my way through the colors. When I was done adding each ink, I did use a blender brush to soften the edges of the ink, so that I didn’t have any harsh lines on the panel. Once everything was stamped, I used the PFS Diagonal Stitched Rectangles to trim it down.

For some added interest to the card, I used the SSS A2 Thin Frames and cut one of those from gold cardstock and adhered it to the panel using liquid glue. I used the SSS The Best is Yet to Come for the sentiment and cut that from the same gold cardstock, along with two additional black layers. The shadow portion of the die was also cut twice from black cardstock, and all of these layers were glued together for a stacked look.

The sentiment was adhered to the panel using SSS 3D Foam Strips and the panel was then adhered to a black panel, for contrast, using SSS Dot Tape Runner, before being adhered to the card base. For a little added bling, I added some PFS Gold Metallic Pearls.

That does it for this one! I hope you enjoyed it! Have you checked out the entire Celebrate release yet? I’d love to know your favorites in the comments! Thanks again for stopping by, and have a wonderful day!

Other Products:

* Affiliate links used at no cost to you. Thank you so much for your support!

Latest Posts

Latest Instagram Posts

Simon Says Stamp Leafy Birthday Wishes

Hello Crafty Friends, and welcome back! I’m so glad that you stopped by! Today’s card is featuring the new Celestial Wishes set, which is featured in the May 2024 Card Kit. So, let’s run through the details!

Main Products:

I began this card by pulling out the SSS Pawsitively Saturated Inks in Bubblegum, Melon, Lemonade, Sprout, Seafoam and Lilac so that I could stamp the largest leaf from this set in a rainbow of colors. I stamped my leaves on a panel of Neenah 110lb cardstock and used the coordinating die to trim them all out.

Once all of the leaves were stamped and cut, I embossed another panel using the SSS Wistful Leaves Embossing Folder and trimmed it down slightly. I played around with the leaf placement, and decided that I wanted some other white leaves tucked between the layers of the rainbow leaves, and I used the SSS Budding Branches for this. This die has quickly become a favorite of mine!

I started adhering the leaves to the embossed panel using liquid glue, while gluing the white leaves between the layers. I used the Happy Birthday sentiment, which is also from the new SSS Celestial Wishes set. I stamped that using VersaFine Onyx Black ink and heat embossed it using Ranger Clear Embossing Powder. Once again, I used the coordinating die to trim it out, along with two additional cuts and glued all of those together for a stacked sentiment.

The sentiment was adhered to the panel using SSS 3D Foam Strips, and I added PinkFresh Jewels to the “buds” of the branches using the colors of the rainbow. The whole panel was then adhered to the card base using foam tape.

That does it for this project! I hope you enjoyed it, and I hope it inspires some creativity for you, as well! You can check out all of the contents for the May 2024 Card Kit over on Simon’s website. Thanks again for stopping by, and I hope you have a wonderful day!

Other Products:

* Affiliate links used at no cost to you. Thanks so much for your support!

Latest Posts

Latest Instagram Posts