Simon Says Stamp Amazing Floral

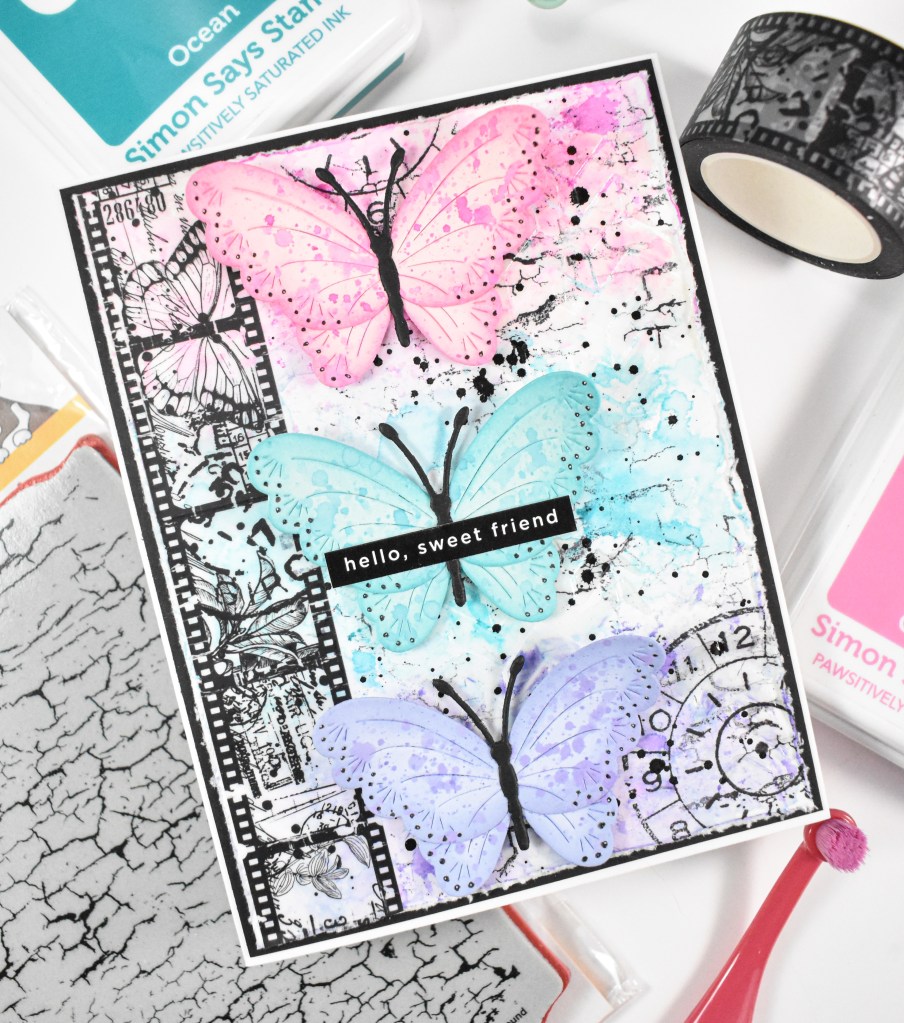
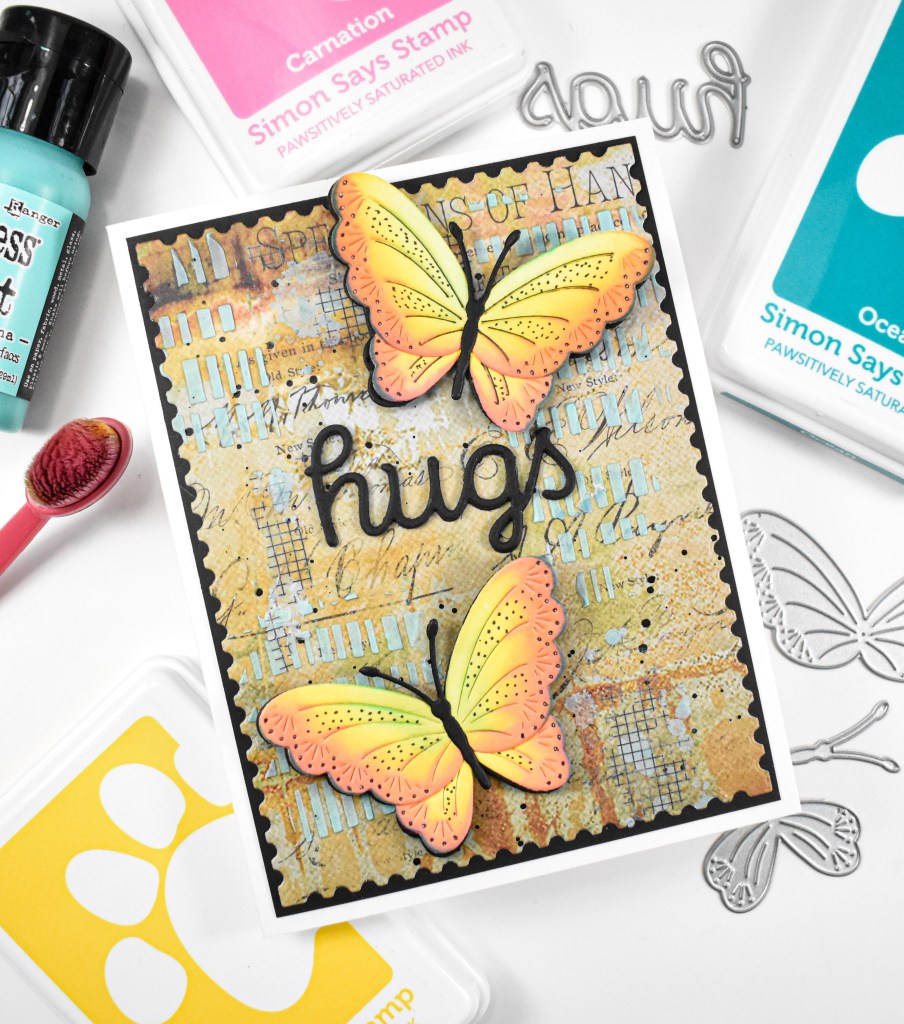
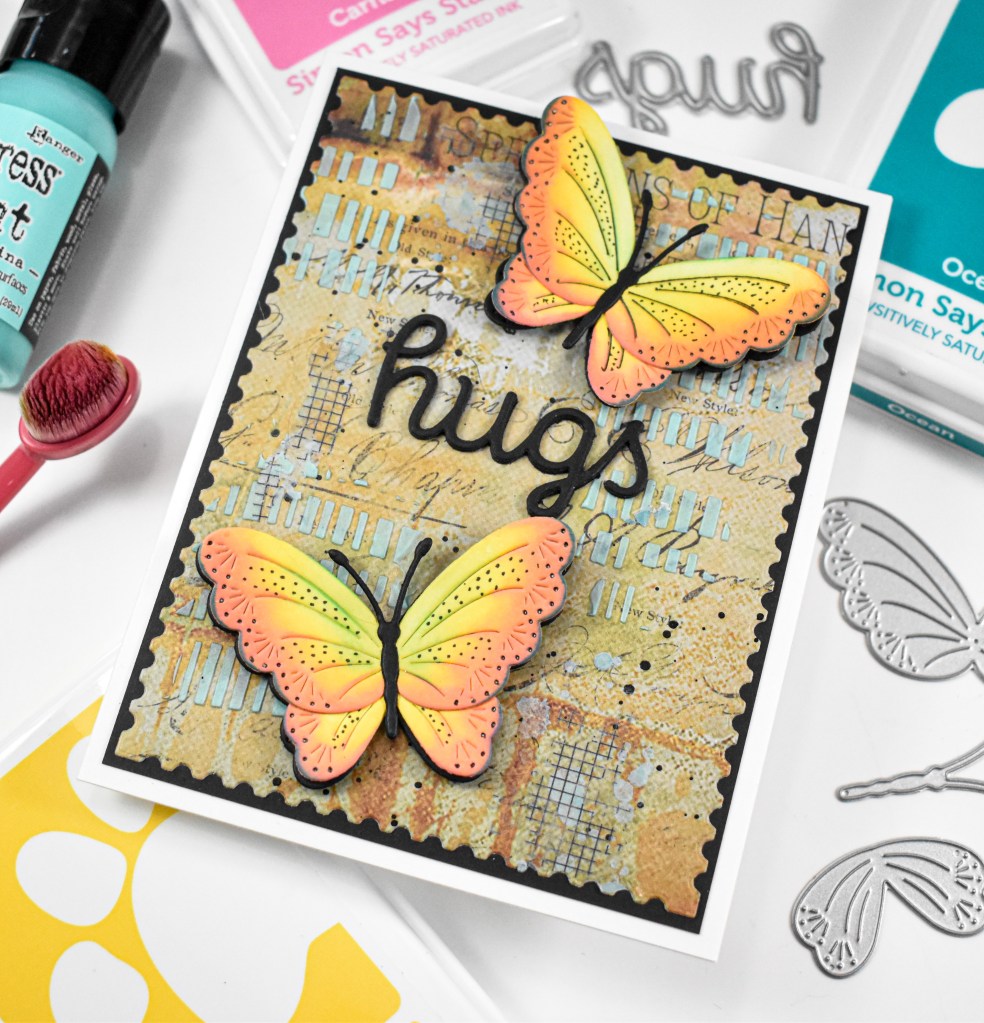
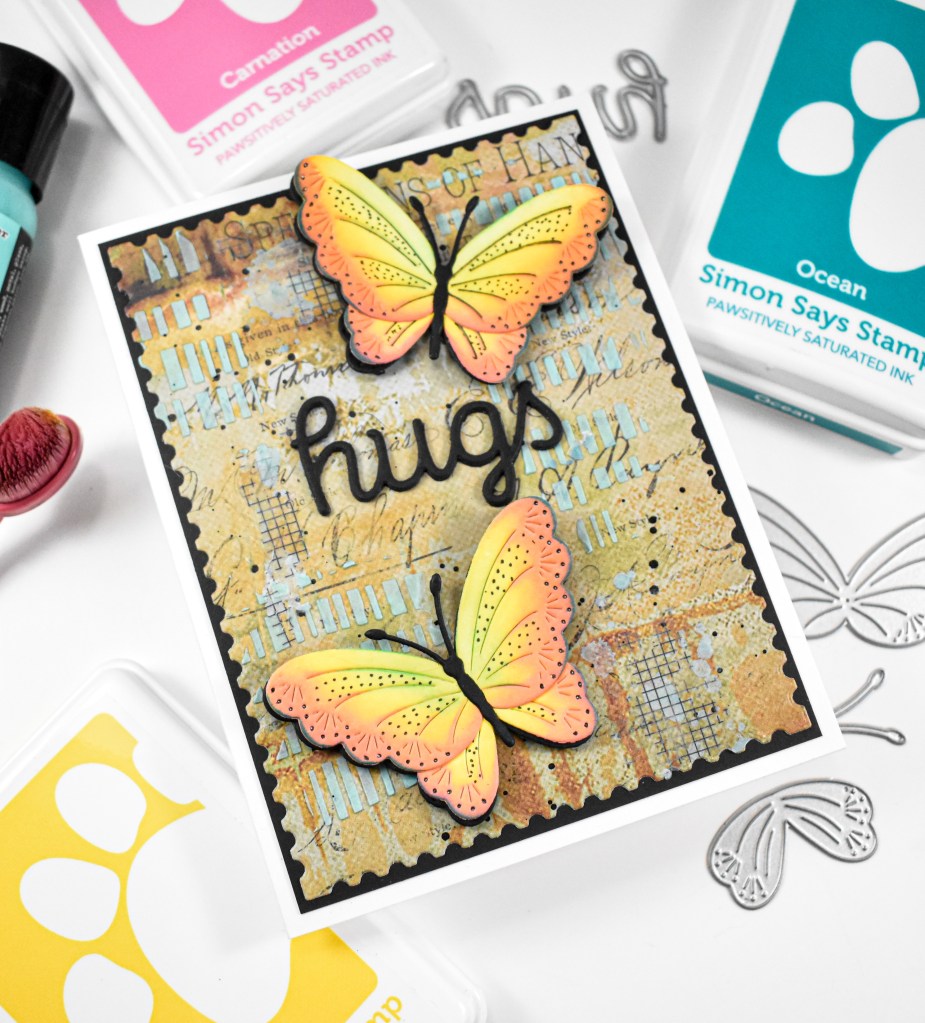
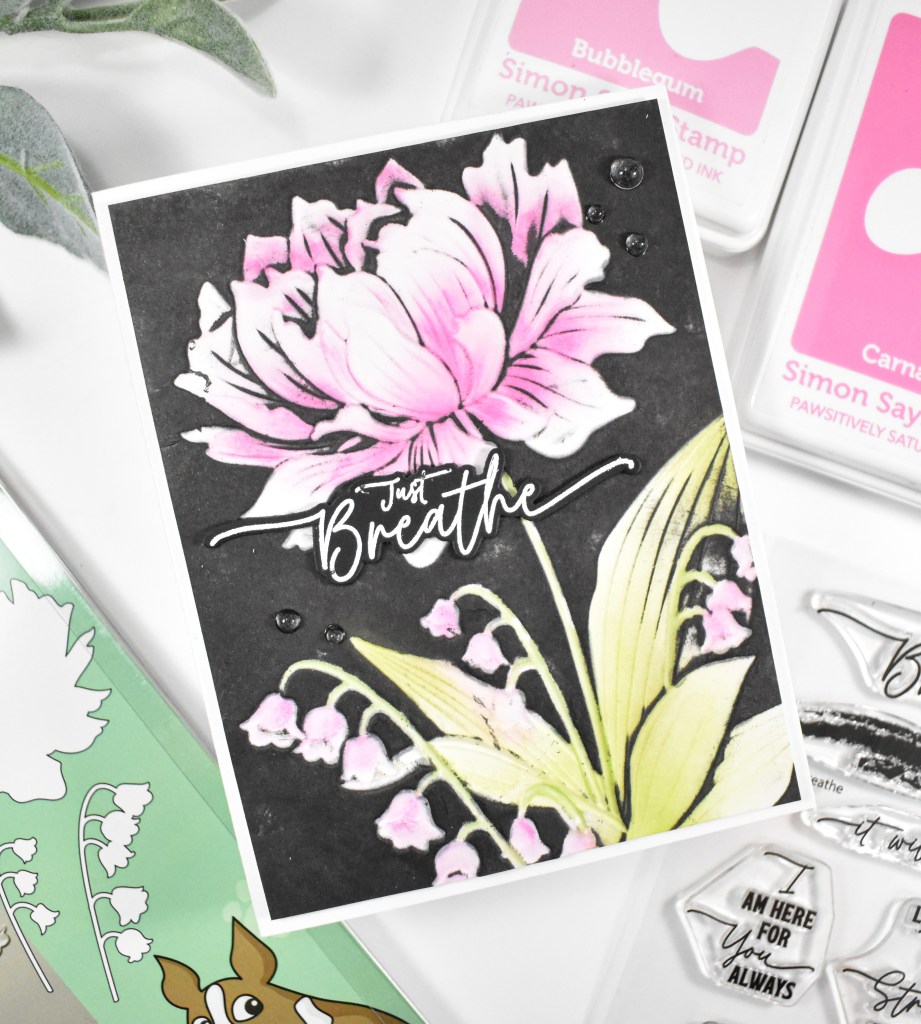
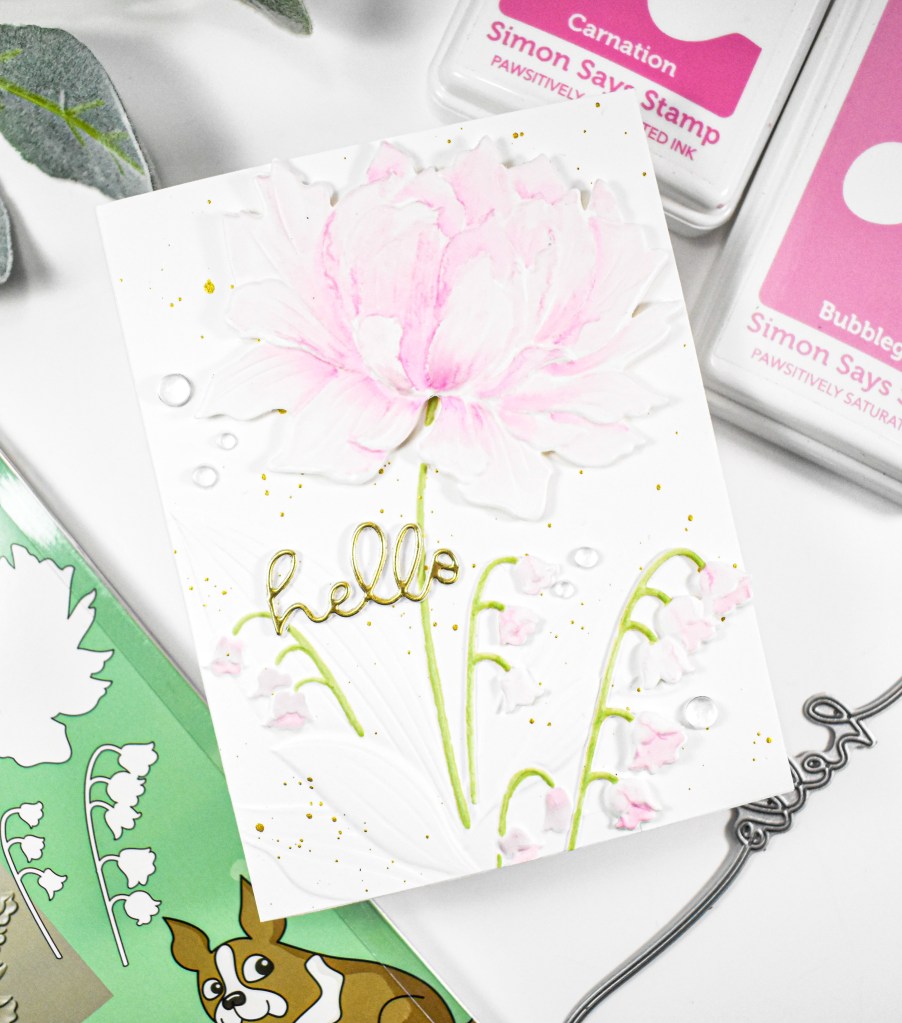
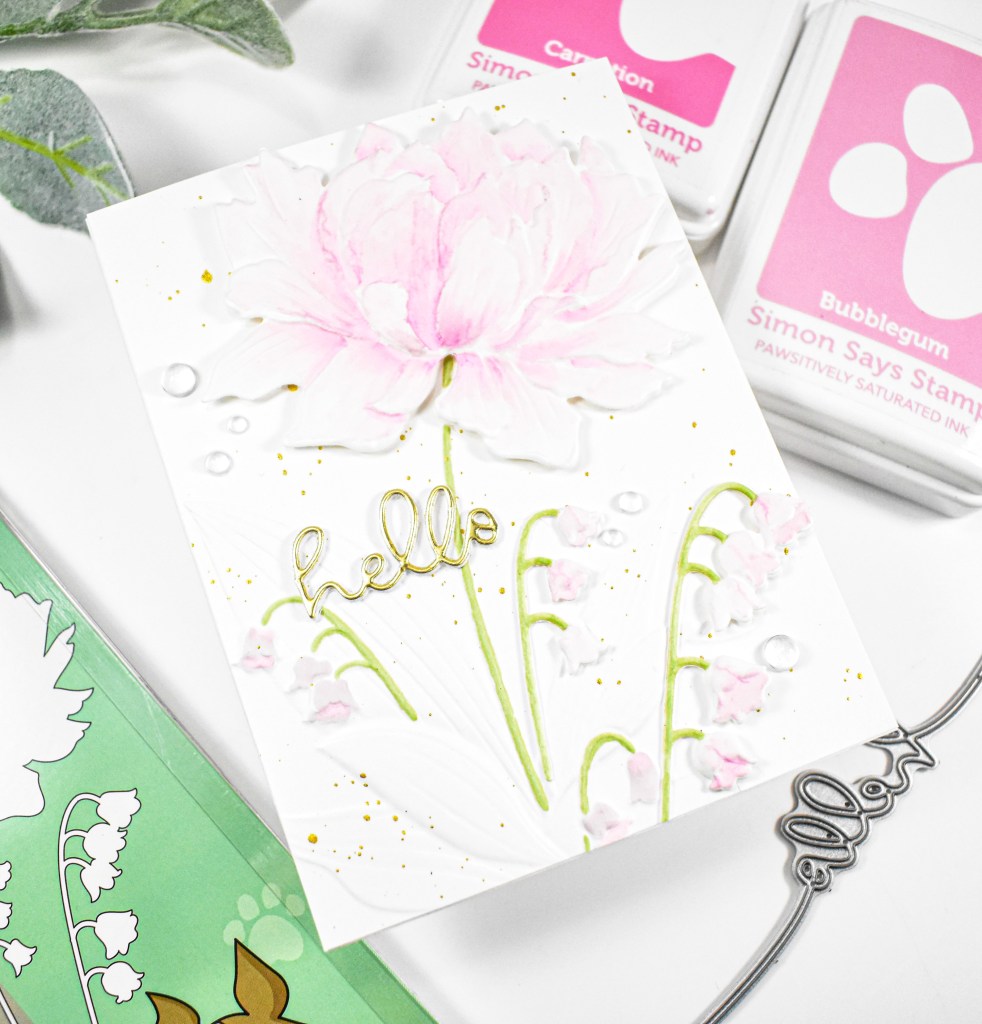
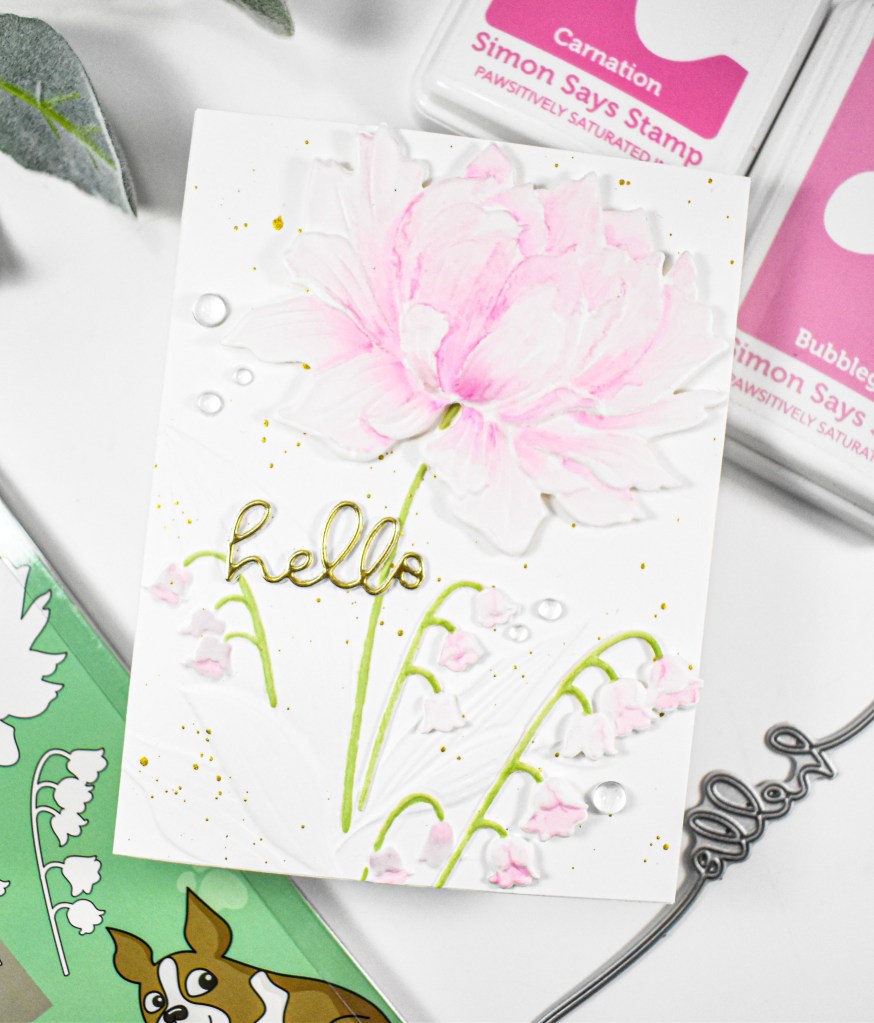
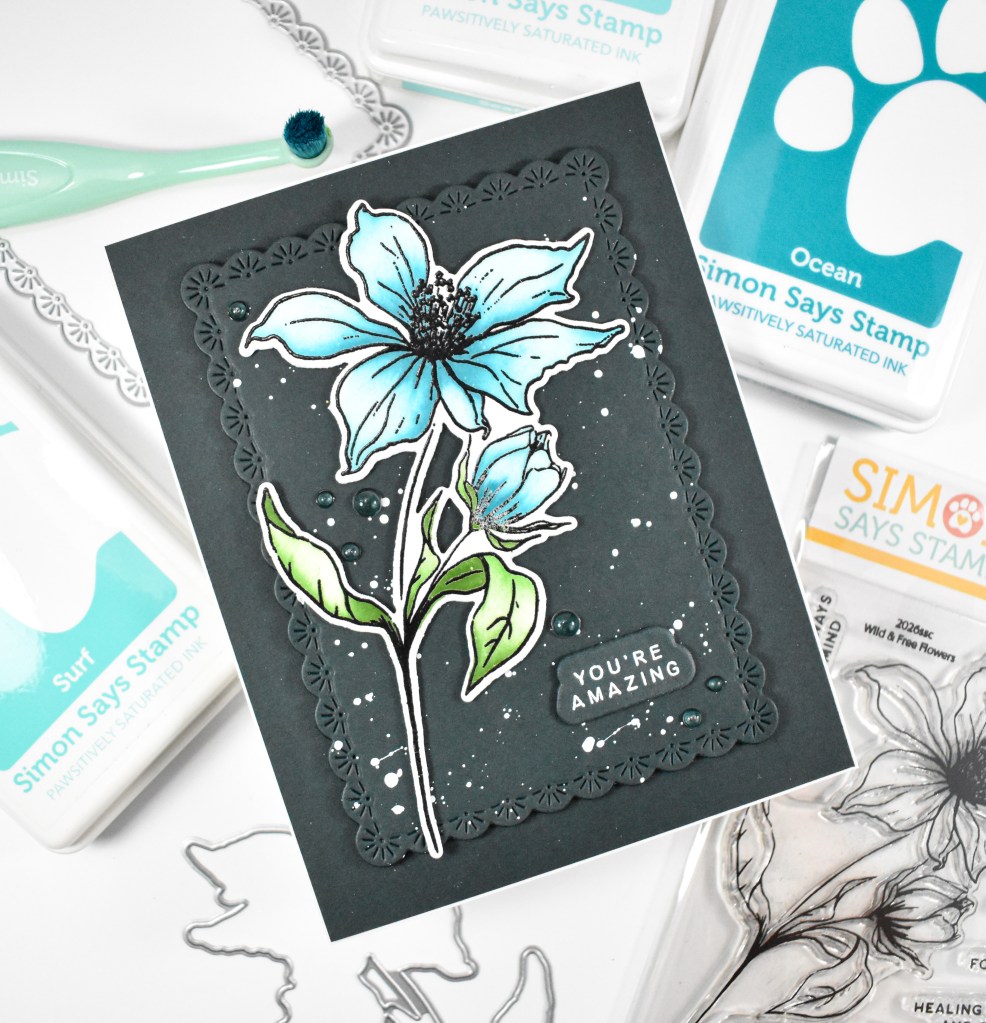
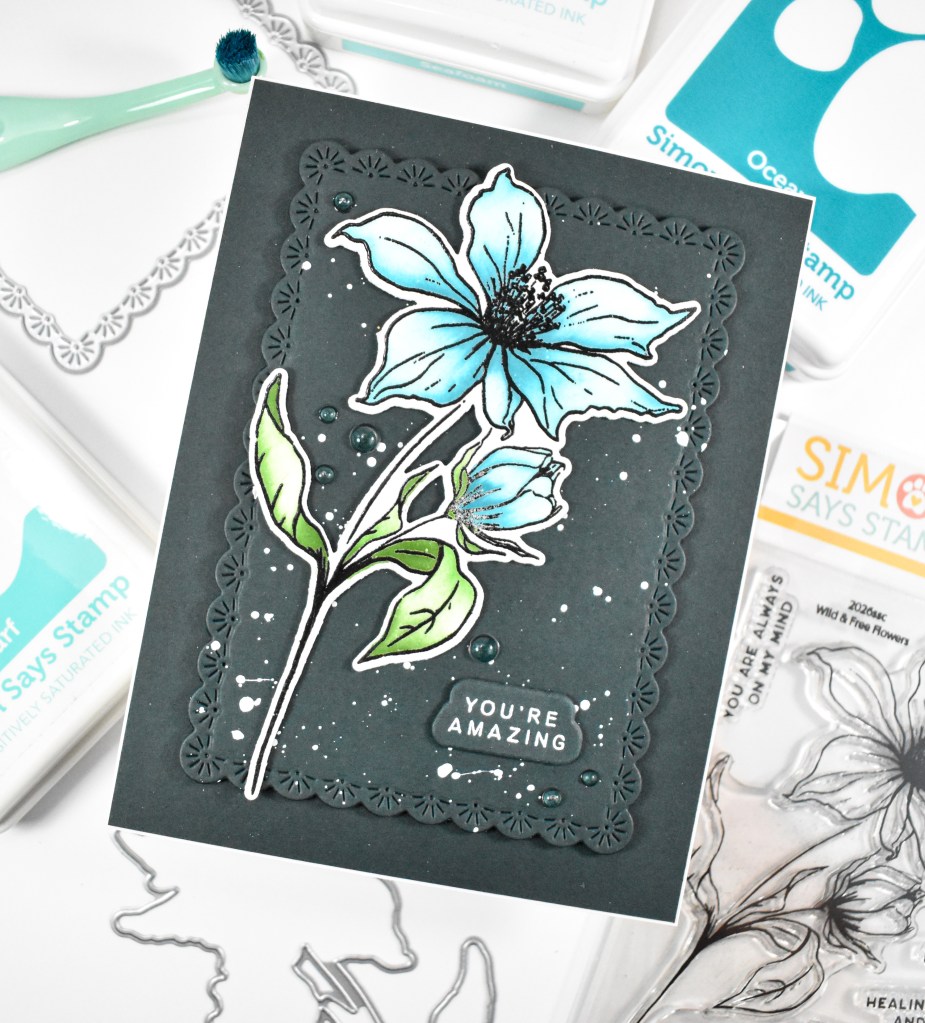
Hello Crafty Friends, and welcome back! I recently ordered the Wild & Free Flowers product suite and promptly made a card with it using some darker colors. Let’s run through the details!
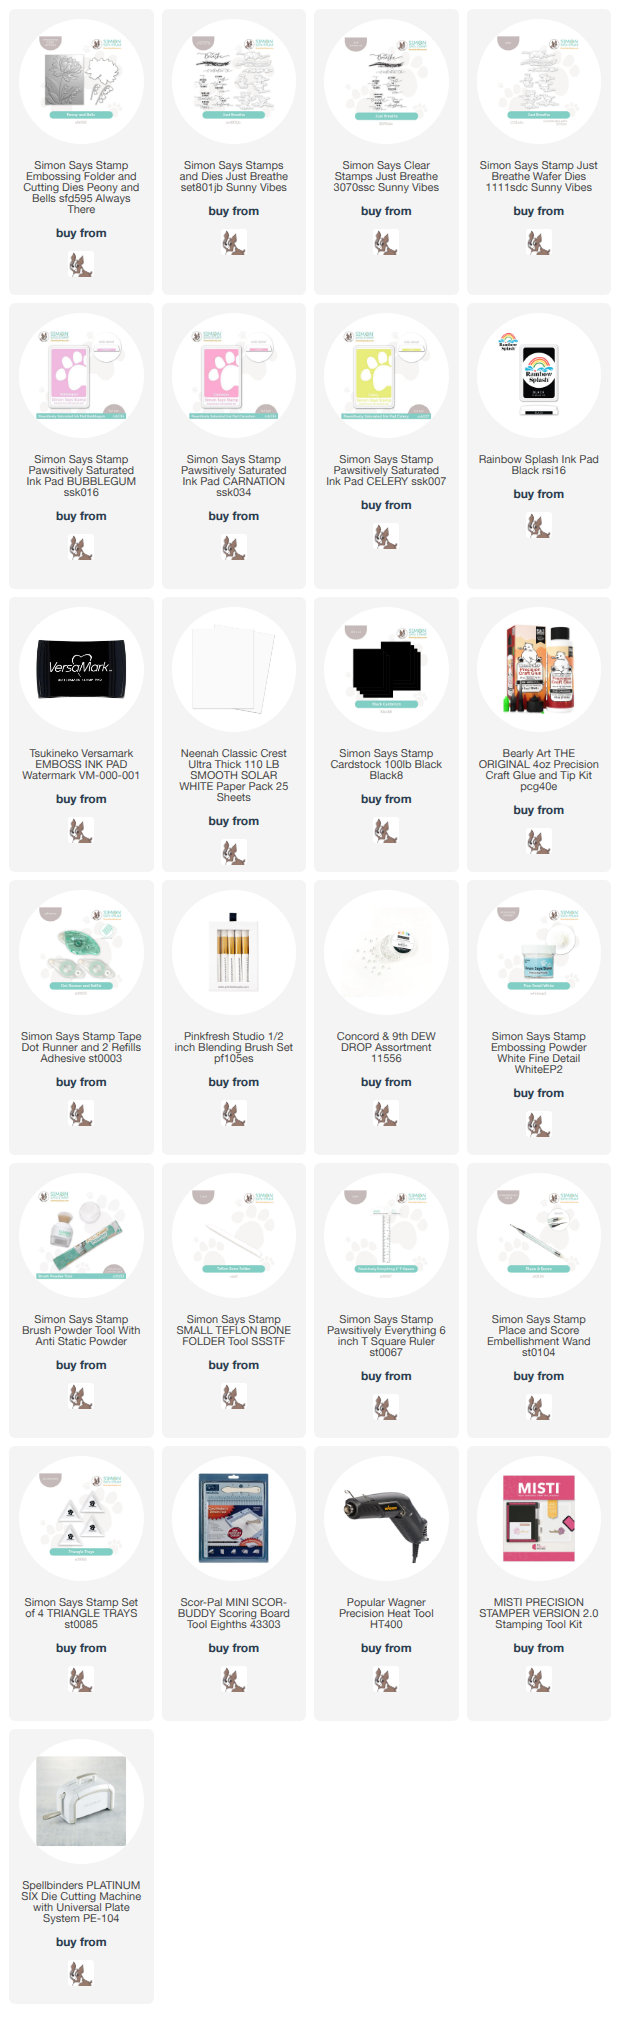
NOTE: all supplies are linked in the thumbnails at the end of this blog post.
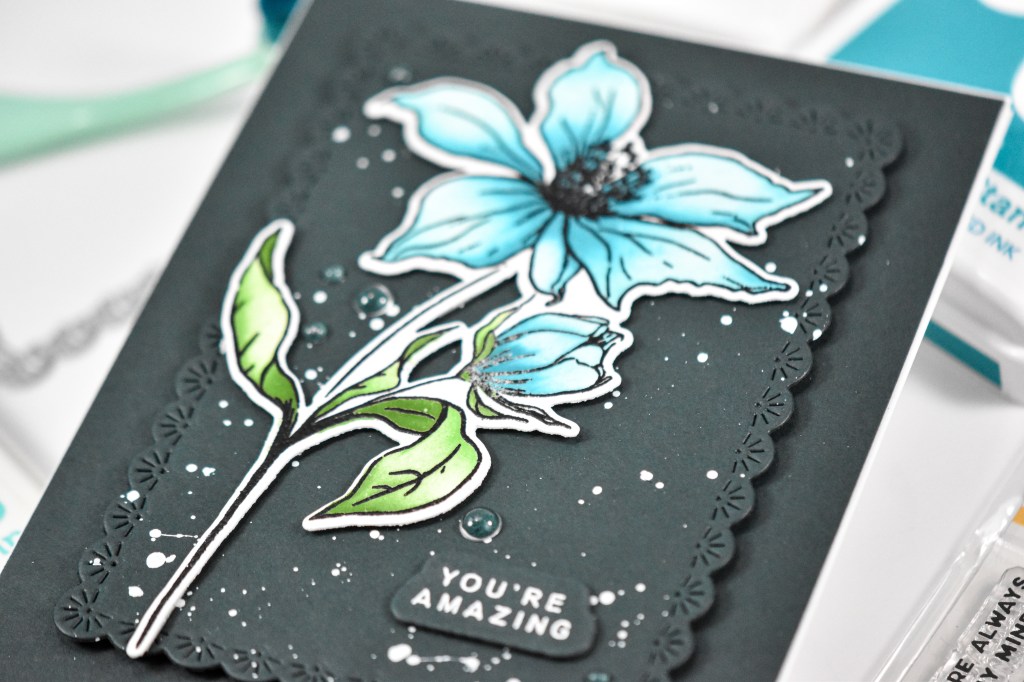
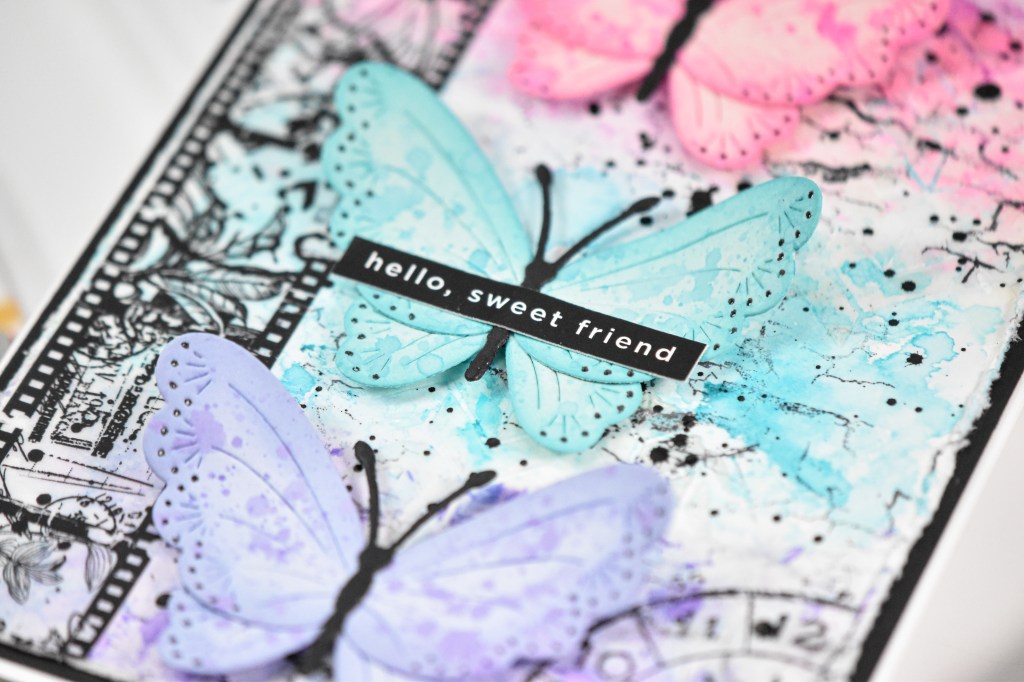
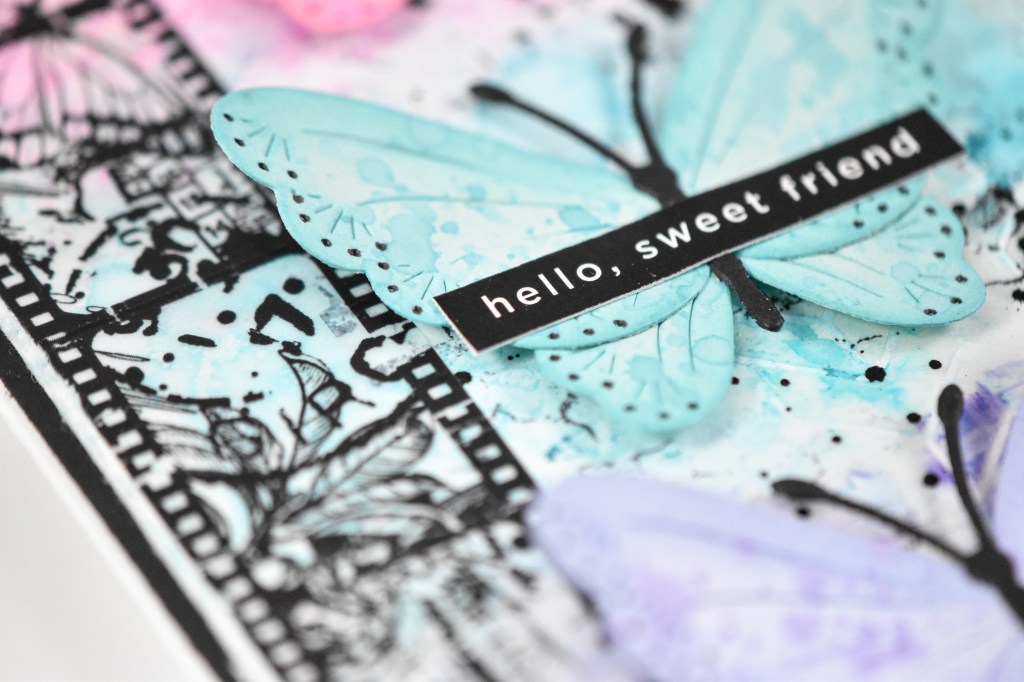
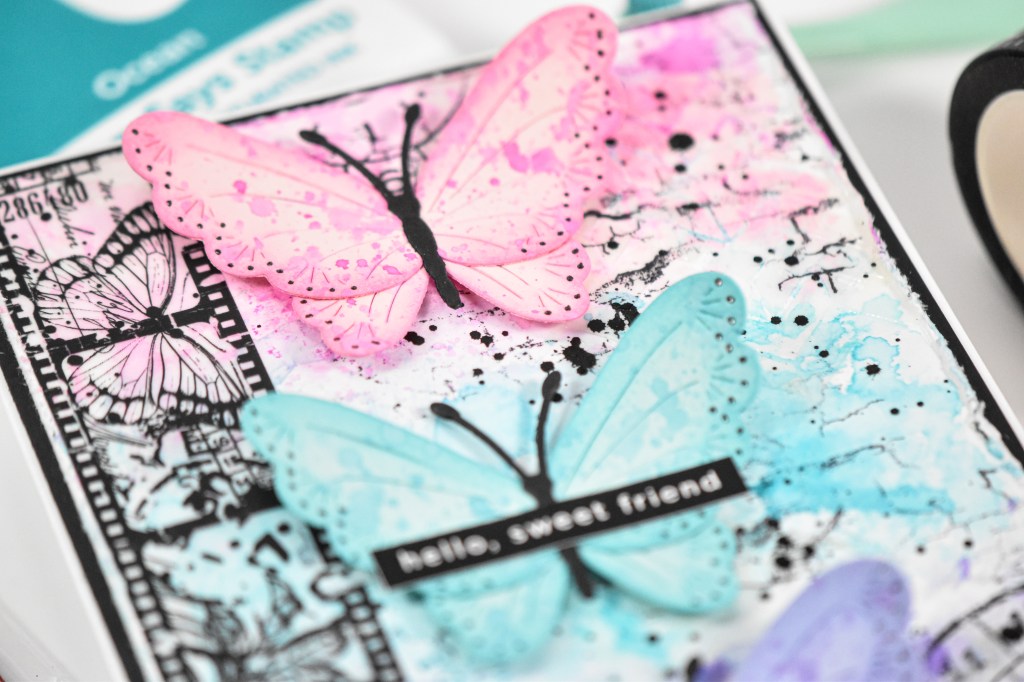
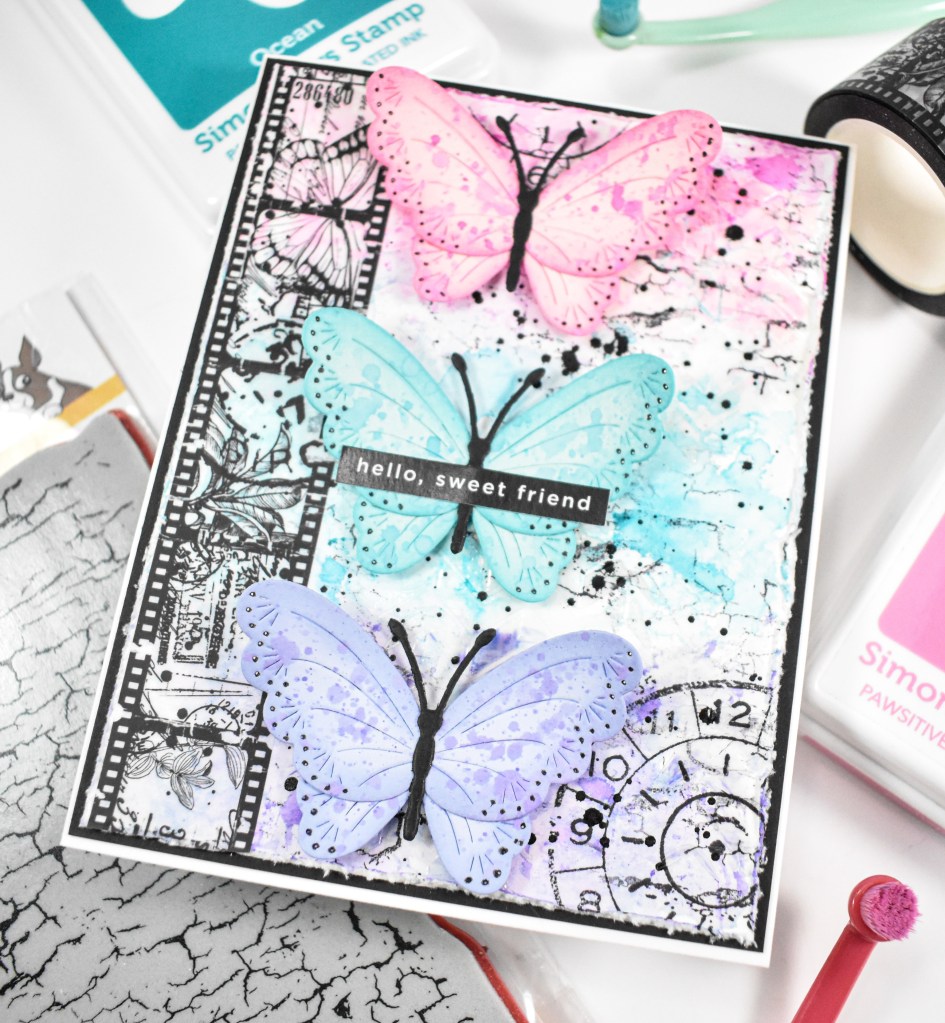
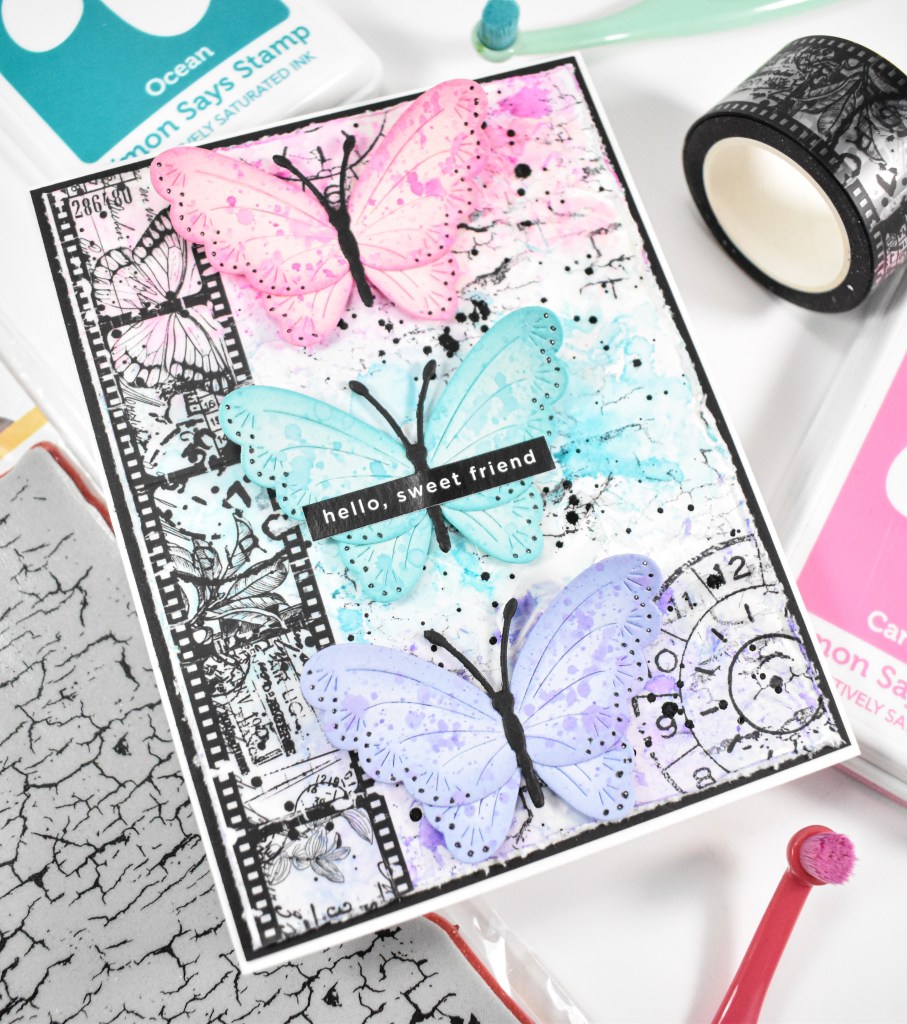
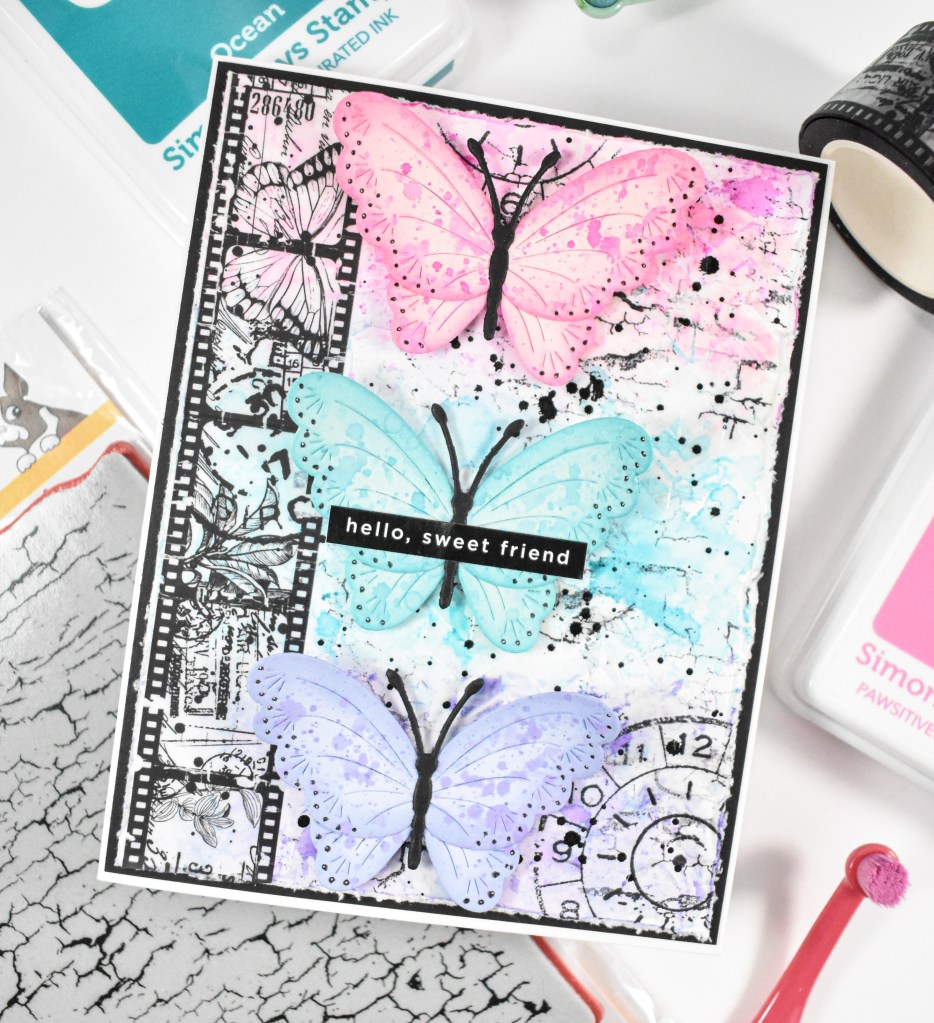
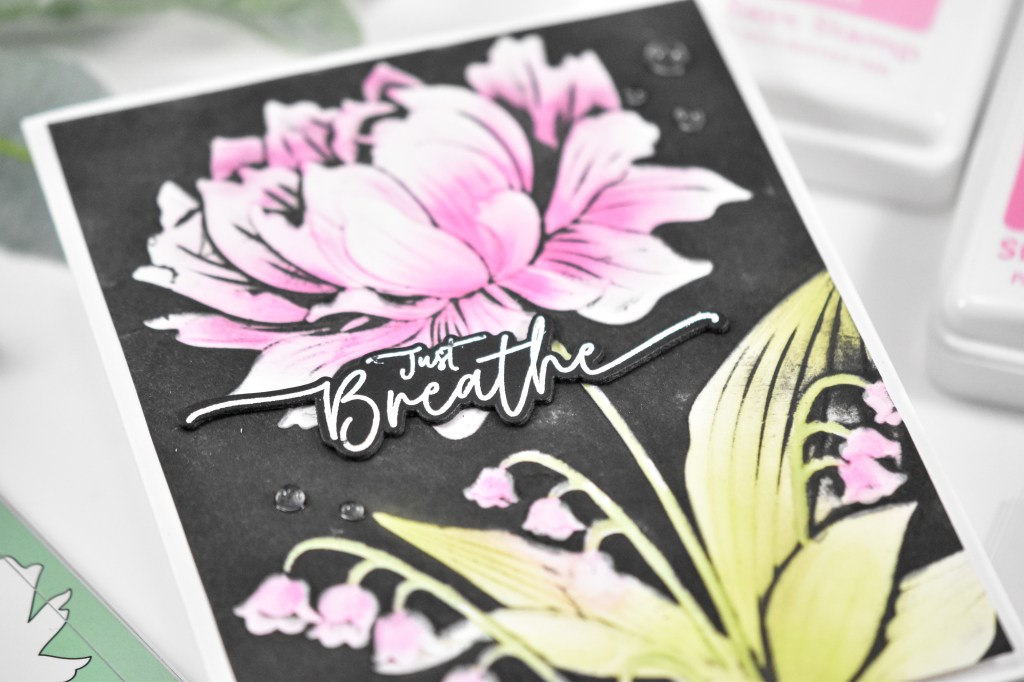
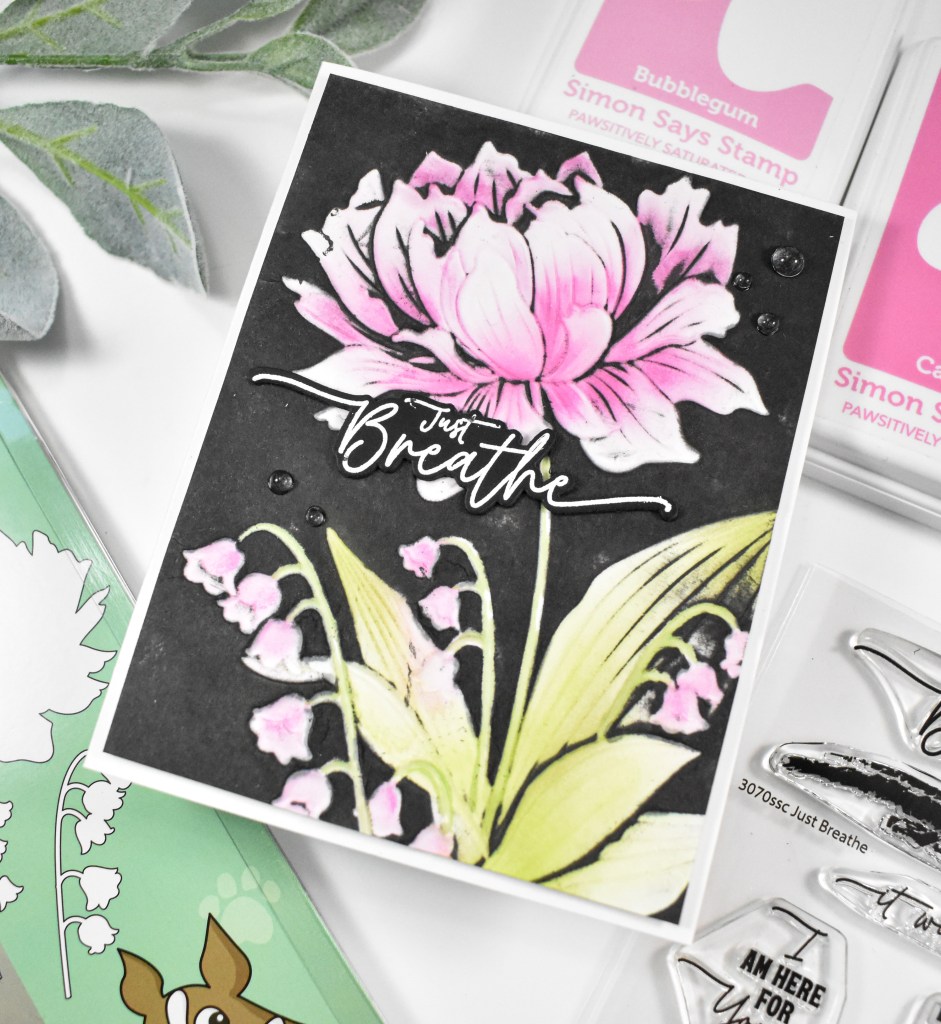
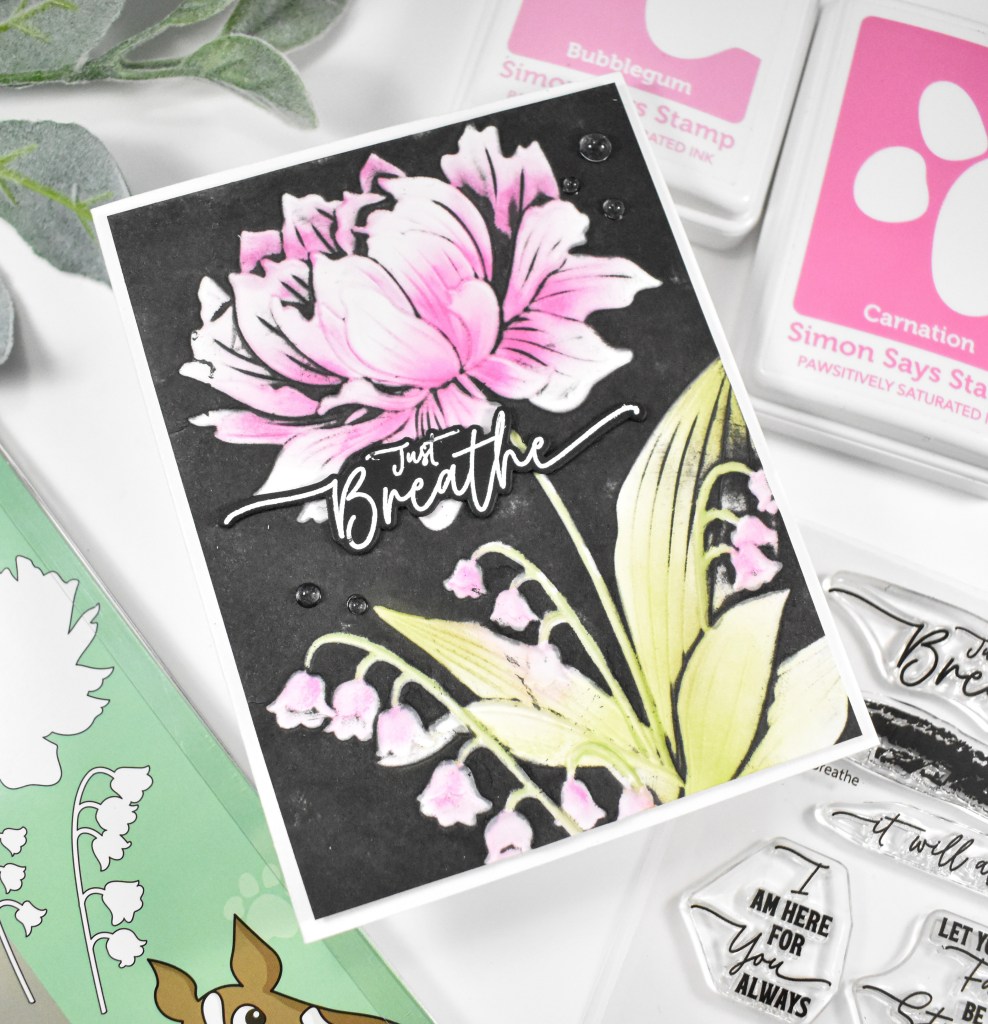
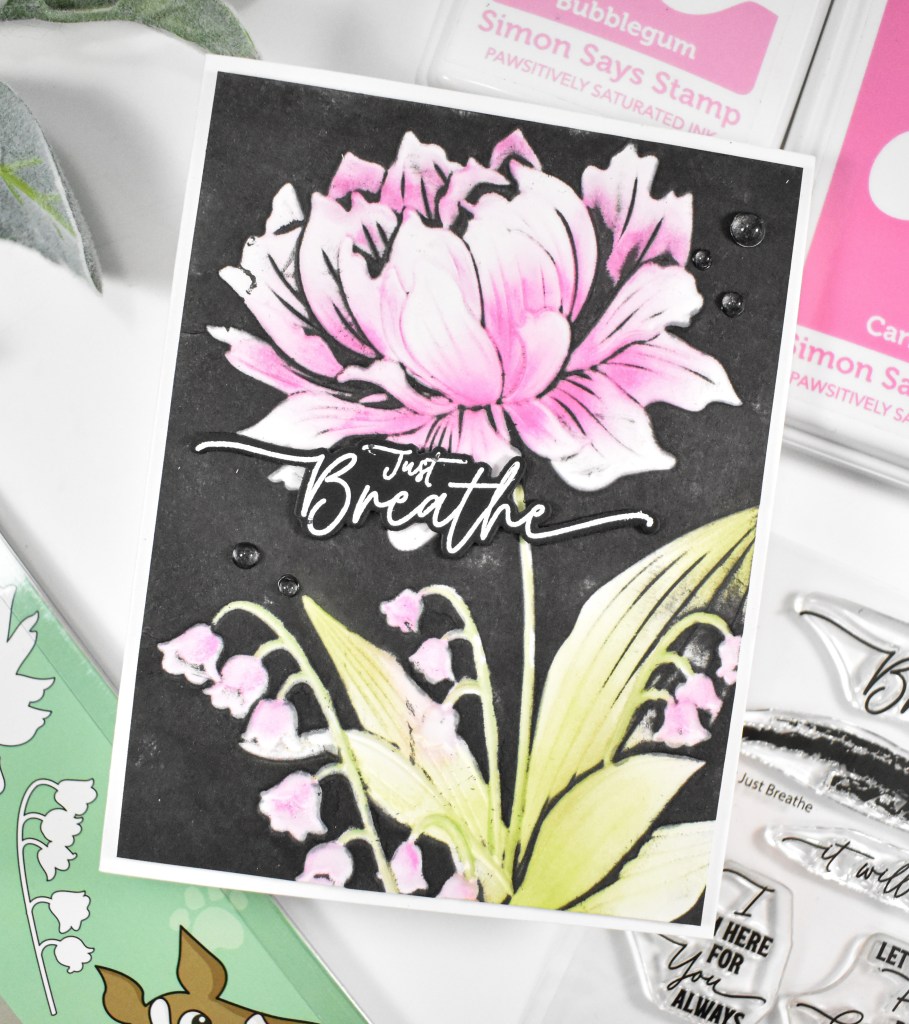
I began this project by stamping one of the florals onto a panel of Neenah cardstock using VersaFine Onyx Black ink and heat setting it with clear embossing powder. I then used the stencils to do some ink blending using Seafoam, Surf, Ocean, Sprout, Fairway and Field. Once that was complete, I used the coordinating dies to trim out the image.

I knew that I wanted a dark background, so I pulled some Forest cardstock and cut a panel of that using the Sparkler Scallop Frames with a good dose of white splatter. I also cut another panel of Forest cardstock for the other background. The sentiment was stamped using VersaMark Ink, heat set using white embossing powder and trimmed out several times for a stacked sentiment.
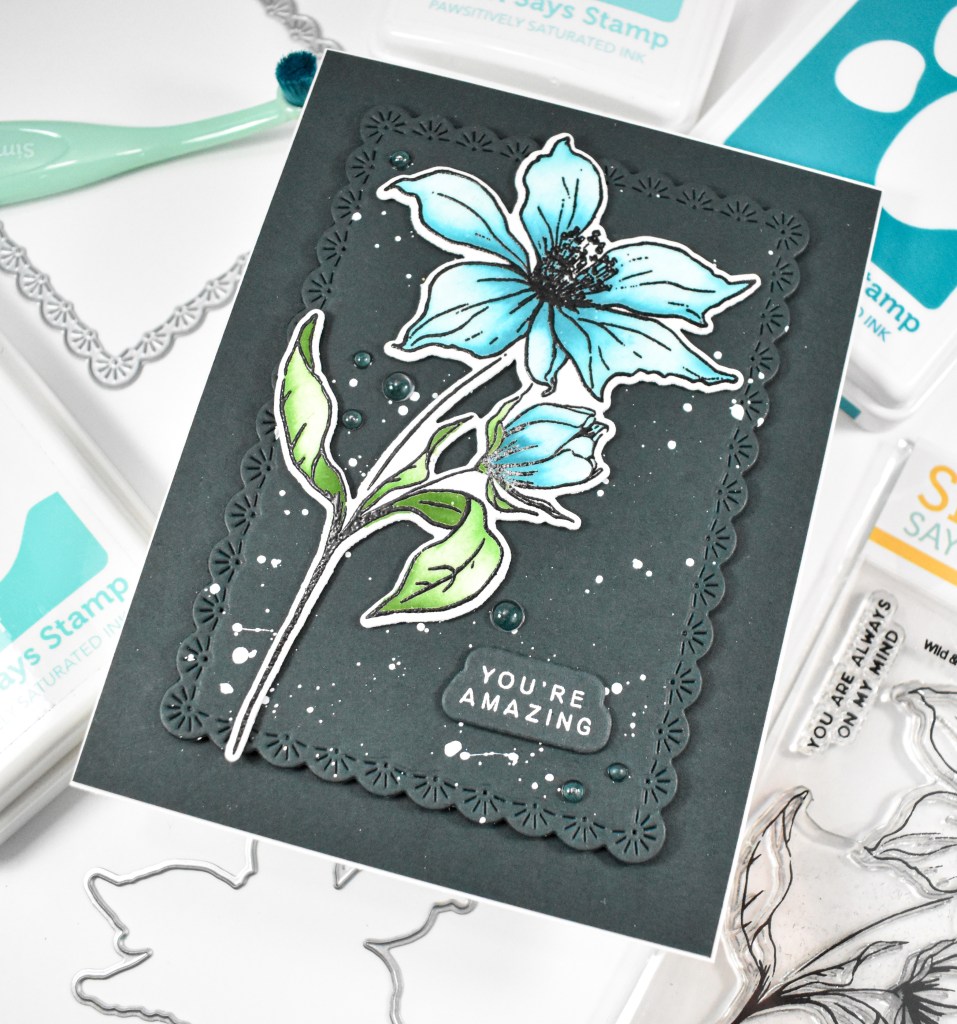
The splattered background was adhered to the other Forest background using foam tape for a bit of added dimension, while the flower was adhered using thin foam squares, and the sentiment was glued directly to the panel. I added some dew drops to finish up.
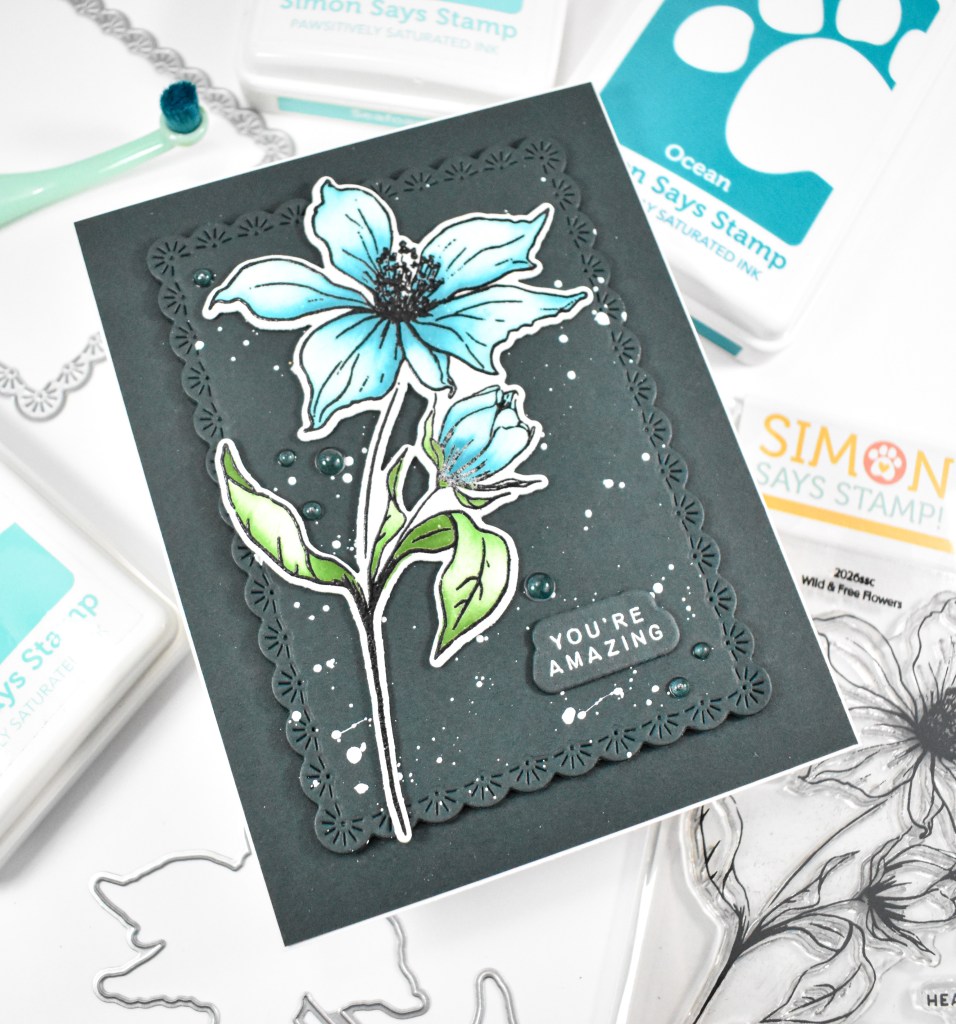
That does it for this project! I hope you like it! I really love working with darker colors, but don’t do it that often, so maybe I need to mix that in a bit more! Thanks for stopping by, and I hope you have a wonderful day!
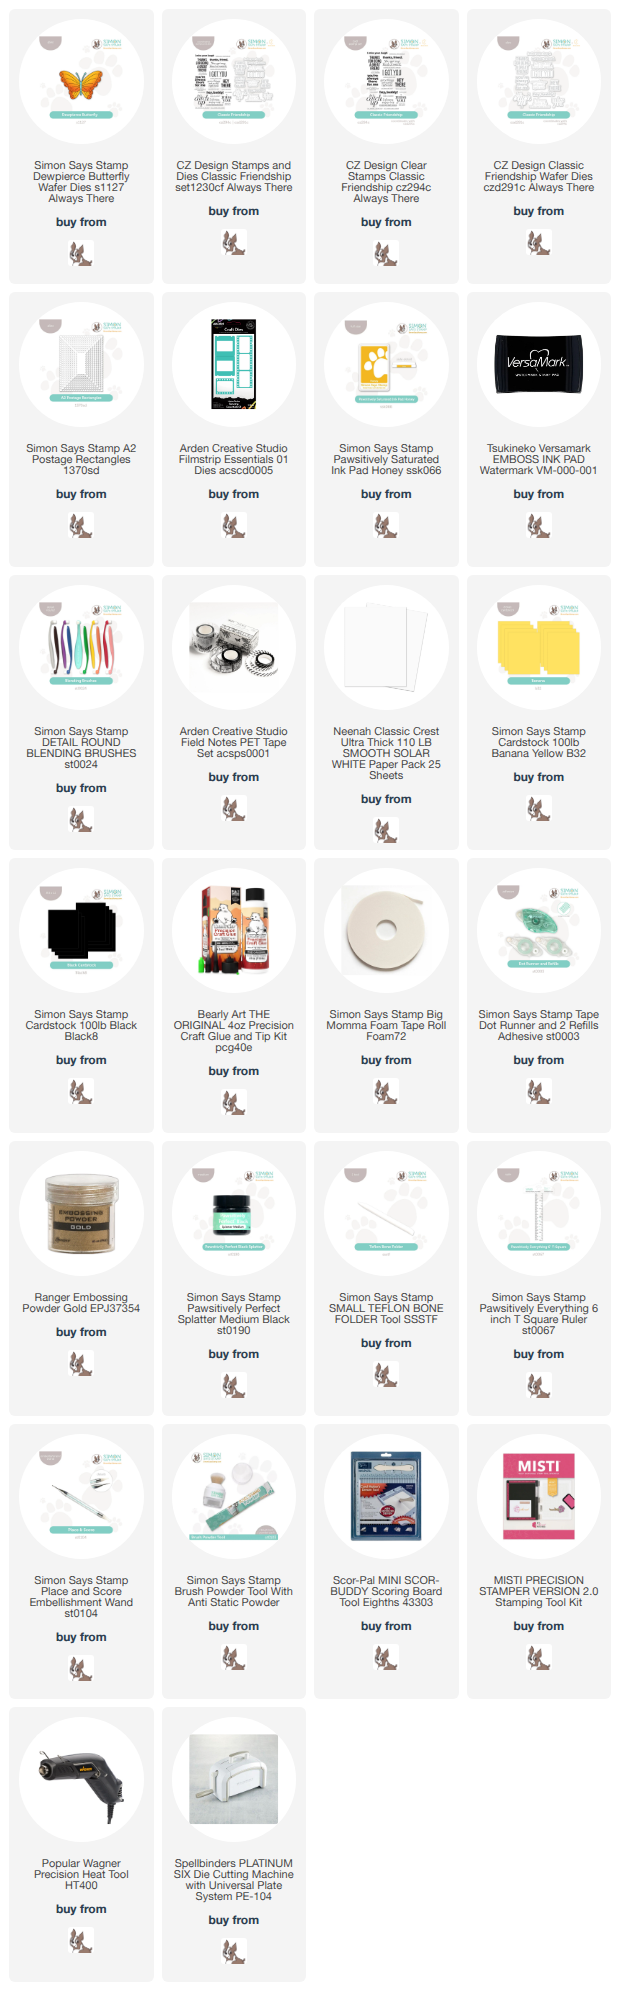
Supply List
Affiliate links used at no cost to you. What does this mean? If you use the links within this post to make a purchase, I receive a small commission, which allows me to continue to post crafty content for your enjoyment. I truly appreciate your support!
Latest Posts
- Simon Says Stamp Amazing Petals

- Simon Says Stamp Take Care Florals

- Simon Says Stamp Happy Daisy Frame

- Simon Says Stamp Flower Puff Thanks
- Together By Design Featuring CZ Design “Simple Ho”

Latest Instagram Posts