Simon Says Stamp Happy Vintage Blooms

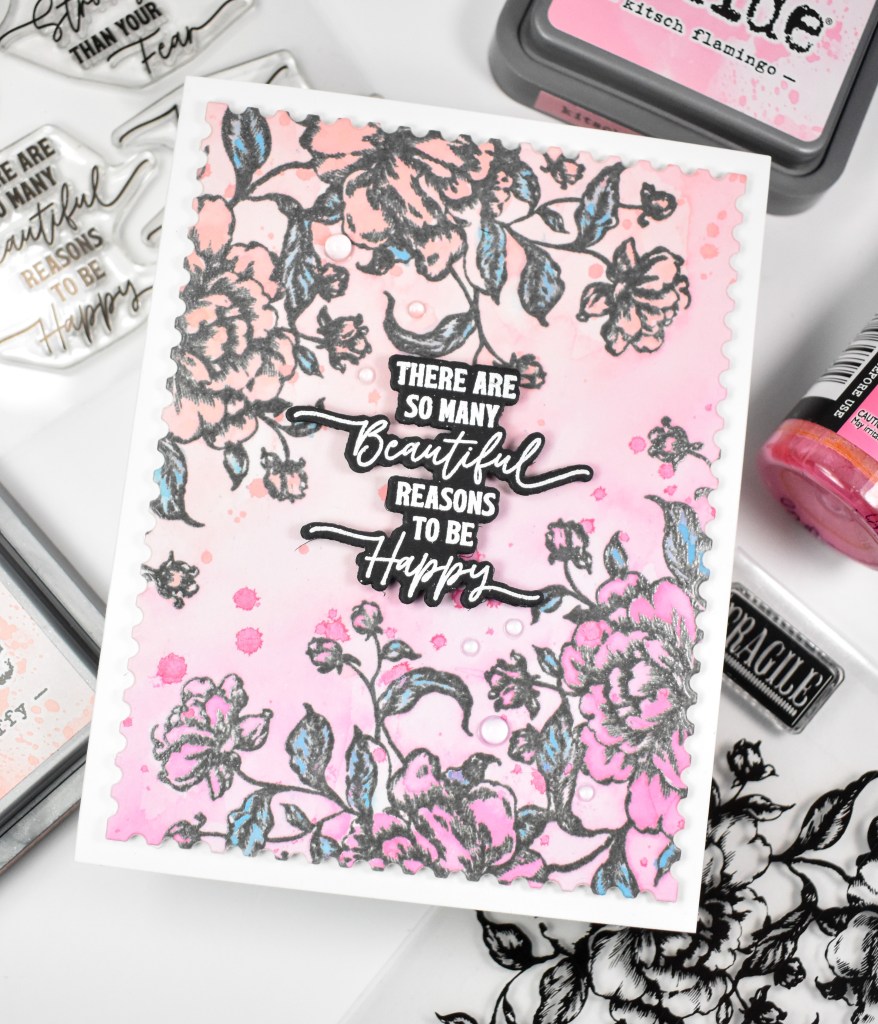
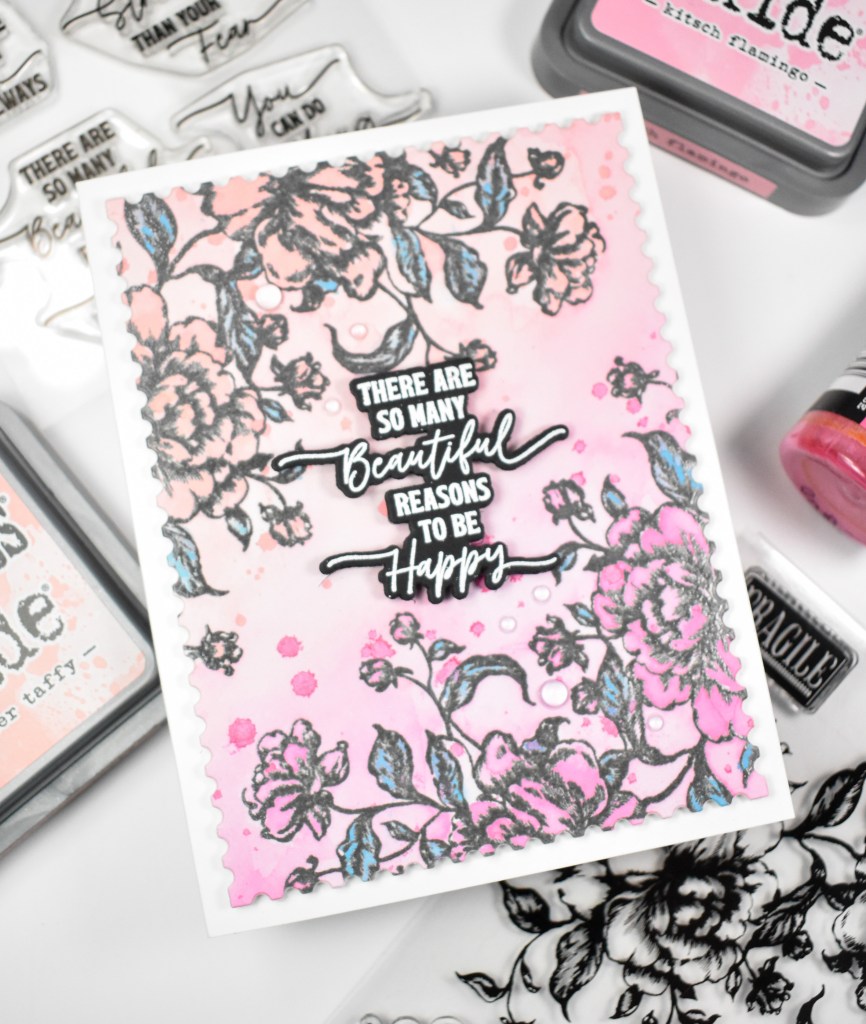
Hello and welcome back, Friends! Today’s project is featuring the new Vintage Blooms from Simon’s latest release, Moments In Time. This set has two larger blooms, but I opted to use just one for this project. Let’s run through the details!
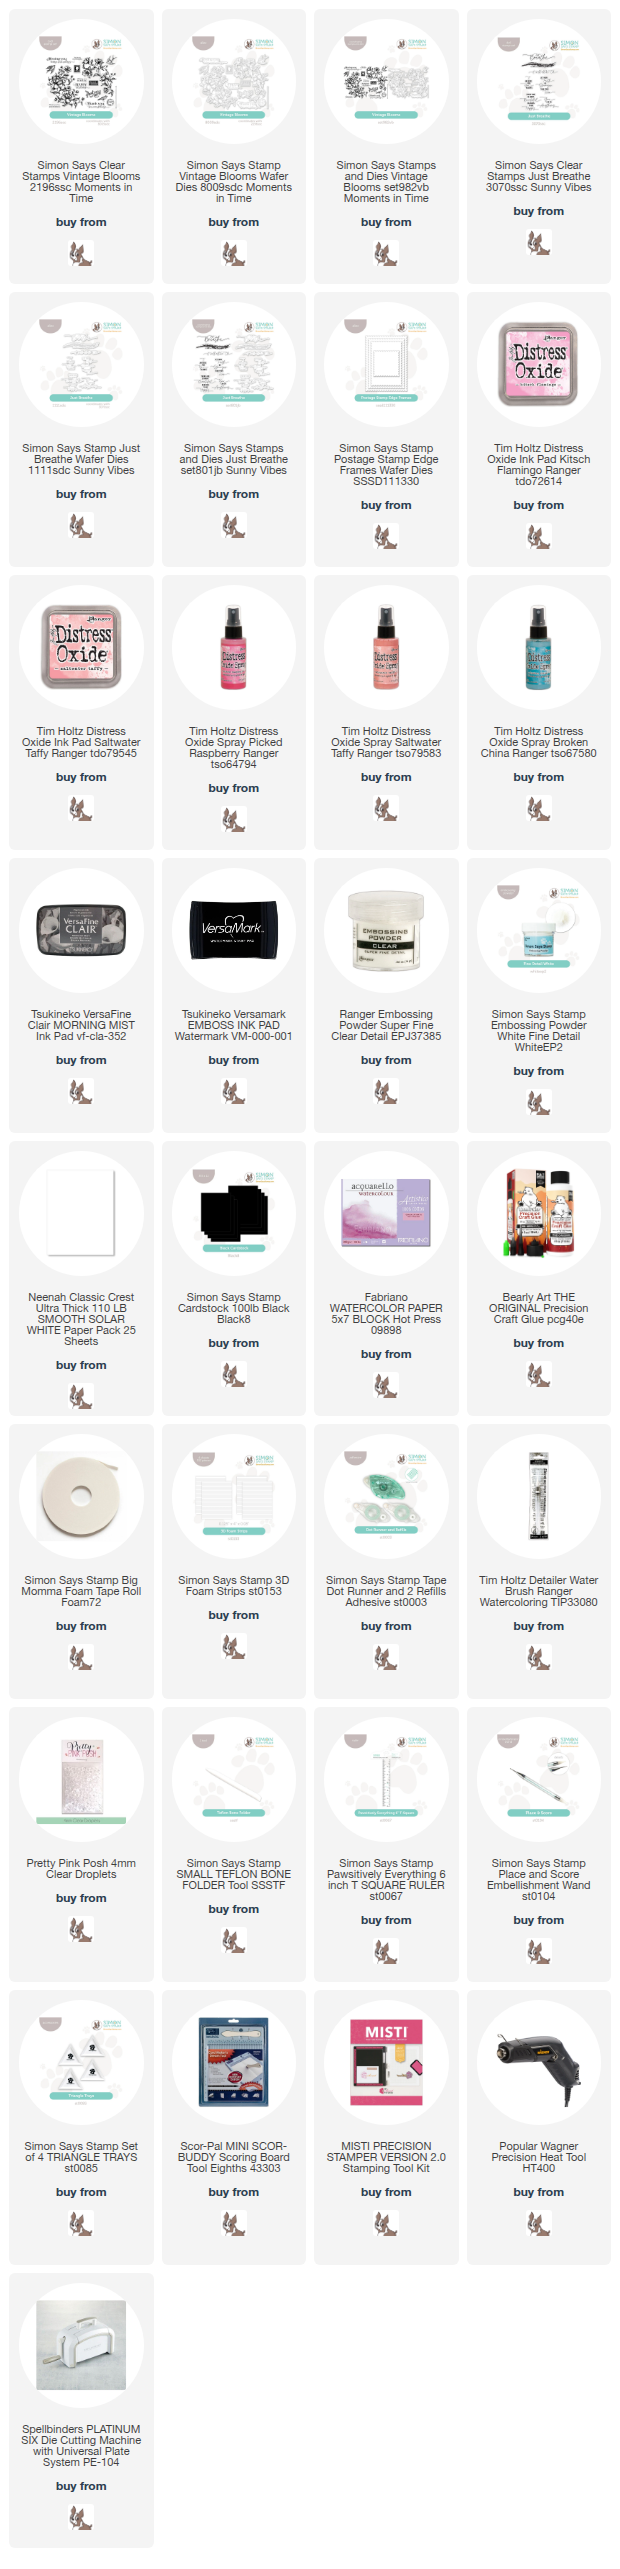
NOTE: all supplies are linked in the thumbnails at the end of this blog post.

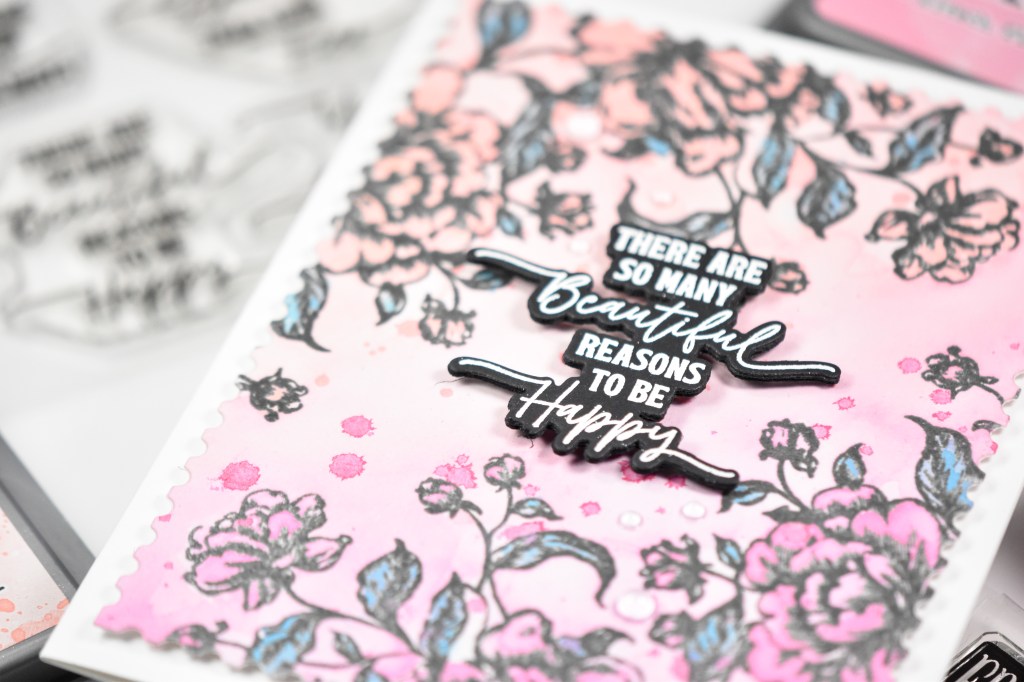
I began by gathering a panel of watercolor paper and the inks that I wanted to use. This background was created by smooshing the ink onto my glass mat and adding a touch of water and painting it onto the panel. I wanted a nice wash of color that blended from a peachy color to a pink color. The inks that I used were Distress Oxide Saltwater Taffy and Kitsch Flamingo. I worked one color at a time, drying between the layers.
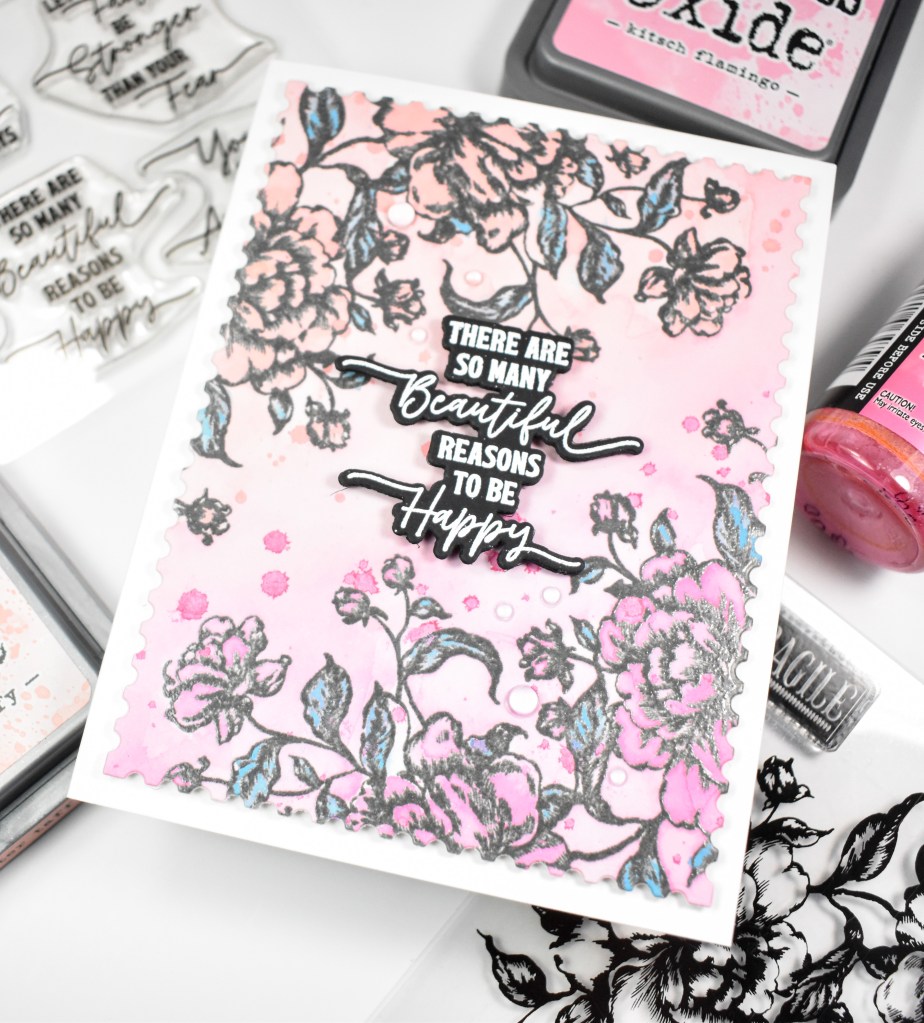
Once I was satisfied with the wash of color, I went ahead and stamped the florals onto the panel using VersaFine Clair Morning Mist. I really like this ink, because it’s dark, but not too dark like the Onyx Black. I heat set the images using Ranger Clear Embossing Powder and took the panel back to my work area. I wanted to darken the flowers and leaves so that they stood out a little more so I pulled out Distress Oxide Sprays in Broken China, Picked Raspberry, and Saltwater Taffy. I just put a few drops on my glass mat, and painted using a water brush this time. I also wanted some splatter so used the same sprays for that.

I dried the panel and trimmed it out using the Postage Stamp Edge Frames and adhered it to the card base using foam tape. The sentiment, which is from the Just Breathe set, was stamped onto black cardstock using VersaMark Ink and heat set using Detail White Embossing Powder. That was then trimmed out using the coordinating die, along with two more cuts. That was adhered with foam strips, and some clear drops were added to finish up.
That does it for this one! I don’t pull out my Tim Holtz inks too much, but I really enjoy it when I do! Maybe that should tell me something! Thanks for stopping by to check out this project, and I hope you have an amazing day! Don’t forget to stay awesome!
Supply List

Affiliate links used at no cost to you. What does this mean? If you use the links within this post to make a purchase, I receive a small commission, which allows me to continue to post crafty content for your enjoyment. I truly appreciate your support!
Latest Posts

Latest Instagram Posts
Simon Says Stamp Thank You Daisy Bundle

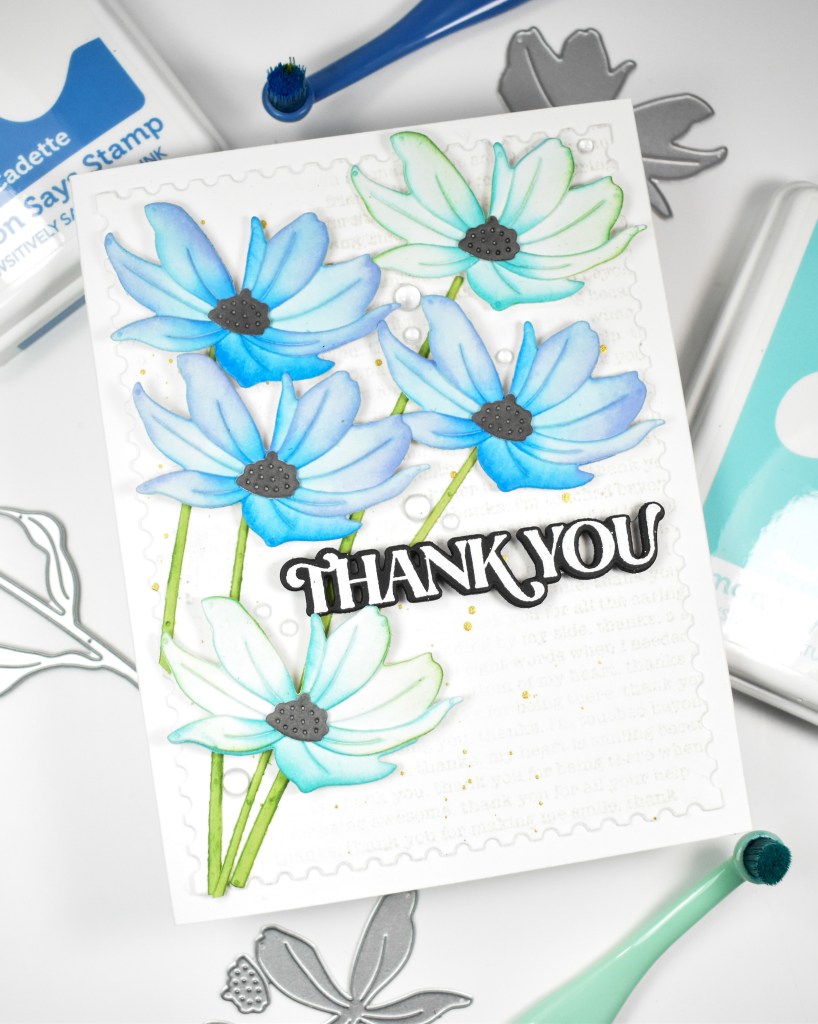
Hello Crafty Friends, and welcome back! The latest Simon release, Moments in Time, is live and today’s project is featuring the new Tattered Daisy along with the Thank You Text background stamp. I kind of went crazy with this flower die cut, so you’ll be seeing it a bunch! Let’s go ahead and go through the deets for this project.

NOTE: all supplies are linked in the thumbnails at the end of this blog post.

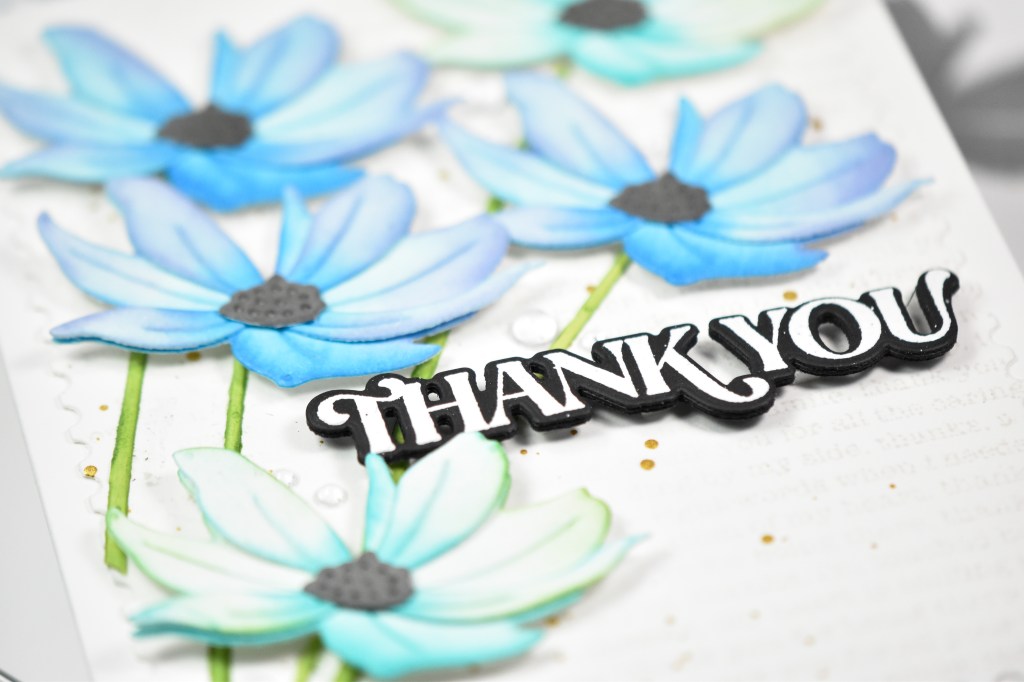
I began this project by die cutting the daisy five times from Neenah 110lb cardstock and did some ink blending using Seafoam, Surf, Marine, Cadette, Heather and Field. I did also use the Rainbow Splash Black ink pad to color the centers of the flowers, because I was feeling a bit lazy and didn’t feel like going back to cut those from black cardstock. Just keeping it real for you .. I do get lazy from time to time. Once the ink blending was complete on all of the pieces, I assembled the flowers and set those aside while I worked on the other elements of the card.

I have a bunch of gold splattered panels sitting around from a class that I taught, so I went ahead and used one of those and stamped the Thank You Text onto that using Misty Coast ink. I chose this ink, because it’s a very light ink and does really well when you’re wanting a barely there type of image. While I was stamping, I went ahead and stamped the sentiment onto black cardstock and heat set that using Detail White Embossing Powder. I trimmed it out using the coordinating die, along with two additional cuts for that stacked sentiment that I love.

For the assembly, I arranged and determined placement and then secured the stems in place using liquid glue, while the flowers and sentiment were added with foam strips. The panel was adhered to the card base and some clear drops were added to finish up.

That does it for this one, and I really like how it came out! I hope you do too! Don’t forget to check out the entire Moments in Time release over on Simon’s website. Thanks again for stopping by, and I hope you have an awesome day!

Supply List

Affiliate links used at no cost to you. What does this mean? If you use the links within this post to make a purchase, I receive a small commission, which allows me to continue to post crafty content for your enjoyment. I truly appreciate your support!

Latest Posts

Latest Instagram Posts
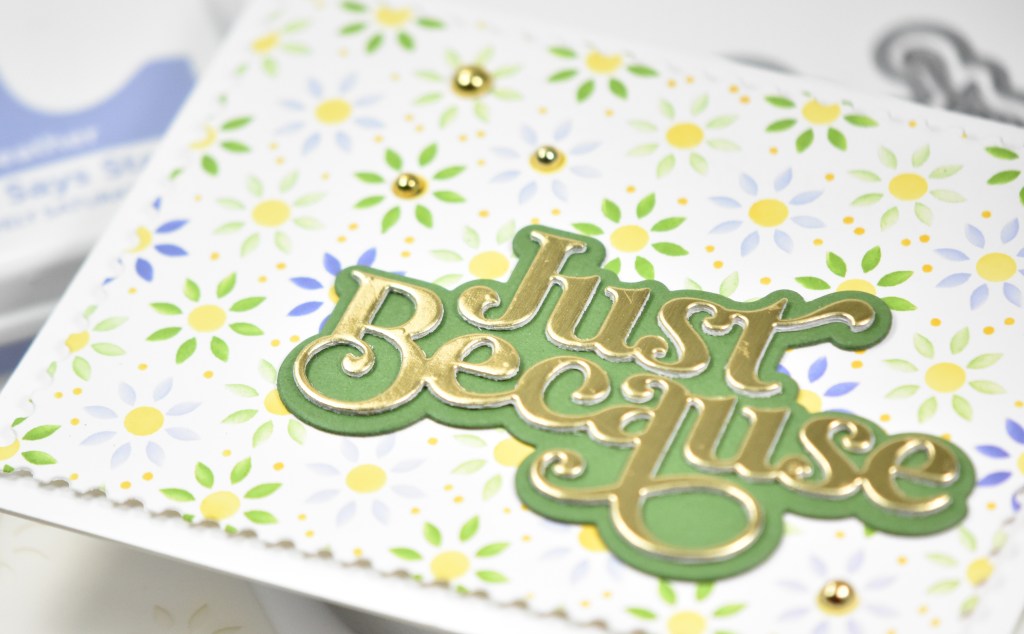
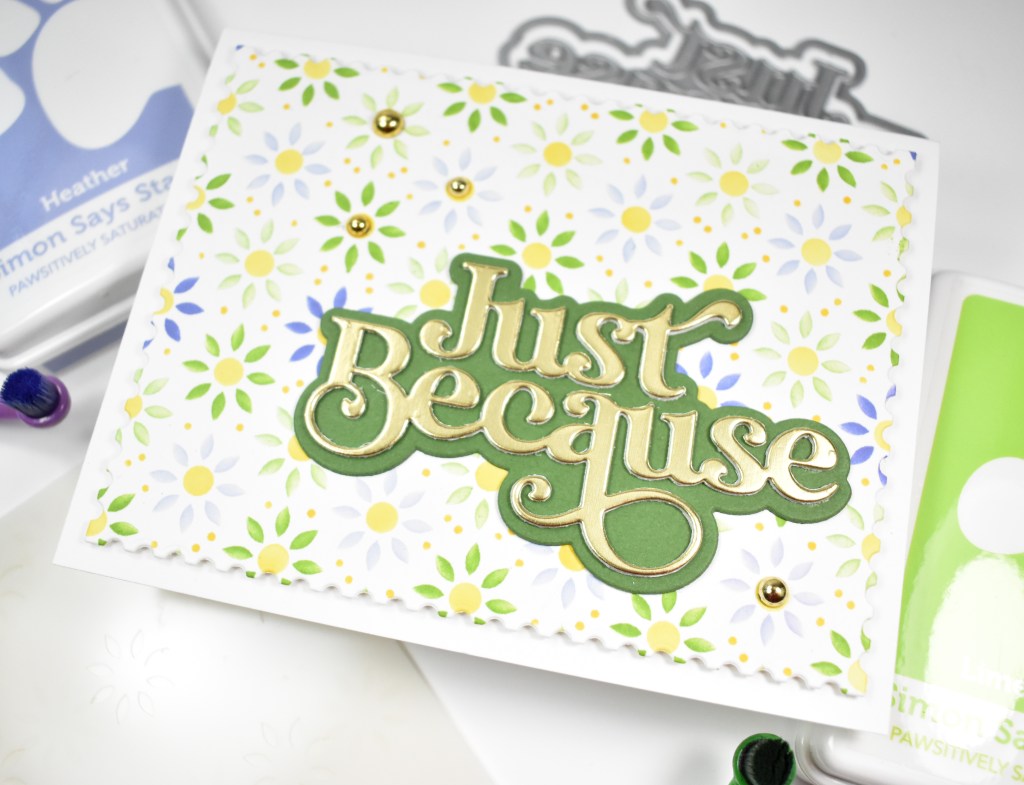
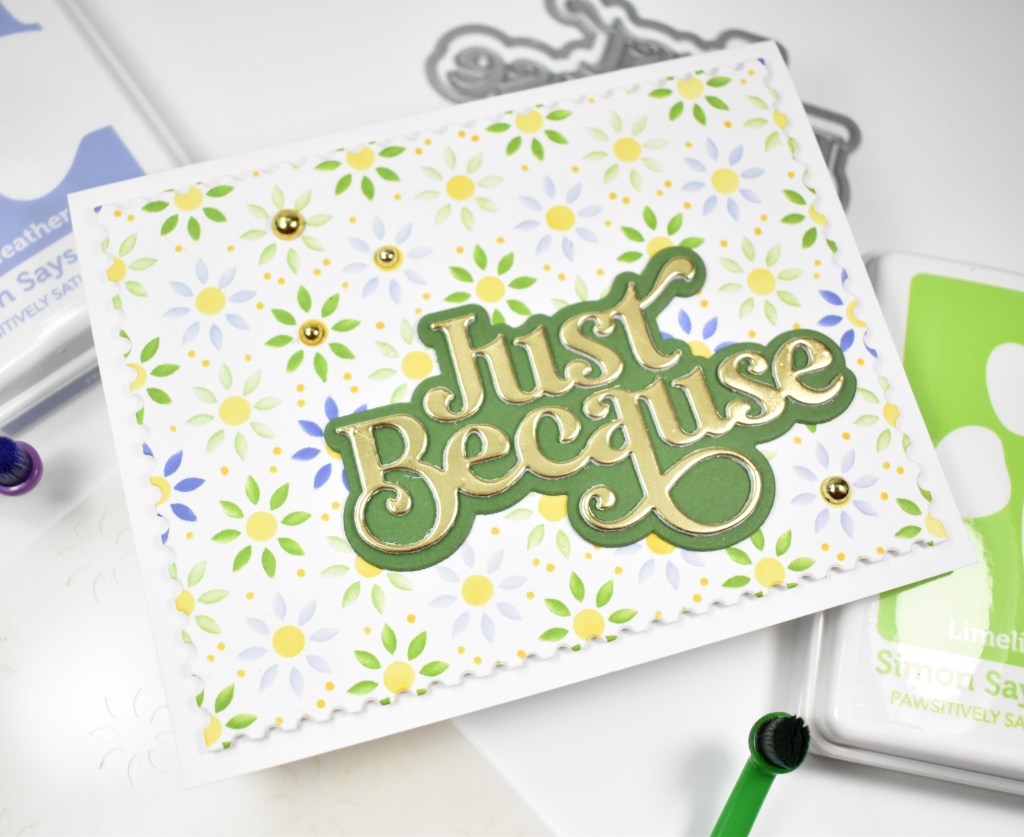
Simon Says Stamp Mosaic Just Because

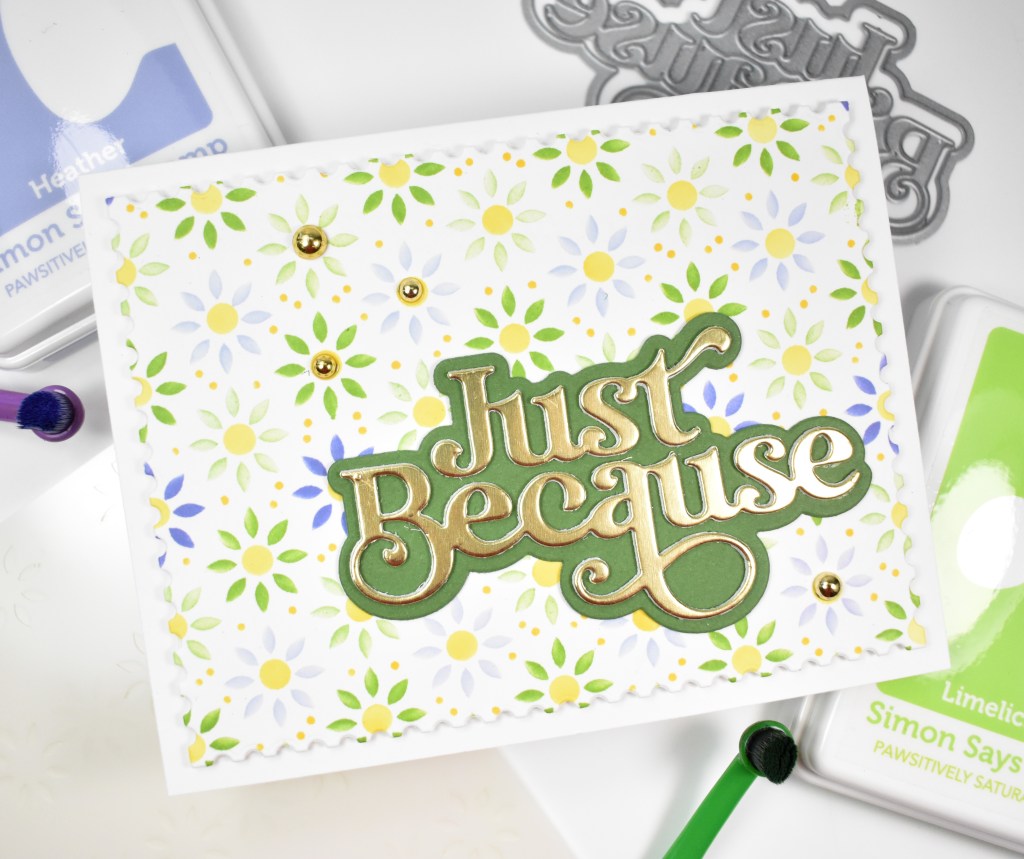
Hello Friends, and welcome back! I hope you’re doing well and having a great day! Today’s project is featuring the new Mosaic Petals Stencil from Simon’s latest release, You Are My Favorite. Let’s run through the details, shall we?

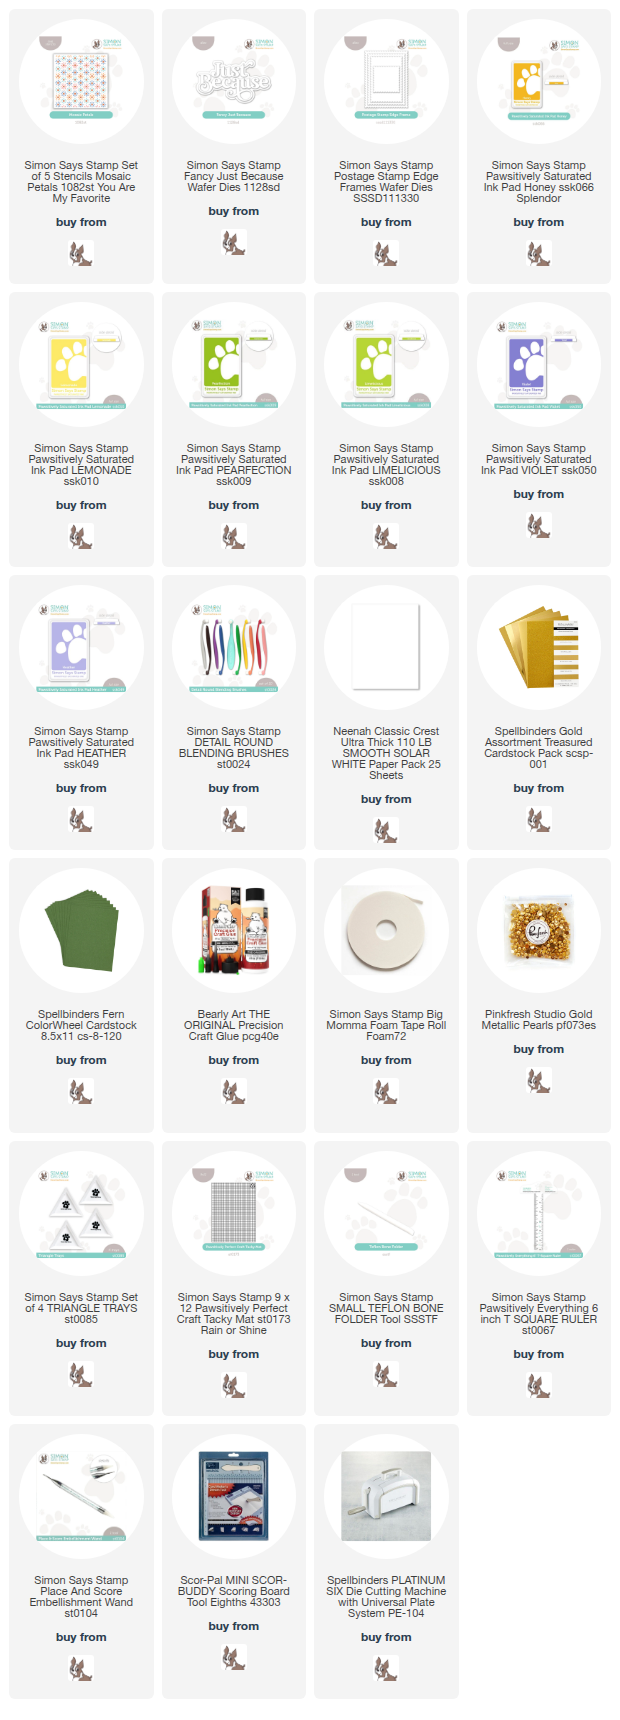
NOTE: all supplies are linked in the thumbnails at the end of this blog post.

I began this project by cutting a panel of Neenah 110lb cardstock and putting my panel and stencil onto my Crafty Tacky Mat to begin the inking process. This is a five stencil set, and the inks that I used were Heather, Violet, Limelicious, Pearfection, Lemonade and Honey.

Once done with the inking, I trimmed the panel down using the Postage Stamp Edge Frames and prepared the sentiment. I die cut the Fancy Just Because once from gold cardstock and twice from Neenah, while cutting the shadow portion from green cardstock. I adhered the panel to the card base using foam tape and secured the sentiment with liquid glue. Some gold pearls were added to finish up.

That does it for this project! Like I said, a simple one! Don’t forget to head on over to check out the entire You Are My Favorite release! Thanks again for stopping by, and I hope you enjoy the rest of your day!

Supply List

Affiliate links used at no cost to you. What does this mean? If you use the links within this post to make a purchase, I receive a small commission, which allows me to continue to post crafty content for your enjoyment. I truly appreciate your support!

Latest Posts

Latest Instagram Posts

Simon Says Stamp In My Thoughts Botanical

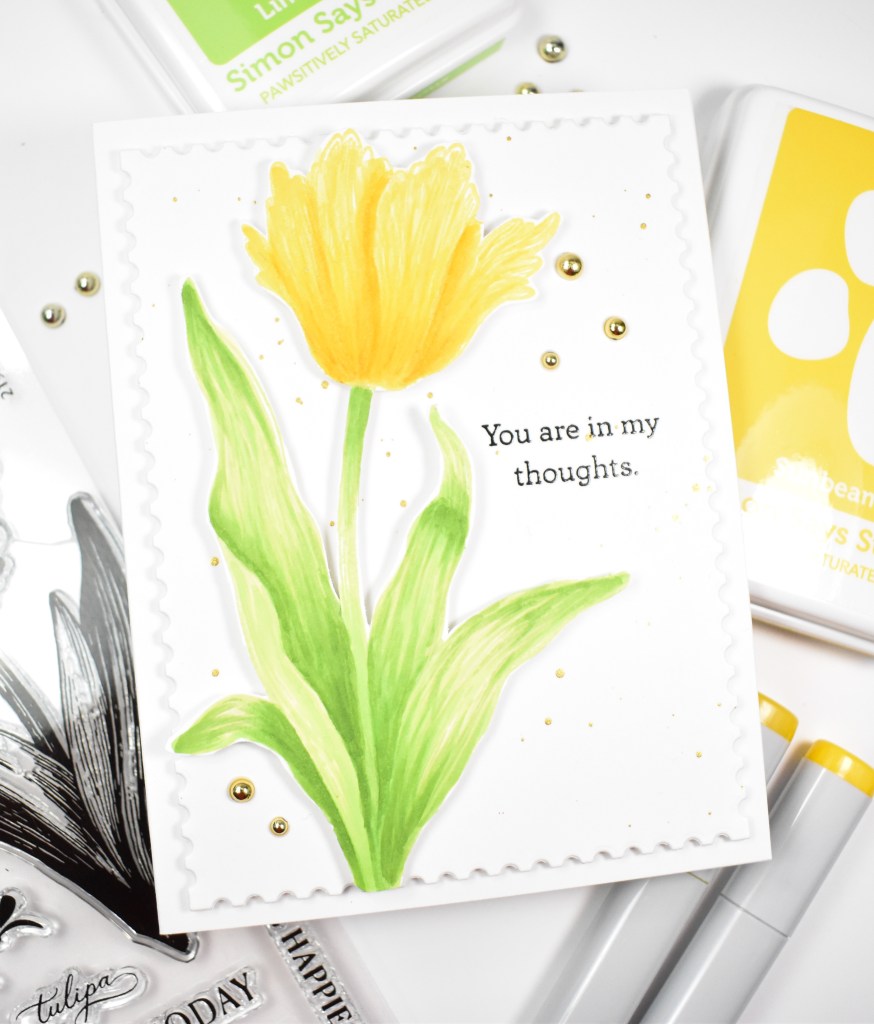
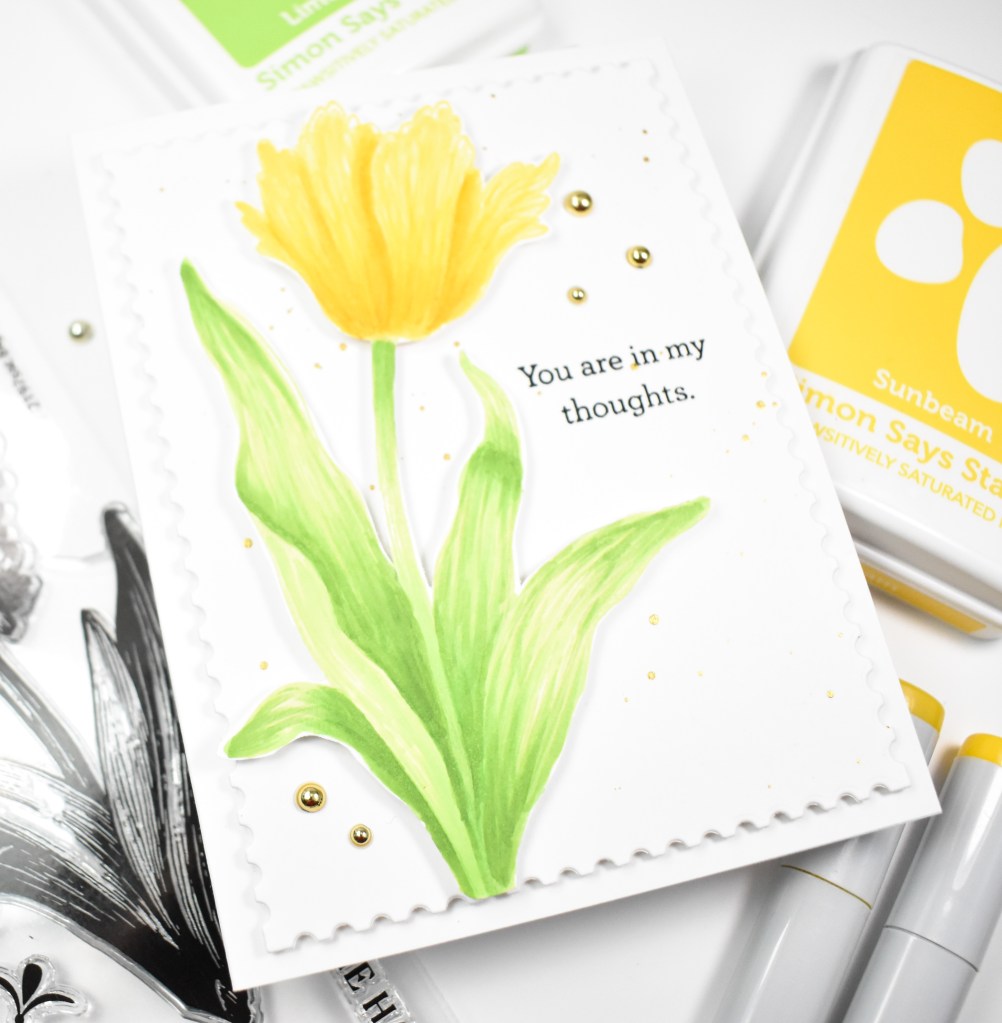
Hello Crafters, and welcome back to my blog! I appreciate you stopping by to check out today’s project featuring the Big Botanicals from Simon’s latest You Are My Favorite release. Let’s not waste time, and get right to the details!

NOTE: all supplies are linked in the thumbnails at the end of this blog post.

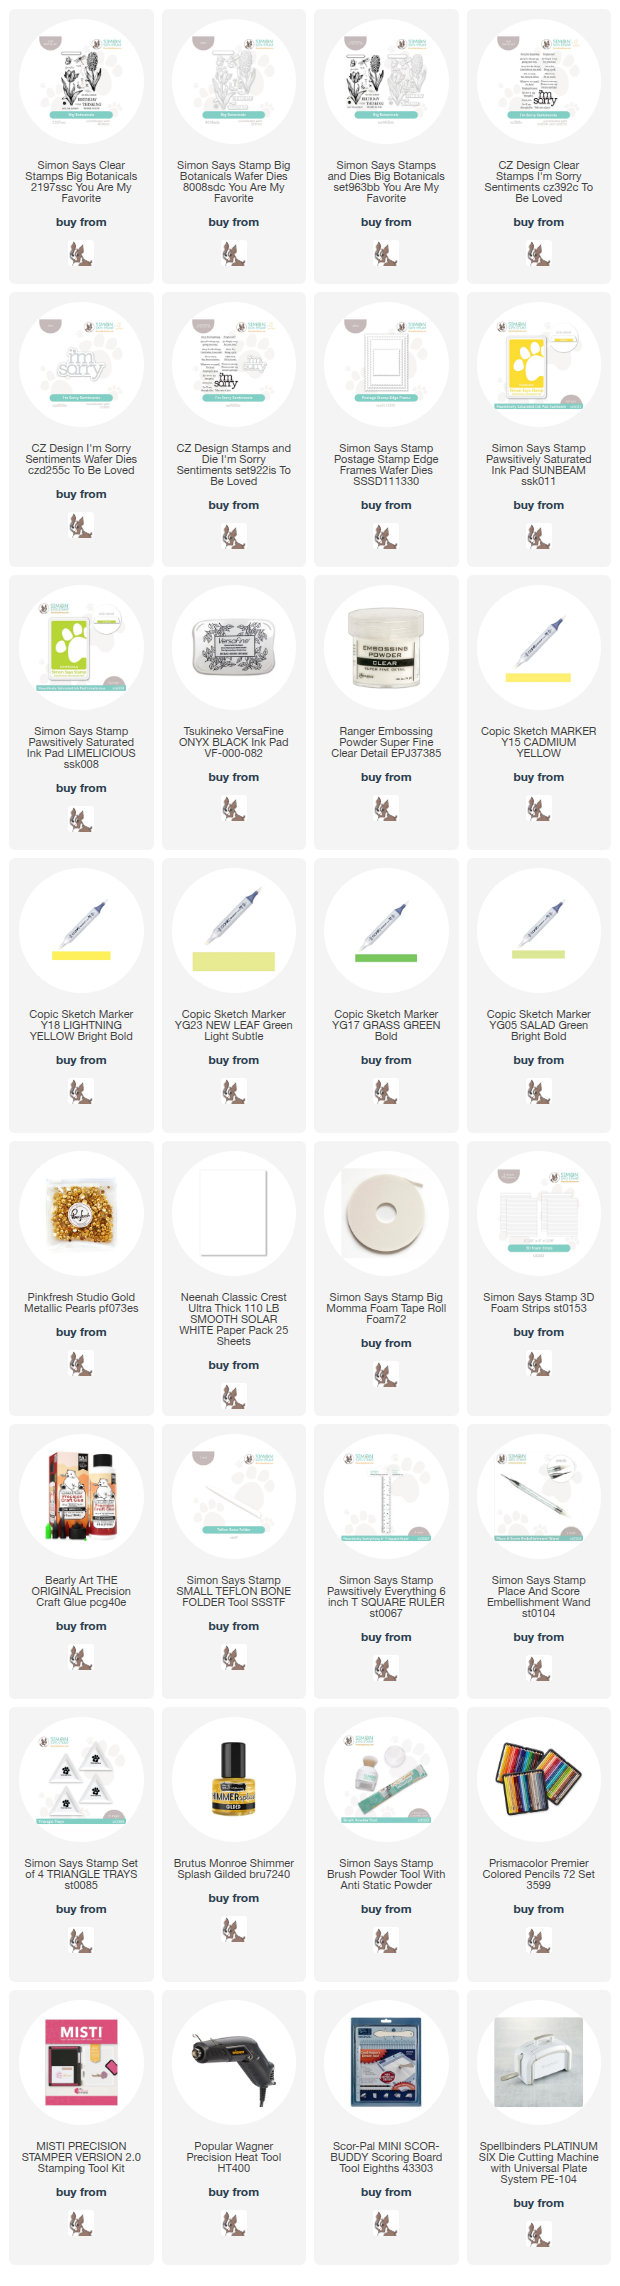
I began this project by stamping the flower portion of this stamp using Sunbeam ink, and the leaf portion using Limelicious ink. I just used a Post-It to mask off the areas, so nothing super technical. I then used Copic Markers Y15, Y18, YG05, YG17 and YG23 to add color to the stamped image. I also went in with some colored pencils to add some extra detail to the shaded areas.

Once I was done with the coloring, I fussy cut the image out. As a note, there are coordinating dies for this stamp set, in case you aren’t a big fan of fussy cutting. My background panel was cut using the Postage Stamp Edge Frames and splattered with some gold ink. Once the splatter was dry, I stamped the sentiment, which is from the I’m Sorry set, using VersaFine Onyx Black ink and heat set using Ranger Clear Embossing Powder.

My panel was adhered to the card base using foam tape, and the floral was adhered using foam strips. I did add a few gold embellishments to tie everything together.

That does it for this project! A relatively clean and simple design for this one. I hope you enjoyed it, and I hope it inspires you to get crafty in your space! Thanks again for stopping by, and I hope you have an awesome day!

Supply List

Affiliate links used at no cost to you. What does this mean? If you use the links within this post to make a purchase, I receive a small commission, which allows me to continue to post crafty content for your enjoyment. I truly appreciate your support!

Latest Posts

Latest Instagram Posts
Simon Says Stamp So Kind Floral

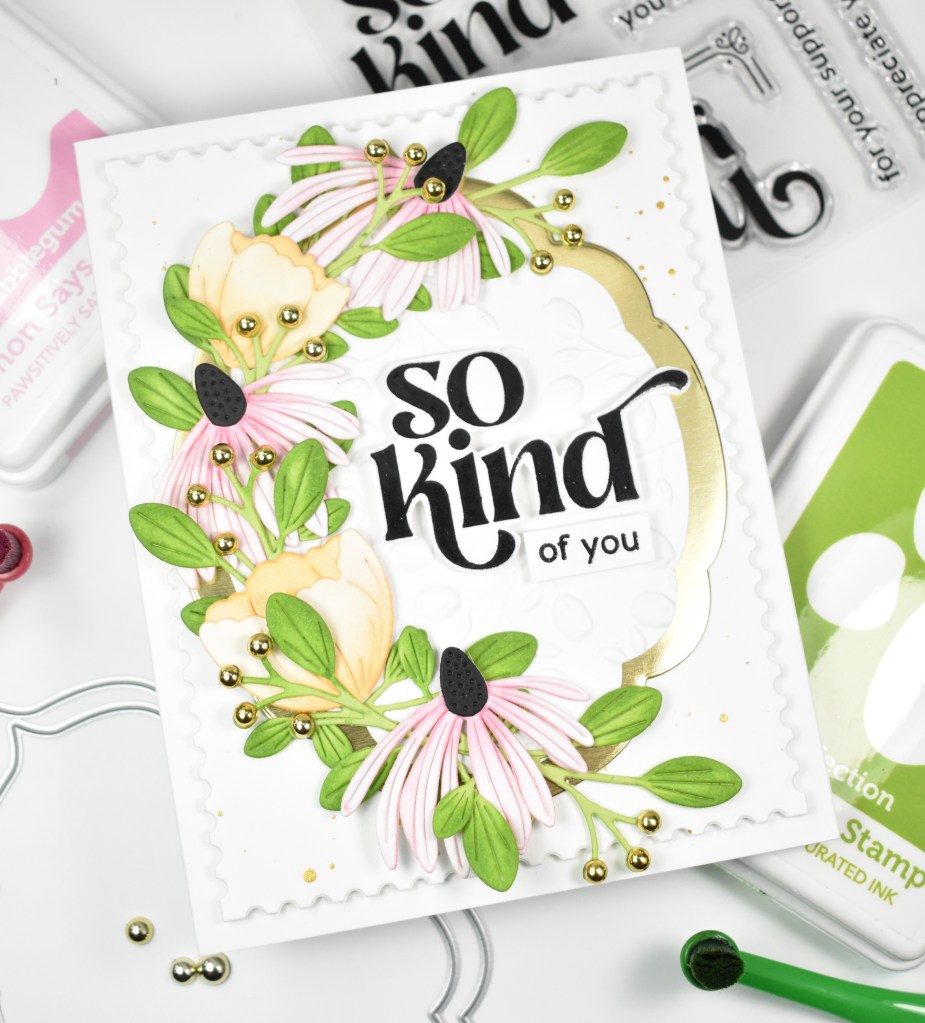
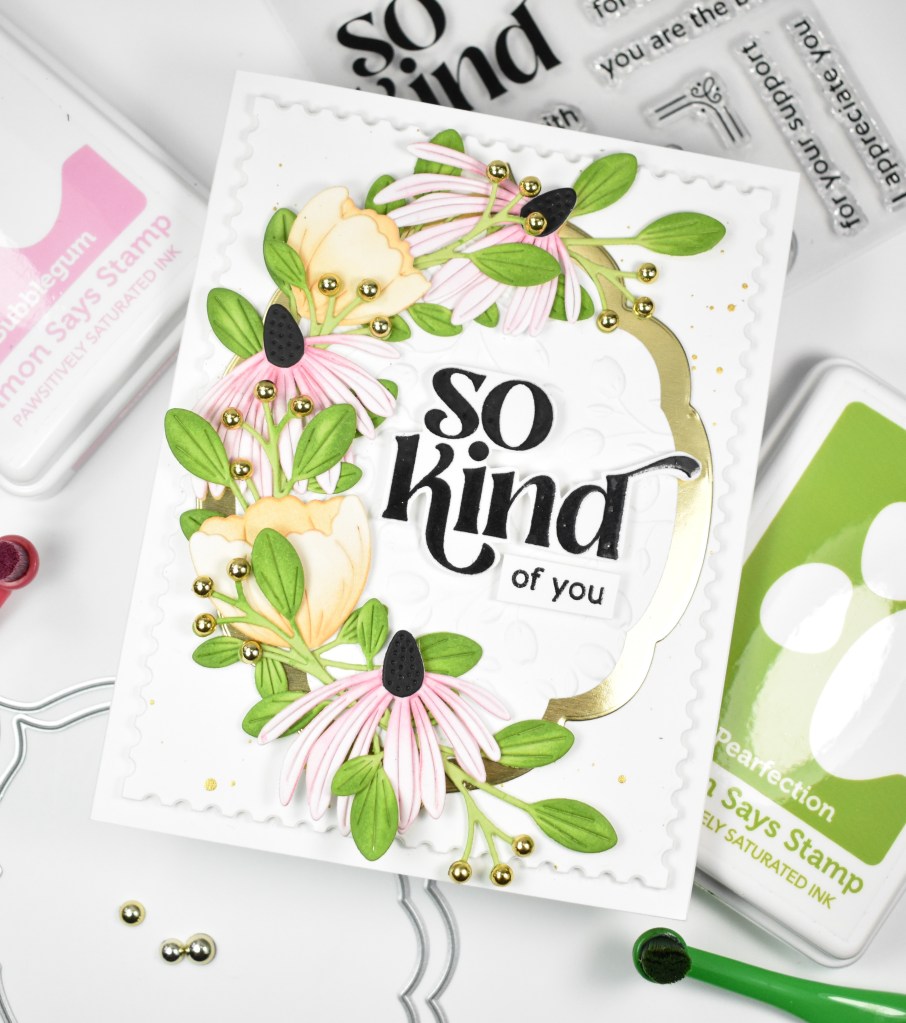
Hello Crafty Friends, and thanks for joining me for today’s project featuring the new With Thanks stamp set along with the new Petal-Tipped Labels. There’s a fun Instagram Hop happening today, so you definitely should check that out and leave comments! Simon is giving away a $25 gift certificate from each stop along the hop! There’s a lot going on with this project, so let’s get into it!

NOTE: all supplies are linked in the thumbnails at the end of this blog post.

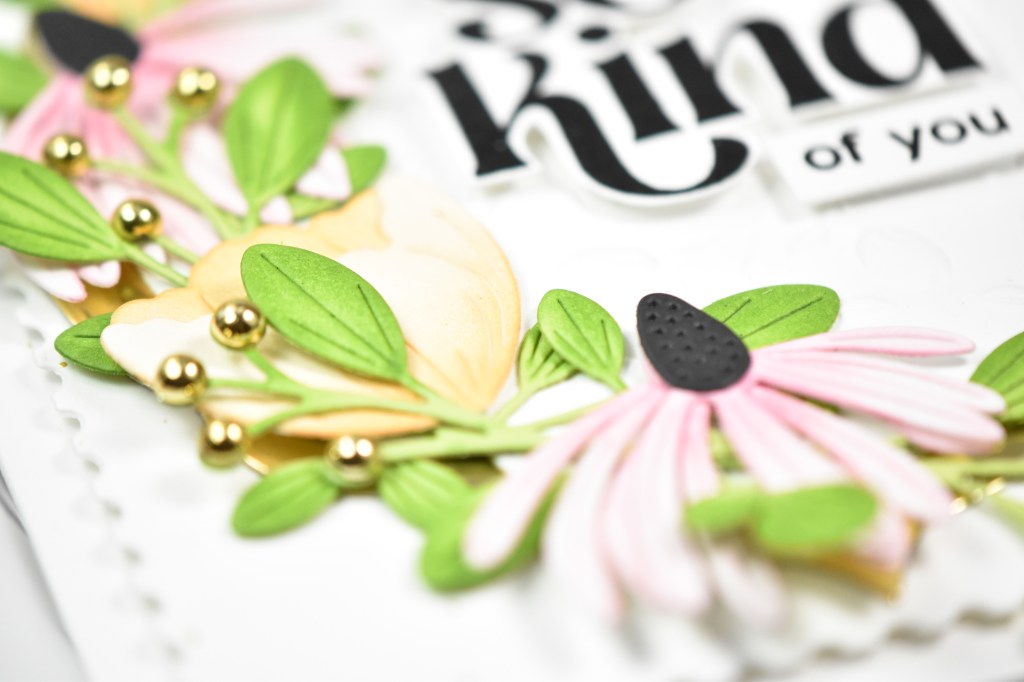
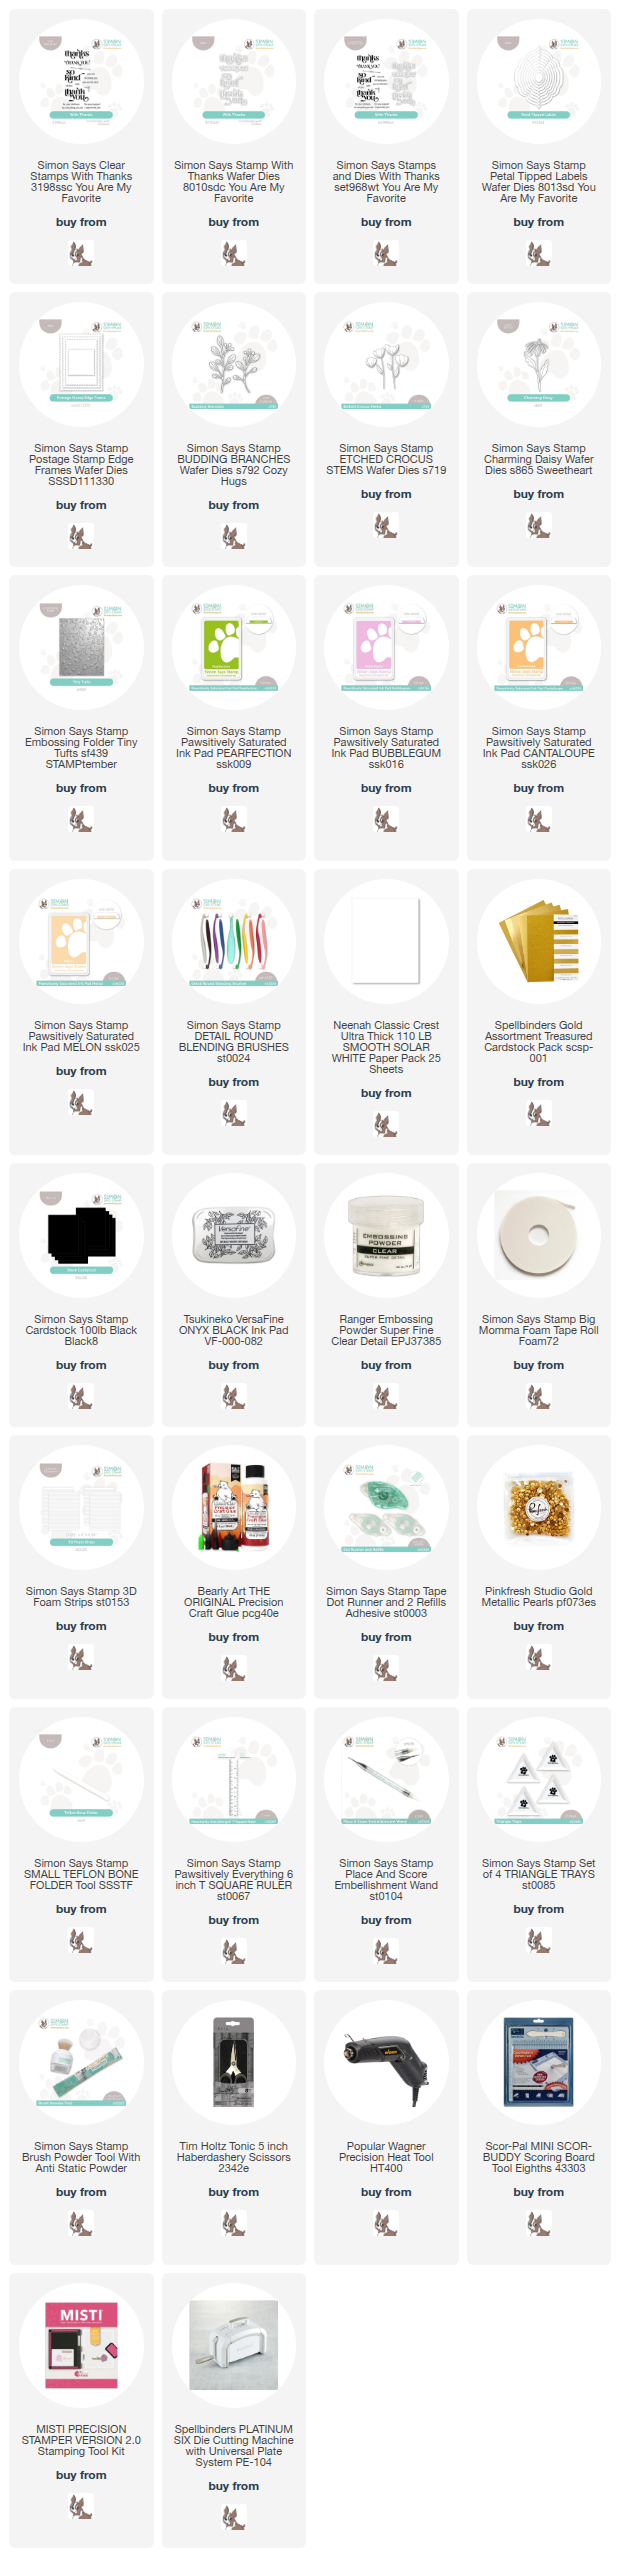
I began this project by cutting my flowers using the Charming Daisy and the Etched Crocus Stems. I also cut my leaves using Green Apple cardstock and the Budding Branches die. Once those were cut, I did some ink blending using Melon, Cantaloupe, Bubblegum and Pearfection inks. I did go back and cut the centers from black cardstock as well. I assembled the florals and set them aside while I worked on the other elements of the card.

I used two of the dies from the Petal-Tipped Labels and cut one from gold cardstock and one from Neenah 110lb cardstock. The one that was cut from Neenah was run through the die cutting machine using the Tiny Tufts Embossing Folder to add just a touch of muted interest for the background. I adhered those together and began adhering the flowers and leaves.

The sentiment, which is from the new With Thanks set, was stamped using VersaFine Onyx Black ink and heat set using Ranger Clear Embossing Powder. The larger sentiment was stamped and embossed twice for a smoother finish. I then fussy cut the sentiments out with my scissors. I’m not the best fussy cutter, so let’s not look at those details too carefully! There are coordinating die cuts for this set, but I did not have those. Both sentiments were adhered using foam strips for a bit of dimension.

My larger background panel was cut using the Postage Stamp Edge Frames and gold splattered. This was then adhered to the card base using foam tape, and the floral panel was glued in place. To finish up, I added some gold metallic pearls to the berry portion of the Budding Branches.

That does it for this project! I hope you enjoyed it! I love creating with florals, so this was a super fun project for me! Head on over to Simon’s website to check out the entire You Are My Favorite release, and head over to Instagram to join the hop! Thanks for joining me, and I hope you have an awesome day!

Supply List

Affiliate links used at no cost to you. What does this mean? If you use the links within this post to make a purchase, I receive a small commission, which allows me to continue to post crafty content for your enjoyment. I truly appreciate your support!

Latest Posts

Latest Instagram Posts
Simon Says Stamp Hello Floral Tag

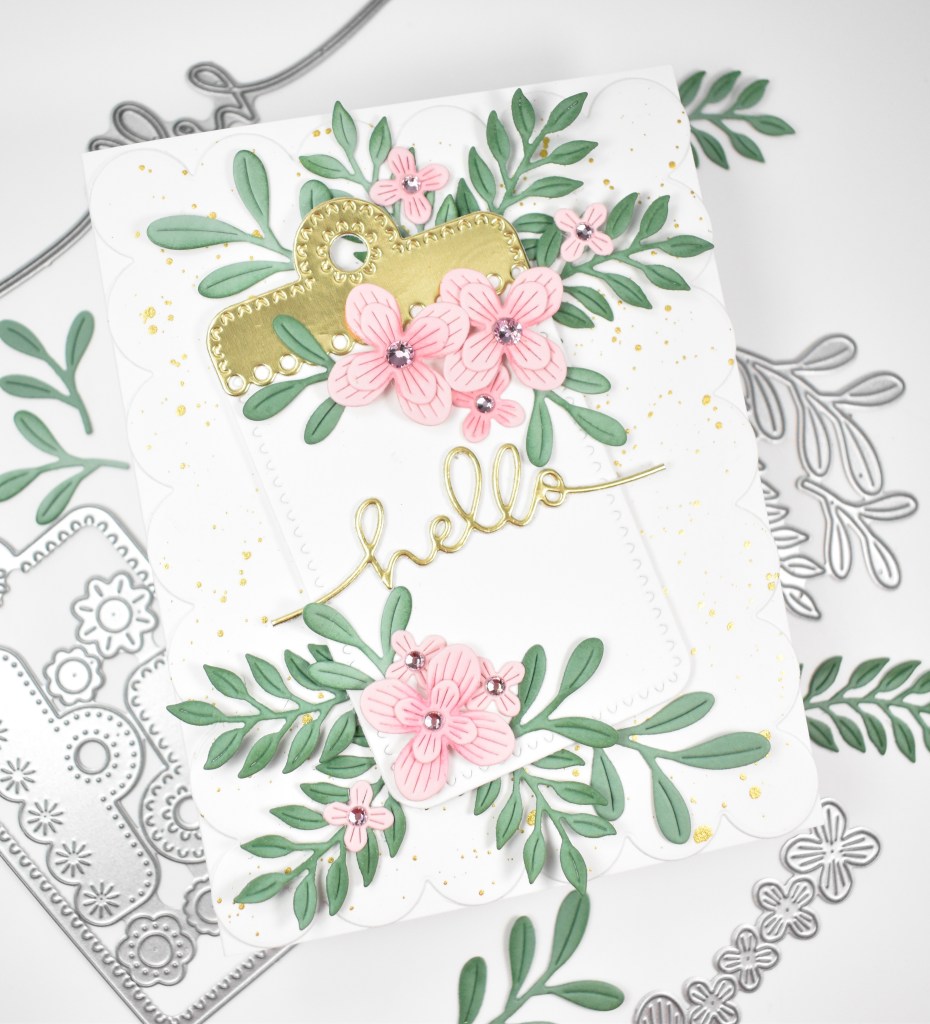
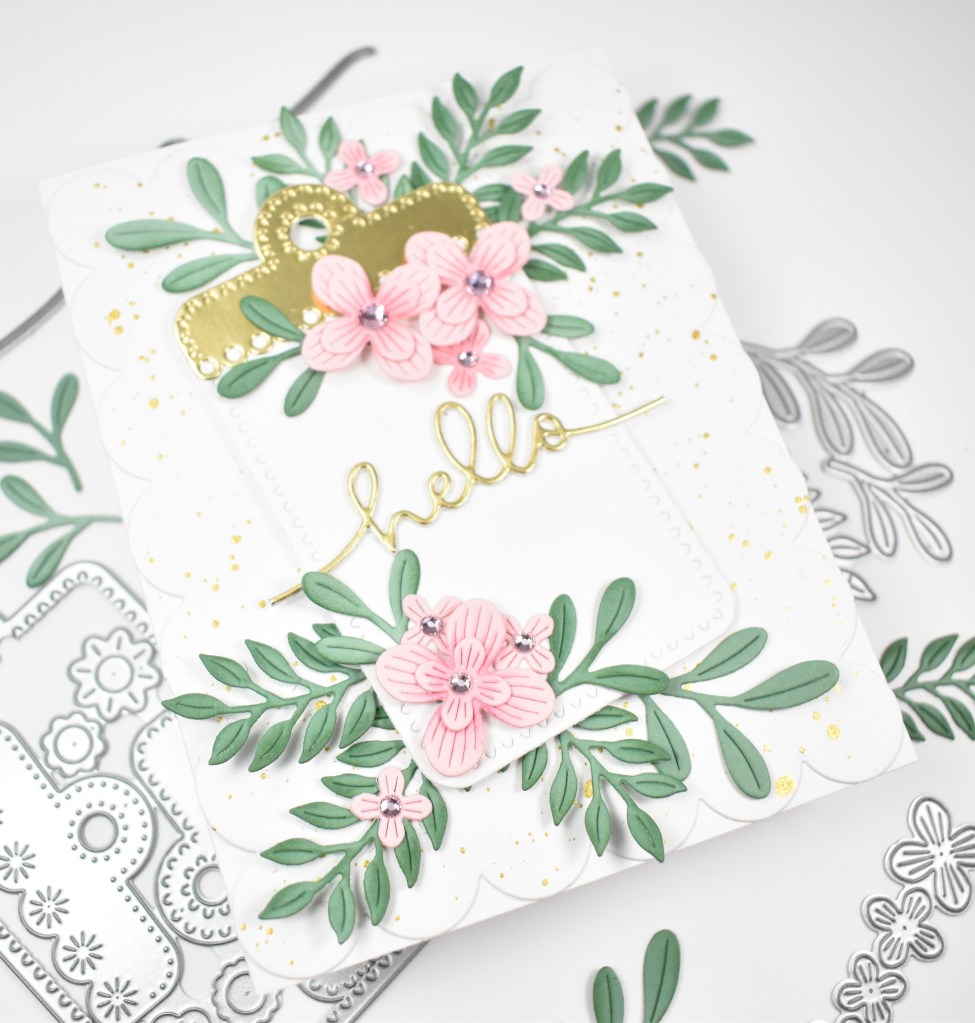
Hello Crafty Friends, and welcome back! So glad you stopped by to check out today’s post featuring the new Scalloped Floral Tag from Simon’s latest release, You Are My Favorite. Have you checked out the release yet? I’d love to know your favorites in the comments! Let’s get right into the details for this one!

NOTE: all supplies are linked in the thumbnails at the end of this blog post.

I began this project by die cutting the tag pieces from Neenah 110lb and gold cardstock. I then used the Hanging Leaf Ring set to cut flowers and leaves from Cotton Candy and Sage cardstock. I did some ink blending on those pieces using Bubblegum and Sage inks, and then assembled the flowers and added some Dazzling Gems to the centers.

I die cut the background using the Chunky A2 Scalloped Rectangles set, gold splattered that and set it aside to dry while I worked on the sentiment. I die cut the hello, which is from the Handlettered Greetings, once from gold cardstock and twice from Neenah, adhering them together for a stacked sentiment.

The background was adhered to the card base, the leaves were glued in place, the tag was adhered using foam tape and the flowers were adhered using a combination of liquid glue and foam strips.

That does it for this project! I hope you enjoyed it! Head on over to Simon’s website to check out all of the new products from the You Are My Favorite release! Thanks again for joining me, and I hope you have a fabulous day!

Supply List

Affiliate links used at no cost to you. What does this mean? If you use the links within this post to make a purchase, I receive a small commission, which allows me to continue to post crafty content for your enjoyment. I truly appreciate your support!

Simon must have discontinued the Chunky A2 Scalloped Rectangles as well as the Handlettered Greetings, because I was unable to locate those on their site. My apologies on that. I will link to items that are similar for your convenience.

Latest Posts

Latest Instagram Posts

Simon Says Stamp Birthday Hexagons

Hello Crafty Friends! Thanks so much for stopping by to check out today’s project featuring the new Hopping Hexagons Embossing Folder from Simon’s latest release, You Are My Favorite. This was a simple project, so it will be a quick one!

NOTE: all supplies are linked in the thumbnails at the end of this blog post.

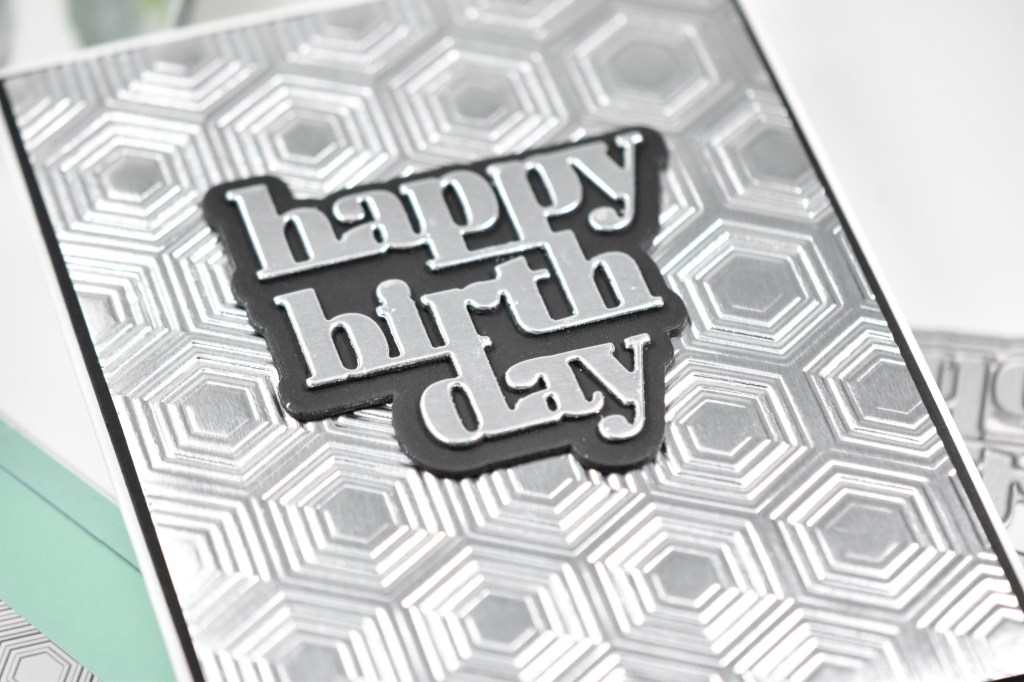
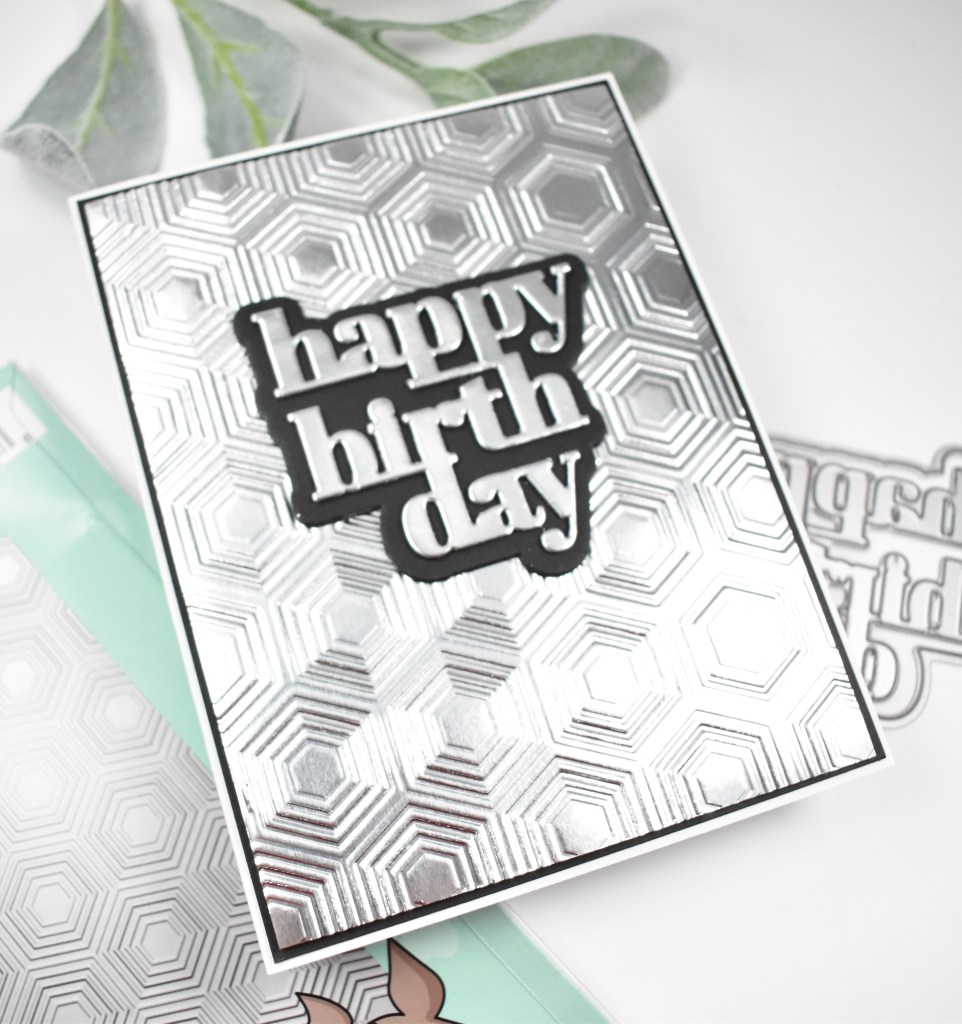
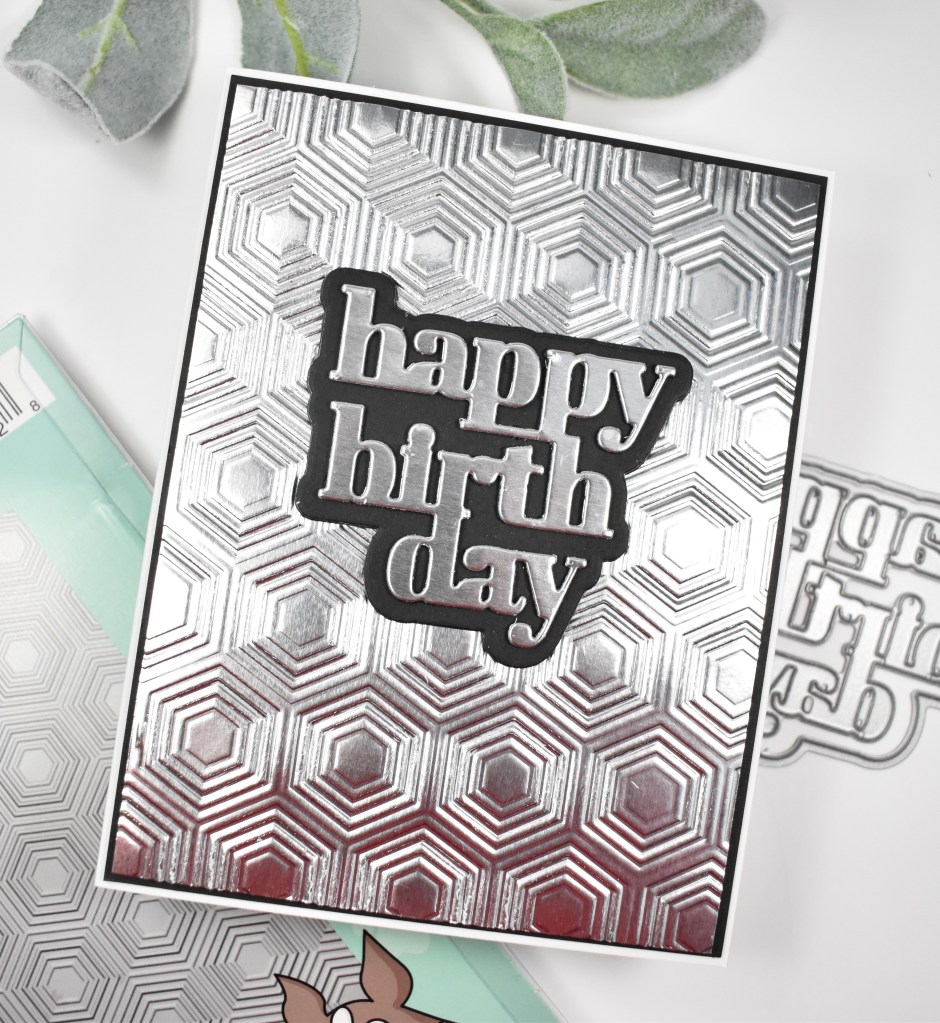
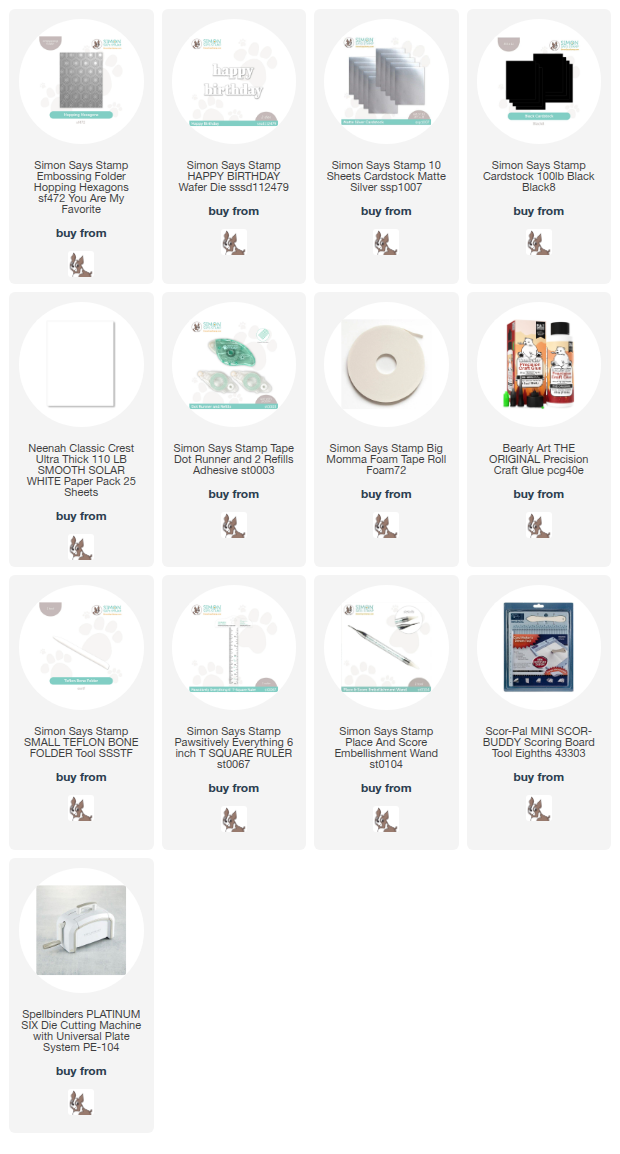
I began this project by embossing a panel of matte silver cardstock in the folder, trimming it down a tad and adhering it to a black panel before adhering to the card base.

I die cut the birthday sentiment (this die was discontinued on the Simon website, so I will link to something similar) from the same matte silver cardstock once and twice from regular black cardstock. In addition, I die cut the shadow portion twice and adhered all of these pieces together for a stacked sentiment. This was then adhered to the embossed panel using liquid glue to finish up.

Super simple project for today, that makes for a great birthday card for anyone. You could also use any sentiment for a quick masculine card. Thanks for stopping by, and I hope you have a wonderful day!

Supply List

Affiliate links used at no cost to you. What does this mean? If you use the links within this post to make a purchase, I receive a small commission, which allows me to continue to post crafty content for your enjoyment. I truly appreciate your support!

Latest Posts

Latest Instagram Posts
Simon Says Stamp Love & Hugs Botanical

Hello Friends, and welcome back to my blog! The latest Simon release, You Are My Favorite, is live and I’m back with a project featuring the new Big Botanicals. Let’s go ahead and get right into the details since this one had lots of steps.

NOTE: all supplies are linked to multiple sources in the thumbnails at the end of this blog post.

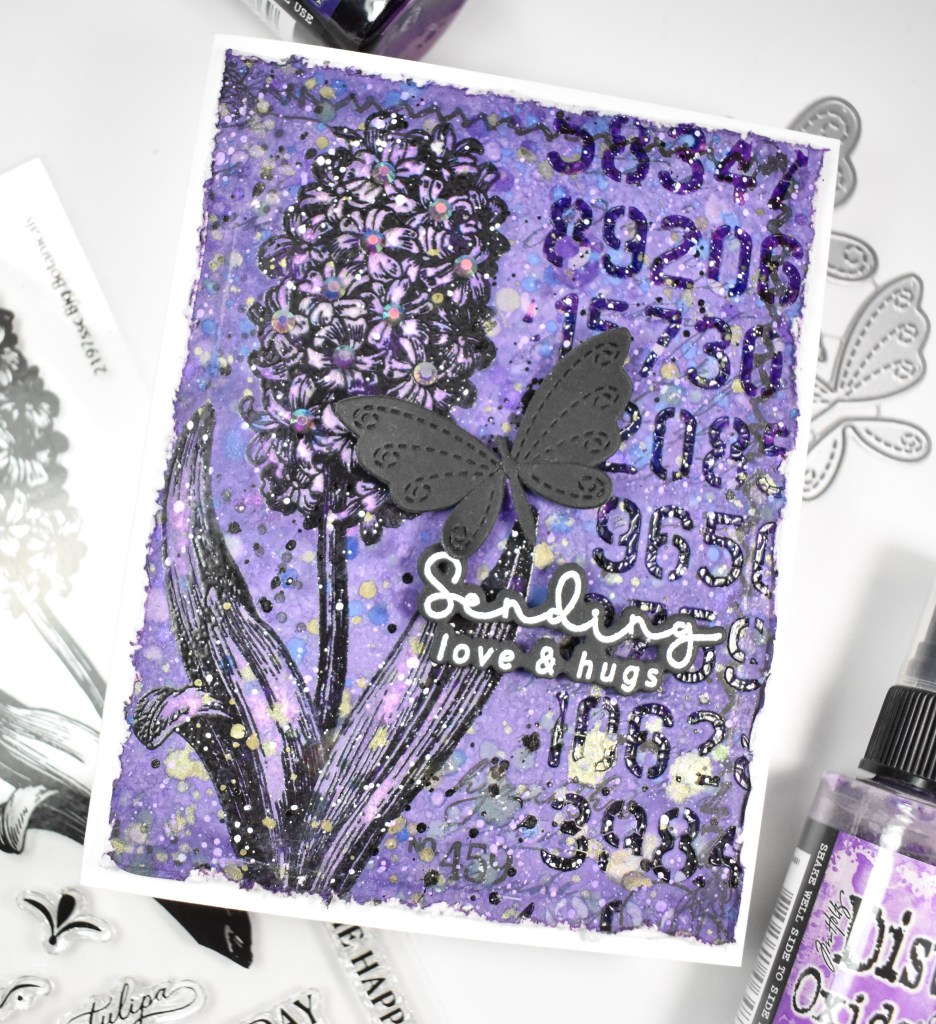
I began this project by putting a panel of mixed media paper in my splat box and adding Distress Oxide Sprays and Spritzes until I was satisfied. The sprays used were Wilted Violet, Villainous Potion, Prize Ribbon and Rustic Wilderness. The Spritzes used were Wilted Violet, Twisted Citron and Peeled Paint. I did dry my paper between layers of color so that I could build upon each other.

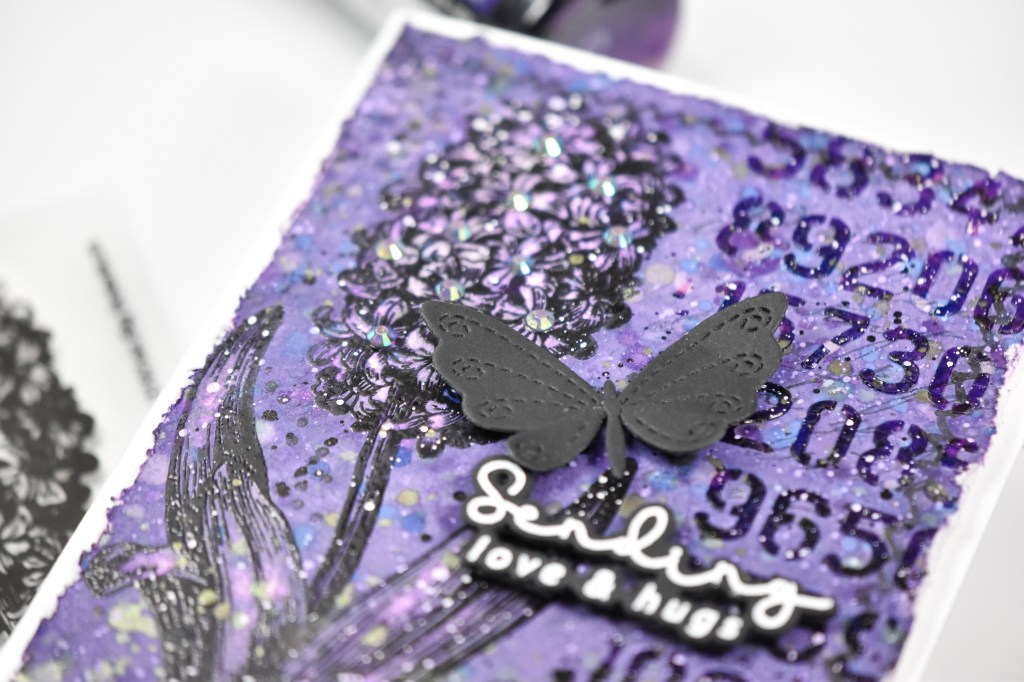
Once satisfied with the panel, I stamped one of the florals from the Big Botanicals set onto the panel using VersaFine Onyx Black and heat set it using Ranger Clear Embossing Powder. I did use a couple of the other elements from the stamp set and added those as well. I also used the TH Stitches set for some other added elements. I also used the TH Digits stencil along with some Ranger Translucent Crackle Paste to add some texture.

I set that aside to dry while I worked on the other elements for the card. I stamped the sentiment, which is from the Mix & Match Butterflies set, onto black cardstock using VersaMark ink and heat set that using Simon Detail White Embossing Powder. It was trimmed out using the coordinating die several times for a stacked sentiment. I used the Stitching Butterflies set to cut and assemble one of the butterflies to add once everything was dry.

For even more texture, I used the TH Paper Distress tool to rough up the edges of the panel, and I used a water brush to paint the floral and dry it with paper towels to lift some of the ink from those areas. My panel was adhered to the card base with foam tape, while the butterfly and sentiment were adhered with foam strips.

That does it for this project! I hope you enjoyed it! I never do mixed media projects because I’m not very good at them, but I enjoy them just the same! Don’t forget to check out the entire You Are My Favorite release over on Simon’s website! Thanks again for joining me, and I hope you have an awesome day!

Supply List

Affiliate links used at no cost to you. What does this mean? If you use the links within this post to make a purchase, I receive a small commission, which allows me to continue to post crafty content for your enjoyment. I truly appreciate your support!

Latest Posts

Simon Says Stamp White Fusion Thanks

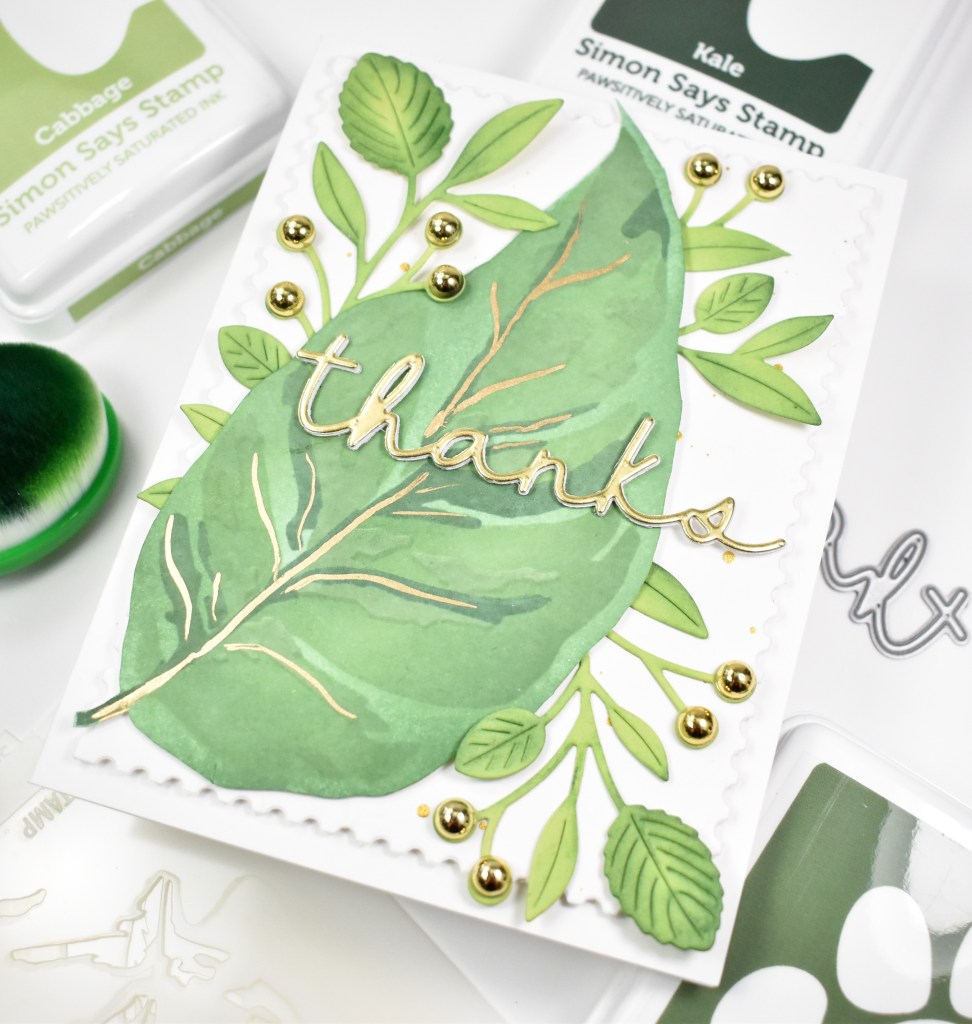
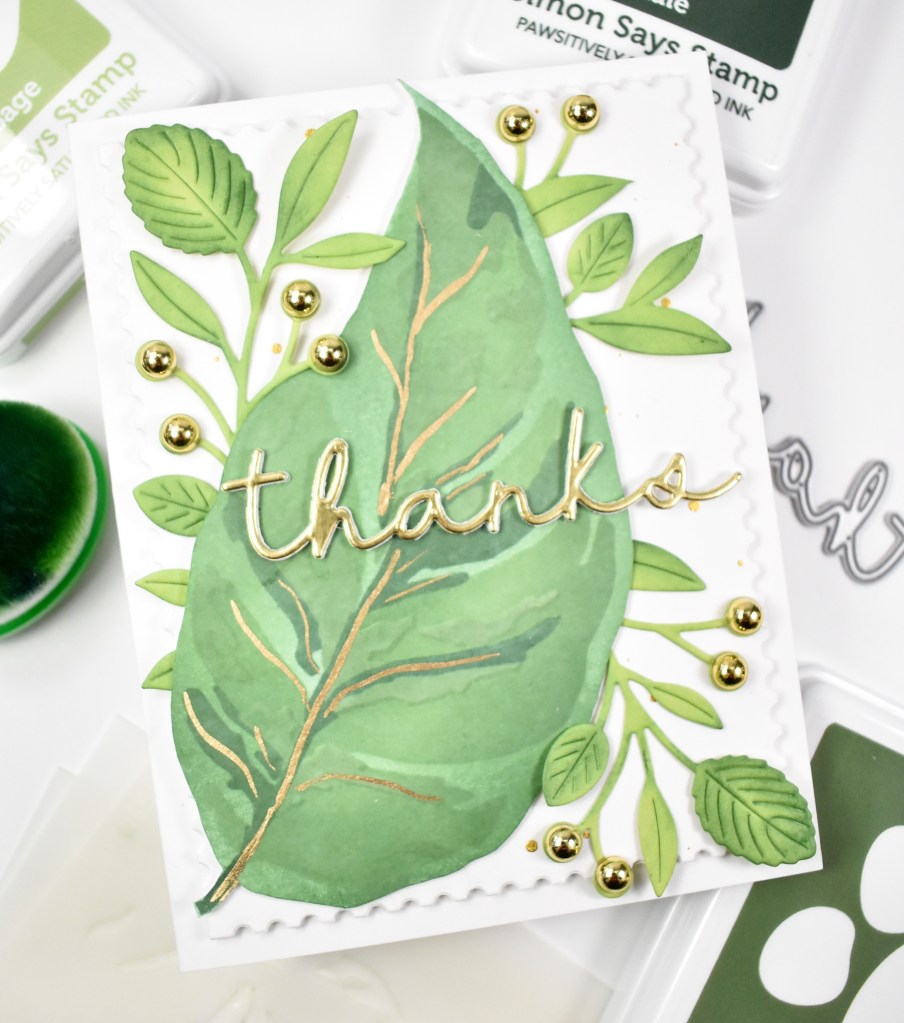
Hello Crafty Friends, and welcome back! Today’s project is featuring the new White Fusion stencil from Simon’s latest Rain or Shine release. Let’s go ahead and jump into the details.

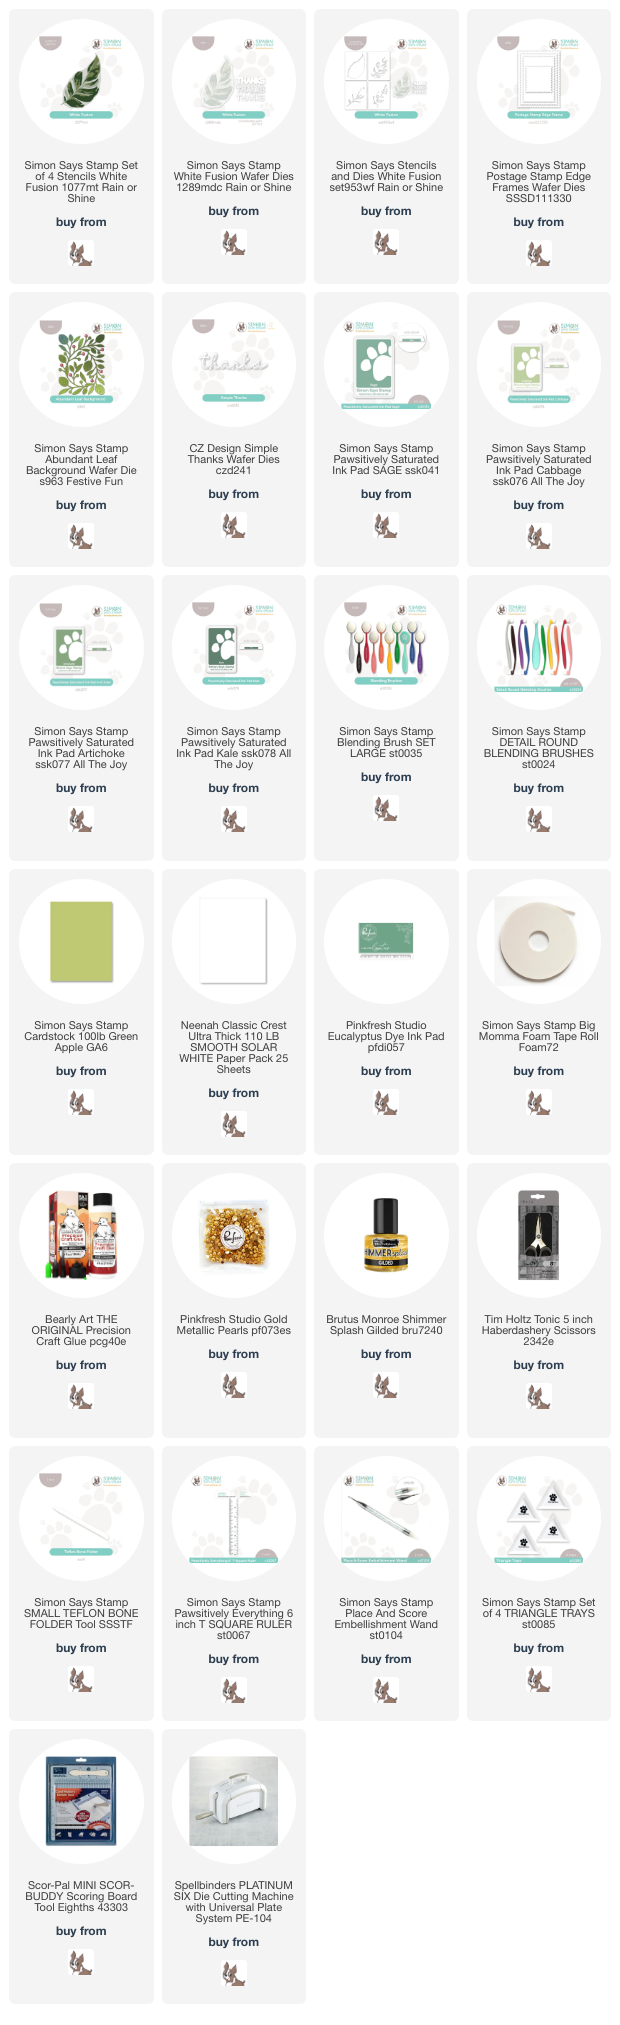
NOTE: all supplies are linked in the thumbnails at the end of this blog post.

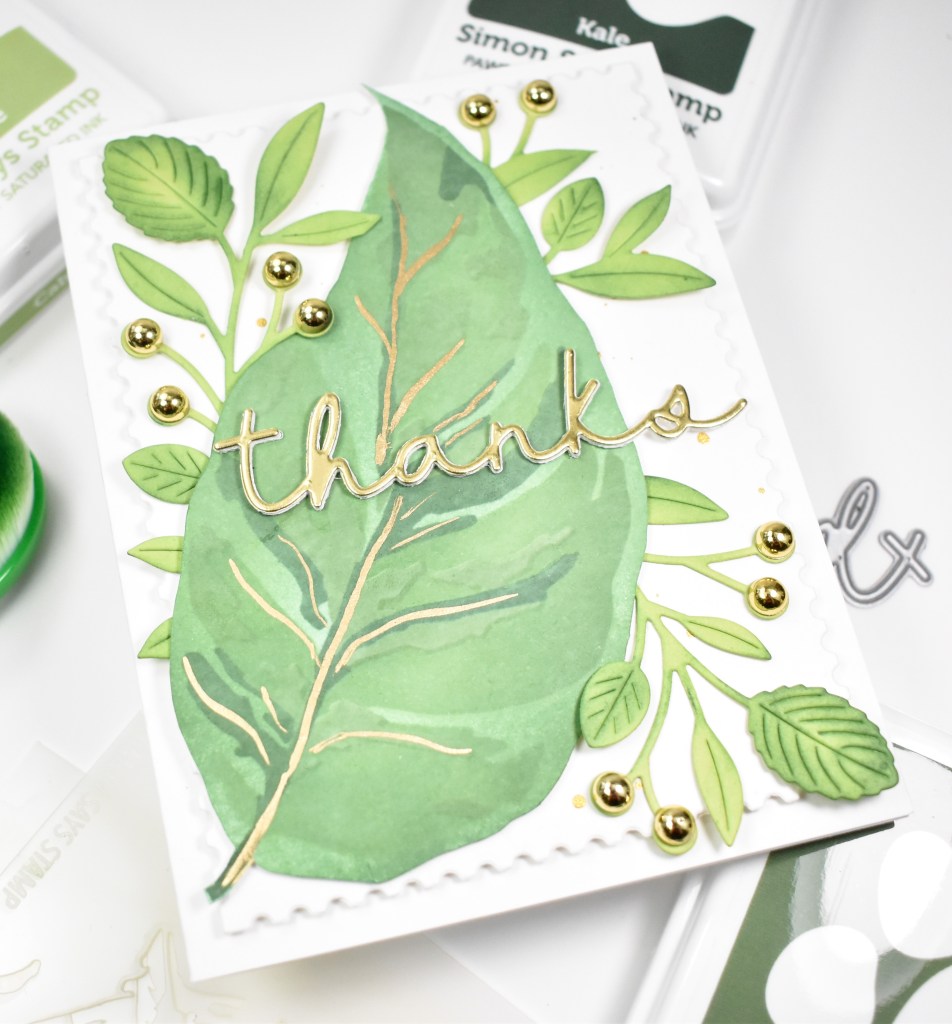
I began this project by stenciling the White Fusion leaf onto a panel of Neenah 110lb cardstock using Simon’s Sage, Cabbage, Artichoke and Kale inks, along with Pinkfresh Eucalyptus ink. Once I was done with all of the stenciling, I fussy cut the leaf out, and added some gold detail with a Krylon Gold Leafing pen.

My next step was to cut a panel using the Postage Stamp Edge Frames and splatter that with gold acrylic ink. I die cut the Abundant Leaf Background from Green Apple cardstock and did some ink blending along the edges using those same green inks. I adhered the background panel to the card base using foam tape, and then adhered the White Fusion leaf with foam tape as well.

The Abudant Leaf Background was trimmed apart and secured with liquid glue underneath the larger leaf. I die cut the Simple Thanks once from gold cardstock and twice from Neenah 110lb and adhered all of those together before being adhered to the card. To finish up, I added some Pinkfresh Gold Metallic Pearls to pull everything together.

That does it for this project! I appreciate you stopping by, and I hope that you found a little bit of inspiration! Have a wonderful day!

Supply List

Affiliate links used at no cost to you. What does this mean? If you use the links within this post to make a purchase, I receive a small commission, which allows me to continue to post crafty content for your enjoyment. I truly appreciate your support!

Latest Posts

Latest Instagram Posts

Simon Says Stamp Rainbow Stacked Blooms

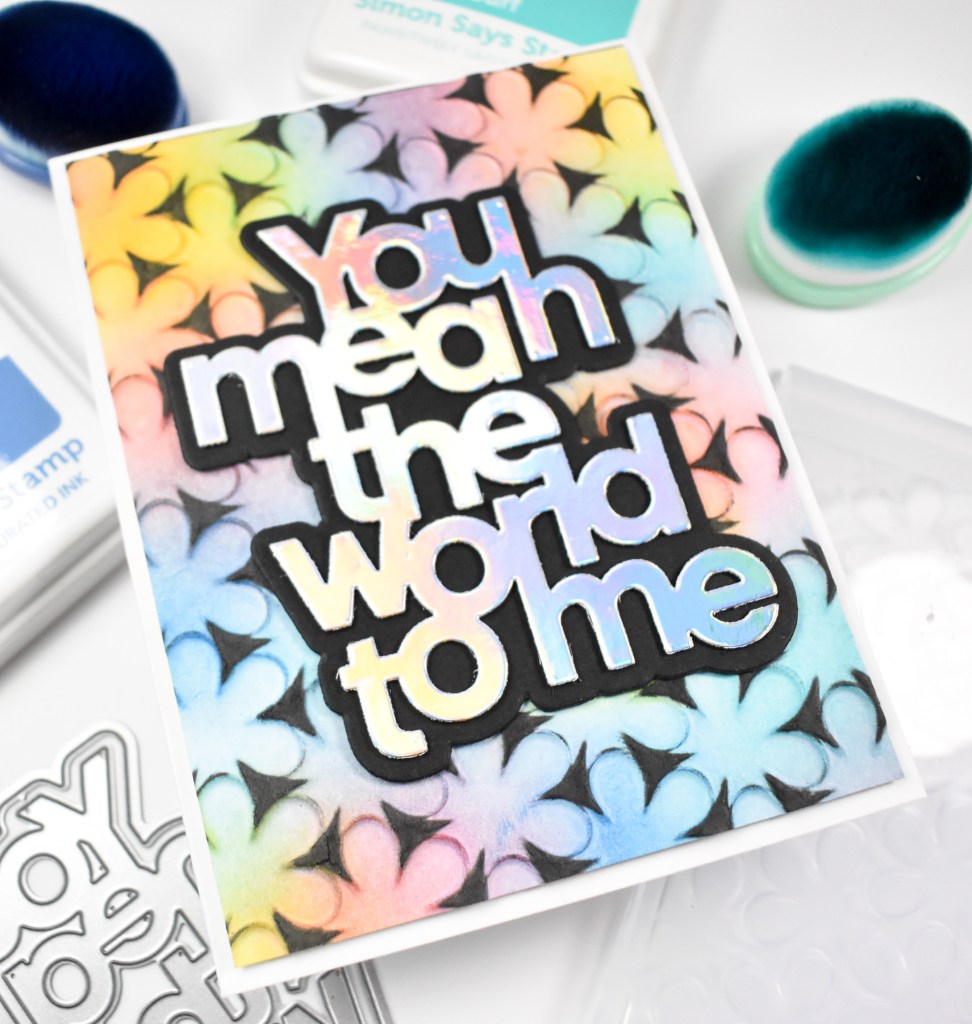
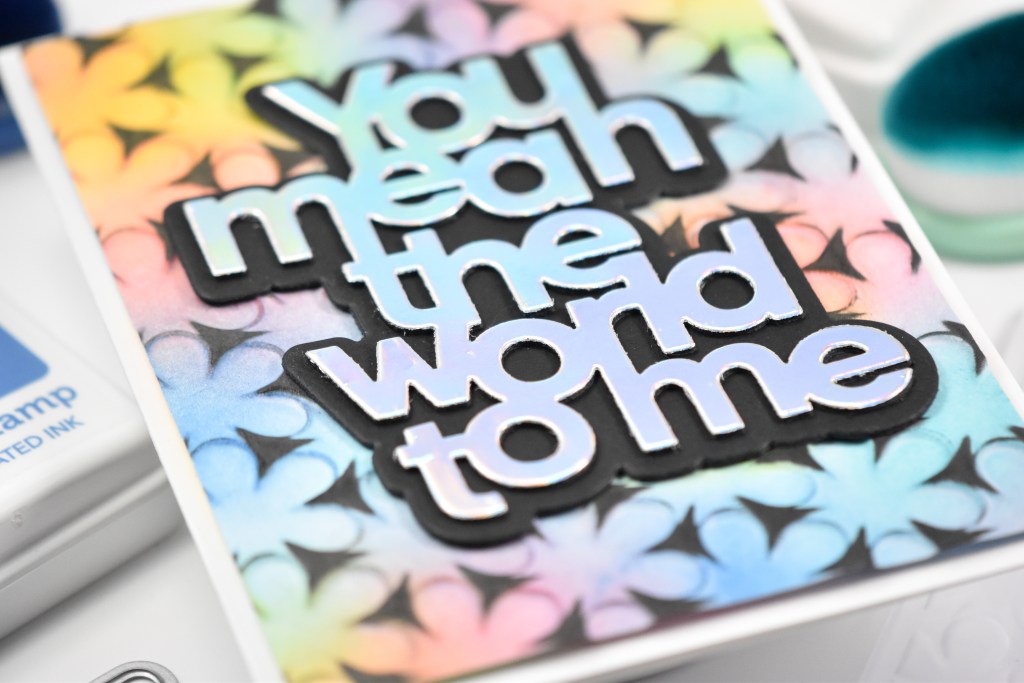
Hey there, Friends! Thanks for joining me! Today’s project is featuring the new Stacked Blooms Embossing Folder from Simon’s latest release, Rain or Shine. This was a super quick card, so let’s get to the details.

NOTE: all supplies are linked in the thumbnails at the end of this blog post.

I began this project by embossing a panel of Neenah 110lb cardstock with the embossing folder and did some random ink blending on the debossed side of the panel using Carnation, Sunbeam, Surf and Cadette inks.

Once the ink blending was complete, I used my black Rainbow Splash ink pad and rubbed that on the raised portions of the panel to give this black-out feel. The You Mean The World to Me sentiment was cut once from holographic cardstock and twice from black cardstock. The shadow portion was also cut twice, and all of those pieces were adhered together using liquid glue.

The panel was adhered to the card base using foam tape, while the sentiment was glued in place. I didn’t feel that this card needed any additional bling, which is weird for me!

That finishes up this project! Like I said, a super, simple one for today. Thanks again for joining me, and I hope you have a fabulous day!

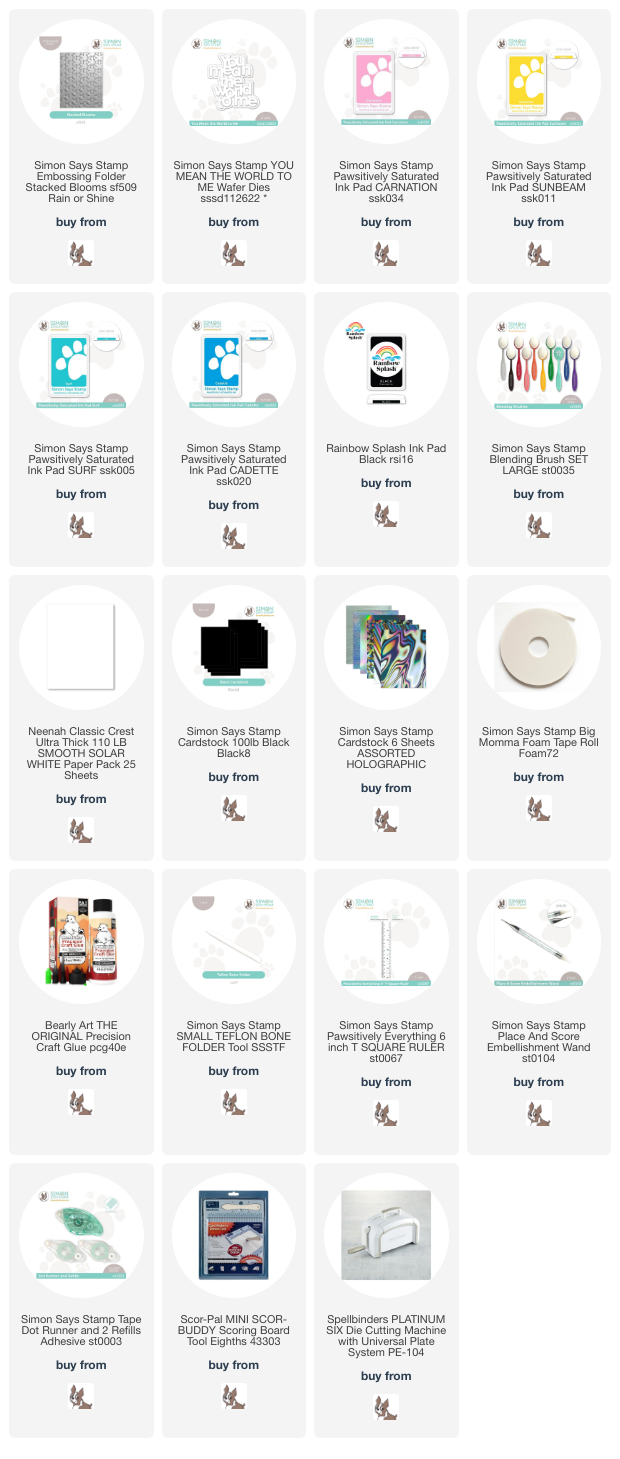
Supply List

Affiliate links used at no cost to you. What does this mean? If you use the links within this post to make a purchase, I receive a small commission, which allows me to continue to post crafty content for your enjoyment. I truly appreciate your support!

Latest Posts

Latest Instagram Posts