Spellbinders Withered Viburnum

Hello Friends, and welcome back! I’m back today with a card featuring the new Withered Viburnum from the Winter’s Grace Garden collection from Spellbinders. This is such a beautiful set from Susan Tierney-Cockburn, and I just loved adding sparklies for the berries! Let’s go ahead and go through the details.

NOTE: all supplies are linked to multiple sources in the thumbnails at the end of this blog post.

I began this project by cutting the leaves from Fern cardstock, and cutting the berry portion from Indigo cardstock. I did end up cutting the leaves several times for a fuller spray. Once the cutting was complete, I did some ink blending on the leaves using SSS Pawsitively Saturated Inks in Cabernet and Kale.

Like I said earlier, I added jewels to the berry portions and then went to work on the rest of the card. The background was created using the Leafy 3D Embossing Folder and I lightly ink blended some Sprout ink on that before splattering it with some gold acrylic ink.

The sentiment, which is from the Making Me Smile Sentiments set, was gold foiled onto black cardstock and die cut several times using the included die. I adhered the background panel to the card base and then began the layout.

The leaves were adhered first and the berry clusters were adhered next, tucking those in as needed. To finish up, the sentiment was adhered with foam strips for dimension.

That does it for this one! I hope you enjoyed it, and I hope it inspires you to get crafty in your space! Don’t forget to head over to the Spellbinders website to catch all of the September releases! Thanks again for stopping by, and have a wonderful day!

Supply List

Affiliate links used at no cost to you. What does this mean? If you use the links within this post to make a purchase, I receive a small commission, which allows me to continue to post crafty content for your enjoyment. I truly appreciate your support!

Latest Posts

Latest Instagram Posts

Simon Says Stamp Double Plaid Floral

Hello Crafty Friends, and welcome back to my blog! I’m so glad that you stopped by to check out today’s project featuring the new Double Plaid Cover, as well as the new Rustic Layering Flower. These new products are from the STAMPtember release, and I had a blast making this card, so let’s get into the details!

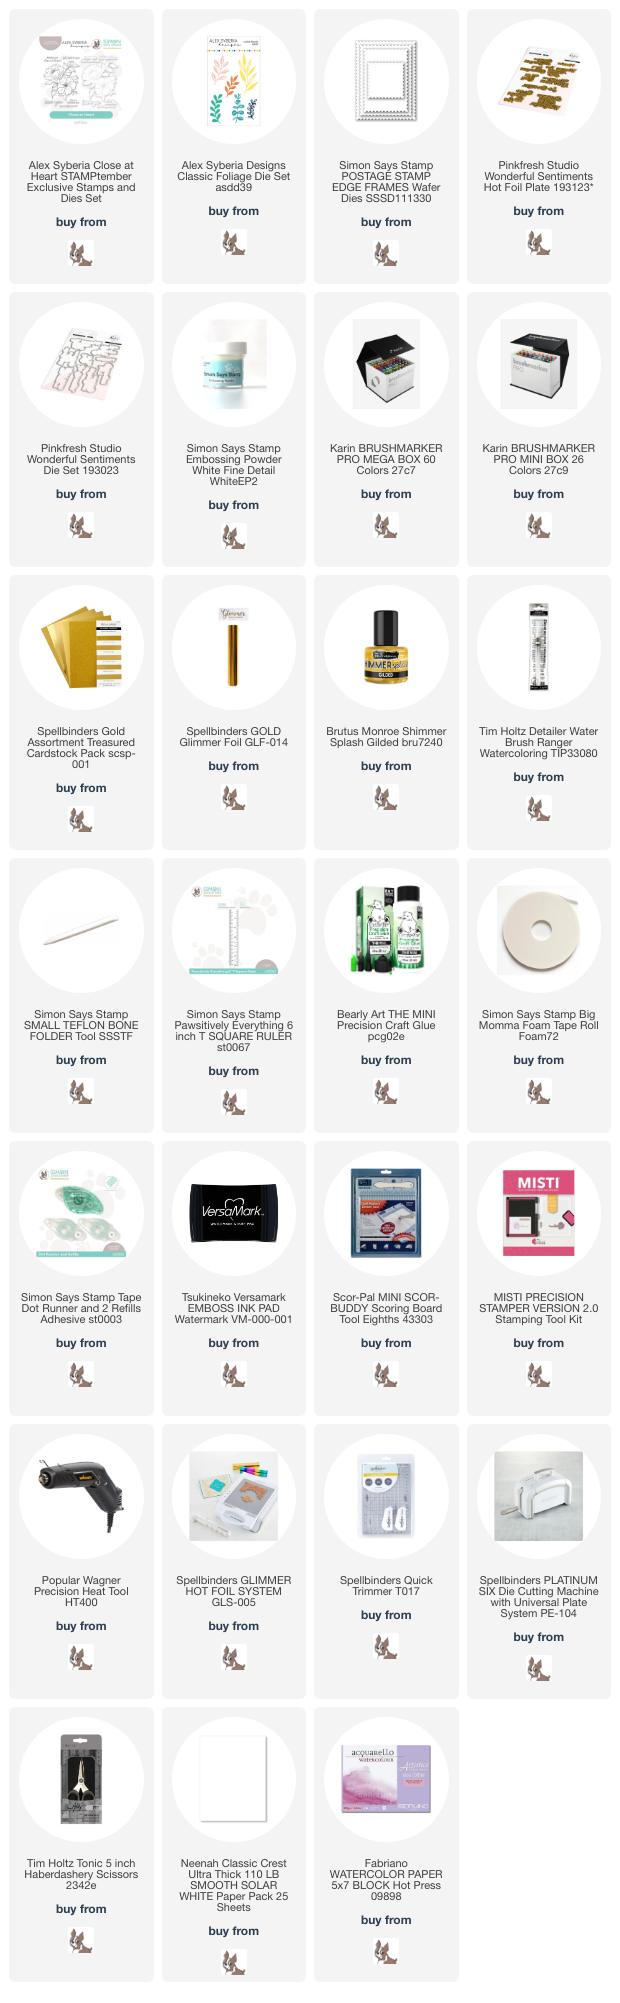
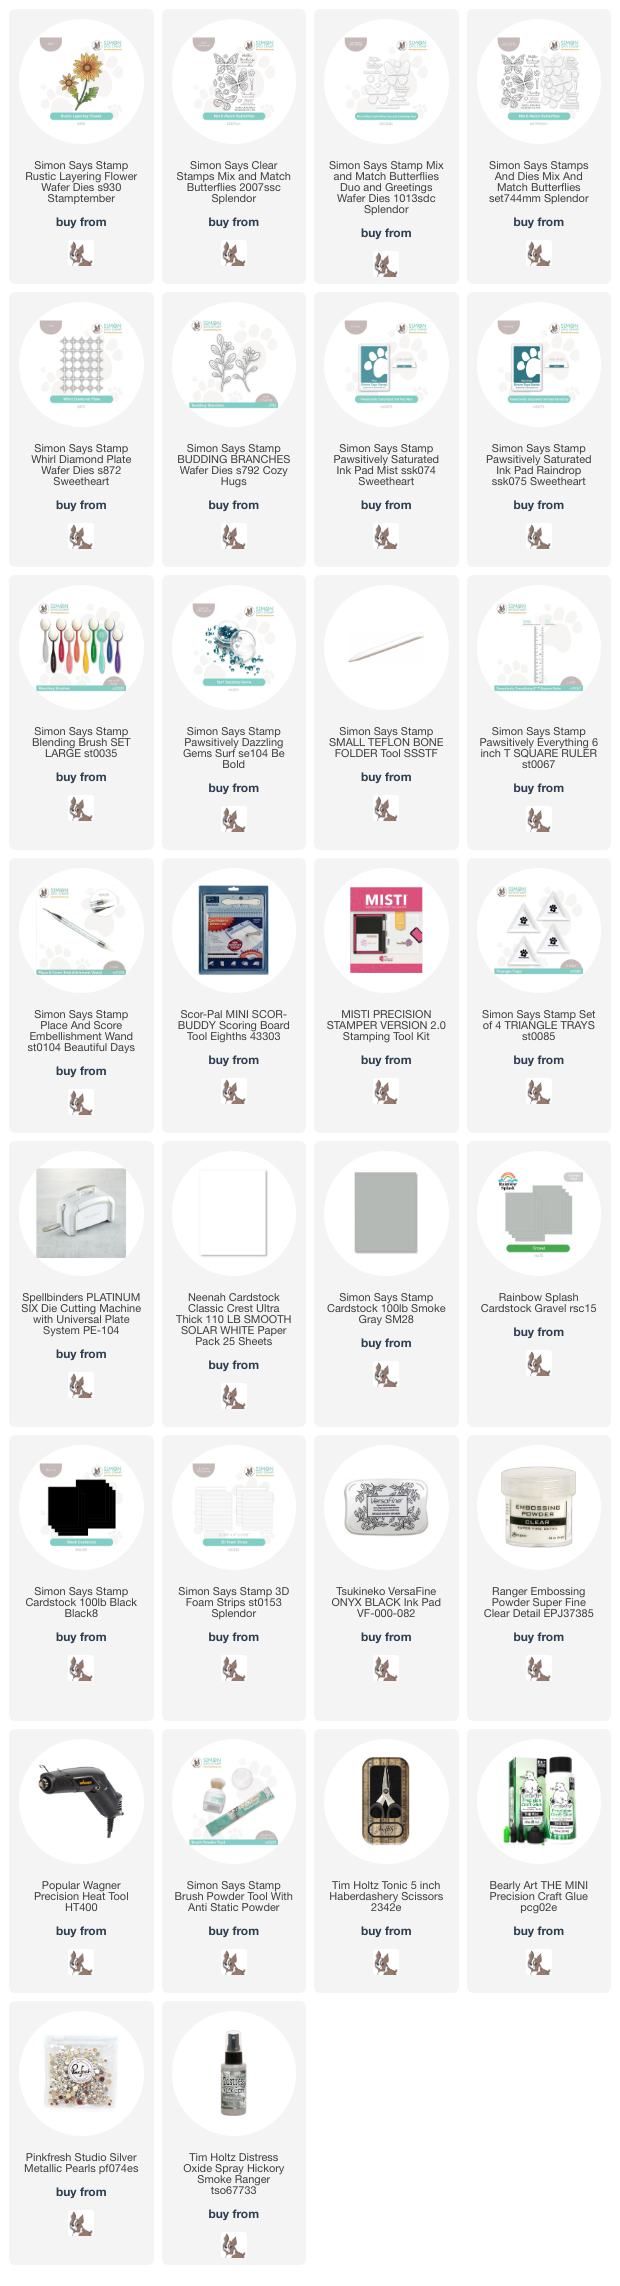
NOTE: all supplies are linked in the thumbnails at the end of this blog post.
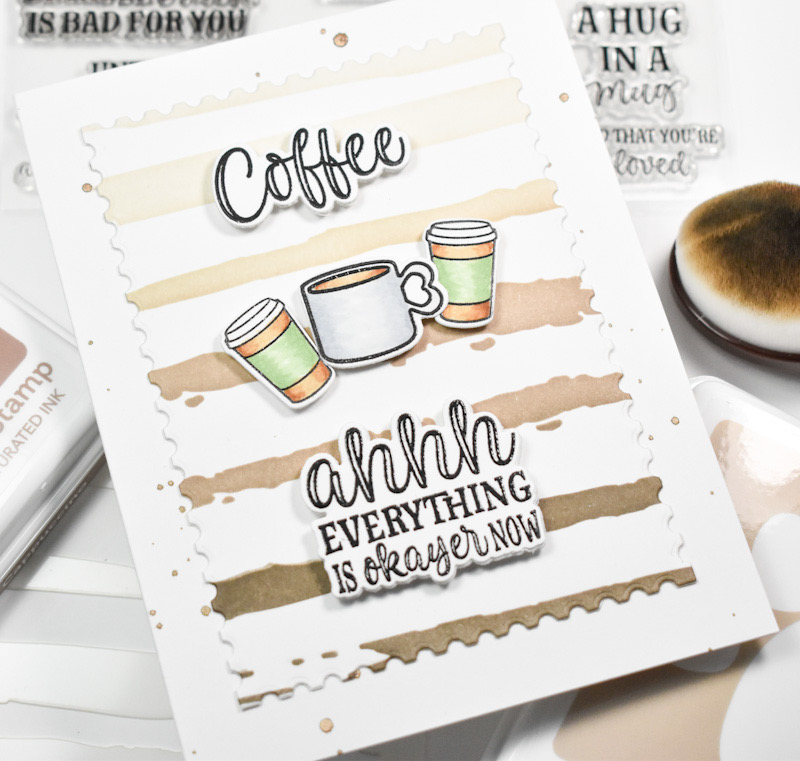
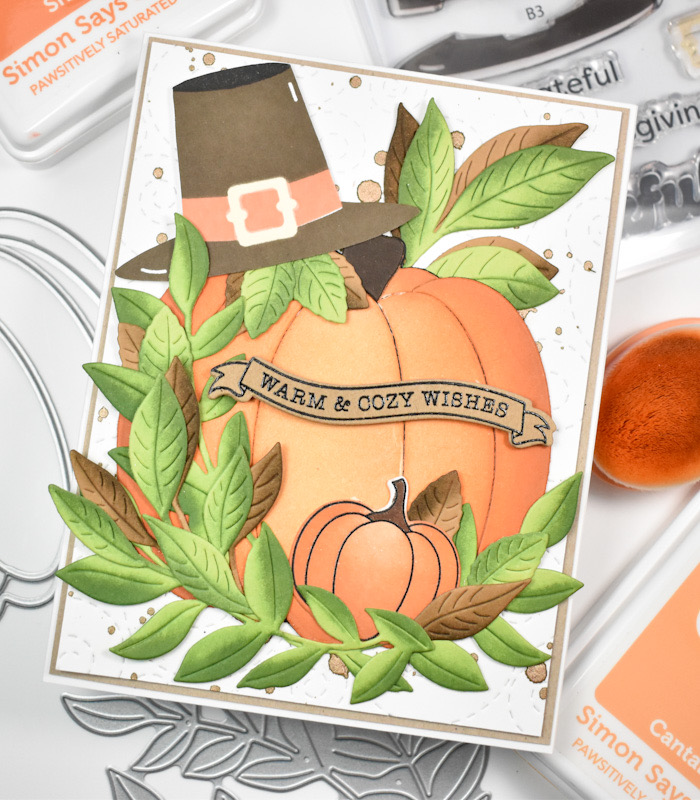
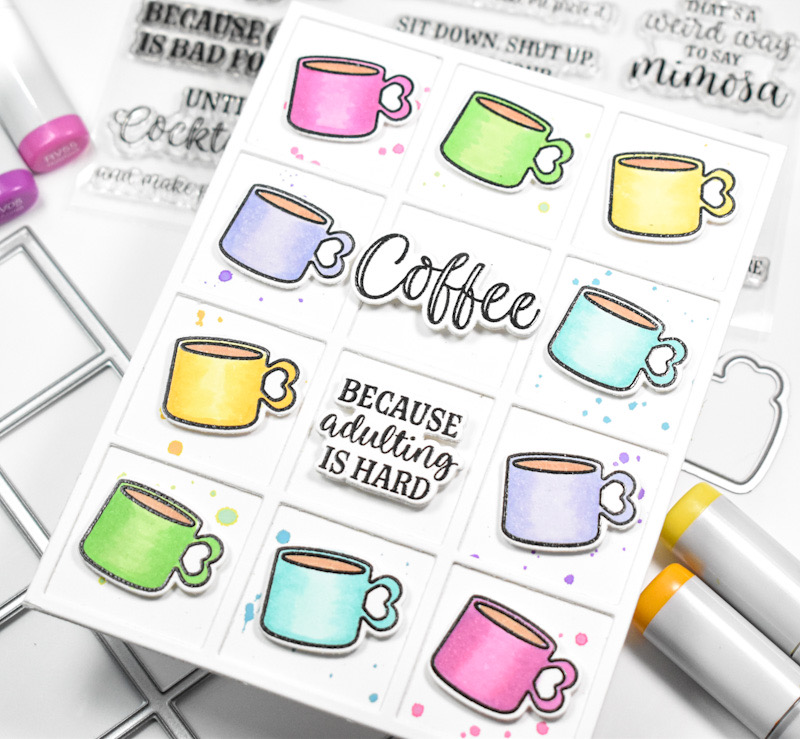
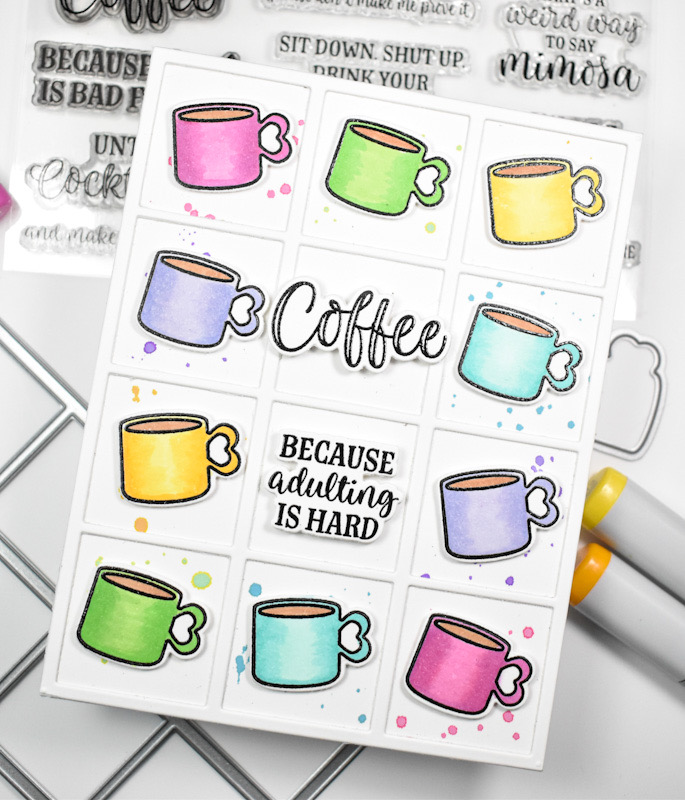
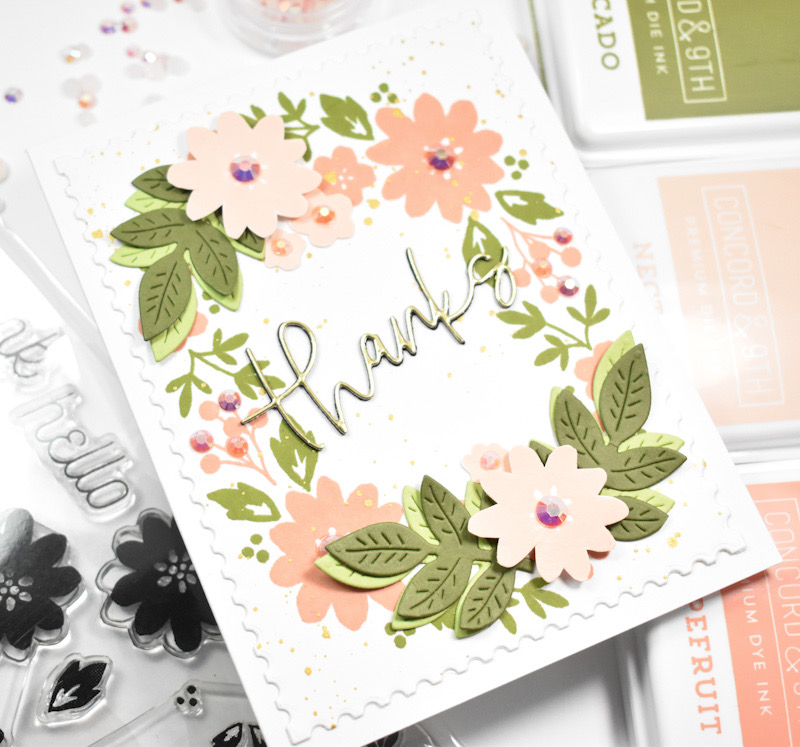
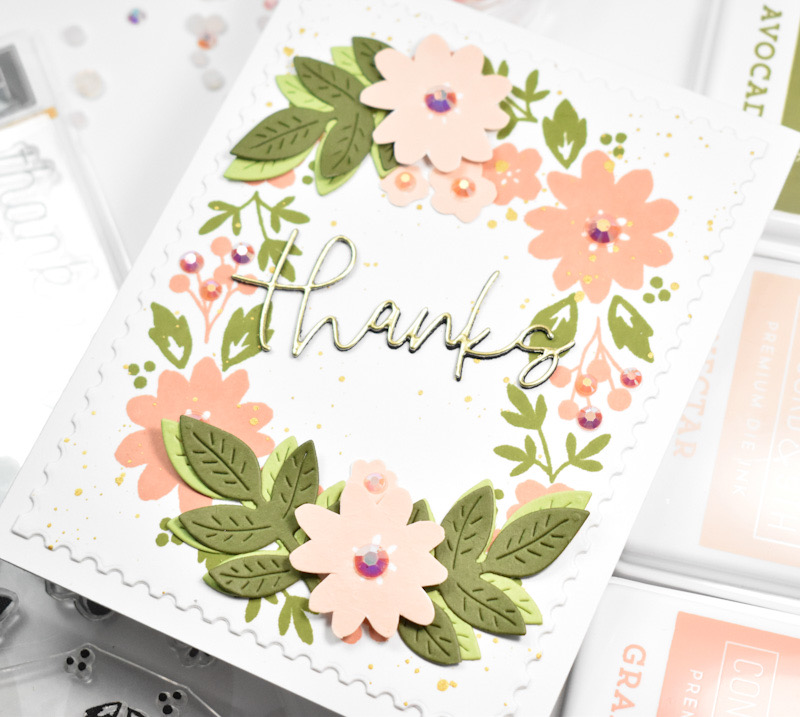
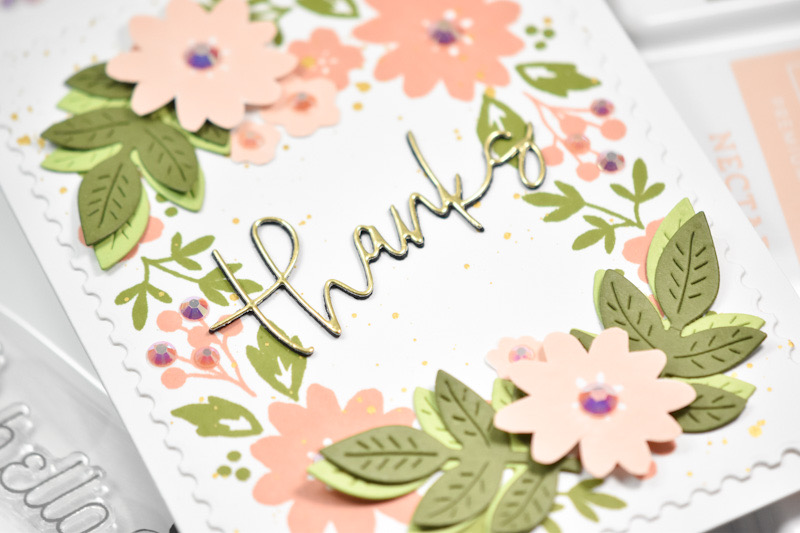
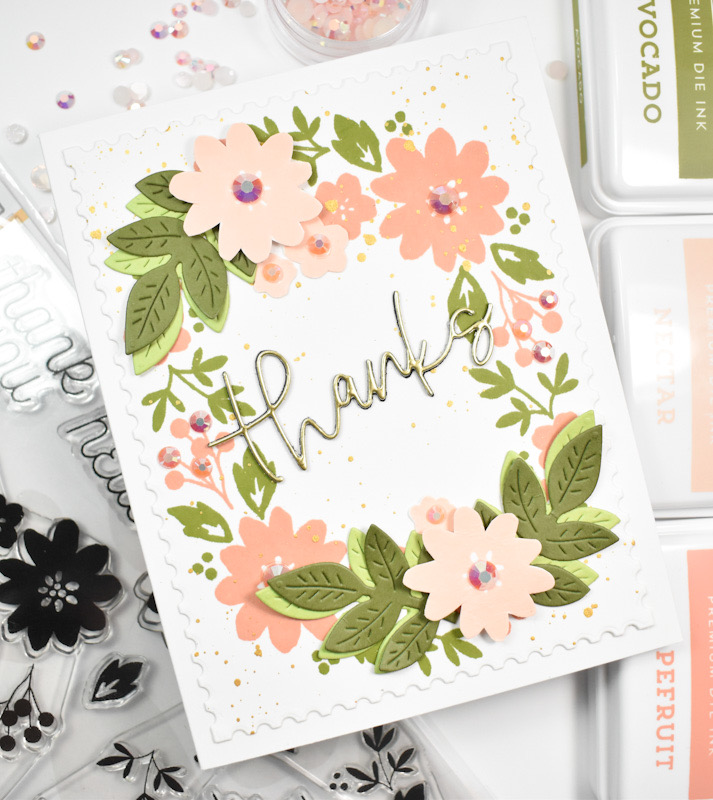
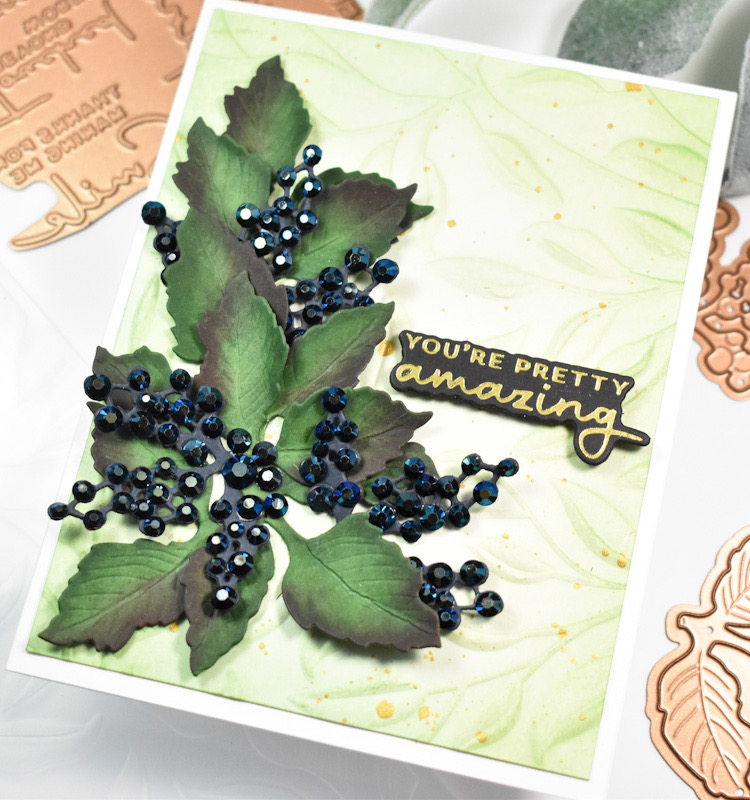
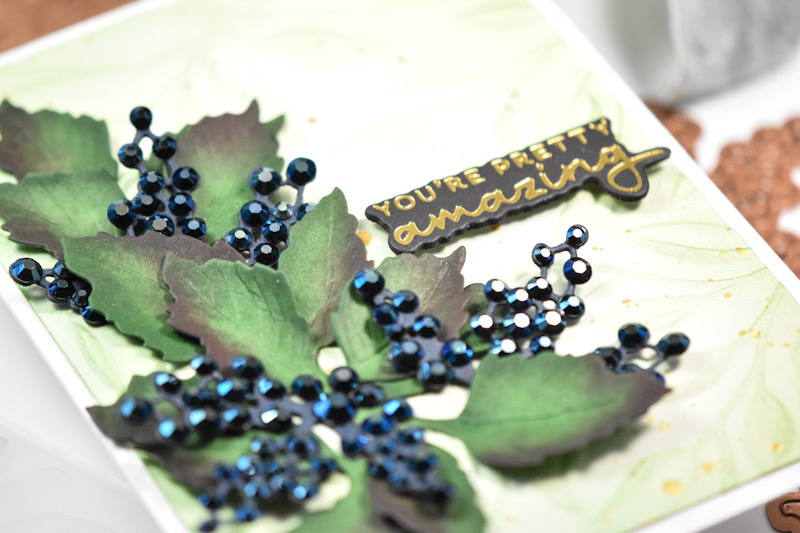
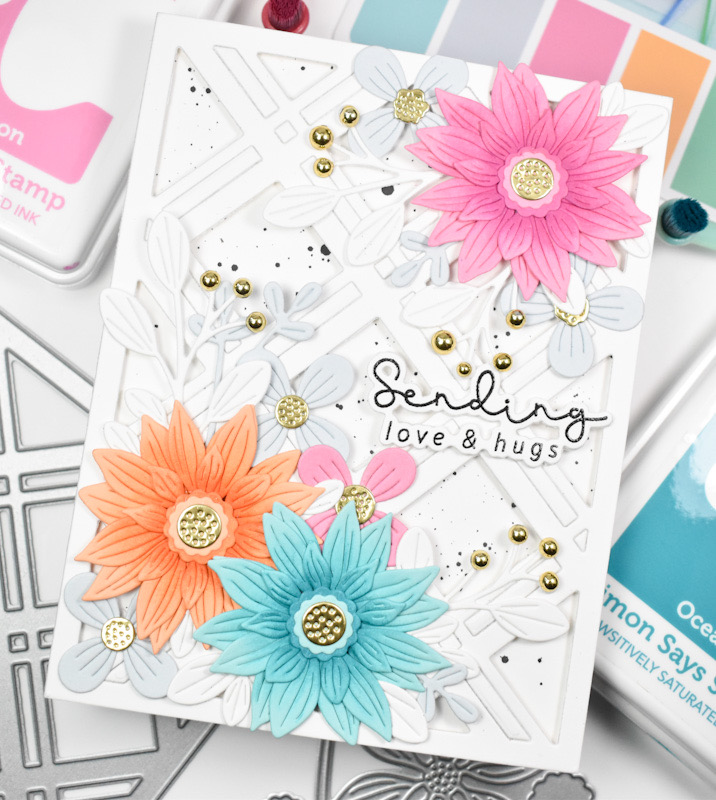
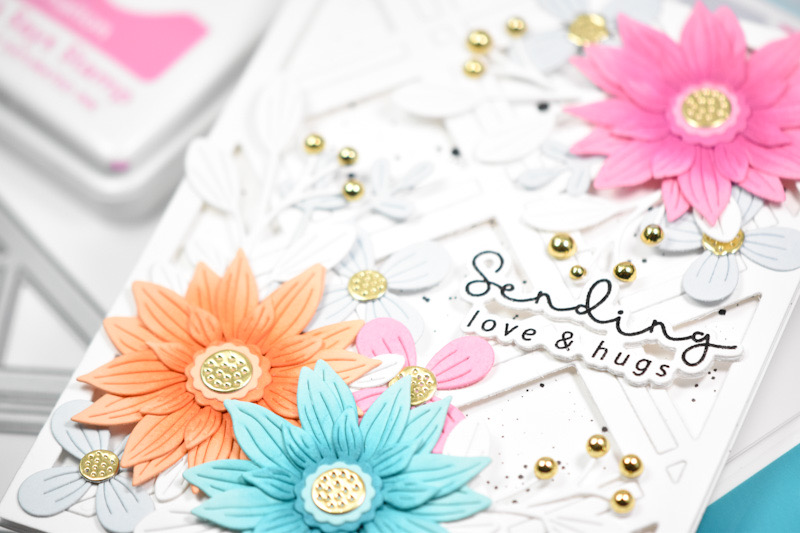
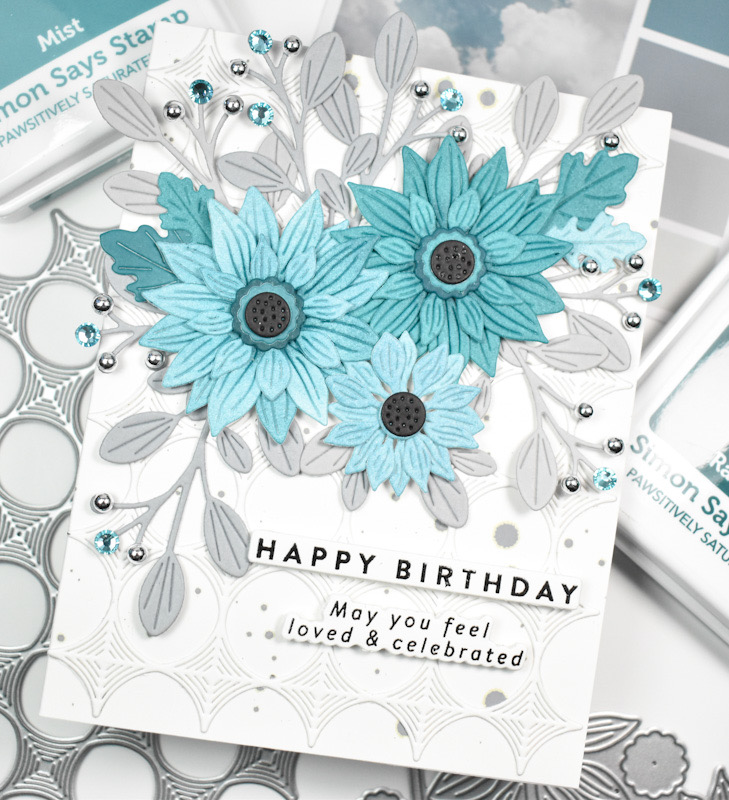
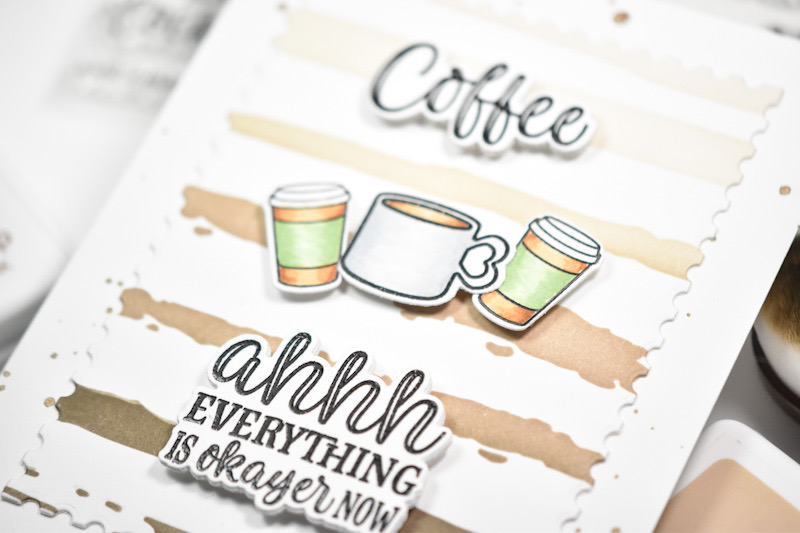
I began this project by pulling an inspiration card from the Color Cubes, just to get some color variety going on. Once I decided on a color combo that I liked, I die cut the Rustic Layering Flower three times from aqua, orange and pink cardstock. This flower has several pieces so I did some ink blending on those pieces before assembling them. The ink colors that I used were Carnation, Sweets, Ocean, Cantaloupe and Sherbet.

For some additional flowers and leaves, I used the Fine Floral Stem for some light blue flowers, as well as the Budding Branches for some white leaves. I have to say that the Budding Branches is by far my most used leaf set from Simon! I did die cut the centers of the flowers from gold cardstock to pull the elements together.

Moving on to assembly .. I splattered my card base using black acrylic ink before adhering the Double Plaid Cover with foam strips. I arranged the flowers and leaves and adhered those using a combination of liquid glue and foam strips to provide support where necessary. I always have to add embellishments to the “buds” of the leaves, because I just think it’s so awesome and so pretty!

I stamped the sentiment, which is from the Mix & Match Butterflies set, using VersaFine Onyx Black ink and heat set that using Ranger Clear Embossing Powder. I used the coordinating die to cut it several times for a stacked look. The sentiment was glued directly to the panel to finish up.

That does it for this project! I’m sorry if you’re sick of florals, but I literally can’t help myself! Florals and leaves are my jam! Don’t forget to check out the entire STAMPtember release, as well as all of the collaboration sets happening all month long! Thanks again for joining me, and have yourself a wonderful day!

Supply List

Affiliate links used at no cost to you. What does this mean? If you use the links within this post to make a purchase, I receive a small commission, which allows me to continue to post crafty content for your enjoyment. I truly appreciate your support!

Latest Posts

Latest Instagram Posts

Simon Says Stamp Floral Birthday Love STAMPtember Blog Party

Hello Crafty Friends, and welcome back! I’m so happy that you joined me for today’s HUGE STAMPtember blog party! Each stop throughout the party has a STAMPtember promotion, so you’ll want to check those out for sure! You can start your party experience here or by heading to Simon’s blog. My project is featuring the new Rustic Layering Flower in aqua tones with a hint of grey. This is such an awesome release, with so many more things coming during the month, so stay tuned for all of the excitement! Let’s go ahead and go through the details for my project!

NOTE: all supplies are linked to multiple sources in the thumbnails at the end of this blog post.

I began this project by pulling an inspiration card from The Color Cubes, and then I ink blended a panel of Neenah 110lb cardstock using SSS Pawsitively Saturated Ink in Mist and Raindrop. Those two colors seemed to match the color palette best. Once the ink blending was complete, I cut the Rustic Layering Flower twice from that panel. I do a little more ink blending in the center of the flowers for more depth before assembling the flowers using liquid glue.

Now that I had the flowers, I had to decide on the rest of the card! I opted to go with the Whirl Diamond Plate for my background, and I cut a bunch of leaves from grey cardstock using the Budding Branches. In laying out the card, I decided that I needed one more small flower, so I cut that and assembled it as well.

I splattered my card base using TH Distress Oxide Spray in Hickory Smoke before adhering the background panel. I began adhering the grey leaves in place first using liquid glue, trimming down as necessary. Once I was happy with the leaf placement, I adhered the flowers using foam strips.

For the sentiment, I used the Mix & Match Butterflies set and stamped that using VersaFine Onyx Black and heat set it using Ranger Clear Embossing Powder. I trimmed it out using the coordinating dies, and made two additional cuts for a stacked sentiment. That was then adhered using foam strips as well. To finish up, I added some Surf Dazzling Gems and some silver metallic pearls to the “buds” of the branches.

That does it for this one! I hope you enjoyed it as much as I did! I always love working with die cut flowers, so this card was totally in my wheelhouse! Don’t forget to head on over to Simon’s website to check out the entire STAMPtember release! Thanks again for stopping by, and have a wonderful day!

Supply List

Affiliate links used at no cost to you. What does this mean? If you use the links within this post to make a purchase, I receive a small commission, which allows me to continue to post crafty content for your enjoyment. I truly appreciate your support!

Latest Posts

Latest Instagram Posts


Simon Says Stamp Fresh Roasted Coffee

Hello Crafty Friends and welcome back! I’m once again playing with the Coffee Time set from Simon’s latest STAMPtember release. This is a CZ Design card if I ever did see one! Cathy is just so freaking talented! Let’s not waste time and go through the details.

NOTE: all supplies are linked to multiple sources in the thumbnails at the end of this blog post.

This card is a double stencil technique. I used the SSS A2 Mask Stencils on a panel of Neenah 110lb cardstock and then secured the new SSS Fresh Roast Stencil atop that. I did some light ink blending using SSS Pawsitively Saturated Inks in Latte and Cappuccino. Once the ink blending was complete, I used the rectangle portion of the mask stencil to cover my ink blending and then splattered it with TH Distress Mica Spray in Crooked Broomstick.

I stamped the coffee mug and the sentiments using VersaFine Onyx Black in and heat set those using Ranger Clear Embossing Powder. I wanted two mugs, so I did a mirror stamping for the second one. In all honesty, I did have to watch a Jennifer McGuire video to learn how to do it! I then used the coordinating dies to trim those out. I did cut the sentiments two additional times for that stacked sentiment look.

I colored the mugs using Copic Markers in C1, C2, C3, E23 and E47, and those, along with the sentiments were adhered to the panel using foam strips. That panel was then adhered to a black panel with foam tape for added dimension, because what do we say? Dimension is life!

And, that does it for this one! I hope you enjoyed it, and I hope it inspires you to get crafty in your space. Don’t forget to check out the entire STAMPtember release over on Simon’s website, and stay tuned all month long for the collaboration sets! Have a wonderful day!

Supply List

Affiliate links used at no cost to you. What does this mean? If you use the links within this post to make a purchase, I receive a small commission, which allows me to continue to post crafty content for your enjoyment. I truly appreciate your support!

Latest Posts

Latest Instagram Posts

Spellbinders All Seasons Floral

Hello Crafty Friends, and welcome back! The Spellbinders August release is live, and there’s some awesome stuff to peruse! Today’s card is featuring the new All Seasons Spring BetterPress Plate, and if you know me, you know that I’m going to pair it with florals! So, let’s run through the details.

NOTE: all supplies are linked to multiple sources in the thumbnails at the end of this blog post.

When I was thinking about this card, I wanted to do a monochromatic color scheme, so I went with black, white and grey. I love the look of white flowers with grey shading, so that’s what I set out to do! I used the Spellbinders Be Bold Blooms set and cut a bunch of the flowers from Neenah 110lb cardstock, and I cut the centers and foliage from black cardstock.

I used SSS Pawsitively Saturated Ink in Earl to do the ink blending on the flowers, and when that was complete, I assembled the flowers using liquid glue. I created the background panel by using gravel cardstock and the Spellbinders Argyle Plaid 3D Embossing Folder, and splattered that with some black acrylic ink.

While the panel was drying, I inked up the All Seasons Spring Press Plate using the BetterPress Black ink onto a panel of Pebble BetterPress Cardstock. That was then cut using the included die. I did cut it a second time from Neenah 110 and adhered those pieces together for a stacked sentiment. This particular sentiment is a very long sentiment, and I didn’t like the way it looked on this particular card, so I ended up cutting it into two pieces so that it would fit better.

My embossed panel was then adhered to a black panel for contrast, and I began gluing in the bottom layers first, which included the smaller flowers and the foliage. I adhered the top flowers with foam strips, as well as the sentiment. I had a few leaves left over, so I secured those in place where needed. To finish up, I added a few clear drops.

That does it for this project! I hope you enjoyed it as much as I did! I really love this color combo from time to time, as a change from the pastel flowers. Don’t forget to head over to the Spellbinders website to check out all of the fun, new August products! Thanks again for stopping by, and I hope you have a wonderful day!

Supply List

Affiliate links used at no cost to you. What does this mean? If you use the links within this post to make a purchase, I receive a small commission, which allows me to continue to post crafty content for your enjoyment. I truly appreciate your support!

Latest Posts

Latest Instagram Posts

Spellbinders Merry Everything

Hello Crafty Friends, and welcome back! I’m glad that you stopped by to check out today’s project featuring the new Spellbinders Night & Day Pines Press Plates, along with the Mistletoe Greetings Press Plates. Let’s not waste time and get into the details!

NOTE: all supplies are linked to multiple sources in the thumbnails at the end of this blog post.

I’ve used the Night & Day Pines Press Plates on a previous project, but I used the “day” plate, and today’s project features the “night” plate. I began this project by inking up the plate with BetterPress Black ink and running it through the machine. I did this a couple of times to make sure that I was getting good coverage. Once that was done, I did some ink blending on the panel using SSS Pawsitively Saturated Inks in Artichoke and Latte.

I trimmed the panel down using the Spellbinders Nested Postage Labels & Tag set and then went on to foil the sentiment. This is a great holiday sentiment set, because it foils multiple sentiments at once. It foils multiples and cuts multiples at once, which is such a time saver! I wanted some gold leaves so I used the Spellbinders Poinsettia Bloom to achieve this. I thought the berries looked nice as well, and decided to use those too. I did go back and cut the berries from red cardstock and adhered those atop the gold berries.

The leaves and berries were glued in place, and I adhered the white sentiment banner atop a gold banner using SSS 3D Foam Strips, and then glued that in place. Everything was the adhered to the card base to finish up.

That does it for this project! I hope you enjoyed it, and I hope it inspires you to get crafty in your space. Don’t forget to head on over to Spellbinders to check out all of the new release items and clubs for July! Thanks again for stopping by, and I hope you have an awesome day!

Supply List:

Affiliate links used at no cost to you. What does this mean? If you use the links within this post to make a purchase, I receive a small commission, which allows me to continue to post crafty content for your enjoyment. I truly appreciate your support!

Latest Posts

Latest Instagram Posts

Simon Says Stamp Bright Starry Sky

Hello Crafty Friends, and welcome back! I’m back today with a card featuring the new Starry Sky Foil Transfer Cards from Simon’s latest release, Cheering for You. Have you checked out the new release yet? I would love to know your favorites! Let go through the deets for this one, shall we?

NOTE: all supplies are linked to multiple sources in the thumbnails at the end of this blog post.

I began this card by foiling the Starry Sky panel using pink foil and the Minc Mini. Once the foiling was done, I trimmed it down using the SSS Postage Stamp Edge Frame and adhered it to a black panel.

I used the SSS You Brighten My Day for the sentiment and cut that once from SSS Color Blend Cardstock and twice from black cardstock. I also cut the shadow portion twice and adhered all of the pieces together using liquid glue for a stacked sentiment.

The panel was adhered to the card base and the sentiment was adhered using SSS 3D Foam Strips for added dimension.

That does it for this card! A super simple card for today, but I love the pink foil with the pink sentiment. Don’t forget to head on over to Simon’s website to check out the entire Cheering for You release. Thanks for stopping by, and I hope you have an awesome day!

Supply List:

Affiliate links used at no cost to you. What does this mean? If you use the links within this post to make a purchase, I receive a small commission, which allows me to continue to post crafty content for your enjoyment. I truly appreciate your support!

Latest Posts

Latest Instagram Posts

Simon Says Stamp Birthday Sunflower Pattern

Hello Friends, and welcome back! I’m back today with a project featuring the new Sunflower Pattern Stencil from Simon’s latest release, Cheering for You. Let’s go ahead and run through the details!

NOTE: all supplies are linked to multiple sources in the thumbnails at the end of this blog post.

I began this project by taping the Sunflower Pattern Stencil to a panel of Neenah 110lb cardstock and doing some ink blending using SSS Pawsitively Saturated Inks in Lemonade, Honey, Clay and Latte. Once the ink blending was complete, I trimmed the panel down using the PFS Diagonal Stitched Rectangles, and splattered it using gold acrylic ink.

The centers of my flowers weren’t showing up as well as I would have liked, so I just went over those dots with a Sharpie. I used the SSS Big Old Birthday Stamp set for the sentiment and stamped that onto black cardstock using VersaMark Ink and heat set it using SSS Detail White Embossing Powder. I then used the coordinating die to trim that out, along with two extra cuts to adhere all of those together.

The sentiment was adhered to the panel using SSS 3D Foam Strips and the panel was then adhered to a black panel for contrast before being adhered to the card base to finish up.

Another super simple card for today, but I like how this one turned out! I have to tell myself sometimes that not every card needs to be some elaborate creation that takes all day! Thanks again for joining me today, and don’t forget to check out the entire Cheering For You release over on Simon’s website. Have a wonderful day!

Supply List

Affiliate links used at no cost to you. What does this mean? If you use the links within this post to make a purchase, I receive a small commission, which allows me to continue to post crafty content for your enjoyment. I truly appreciate your support!

Latest Posts

Latest Instagram Posts


Simon Says Stamp Faithful Florals

Hello Crafty Friends, and welcome back to my blog! Simon’s latest release, Cheering for You, is live, and I’m back today with a project featuring their new Acetate Card Base. This was my first time using an acetate card base, and I’ve got to say, I am in love! Let’s go ahead and run through the details!

NOTE: all supplies are linked to multiple sources in the thumbnails at the end of this blog post.

I began this card by working on the florals using SSS Dreamy Daisy Layers, Etched Magnolia Blossom, Charming Daisy and the Etched Berry Branch. All of these were cut from colored cardstock and ink blended using SSS Pawsitively Saturated Inks in Bubblegum, Carnation, Seafoam, Ocean and Pearfection. Once the ink blending was complete, I assembled the flower pieces using liquid glue.

For the white base, I used the Memory Box Circle Basics set and cut two circles from Neenah 110lb cardstock. I splattered one with gold ink and adhered the flowers to it, beginning with the leaves and then adding the flowers on top. I used SSS Surf Pawsitively Dazzling Gems to add to the “berry” portion of the leaves.

The sentiment is from the SSS Just Breathe set and I stamped that onto black cardstock using VersaMark Ink, and heat set it using SSS Detail White Embossing Powder. That was trimmed out using the coordinating die, along with two additional cuts for a stacked sentiment.

The sentiment was glued in place and the circle panel was adhered to the acetate using Scor-Tape. The second circle was adhered inside the card behind the front circle. This was done to ensure that you wouldn’t be able to see the adhesives.

That does it for this project! Have you tried using an acetate card base? If not, I encourage you to give it a try! I think it’s a fun, unique look, and definitely something that I’ll try again. Thanks again for stopping by! Don’t forget to check out the entire Cheering for You release over on Simon’s website! Have a wonderful day!

Supply List

Affiliate links used at no cost to you. What does this mean? If you use the links within this post to make a purchase, I receive a small commission, which allows me to continue to post crafty content for your enjoyment. I truly appreciate your support!

Latest Posts

Latest Instagram Posts

Spellbinders Happy Christmas

Hello Crafty Friends, and welcome back to my blog! I’m back today with a project featuring the new Spellbinders Poinsettia Spray, along with the new Starshine Background as well. Both of these products are from their new Home for the Holidays Collection that is available now over on their website. So, let’s go ahead and run through the details, shall we?

The Poinsettia Spray, as the name suggests, does creates a spray, however, I wanted to make a wreath with the flowers instead. Just another way to stretch your supplies! I began this project by cutting the poinsettias from the set a bunch of times from pink cardstock. While I was cutting, I cut some of the holly leaves and the flower centers from green cardstock as well. Once those were all cut, I sat down to do some ink blending using SSS Pawsitively Saturated Inks in Bubblegum, Carnation and Pearfection.

I then assembled the flowers and set those aside while I worked on the rest of the card. I used the Spellbinders Starshine Background and cut that from a panel of Neenah 110lb cardstock and trimmed that down ever so slightly. I started arranging the poinsettias and holly leaves atop the background panel and, of course, decided that I needed more leaves. I cut some leaves from the Spellbinders Club Blooms from the same green cardstock and a few from gold cardstock as well. Those green leaves got the same ink blending before moving on with wreath assembly.

I adhered the leaves in place first using liquid glue, then glued the larger flowers in place and then secured the smaller flowers with foam tape for a little added dimension. I then went back through and glued the tiny holly leaves, as well as the gold leaves in place.

Tracy-Ware-2024-Home for the Holidays

The sentiment is from the new Spellbinders Mistletoe Greetings BetterPress set, and that foiled using gold foil. This is a great set, because it creates several sentiments with one pass, and I just love sets like that! The sentiment was adhered atop the flowers using SSS 3D Foam Strips, and the entire panel was adhered to the card base with foam tape. I added a few clear drops for a bit of interest to finish up.

That does it for this one! I hope you enjoyed it, and I hope it inspires you to get crafty in your space! Don’t forget to check out the entire Home for the Holidays Collection over on the Spellbinders website! Thanks again for stopping by, and I hope you have a wonderful day!

Supplies

* Affiliate links used at no cost to you. What does this mean? If you use the links within this post to make a purchase, I receive a small commission, which allows me to continue to bring you crafty content for your enjoyment. I truly appreciate your support!

Latest Posts

Latest Instagram Posts