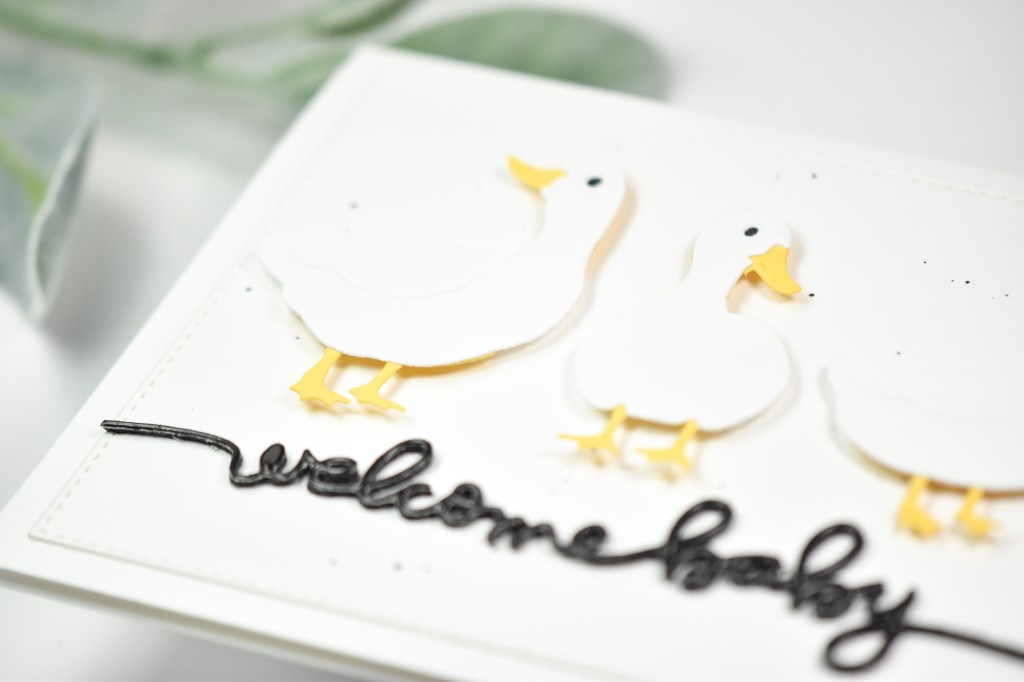
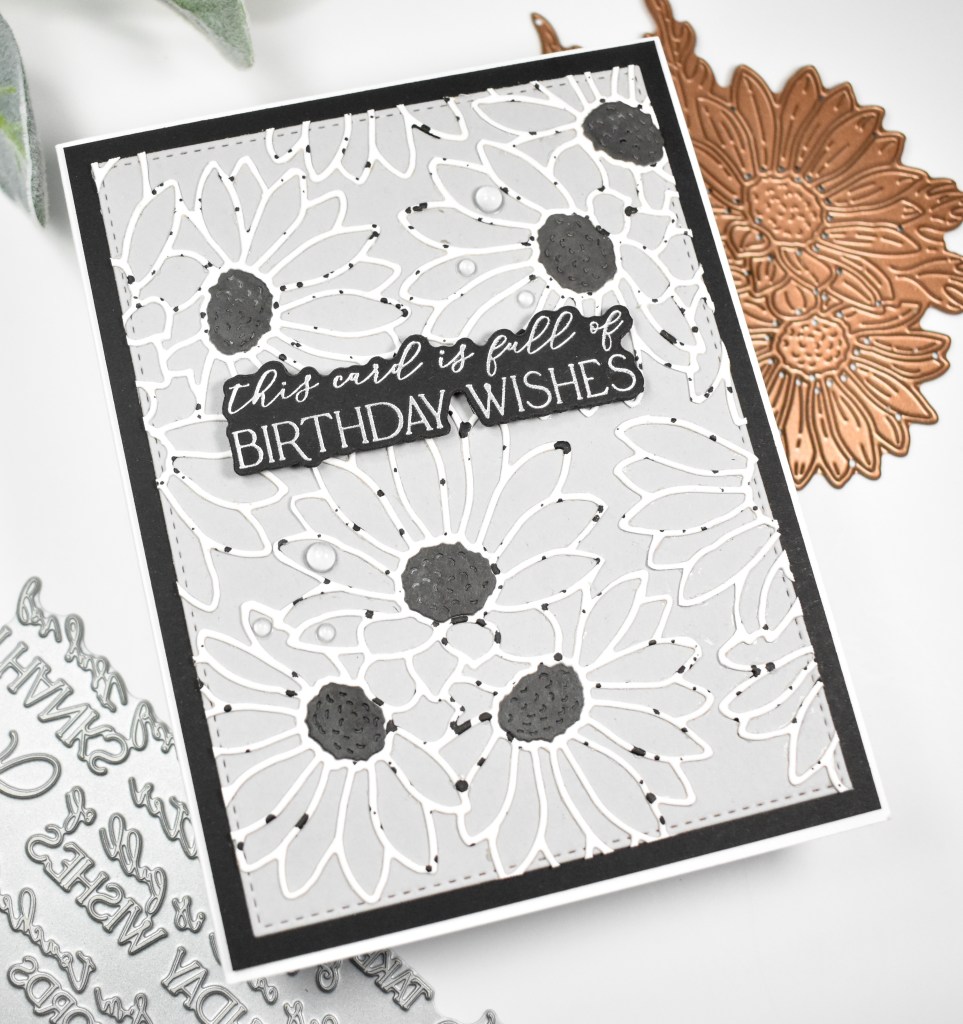
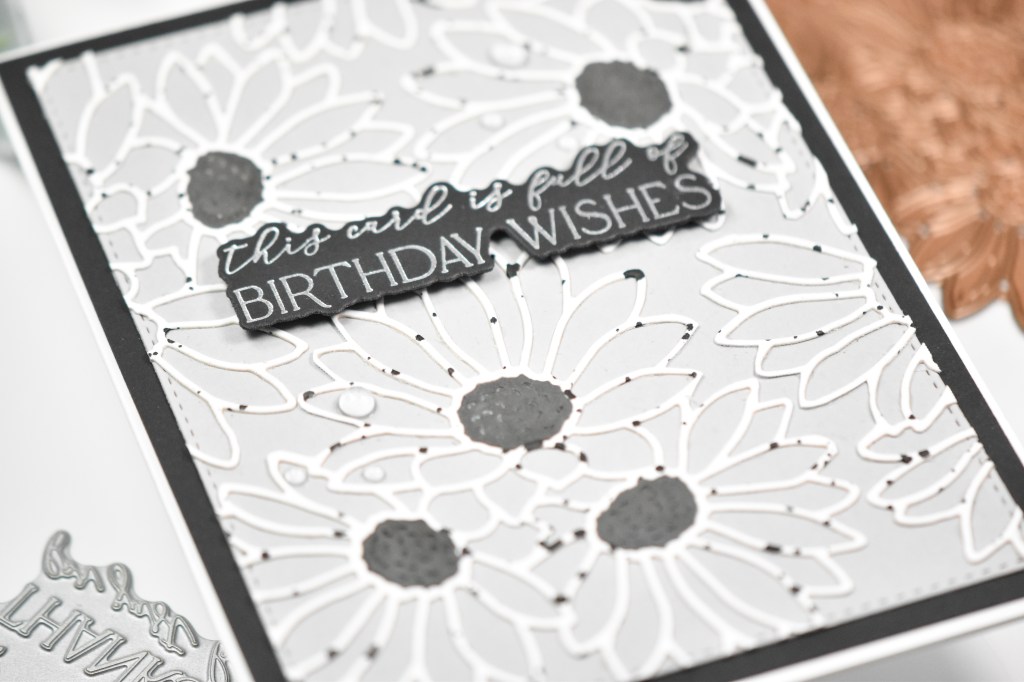
Spellbinders Floral Birthday Grid

Hello Friends, and welcome back! The May Spellbinders releases are live today, and I’m back with a project featuring the new Journal Grid along with the Anemone and Cosmos florals. Let’s run through the details for this one!
NOTE: all supplies are linked to multiple sources in the thumbnails at the end of this blog post.

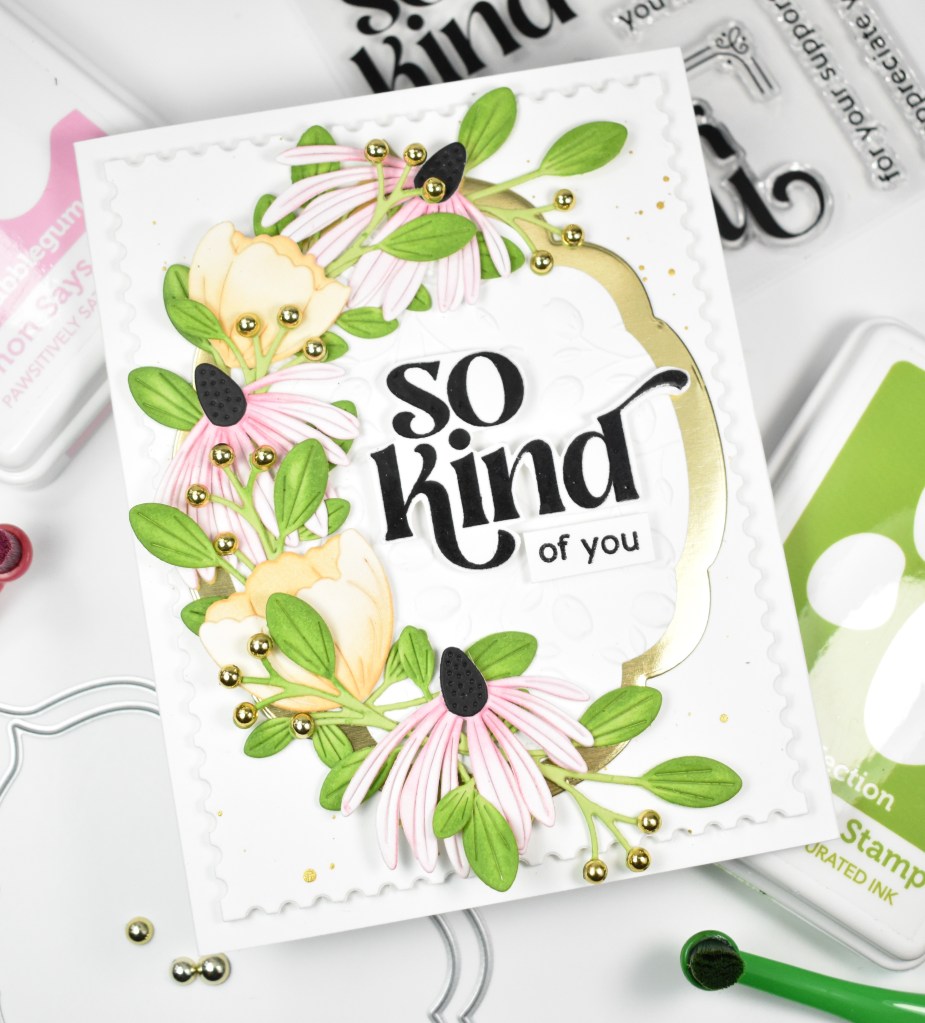
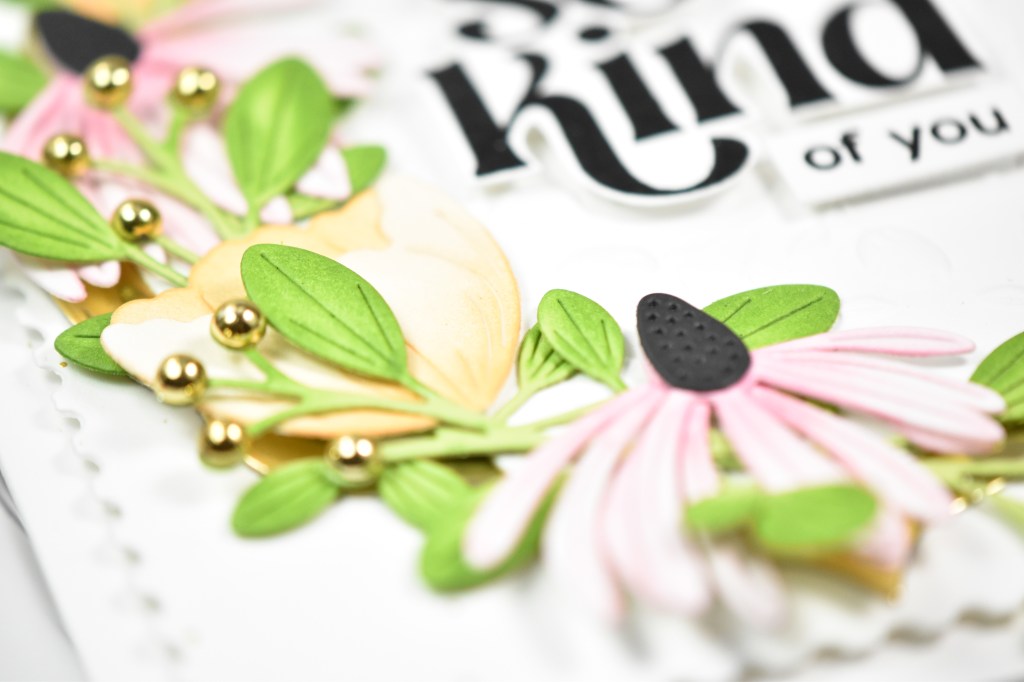
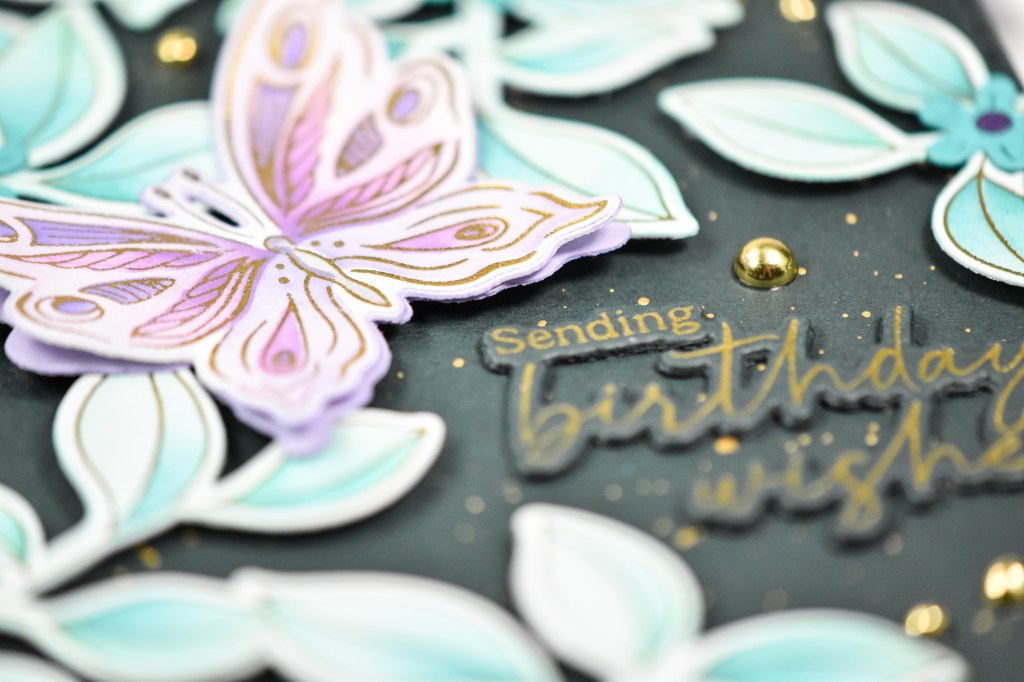
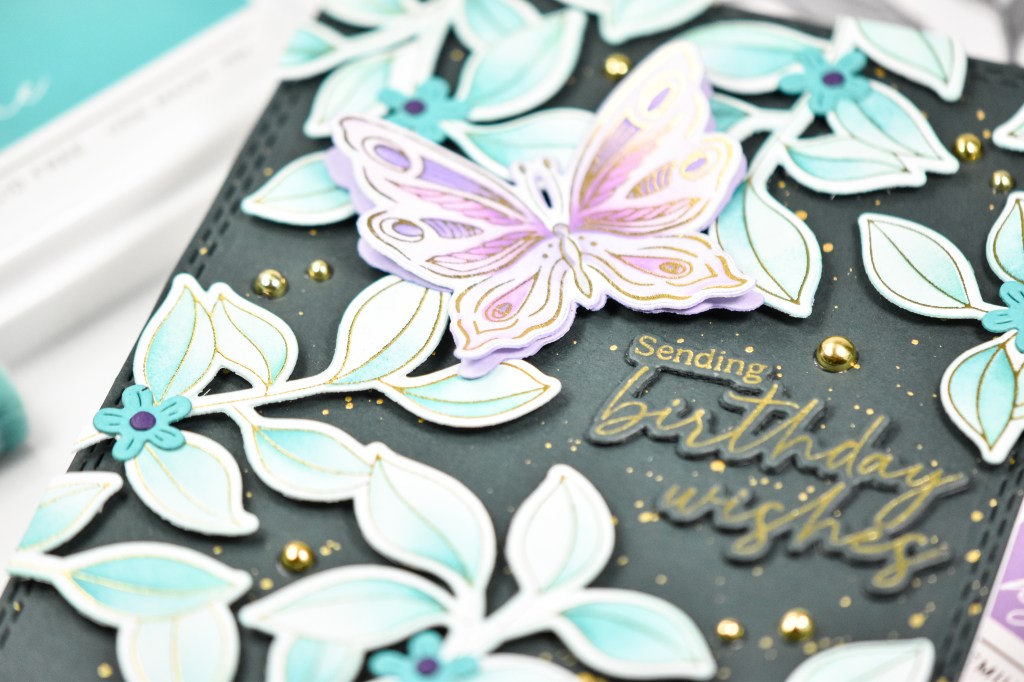
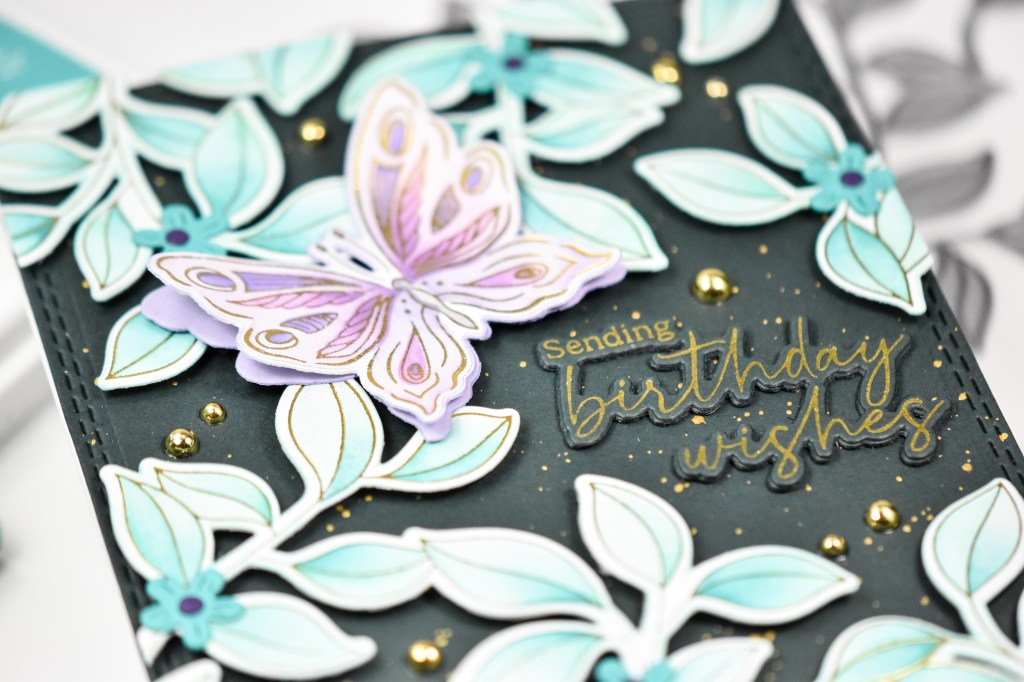
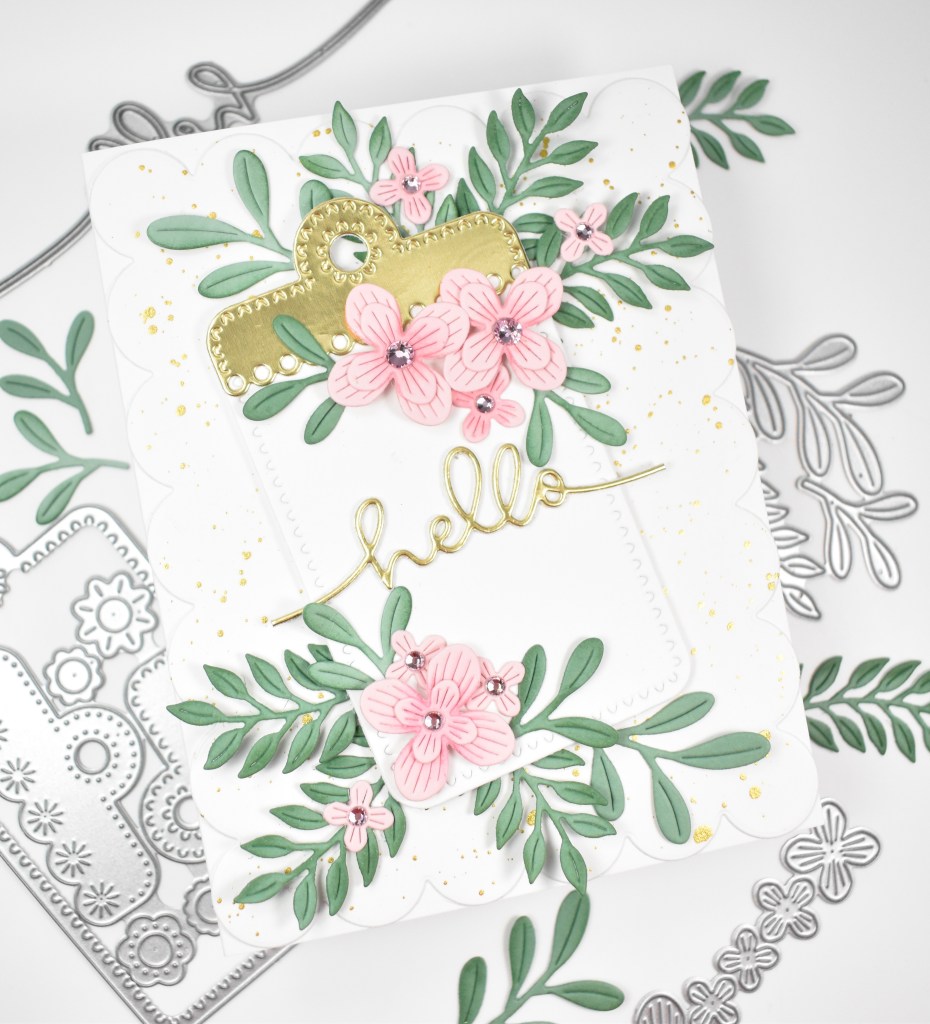
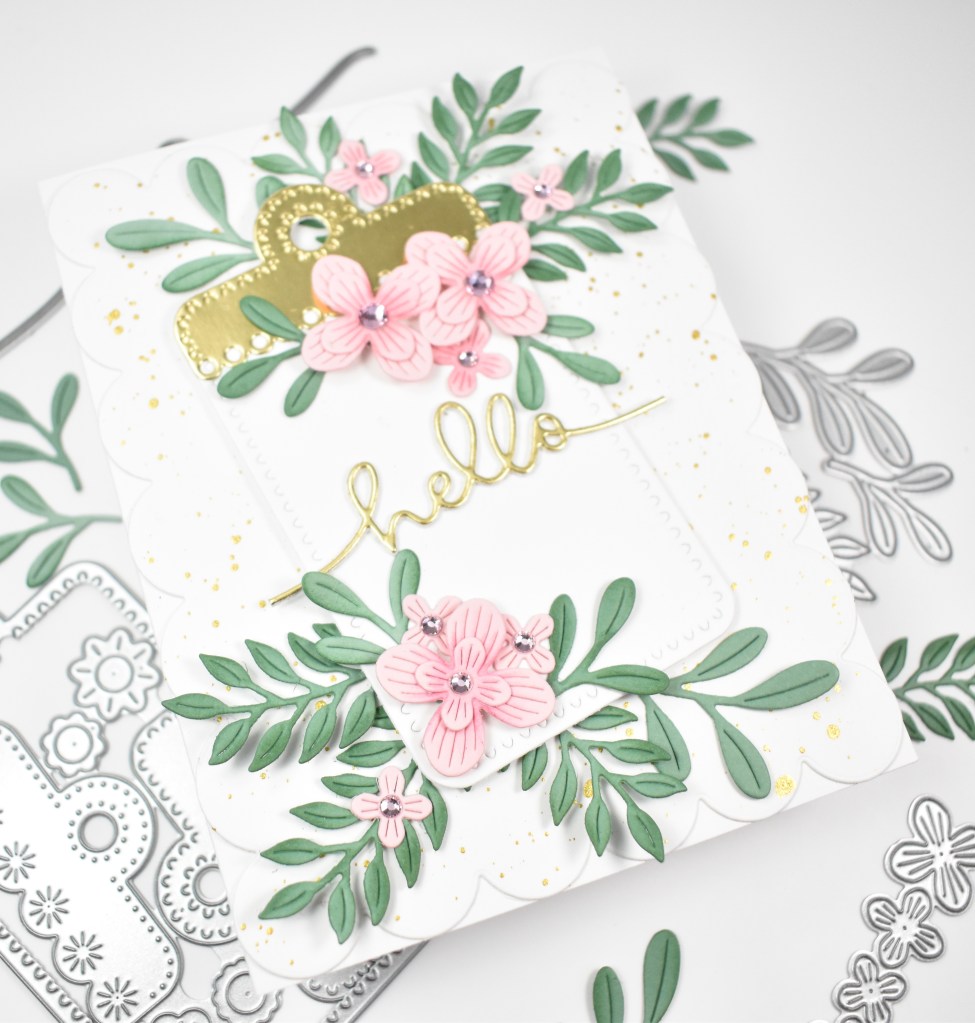
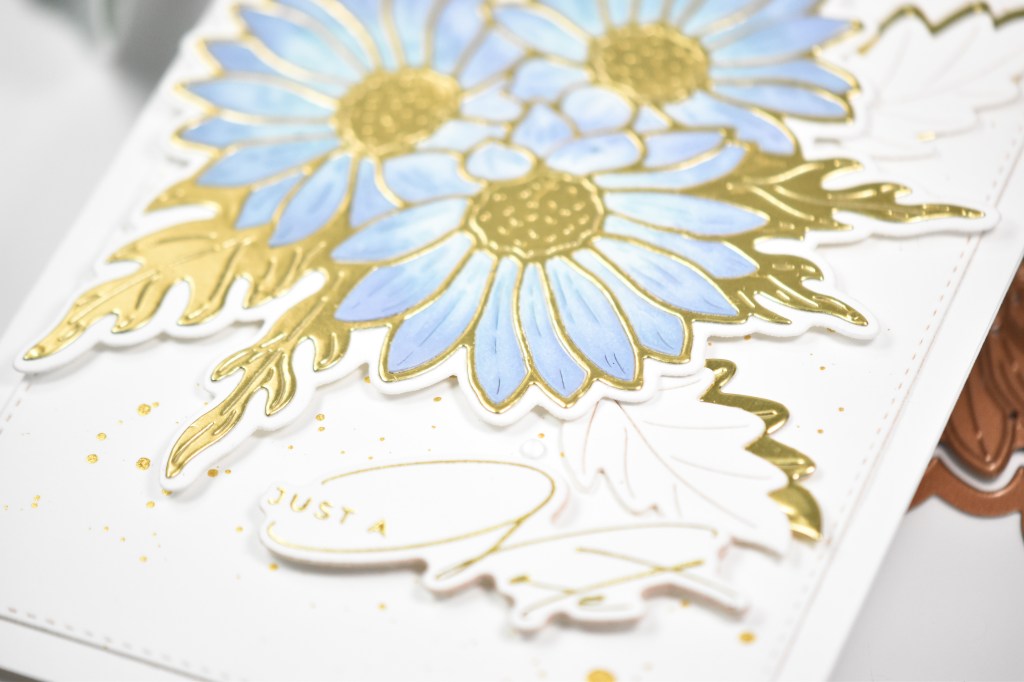
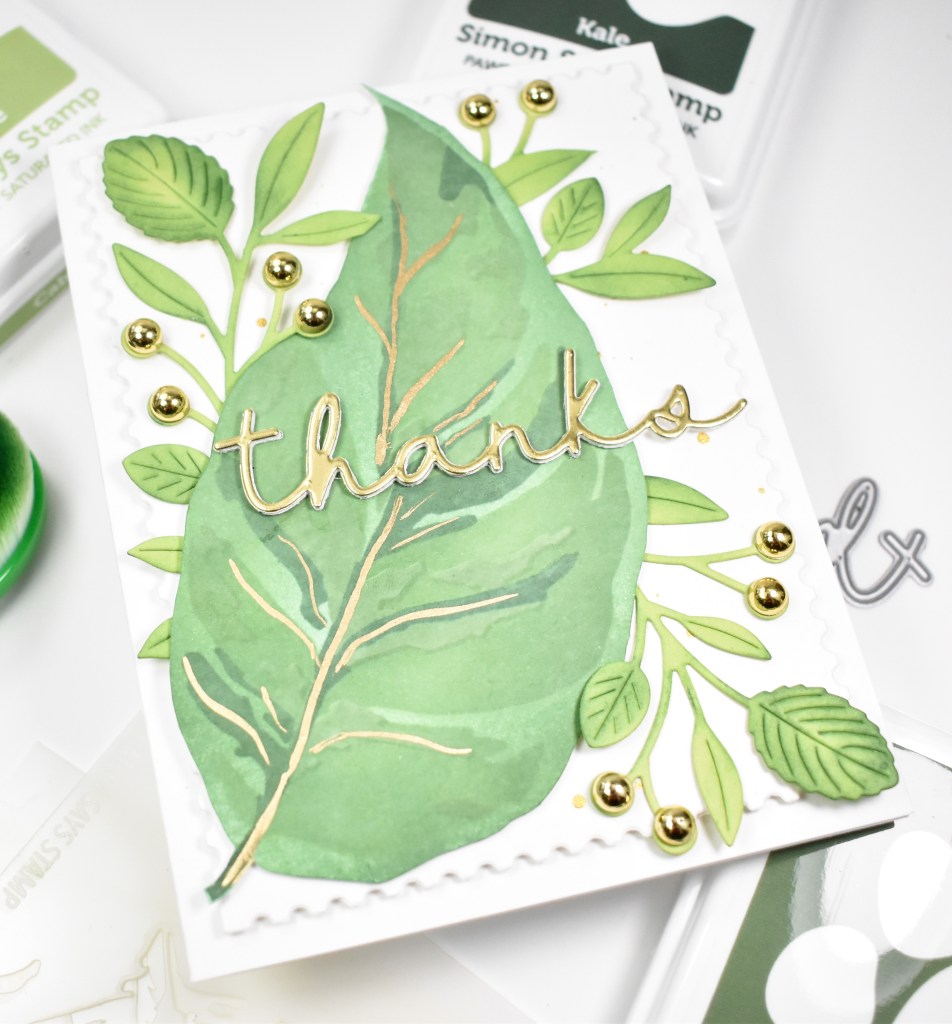
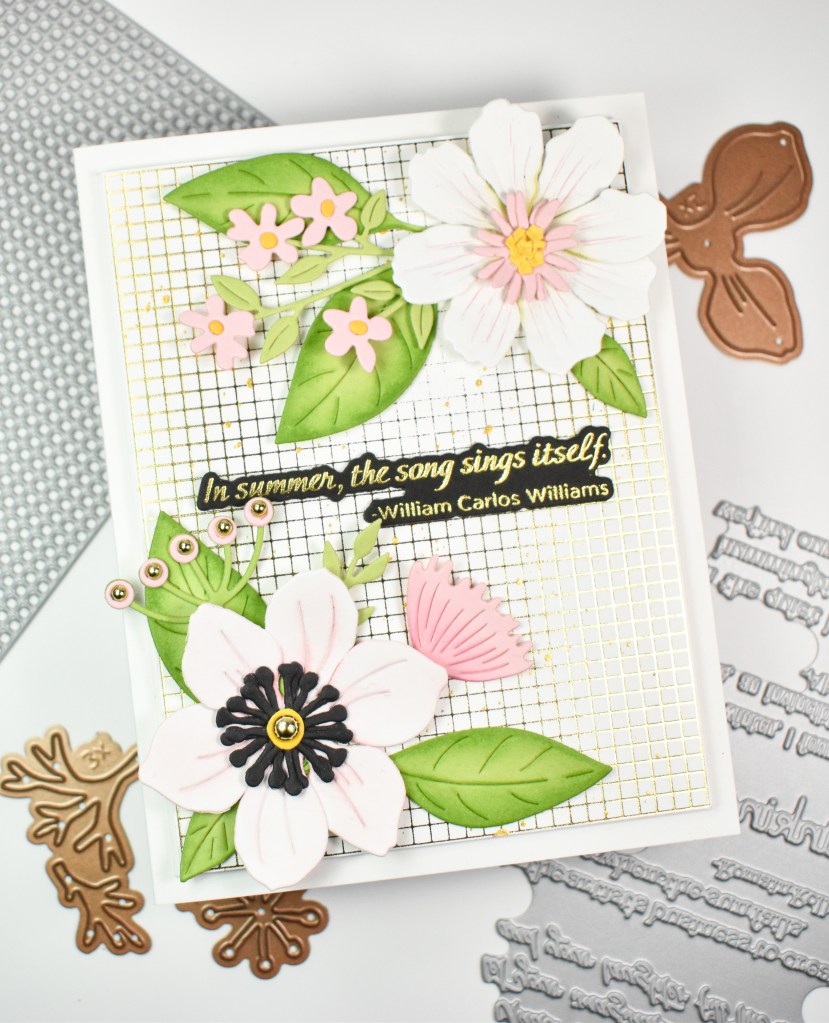
I began this project by die cutting the Anemone and Cosmos flowers from Neenah 110lb, pink, yellow and black cardstocks. I did some light ink blending on the flowers using Bubblegum ink. Once the ink blending was complete, I assembled the flowers using liquid glue and set those aside while I figured out the rest of the card.

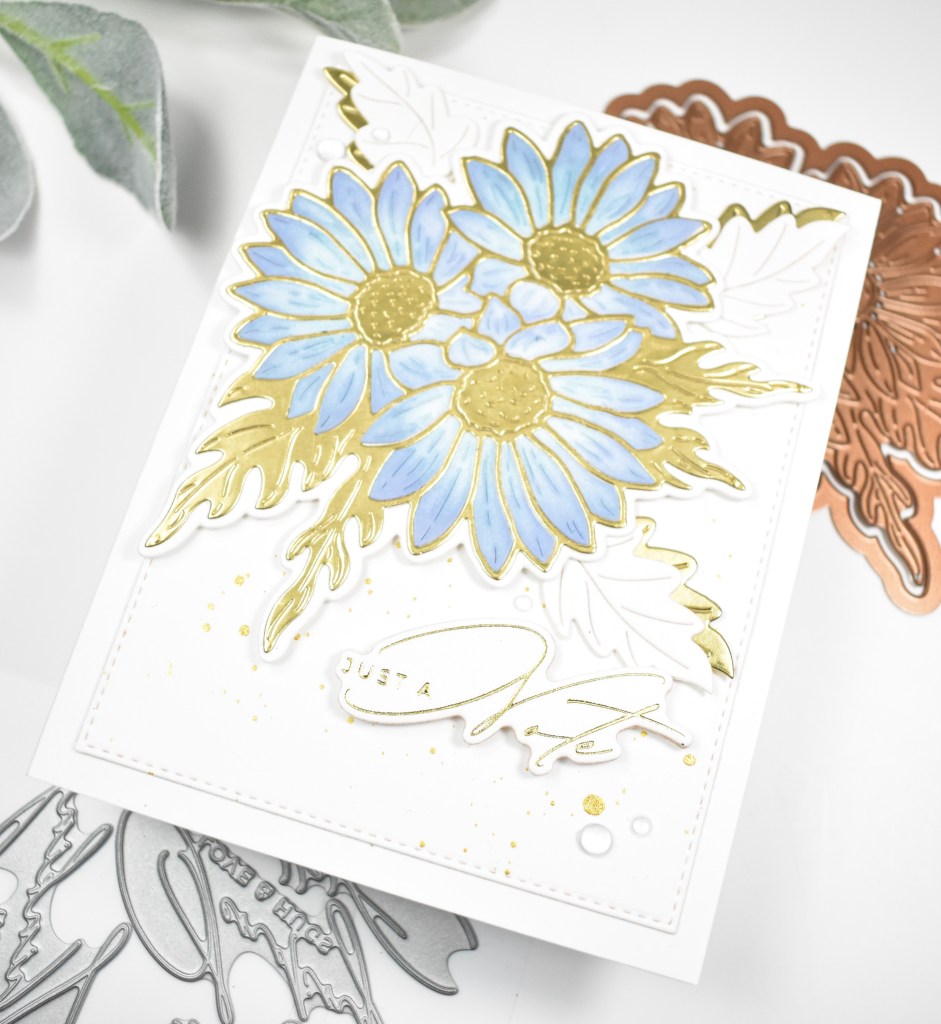
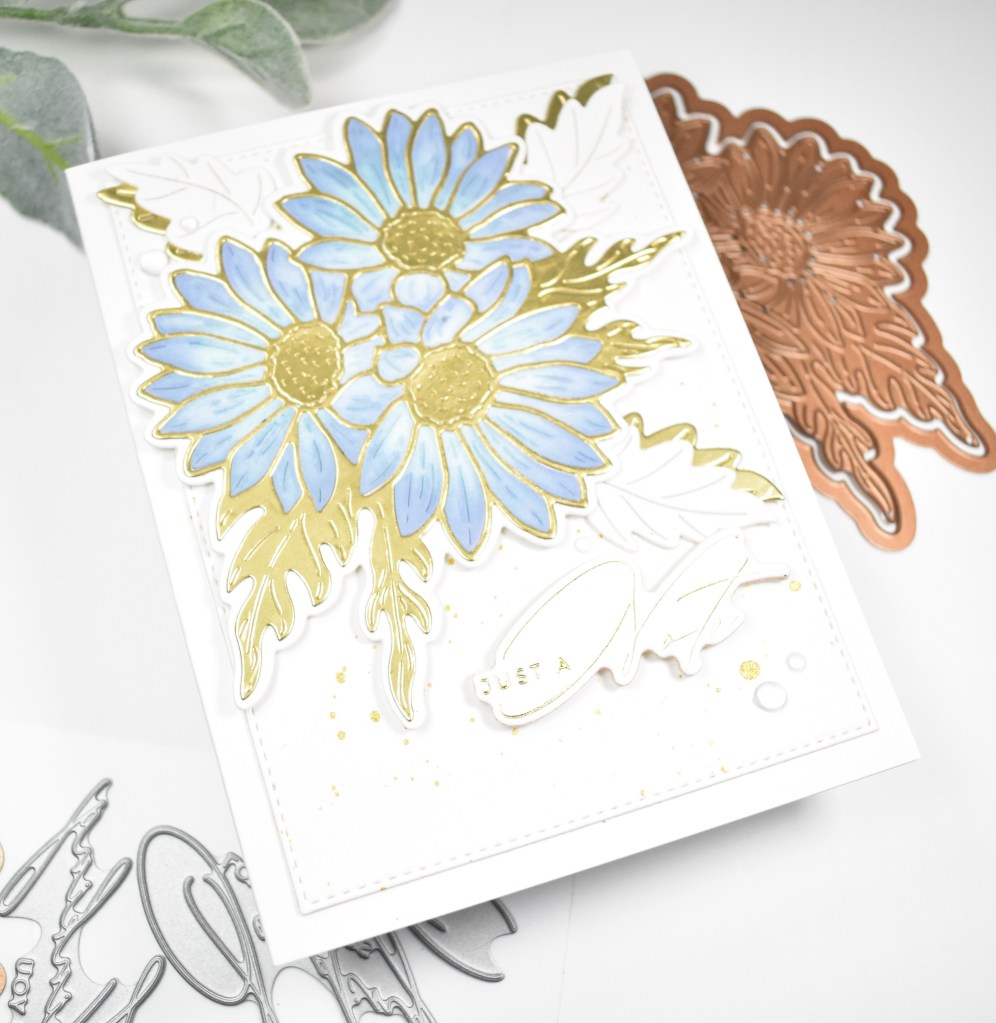
I went ahead and gold foiled the Journal Grid onto a panel of Neenah 110lb and added some gold splatter for additional interest. While I was foiling, I gold foiled the Summer Solstice Garden Sentiments onto black cardstock and trimmed that out with the coordinating die, along with two additional cuts for a stacked look.

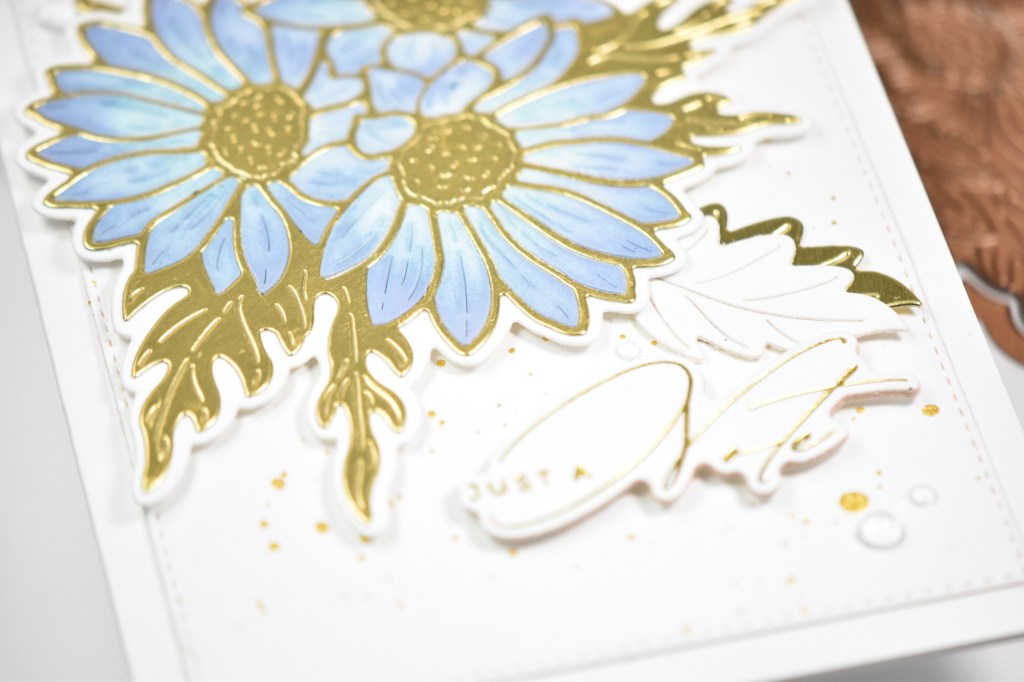
I adhered the grid to my card base using foam tape, and started playing around with placement. I decided that I need some other florals and leaves and cut those using Vivid Blooms and Sealed Wildflowers from pink, yellow and green cardstock. I did do some ink blending on one of the smaller flowers using Carnation ink and some Pearfection ink on the leaves.
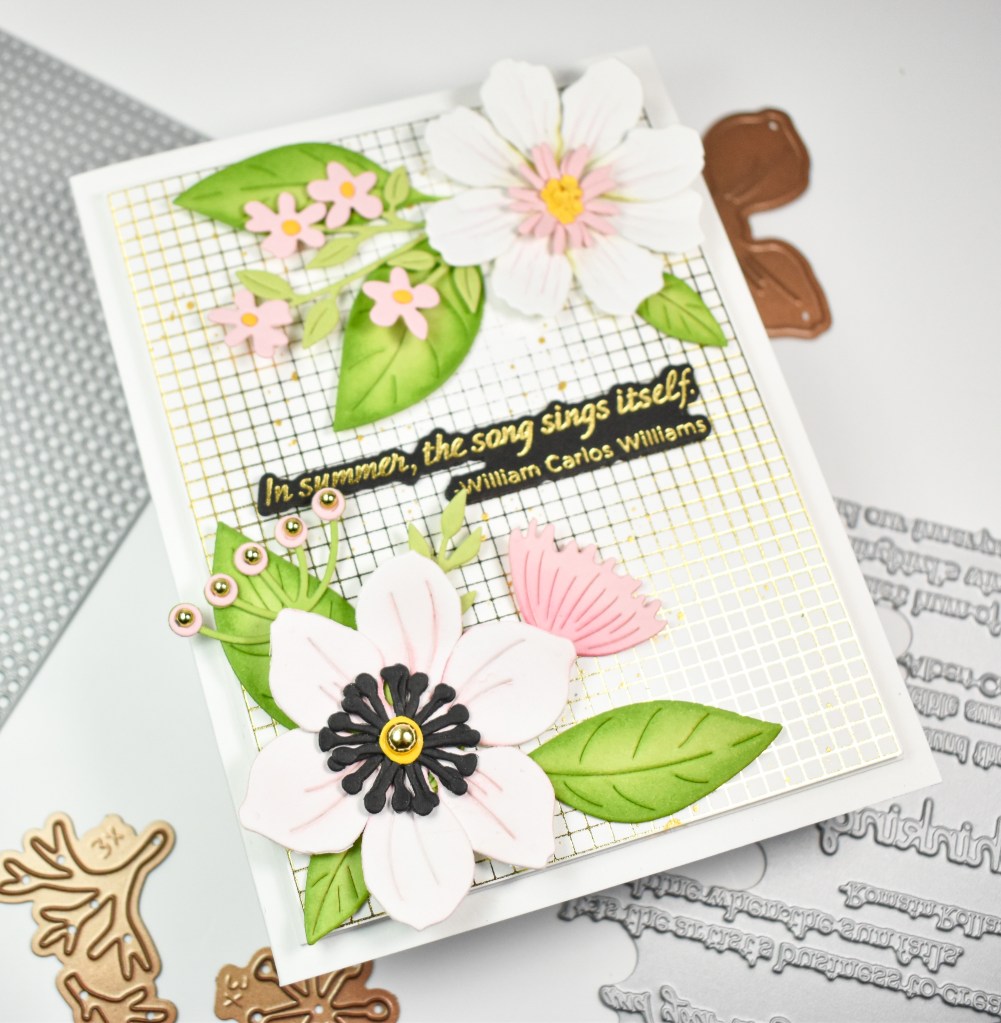
I secured the leaves in place on the panel using liquid glue, followed by the smaller flowers and then the larger flowers. The sentiment was glued in place, and I added some Gold Metallic Pearls to finish up.

That does it for this project! Everyone knows that I love florals, so I really enjoyed this project! I think that I’m going to get a lot of use out of this Grid Journal Press Plate, as you can use it with inks and foils, which I love! Don’t forget to head over to the Spellbinders website to check out all of the new releases! Thanks again for joining me, and I hope you have an awesome day!
Supply List
Affiliate links used at no cost to you. What does this mean? If you use the links within this post to make a purchase, I receive a small commission, which allows me to continue to post crafty content for your enjoyment. I truly appreciate your support!
Latest Posts
- Spellbinders Dear Santa Floral Letter
- Simon Says Stamp Grungy Dewdrop Daisy

- Simon Says Stamp Pastel Birthday Wishes

- Simon Says Stamp Best Fish

- Simon Says Stamp Circle Thanks

Latest Instagram Posts