Simon Says Stamp Wavy Circles Birthday

Hello Friends and thanks for stopping by! I hope you’re having a wonderful day! Today’s project is featuring the new Wavy Circles Background stamp along with the new Basic Box Card Happy Birthday. So let’s run through the details!

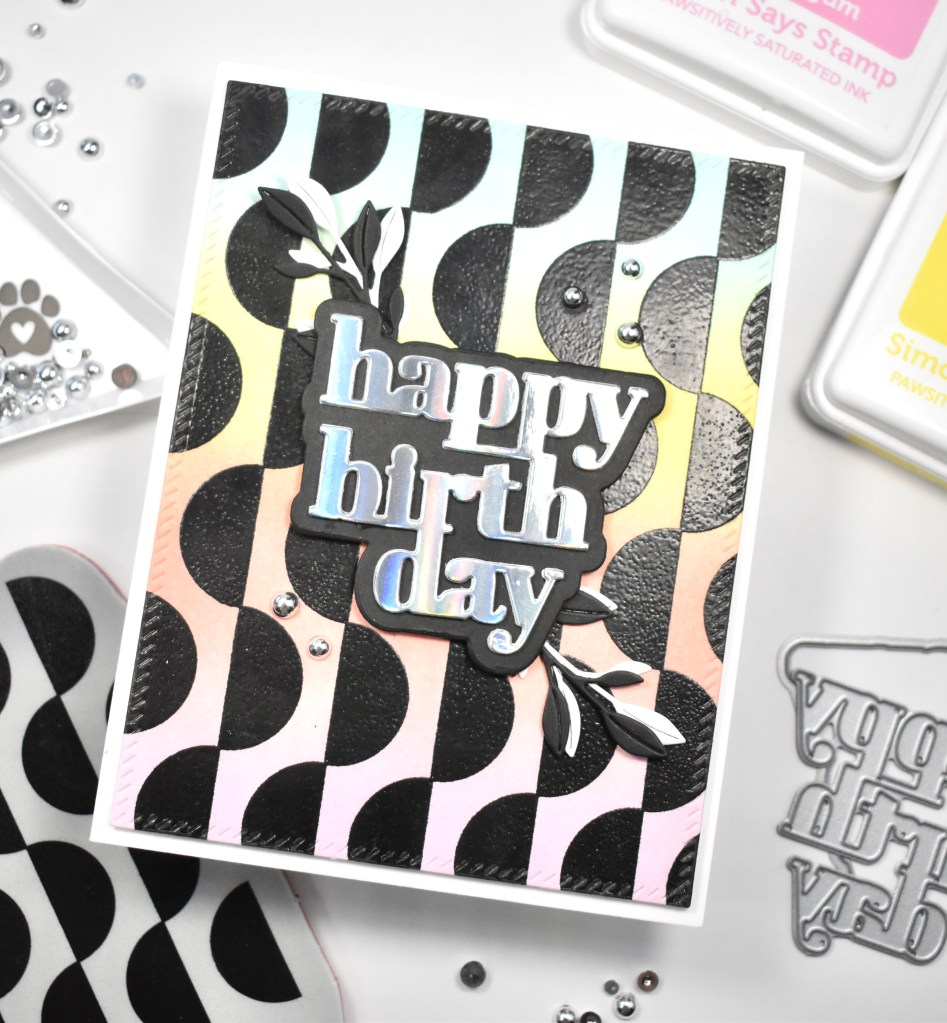
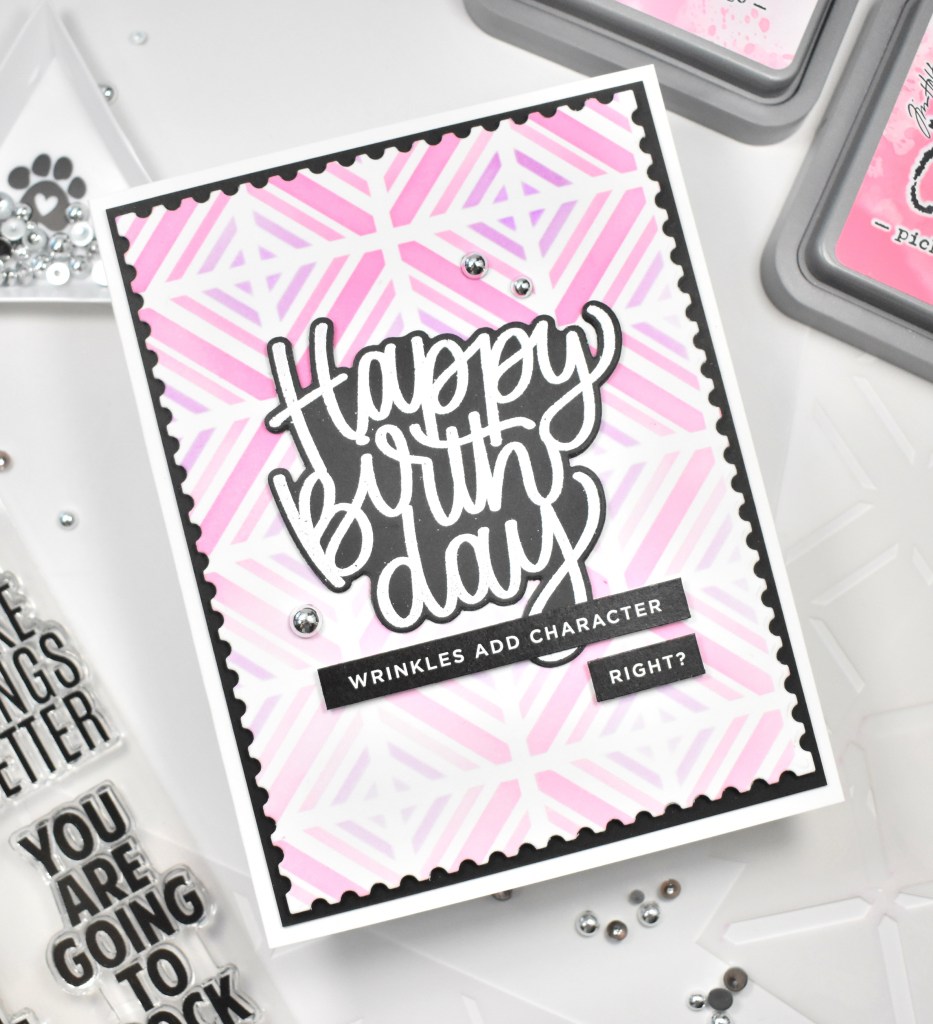
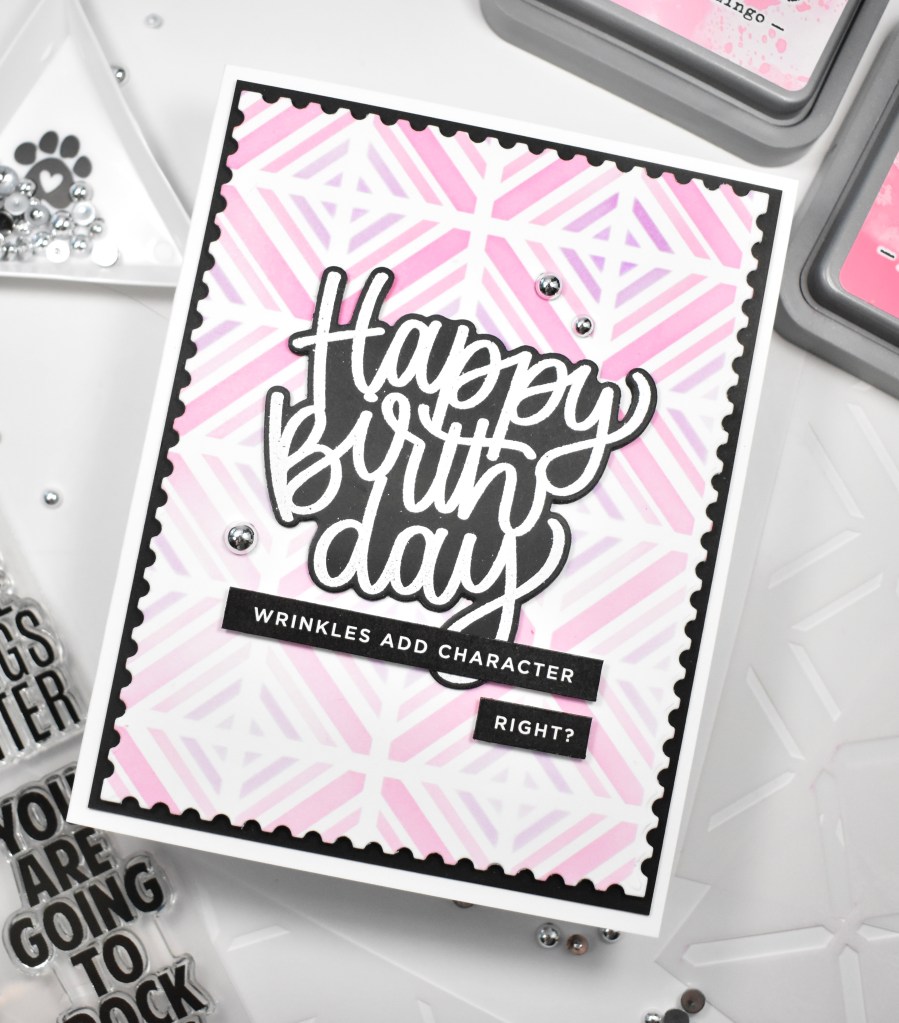
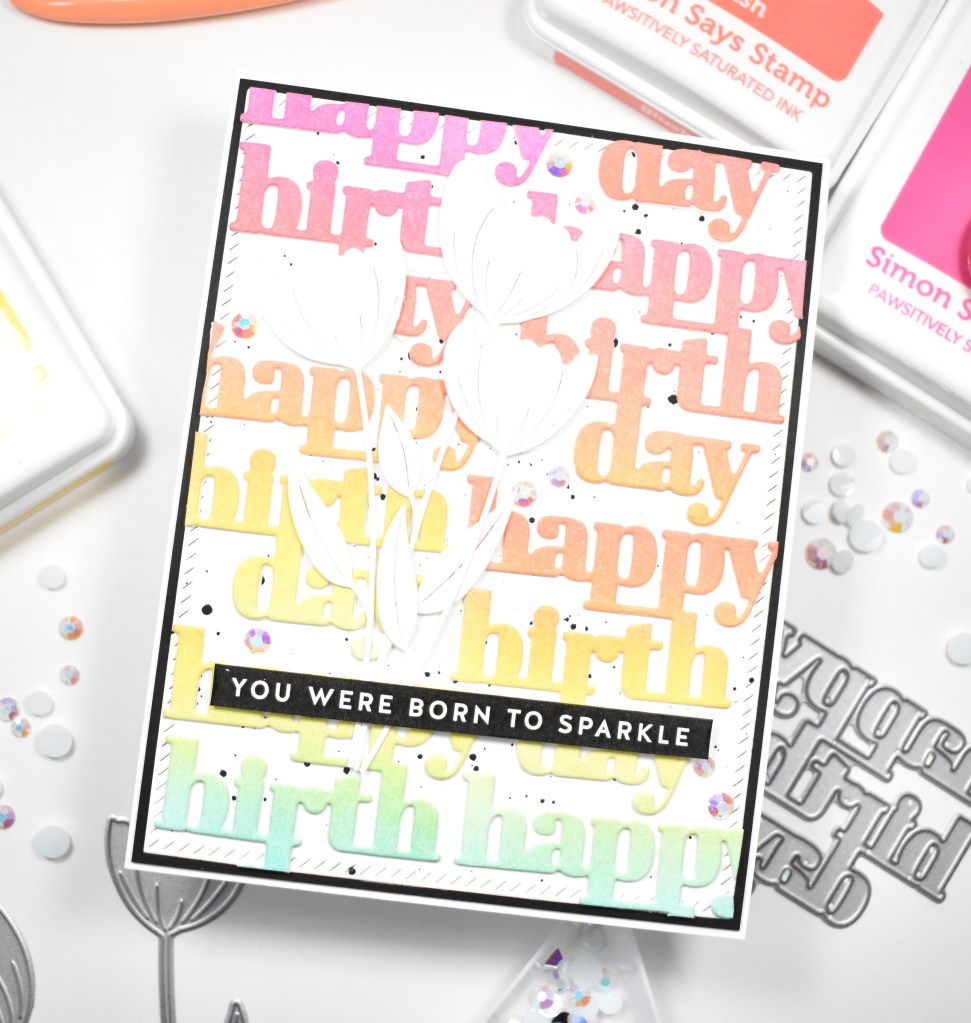
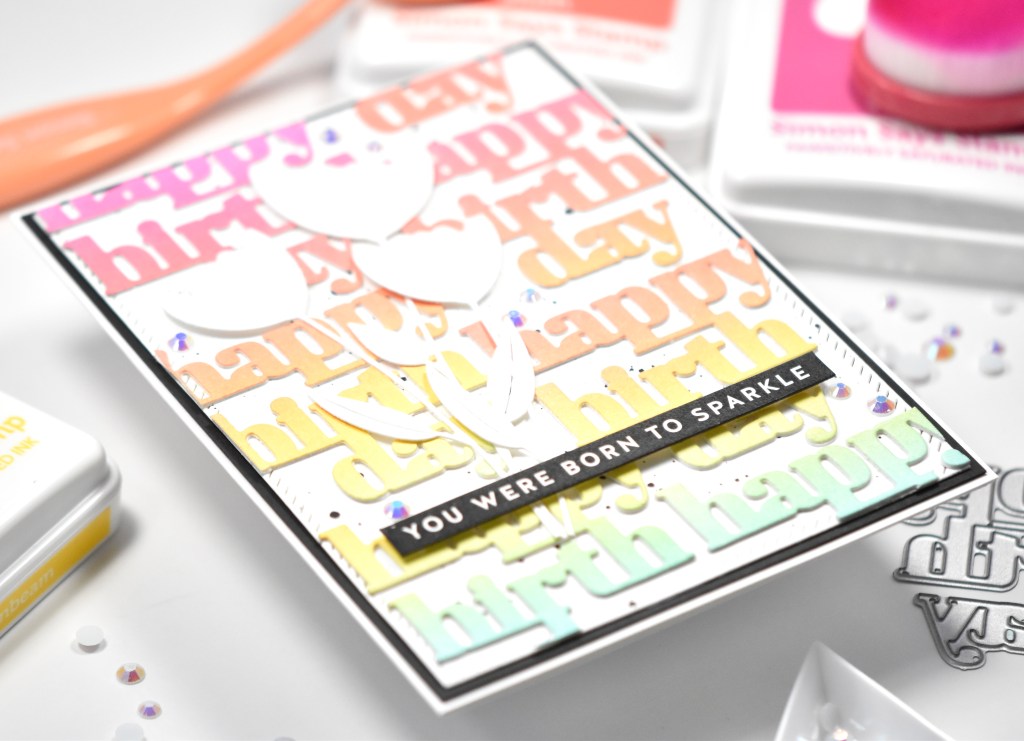
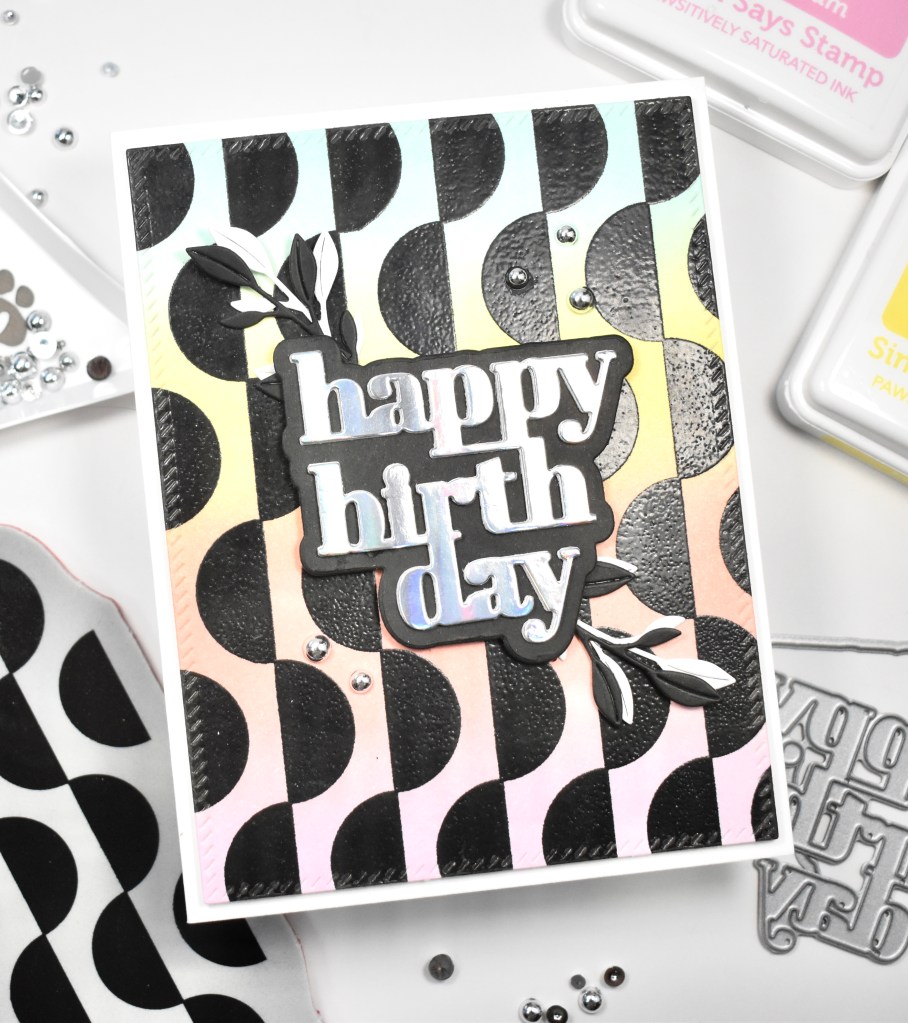
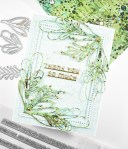
I began this project by stamping the SSS Wavy Circles Background on a panel of Neenah Classic Crest 110lb cardstock, using VersaFine Onyx Black ink and heat setting that with Ranger Clear Embossing Powder. Once that was complete, I did some ink blending using SSS Pawsitively Saturated Inks in Bubblegum, Cheeky, Lemonade and Seafoam. I trimmed the panel down using PinkFresh Studio Diagonal Stitched Rectangles.

I used the new SSS Basic Box Card Happy Birthday for the sentiment, and trimmed that once from SSS Holographic cardstock and twice from Neenah 110lb cardstock. I trimmed the shadow portion twice from black cardstock and adhered all of those together using liquid glue.

The card needed something behind the sentiment in my opinion, so I opted for some leaves from the SSS Etched Meadow Flowers and Leaves. I cut those from some Neenah 110lb, as well as, some black cardstock and tucked those underneath the sentiment. The sentiment was adhered to the panel with foam tape for some added dimension.

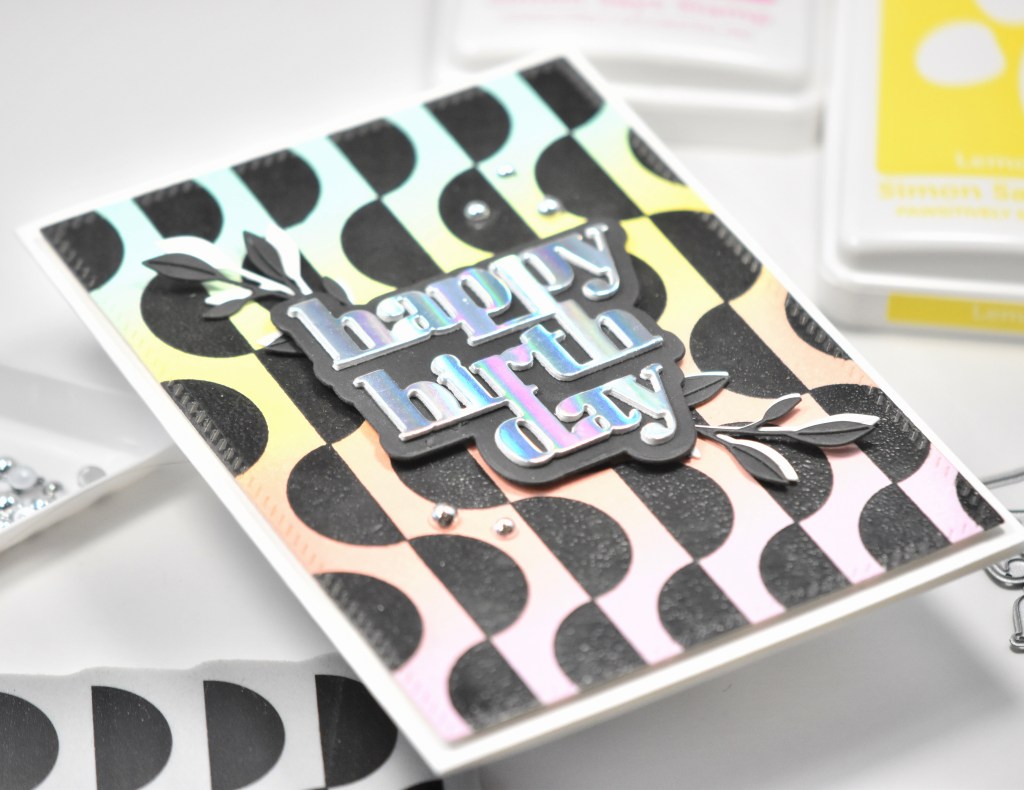
My panel was also adhered to the card base using foam tape, before adding some PinkFresh Studio Silver Metallic Pearls to finish up.

That does it for today’s project! I hope you enjoyed it and I hope it inspires you to get crafty! Have a wonderful day and don’t forget to stay awesome!

Supply List:

* Affiliate links used at no cost to you. Thanks so much for your support!

Latest Instagram Posts

Simon Says Stamp Glitzy Thank You

Hello Crafty Lovelies! I hope you’re having a great day! Thanks for stopping by to check out my project today featuring the new Radiating Squares Stencil set from Simon Says Stamp’s newest release, Good Luck Charm. Let’s go through the details.

I began this project by adhering my first stencil to a panel of Neenah Classic Crest 110lb cardstock using masking tape. There are four stencils in this set, so I pulled four PinkFresh Studio inks in Raspberry Bliss, Apricot, Lemon Whip, and Aquamarine, and began ink blending. I used a different ink for each stencil and made my way through the stencils.

To be honest, I messed up this panel, hence having to trim it down so small. But, mistakes happen, and you just have to roll with them! I wanted to add some glitz, so I adhered one of the stencils and used some Iridescent Gina K Glitz Glitter Gel. Once that was dry, I used a frame from the Honey Bee Scallop A2 Frames set to trim it down. I got a little ink out of place on the bottom corner, so I opted for the smaller size. I used another frame from the same set to cut a larger panel and adhered those together using SSS Dot Tape Runner.

I die cut the SSS Swoopy Thank You once from gold mirror cardstock and once from black cardstock, adhering those together with liquid glue. I also die cut the shadow twice from black cardstock and adhered those together as well. Once the sentiment was assembled, I placed foam tape on the back of that and placed it towards the bottom of the panel.

The card needed something in the middle of the squares, so I adhered some PinkFresh Studio Gold Metallic Pearls, before adhering everything to the card base.

That finishes up this project! I hope you enjoyed it and I hope it inspires you to get crafty! I was worried that I was going to have to trash this panel because of my mistake, but I worked through it and ended up with a cool card! Don’t forget to check out the entire Good Luck Charm release! There’s so many fun things in this release. Have a wonderful day and stay awesome!

Supply List:

Latest Instagram Posts

Simon Says Stamp Birthday Wrinkles

Hello Crafty Friends! Thanks so much for stopping by for today’s project featuring the Radiating Squares Stencil set from Simon Says Stamp’s newest release, Good Luck Charm! Have you checked out the release yet? I love sentiment sets, so I was thrilled to see a few of those in this release! Let’s get to the details!

I began this project by adhering the first stencil to a panel of Neenah Classic Crest 110lb cardstock using masking tape. There are a total of four stencils in this set, so I pulled out four inks for the ink blending. I ended up using Distress Oxide inks in Picked Raspberry and Kitsch Flamingo, as well as, PinkFresh Studio inks in Candy Violet and Lavender. For the ink blending, I used a heavier hand at the top and a lighter hand near the bottom creating that ombre look. I used a different ink for each stencil layer and just made my way through the stencils.

Once the ink blending was done, I trimmed the panel using the SSS Postage Stamp Edge Frames and set that aside while I worked on the remainder of the card. I stamped the Happy Birthday sentiment, which is from the SSS XL Greetings 3 set, onto black cardstock using VersaMark ink and heat set that using SSS Detail White Embossing Powder. I used the coordinating die to trim that out, along with two additional dies and adhered all of those together using liquid glue.

I wanted to add a sub-sentiment, so I found a SSS Sentiment Strip that I thought would work. I adhered the main sentiment to the panel using glue and adhered the sub-sentiments using foam tape for dimension.

The ink blended panel was then adhered to a black panel using foam tape, and everything was then adhered to the card base using SSS Dot Tape Runner. No card is complete without bling, so I added a few PinkFresh Studio Silver Metallic Pearls to finish it up!

That wraps up this project! I hope you enjoyed it, and I hope it inspires you to get crafty! Don’t forget to check out the entire Good Luck Charm release, there’s so many fun things! Have a wonderful day and stay awesome!

Supply List:

* Affiliate links used at no cost to you. Thanks so much for your support!

Latest Instagram Posts

Simon Says Stamp Spring Stems

Hello and welcome back! Thanks so much for stopping by to check out another project featuring the new Spring Stems stamp set from Simon Says Stamp’s newest release, Good Luck Charm! This release is so much fun, and I’ve loved playing with the goodies that I received! Let’s go through the details for today’s project!

I began this project by stamping the floral images from the new SSS Spring Stems stamp set onto Neenah Classic Crest 110lb cardstock using VersaFine Onyx Black Ink and heat setting it using Ranger Clear Embossing Powder. I used Copic markers in Y02, Y08, Y15, Y17, YR24, G43 and G94 to add color to the flowers and leaves. Once that was done, I fussy cut the images and placed foam tape on the back of one of them.

For the background, I used the SSS Detail Pincushion Plate and a panel of SSS blue cardstock. I wanted an ombre blue background, so I used SSS Pawsitively Saturated Ink in Marine and Cadette and did some ink blending on the blue cardstock. I adhered the pincushion panel to the blue panel using liquid glue.

For the sentiment, I used SSS Silhouette Sentiments stamp set. I stamped the thinking of you on black cardstock using VersaMark Ink and heat set that using SSS Detail White Embossing Powder, trimming that out with the coordinating die when finished.

I adhered one flower set directly atop the pincushion background using glue, while adhering the other with foam tape for dimension. I also placed foam tape on the sentiment and adhered that as well. Everything was then adhered to the card base using SSS Dot Tape Runner, and I added some pearls to finish it up!

I hope you enjoyed this project and I hope you’ll stop by and take a look at the entire Good Luck Charm release! Have a fabulous day and don’t forget to stay awesome!

Supply List:

* Affiliate links used at no cost to you. Thank you so much for your support!

Latest Instagram Posts

Simon Says Stamp Birthday Background

Hello Crafty Friends and welcome to another Simon Says Stamp release! Good Luck Charm is live and ready for your viewing pleasure! My project today is featuring the new Basic Box Card Happy Birthday. Let’s run through the details, shall we?

I’ve really enjoyed making backgrounds with sentiments lately, so I decided to hop on that bandwagon again for this one! It’s such a great way to stretch those sentiment dies, or even just stand alone dies! Anyhoo, I began this project by ink blending a large panel of Neenah Classic Crest 110lb cardstock using SSS Pawsitively Saturated Inks in Sweets, Blush, Sunshine and Surf. Once that was done, I die cut enough sentiments to cover an A2 card panel. I also cut them a second time for stacking purposes, and adhered them together using liquid glue.

I cut another panel of Neenah 110lb cardstock using the PFS Diagonal Stitched Rectangles and splattered that using Royal Talens Amsterdam Oxide Black Acrylic Ink. You guys know how much I love my black splatter! Once that panel was dry, I began adhering the sentiments in rainbow order using liquid glue.

Because the background was so colorful, I decided to downplay the floral elements by cutting the SSS Etched Crocus Stems from Neenah 110lb cardstock and leaving those white. I adhered the background panel to a black panel using SSS Dot Tape Runner and I adhered the flowers using glue. I found a coordinating SSS Sentiment Strip and adhered that over the stems using foam tape for dimension.

Everything was then adhered to the card base, and I added some PFS Jewels to finish it up with some bling.

I hope you enjoyed this project! Take a look at your dies and see what kind of background that you can make, and stretch those supplies! Stop by and check out the entire Good Luck Charm release and let me know your favorites! Have a wonderful day and don’t forget to stay awesome!

Supply List:

* Affiliate links used at no cost to you. Thanks so much for your support!

Latest Instagram Posts

Alex Syberia Design February Release

Hello Crafty Friends! Thanks so much for stopping by! Today, the design team is celebrating Alex’s new release with an Instagram hop, so be sure to head over there to check that out! She’s giving away a $15 gift card for her shop to three lucky commenters, so hop along for your chance to win! Let’s get into the details for my card today!

I began this project by printing the Tulip Close Up on some Neenah Classic Crest 110lb cardstock. I don’t use fancy software because I’m so not tech savvy. I just use Pages on my MacBook and resize the image to whatever size I’m looking for, and sometimes I tone down the opacity as I did for this image. That allows you to get a more no-line look, if you’re into that.

Once printed, I began coloring the image using Copic markers RV91, RV93, RV95, R56, BG93, BG96, BG99, N0 and N2. This is such a beautiful combination of pinks and reds, and definitely a go-to combo for me. When I was done coloring, I fussy cut the image and set it aside while I worked on the remainder of the card.

I’ve done a card like this before for Alex, and wanted to recreate that, so I pulled out this patterned paper, which is from the Wandering Ivy Collection from KaiserCraft and trimmed it down. For the sentiment, I decided to use the Thanks from PinkFresh Studio Fancy Script Words set. I hot foiled the sentiment using Spellbinders Champagne foil onto black cardstock and used the coordinating die set to trim that out. I did cut two more blank sentiments and adhered all of those together using liquid glue.

I applied foam tape to the tulips and adhered those to the text background, which I splattered using Royal Talens Oxide Black Acrylic Ink, trimming off any excess of the flowers. After those were on, I used the Copic markers in N0 and N2 to add shadows around the flowers. The text panel was then adhered to a black panel using SSS Dot Tape Runner, and that was then adhered to the card base. I adhered the sentiment using a combination of foam tape and liquid glue, and also added a few black jewels to finish up.

That does it for this project! I hope you enjoyed it, and I hope you’ll head over to Instagram to participate in the hop! Don’t forget to check out all of Alex’s new images over in her Etsy shop! Have a wonderful day and stay awesome!

Supply List:

* Some affiliate links used at no cost to you. Thanks so much for your support!

Latest Instagram Posts