Simon Says Stamp Snowy Plaque Slide

Hello Friends, and welcome back! It’s been a little bit! I was super busy creating for the STAMPtember collab sets, and took a smidge of a break. I’m back today with a card featuring the new Plaque Slides from Simon’s latest release, Sugar & Spice. Let’s get to the details!

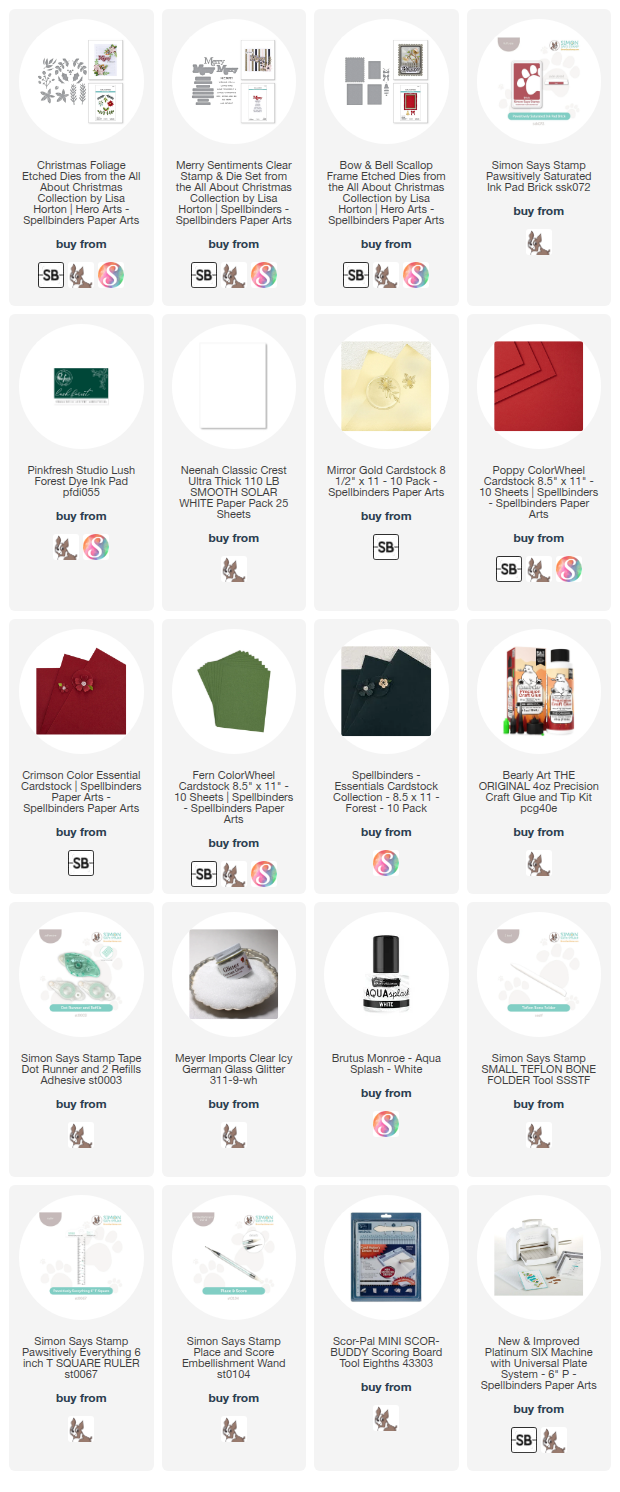
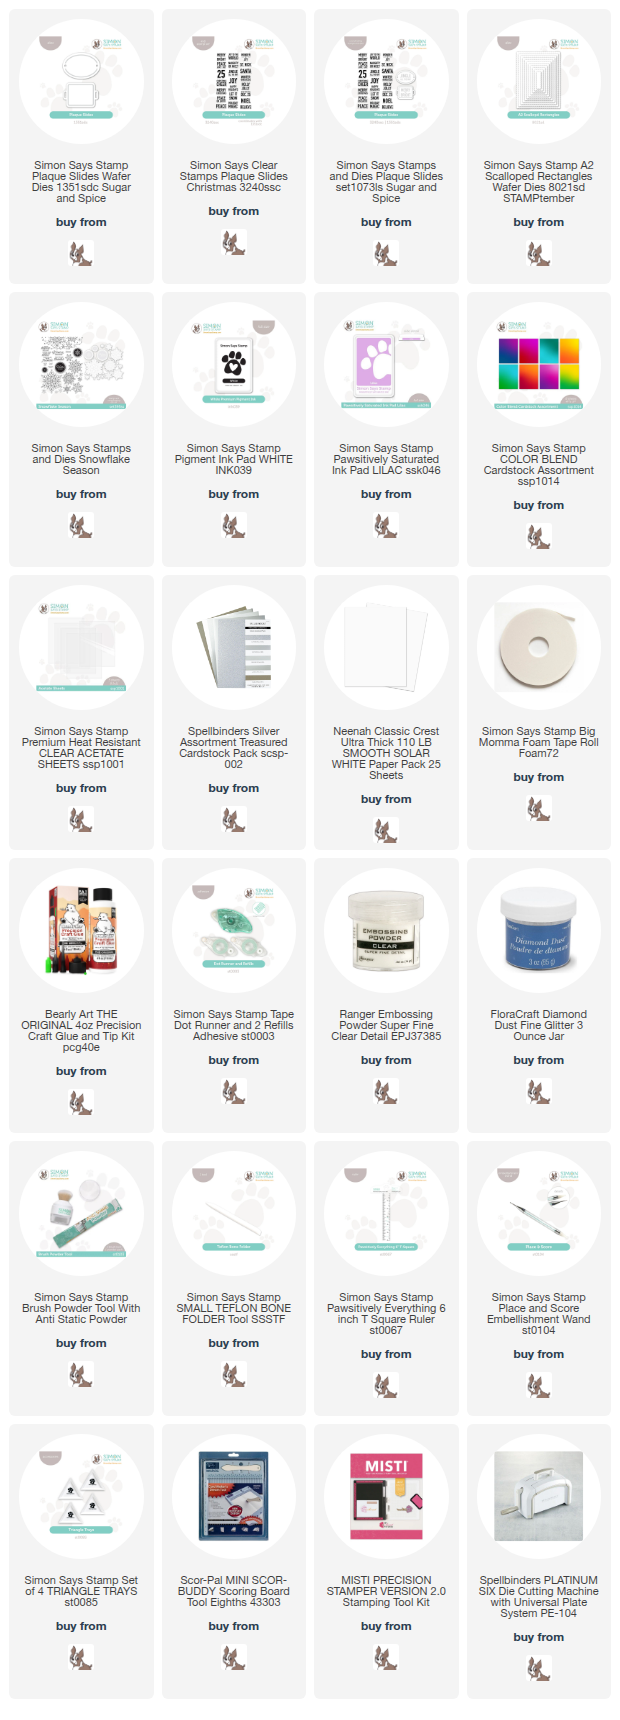
NOTE: all supplies are linked in the thumbnails at the end of this blog post.

I went into this project knowing that I wanted to make a shaker card, so I used the A2 Scalloped Rectangles to cut the frame. I then used snowflakes from the Snowflake Season set to stamp onto acetate using white ink and heat embossed using clear embossing powder. For the background, I remembered that I had some Color Blend Cardstock hanging around, so I also cut that using the A2 Scalloped Rectangles.

The slide was created using silver cardstock and the new Plaque Slides die cut along with the new Plaque Slides Christmas stamp set. I used the same white ink and embossing powder for the sentiment. I wanted the slide to be a bit more sturdy, so I cut it an additional four times from Neenah and glued all of those together.
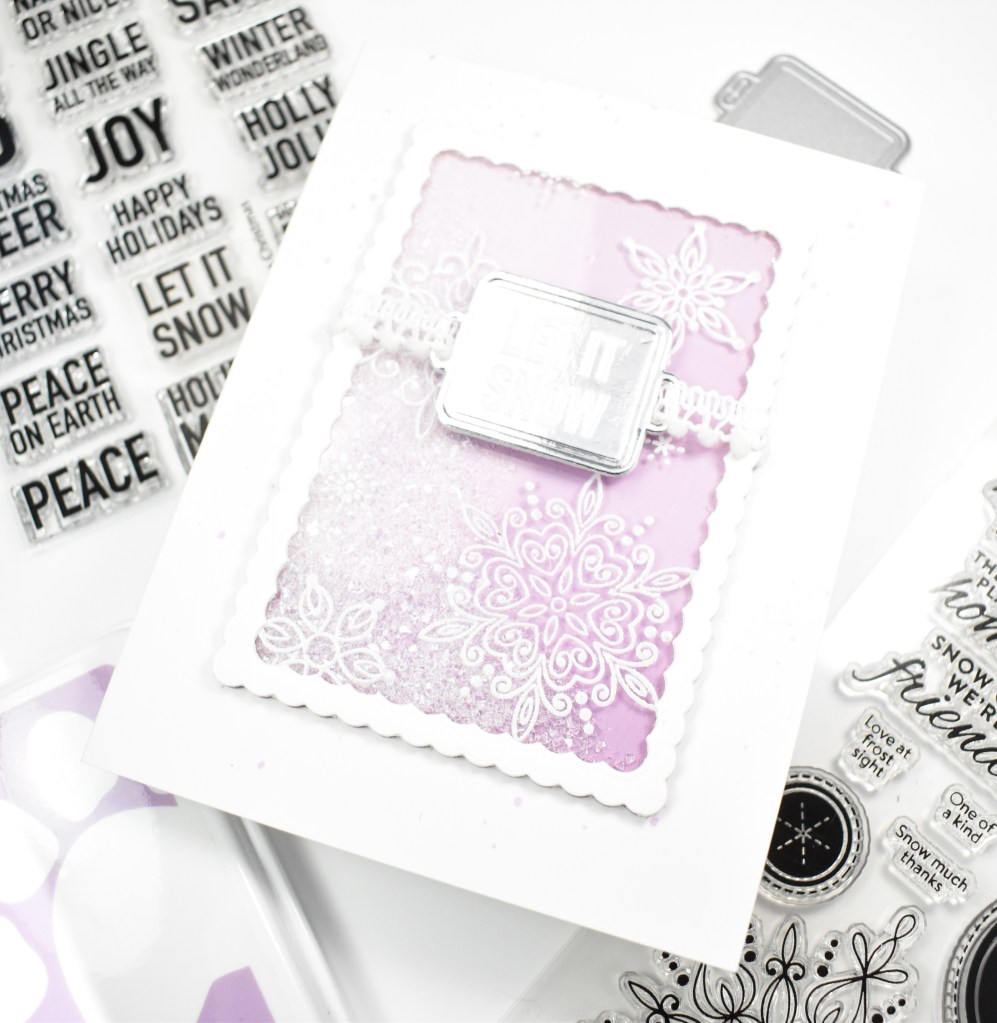
The Lilac ink paired perfectly with the Color Blend cardstock, so I splattered my card base with that and set that aside to dry while I worked on the shaker. I glued the acetate to the frame and used foam tape to build the walls of the shaker. I sprinkled in some Diamond Dust and adhered the purple panel in place. My ribbon was woven in place and secured using liquid glue before everything was adhered to the card bae to finish up.

That does it for this project! I hope you enjoyed it! Based on the name of this new Christmas stamp set, I have to believe there will be other sets coming in the future! Don’t forget to head on over to check out the entire Sugar & Spice release! Thanks again for stopping by, and I hope you have a wonderful day!

Supply List

Affiliate links used at no cost to you. What does this mean? If you use the links within this post to make a purchase, I receive a small commission, which allows me to continue to post crafty content for your enjoyment. I truly appreciate your support!
Latest Posts

Latest Instagram Posts
Simon Says Stamp + Tim Holtz STAMPtember Collaboration Set

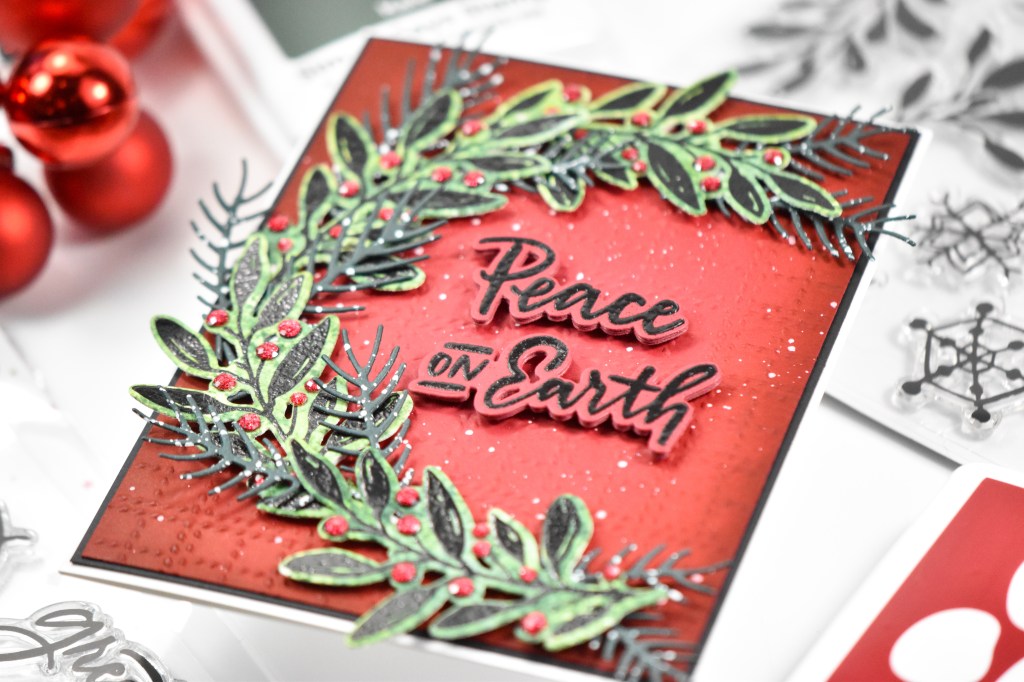
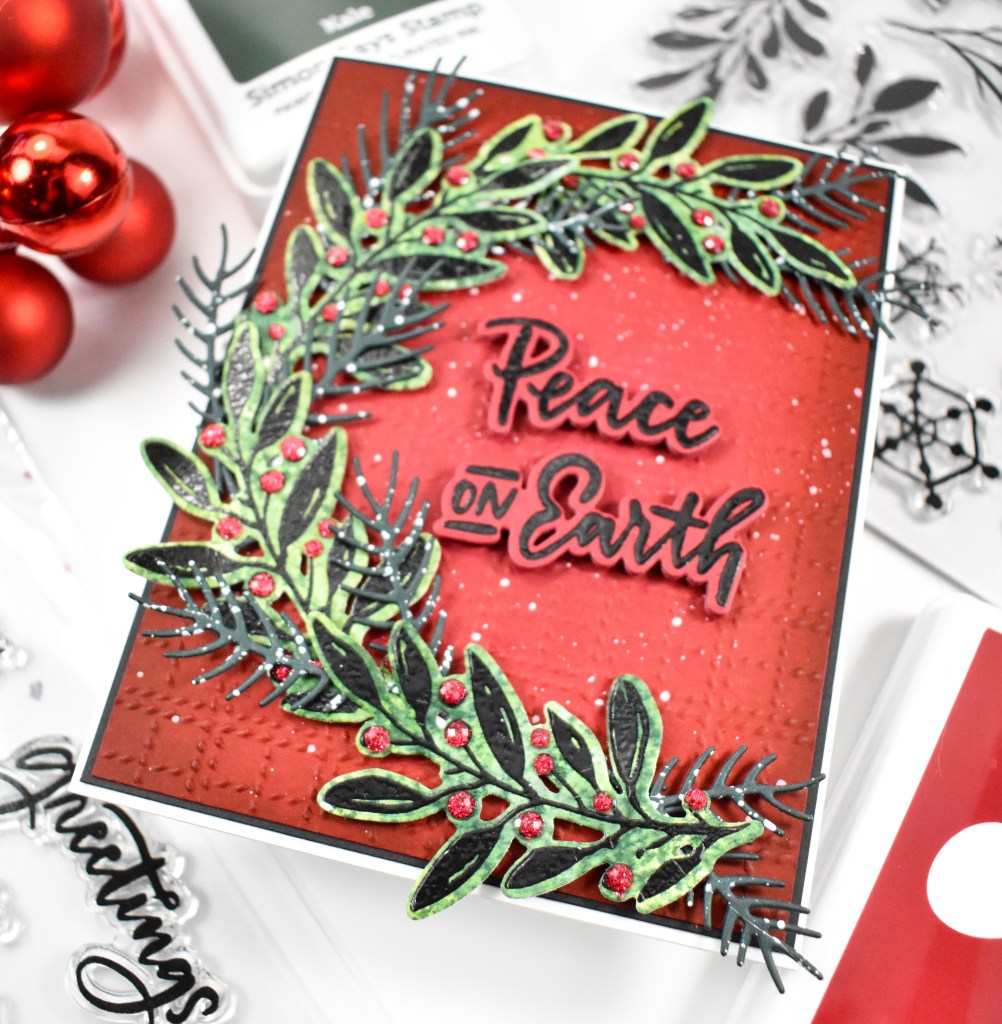
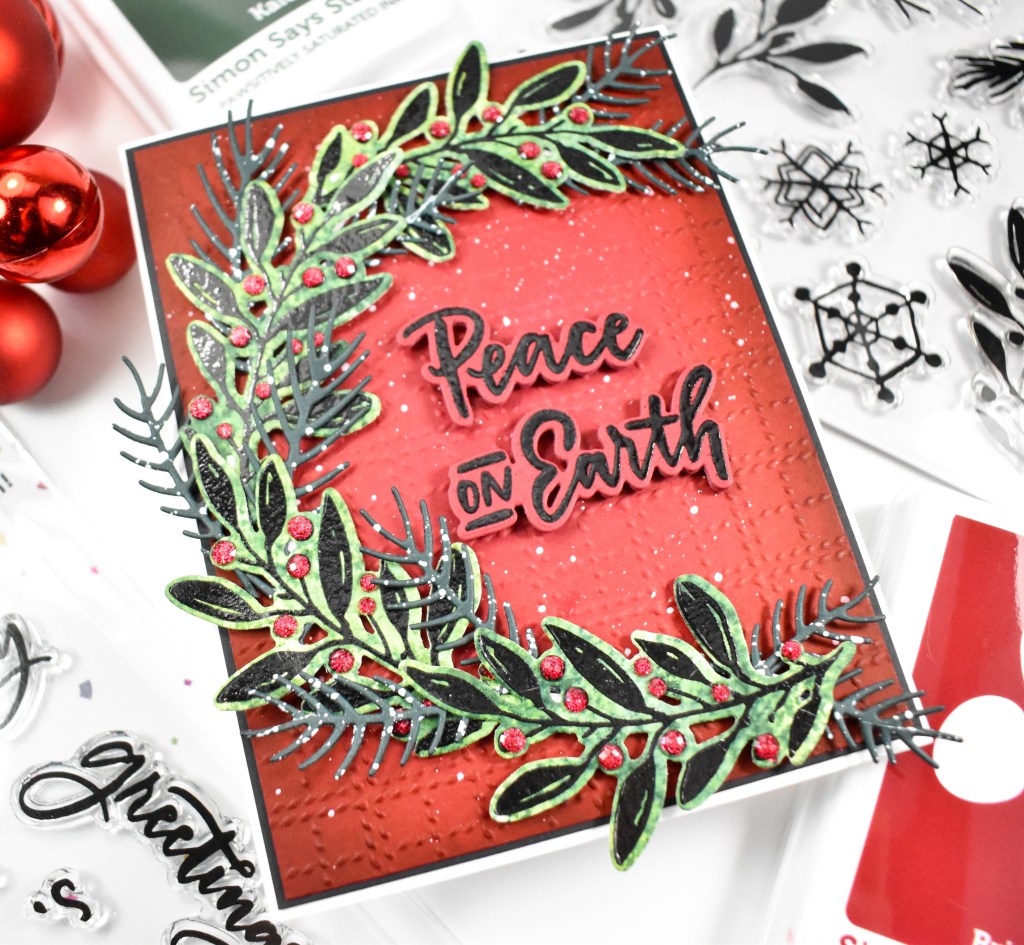
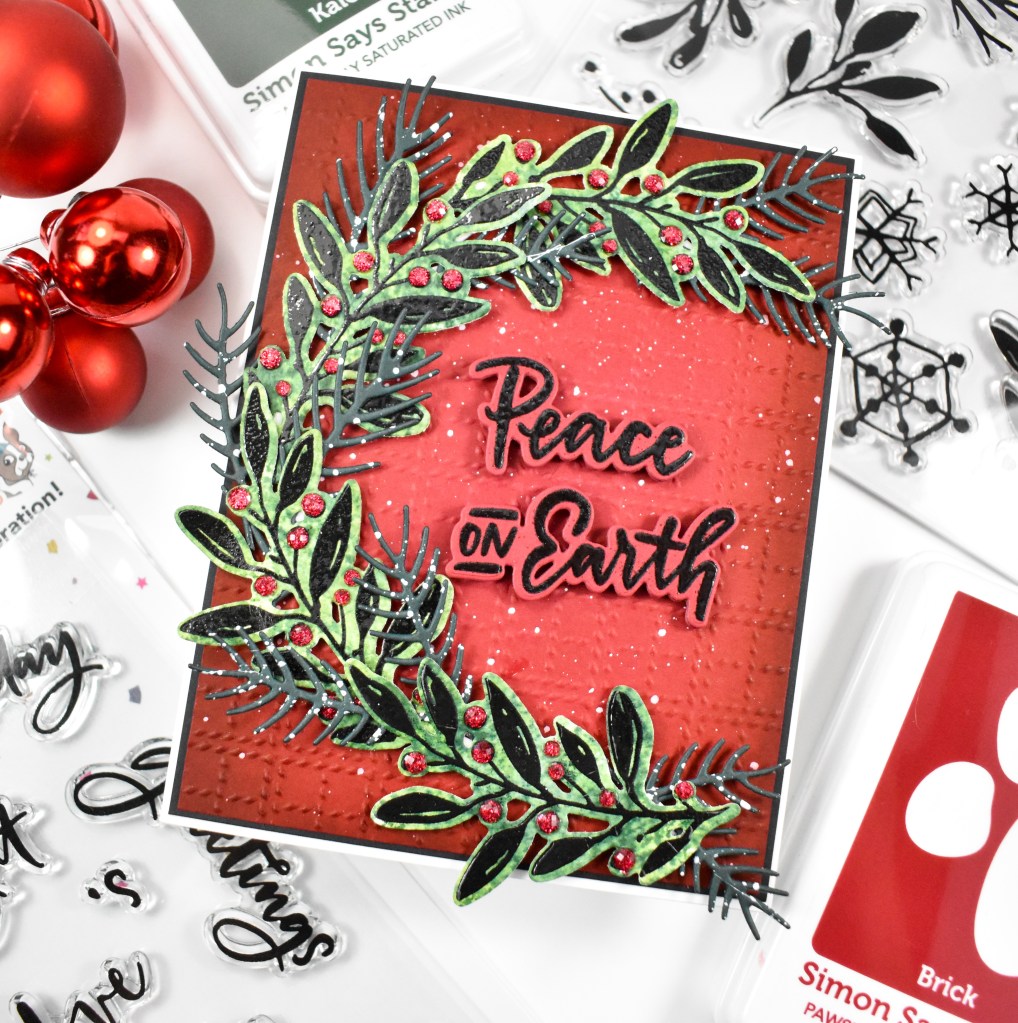
Hello Friends, and welcome back! It’s time for the Tim Holtz Collaboration that you’ve all been waiting for! Tim actually has SIX new holiday products that are part of Tim’s STAMPtember Technique Workshop! How exciting is that?! As you know, from previous classes with Tim, these kits sell out super fast, and there are limited quantities available! With that being said, if you’d like one, don’t delay in grabbing yours TODAY! My project is featuring the new Festive Watercolor along with the new Festive Sentiments, so let’s go ahead and go through the deets!

NOTE: all supplies are linked in the thumbnails at the end of this blog post.

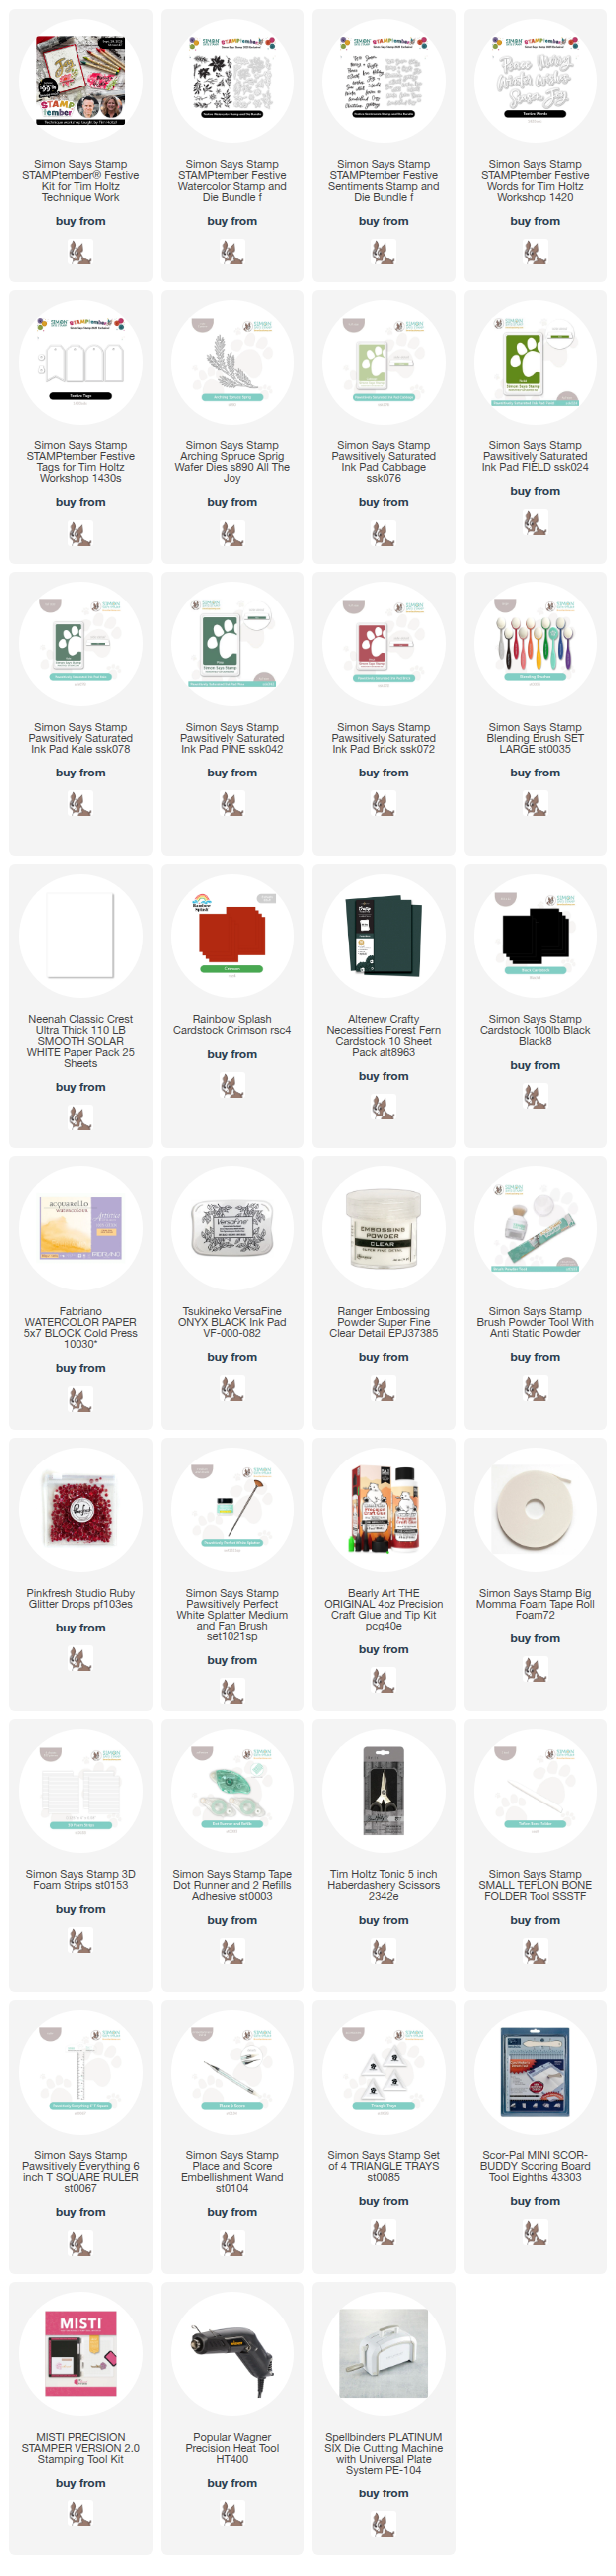
I began this project by creating an ink smooshed panel using Simon Cabbage, Kale, Pine and Field inks. I worked one color at a time, and smooshed the ink onto my glass mat and spritzed it with water. I smooshed my panel into the puddle and dried it with my heat tool before moving on to the next color. Once I was satisfied with the panel, I stamped a leaf from the Festive Watercolor set using VersaFine Onyx Black ink and heat set it using clear embossing powder. I did this several times to have enough to make a swag.

I then used the coordinating die to trim those leaves out. I stamped the sentiment, which is from the new Festive Sentiments set, onto Crimson cardstock using VersaFine again, and heat setting it the same way. I did cut the sentiment three times for a stacked sentiment look.

My background was created using a really old embossing folder from Tim Holtz with some ink blending on the edges using Brick ink for some added depth. As I always say, I needed more leaves, so I used the Arching Spruce Sprig from Simon and cut those from Forest cardstock. I took everything over and gave it a good white splatter!

I adhered the stamped leaves and sentiment using foam strips and tucked in the other leaves, securing those with liquid glue. The panel was adhered to a black panel for added contrast, and I added some red gems to areas where a berry might go to finish up.

That does it for this project! I hope you enjoyed it as much as I did! Be sure to snag your kit TODAY for this workshop, as supplies are limited! Thanks again for joining me, and I hope you have a wonderful day!

Supply List

Affiliate links used at no cost to you. What does this mean? If you use the links within this post to make a purchase, I receive a small commission, which allows me to continue to post crafty content for your enjoyment. I truly appreciate your support!

Latest Posts

Latest Instagram Posts

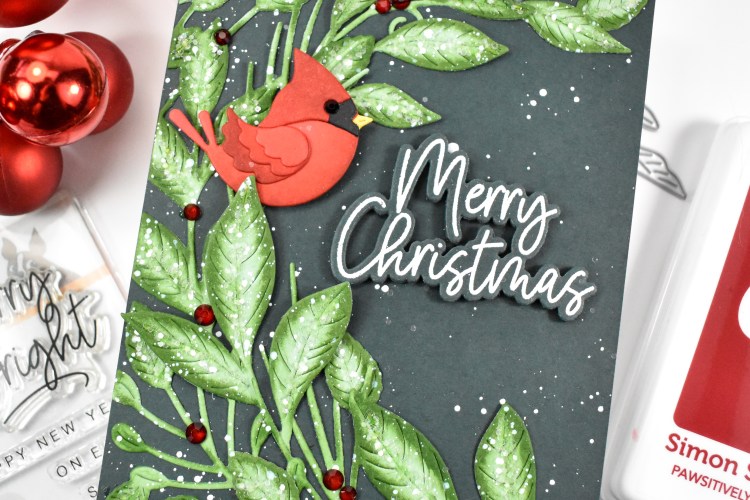
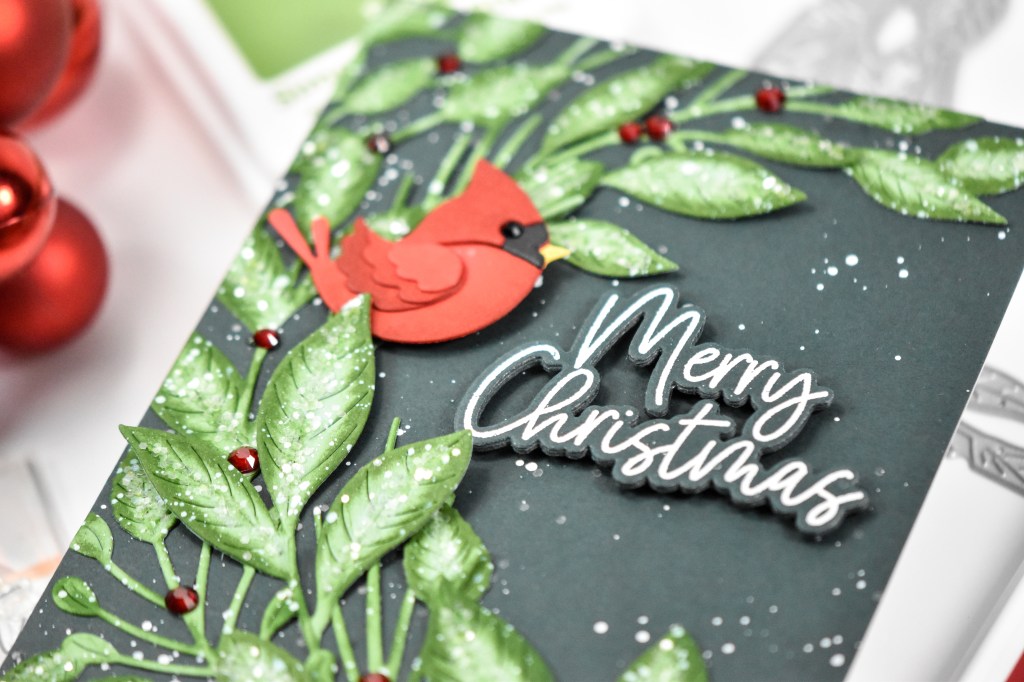
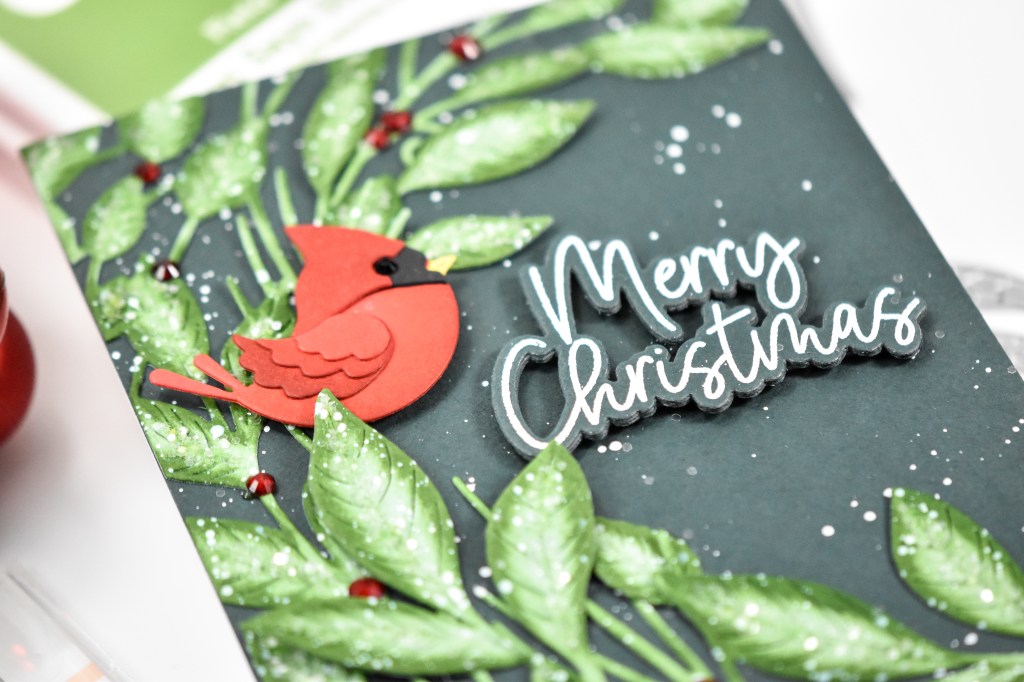
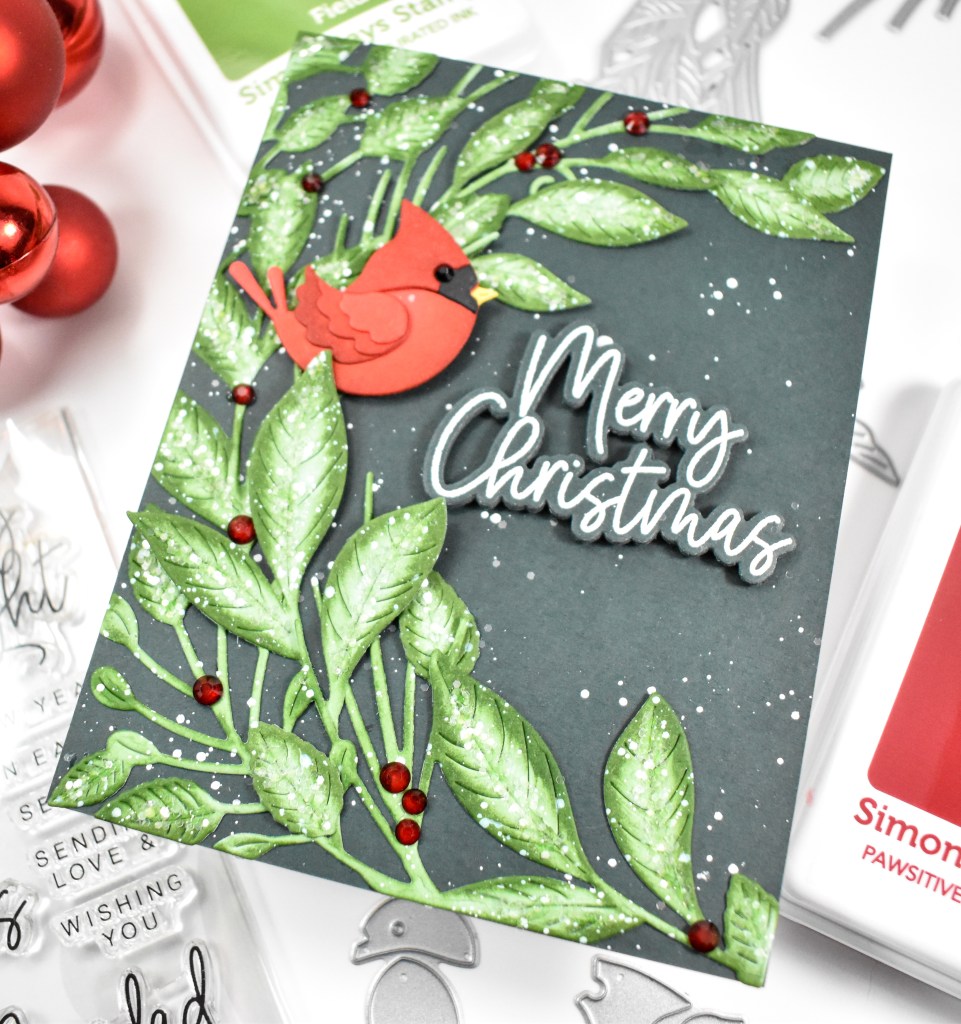
Simon Says Stamp Christmas Cardinal

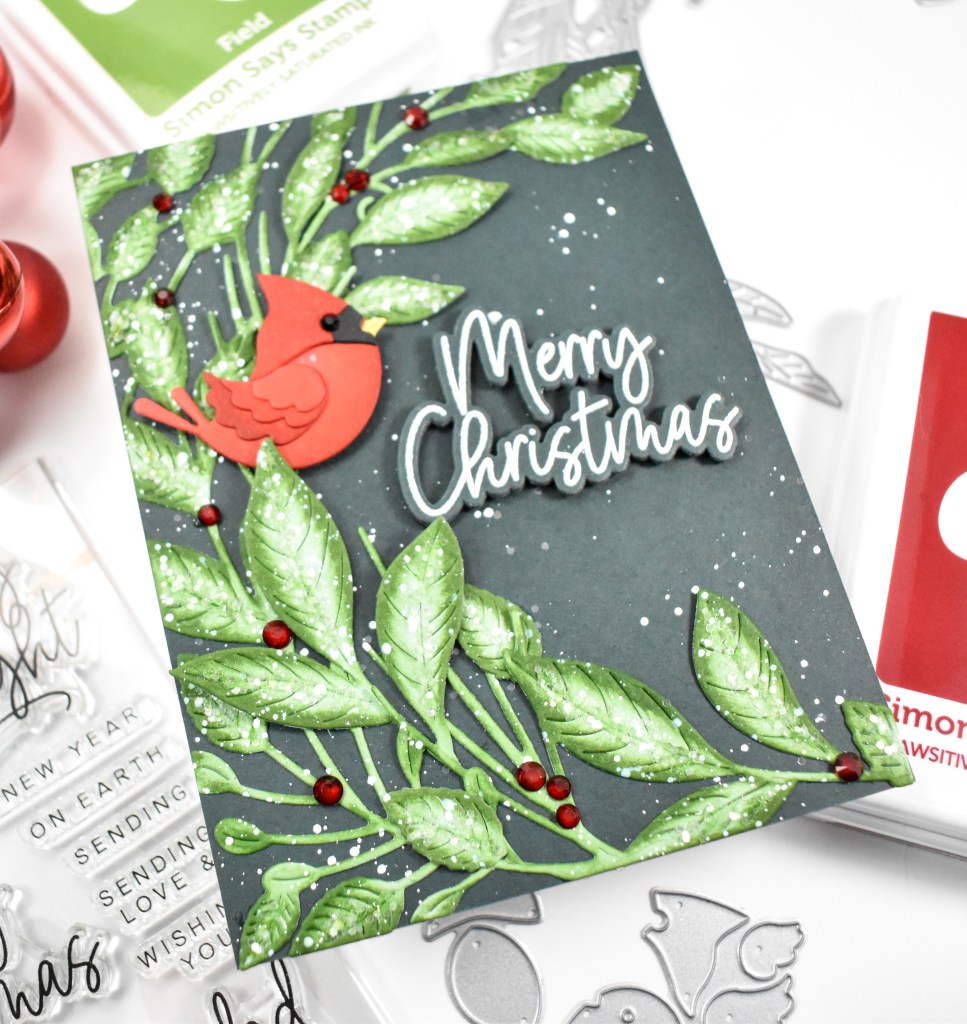
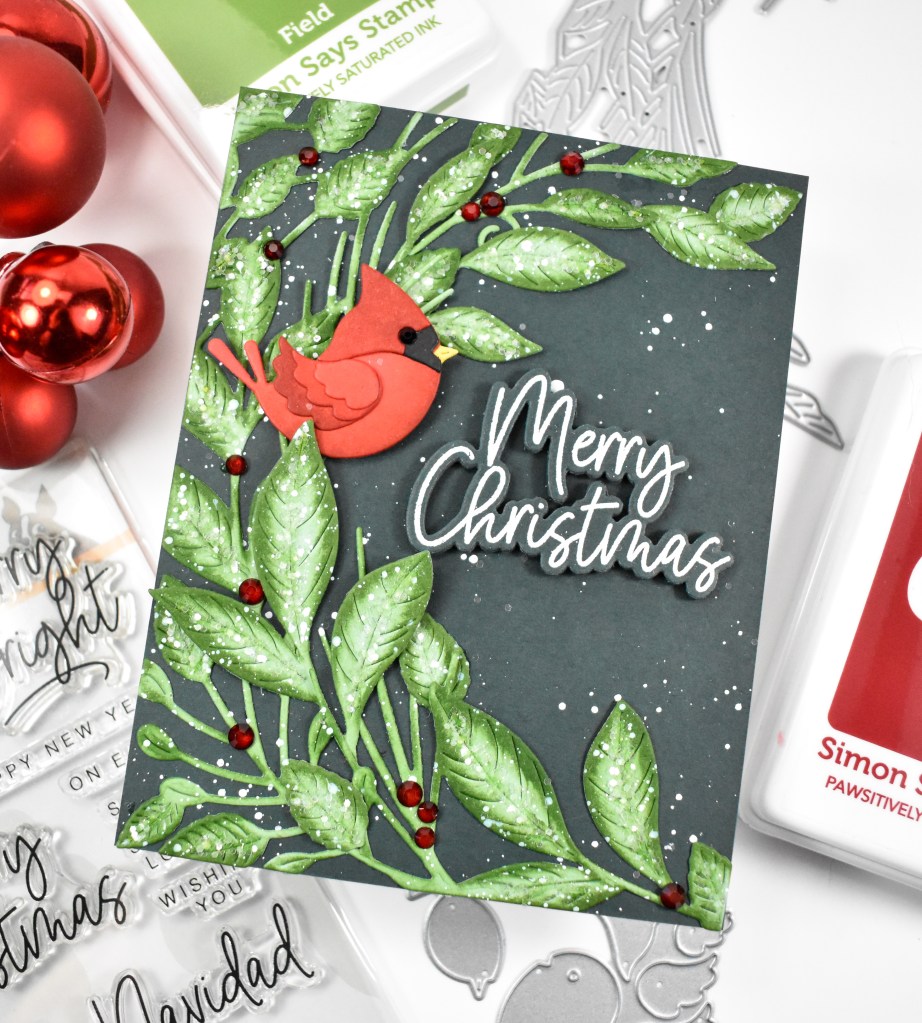
Hello Friends, and welcome back to my blog! Hope you’re having a great STAMPtember so far! Today’s project is featuring the new Cute Cardinal along with some older products. Let’s get into the details!

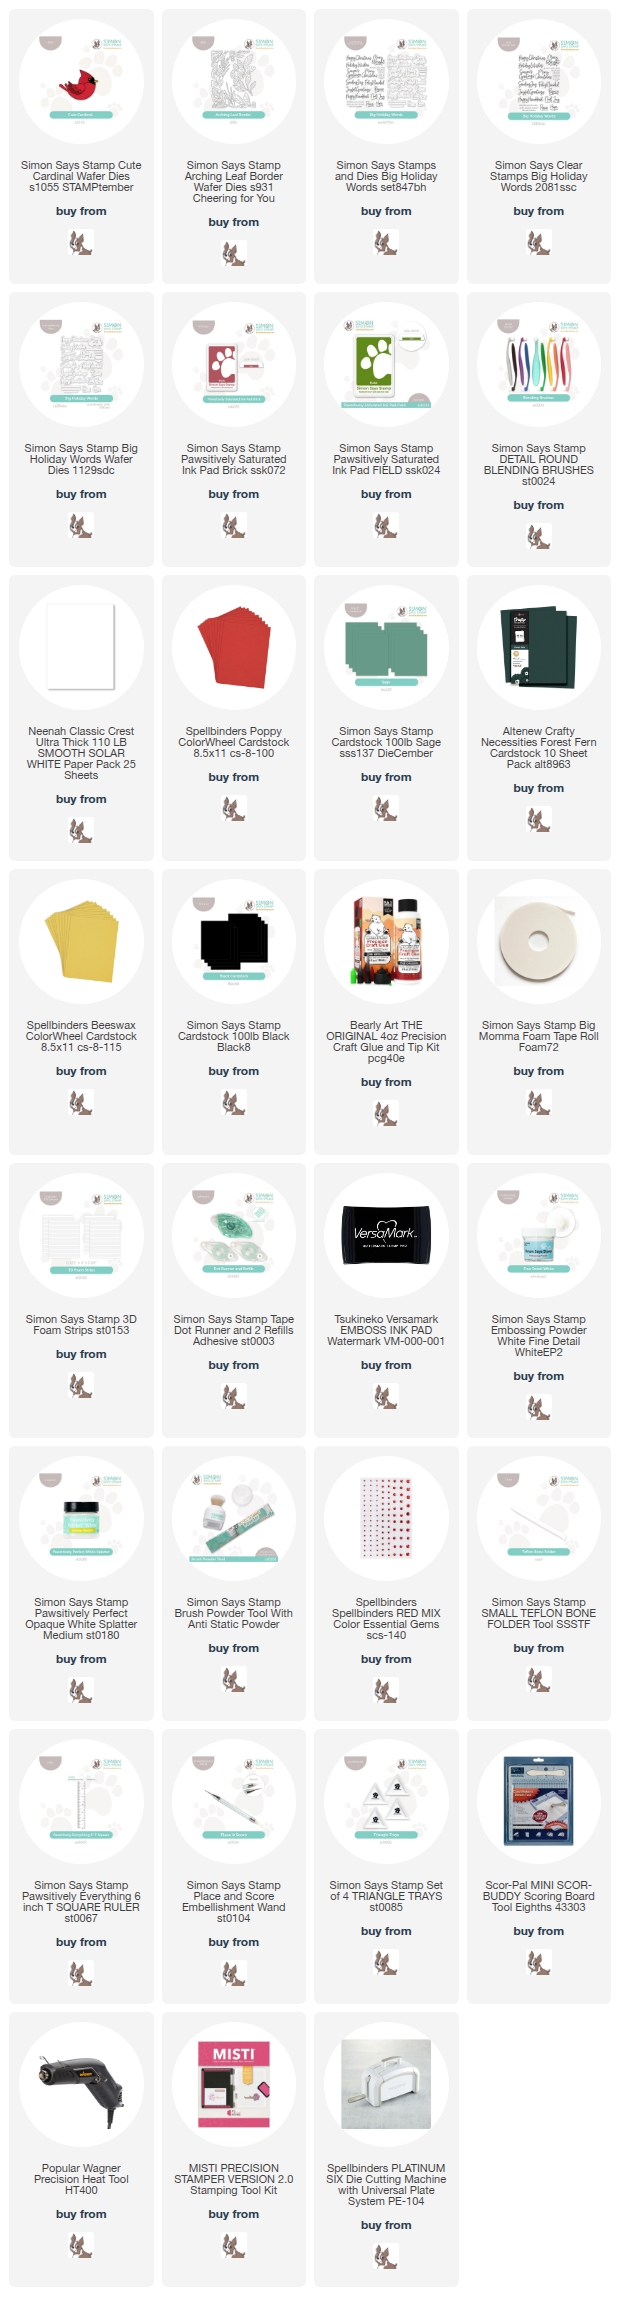
NOTE: all supplies are linked in the thumbnails at the end of this blog post.

I began this project by die cutting the cardinal from Poppy, Black and Beeswax cardstock and ink blending using Brick ink. I also cut the Arching Leaf Border from Sage cardstock and used Field for the ink blending on that. Once I was done ink blending the leaves, I gave them a good splatter of white, along with my forest green background. When the splatter was dry, I applied some liquid glue down the centers of the leaves and added some glitter for an icy look.

The sentiment was stamped onto that same green cardstock using VersaMark Ink and heat set using white embossing powder. It was trimmed out three times for that stacked sentiment look. When my glitter was dry, I started the assembly process.

I arranged the leaves and secured those in place using liquid glue, tucking in the extra leaves from the die cut set. I also added red gems in random places for the appearance of berries. The cardinal and sentiment were secured with foam tape, and the panel was adhered to the card base to finish up.

That does it for this project! I’m really loving that snowy, icy look on my holiday cards, so I’m thinking that I might have to incorporate it into my personal Christmas cards for this year. Don’t forget to head over to Simon’s website to check out the entire release. Thanks again for joining me, and I hope you have an awesome day!

Supply List

Affiliate links used at no cost to you. What does this mean? If you use the links within this post to make a purchase, I receive a small commission, which allows me to continue to post crafty content for your enjoyment. I truly appreciate your support!

Latest Posts

Latest Instagram Posts
Spellbinders Seasonal Wreath

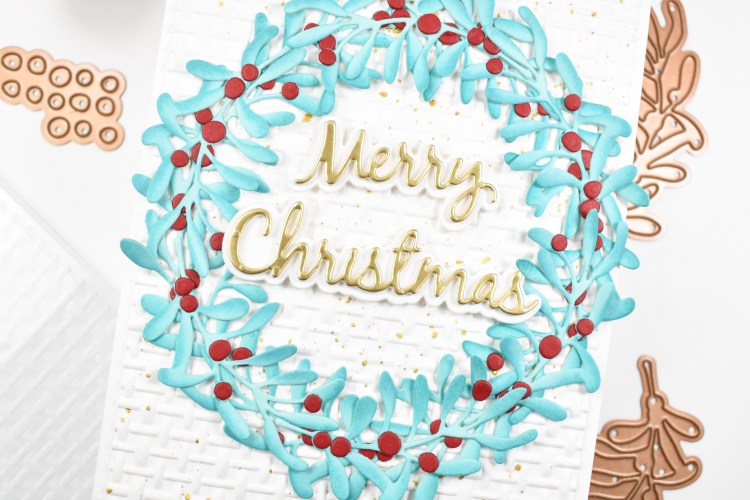
Hello Friends, and welcome back! Today’s project is featuring the Seasonal Wreath Foliage from Spellbinders and Suzanne Hue. It’s also featuring the new Linen 3D Embossing Folder, so let’s go ahead and run through the details!

NOTE: all supplies are linked to multiple sources in the thumbnails at the end of this blog post.

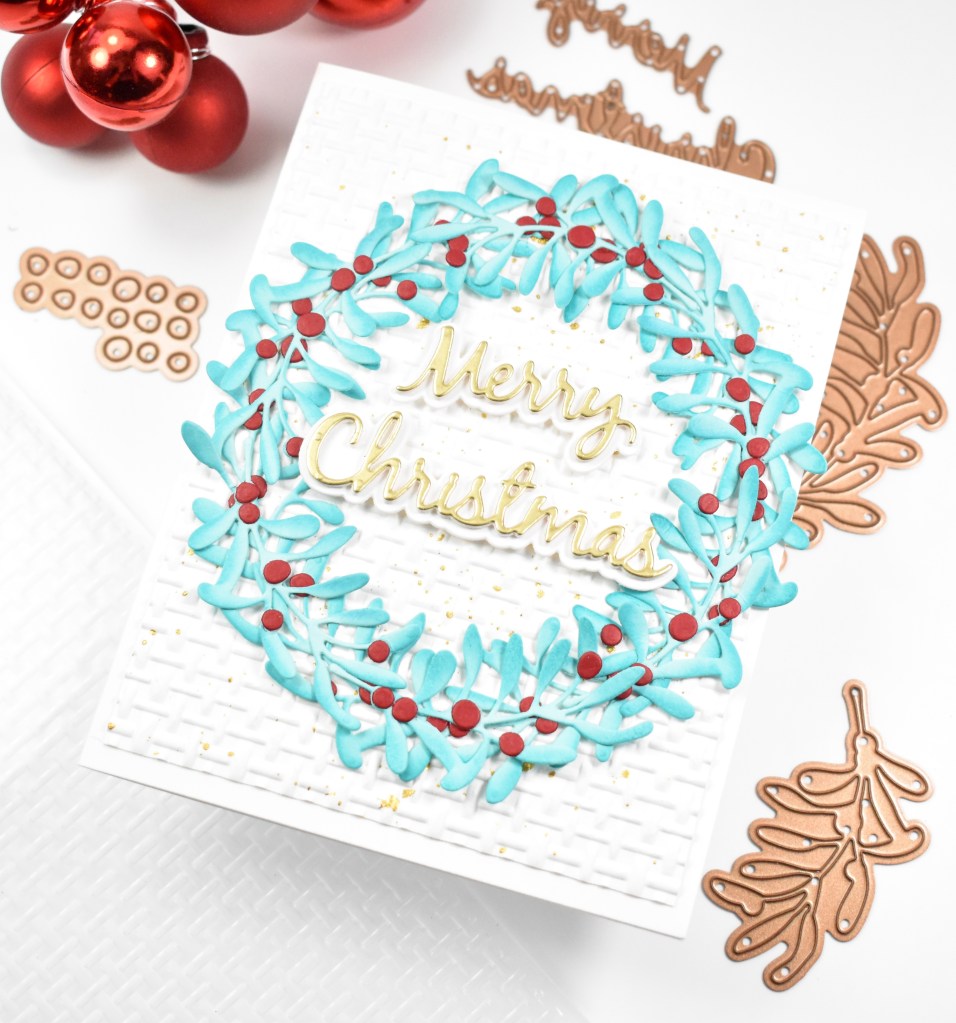
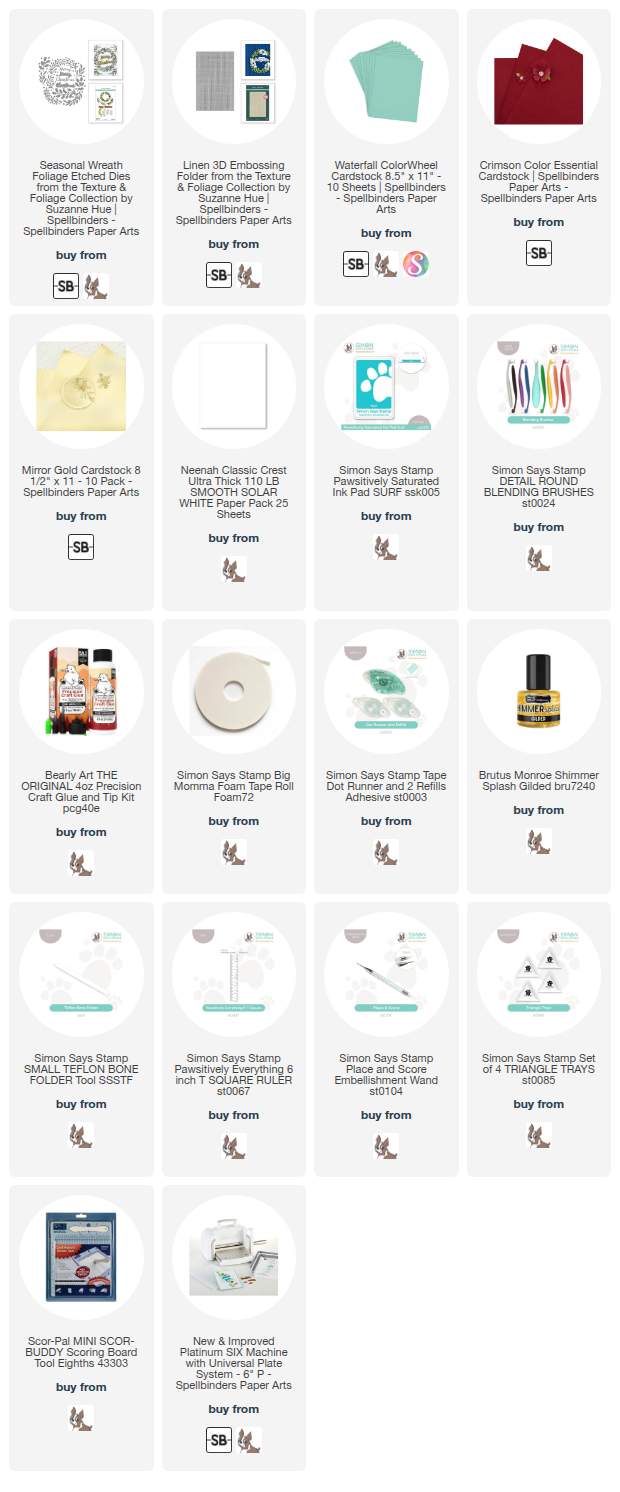
I began this project by die cutting the leaves a bunch of times from Waterfall cardstock, while also cutting the berries from Crimson cardstock. I did some ink blending on the leaves using Surf ink and then adhered the berries to the leaves.

The background was created using the new Linen 3D Embossing Folder and some gold splatter. The sentiment was cut once from gold cardstock and three times from Neenah, while the shadow portion was cut twice. All of those layers were adhered together for a stacked sentiment.

The background was adhered to the card base, and then I began adhering the leaves in place. Once those were all in place, I added the sentiment using foam strips for some added dimension.

That does it for this project! I hope you enjoyed it! Thanks again for stopping by, and I hope you have a wonderful day!

Supply List

Affiliate links used at no cost to you. What does this mean? If you use the links within this post to make a purchase, I receive a small commission, which allows me to continue to post crafty content for your enjoyment. I truly appreciate your support!

Latest Posts

Latest Instagram Posts
Spellbinders Foliage Swag

Hello Friends, and thanks for joining me! Today’s project is featuring several new products from the Spellbinders August releases. I had a lot of fun creating this swag, so let’s go ahead and go through the details.

NOTE: all supplies are linked to multiple sources in the thumbnails at the end of this blog post.

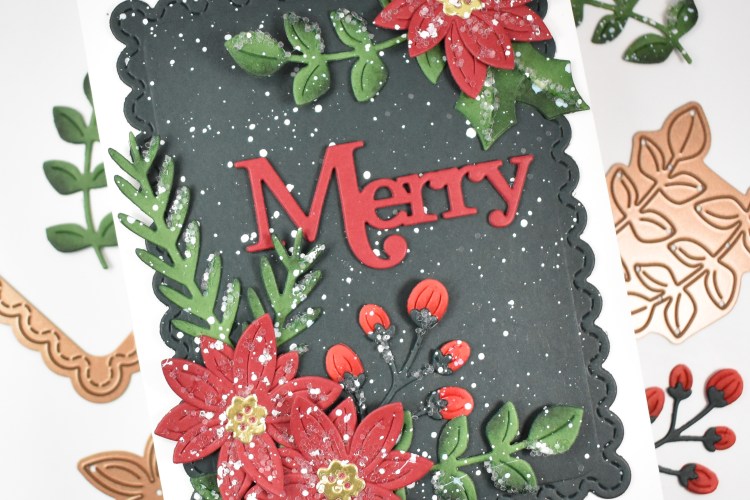
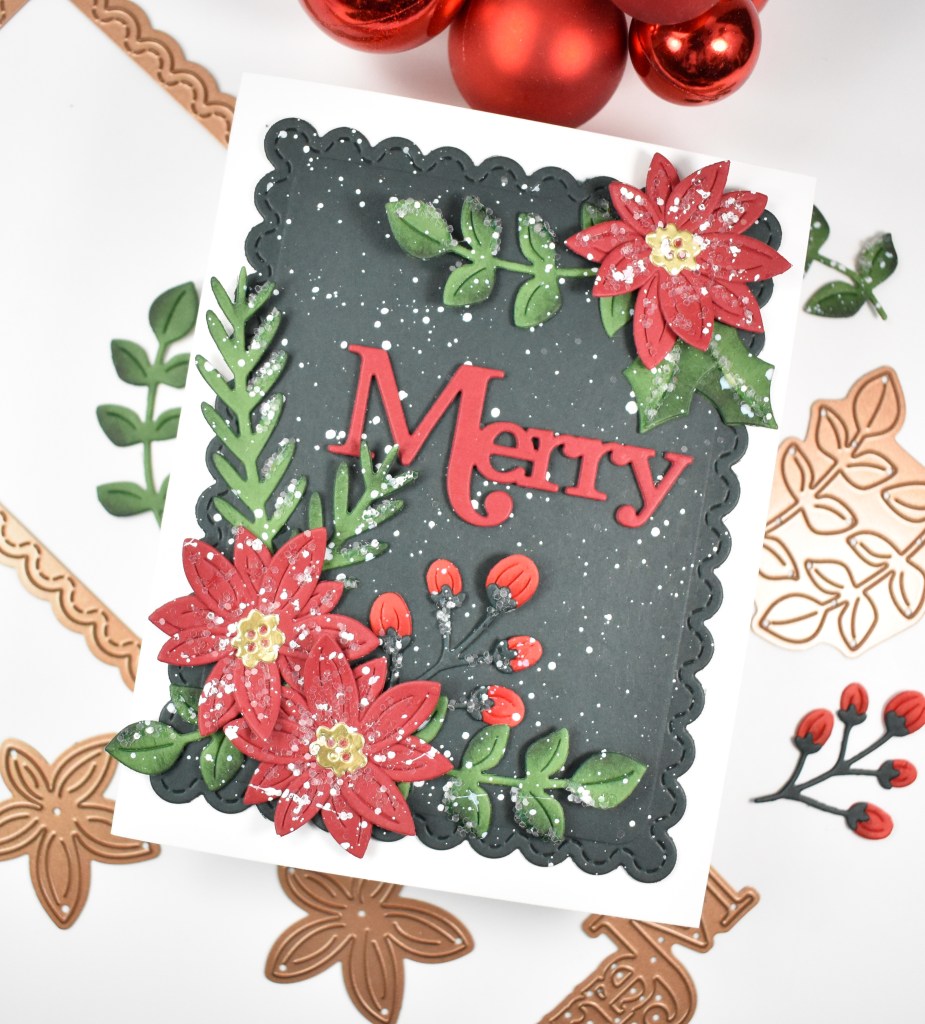
I began this project by die cutting the Christmas Foliage from Crimson, Fern and gold cardstock. I will mention that this leaf was cut multiple times to achieve this full look. I did some ink blending Lush Forest and Brick inks. Once I was done with that, I assembled the flowers and white splattered the leaves and added “ice” using glue and clear glitter.

The background panel was created using the new Bow & Bell Scallop Frame along with some gold splatter. I cut the Merry sentiment once from gold cardstock and twice from Neenah 110lb cardstock and adhered all of those together for that stacked sentiment that we all love.

The panel was adhered to the card base, the leaves were glued in place, as were the flowers and the sentiment.

It was a lot of die cutting, but I’m quite happy with the end project. It’s hard for me to work on holiday cards this early in the year, but I didn’t mind this one, because I think it came out so pretty. Thanks again for joining me, and I hope you have a wonderful day!

Supply List

Affiliate links used at no cost to you. What does this mean? If you use the links within this post to make a purchase, I receive a small commission, which allows me to continue to post crafty content for your enjoyment. I truly appreciate your support!

Latest Posts

Latest Instagram Posts
Spellbinders Merry Floral

Hello Crafty Friends, and welcome back! Today’s project is featuring several new products from the Spellbinders August releases. It’s hard for me to think about holiday cards in August, but I really enjoyed making this card, especially with all of the glitter and splatter. Let’s run through the details, shall we?

NOTE: all supplies are linked to multiple sources in the thumbnails at the end of this blog post.

I began this project by die cutting the Christmas Foliage from Crimson, Poppy, Fern, Forest and gold cardstock. I did some ink blending on the flowers using Brick ink, and used Lush Forest ink on the greenery. Once I was done with the ink blending, I assembled the flowers, splattered white acrylic ink on all of the pieces and then added sparkly glitter using some glue that dries clear. I thought all of the pieces came out really pretty with the “icy” look.

I die cut the Bow & Bell Scallop Frame from Forest cardstock and white splattered that as well. I wondered if I had too much splatter, but then just decided to go with it! I also cut the Merry sentiment from Crimson three times and adhered all of those together for a stacked sentiment.

I secured the panel to the card base and then began adhering the leaves first, followed by the flowers. The sentiment was the last addition to finish up this project.

That does it for this project. I hope you enjoyed it as much as I did! Don’t forget to head over to the Spellbinders website to check out all of the August releases! Thanks again for stopping by, and have a wonderful day!

Supply List

Affiliate links used at no cost to you. What does this mean? If you use the links within this post to make a purchase, I receive a small commission, which allows me to continue to post crafty content for your enjoyment. I truly appreciate your support!

Latest Posts

Latest Instagram Posts
Simon Says Stamp Joyful Santa

Hello Friends and welcome back! Have you snagged your free Be of Good Cheer set from Tim Holtz and SSS yet?! This is such a great deal! It’s automatically added to your cart when you spend $25 on TH branded products. These are products that we use anyway, so why not grab yours! My project today is featuring the Santa from the set, so let’s get into the details!

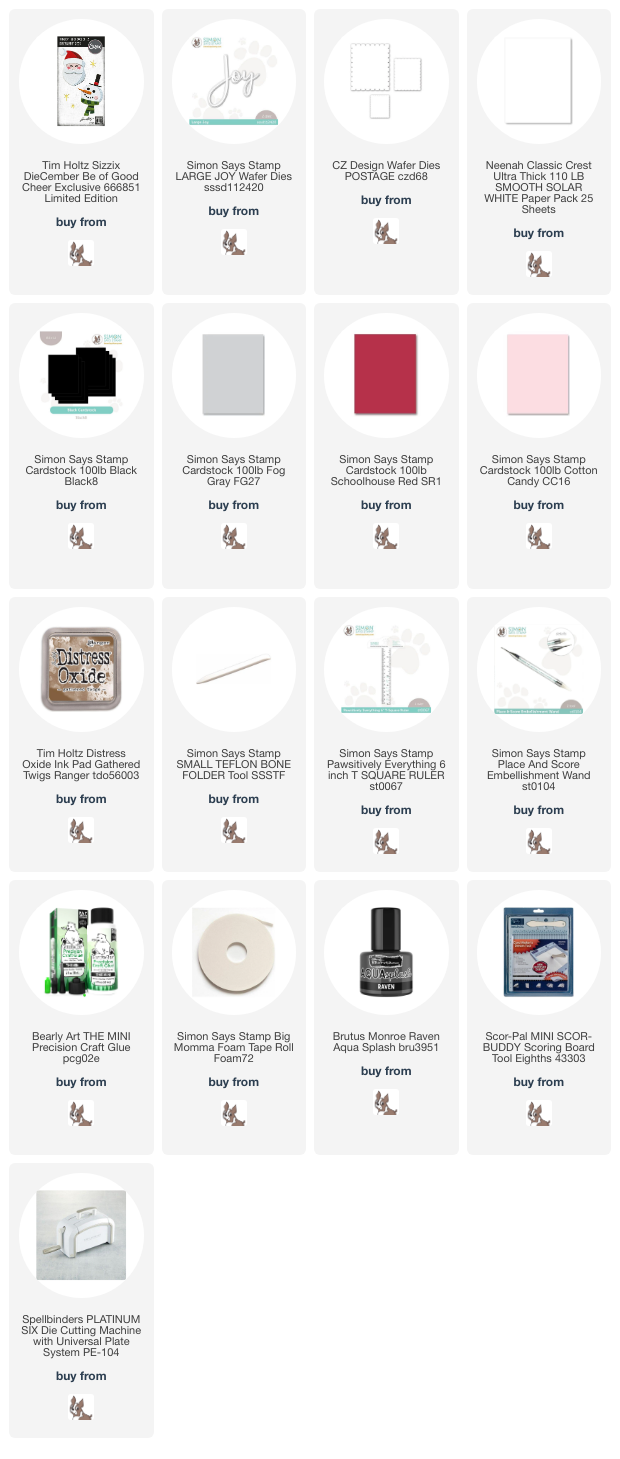
NOTE: all supplies are linked in the thumbnails at the end of this blog post.

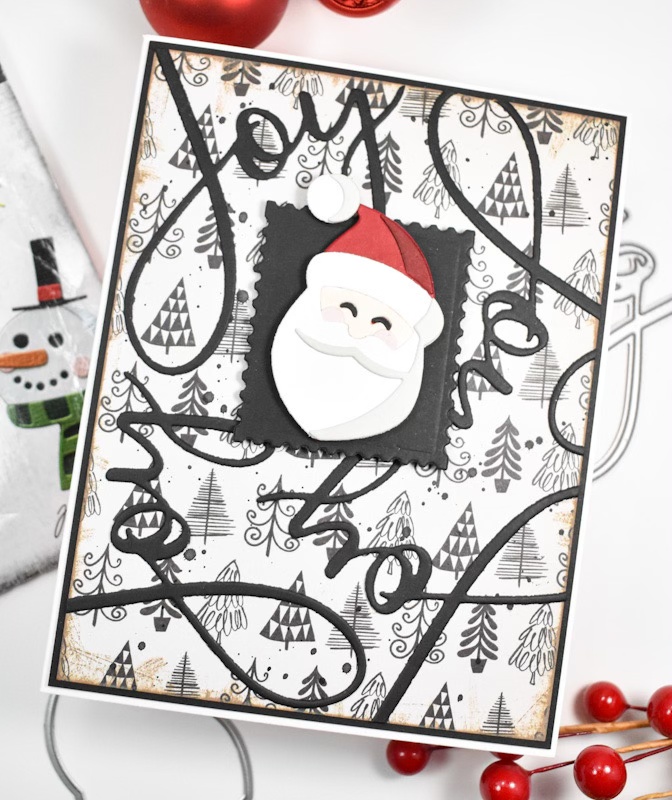
I began this project by selecting a piece of patterned Holiday paper and trimming it down. I then inked the edges of the paper using Distress Oxide Gathered Twigs to give it an aged look, along with some black splatter. I cut several of the Large Joy die cuts from black cardstock and adhered those to the panel in a random pattern.

I die cut the pieces of the Santa from coordinating colors in Neenah Solar White, black, red, fog, pink and tan cardstock colors. Once those were cut, I assembled the Santa using liquid glue. I used the Postage Stamps die to cut a black square that would be used to mount the Santa on.

The black square was adhered to my panel using foam tape and the Santa was adhered atop that with more foam tape for lots of dimension. This was then adhered to a black panel for contrast before being adhered to the card base to finish up.

That finishes up this project! I thought this was a good card to utilize some of that patterned paper that I seem to hoard for whatever reason! Be sure to grab your Tim Holtz set before they’re gone! Thanks again for stopping by, and I hope you have a wonderful day!

Supply List

Affiliate links used at no cost to you. What does this mean? If you use the links within this post to make a purchase, I receive a small commission, which allows me to continue to post crafty content for your enjoyment. I truly appreciate your support!

Latest Posts

Latest Instagram Posts
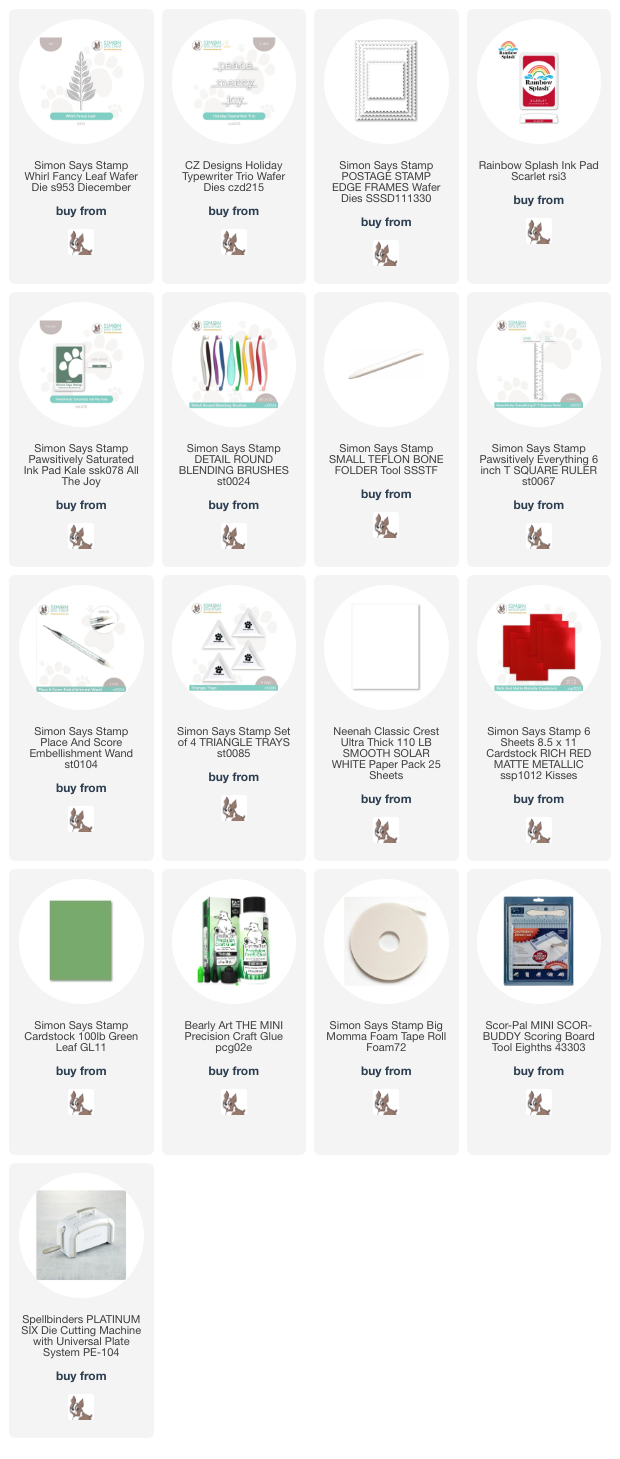
Simon Says Stamp Merry Whirl Leaf

Hello Friends and welcome back! Simon’s latest DieCember release is live, and it’s a fun one! My project today is featuring the new Whirl Fancy Leaf, and I can’t even tell you how much I love this project! I love it so much that I’ve decided that it will be the design for my personal Christmas cards this year! Let’s go ahead and get into the details!

NOTE: all supplies are linked in the thumbnails at the end of this blog post.

I began this project by die cutting the Whirl Fancy Leaf from a green cardstock and did some ink blending along the edges using Kale ink. I then adhered red crystals at the intersections of the stem and leaves. I ordered these gems from Amazon, but use whatever you have! I also die cut the Merry, which is from the Holiday Typewriter Trio, once from Simon Red Matte Metallic Cardstock and twice from Neenah 110lb cardstock. Those pieces were then adhered together using liquid glue.

I then used the Postage Stamp Edge Frames to trim a panel from Neenah 110 and then splattered it using Rainbow Splash Scarlet ink. I just smooshed some ink on my glass mat and added some water next to it and mixed a tiny bit of water with the ink.

The leaf was adhered to the panel using liquid glue, which was just placed along the stem, and the merry was adhered atop that. That panel was then adhered to the card base using foam tape for added dimension to finish up.

That does it for this one! I hope you enjoyed it! This is a very clean and simple design, but I love the way it turned out! And, clean and simple is good when you decide to mass produce for your own holiday cards! Don’t forget to swing over and check out the entire DieCember release! Thanks again for stopping by, and I hope you have a wonderful day!

Supply List

Affiliate links used at no cost to you. What does this mean? If you use the links within this post to make a purchase, I receive a small commission, which allows me to continue to post crafty content for your enjoyment. I truly appreciate your support!

Latest Posts

Latest Instagram Posts
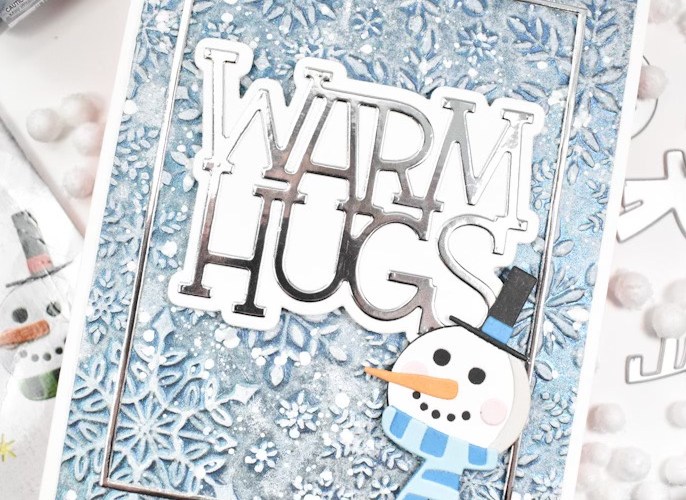
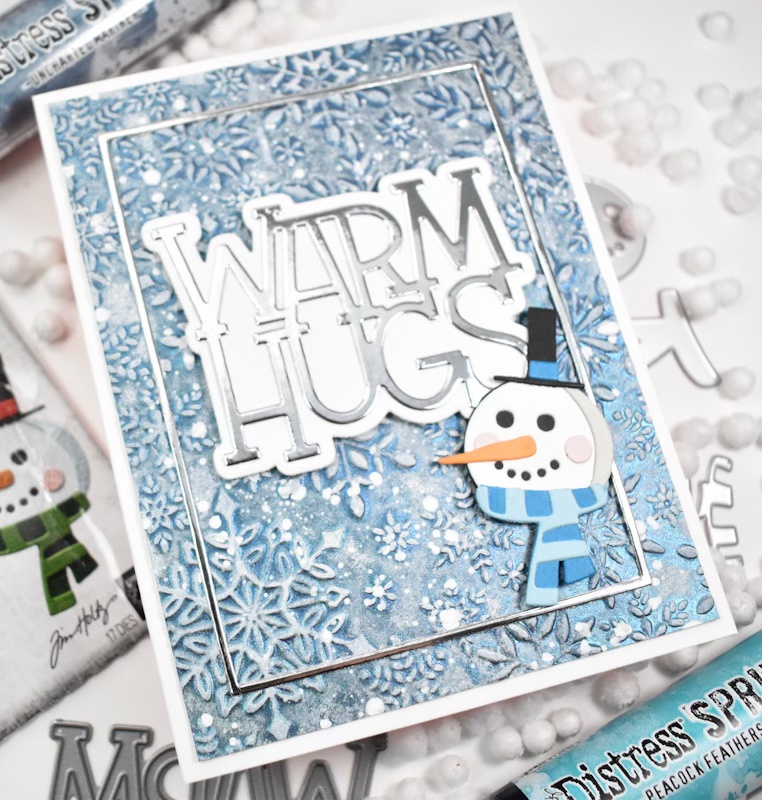
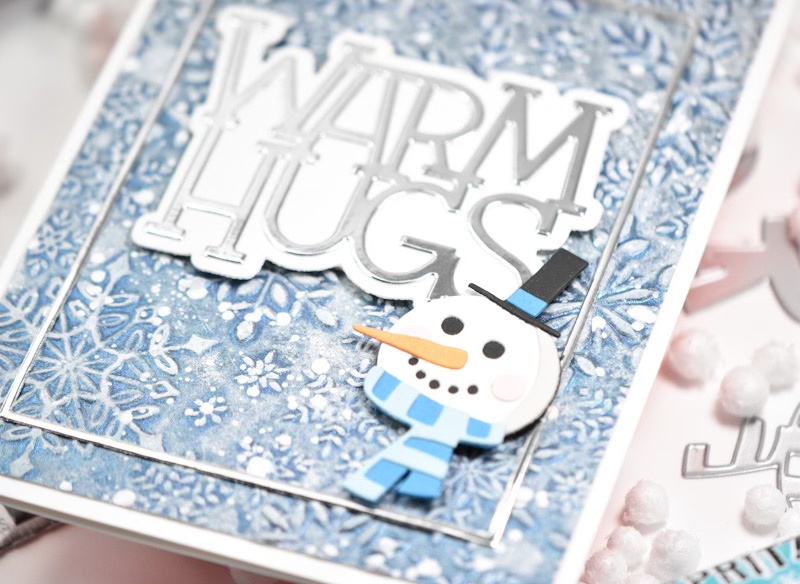
Simon Says Stamp Snowy Warm Hugs

Hello Crafty Friends and welcome back! Today I’m featuring the new Simon Says Stamp Exclusive die cut from Tim Holtz, Be of Good Cheer! What a fun little set to play with, AND it’s free with any $25 Tim Holtz branded purchase! Hurry though, this offer is only while supplies last! I created a few projects with this set, so let’s go ahead and go through the first one.

NOTE: all supplies are linked in the thumbnails at the end of this blog post.

I began this project by embossing a panel of watercolor paper using the Snowflake Visions Embossing Folder. I used watercolor paper because I knew that I was going to be adding moisture, and I wanted a paper that good withstand that. I added some TH Distress Spritz in Uncharted Mariner and let that dry some before adding some Peacock Feathers Spritz. When that was dry, I used a brayer and white ink to roll over the raised portions of the panel to brighten it back up. I wasn’t done there .. I also added some white splatter to the panel as well.

I set that aside to dry while I worked on the snowman. The snowman is several pieces so I cut the coordinating pieces from Neenah, black, blues, grey, orange and pink. Once those were all cut, I assembled the snowman using liquid glue. I also cut a silver frame using the SSS A2 Thin Frames set, and the Warm Hugs was also cut from silver cardstock as well. I did two additional cuts from Neenah and cut the shadow twice from Neenah and glued all of those pieces together for that stacked sentiment look.

The silver frame was glued to the panel, while the sentiment and the snowman were adhered using foam tape before being adhered to the card base.

That finishes up this project! I hope you enjoyed it! Don’t forget to check out the entire DieCember release, including this cutie set from Tim Holtz. Thanks again for joining me, and I hope you have a wonderful day!

Supply List

Affiliate links used at no cost to you. What does this mean? If you use the links within this post to make a purchase, I receive a small commission, which allows me to continue to post crafty content for your enjoyment. I truly appreciate your support!

Latest Posts

Latest Instagram Posts
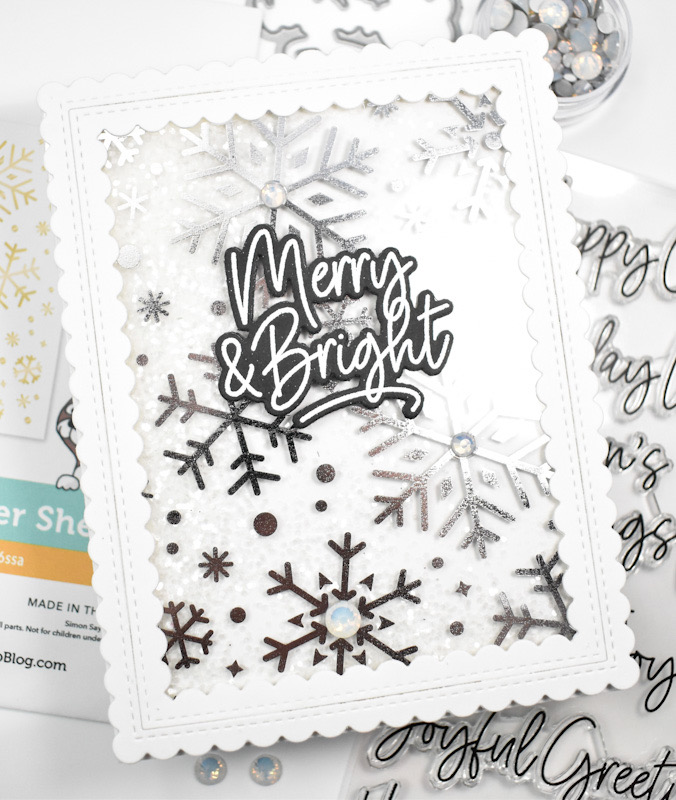
Simon Says Stamp Merry & Bright Snowflakes

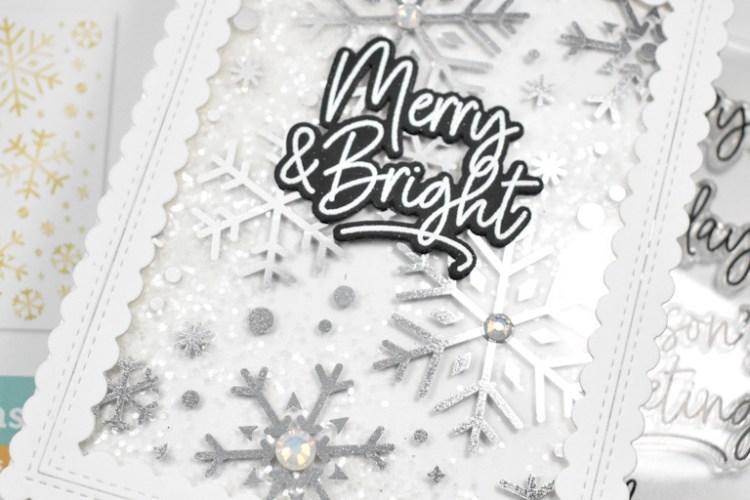
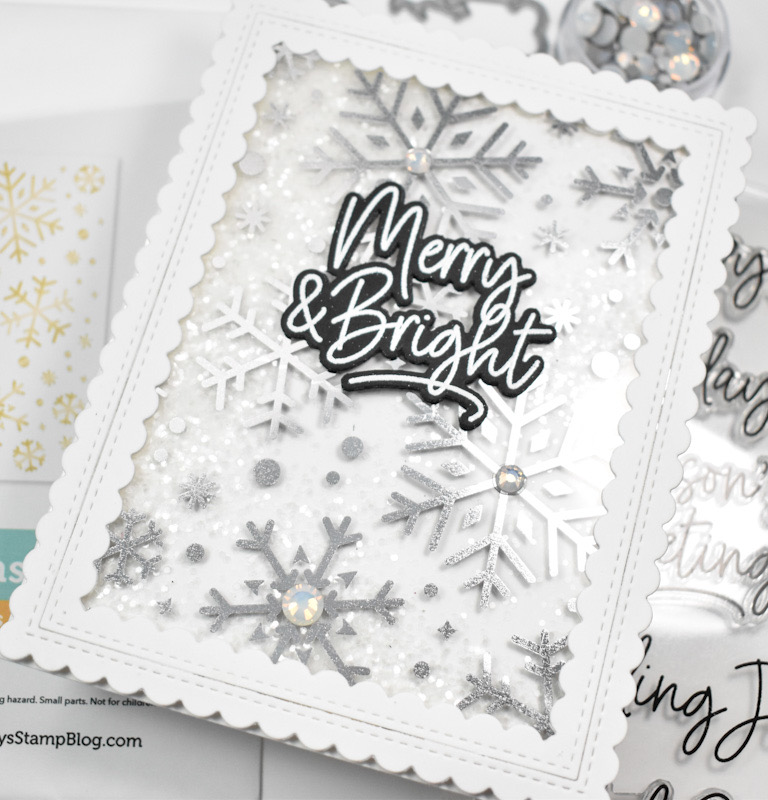
Hello Crafty Friends and welcome back! Thanks so much for stopping by to check out today’s project featuring the new Falling Snowflakes Acetate Foil Transfer Sheets from Simon’s latest release, Festive Fun. Let’s go ahead and go through the details!

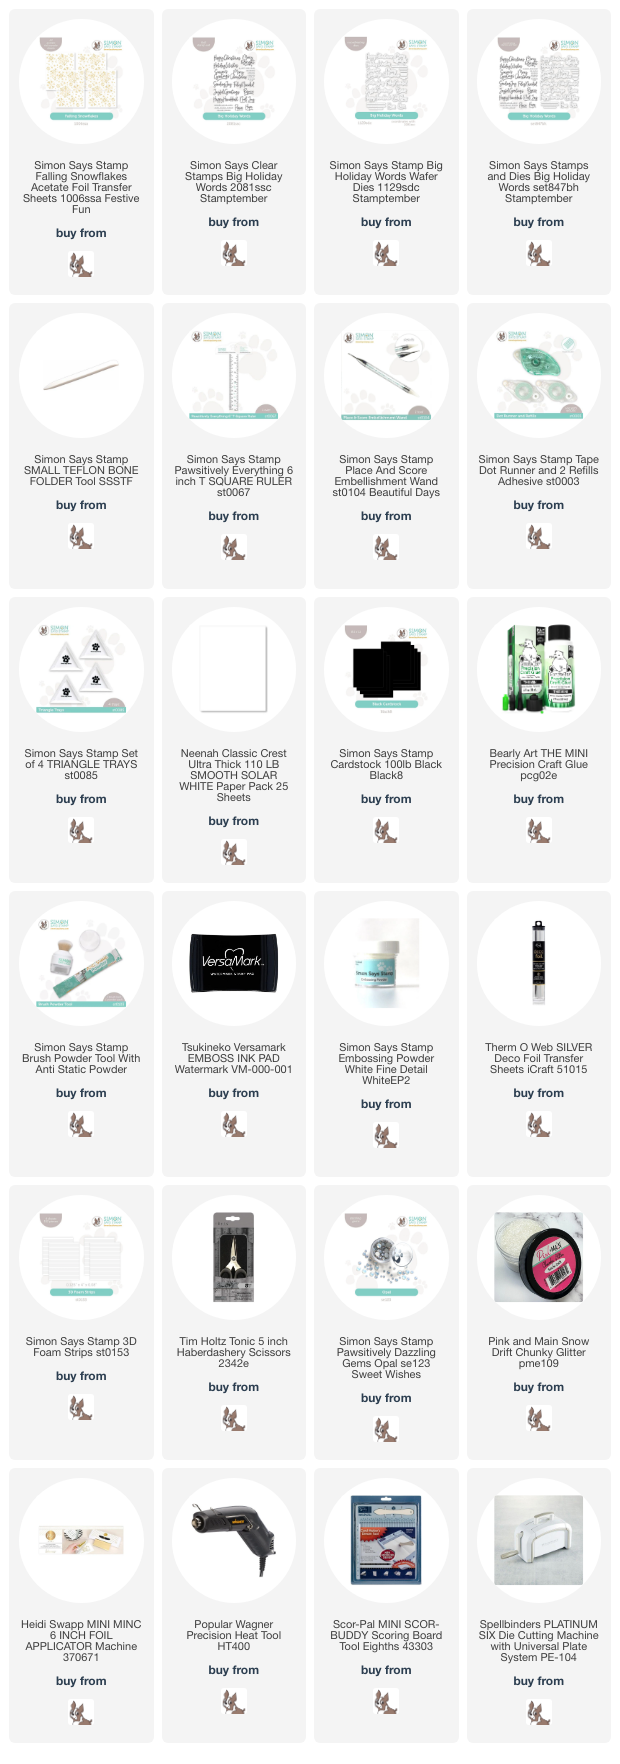
NOTE: all supplies are linked in the thumbnails at the end of this blog post.

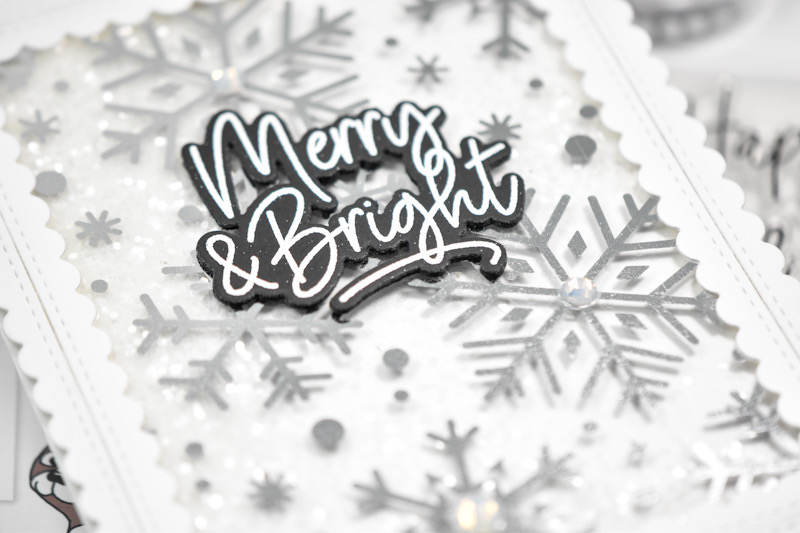
I began this project by silver foiling the acetate sheet to create a shaker card. To build the shaker, I used the PFS Stitched Scallop Rectangle to create a frame and applied glue around the edges and adhered the acetate sheet. I then added foam strips around the edges to create the well for my glitter shaker bits. A plain white panel was then adhered to that to contain everything. I did have some edges hanging out, because I don’t have the steadiest of hands, so I trimmed that off with scissors.

I stamped the Merry & Bright sentiment, which is from the Big Holiday Words set, using VersaMark ink onto black cardstock and heat set that using Detail White Embossing Powder. I trimmed it out using the coordinating die, along with two additional cuts, because I love that stacked sentiment look! The panel was adhered to the card base, the sentiment was glued in place and some Opal Dazzling Gems were added to finish up.

That does it for this project! I’m glad that I finally got the hang of making shaker cards, but I don’t even want to think about how many I messed up back in the day! Thanks for joining me, and I hope you have a fabulous day!

Supply List

Affiliate links used at no cost to you. What does this mean? If you use the links within this post to make a purchase, I receive a small commission, which allows me to continue to post crafty content for your enjoyment. I truly appreciate your support!

Latest Posts

Latest Instagram Posts