Simon Says Stamp STAMPtember Tim Holtz Collaboration

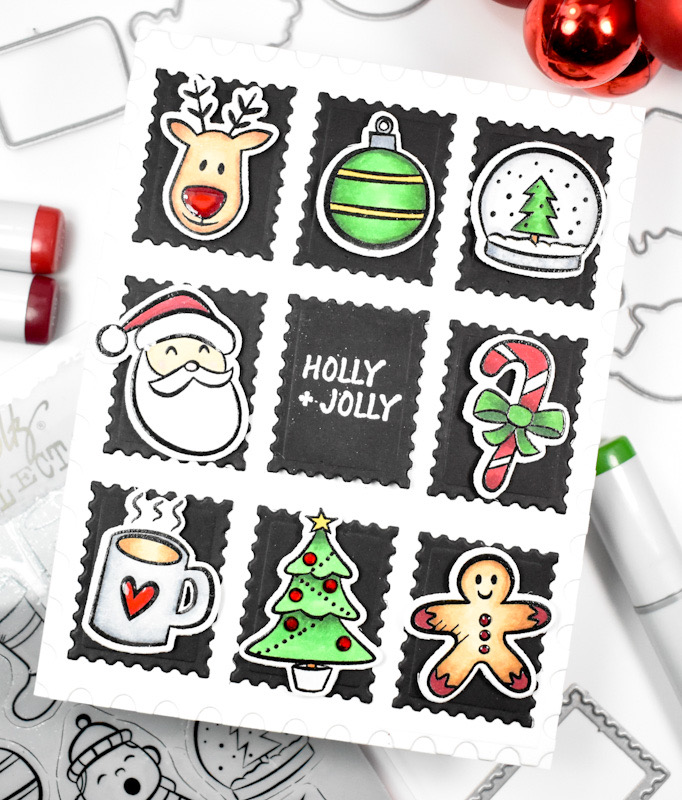
Hello Crafty Friends, and welcome back! YES, it’s the day that we’ve all been waiting for, the Tim Holtz Collaboration set for STAMPtember! You guys, this is such a fun set! It has two die sets, one set is a postage stamp set, and the other is the set that die cuts all of the fun images! Let’s go ahead and go through the details for this project!
NOTE: all supplies are linked in the thumbnails at the end of this blog post.

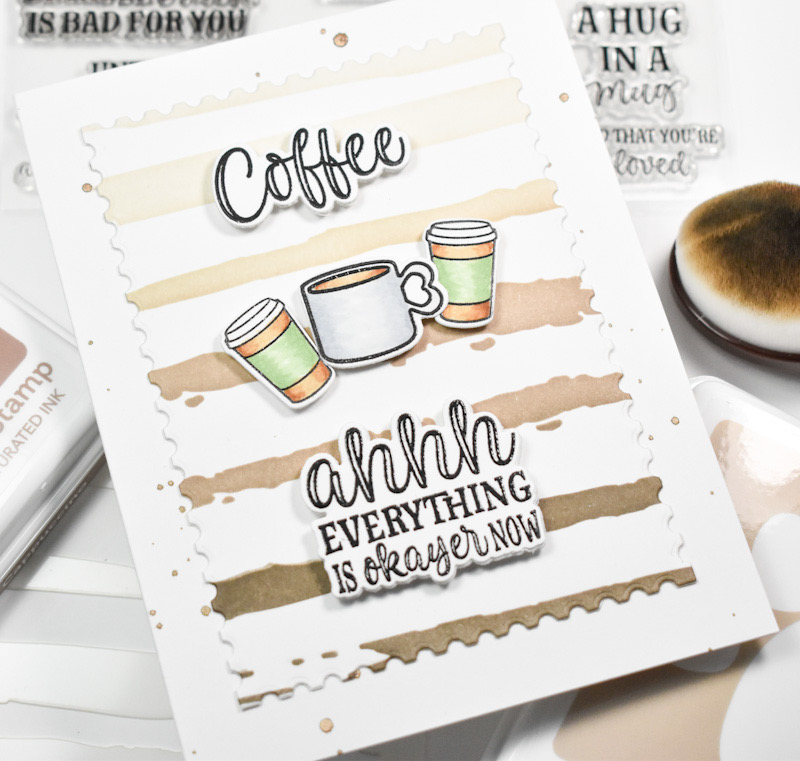
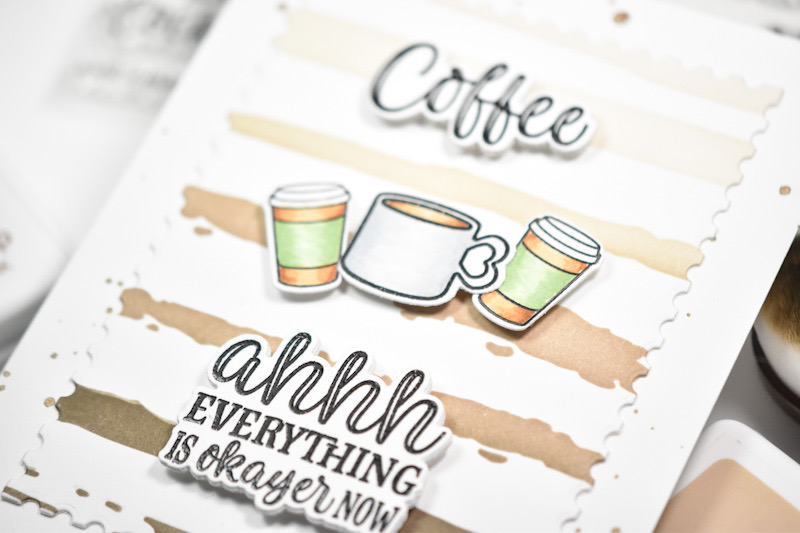
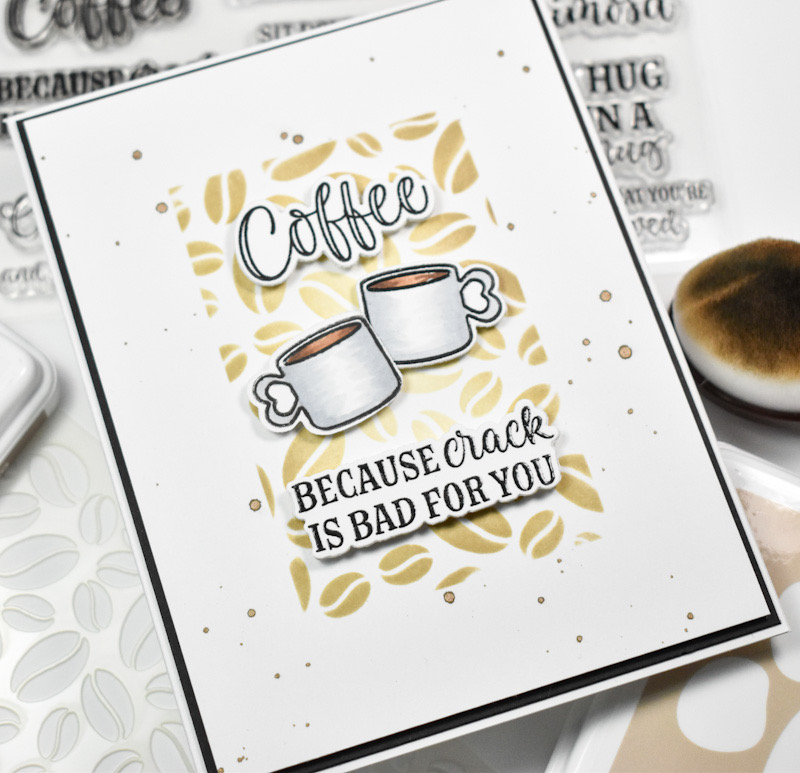
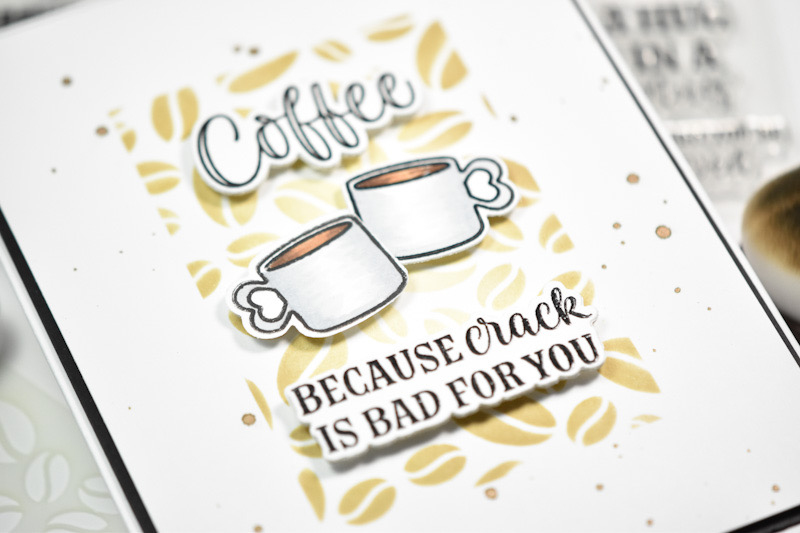
I began this project by stamping all of the images from the set. I just peeled the set from the plastic and plopped the whole thing into the Misti! I figured that I could figure out what I was going to use later. I used VersaFine Onyx Black ink for the stamping and Ranger Clear Embossing Powder to heat set.
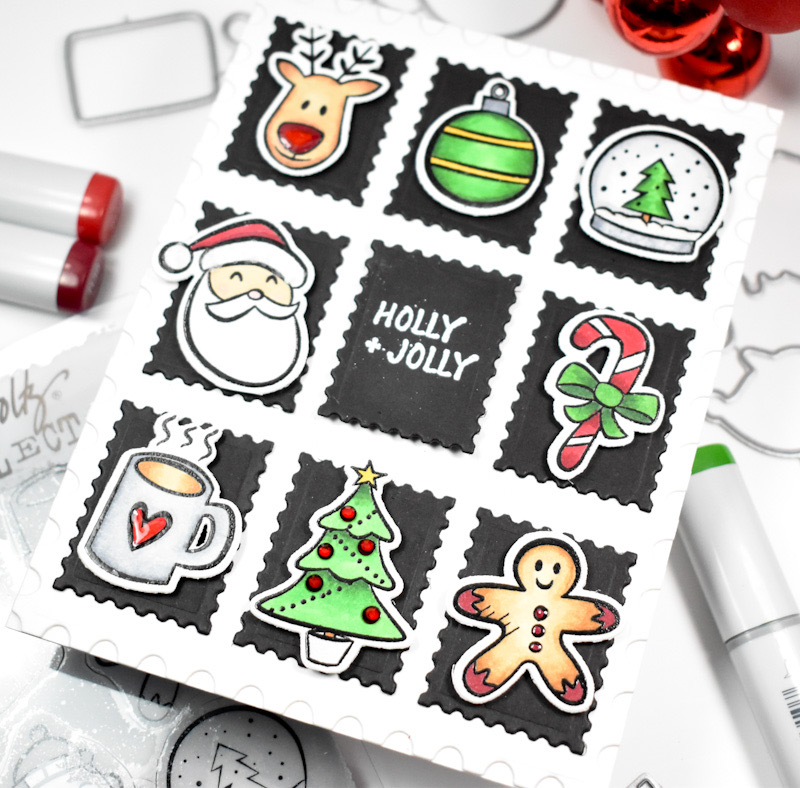
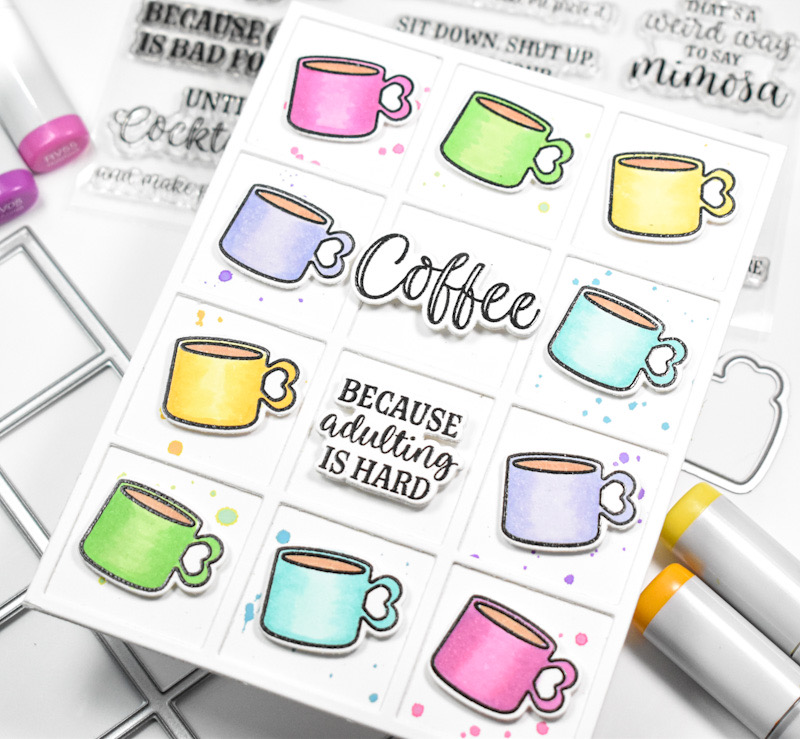
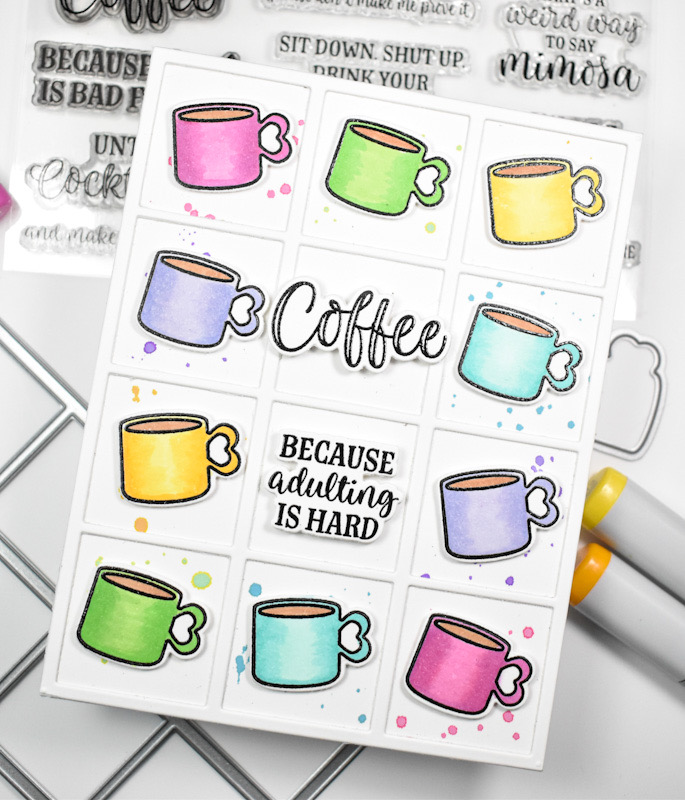
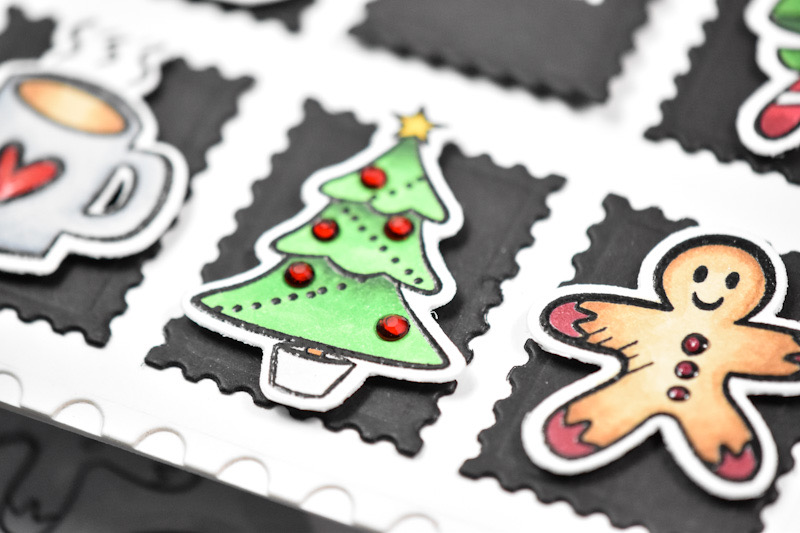
I then went to work coloring the images that I wanted to use with Copic Markers. I’ll link to those colors in the thumbnails below. Once the coloring was complete, I used the coordinating dies to trim the images out. I knew that I wanted to create a grid for my card, so I also cut nine of the small postage squares from black cardstock.

For some of the images on my card, I added some elements of interest. I added red gems to the Christmas tree, glitter to Santa’s hat and Glossy Accents to several of the images. Once those were dry, I adhered the images to the black squares using foam tape. My center square needed a sentiment, so I stamped this one using VersaMark Ink and heat set it using white embossing powder.
I created a background panel to work on using the SSS Postage Stamp Edge Frames and glued my images in place, while the middle sentiment was adhered using foam tape so that it would match the dimension of the other squares. The panel was then adhered to the card base to finish up.

That does it for this project! I hope you enjoyed it as much as I did! Be sure to grab your TH STAMPtember Collaboration set before it sells out, because once it’s gone, it’s gone forever! Thanks again for stopping by, and don’t forget to stay awesome!
Supply List
Affiliate links used at no cost to you. What does this mean? If you use the links within this post to make a purchase, I receive a small commission, which allows me to continue to post crafty content for your enjoyment. I truly appreciate your support!
Latest Posts
- Simon Says Stamp Braided Greetings

- Together By Design Color Cube Floral

- Simon Says Stamp Cute Duckling

- Simon Says Stamp Watercolor Wild Rose

- Simon Says Stamp Striped Missing You