Simon Says Stamp Leafy Birthday Wishes

Hello Crafty Friends, and welcome back! I’m so glad that you stopped by! Today’s card is featuring the new Celestial Wishes set, which is featured in the May 2024 Card Kit. So, let’s run through the details!

Main Products:

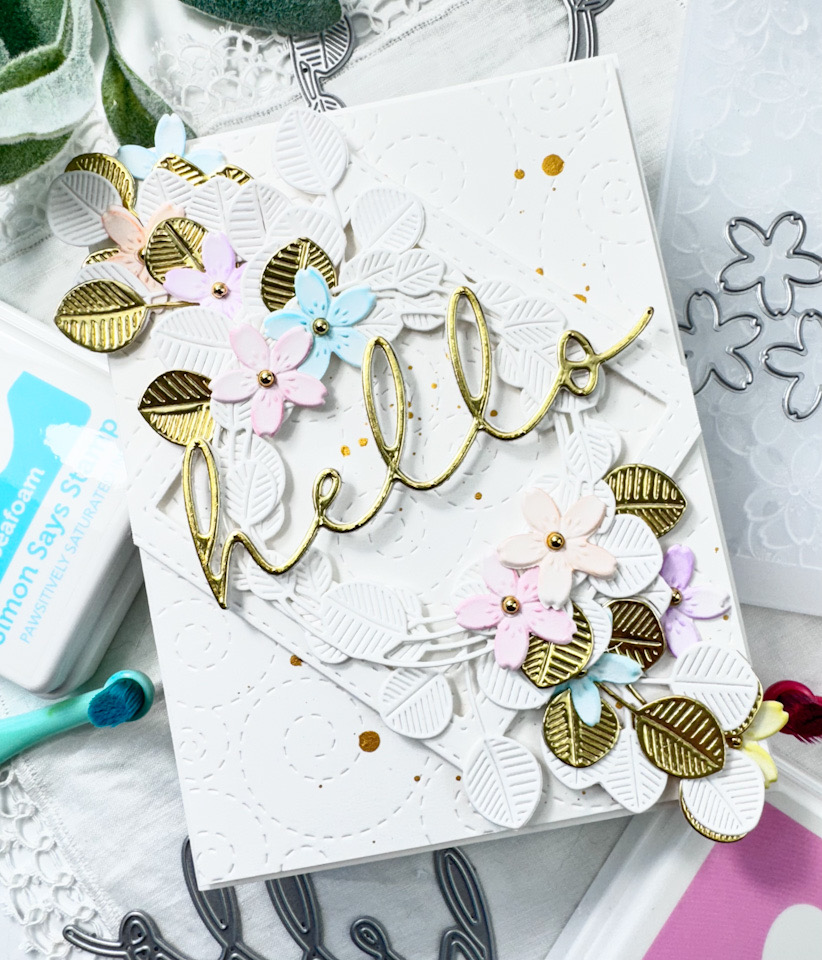
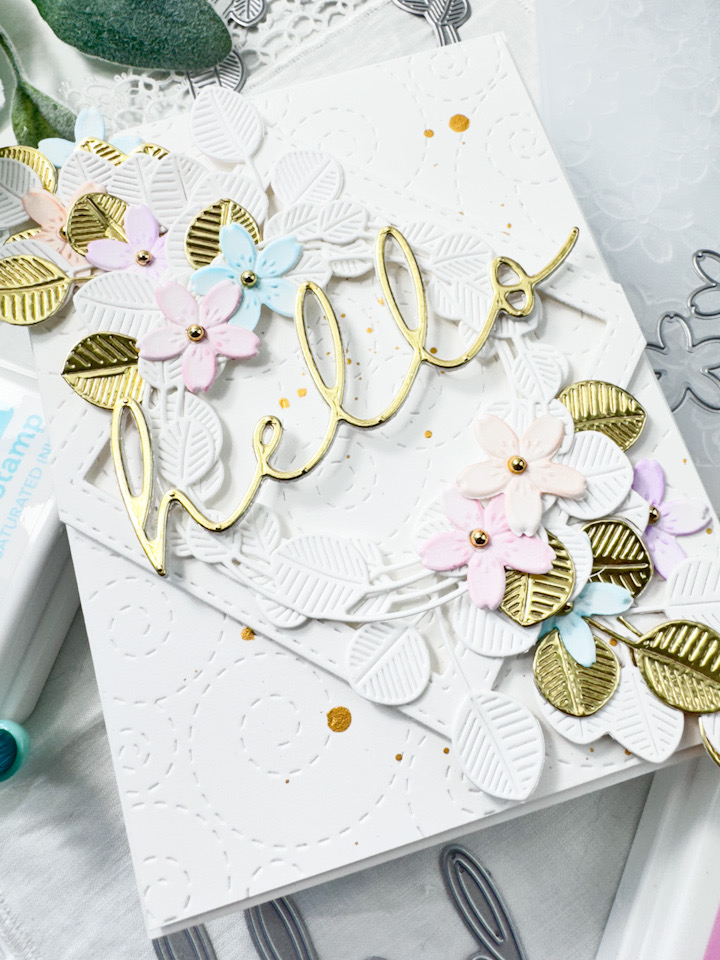
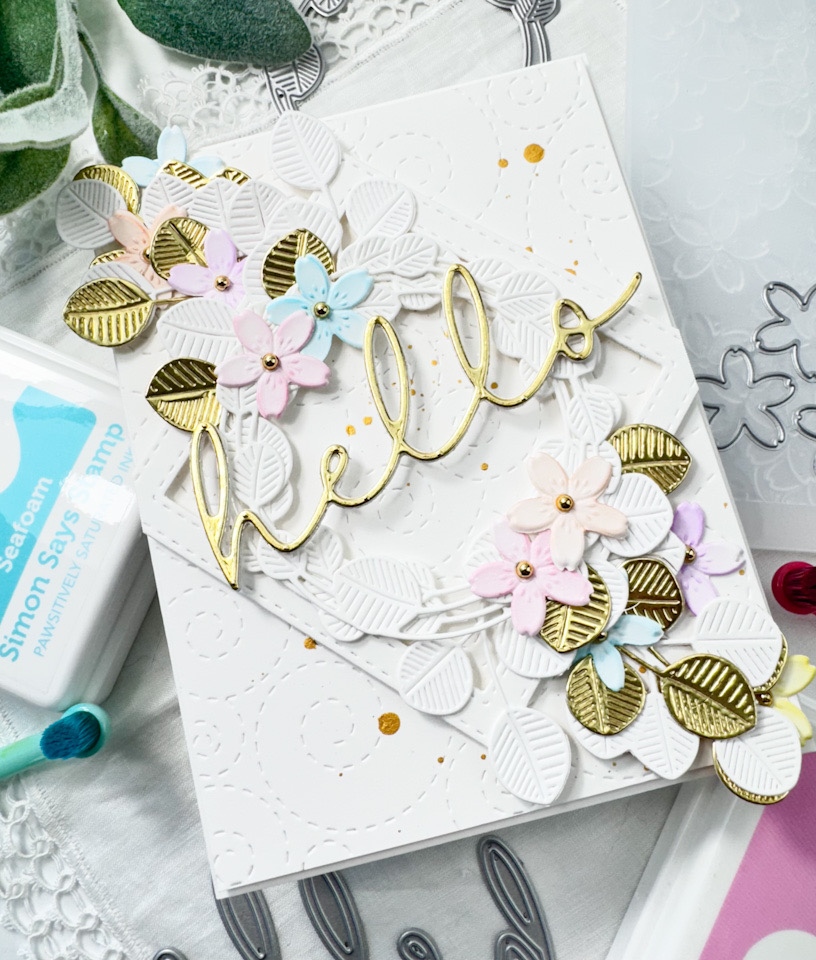
I began this card by pulling out the SSS Pawsitively Saturated Inks in Bubblegum, Melon, Lemonade, Sprout, Seafoam and Lilac so that I could stamp the largest leaf from this set in a rainbow of colors. I stamped my leaves on a panel of Neenah 110lb cardstock and used the coordinating die to trim them all out.

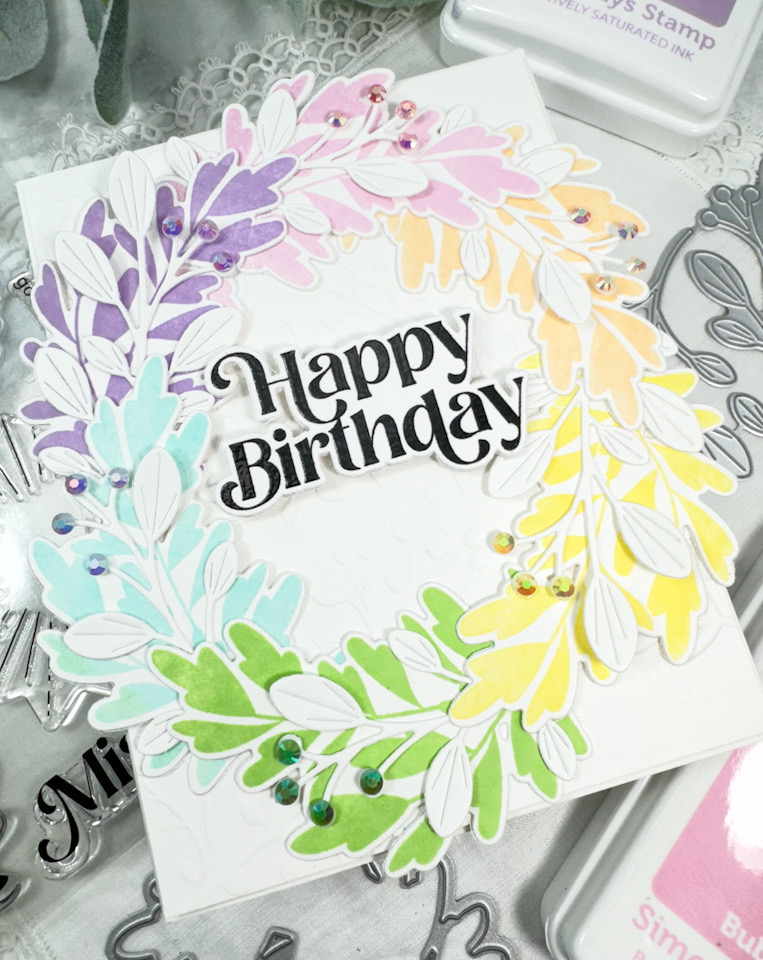
Once all of the leaves were stamped and cut, I embossed another panel using the SSS Wistful Leaves Embossing Folder and trimmed it down slightly. I played around with the leaf placement, and decided that I wanted some other white leaves tucked between the layers of the rainbow leaves, and I used the SSS Budding Branches for this. This die has quickly become a favorite of mine!

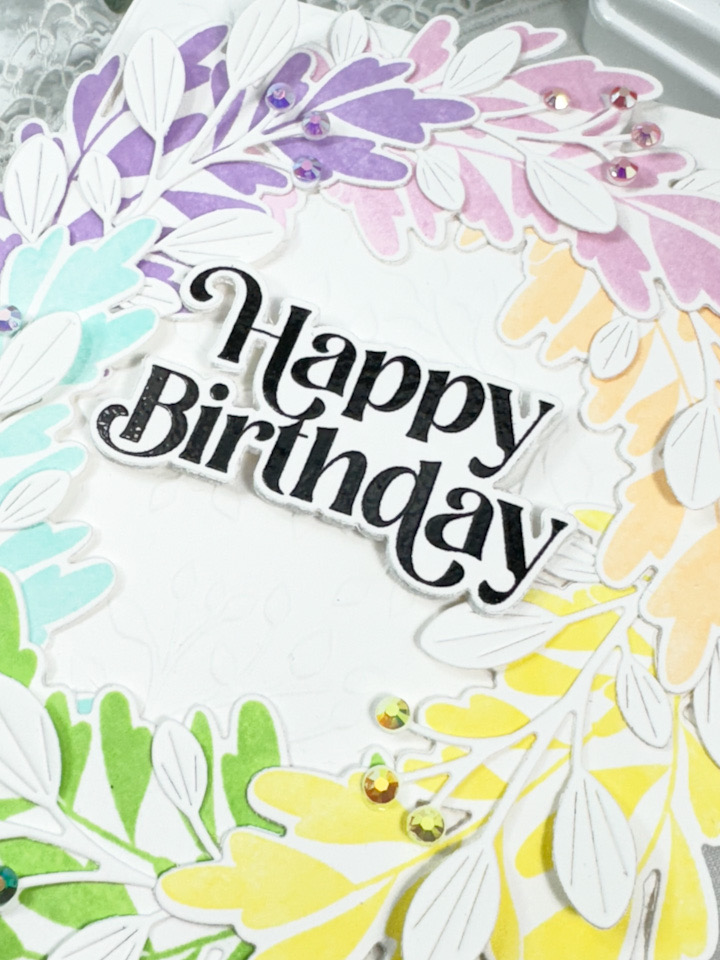
I started adhering the leaves to the embossed panel using liquid glue, while gluing the white leaves between the layers. I used the Happy Birthday sentiment, which is also from the new SSS Celestial Wishes set. I stamped that using VersaFine Onyx Black ink and heat embossed it using Ranger Clear Embossing Powder. Once again, I used the coordinating die to trim it out, along with two additional cuts and glued all of those together for a stacked sentiment.

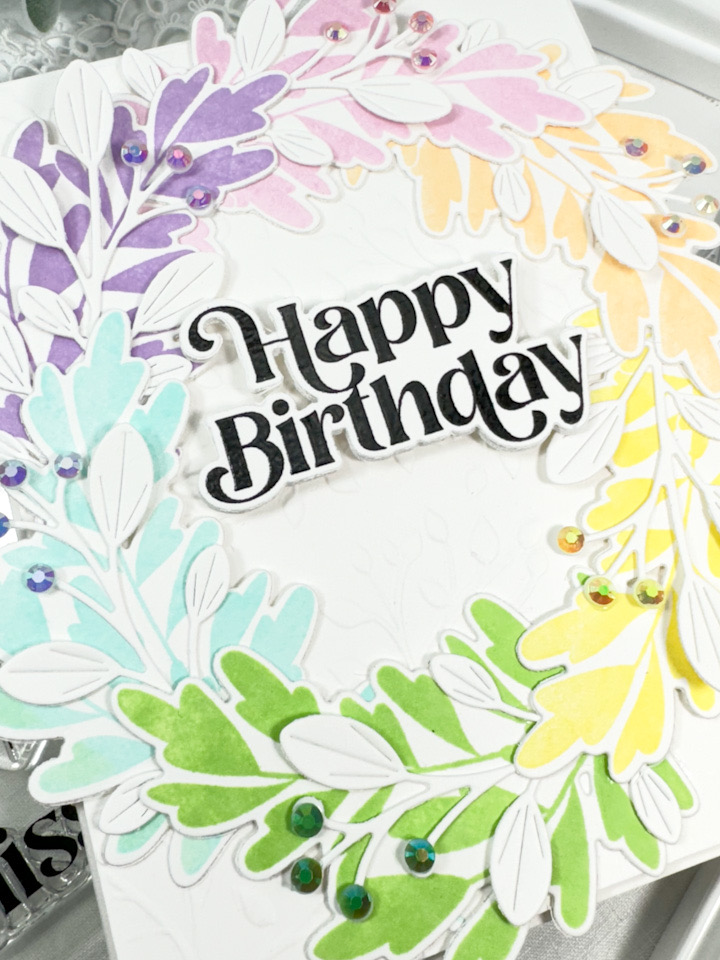
The sentiment was adhered to the panel using SSS 3D Foam Strips, and I added PinkFresh Jewels to the “buds” of the branches using the colors of the rainbow. The whole panel was then adhered to the card base using foam tape.

That does it for this project! I hope you enjoyed it, and I hope it inspires some creativity for you, as well! You can check out all of the contents for the May 2024 Card Kit over on Simon’s website. Thanks again for stopping by, and I hope you have a wonderful day!

Other Products:

* Affiliate links used at no cost to you. Thanks so much for your support!

Latest Posts

Latest Instagram Posts

Simon Says Stamp Feel Better Blossoms

Hello Friends and welcome back! Thanks so much for stopping by to check out today’s project featuring the new Cherry Blossom Embossing Folder from Simon’s latest release, Be Bold. Let’s run through the deets for this one!

Main Products:

I began this project by spritzing a panel of Neenah 110lb cardstock with water and placing it in the SSS Cherry Blossom Embossing Folder and running it through the machine. I also used the included die cut and cut a few white flowers and ink blended those using SSS Pawsitively Saturated Ink in Seafoam.

To add the black to the flowers, I used the TH Brayer and a VersaFine Onyx Black ink pad, and just rolled the black onto the raised portions of the panel. I also used a Copic 110 marker to touch up some of the black flowers as well. Once that was dry, I used Cosmic Shimmer Snow and Ice Lustre Polish to add some shine to some of the black flowers using my finger.

I used the SSS Feel Better Soon sentiment and cut that once from Aqua Mirror cardstock and twice from Neenah 110lb cardstock. I also cut the shadow portion twice and adhered all of those pieces together using liquid glue. The sentiment was glued directly to the panel, and I glued the ink blended flowers in place also.

To finish up, I added some SSS Dazzling Gems in Surf to some of the flowers before adhering the floral panel to a black panel with foam tape.

That does it for this one! I hope you enjoyed this project, and I hope it inspires you to experiment and play around with your embossing folders. Don’t forget to check out the entire Be Bold release over on Simon’s website. Thanks again for stopping by, and have yourself a wonderful day!

Other Products:

* Affiliate links used at no cost to you. Thanks so much for your support!

Latest Posts

Latest Instagram Posts

Simon Says Stamp Hello Cherry Blossoms

Hello Crafty Friends, and thanks so much for joining me! I’m back today with a project featuring the new Cherry Blossom Embossing Folder from Simon Says Stamp’s latest release, Be Bold. There’s a lot going on with this card, so let’s get to the details!

Main Products:

This card begins with cutting some white flowers using the included die from the SSS Cherry Blossom Embossing Folder. Once I had quite a few cut, I placed them inside the folder and ran them through the machine to add the embossed texture to them. I then did some light ink blending on them using SSS Pawsitively Saturated Inks in Bubblegum, Lilac, Lemonade, Marine, Seafoam, and Melon.

I then used the SSS Etched Eucalyptus Wreath and cut three of those from Neenah 110lb cardstock. While I was cutting, I went ahead and cut a bunch of leaves using the SSS Eucalyptus Leaves die from Neenah 110lb cardstock and gold cardstock, and I used the SSS Stitched Squares to cut one of those.

The background was created using the SSS Stitched Whirl Background and some gold acrylic ink splatter. As you can imagine, there was a lot of playing around with placement on this card! I adhered the three eucalyptus wreaths together using liquid glue and set that aside. I placed SSS 3D Foam Strips on the back of the square and decided placement of the leaves, and began gluing those in place. Some leaves had to be trimmed, and I reserved those to tuck back in where needed.

The square was then adhered to the panel and the wreaths were adhered atop that using a combination of liquid glue and foam strips for support. I glued a few flowers to the wreath and tucked in the remaining flowers here and there, along with the reserved white and gold leaves. I die cut the SSS Simple Hello once from gold cardstock and four times from Neenah 110lb cardstock and glued all of those together with liquid glue. I don’t normally make my sentiments that thick, but I knew it was going to need additional support, because it was going to be adhered atop the wreath with very few connect points.

I glued the Hello in place, and added some PFS Gold Metallic Pearls to the flower centers for added interest. The entire panel was then adhered to the card base using foam tape. Needless to say, this card is quite thick, but I love how it turned out!

Don’t forget to check out the entire Be Bold release over on Simon’s website! Thanks again for joining me, and I hope you have a fabulous day!

Other Products:

* Affiliate links used at no cost to you. Thanks so much for your support!

Latest Posts

Latest Instagram Posts