Full Bloom Sunrise Stem

Hello Crafty Friends, and thanks for stopping by. Simon Says Stamp’s latest release, Just a Note, is live, and I’m back today with a card featuring the new Plant Sentiments stamp set. Since I gravitate towards flowers, I was super happy to receive a sentiment set that would coordinate. So, let’s run through the details for this one.

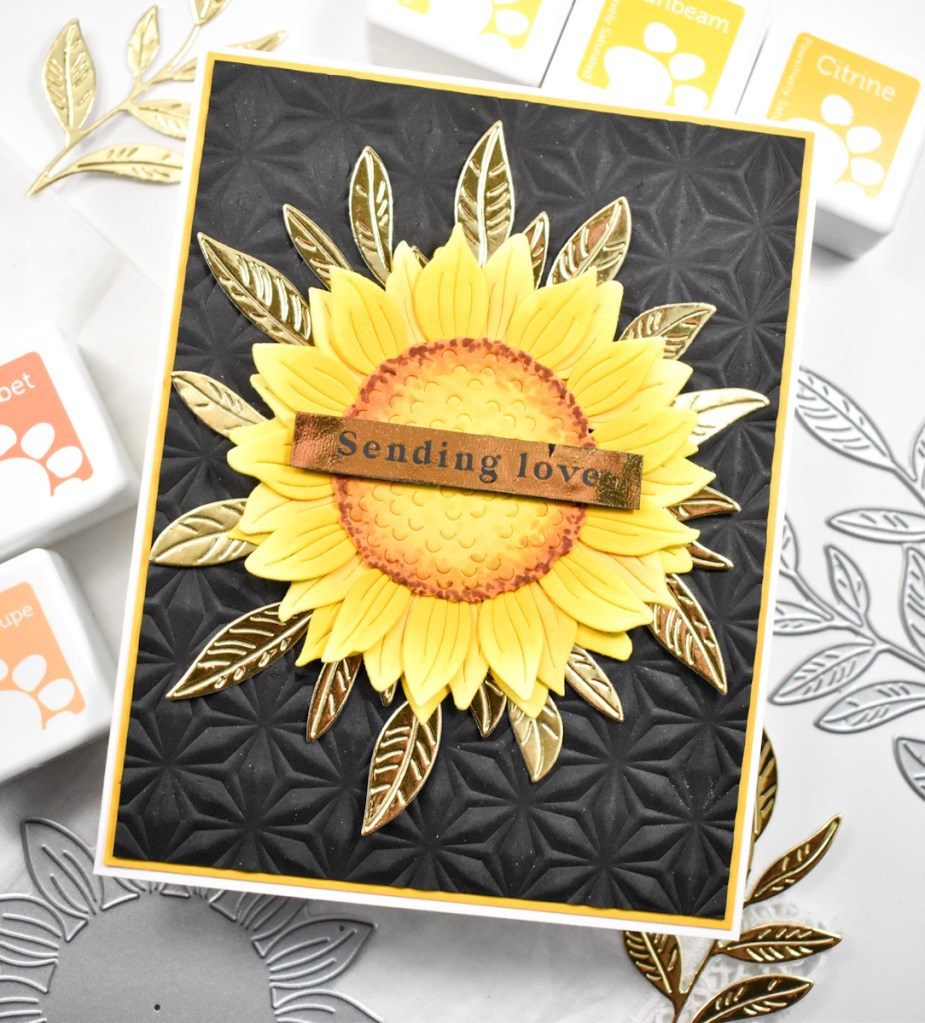
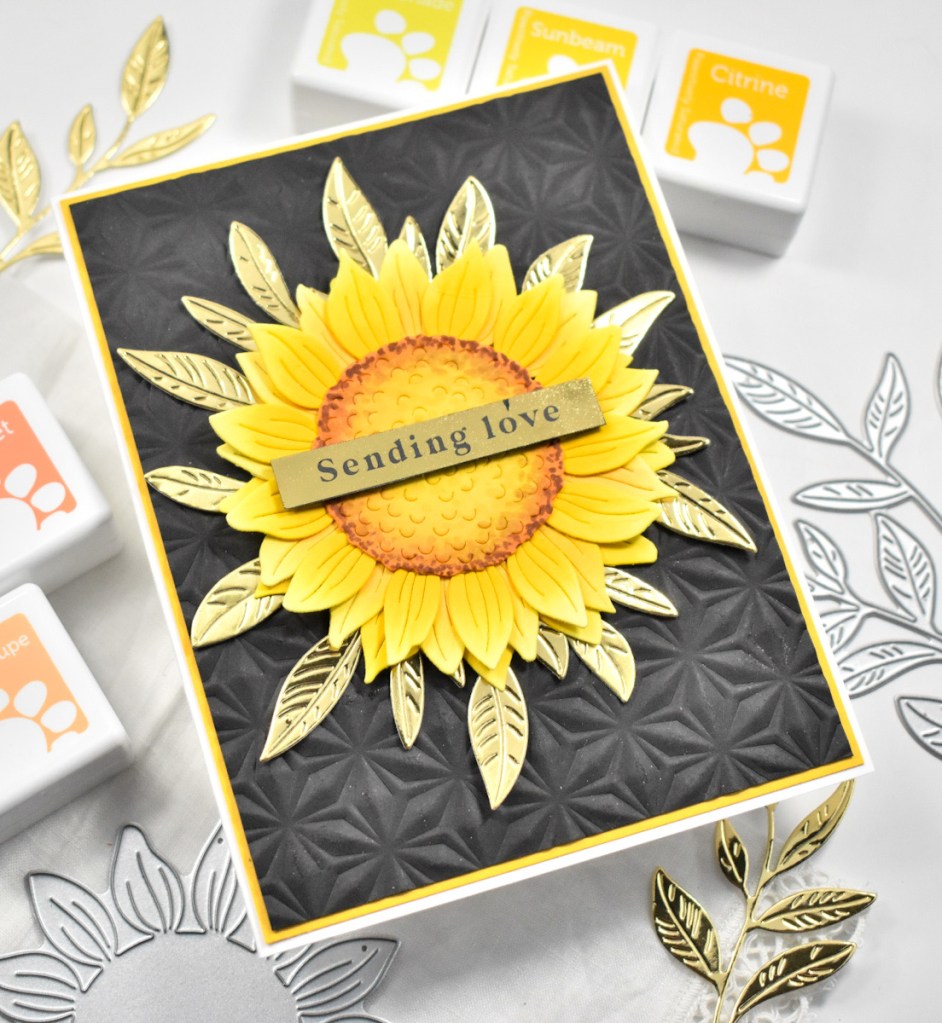
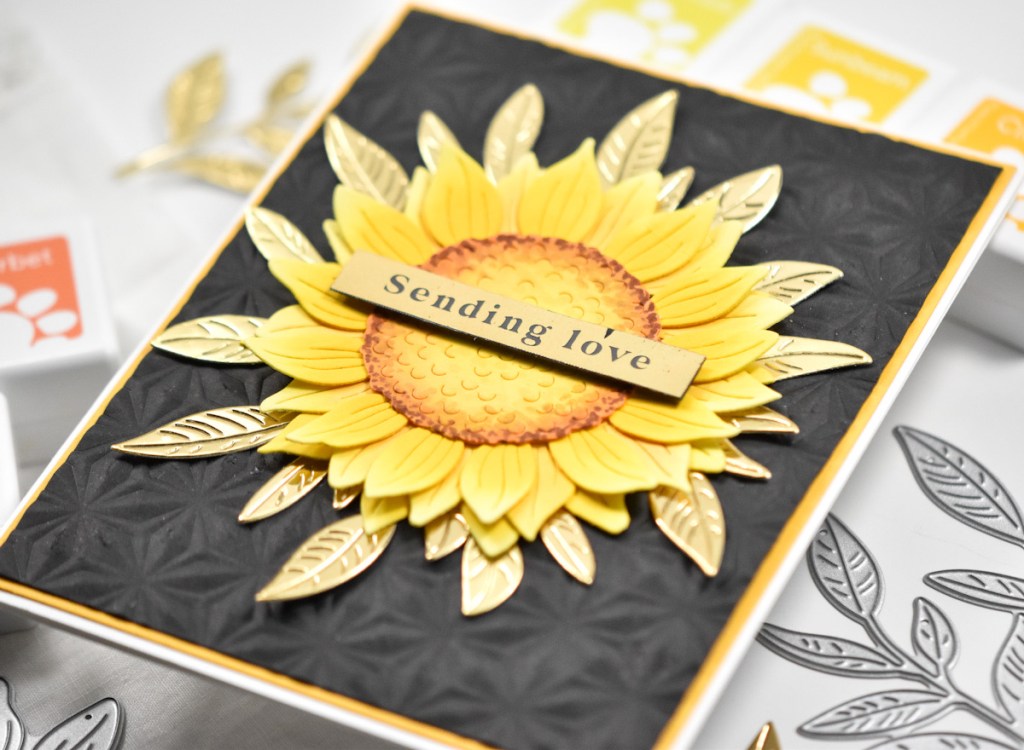
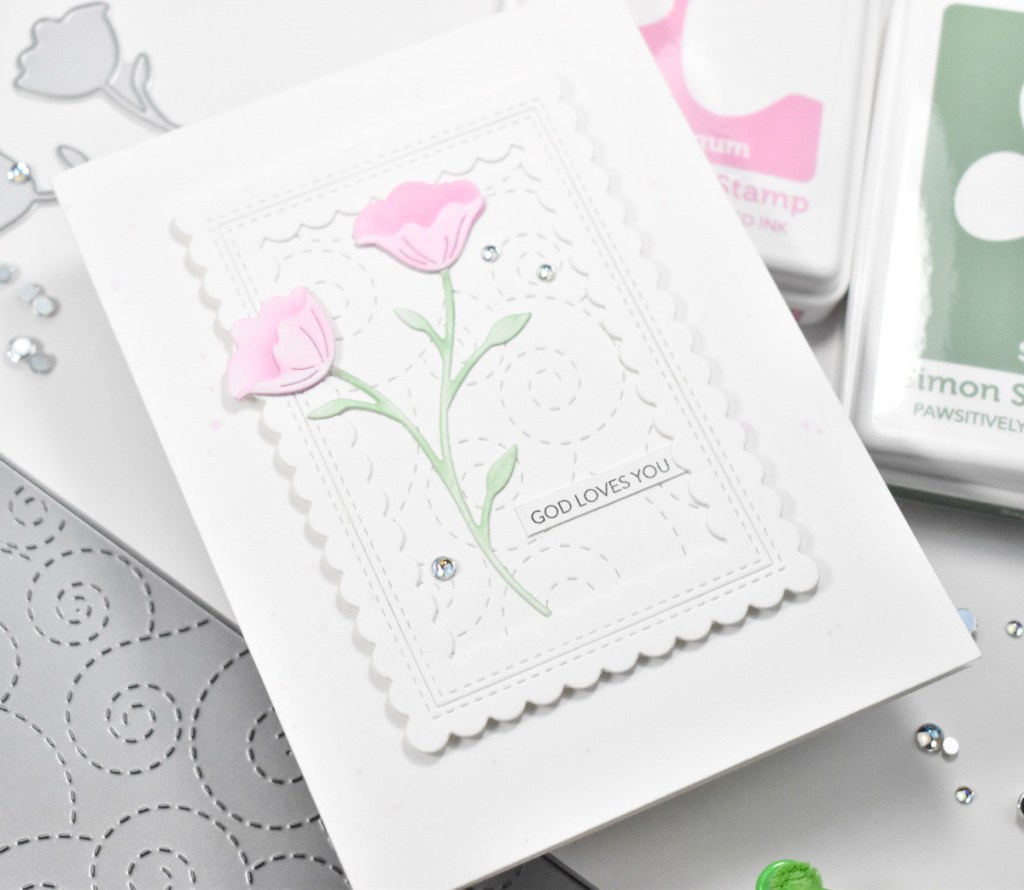
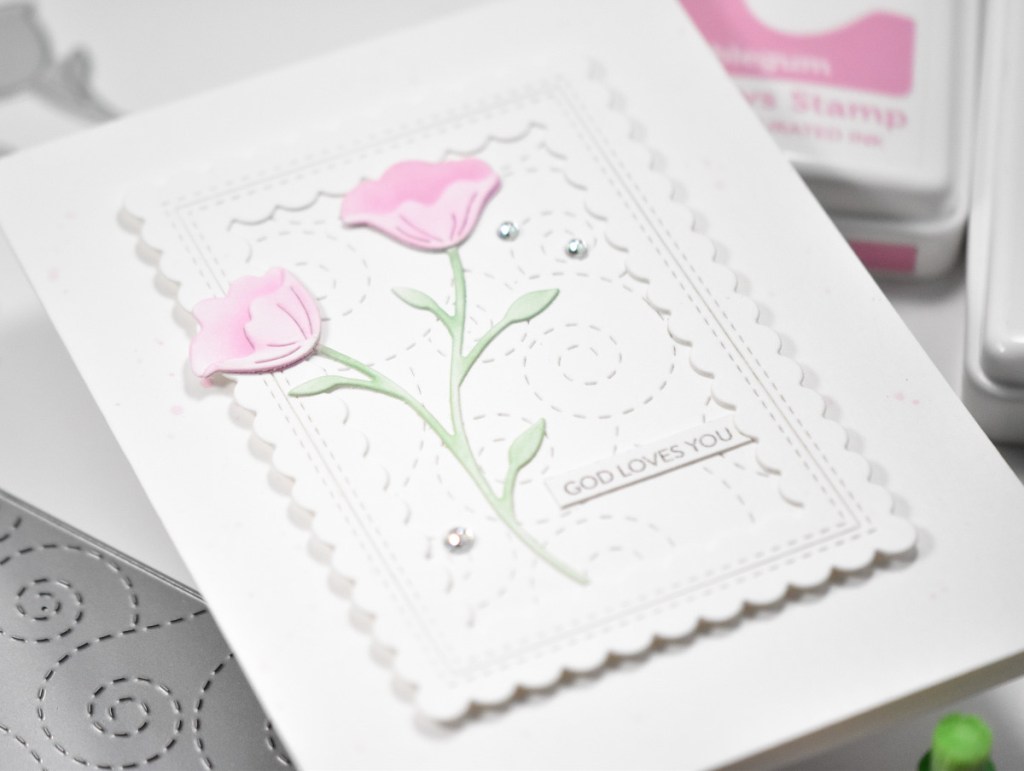
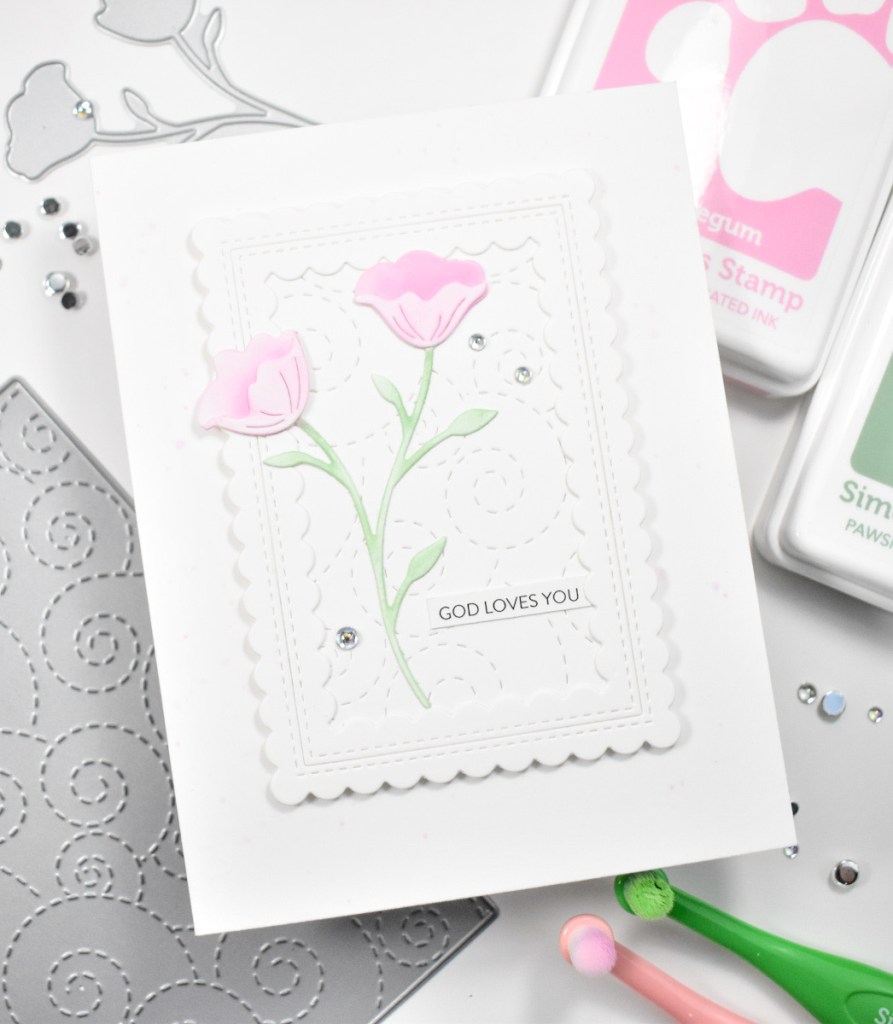
I began this card by die cutting three of the SSS Sunrise Stem flowers from Neenah 110lb cardstock. To add color to the flowers, I did some ink blending using SSS Pawsitively Saturated Ink in Celery, Limelicious, Lemonade, Sunbeam and Lilac.

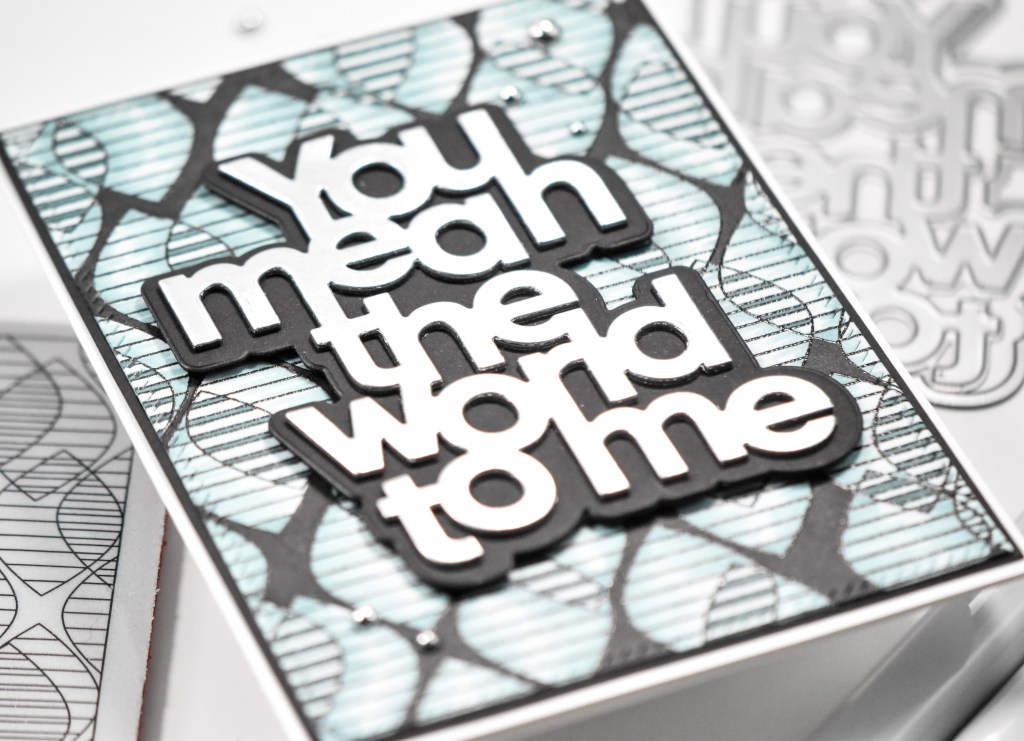
Once the flowers had some color, I cut a background using the SSS Stitched Whirl Background and set that aside while I worked on the sentiment. I selected a sentiment from the SSS Plant Sentiments set, and stamped that onto some black cardstock using VersaMark Ink. I then heat set it using SSS Detail White Embossing Powder and hand trimmed it out.

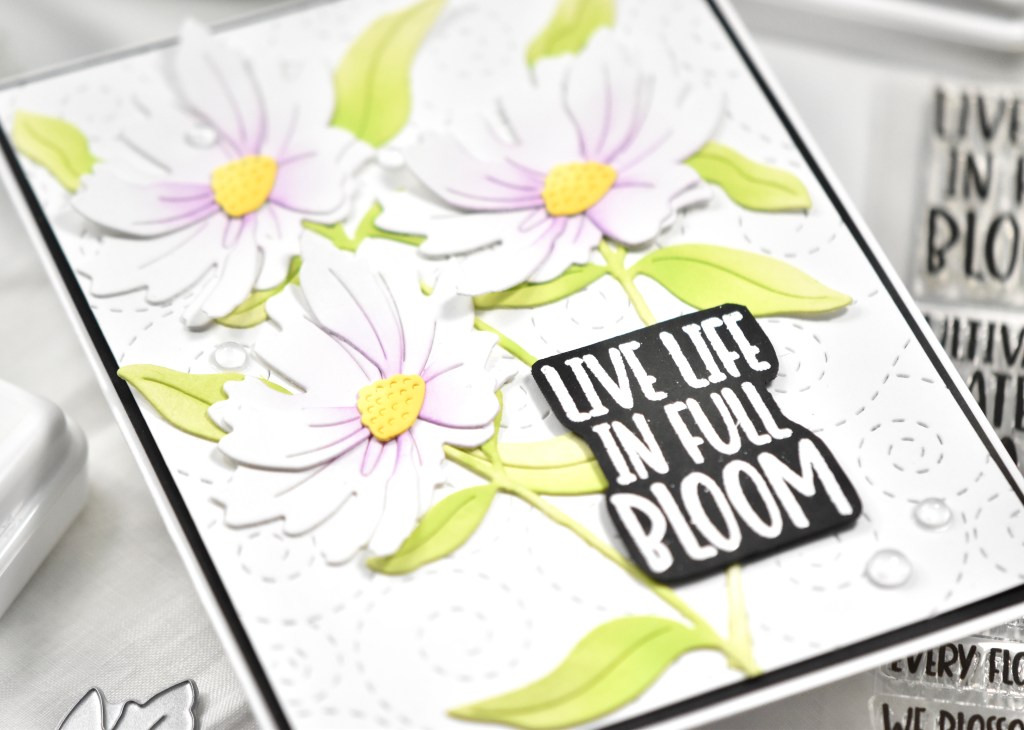
I assembled the flowers using liquid glue and then arranged them atop the background and adhered those to the panel. I then figured out the placement for the sentiment and adhered that using foam tape for a little added dimension. The panel was then adhered to a black panel for contrast before being adhered to the card base. I also added a few clear drops for added interest.

That does it for this project. I hope you enjoyed it, and I hope it inspires you to get crafty in your space. Be sure to check out the entire Just a Note release over on Simon’s website, because there’s lots of fun things to look at and be inspired by. Have a wonderful day and don’t forget to stay awesome!

Supply List:

* Affiliate links used at no cost to you. Thanks so much for your support!

Latest Posts

Latest Instagram Posts

Framed English Garden

Hello Crafty Friends, and thanks so much for stopping by! I spent some time not too long ago playing with some PinkFresh Studio Washi Tapes, and today’s project is a product of that playtime! So, let’s run through the detail, shall we?

To begin, I adhered a portion of the PFS English Garden Washi Tape to a panel of Neenah 110lb cardstock and used the coordinating die to trim those pieces out. I then used the PFS Sparkling Diamonds cover plate to cut another panel of Neenah to use for the background.

I also pulled out a scrap and used the PFS Stitched Scalloped Rectangles to cut one of the smaller rectangles from this set. I set all of these pieces aside while I worked on the sentiment, and for that I used the PFS Scripted Sentiments. I used gold hot foil to foil the sentiment and used the coordinating die to trim it out. I cut two additional sentiments and adhered those together to make it a bit more sturdy and to add more dimension.

To assemble the card, I adhered the frame to the background panel using foam tape, placing some of the washi tape pieces underneath it. I adhered the additional pieces atop the frame using liquid glue. I decided that it needed some additional leaves, so I used the PFS Leafy Branch and cut a few from Neenah and tucked those behind the flowers, securing with glue.

I adhered the sentiment, offset from the frame just a little bit, using a combination of glue and foam tape. The panel was then adhered to the card base before adding a few PFS Gold Metallic Pearls to finish up.

I really enjoy working with the PinkFresh Studio washi tapes, because beautiful cards come together so effortlessly! They have so many to choose from and each one is gorgeous in its own way! I hope you enjoyed this project, and I hope it inspires you to get crafty in your space. As always, have a wonderful day and don’t forget to stay awesome!

Supply List:

* Affiliate links used at no cost to you. Thanks so much for your support!

Latest Posts

Latest Instagram Posts

Sending My Love Icon

Hello and welcome back! So glad that you could stop by today to check out another card featuring the new SSS Happy Icons stamp set, which is from their latest release, Out of This World. Let’s run through the details, shall we?

To begin, I stamped one of the stamps from the SSS Happy Icons stamp set onto a scrap of Neenah 110lb cardstock using VersaFine Onyx Black ink and heat set that using Ranger Clear Embossing Powder. I repeated that process for a second time to get a smoother finish on the embossing. Once done, I used scissors to trim the image down to actual size.

I pulled out the SSS Friendship Text Background stamp and stamped that onto a panel using PFS Misty Coast ink and trimmed it down using the SSS Postage Stamp Edge Frames. I foiled this sentiment from Spellbinders Yana’s Sentiments using silver foil onto black cardstock and trimmed it out using the included coordinating die. I cut it an additional two times and glued all of those together for added dimension.

Before assembling the card, I splattered the card base using acrylic ink. The text background was adhered and the Happy Icon was adhered atop that using foam tape, and the sentiment was glued in place.

That finishes up this project! I hope you enjoyed it! Don’t forget to check out the entire Out of This World release! Thanks again for stopping by and as always, stay awesome!

Supply List:

* Affiliate links used at no cost to you. Thanks so much for your support!

Latest Posts

Latest Instagram Posts

So Appreciate You

Hello Crafty Friends, and thanks for stopping by! Today’s project is featuring the new Pawsitively Saturated Ink Cubes in Yellow Sunsets, from Simon Says Stamps’s latest release, Out of This World. Have you checked it out yet? What are your favorites? I would love to know what they are. Let’s run through the details for today’s project!

I began with a panel of Neenah 110lb cardstock and swiped the SSS Pawsitively Saturated Ink Cubes, from the Yellow Sunsets, across the panel. The colors that I used were Lemonade, Sunbeam, Citrine, Melon and Cantaloupe. Once that was done, I used the SSS Postage Stamp Edge Frames to trim it down. I used a larger frame to trim a panel of black cardstock as well.

The black and yellow was really speaking to me, so I used the SSS Etched Crocus Stems and cut some of those from black cardstock. I used a white gel pen to add some detail to the flowers before adhering them to the yellow panel with liquid glue. I used a sentiment from the SSS Reverse Gratitude Sentiment Strips and used foam tape to adhere that.

The yellow panel was then adhered to the black panel before being adhered to the card base. To finish up, I added some clear drops for a little bit of added interest.

Super simple project today, but simple cards are sometimes all that you need, or all that you feel like making for that day. Not every card has to be an elaborate undertaking to create. I hope you enjoyed this project, and I hope it inspires you to get creative in your space! Don’t forget to check out the entire Out of This World release, and don’t forget to stay awesome! Have yourself a wonderful day!

Supply List:

* Affiliate links used at no cost to you. Thanks so much for your support!

Latest Posts

Latest Instagram Posts

Simple Sunflower Blossom

Hello Crafty Friends, and welcome back to my blog! I’m so glad that you stopped by! I’m back today with a card featuring the brand new Bountiful Sunflower Blossom, from Simon Says Stamp’s latest release Out of This World. I can’t even express how much I love this die! Flowers and sentiment dies are my jam, so I was thrilled to receive this sunflower die! Let’s run through the details for this project, shall we?

I had a lot of ideas going on when making this card, and it originally was going a different direction when I decided that I liked the white on white texture of this one. I began by cutting the SSS Bountiful Sunflower Blossom five times from Neenah 110lb cardstock and assembling those together using liquid glue.

I played around with the placement of the flowers on the card front, trying to cover as much surface area as possible. Once trimmed, I filled in with the remaining pieces and petals. I decided that a white on white theme was quite calming, so I opted for a more suitable sentiment.

The SSS Prayers die seemed a suitable fit for this card. I tried a white sentiment, but ultimately decided on using Polished Gold cardstock. I cut the shadow portion of the die three times and the sentiment portion once and adhered all of those together before gluing to the card.

To finish up, I added some clear drops for a little added interest. That finishes up this card. Super simple, but I like the way it turned out. Simple isn’t usually my go-to, and I struggle with this design process, so I hope you enjoyed it! Don’t forget to check out the entire Out of This World release, and let me know your favorites! Thanks again for stopping by, have yourself a wonderful day, and stay awesome friend!

Supply List:

* Affiliate links used at no cost to you. Thank you for your support!

Latest Posts

Latest Instagram Posts

Beautiful Icon

Hello Crafty Friends and welcome back to my blog! I’m so glad that you stopped by to check out today’s card featuring the new Happy Icons stamp set from Simon Says Stamp’s latest release, Out of This World. So, let’s get right to it, and talk about the deets!

To begin, I selected one of the stamps from the SSS Happy Icons stamp set and stamped it on a scrap of Neenah 110lb cardstock using VersaFine Onyx Black ink. Once I got a good impression, I heat set it using Ranger Clear Embossing Powder. I repeated that process a second time for a smoother finish on the embossing.

Once the embossing was done, I used some scissors to trim the image down to its actual size. I then used the SSS Pride Flags to cut strips of rainbow cardstock. Those were then adhered to a scrap of cardstock and trimmed down as well.

I used the SSS Beautiful die and cut that three times from black cardstock and glued all of those together. I stamped the “you are,” which is from the SSS Tiny Words stamp set, on black cardstock using VersaMark ink and heat embossed it using SSS Detail White Embossing Powder.

Before assembling the card, I splattered the card base using black acrylic ink. The flag was glued to the card base, while the icon and sub-sentiment were adhered using foam tape for added dimension. The beautiful sentiment was glued atop the card to finish it up.

That’s all for this one! It’s not too elaborate, but I like the way it turned out! I hope you like it too, and I hope it inspires you to get crafty in your space. Don’t forget to check out the entire Out of This World release, and let me know your favorites! I’m nosey. I like knowing things! Thanks again for stopping by! Have a wonderful day and stay awesome!

Supply List:

* Affiliate links used at no cost to you. Thanks so much for your support!

Latest Posts

Latest Instagram Posts

Sending Love Sunflower

Hello and welcome back friends! I’ve been having a lot of fun playing with goodies from Simon Says Stamp’s latest release, Out of This World. For today’s card, I’m featuring the new Bountiful Sunflower Blossom. Let’s go through the deets, shall we?

To begin, I cut the SSS Bountiful Sunflower Blossom twice from Neenah 110lb cardstock and did some ink blending using the new Pawsitively Saturated Ink Cubes in Yellow Sunsets. Once all of the color was added, I adhered the layers together using liquid glue. I also added a little bit more detail using Copic Markers E18, E31, E35 and E55.

I used the SSS Kaleidoscope Embossing Folder to emboss a black panel, and I used the SSS Privet Branch to cut leaves from Polished Gold cardstock. I played around with the placement of the leaves before gluing those in place, and then glued the sunflower atop the leaves.

A foiled sentiment seemed to be the perfect fit for this card, so I used a sentiment from the SSS Everyday Acetate Sentiment Strips set and hot foiled that using gold foil. I adhered the sentiment over the sunflower using foam tape for some added dimension.

The finished panel was then adhered to a yellow panel for some contrast before being adhered to the card base.

That finishes up this project. I hope you enjoyed it, and I hope it inspires you to get crafty! Stop by and check out the entire Out of This World release and let me know your favorites. Have a wonderful day and stay awesome!

Supply List:

* Affiliate links used at no cost to you. Thanks so much for your support!

Latest Posts

Latest Instagram Posts

Simon Says Stamp You Mean the World

Hello Crafty Friends and thanks for joining me! Happy STAMPtember! It’s the best month of the year, in my opinion! What an amazing release! As exciting as today is, there’s a huge blog party happening tomorrow with exclusive promotions, so stay tuned for that! Today’s project is featuring the new Overlapping Drops background stamp. So, let’s go through the deets!

To begin this project, I stamped the SSS Overlapping Drops onto a panel of Neenah Classic Crest 110lb cardstock using VersaFine Onyx Black ink. Once I got a good impression, I heat set it using Ranger Clear Embossing Powder.

The panel was then trimmed down using the PFS Diagonal Stitched Rectangles. I pulled out my Copic Markers BG72 and BG75 and did some coloring of the pattern, and then used the 110 Special Black to color in the background.

I used the SSS You Mean the World to Me die and cut that from SSS Matte Silver cardstock once and then cut it two additional times from black cardstock. I also cut the shadow die from black cardstock as well. I adhered all of those together using liquid glue.

My stamped panel was adhered to a black panel using SSS Dot Tape Runner and that was then adhered to the card base. The sentiment was adhered to the panel using SSS Foam Squares, and I added a few PFS Silver Metallic Pearls.

That finishes up this project. It was a relatively simple card, but I like how it came out just the same. I hope you’ll stop by and check out the entire STAMPtember release, and let me know your favorites! Have a wonderful day, and don’t forget to stay awesome!

Supply List:

* Affiliate links used at no cost to you. Thanks so much for your support!

Latest Posts
Latest Instagram Posts

Simon Says Stamp God Loves You

Hello Crafty Lovelies! Thanks so much for stopping by! For today’s project, I played around with the new Blossom Vine die. Of course, I always love the opportunity to play with florals, so let’s go through the details!

To begin, I die cut the SSS Blossom Vine once from Neenah Classic Crest 110lb cardstock and did some light ink blending using the SSS Pawsitively Saturated Inks in Bubblegum and Sage. I then set that aside to work on the remainder of the card.

I die cut the smaller PFS Stitched Scallop Rectangles and trimmed a panel that would go behind the frame, and added texture to it using the SSS Whirl Background. That was then adhered together using liquid glue.

Before adhering anything to the card base, I smooshed a little of the Bubblegum ink on my glass mat and used a water brush to flick some splatters on it. The frame was then adhered to the card base using SSS 3D Foam Squares.

I then glued the flower element to the frame, along with a SSS Sentiment Strip. To finish up, I added some PFS Iridescent Clear Drops.

That finishes up this project! It was actually pretty simple, but I love the elegance of this card. I hope you’ll stop by and check out the entire Dream Big release over on Simon’s website. Thanks again for stopping by! Have a wonderful day and don’t forget to stay awesome!

Supply List:

* Affiliate links used at no cost to you. Thank you so much for your support!

Latest Posts
Latest Instagram Posts

Simon Says Stamp Rainbow Pieces

Hello Crafty Lovelies and welcome back! Thanks so much for stopping by today to check out my post featuring the new Pinpoint Starlet Emboss and Cut folder from Simon’s latest release, Dream Big. There’s an Instagram Hop going on over there with lots of chances to win a $25 gift card to Simon’s store. You don’t want to miss out on that! So, let’s go through the details for this one!

For this project, I opted to use just the center cut portion of this folder, so I cut it thirteen times from Neenah Classic Crest 110lb cardstock, and pulled out a bunch of Distress Oxide Sprays and sprayed each piece a different color. I’ll list all of the supplies at the end, if you’re interested in what I used.

Once all the pieces were dry, I pulled out a few Tim Holtz stamp sets and stamped on all of the pieces using Ranger Archival Jet Black ink. For the sentiment, I used the SSS The World Needs and cut that three times from black cardstock and adhered all of them together using liquid glue.

My background paper is from 49 and Market and the pack is just gorgeous! I trimmed this piece down using the PFS Diagonal Stitched Rectangles, splattered it using Royal Talens Oxide Black Acrylic Ink and began the assembly process. I began by gluing the colored pieces along the left side of the panel in rainbow order, of course, in a step sort of way, and I glued the sentiment to the right side.

I felt like it needed something else, so I added a black butterfly to tie in all of the black elements going on, and trimmed off the excess. The panel was then adhered to a black panel using SSS Dot Tape Runner before being adhered to the card base in the same way.

That wraps this one up! To be honest, I worked on so many different ideas with these pieces, and none of them were thrilling me, until I came up with this step idea. I’m still not in love with it, but I kind of like it. Anyhoo, thanks for stopping by today! Head on over and check out the Instagram Hop going on, and comment along the hop for your chance to win a gift card! Have a wonderful day and don’t forget to stay awesome!

Supply List:

* Affiliate links used at no cost to you. Thanks so much for your support!

Latest Posts
Latest Instagram Posts