Hello Crafty Lovelies! Thanks so much for stopping by! For today’s project, I played around with the new Blossom Vine die. Of course, I always love the opportunity to play with florals, so let’s go through the details!

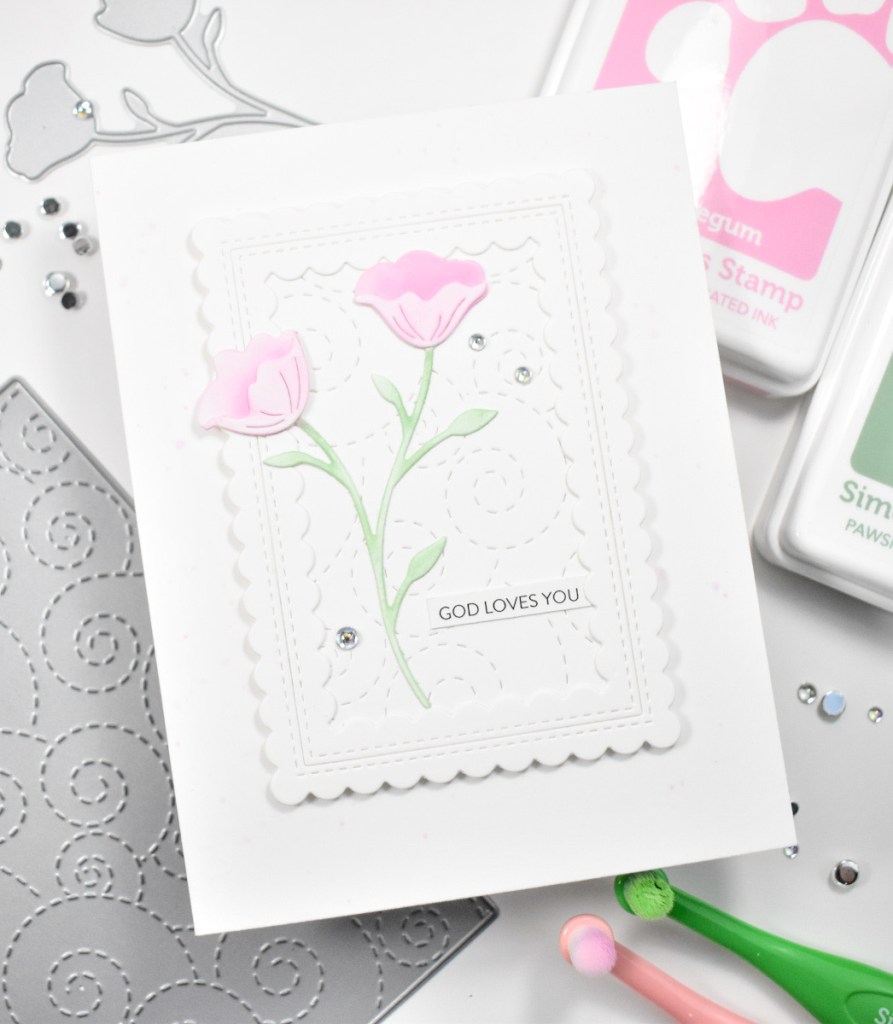
To begin, I die cut the SSS Blossom Vine once from Neenah Classic Crest 110lb cardstock and did some light ink blending using the SSS Pawsitively Saturated Inks in Bubblegum and Sage. I then set that aside to work on the remainder of the card.
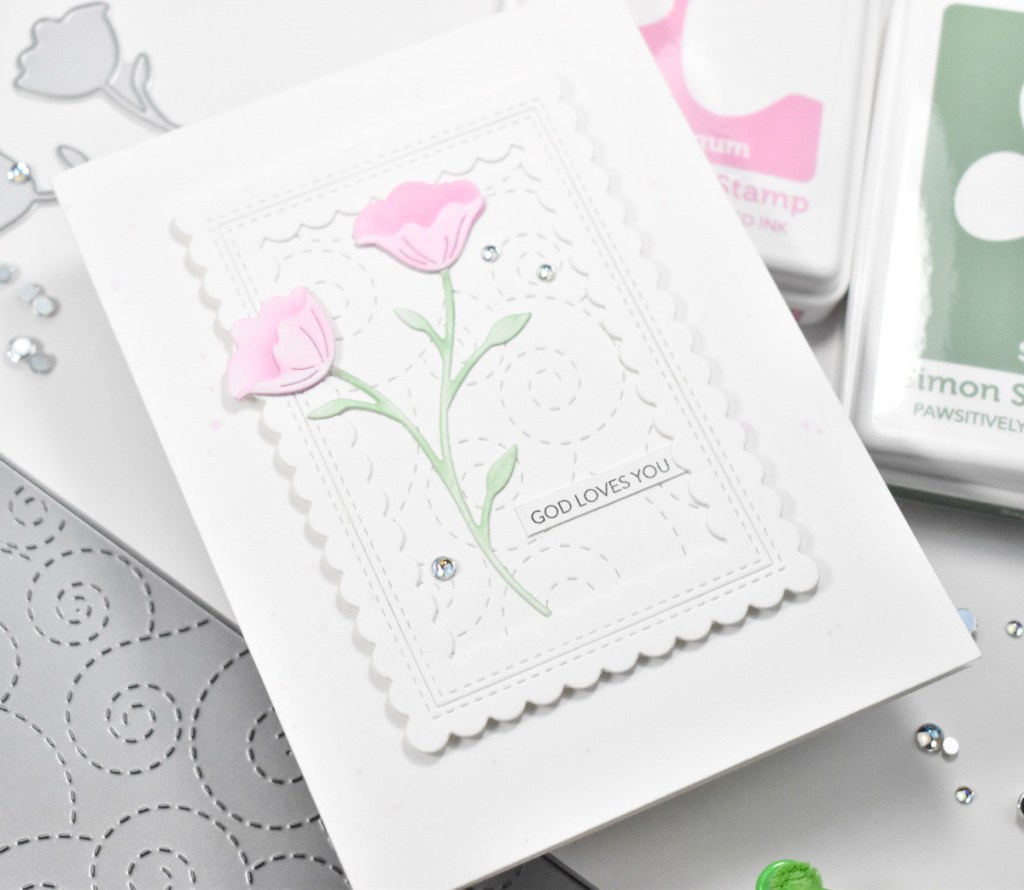
I die cut the smaller PFS Stitched Scallop Rectangles and trimmed a panel that would go behind the frame, and added texture to it using the SSS Whirl Background. That was then adhered together using liquid glue.

Before adhering anything to the card base, I smooshed a little of the Bubblegum ink on my glass mat and used a water brush to flick some splatters on it. The frame was then adhered to the card base using SSS 3D Foam Squares.
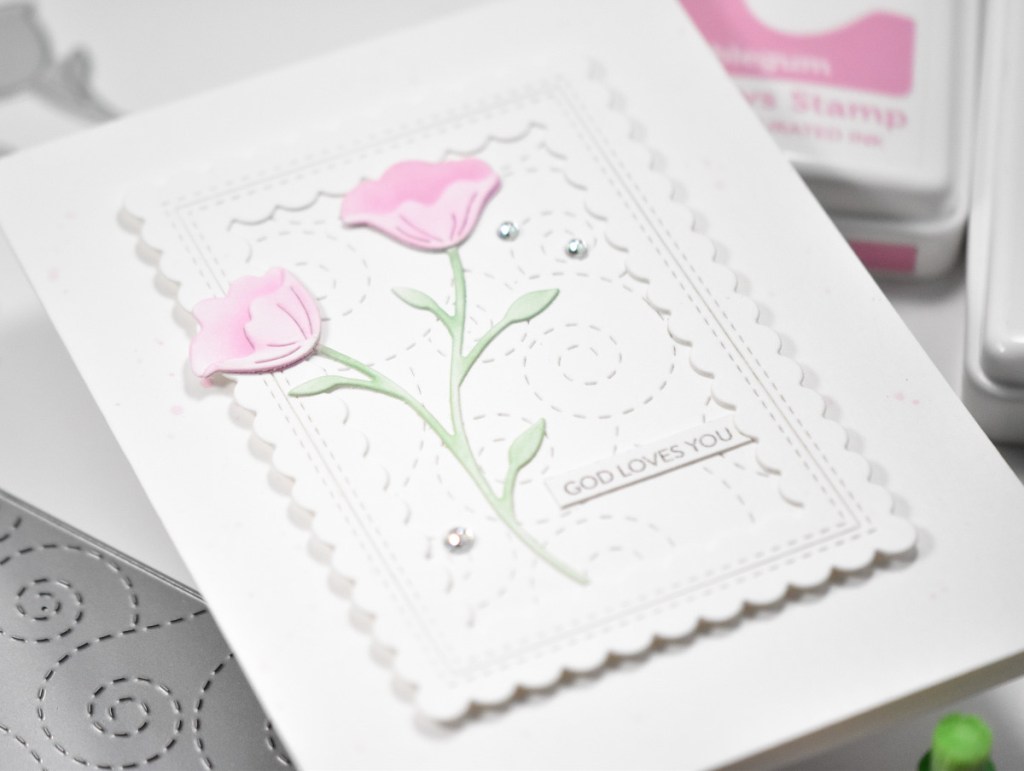
I then glued the flower element to the frame, along with a SSS Sentiment Strip. To finish up, I added some PFS Iridescent Clear Drops.
That finishes up this project! It was actually pretty simple, but I love the elegance of this card. I hope you’ll stop by and check out the entire Dream Big release over on Simon’s website. Thanks again for stopping by! Have a wonderful day and don’t forget to stay awesome!
Supply List:
- SSS Blossom Vine
- SSS Whirl Background
- SSS Pawsitively Saturated Inks: Bubblegum, Sage
- SSS Blender Brushes: Round, Flat
- SSS 3D Foam Squares
- PFS Stitched Scallop Rectangles
- PFS Iridescent Clear Drops
- Neenah Classic Crest Solar White 110lb Cardstock
- Studio Katia Embellishment Wand
- Scor Buddy
- Water Brush
- Bearly Art Glue
- Gemini Jr.
* Affiliate links used at no cost to you. Thank you so much for your support!
Latest Posts
- Simon Says Stamp Grungy Dewdrop Daisy

- Simon Says Stamp Pastel Birthday Wishes

- Simon Says Stamp Best Fish

- Simon Says Stamp Circle Thanks

- Simon Says Stamp Glowing Daisies