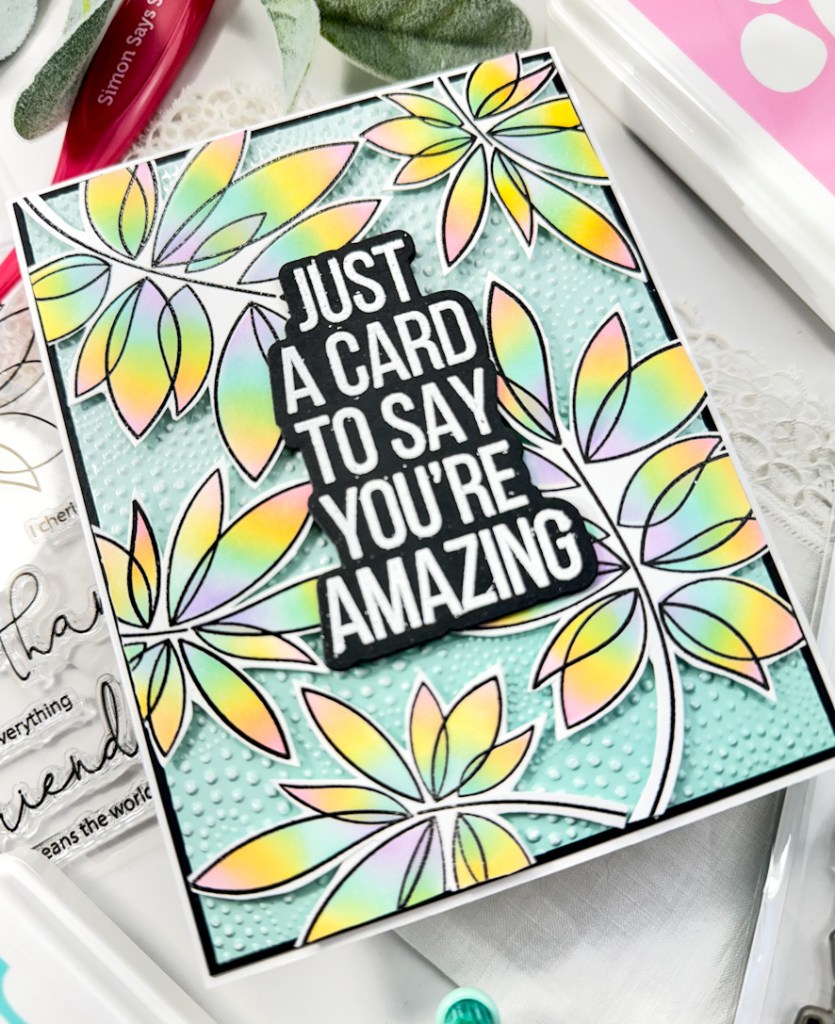
Simon Says Stamp Appreciate You Lattice
Hello Friends, and welcome back! I’m so glad that you stopped by today! Simon Says Stamp’s latest release, Be Bold, is live, and today’s project is featuring a couple of new products! So, let’s run through the deets for this one!

Main Products:
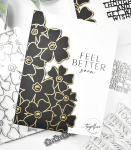
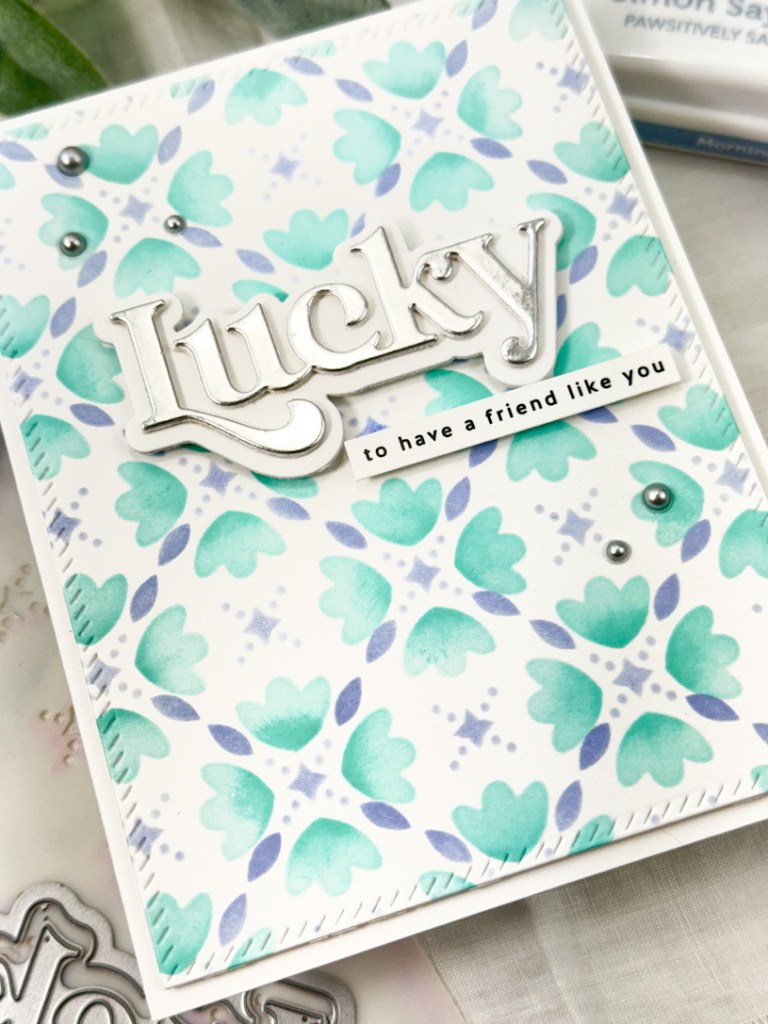
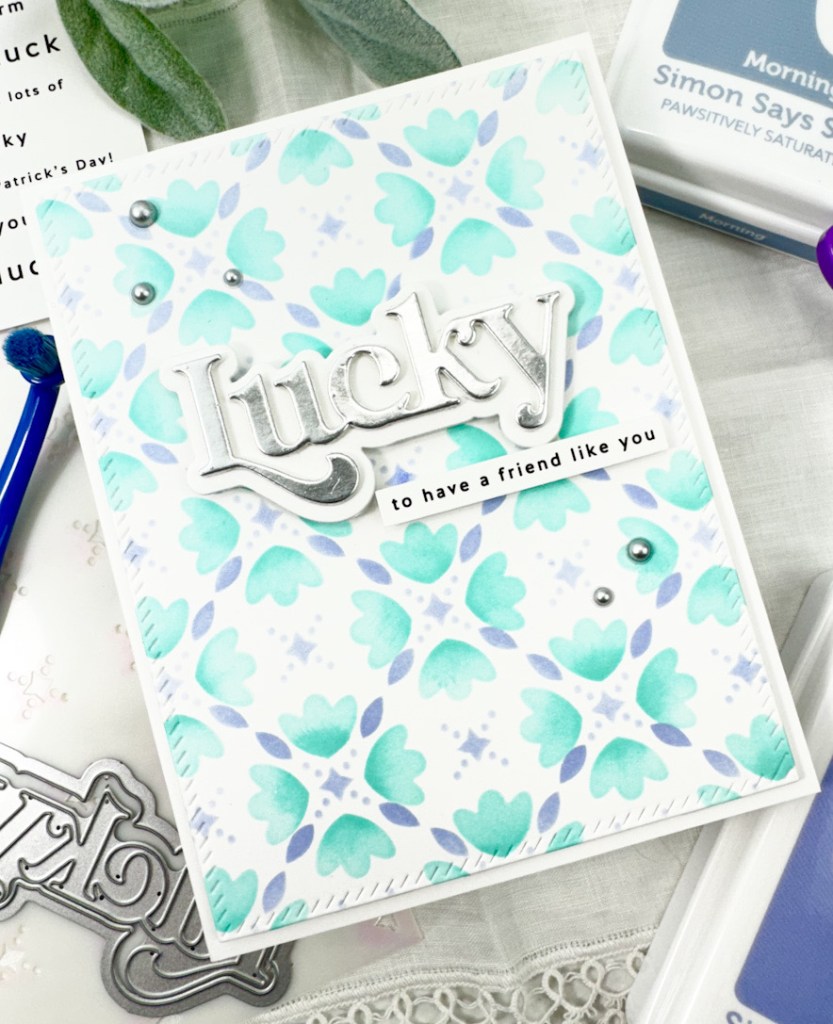
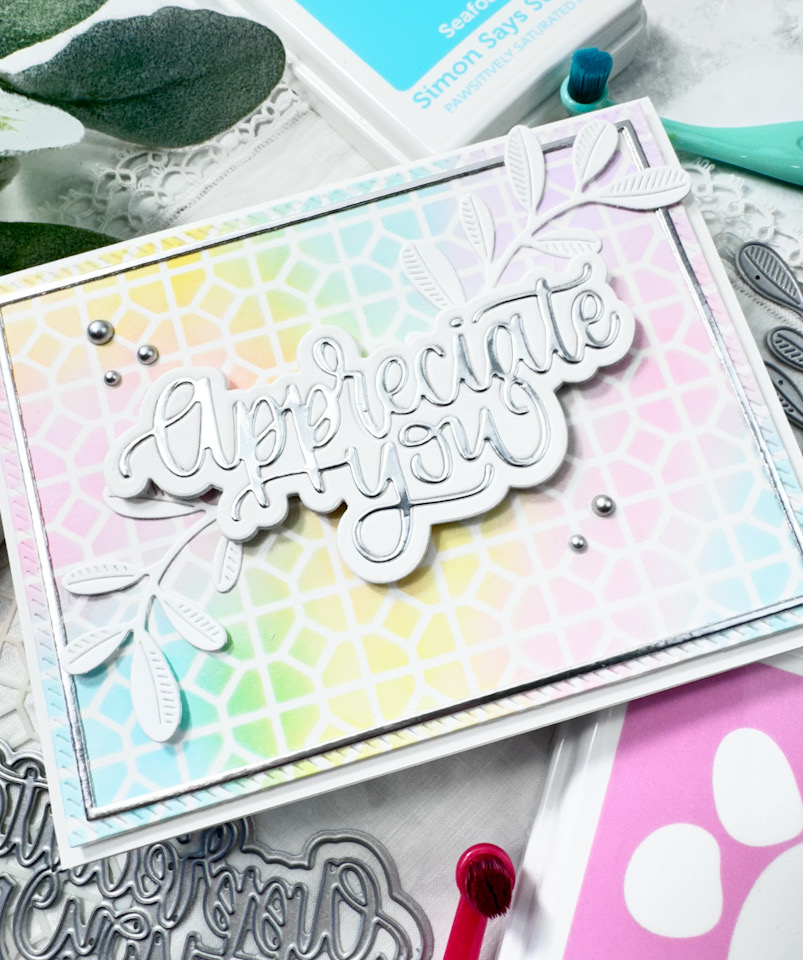
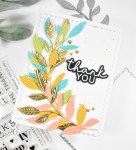
I began this project by taping down the SSS Lattice Tile Stencil to a panel of Neenah 110lb cardstock, and did some light ink blending using SSS Pawsitively Saturated Ink in Bubblegum, Lilac, Seafoam and Sunbeam. Once the ink blending was complete, I used the PFS Diagonal Stitched Rectangles to trim it down. I also used the SSS A2 Thin Frames to cut a frame from matte silver cardstock. The frame was glued to the panel and set aside while I worked on the sentiment.
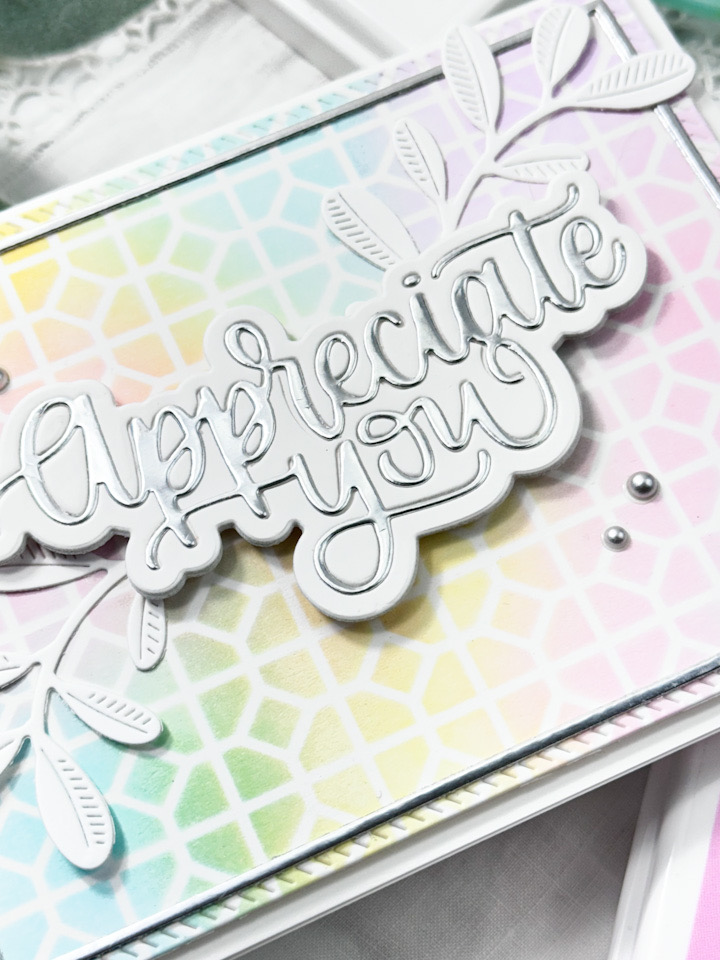
I die cut the SSS Appreciate You once from SSS Matte Silver cardstock, and I die cut the shadow three times from Neenah 110lb cardstock. I die cut the actual sentiment from one of the shadow pieces, and adhered all of those together using liquid glue. I then used glue and inset the silver sentiment into the shadow. I also used the SSS Olive Leaves to cut those for some added interest.

The leaves were adhered to the ink blended panel and the sentiment was adhered atop those using SSS 3D Foam Strips. I added some PFS Matte Silver Pearls to match the Matte Silver cardstock. This panel was then adhered to the card base using foam tape.
That does it for this one! Head on over and check out the entire Be Bold release! Thanks for stopping by, and don’t forget to stay awesome! Have a wonderful day!

Other Products:
- SSS Pawsitively Saturated Ink: Bubblegum, Lilac, Seafoam, Sunbeam
- SSS A2 Thin Frames
- SSS Matte Silver Cardstock
- SSS Blender Brushes
- SSS Place and Score Embellishment Wand
- SSS Bone Folder
- SSS Triangle Trays
- SSS 3D Foam Strips
- SSS Foam Tape
- Neenah Classic Crest Solar White 110lb Cardstock
- PFS Diagonal Stitched Rectangles
- PFS Matte Silver Pearls
- Bearly Art Glue
- Tim Holtz Craft Pick
- Tim Holtz Scissors
- Scor-Buddy
- Spellbinders Platinum 6
* Affiliate links used at no cost to you. Thanks so much for your support!
Latest Posts
- Simon Says Stamp Leafy Thank You
- Simon Says Stamp Love You Watercolor Hearts
- Simon Says Stamp Just Because Daisies
- Simon Says Stamp Love You Jumbled Hearts
- Together By Design featuring Kristina Werner with Concord and 9th