Waffle Flower Jumbo Flower Pot Hugs

Hey there! How are my crafty friends doing today? Thanks so much for stopping by! I’m playing around with some more products from the Waffle Flower April 2021 release. Have you checked it out yet? There’s a blog hop that started yesterday to celebrate this release, with prizes! Prizes are always cool, right?! You can check out my post from yesterday for details or head to the Waffle Flower Blog. So .. let’s get into today’s project!

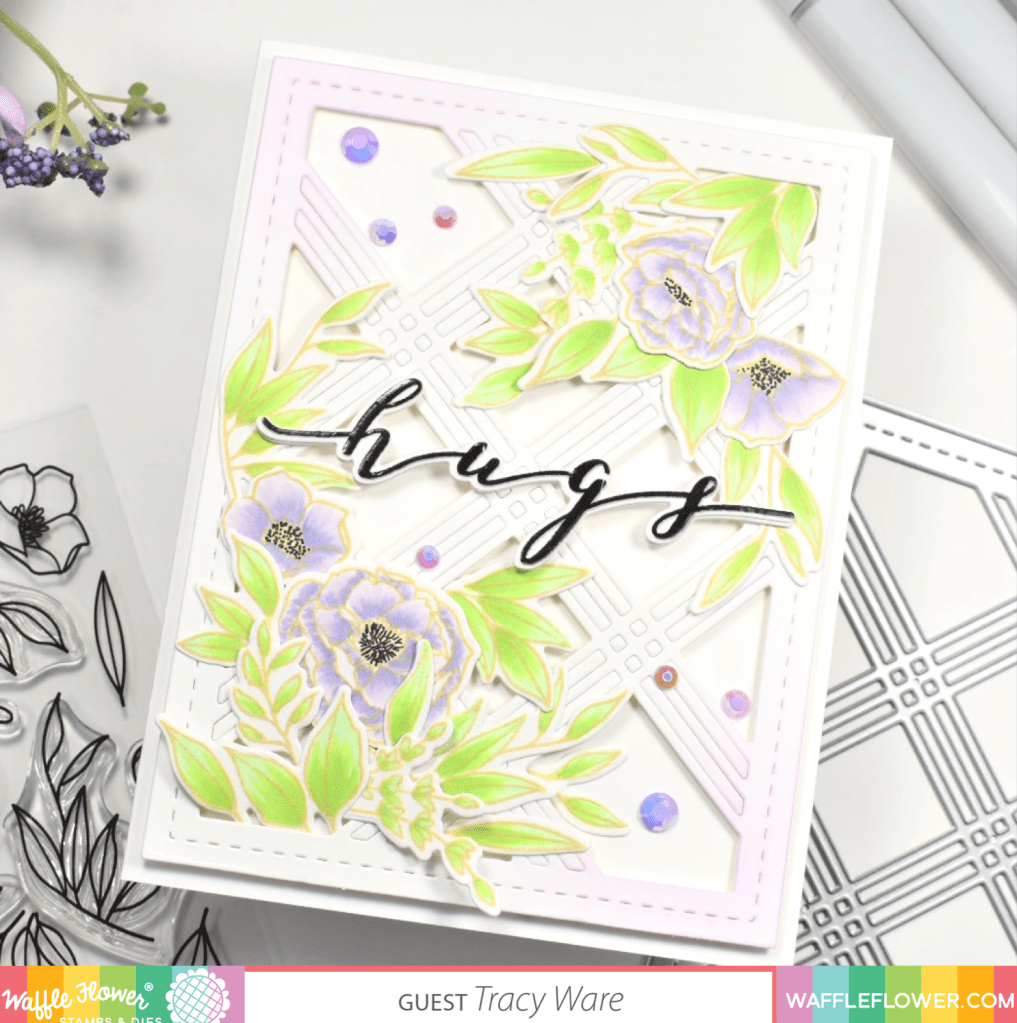
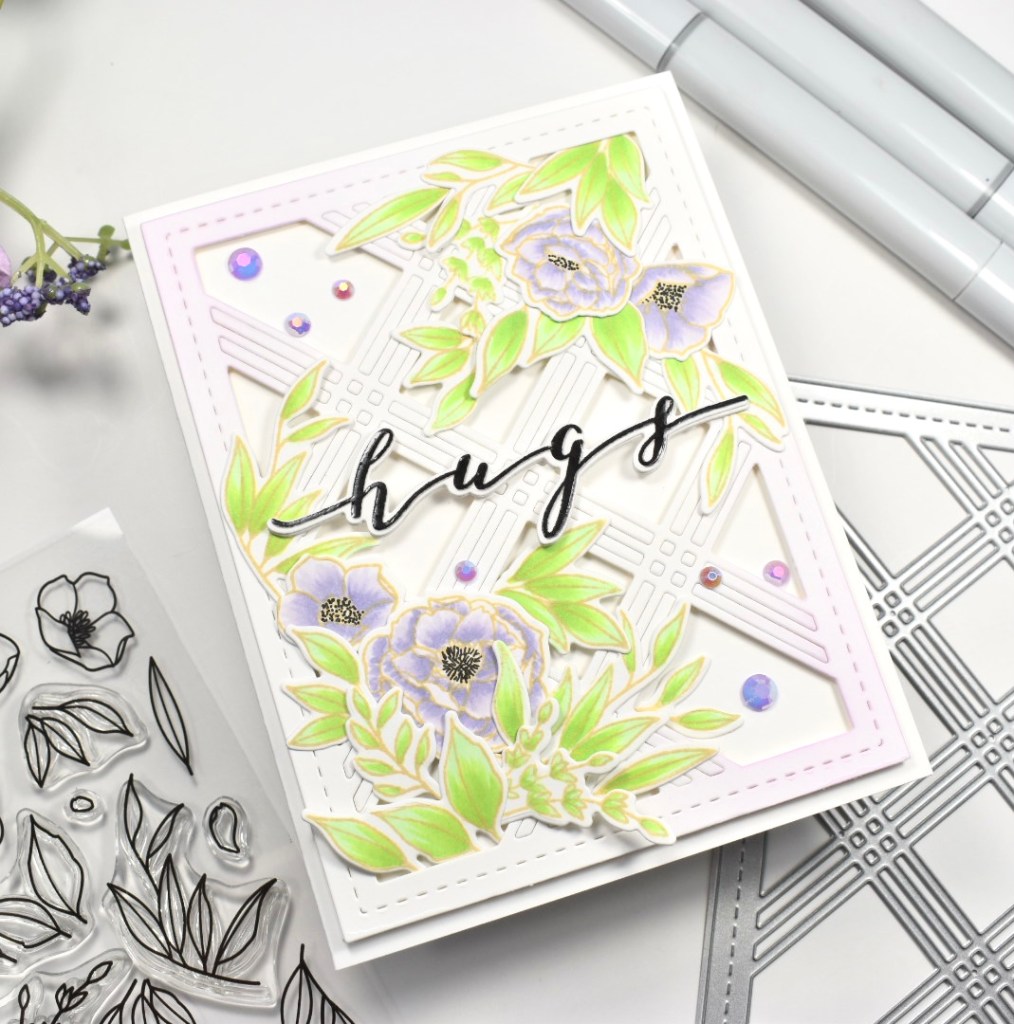
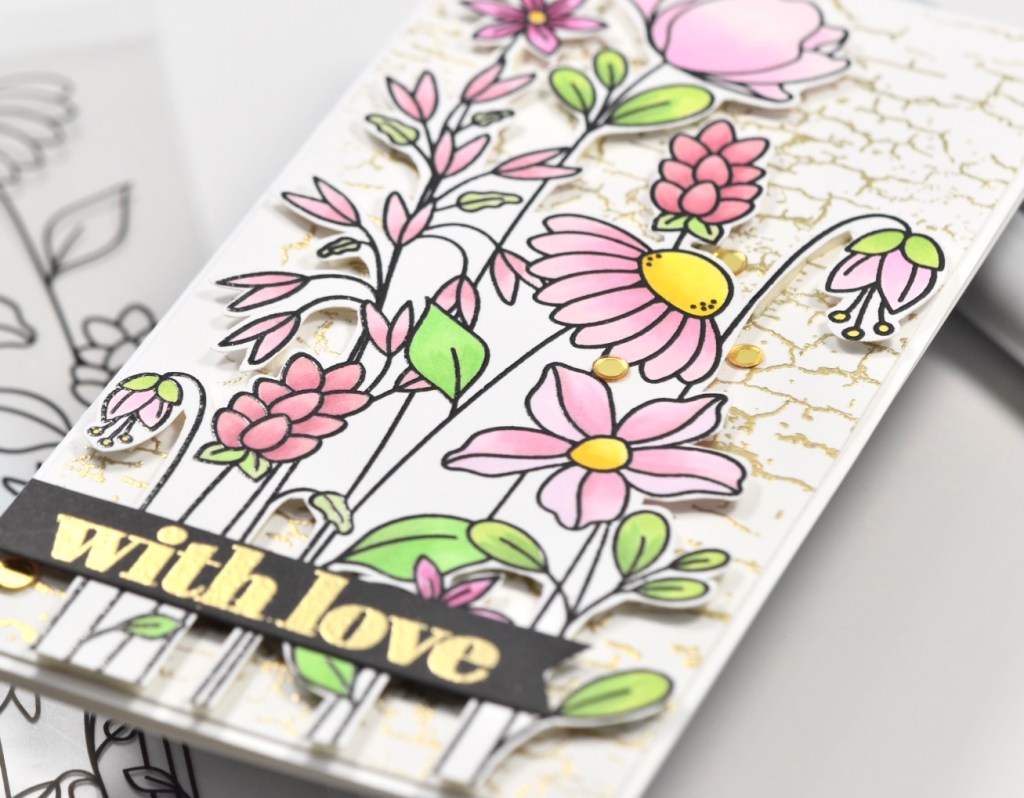
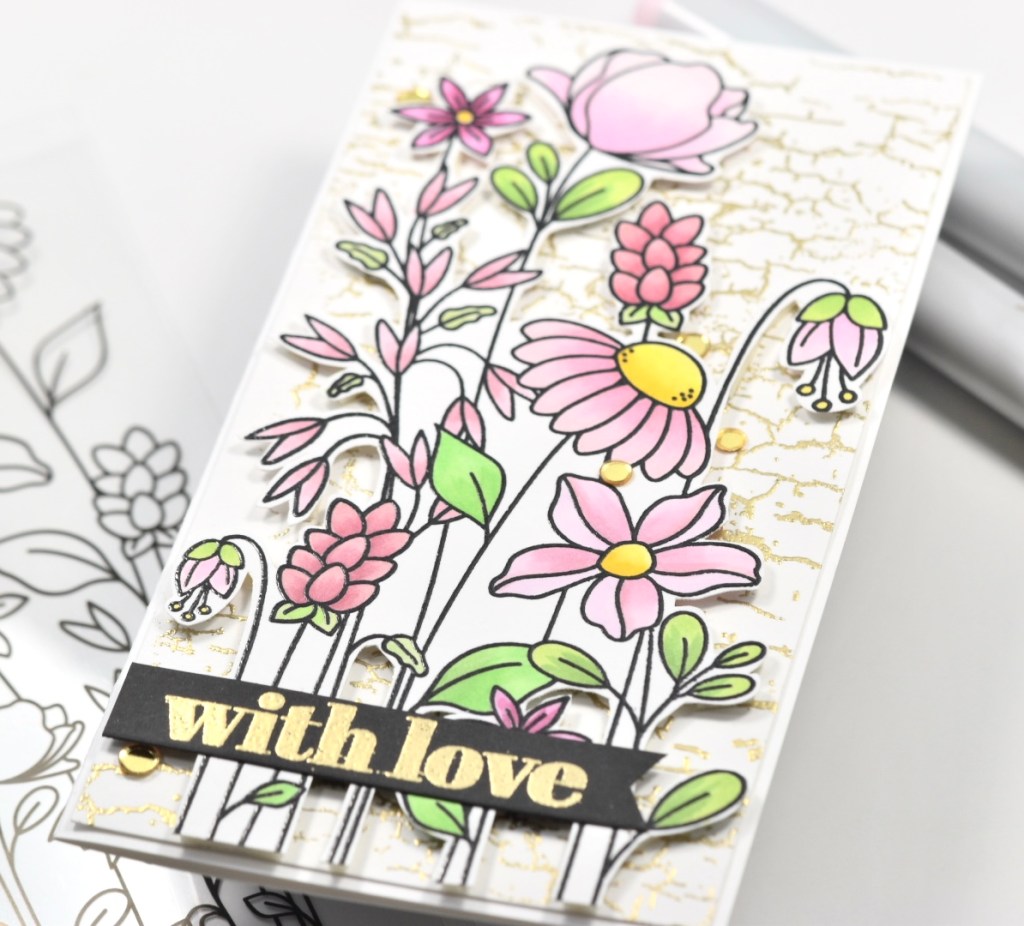
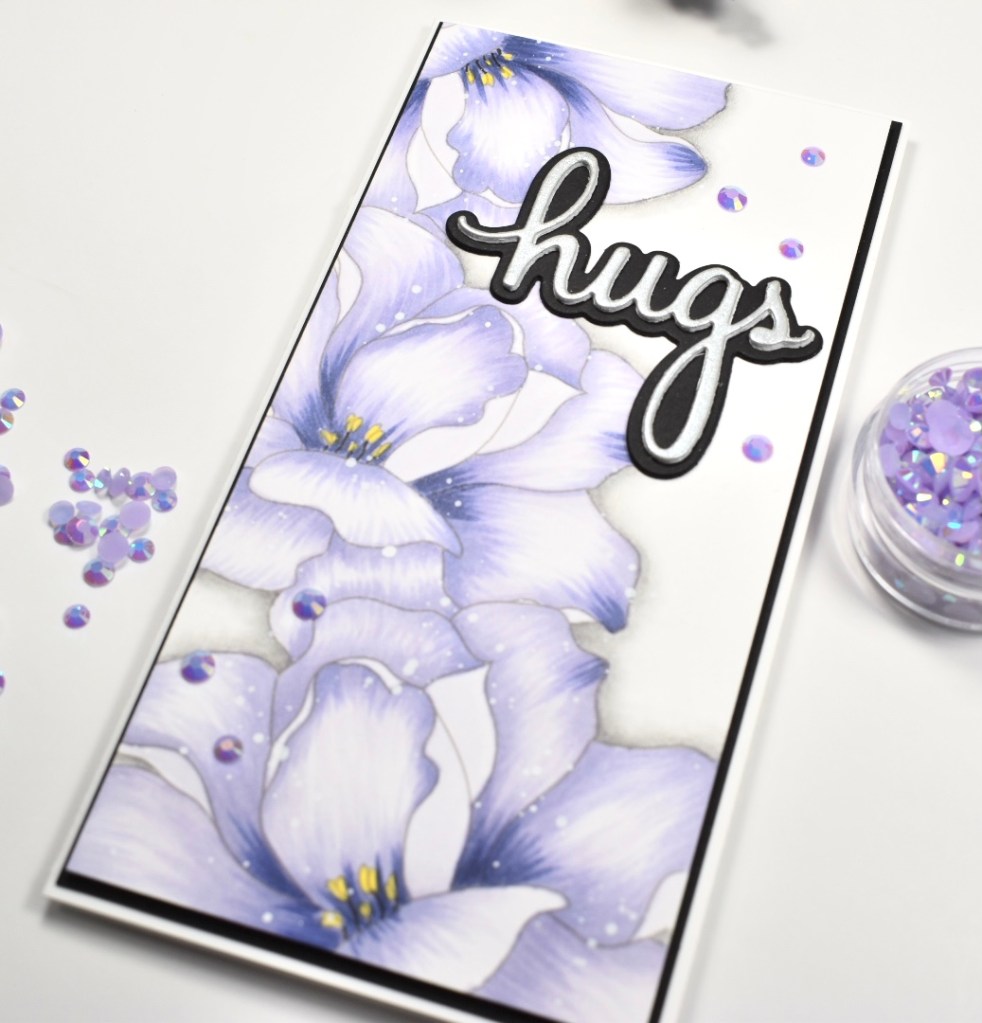
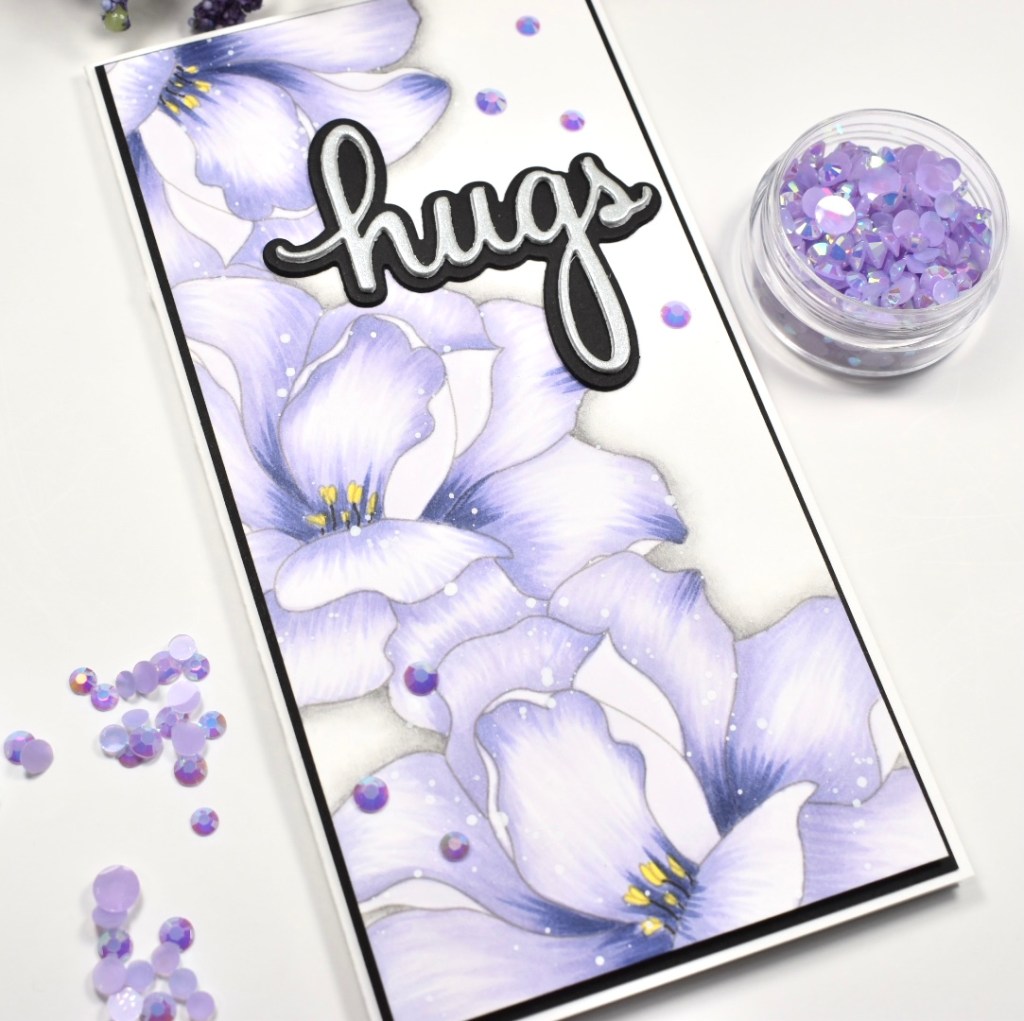
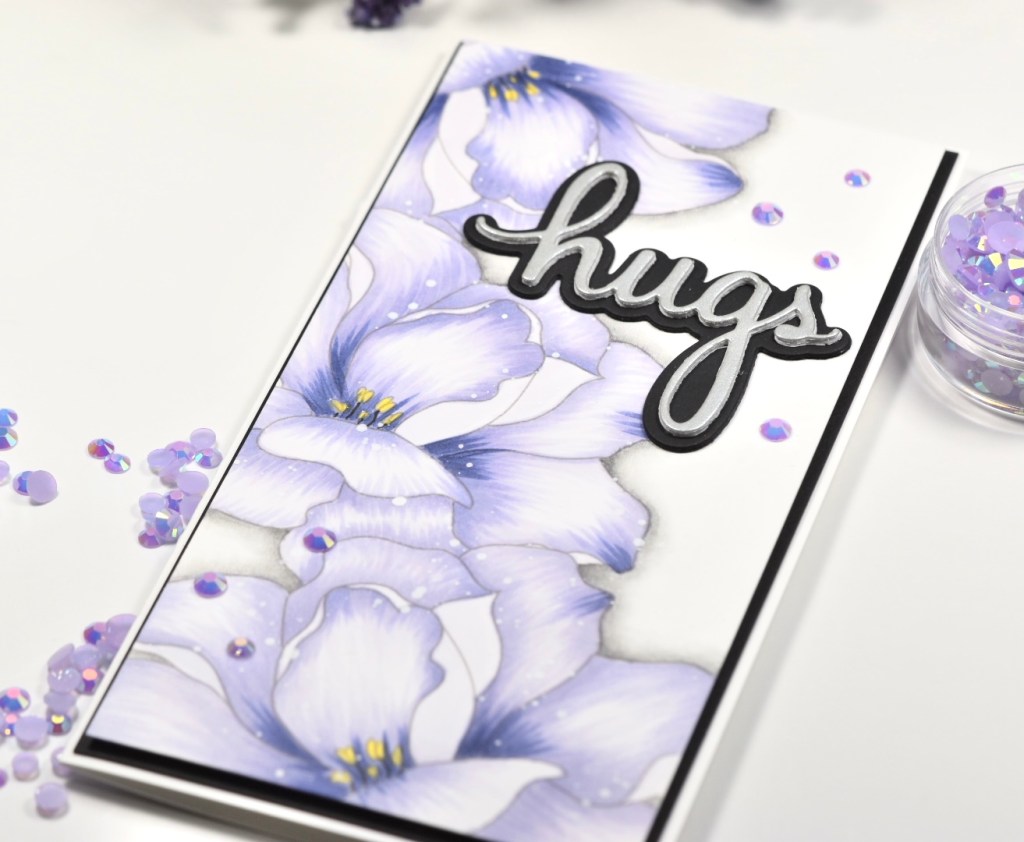
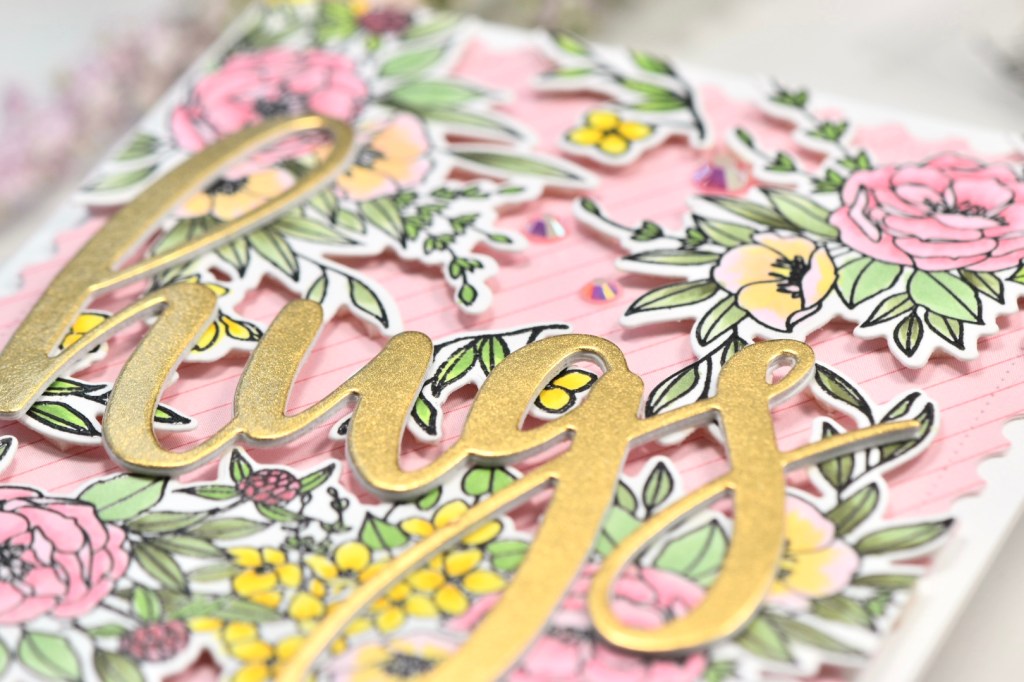
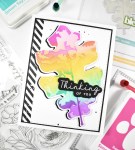
Sometimes I forget that stamps don’t have to be used in the way they are presented. Take today’s project for example .. I ended up not using the flower pot in this set and opted for an all over floral design. Anyhoo, just a reminder to think outside the box! To begin my project, I stamped the large floral image from the Jumbo Flower Pot set twice on Neenah Classic Crest 110lb cardstock using VersaFine Onyx Black ink and embossed those with Ranger Clear Embossing Powder. I also stamped another smaller floral image from this set a few times in the same way to use as additions to fill the space.
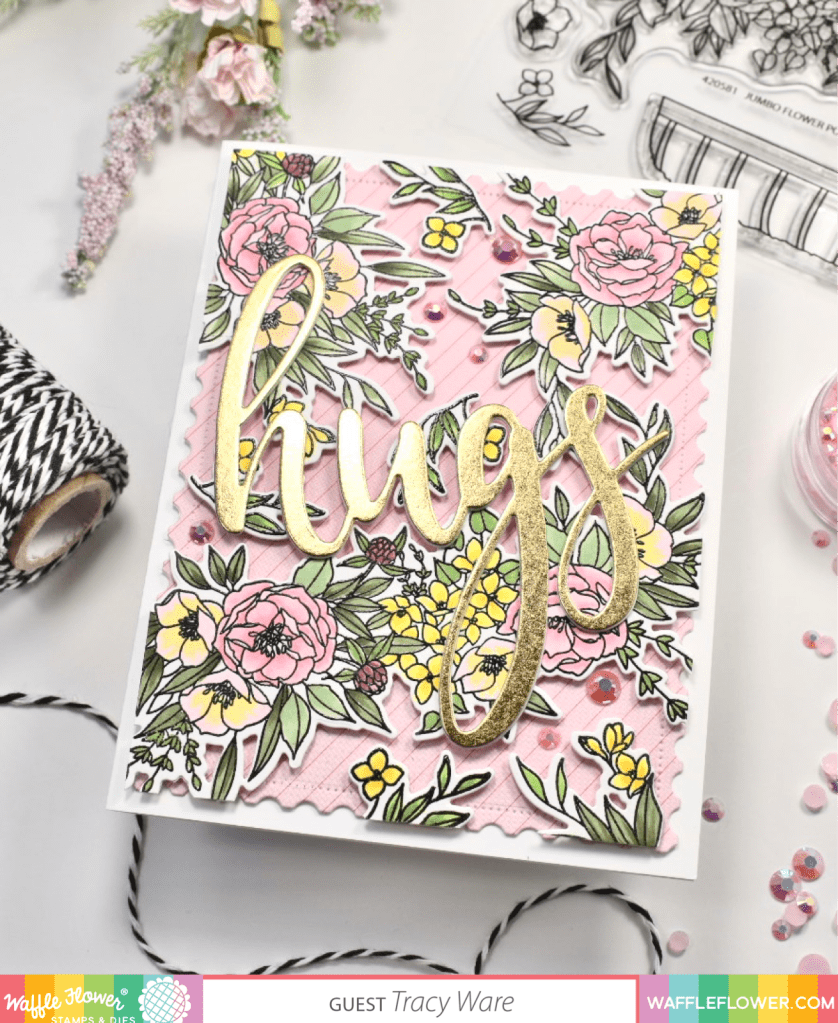
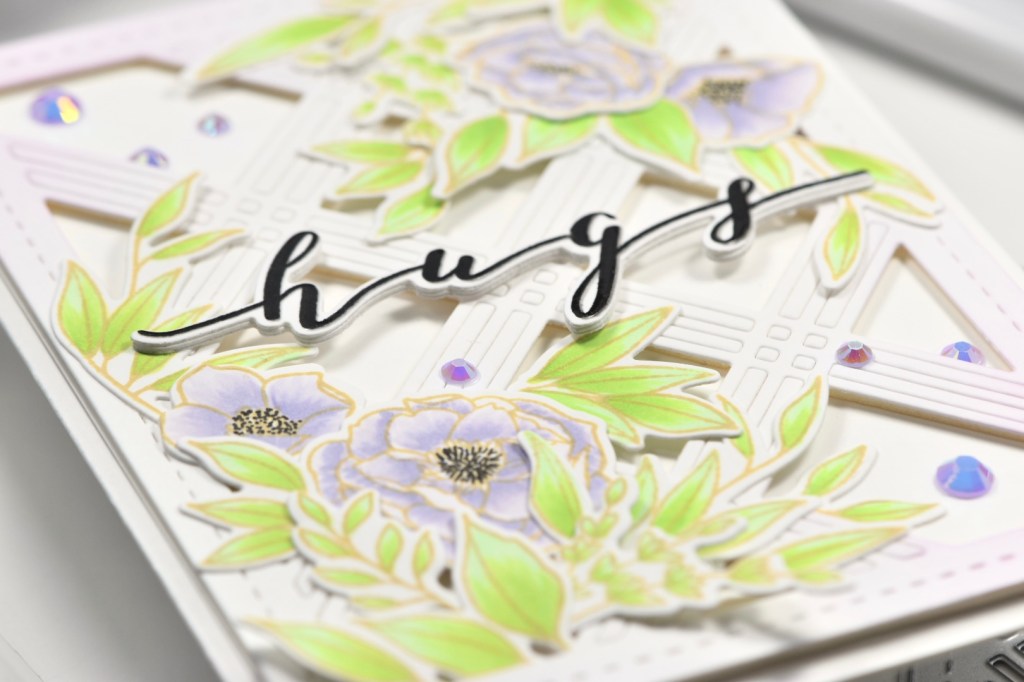
Once everything was stamped, I began coloring the images using Copic Markers RV10, RV11, RV13, Y08, Y11, Y13, YG17, YG25, YG61, G21, G94 and G99. I then cut those images using the Jumbo Flower Pot coordinating die. For a backdrop to showcase all these florals, I chose a page from the Waffle Flower Dot and Lines Sampler Pack.

I trimmed down that piece of patterned paper using the Postal Frames Die from The Greetery, and began adhering my floral pieces using 3M Foam Tape, trimming off the excess as needed. Moving along to my sentiment .. I chose the Waffle Flower Oversized Hugs die, because I love this sentiment, and large sentiment are my jam! I cut the Hugs once from gold cardstock and twice from Neenah 110lb and adhered those together using Craft Tacky Glue.

I adhered the Hugs sentiment directly to my floral panel using glue and added some bling! My bling of choice is the PinkFresh Studio Jewels Mix, but really, let’s be honest, ALL bling is fabulous! I glued some jewels down and attached my panel to a Neenah Classic Crest 110lb card base.

That does it for today’s project! I hope you enjoyed it and thanks so much for stopping by! Don’t forget to think outside the box! For me, the box is comfortable and getting outside the box is a challenge sometimes, but it can be done. Thanks so much to Waffle Flower for inviting me to play with their April 2021 goodies! I’ve had so much fun! Also, don’t forget to check out my post from yesterday for blog hop details, or head to the Waffle Flower Blog.
Have a wonderful day and stay awesome!
Supply List:
- Waffle Flower Jumbo Flower Pot Stamp, Die, Combo Set
- Waffle Flower Oversized Hugs Die
- Waffle Flower Dots and Lines Sampler Pack
- Copic Markers: RV10, RV11, RV13, Y08, Y11, Y13, YG17, YG25, YG61, G21, G94, G99
- VersaFine Onyx Black Ink
- Ranger Clear Embossing Powder
- Neenah Classic Crest 110lb Cardstock
- The Greetery Postal Frames Die
- PinkFresh Studio Jewels Mix
- 3M Foam Tape
- Craft Tacky Glue
- Anti-Static Tool
- Tim Holtz Scissors
- Marvy Jewel Picker
- Misti
- Gemini Jr.
*Affiliate links used at no cost to you. Thank you for your support!
- Simon Says Stamp Rainbow Oak Leaf
- Spellbinders Dear Santa Floral Letter
- Simon Says Stamp Grungy Dewdrop Daisy

- Simon Says Stamp Pastel Birthday Wishes

- Simon Says Stamp Best Fish