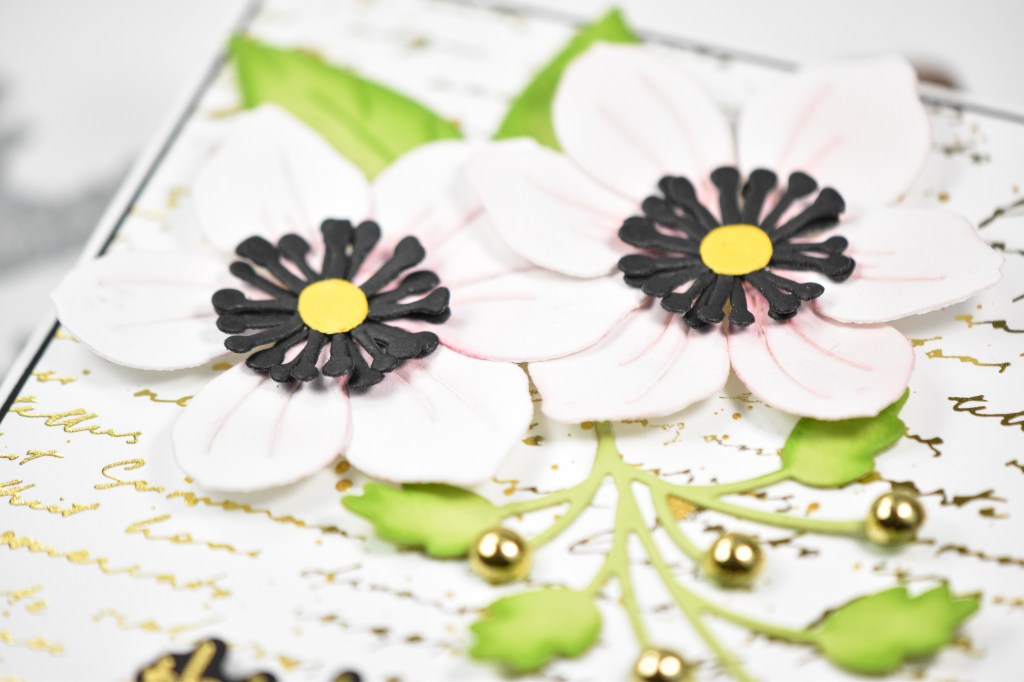
Hello Friends, and thanks for stopping by! The May Spellbinders releases are live, and I’m back today with a project featuring the Anemone, along with the Script Text BetterPress Plate and the Summer Solstice Garden Sentiments. Let’s go ahead and get into the details!
NOTE:all supplies are linked to multiple sources in the thumbnails at the end of this blog post.
I began this project by die cutting the Anemone from Neenah 110lb cardstock, along with black and yellow for the pieces. I did some light ink blending on the petals using Peony ink. I knew that I was going to want some leaves, so I cut those using the Vivid Blooms set from Green Apple cardstock and did some ink blending on those with Pearfection ink.
I gold foiled the Script Text plate onto Neenah 110lb cardstock, and gold foiled the sentiment onto black cardstock. I trimmed out the sentiment with the coordinating die, along with two additional cuts for a stacked sentiment. I trimmed the script background and gold splattered it before adhering it to a black panel.
The leaves were secured in place using liquid glue, while the flowers and the sentiment were adhered using foam strips. To finish up, everything was adhered to the card base, and I added some gold metallic pearls to one leaf.
That does it for this project! I hope you’ll take some time to check out all of the new May releases over on the Spellbinders website! There really is a lot of good stuff! Thanks again for joining me, and I hope you have a fabulous day!
Supply List
Affiliate links used at no cost to you. What does this mean? If you use the links within this post to make a purchase, I receive a small commission, which allows me to continue to post crafty content for your enjoyment. I truly appreciate your support!
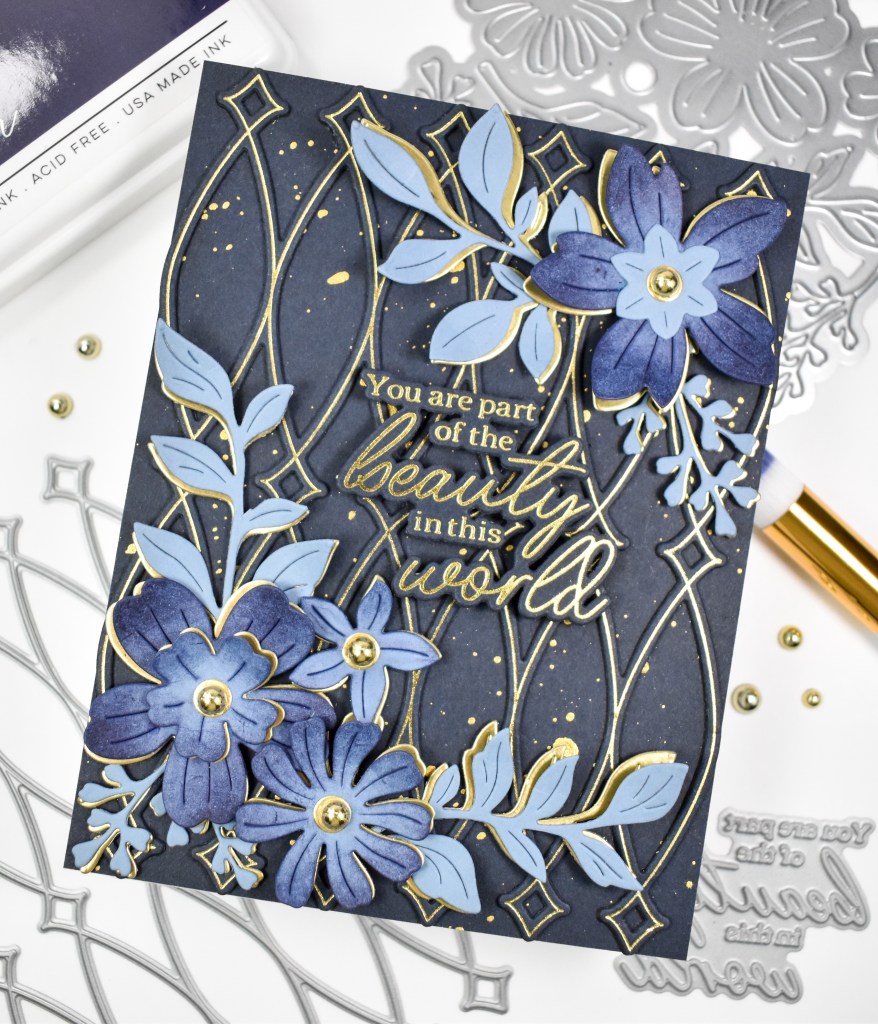
Hello Crafty Friends! Thanks so much for stopping by to check out today’s project featuring some relatively new Pinkfresh goodies. I have a problem .. I purchase Pinkfresh products, and then I never use them, so I’m trying to do something about that! With that being said, I love the pastel, floral vibe of Pinkfresh, but I wanted to try my hand at a dark Pinkfresh card. Let me know what you think in the comments. Let’s go ahead and run through the details for this project!
NOTE:all supplies are linked to multiple sources in the thumbnails at the end of this blog post.
Ok, so I knew I wanted dark colors, but I didn’t want to go my usual route of black and grays, so I opted for blues and gold. I began by gold foiling the Interlaced Diamond Press Plate onto Indigo cardstock and used the coordinating die to trim it out. I also cut one from black and adhered those together using liquid glue. My next step was to cut the Fresh Florals from Partly Cloudy cardstock. This is an older Spellbinders cardstock, and I think the comparable new ColorWheel color would be Malibu.
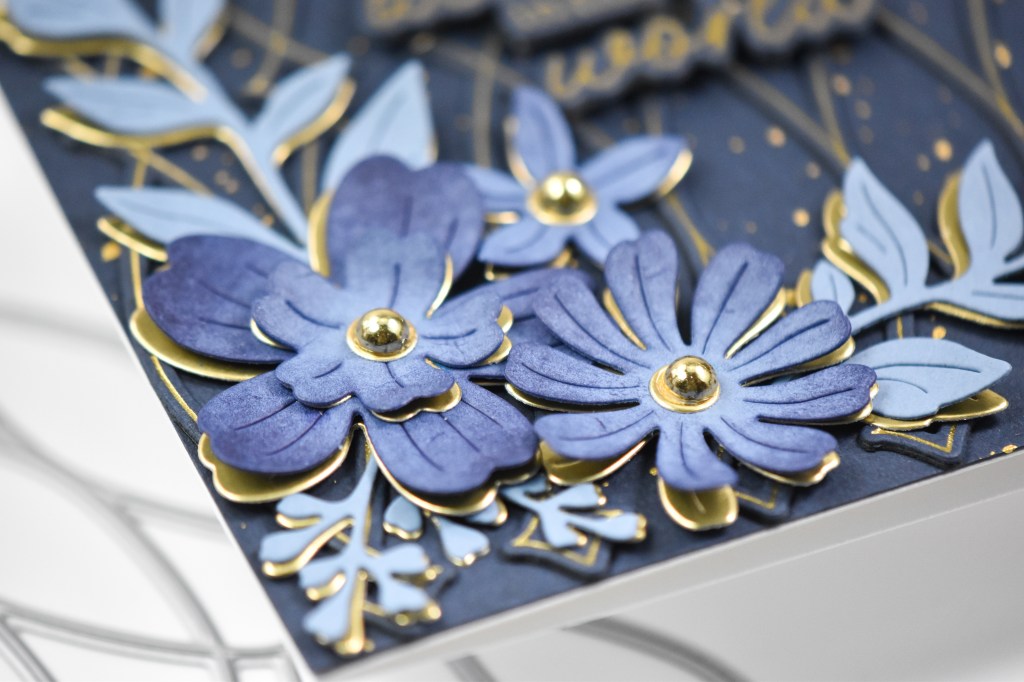
Once all of the florals and leaves were cut, I did some ink blending on the flowers using Stargazer ink. I went pretty heavy handed as I wanted the flowers to match the indigo. After I was done ink blending, I decided that it might be pretty to add a layer of gold to everything, so I cut the Fresh Florals again from gold cardstock. I adhered the blue flowers to the gold flowers using foam squares, because I wanted to be able to see the underlying layer. I then assembled the rest of the flowers with liquid glue.
I gold foiled the sentiment, which is from the Favorite Things set, onto the same indigo cardstock and used the coordinating die to trim it out twice. Before beginning the assembly of the card, I cut a panel of the indigo and gold splattered that to add a bit of background interest.
The Interlaced Diamonds was adhered first and then I began adhering the leaves. I glued the gold leaves in place and then glued the blue leaves atop those but slightly off center. I then glued the flowers in place and adhered the sentiment in the center using foam strips. To finish up, I added gold metallic pearls to the centers of the flowers.
That does it for this project! So, how do you feel about a dark Pinkfresh card? Don’t get me wrong, I do love me some pastel colors too, but I needed to try this. I appreciate you swinging by to check out this project, and I hope you have a wonderful day! Stay awesome, friend!
Supply List
Affiliate links used at no cost to you. What does this mean? If you use the links within this post to make a purchase, I receive a small commission, which allows me to continue to post crafty content for your enjoyment. I truly appreciate your support!
Hello Friends and thanks for stopping by! There’s a super fun Instagram Hop going on today to celebrate Simon’s latest release, Let’s Chill! You don’t want to miss it, because there are prizes to be won all along the hop! All you need to do is comment along the way and you could win a $25 gift card to SSS! For today’s card, I’m featuring several new products from this release, so let’s get into the details!
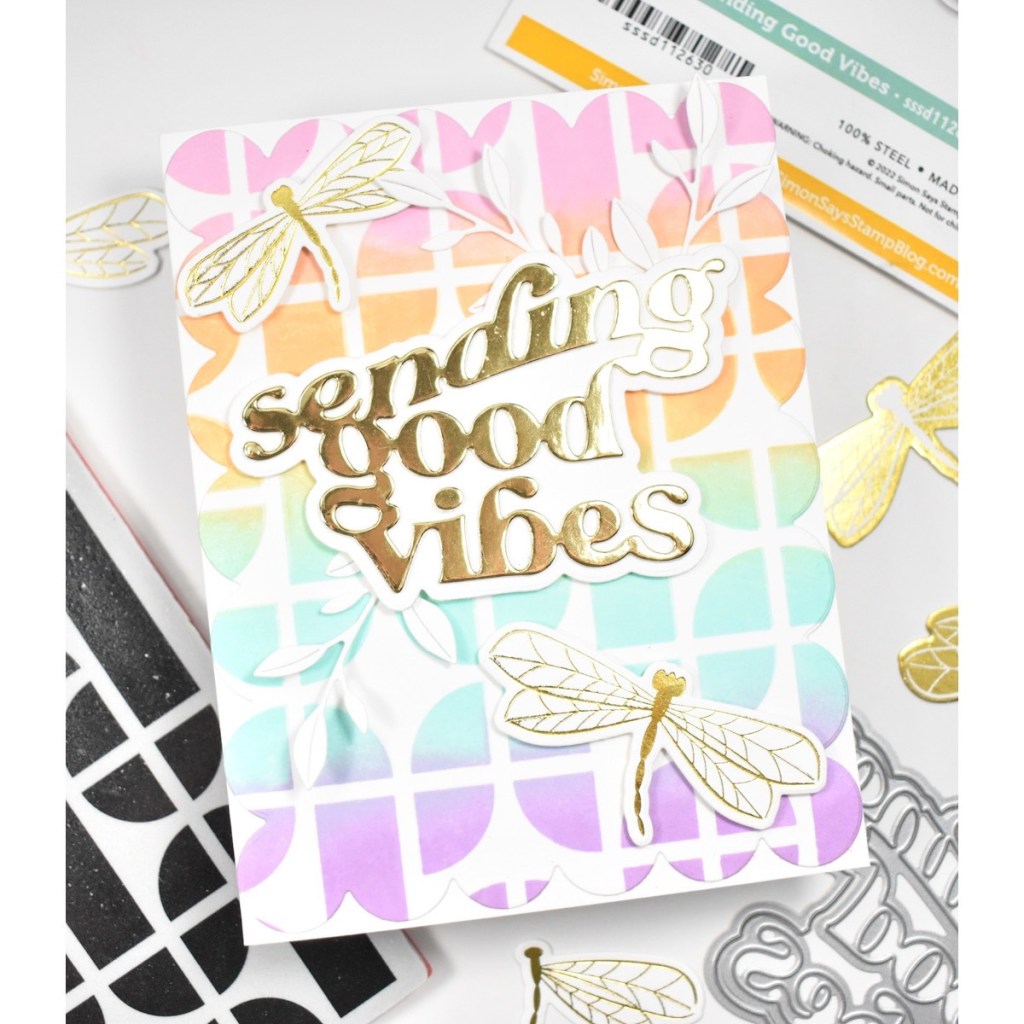
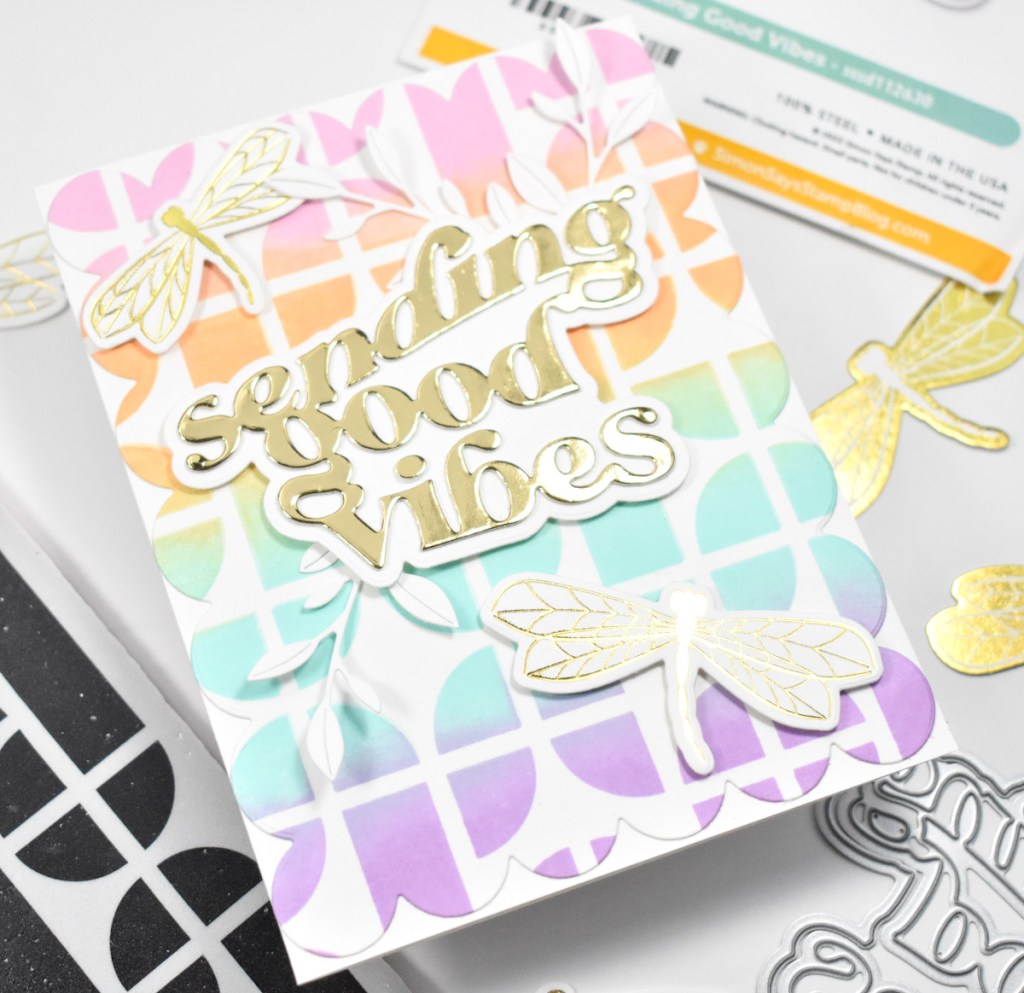
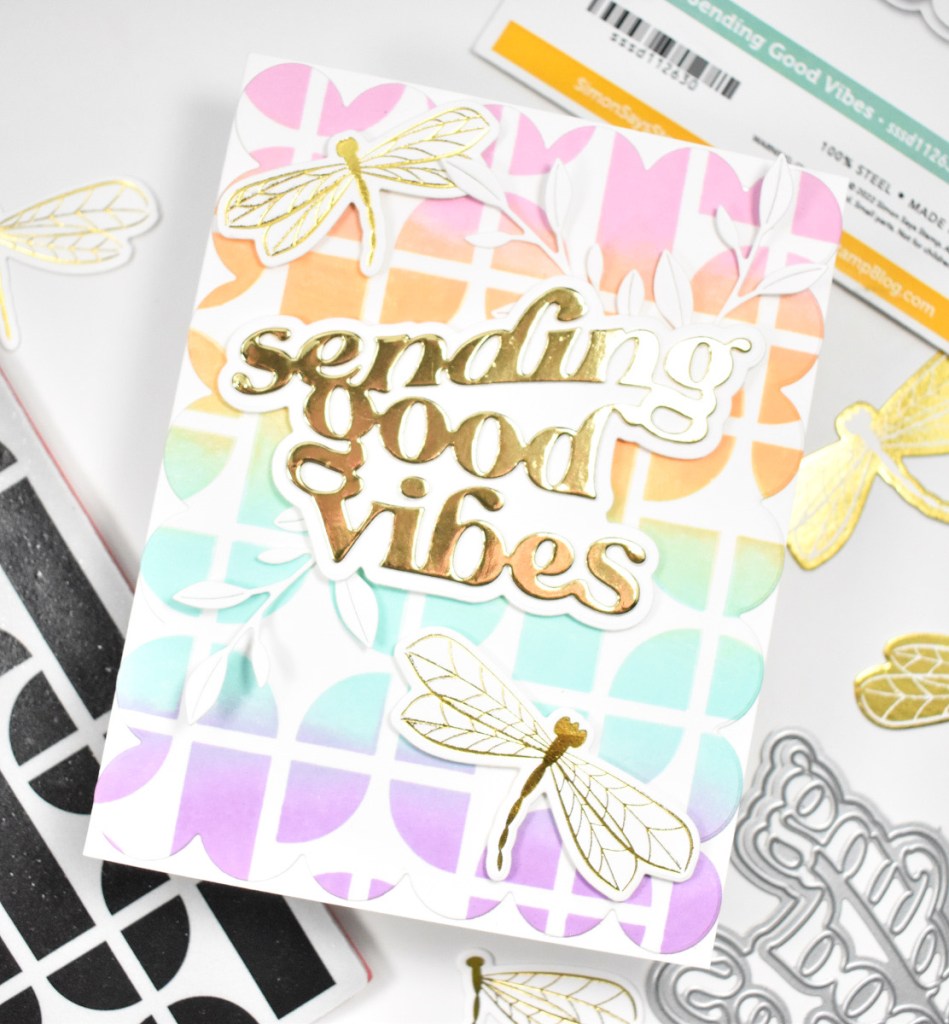
To begin, I stamped the new SSS Retro Tiles background stamp onto a panel of Neenah Classic Crest 110lb cardstock using SSS Pawsitively Saturated Inks in Bubblegum, Cantalope, Seafoam and Lilac. I applied the first color beginning at the top of the stamp and used a blender brush to soften the edges of the ink before stamping. I wiped the stamp clean, and continued with the next color until the panel was full. It’s super important to soften those ink edges with the brush or you’ll end up with hard edges.
For the sentiment, I opted to use the SSS Sending Good Vibes die and cut that once from Polished Gold cardstock and once from Neenah 110lb, while cutting the shadow once from the same white cardstock. I adhered all of those together using liquid glue and placed foam tape on the back. I also placed foam tape on the back of the dragonflies as well.
I determined placement of everything and decided that I could use a few leaves, imagine that! Every card that I make seems to need leaves! Anyhoo, I used the SSS Etched Meadow Flower and Leaves and cut three leaves and tucked them under the sentiment before adhering it, along with the dragonflies. The panel was then adhered to the card base using SSS Dot Tape Runner to finish up.
That finishes this one up! I hope you enjoyed it, and I hope it inspires you to get crafty! Don’t forget to head over to Instagram to join the hop for your chance to win a $25 gift card! Who doesn’t love prizes, am I right?! Thanks again for stopping by! Have a wonderful day and stay awesome!
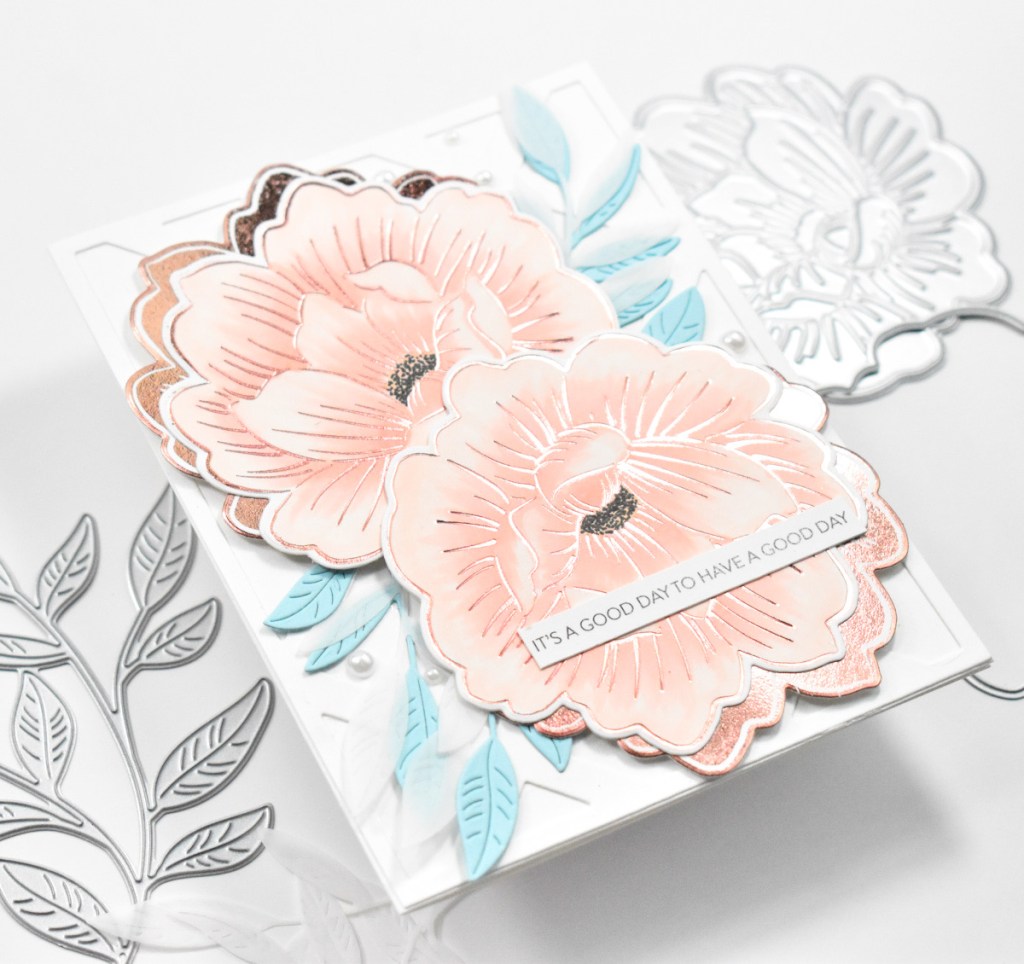
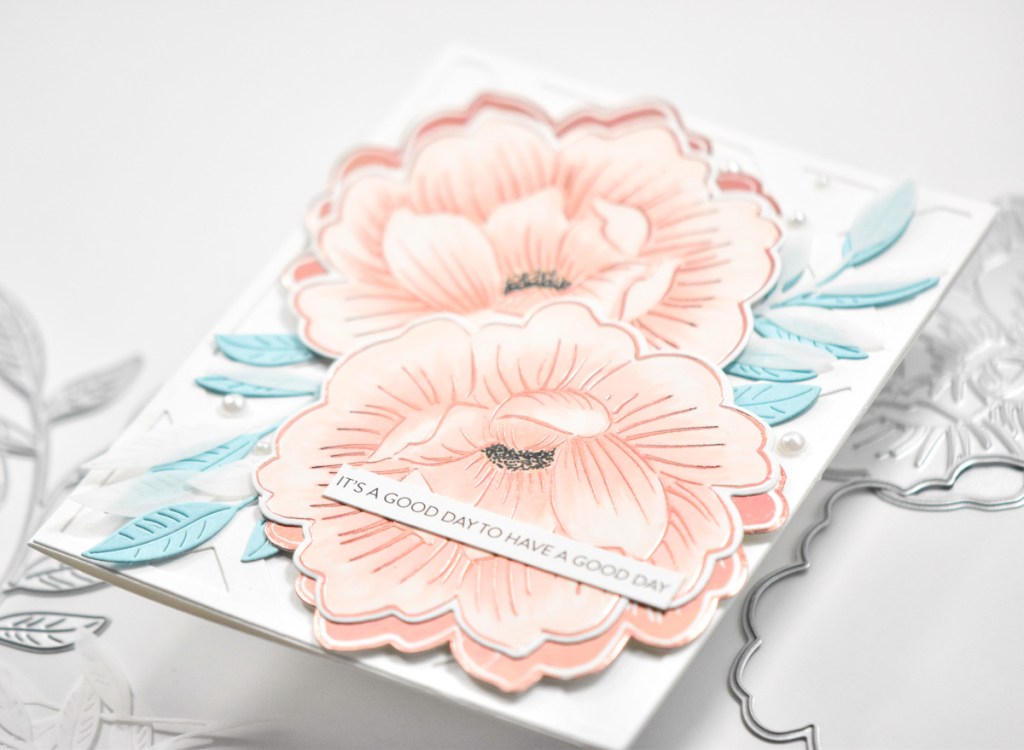
Hello Friends and thanks for stopping by! The newest Simon Says Stamp release, Yay You, is a gorgeous one, and I’m playing with the new Sketched Peony Blossom Foil and Cut set! Have you jumped on the foiling band wagon yet? I did a while back, and I just love it! Let’s run through the details for today’s card, shall we?
To assemble the card, I glued the solid foiled peonies to the colored peonies. I adhered the leaves to the card base using glue, and adhered the peonies atop those using foam tape for dimension.
The SSS Sentiment Strip was glued directly to the flower and I added some pearls to finish it up.
That does it for this card! I hope you enjoyed it, and I hope it inspires you to get crafty in your space! Don’t forget to stop by and check out the entire Yay You release. Have a wonderful day and stay awesome!
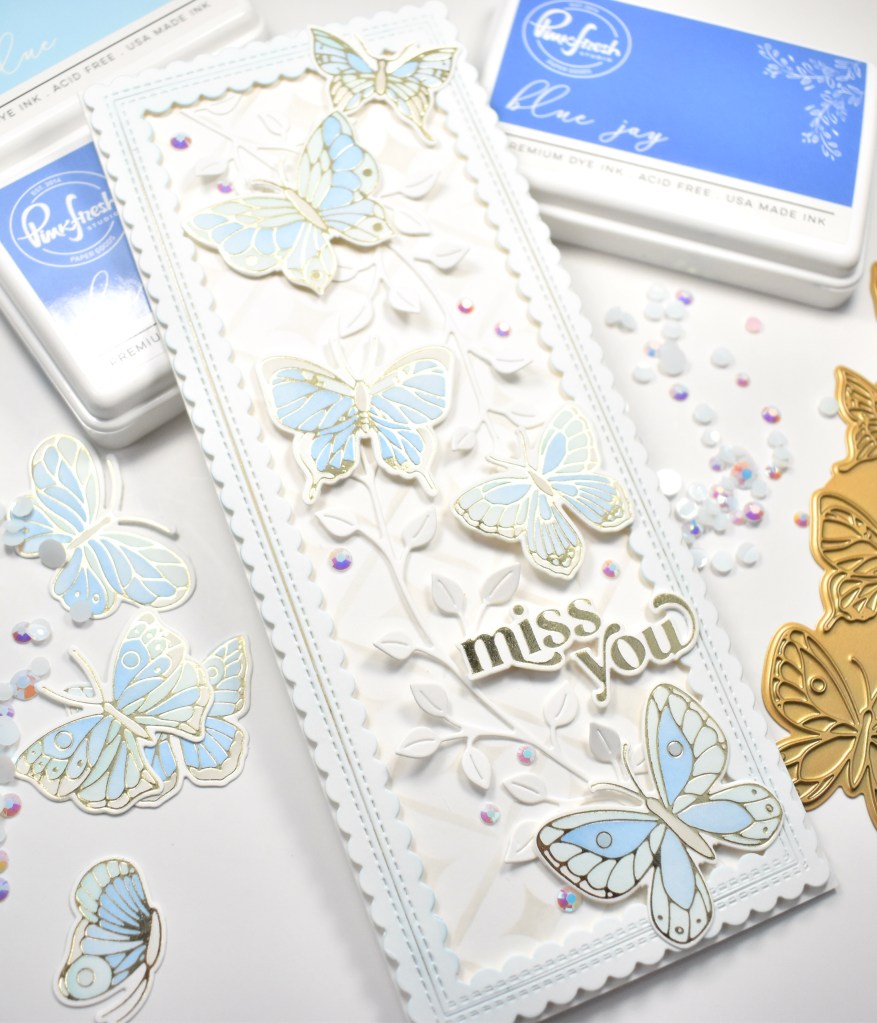
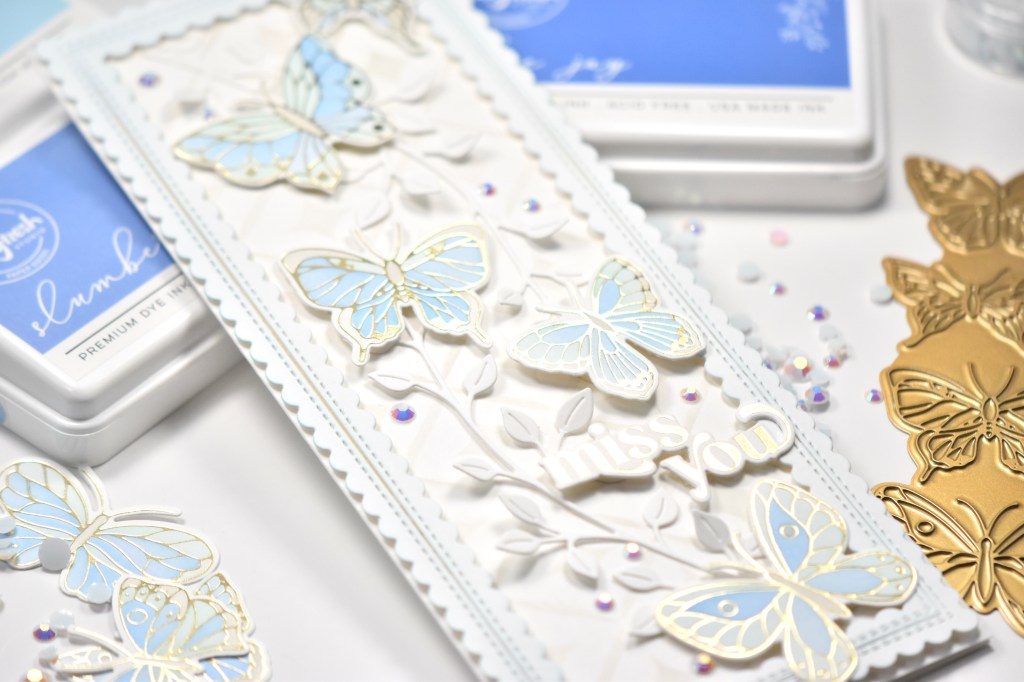
Hello Friends and Happy Friday! I hope you’ve had a great week! Thanks for stopping by to check out my new butterflies card featuring the new Small Butterflies combo from PinkFresh Studio! This is such a beautiful set! I can’t wait to try the butterflies again in different foil and ink combinations! Let’s jump right in, shall we?
While die cutting, I went ahead and cut a frame using the Slim Stitched Scalloped Rectangles, and also did a little ink blending on that as well, using the same Sky Blue ink. I cut another panel of Neenah 110lb and pulled out the Diamond Motif stencil and lightly ink blended some Misty Coast ink on that. I put foam tape on the back of the frame and adhered it to the Diamond Motif panel. I also cut a couple pieces of the Leafy Branch to add to the panel as well.
I glued only the base of the stems of the Leafy Branch to the Motif panel and added the butterflies using foam tape for dimension. I adhered this to my card base, which is also Neenah 110lb. To finish up the project, I added my Miss You sentiment from the Perfect Sentiments set using a combination of glue and foam tape. And .. no project is complete without some bling, so I added some PinkFresh Studio Jewels
That does it for this project! I might actually be in love with these butterflies! So much so, that I might have to order the larger ones! I hope you enjoyed this project and I hope you’re inspired to get crafty too! Stay awesome sweet friend!
Hey there Crafty Friend! Woohoo for Friday, right?!? I hate to admit, but I have a huge bin of products that I just haven’t gotten around to using yet. Do you have a bin or pile that you haven’t gotten around to yet? So for this project, I pulled out some of the PinkFresh products in there and got to work!
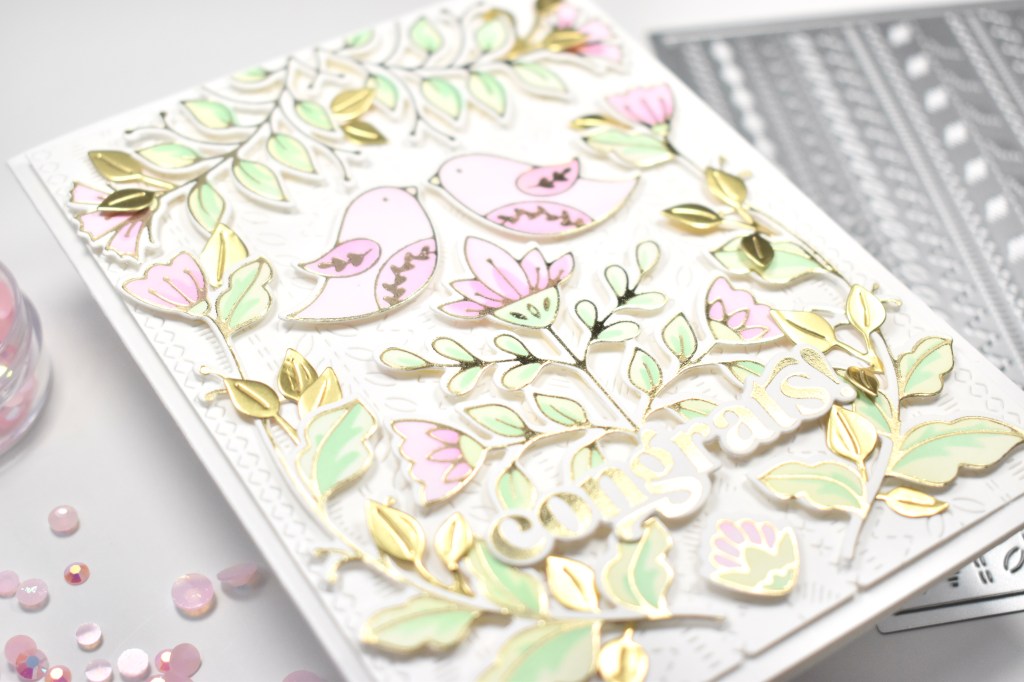
I also ran a panel of Neenah 110lb through the die cutting machine using the PFS Stitches Background, because I wanted some interest and that subtle hint of texture behind my birds. I placed foam tape on the back of all of the Folk Art Bird pieces and adhered those to my stitched panel. I used the PFS Leafy Branch Die to cut one piece from gold cardstock and trimmed that into pieces so that I could tuck them around the leaves from the foiled pieces with glue.
I foiled the PFS Perfect Sentiments Foil Plate using the same Champagne foil and cut those out using the coordinating die. I cut the sentiments two more times from Neenah 110lb so that I could glue those to the corresponding sentiments for dimension. I chose the Congrats sentiment from this set, because this card kinda seems wedding-ish, and glued that directly atop the Folk Art Bird pieces.
To finish up, I adhered the panel to my card base, which is also Neenah 110lb cardstock. I debated on whether to add jewels, but decided against it since there was so much shine as it was. I hope you enjoyed this project, and I hope it inspires you to get crafty!
Have a wonderful weekend and don’t forget to stay awesome!
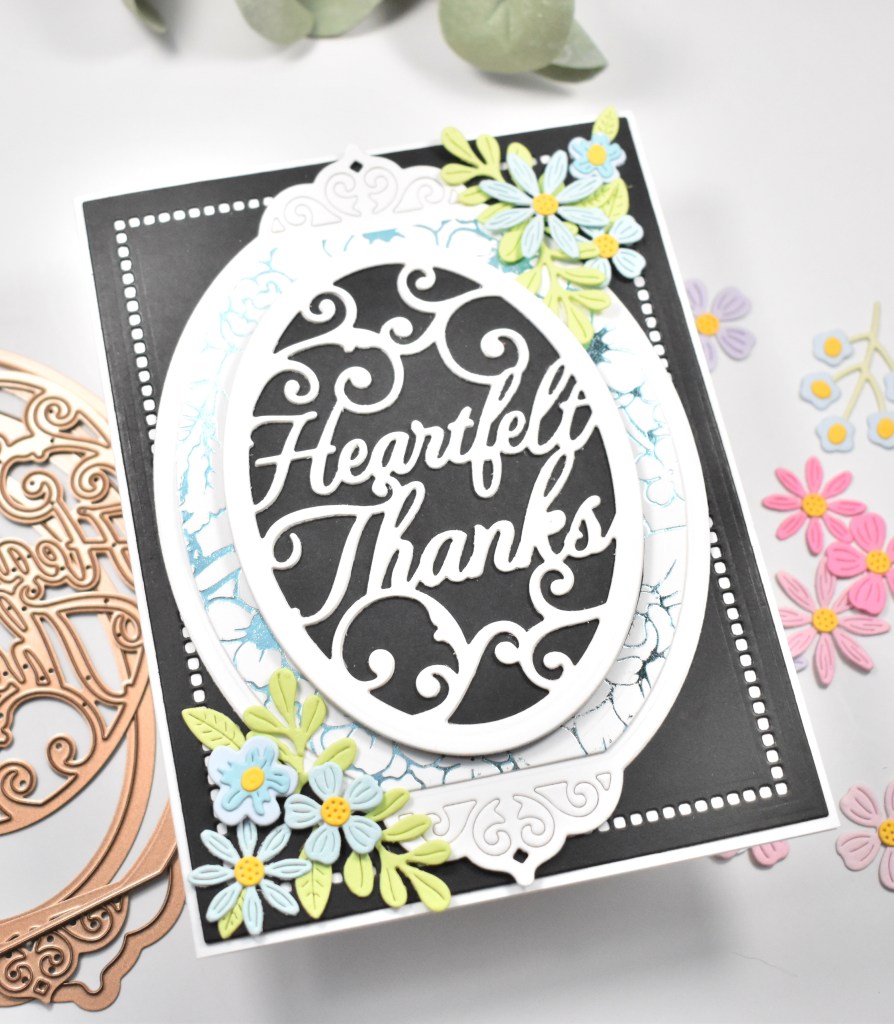
I adhered all of the oval sections together using a combination of glue and foam tape. I used the Hemstitch Rectangles to cut a panel of black cardstock, and adhered that to my card base, which is also Neenah 110lb. I then glued the oval panels atop that. For more added interest, I used the Mini Blooms and Sprigs Die set to cut some matching blue flowers, yellow centers and green leaves and adhered those to the card using glue and foam tape as well.
Super simple card today! Die cutting is my jam, and I love solely die cut cards! I hope you enjoyed this project and I hope it inspires you to get crafty! What’s your favorite technique on cards? I’d love to know in the comments! Hop over and check out the entire Beautiful Sentiment Vignettes Collection from Spellbinders!
Have a wonderful day and don’t forget to stay awesome!
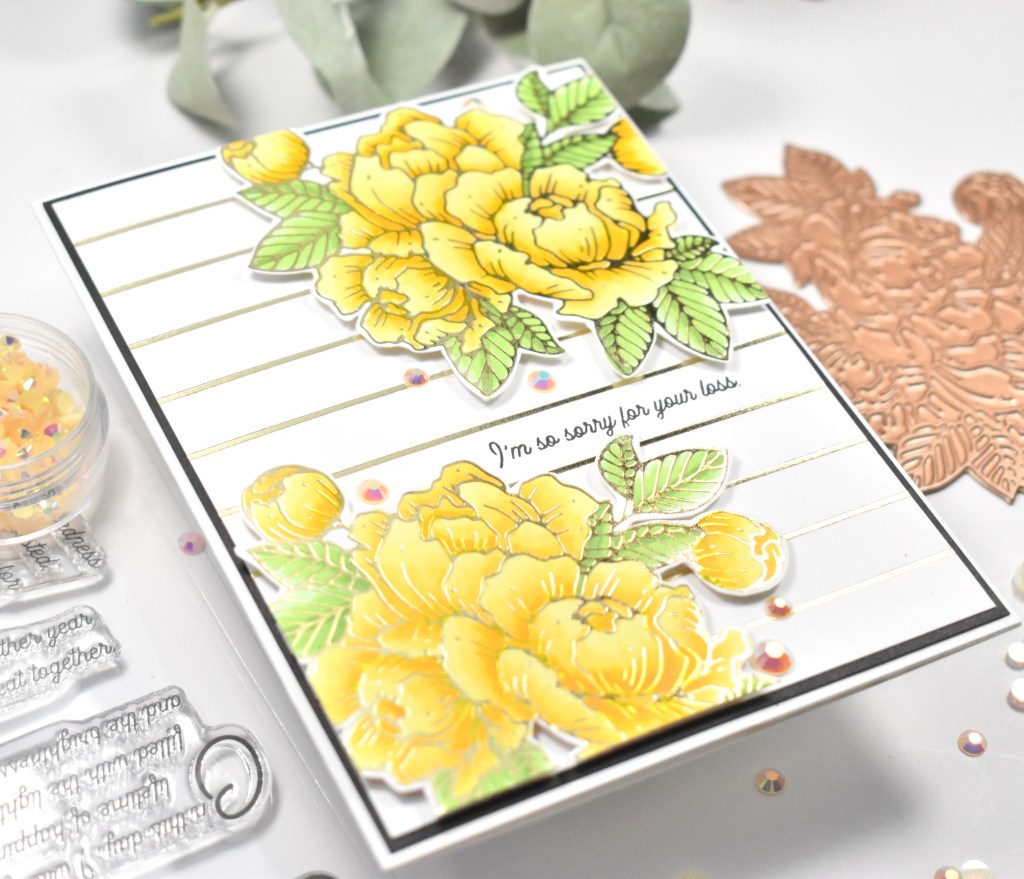
To begin this project, I cut two pieces of Neenah Classic Crest 110lb cardstock and foiled the Spellbinders Glimmering Peony Hot Foil Plate using Champagne Foil. Champagne is my go-to color for foil! I just ordered a bunch of new to me colors, so I may find a new favorite in those, but who knows! While I already had the Glimmer machine going, I went ahead and foiled the Skinny Stripe Background using the same foil on another panel of Neenah 110. Anyhoo, I went to town coloring the foiled peonies using Copic Markers Y00, Y08, Y11, Y13, Y15, Y17, YG11, YG13 and YG17.
Once those were colored, I fussy cut them and placed foam tape on the back of both. I took the Skinny Stripe panel, trimmed it down and popped it in the Misti and stamped my sentiment from the Beautiful Inside and Out Sentiments, using VersaFine Onyx Black Ink. I removed the backing from the foam tape on the flowers and adhered those to my striped panel and trimmed off the excess.
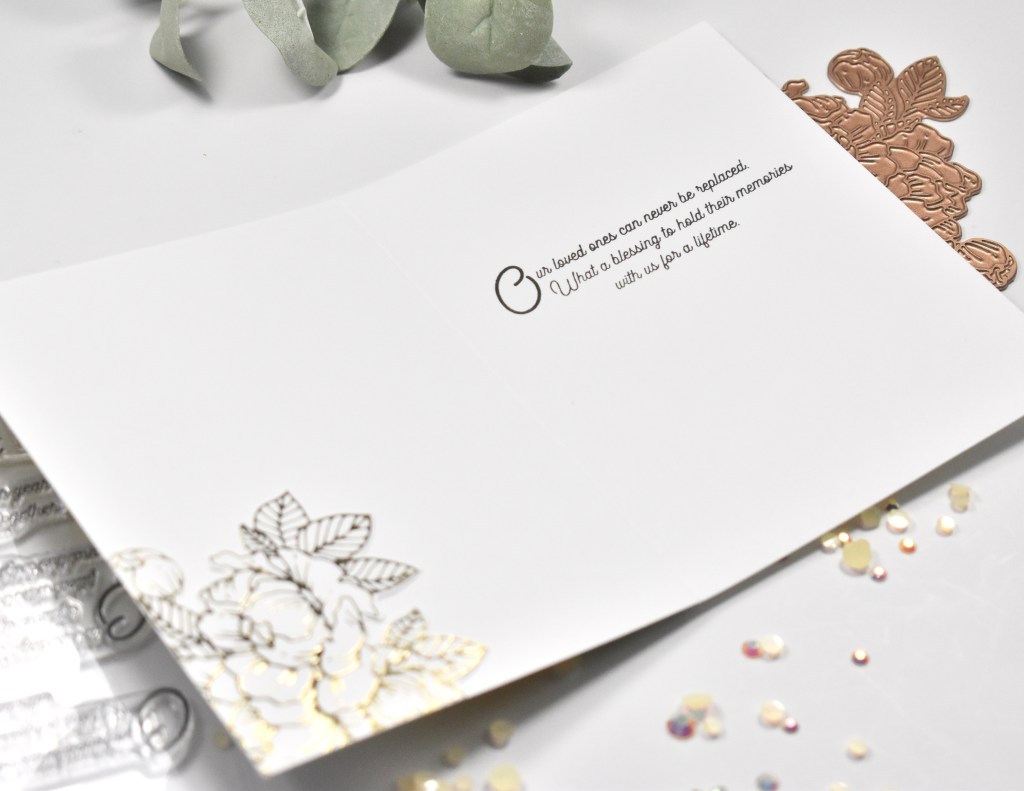
I adhered the striped panel to a black cardstock panel for some contrast and then adhered those to my card base, which is also Neenah 110lb. I decided to foil another peony and fussy cut that to adhere on the inside of the card where I stamped the other sentiment using the same VersaFine ink. To finish up the card, I added some PinkFresh Studio Jewels for some bling.
That does it for this card! I hope you like it, and I hope it inspires you to get crafty in your space! Hop over and check out the entire Beautiful Sentiment Vignettes Collection! Lots of fun things to look at!
Hello Crafters and welcome back to my blog! I was super excited when I was asked to create a few projects using the Spellbinders Truly Yours Collection! This is such an awesome collection because it features Glimmer plates, dies and even a great sentiment stamp set! So let’s get into today’s four projects!
I adhered the white circles to my card panel in a random pattern, and inlaid the small yellow circles into the big circles using glue. I then die cut the flowers and leaves from the Heart Swans Die set using blue, green and yellow cardstock, and adhered the centers of the flowers. The flowers were then adhered to the middle of the circles using a combination of glue and 3M Foam Tape.
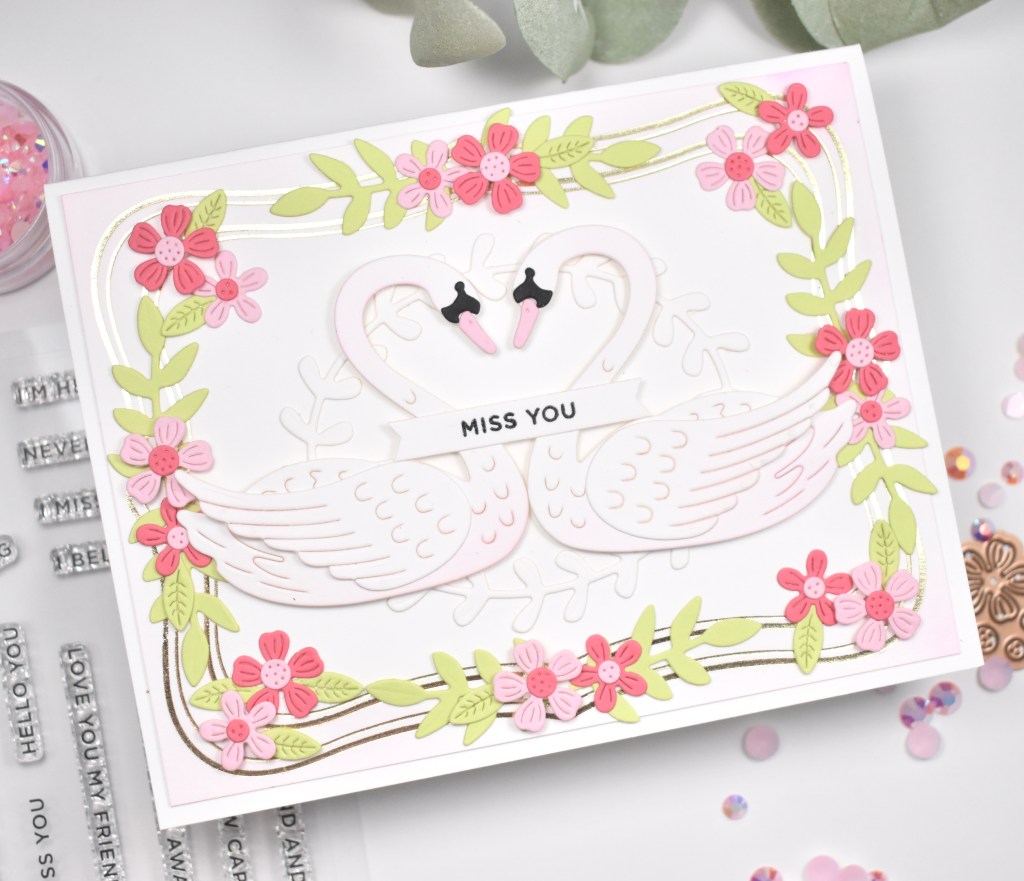
I die cut the flowers from the swan set using pinks and green cardstock and adhered the centers of the flowers. I then adhered the flowers around the the gold foil using glue and foam tape for dimension. I stamped the Miss You sentiment from the I’m Here for You Stamp and Die set using VersaFine Onyx Black Ink and heat embossed it using Ranger Clear Embossing Powder. I glued the sentiment directly to the swans in the center. My panel was then adhered to my card base.
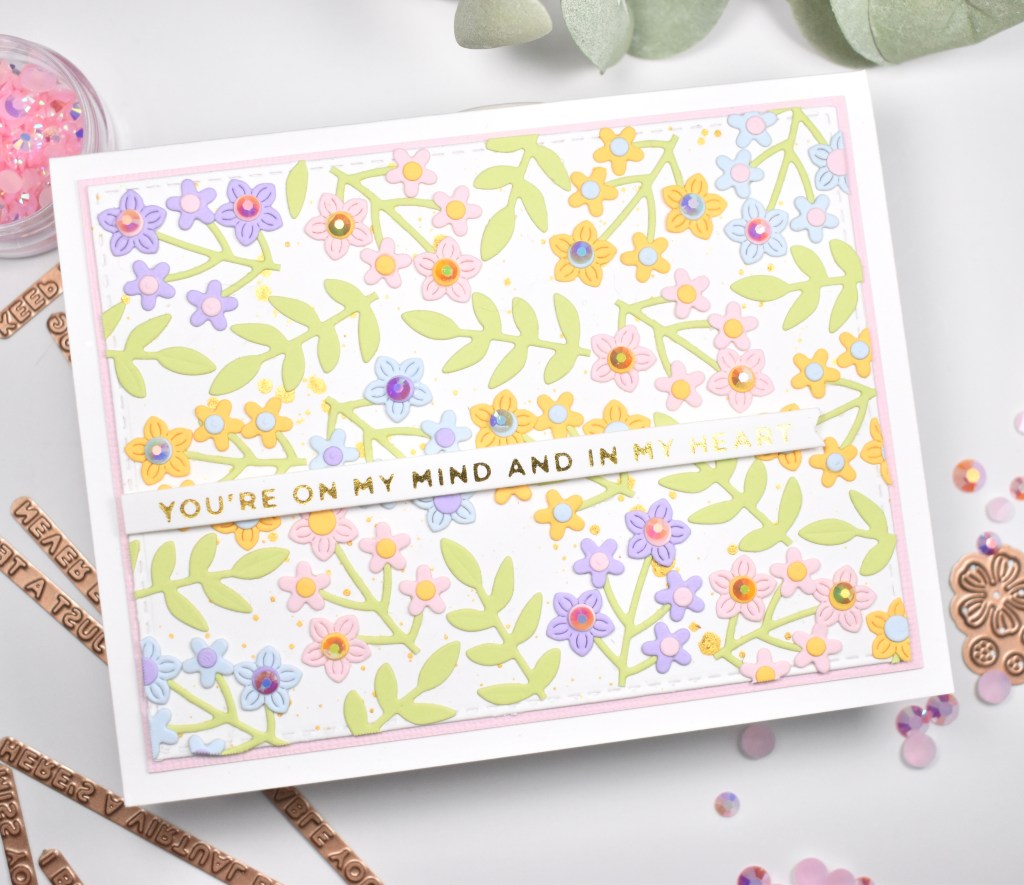
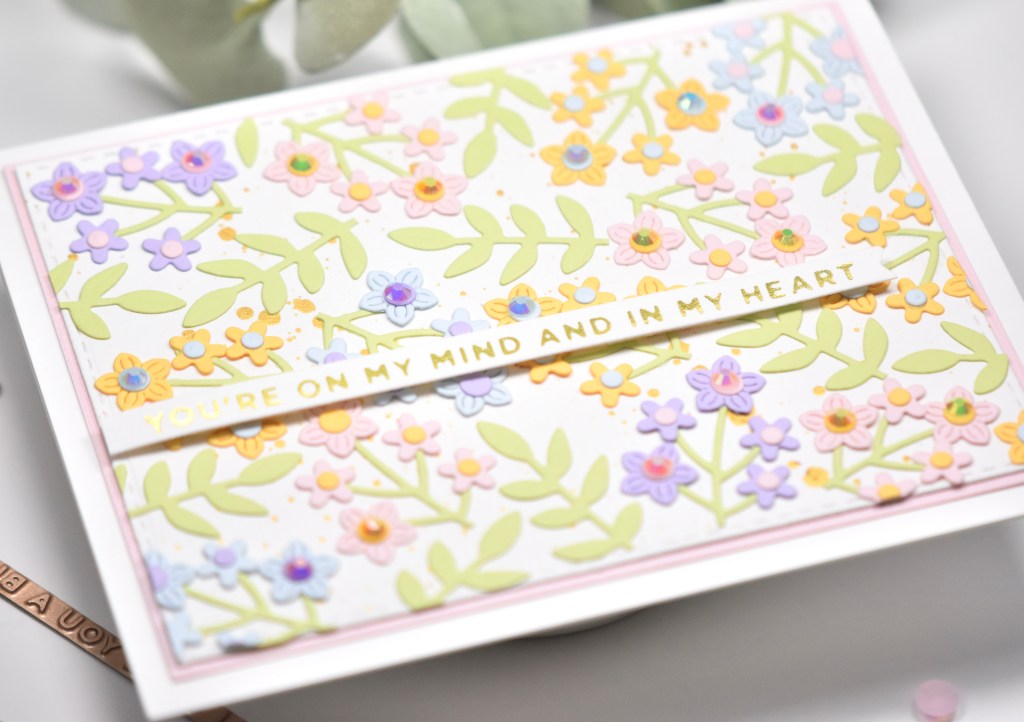
My third project, You’re on My Mind Floral, ended up being my favorite project of them all! I loved these little flowers so much that I decided to make my own background using them. For this one, I die cut a bunch of flowers and leaves from the Bouquet of Flowers Die set using blue, pink, purple, yellow and green cardstock and adhered the stems and flower centers using glue. I then arranged and glued them atop a gold splattered panel, trimming off the excess as needed.
I then adhered my panel to a pink panel, and then to my card base, which is 110lb cardstock. Using gold foil, I foiled the sentiment from the Mini Sincere Sentiments Glimmer Hot Foil Plate and Die set, trimmed it out, and adhered it to my card using foam tape for dimension. To finish up, I added some PinkFresh Studio Jewels Mix to the larger flowers, because I thought some bling was in order!
For my last project, I die cut the two largest Elliptical Ovals Dies from black and white cardstock and glued those together, and then glued those to a black splattered panel. I then die cut the dress portions of the Paper Coutour Dress Dies from black cardstock, and the bow and hanger portions using glitter cardstock, and adhered those together. I again used the flowers and leaves from the Heart Swans Die set to cut those out of white cardstock.
I adhered the dress to the ovals using foam tape, and adhered the white flowers around the ovals using a combination of glue and foam tape. I then attached my panel to a panel of black cardstock to pull all of the black elements together, and then to a card base. Using silver foil, I hot foiled the sentiment from the Mini Sincere Sentiments Glimmer Hot Foil Plate and Die set, trimmed it down and glued it to the bow of the dress. To finish this card, I added some silver embellishments to the flowers for some added bling.
That does it for my projects featuring the Truly Yours Collection from Spellbinders! I hope you enjoyed them, and I hope they inspire you to get crafty!
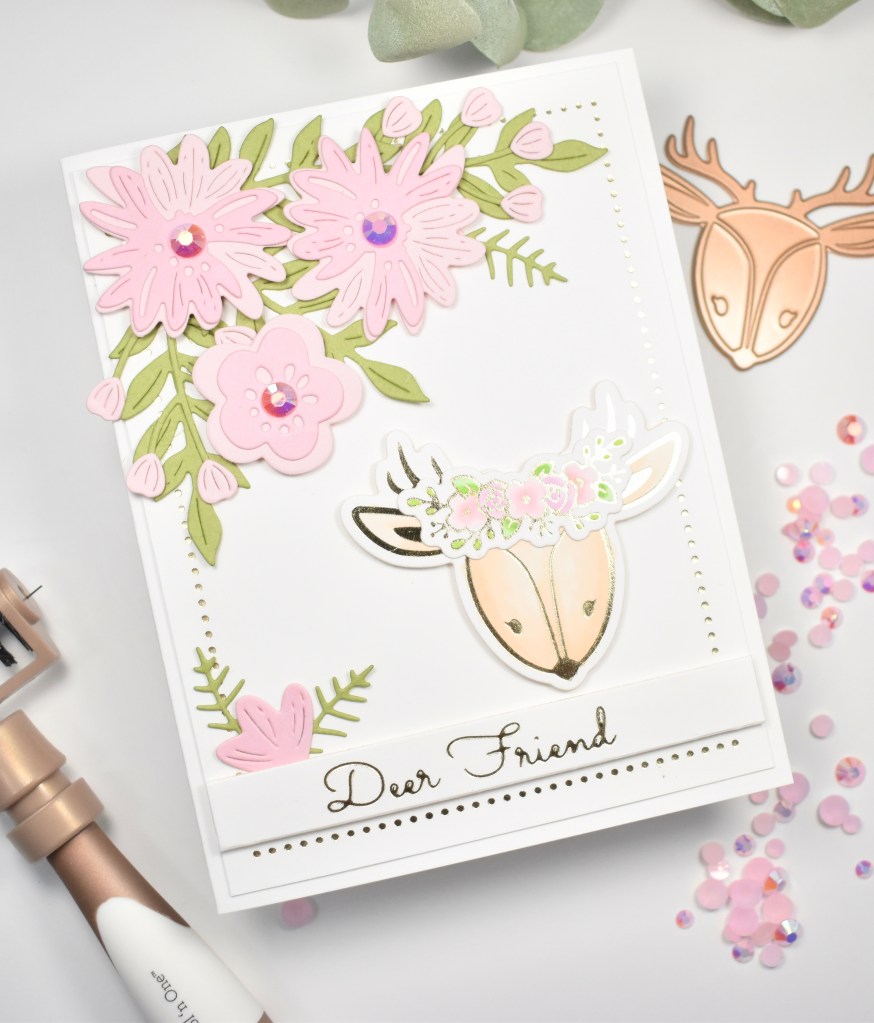
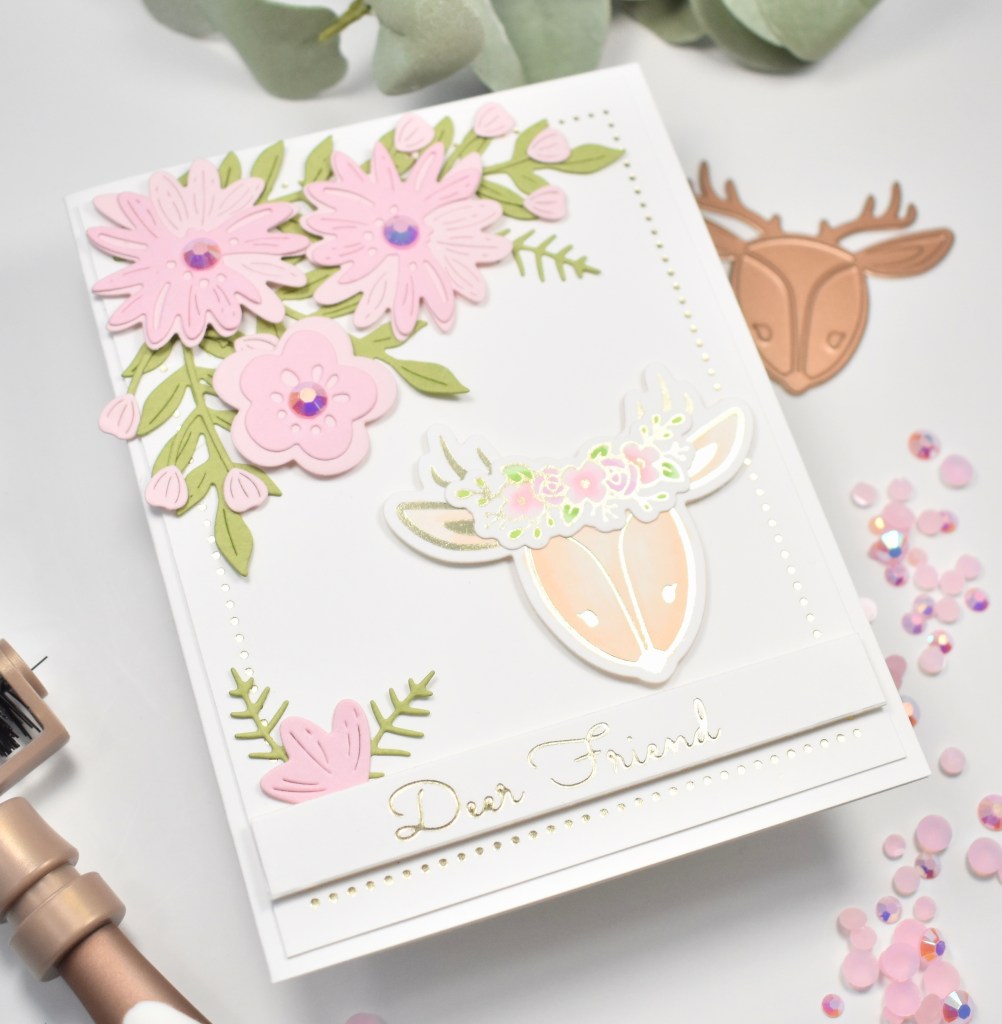
Hello! Hello! I was super excited to be able to play with the new Deer Friend Glimmer Hot Foil Plate and Die Set from Becca Feeken! This is such a cute little set and made the sweetest card. Let’s get started!
I used Copic Markers E000, E00, YG11, YG13, RV00 and RV10 to color the deer and florals, and used the coordinating dies in the set to cut them out. I also used the Simply Perfect Layered Blooms Set to cut some florals and leaves from pinks and green cardstock. I went ahead and adhered the floral pieces together using Craft Tacky Glue.
To assemble the card, I used foam tape for the sentiment and the deer in the bottom right corner, and used a combination of glue and foam tape to adhere the blooms and leaves in the upper left corner. I had a bloom left over, so I tucked it down around the sentiment. I added PinkFresh Studio Jewels to the centers of the flowers, because every card needs bling! Am I right?!?! I attached my panel to a Neenah 110lb card base to finish it up.
I hope you enjoyed this project! I think this deer is the cutest and really enjoyed playing with it! Don’t forget to check out the entire Sweet Cardlets II Collection from Becca Feeken. There’s other super cute stuff in this collection!
Thanks so much for stopping by today! Stay awesome!