Simon Says Stamp Friendship Leaves

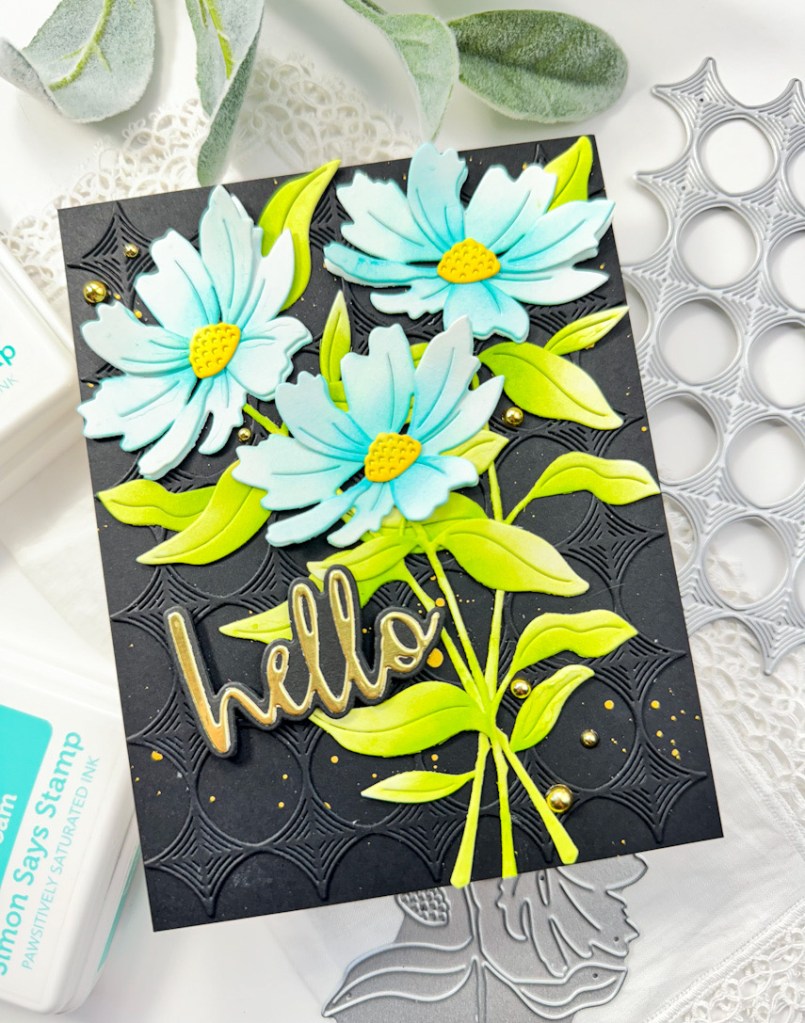
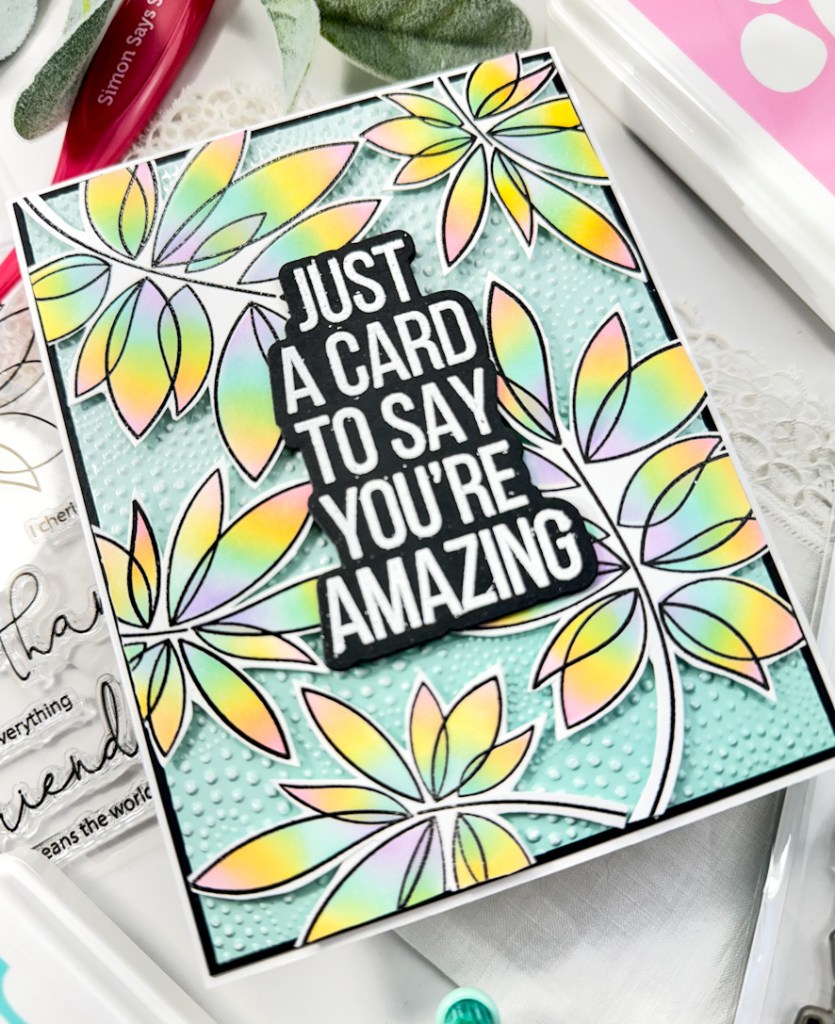
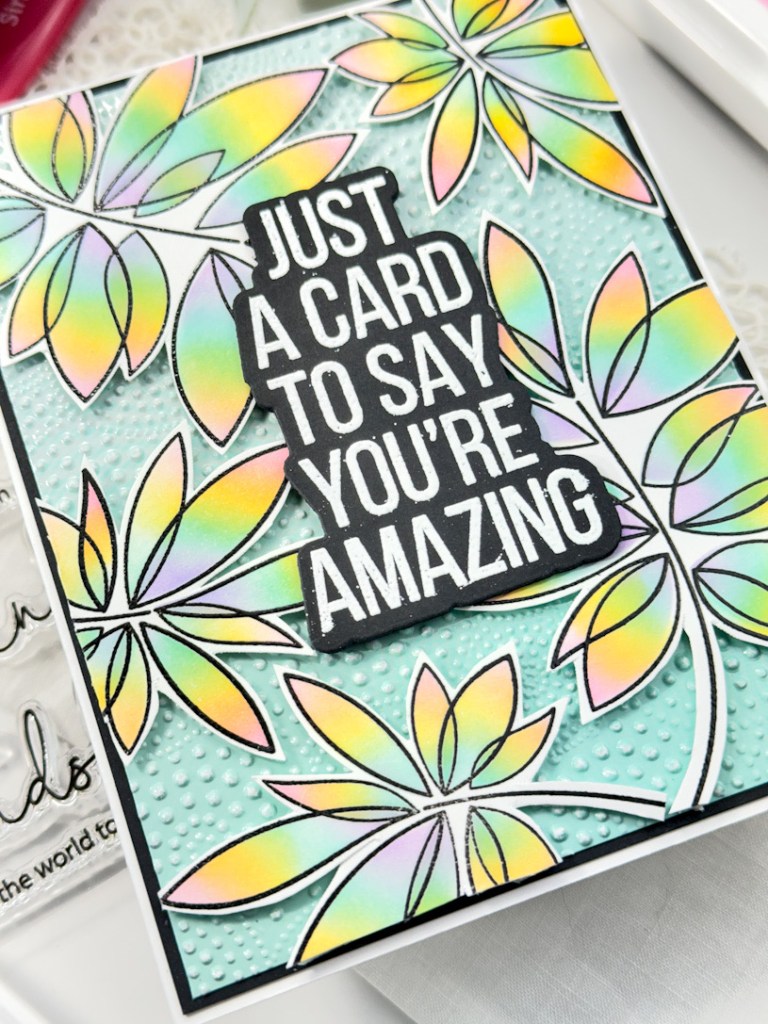
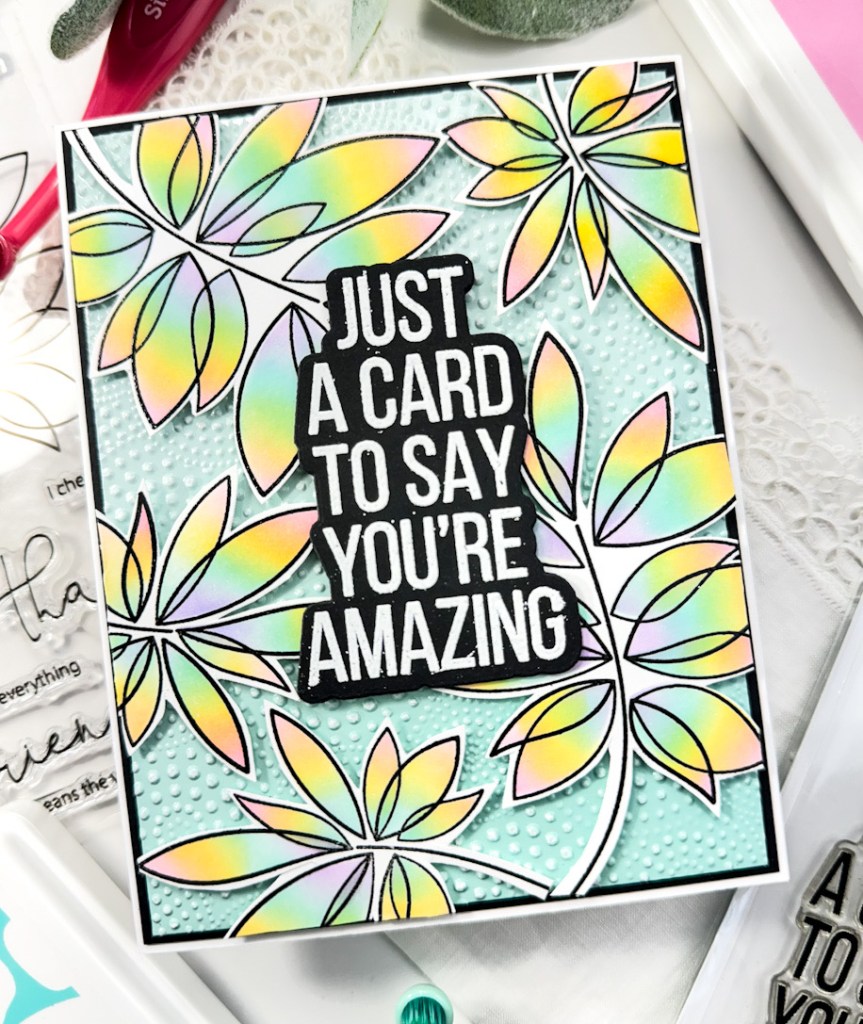
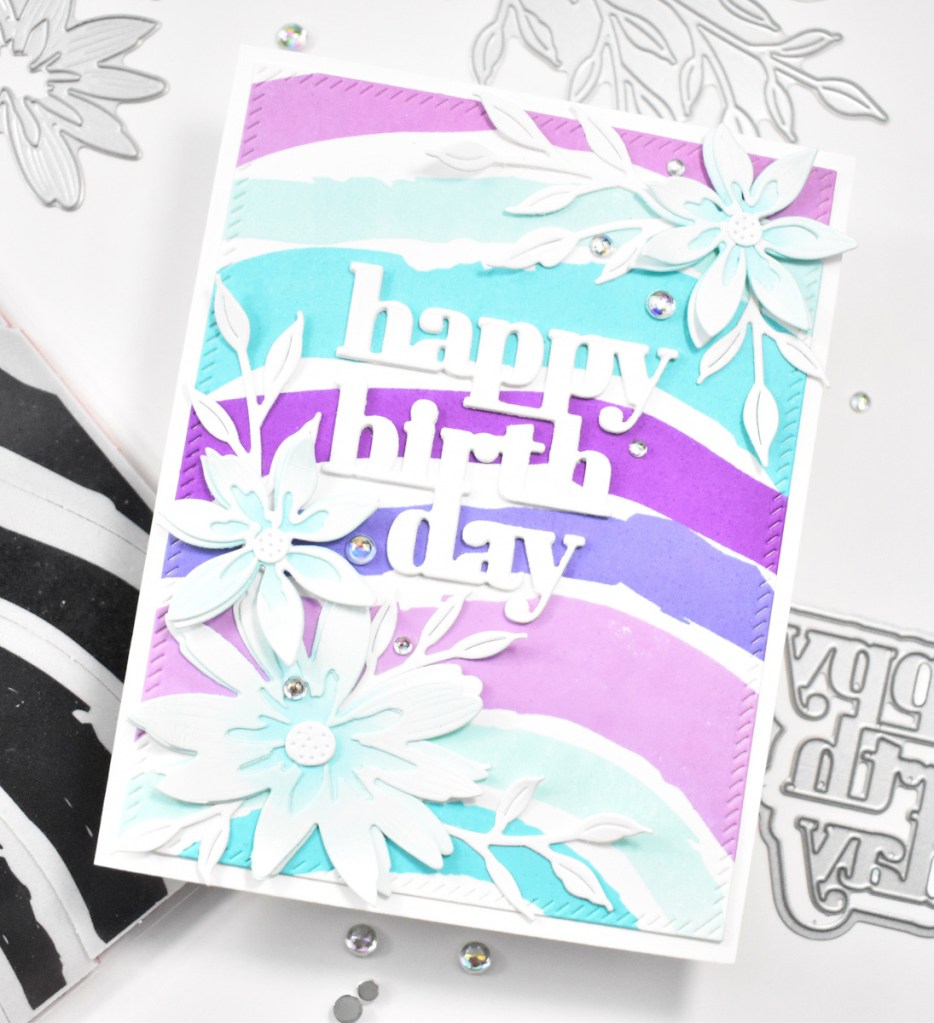
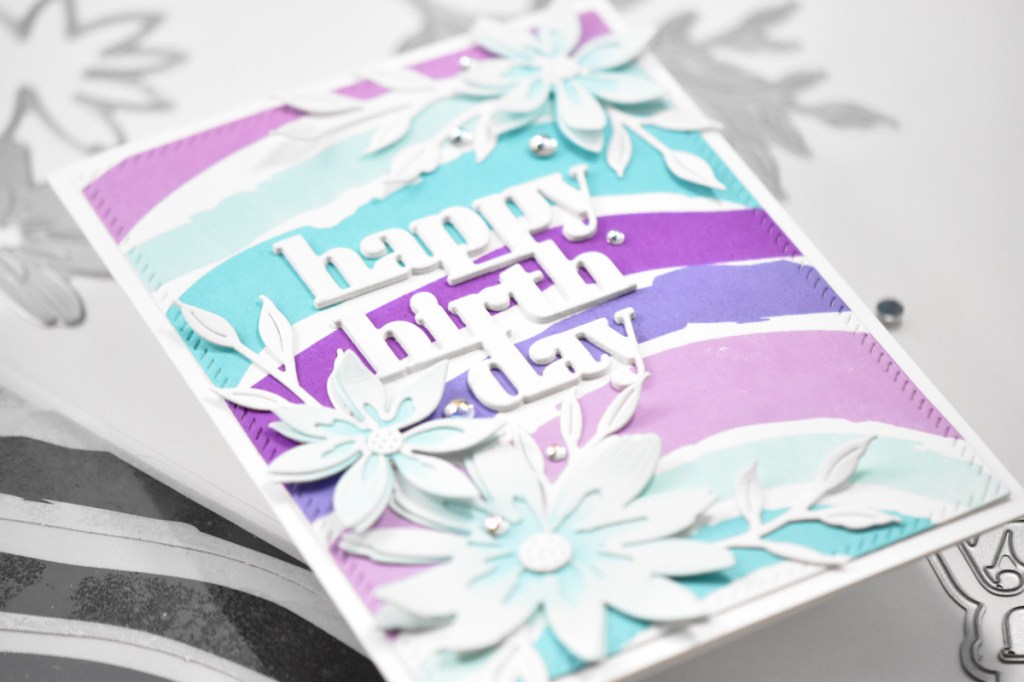
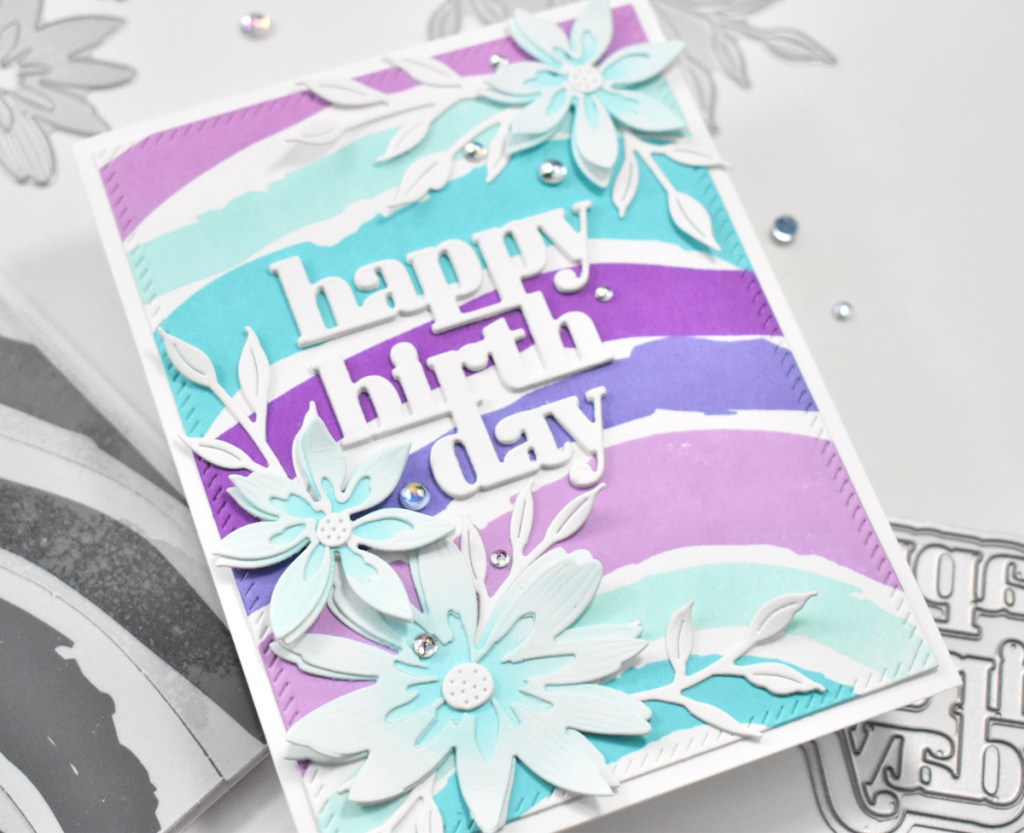
Hello Fellow Crafter, and thank you so much for swinging by! I’m back today with a card featuring the new Friendship Leafy Cluster from Simon Says Stamp’s latest release, Sweetheart. This really is becoming one of my favorite sets! I love the fact that it’s a product suite that includes a stamp, stencil and die! Let’s run through the details for this one, shall we?

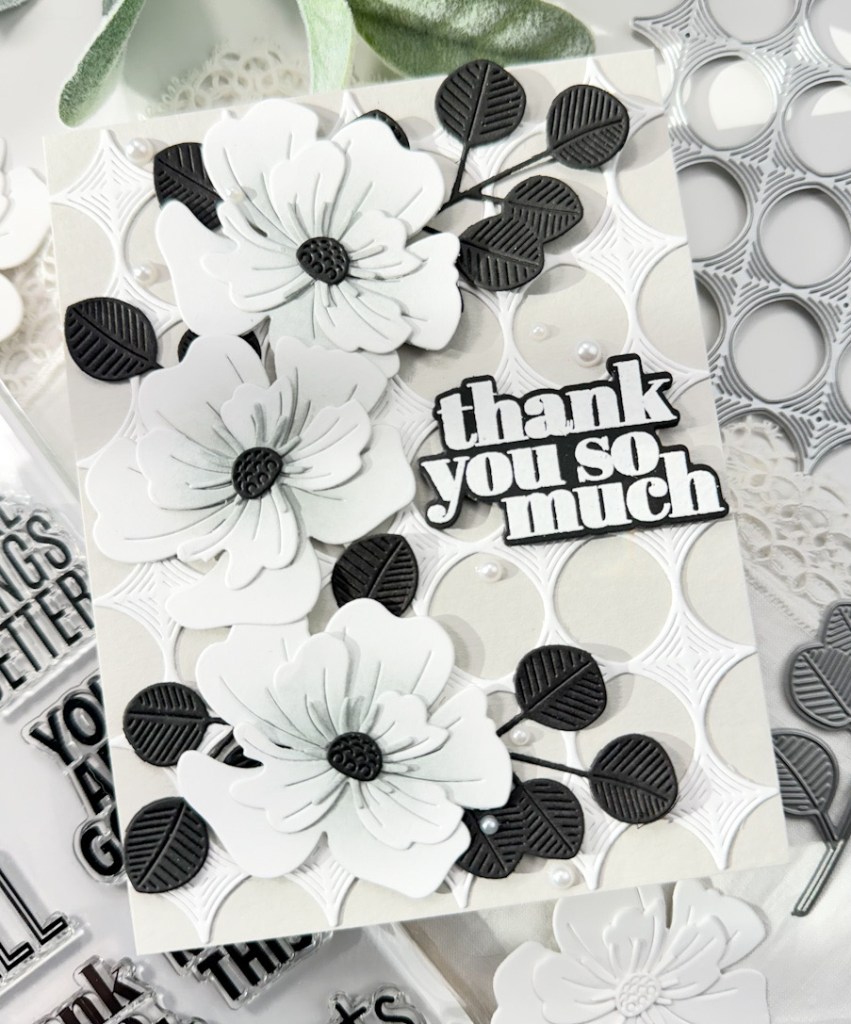
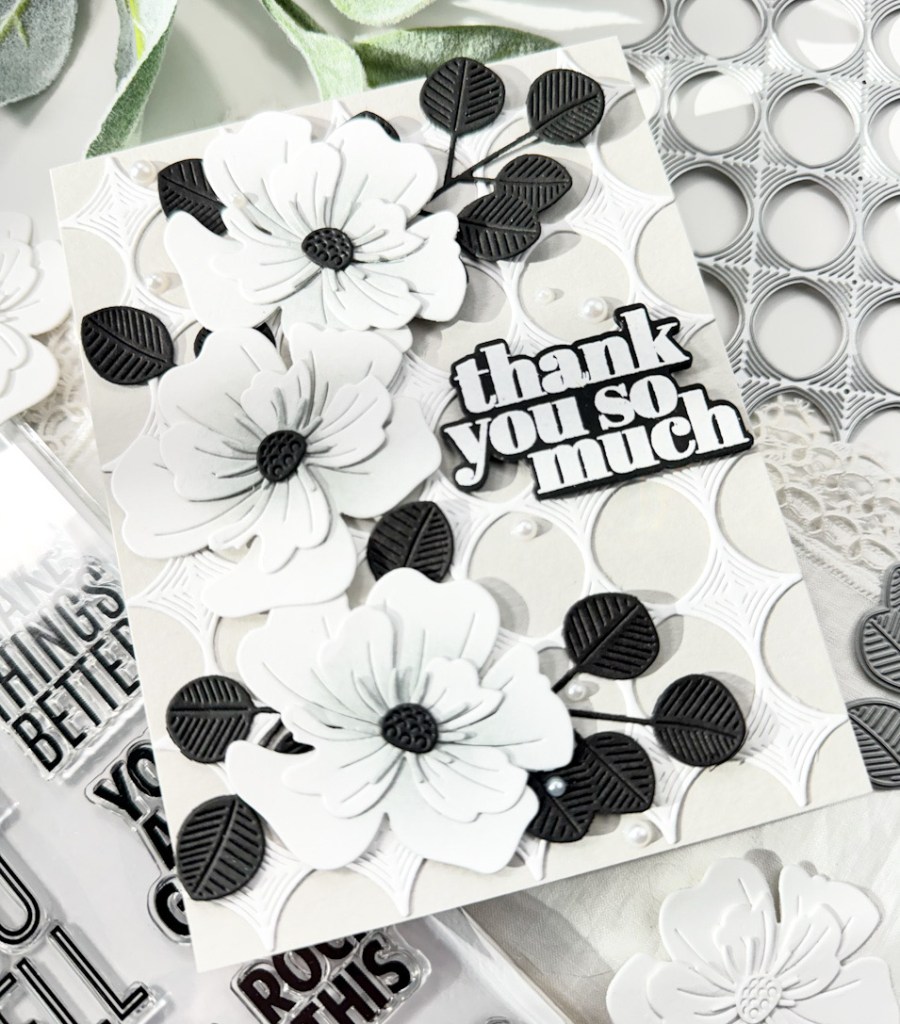
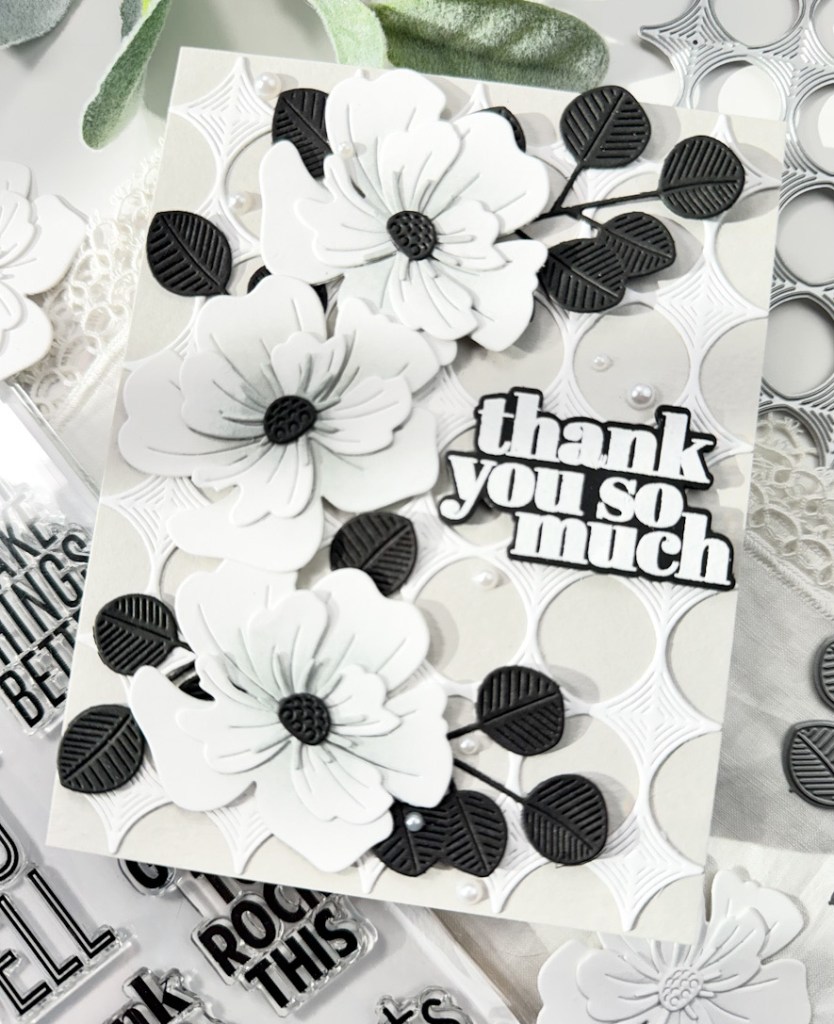
I received The Color Cube bundle for Christmas from my bestie, and this passed Saturday, she and I went through them together and ooohed and awed at each card. This inspired me to pull out a card from the bundle and do some ink blending using the SSS Friendship Leafy Cluster. To begin, I stamped the leaf clusters twice on a panel of Neenah 110lb cardstock using VersaFine Onyx Black ink and heat set them using Ranger Clear Embossing Powder.

I took the card from The Color Cube over to my inks and tried to match them the best that I could. The inks that I chose were, SSS Pawsitively Saturated Ink in Cabbage and Sherbet, along with PFS Atlantis and C&9th Harbor and Powder. I taped the stencil to my stamped panel and began ink blending using the various inks in a random pattern. This is a set of two stencils, so I just made my way through each stencil, and each leaf. Once the ink blending was complete, I used the coordinating die to trim the clusters out.
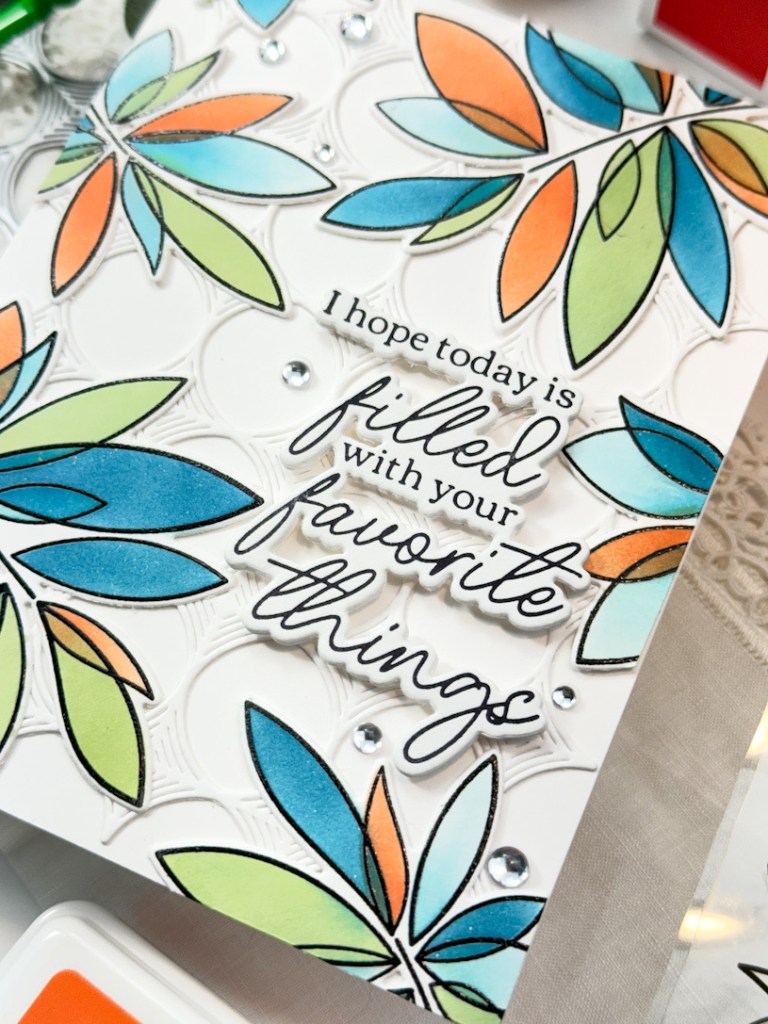
For the background, I die cut the SSS Whirl Diamond Plate from a panel of Neenah 110lb cardstock and adhered it to the card base using liquid glue. For the sentiment, I used this one, which is from the PFS Favorite Things Sentiments Press Plate set. I inked it up using the BetterPress Black Ink and a BetterPress A2 Card Panel and ran it through the Spellbinders Platinum 6 to make the impression. I then used the coordinating die to trim it out. I cut the sentiment two more times and adhered all of them together using liquid glue for a stacked sentiment.
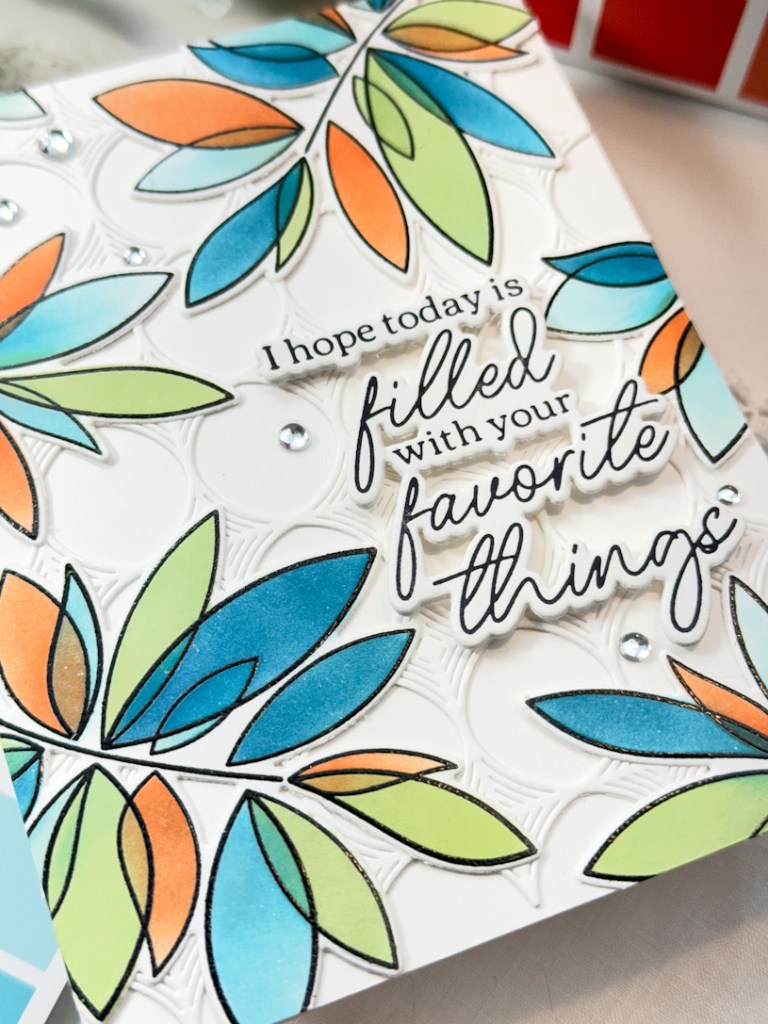
I decided on the placement of the sentiment and adhered that atop the card using SSS Foam Tape, and then determined the placement of the leaves. Those were then adhered using liquid glue, and the excess was trimmed off. To finish off the card, I added a few PFS Ice Clear Drops for a little bit of shine.

That does it for this one! I hope you enjoyed it, and I hope it inspires you to get crafty in your space! I really enjoyed pulling a card from The Color Cube and matching inks up to it for a color combination that I knew would work. Thanks again for joining me, and I hope you have a wonderful day! Don’t forget to stay awesome!
Supply List:
- SSS Friendship Leafy Cluster Stamp, Stencil, Die, Bundle
- SSS Whirl Diamond Plate
- SSS Pawsitively Saturated Ink: Cabbage, Sherbet
- SSS Blender Brushes
- SSS Place and Score Embellishment Wand
- SSS Bone Folder
- SSS Foam Tape
- SSS Triangle Trays
- PFS Ink Atlantis
- PFS Favorite Things Sentiments Press Plate, Coordinating Dies
- PFS Ice Clear Drops
- C&9th Ink: Harbor, Powder
- Spellbinders BetterPress Letterpress System
- Spellbinders BetterPress Black Ink
- Spellbinders BetterPress A2 Card Panels
- Spellbinders Platinum 6
- The Color Cube
- Neenah Classic Crest Solar White 110lb Cardstock
- VersaFine Onyx Black Ink
- Ranger Clear Embossing Powder
- Wagner Heat Tool
- Bearly Art Glue
- Tim Holtz Scissors
- Anti-Static Powder Tool
- Misti
- Scor-Buddy
* Affiliate links used at no cost to you. Thanks so much for your support!
Latest Posts
- Simon Says Stamp Braided Greetings

- Together By Design Color Cube Floral

- Simon Says Stamp Cute Duckling

- Simon Says Stamp Watercolor Wild Rose

- Simon Says Stamp Striped Missing You