STAMPtember Butterfly Rose Bouquet

Hello, and welcome to my blog! I’m so happy that you dropped by! It’s that time of year again when STAMPtember is upon us. One of the best months of the year! There’s so many new products, and so much inspiration to draw from, not to mention all of the collaboration sets that will debut soon. With the release of all the STAMPtember products, Simon Says Stamp is hosting a huge blog party with codes for free gifts and gifts with purchase! So, be sure to check out all of the blog posts in the party! You can begin the party by starting at Simon’s blog! Check the bottom of this post for my STAMPtember code! For my card today, I’m featuring the new Billow Butterfly, so let’s run through the details.

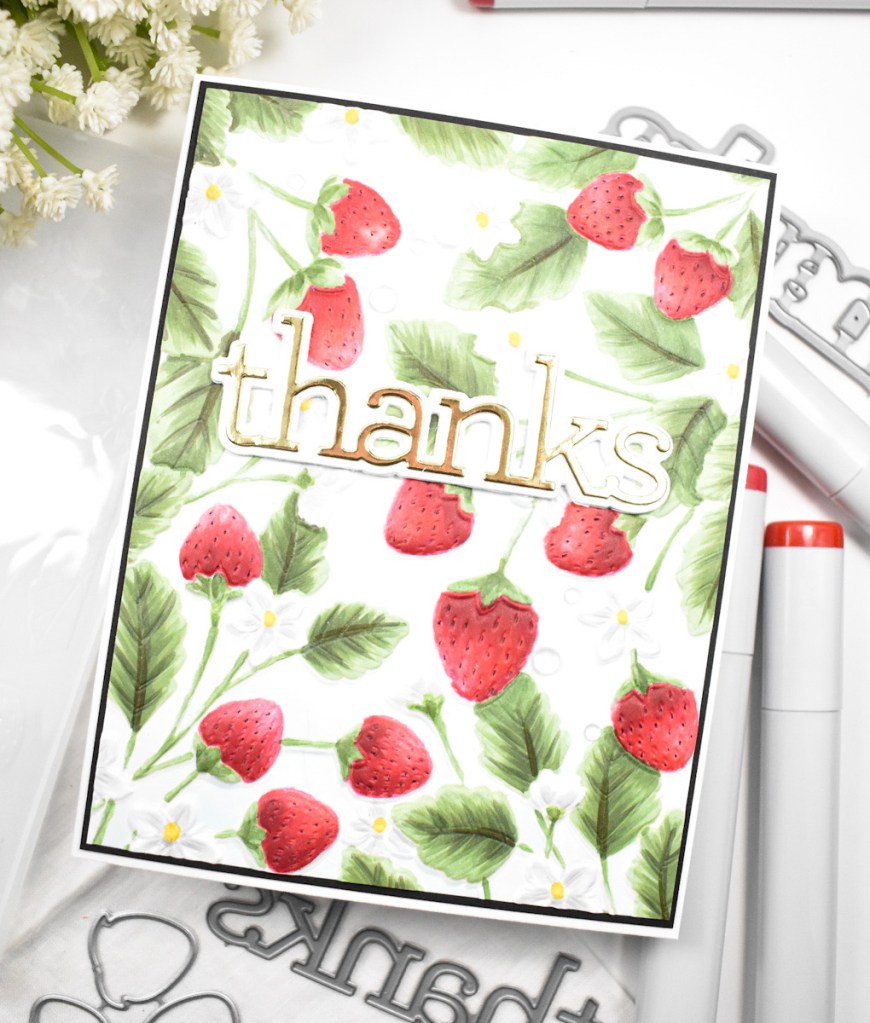
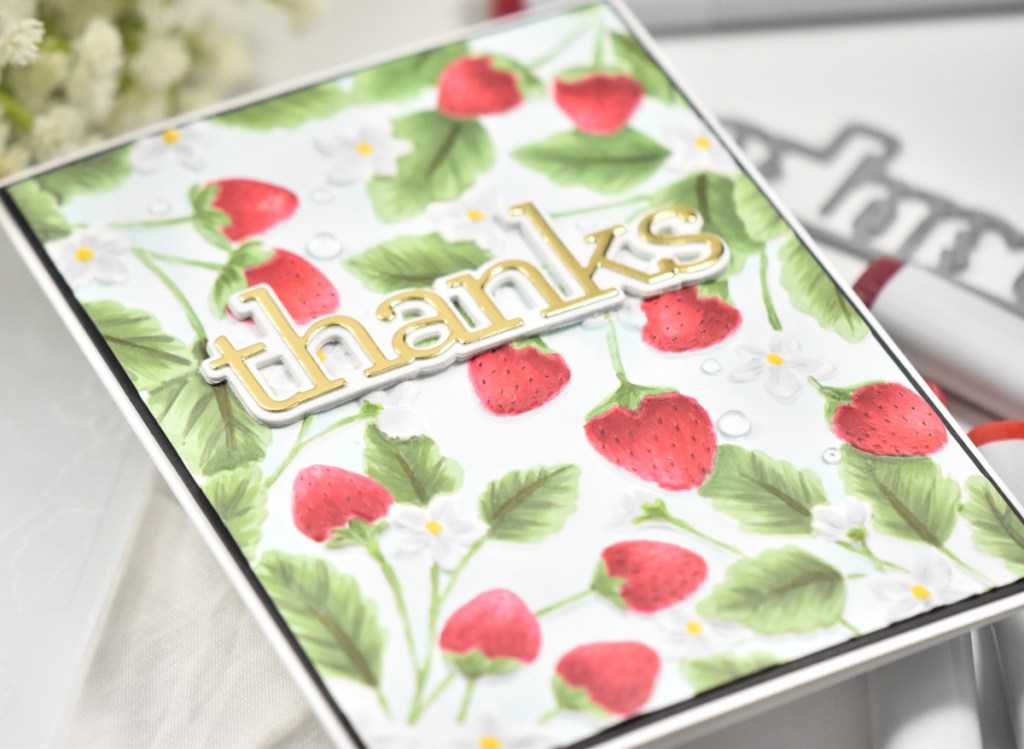
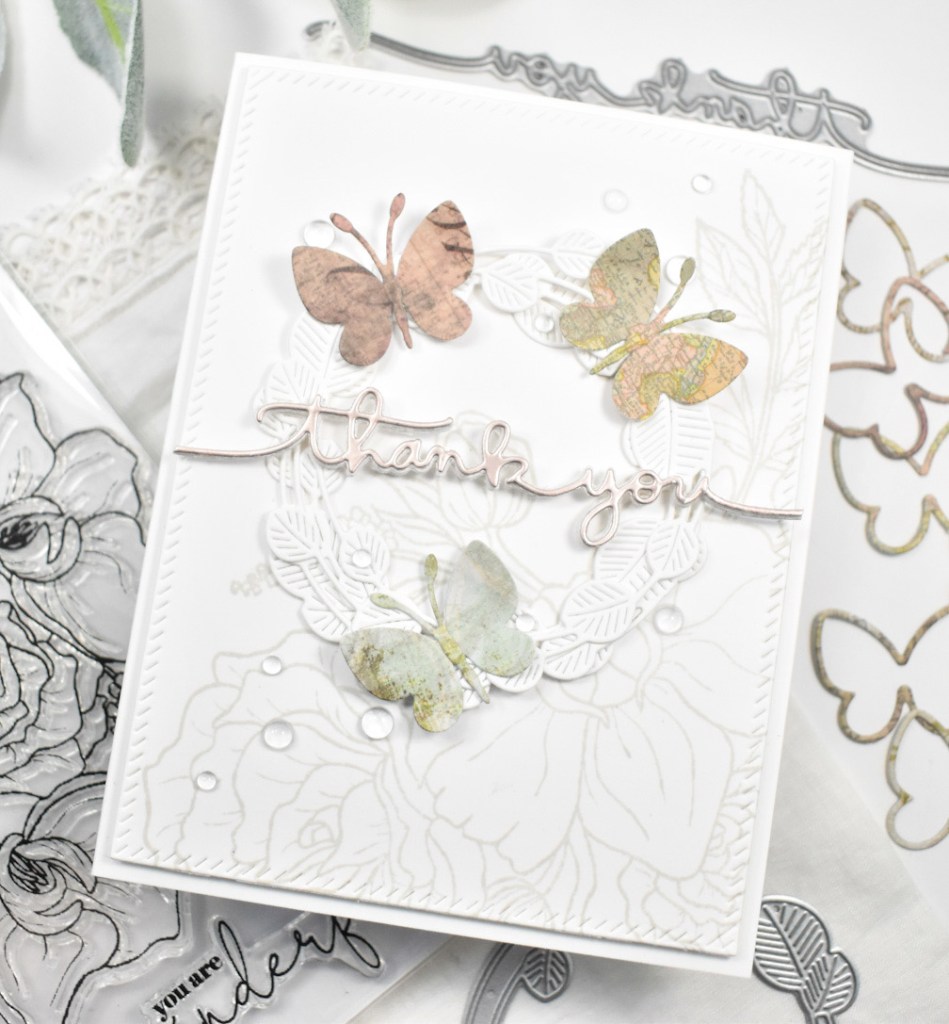
To begin, I stamped the floral image from the SSS Orchid Rose Bouquet on a panel of Neenah 110lb cardstock using PFS Misty Coast Ink. I chose this ink, because I wanted a very light background that didn’t distract from the focal point of the card. I then trimmed the panel down using the PFS Diagonal Stitched Rectangles, and cut so that the floral image was on the bottom portion of my card panel.

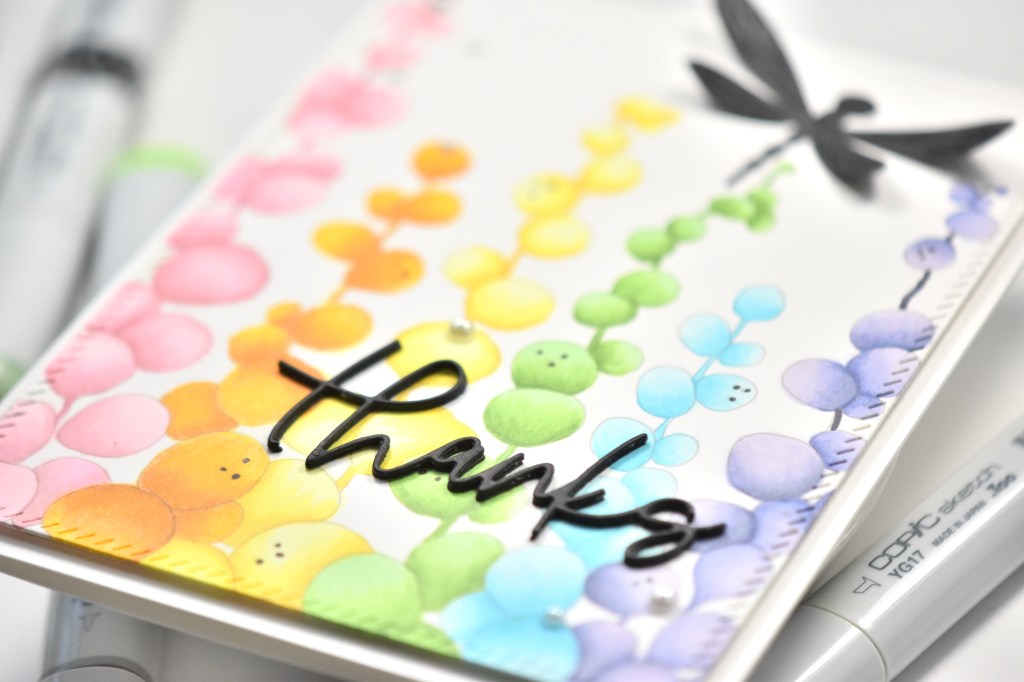
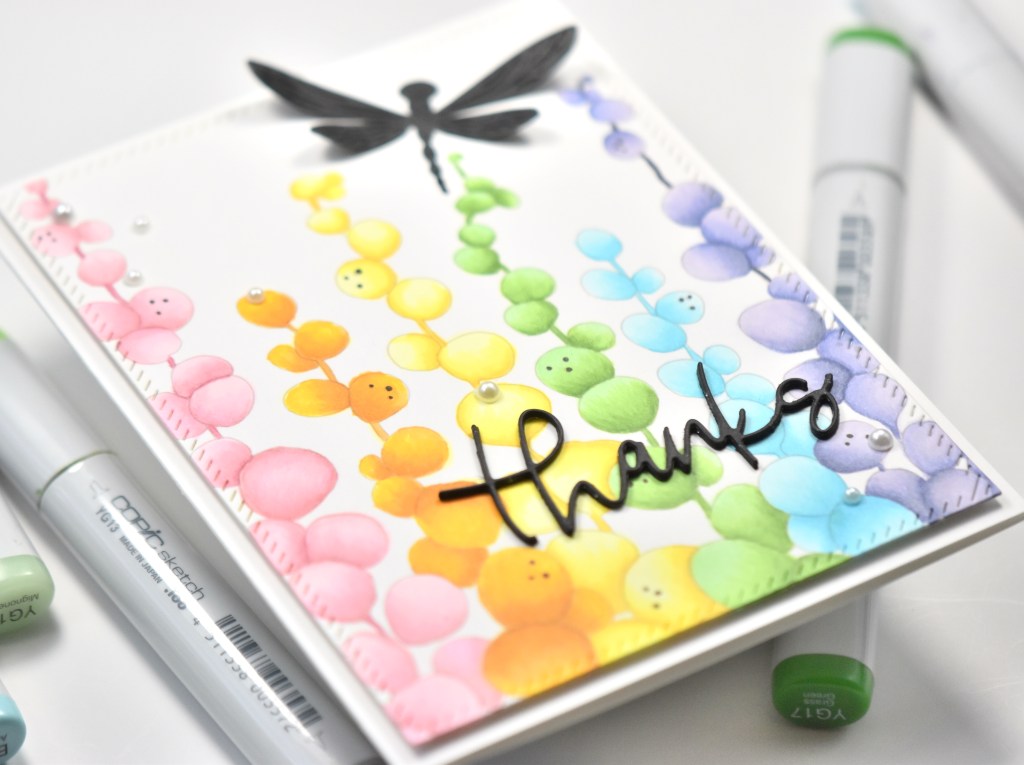
I used the SSS Etched Eucalyptus Wreath and cut three of those from Neenah 110lb cardstock, and adhered them together using liquid glue. Next, I used the new SSS Billow Butterfly to cut some of the butterflies from some scrap Tim Holtz patterned paper that I had hanging around in my stash. This die is super cool, because it’s one piece that cuts several different butterflies, including solid butterflies as well as, outline butterflies. I opted for the solid for this particular project, because I wanted to be able to see the print of the patterned paper. Once the butterflies were cut, I adhered the bodies using liquid glue and moved on to working on the sentiment.

For the sentiment, I used the thank you die, which is from the SSS Handlettered Greetings set. I die cut the sentiment once from Burnished Rose cardstock, and four times from Neenah 110lb, and adhered all of those together. I wanted the sentiment to be thick, so that it would be sturdy.

To assemble the card, I glued the wreath to the stamped panel, and then glued the patterned butterflies atop the wreath. The butterflies are only glued down at the bodies, so that their wings could be curled for added dimension. Once those were in place, I adhered the sentiment only where it comes into contact with the wreath, hence wanting a thicker sentiment for sturdiness. I trimmed off the excess portions of the sentiment and added some clear drops for a little shine. The panel was then adhered to the card base using foam tape.

That does it for this project! I hope you enjoyed it, and I hope it inspires you to get crafty as well. Don’t forget to check out the entire STAMPtember release along with all of the blog posts celebrating this awesome release! Each blog post will have a different code for gifts! Thanks again for stopping by! Have a wonderful day and stay awesome friend!

Supply List:

* Affiliate links used at no cost to you. Thanks so much for your support!

Latest Posts

Latest Instagram Posts

Strawberry Fields

Hello Friends and thanks so much for stopping by! I’m back today with a card featuring the new Strawberry Fields Embossing Folder from Simon Says Stamp’s latest release, Out of This World. I had a fun time working on this one, although it took me the better part of a day. That’s just me though, it takes me forever to color anything! Anyhoo, let’s roll through the details of this one.

I began by trimming a panel of Neenah 110lb cardstock and misting it with a bit of water before running it through the die cutter. Once the image was embossed, I sat down and got to coloring! The Copic Markers used were R27, R35, R37, R39, RV14, B0000, Y18, N1, C2, BG96, YG99, G21, G24, G85 and G94. If you don’t have a Copic Hex Chart, I highly recommend it. It’s super nice to be able to glance at the chart and know which colors will work nicely together.

Once all of the coloring was complete, I used a Copic Multiliner 0.03 to add some detail for the strawberry seeds. I then trimmed the panel down just a smidge and adhered it to a black panel for a little bit of contrast.

For the sentiment, I opted to use the SSS Thanks die. I cut the shadow three times and the sentiment once from Polished Gold cardstock and adhered all of those together using liquid glue. That was then placed in the center of the panel.

I adhered everything to the card base and added a few clear drops to complete this project.

That does it for this one. Don’t forget to check out the entire Out of This World release and let me know your favorites! Thanks again for stopping by and have a wonderful day!

Supply List:

* Affiliate links used at no cost to you. Thanks so much for your support!

Latest Posts

Latest Instagram Posts

Simon Says Stamp Floral Thank You

Hello Friends and thanks so much for stopping by! I’m still playing with goodies from Simon’s latest release, Happy and Joyful. There are so many beautiful florals in this release, and today’s card is featuring the new Lisianthus stamp set. Let’s run through the details for this card!

I began by stamping the floral image on a panel of Neenah Classic Crest 110lb cardstock using VersaMark Ink and then heat set it using SSS Detail White Embossing Powder.

I was going for an emboss resist technique so I used PinkFresh Studio inks in Soft Lilac and Lavender, as well as Simon’s Aspen Pawsitively Saturated Ink for the ink blending on this panel. When the ink blending was complete, I used the new SSS A2 Marquee die set to trim it down. I cut the marquee an additional two times and adhered all of those together using liquid glue for added dimension without the bulk. This is such a cool die, and I just love the detail that it adds! I also added some white splatter to the panel using Royal Talens Titanium White Acrylic Ink before moving on.

For the sentiment, I used the SSS Clean Line Gratitude stamp and die set. I stamped thanks using VersaFine Onyx Black ink and heat set that using Ranger Clear Embossing Powder. I trimmed it out using the coordinating die and placed foam tape on the back. I searched my SSS Sentiment Strips to find a sub-sentiment that worked well and added foam tape to that as well.

The sentiments were added to the panel along with some pearl accents before being added to the card base using SSS Dot Tape Runner.

Super simple card, but I love the soft airy feeling to it. I hope you enjoyed it, and I hope it inspires you to get crafty! Don’t forget to check out the entire Happy and Joyful release, and let me know your favorites! Have a wonderful stay and stay awesome!

Supply List:

* Affiliate links used at no cost to you. Thanks so much for your support!

Latest Posts
Latest Instagram Posts

Alex Syberia Design Coloring Therapy

Hello Crafty Friends! Thanks for stopping by today to check out my project for the new July release from the awesome Alex Syberia! Lots of fun things in this release, and of course, some beautiful flowers for your coloring pleasure! To celebrate Alex’s new release, we are having a super fun Instagram Hop, with a chance to win a $20 gift certificate for her shop! You can check out her Instagram or my Instagram for all the details! For today’s project, I’m featuring the Coloring Therapy A2 Panel, so let’s get started!

I began by printing the image on Neenah Classic Crest 110lb cardstock. When I printed the image, I did adjust the opacity down to about 30%. By doing this, you can get somewhat of a no-line look, especially when watercoloring. I then got busy coloring. I started with the purples, and thought that I was going to color the whole thing purple to resemble grapes, but then decided that it might be cool to do rainbow colors instead.

The Copic Markers that I used were BV000, BV00, BV01, BV02, BV04, BV23, BV29, Y00, Y06, Y08, Y11, Y13, Y15, Y17, RV00, RV02, RV11, RV32, R85, YR23, YR24, YG11, YG13, YG17, BG000, BG01 and BG02. Goodness gracious, that’s a lot of markers, right!?!? Anyhoo, once everything was colored, I used the PinkFresh Studio Diagonal Stitched Rectangles to trim the panel.

I also used a Copic Multiliner 0.3 to add back the black dots on the “berries” as they got lost during the coloring process. I opted for a Thanks sentiment using the Concord and 9th Scripted Thanks die cut. I cut it three times from black cardstock and adhered those together using liquid glue. I also cut the SSS Etched Dragonfly from black cardstock.

I adhered the sentiment and the dragonfly to the colored panel using glue, and adhered the panel to my card base, which is also Neenah 110lb, using foam tape for dimension. To finish up the project, I added some Soft Snowfall Pearls from Little Things from Lucy’s Cards. I thought the softness of them added a nice little touch!

I hope you enjoyed this project, and I hope you found some inspiration to get crafty in your space! Head on over to Alex’s Etsy shop to check out the full release! You don’t want to miss it. Stay awesome sweet friend!

Supply List:

*Affiliate links used at no cost to you. Thank you so much for your support!

Latest Instagram Posts

Simon Says Stamp Thank You Gold Fading Hearts

Hello there crafty friends! I hope you are all doing well and enjoying your day! I’m still playing with goodies from the new Rainbows release from Simon Says Stamp! The Fading Hearts Stencil is one of my favorites from this release, so let’s jump right in!

I always tend towards white cardstock, but decided to mix it up with this project by using kraft cardstock instead. I began this mini slimline card by cutting a panel of kraft and adhering my stencil to it using masking tape. I then used ThermoWeb Deco Foil Transfer Gel to get a good layer on my cardstock before removing the stencil. Don’t forget to wash your tools right away, so as not to ruin them. Did I sound like your mom there? I let the panel dry for a few hours while I continued to figure out my sentiment.

Once my panel was ready, I used Tonic Studios Nuvo Gold Gilding Flakes on the hearts. I just put some flakes on and rubbed them around with my finger until all of the hearts were covered, beautiful and shiny! I decided on some SSS Sentiment Strips to adorn this card, so I trimmed those down and adhered them to my panel using 3M Foam Tape. I also found a cute, black heart in my sticker stash to add as well.

I adhered my kraft panel to a larger black panel, because I love that contrast. I then adhered those to my card base, which is Neenah Classic Crest 110lb cardstock.

That does it! Super duper simple card with lots of shiny impact! Don’t forget to check out the new SSS Rainbows release! Lots of pretty things!

Thanks so much for stopping by, and don’t forget to stay awesome!

Supply List:

*Affiliate links used at no cost to you. Thank you so much for your support!

Latest Instagram Posts