
Hello Crafty Friends! I recently had a studio renovation, and thank goodness it’s finally done! It took longer than expected, but it’s beautiful and very functional and I’m in love! Many of you have asked for pictures and a tour, so here it is!
So a little back story to the studio … My area used to be down in our basement, which as you can imagine, was very dark. And being down there, I felt quite cut off from the rest of the house. But, you do what you can with the space that you have! We’ve lived in this house just over seven years now, and at about the five year point, my husband got up one morning and said that he had a dream that we moved the studio into the sunroom. We had never used this room in our house in those five years! It was just a room that housed random furniture that we really didn’t use. Of course, by the time he finished his sentence, I was downstairs packing my stuff up!

When I moved into this space, I moved some of the white Ikea furniture that we had for our daughters when they were younger, up here with me. We also had a white dresser in my daughter’s old room that she was no longer using that I also brought into this room. It was a hodge podge of stuff, but it worked for me, and that’s what really mattered.
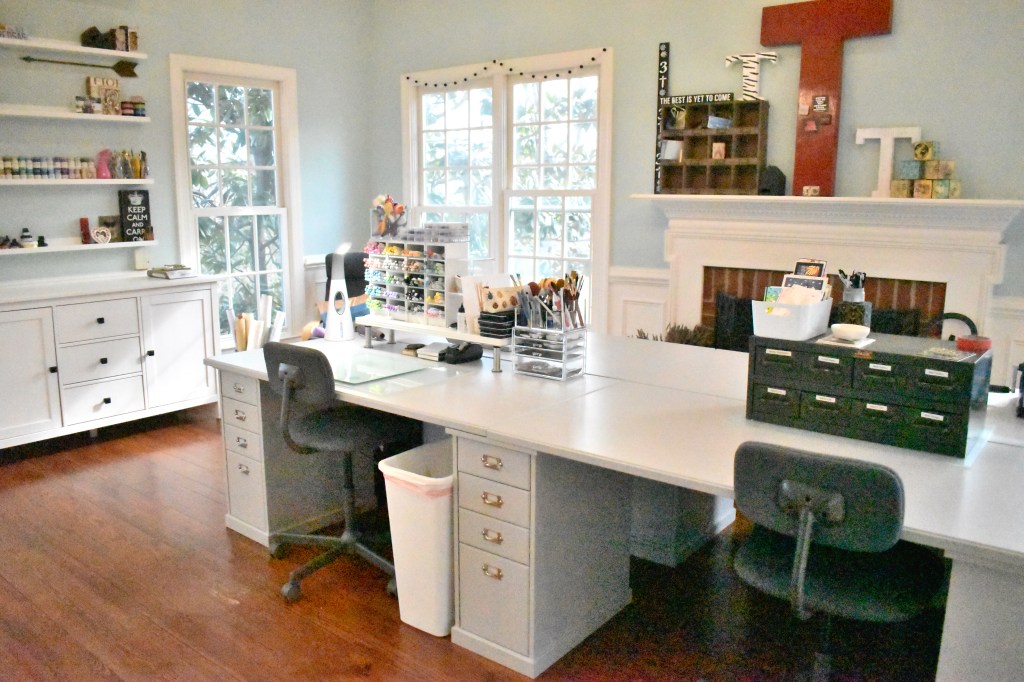
After I moved into this room, we purchased the grey tables from Ikea, which you’ll see in some of the pics. The name of the table is Klimpen, but unfortunately, this has been discontinued. This table system has two table tops, two drawer units and one bookshelf unit. Overall, it measures 94 1/2″ x 23 5/8″. I ended up purchasing two of these systems and have them back to back, basically doubling that width.
To move along in the story, my husband was renovating an office/lounge on the other side of the studio, and we decided to give the studio a face lift as well, adding built in bookshelves with countertops.
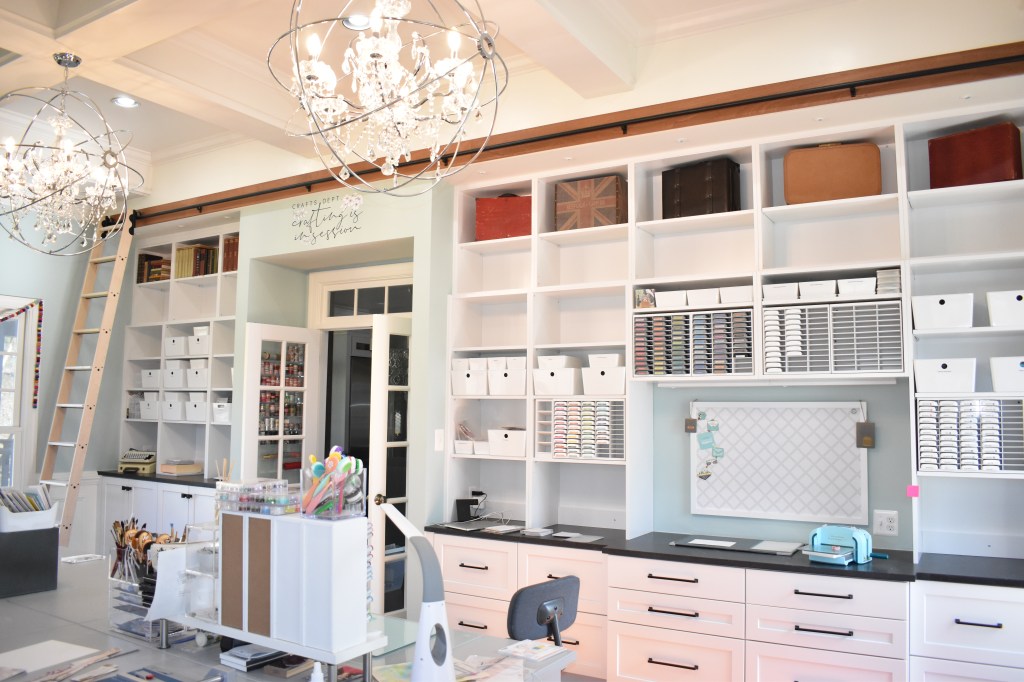
It was very hard to get a full view of the entire storage wall, so I took pics of both sides of the french doors. As you can see from the photos, one set of doors was eliminated to add lots more storage on my side, as well as his side of the wall.
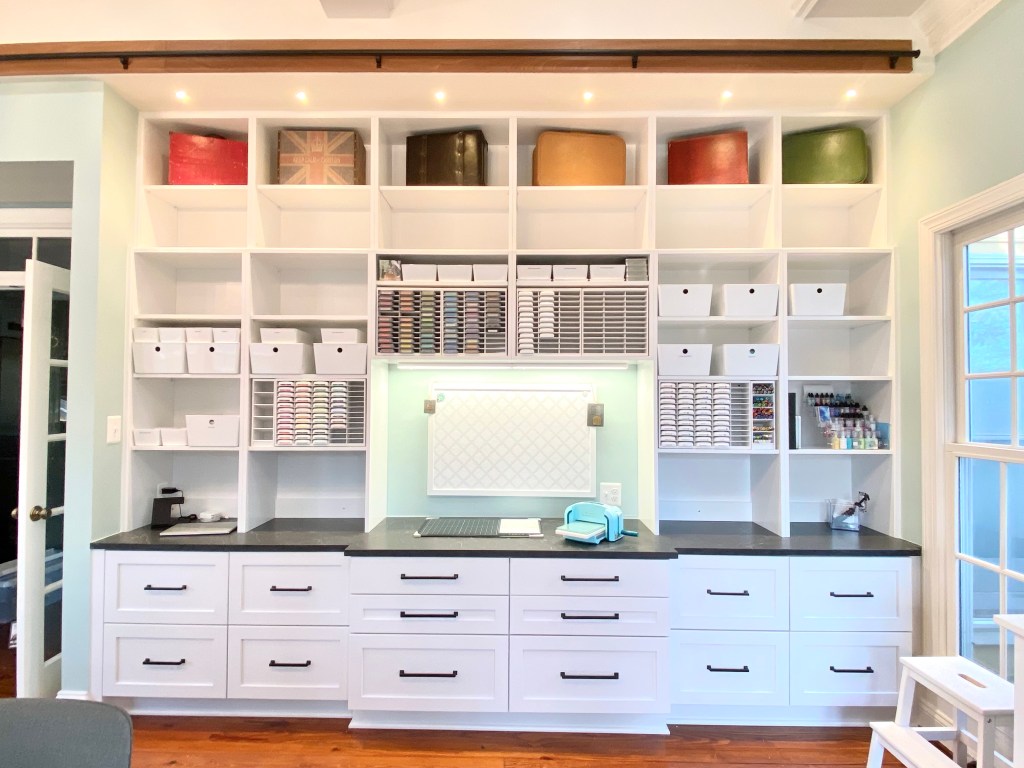
The right side of the doors is the main work area with lots of shelves and countertop space. The top shelf houses suitcases that I actually use to display cards when I do craft fairs. The white storage bins are Kuggis boxes with lids from Ikea. As you can see, I have lots of extra space to grow! I have two 60 ink pad storage systems, one on each side of the middle area, flanked by a marker organizer as well. Just above the that middle area are four 36 ink pad storage systems, and all of these are from OrganizeMore.com. I’ll be sure to have links below to everything.
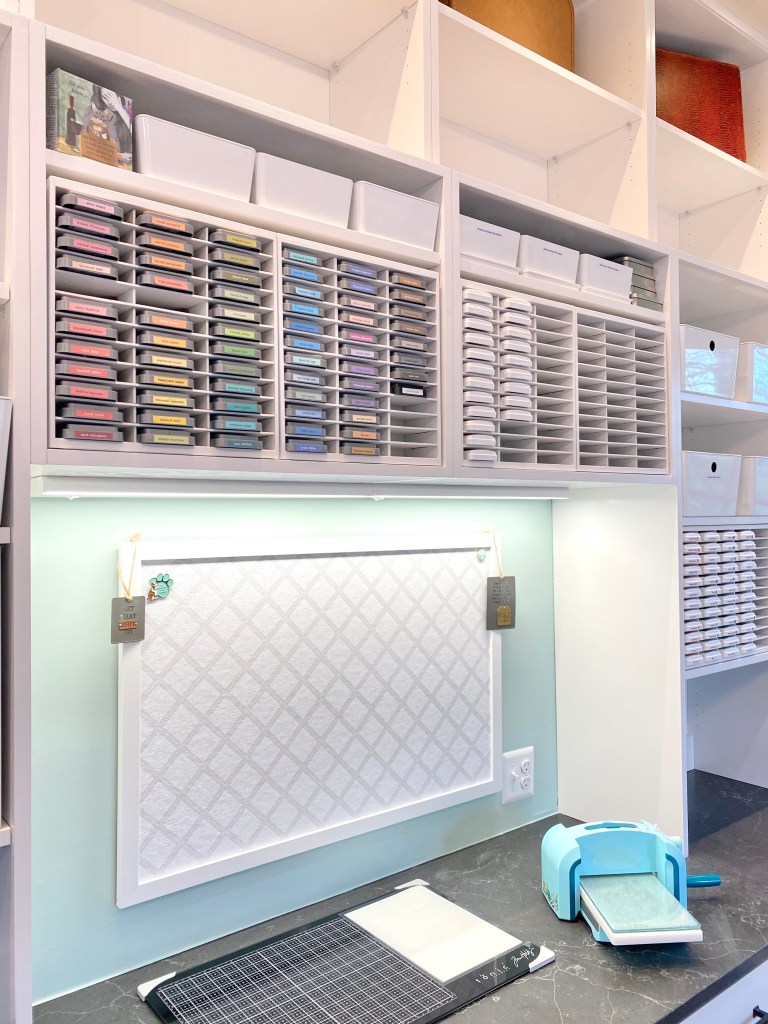
Here’s a closer look at ink storage and countertop work area. This canvas bulletin board is from Amazon, and as you can see, there’s nothing on it right now! Undoubtedly, that will change!

This is just to the right of the canvas bulletin board. This houses ink storage and marker storage. The tiered acrylic stand houses alcohol inks, as well as, Nuvo Drops.

Left of the canvas bulletin board houses ink storage, other storage and my device charging area. The black stand will charge my iPhone and iWatch at the same time or separately.

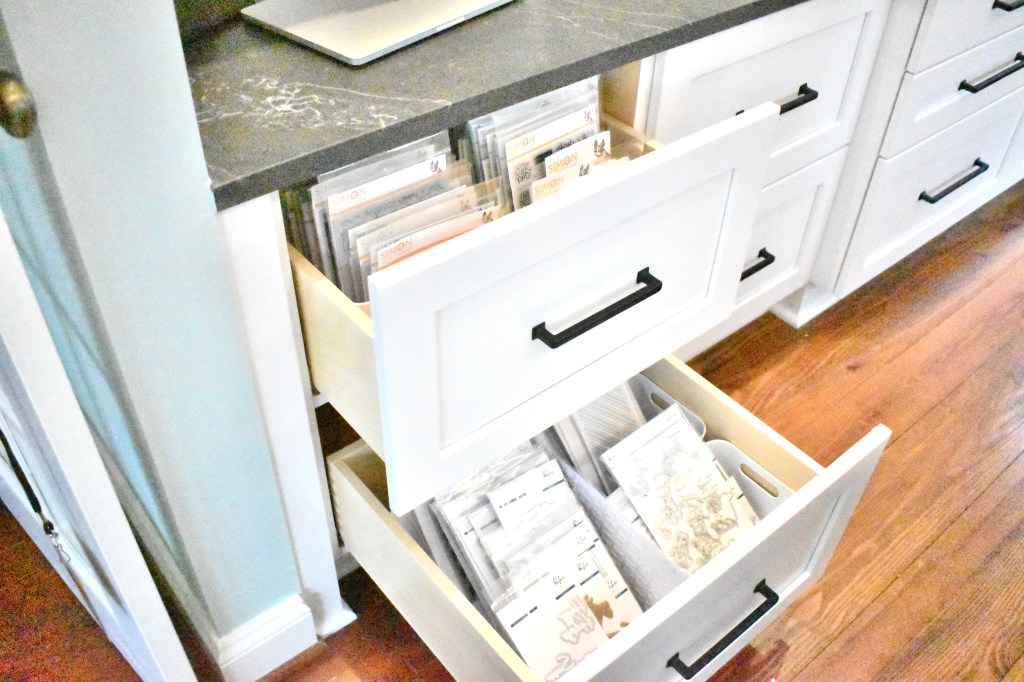
Inside the drawers are my Simon Says Stamp and PinkFresh Studio products at the moment. As things are new, I’m sure there will be some re-organizing as I get used to where everything is. The products are stored inside Variera boxes from Ikea.
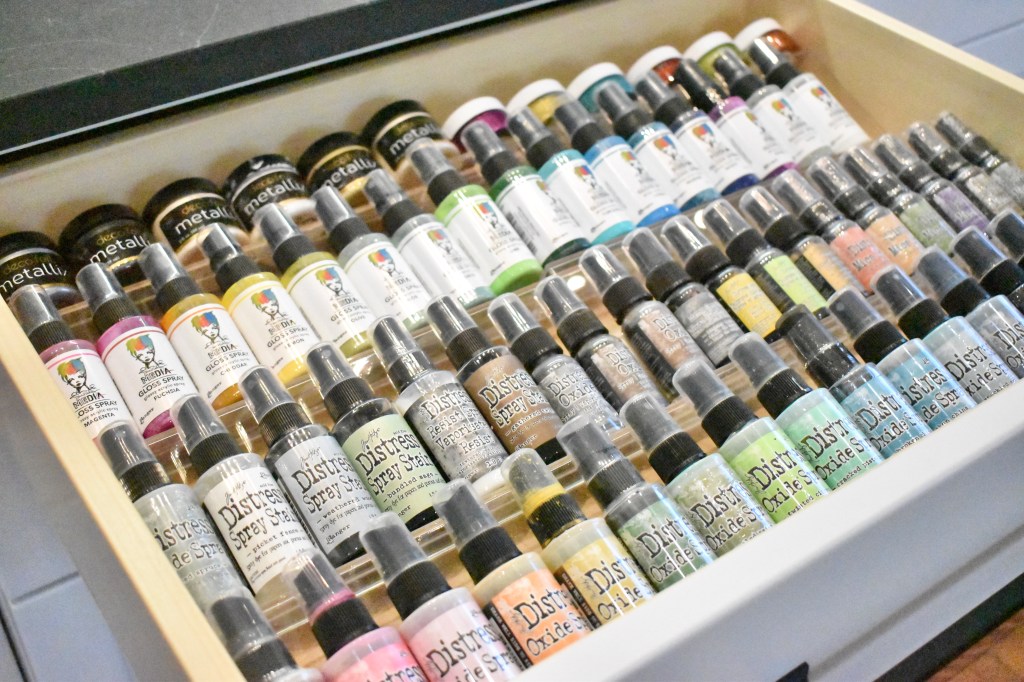
Two of the shallow drawers have spice drawer organizer inserts where the spray bottles and pastes are housed.
One of the bottom drawers houses a variety of envelopes. Some of the other larger drawers house packing and shipping supplies that I use for my Etsy shop.
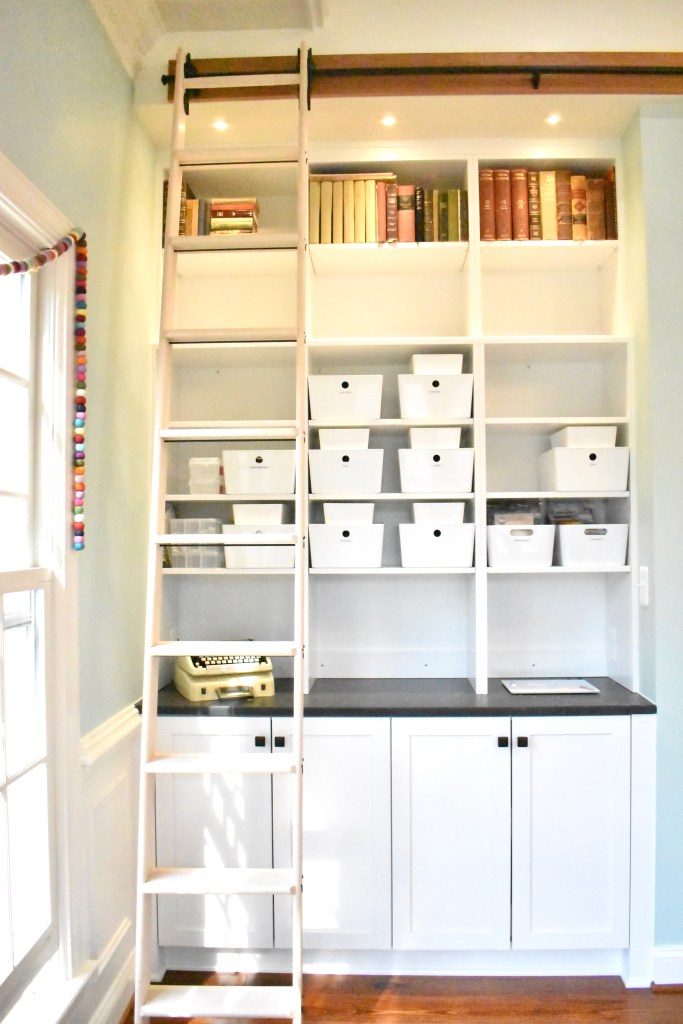
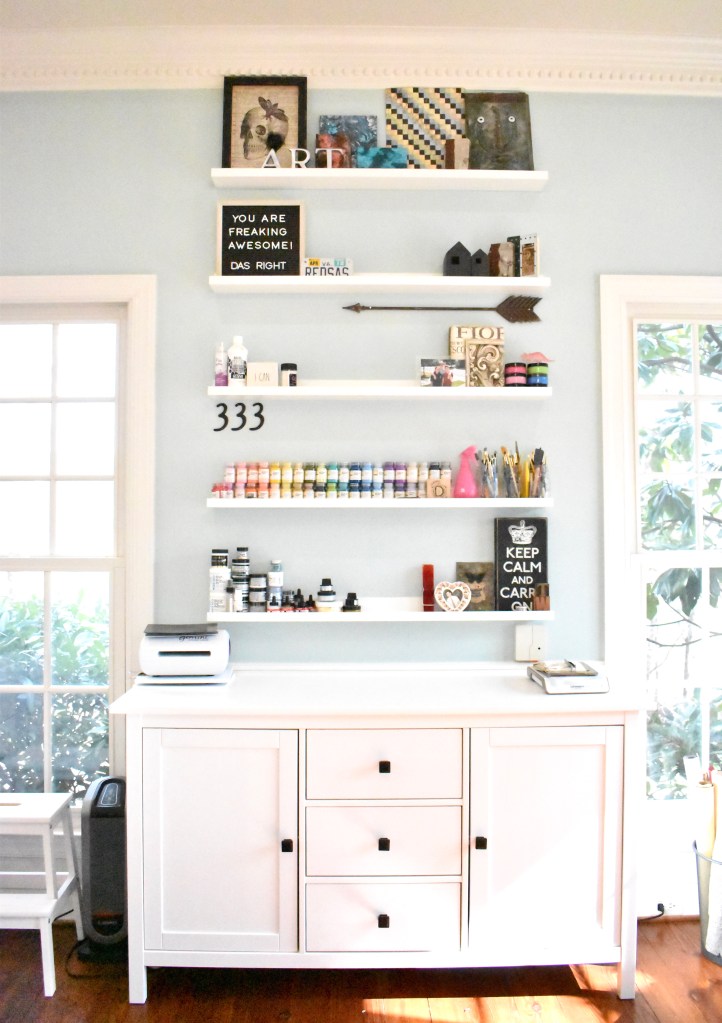
How cool is a library ladder?! This is the left side of the french doors. The top shelf houses old books that I sometimes use for projects. Yes, I do rip them up! I have a little vintage typewriter as well. It doesn’t work that great, but it’s cute!

Underneath the cute little typewriter, this cabinet houses both of my printers on pull out shelves. Why do I have two printers? That’s a very good question, and my only answer is that, the top printer is used to print specific items that I use for some cards, and the bottom printer is used to print on heavier cardstock and watercolor paper.

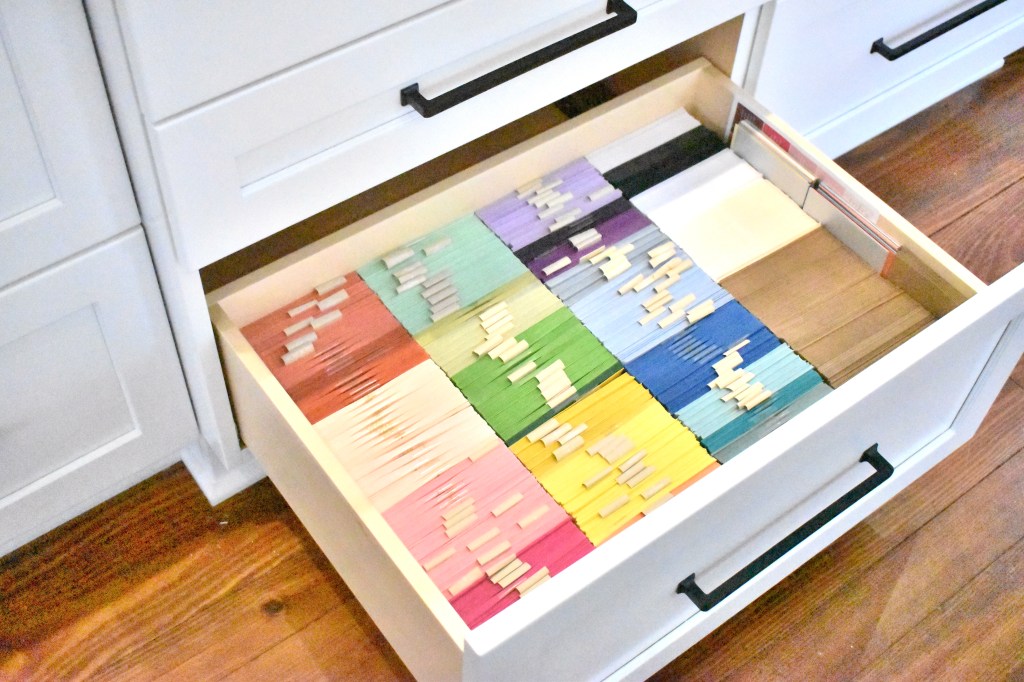
Next to the printer storage cabinet is the Brother Scan N Cut storage area, and underneath that is 12 x 12 patterned paper storage. I had the contractors build a pine insert for the pull out shelf to raise the machine up so that it could scan and work properly while being in the cabinet.

Just to the right of the Brother Scan N Cut, on the wall, is the washi storage. This acrylic storage unit is actually for nail polish, but I thought it worked great for washi! And it also works for little bottles as well. This is actually two units hung together, by the way.

The second picture in this post showed the tables as you walk into the room. This view gives you the end view, and shows the bookshelves that came with the table system. These end units house other stamps, die, stencils and embossing folders. The green metal cabinet sitting on top of the tables is a vintage cabinet that I found at an antique store, and I use it for craft fairs, as well as the suitcases.

This is command central, where all of the magic happens! So many things right at my finger tips! I have all of my Copic markers, their refills, pens and pencils housed in these marker organizers, which is raised on a shelf with attached legs from Ikea. By raising things off the table, it gave me a little bit of additional storage underneath it. On top of the markers are embellishment storage containers, as well as some blending brushes. To the right are some additional acrylic storage containers that house paint brushes, other blender brushes and odds and ends.
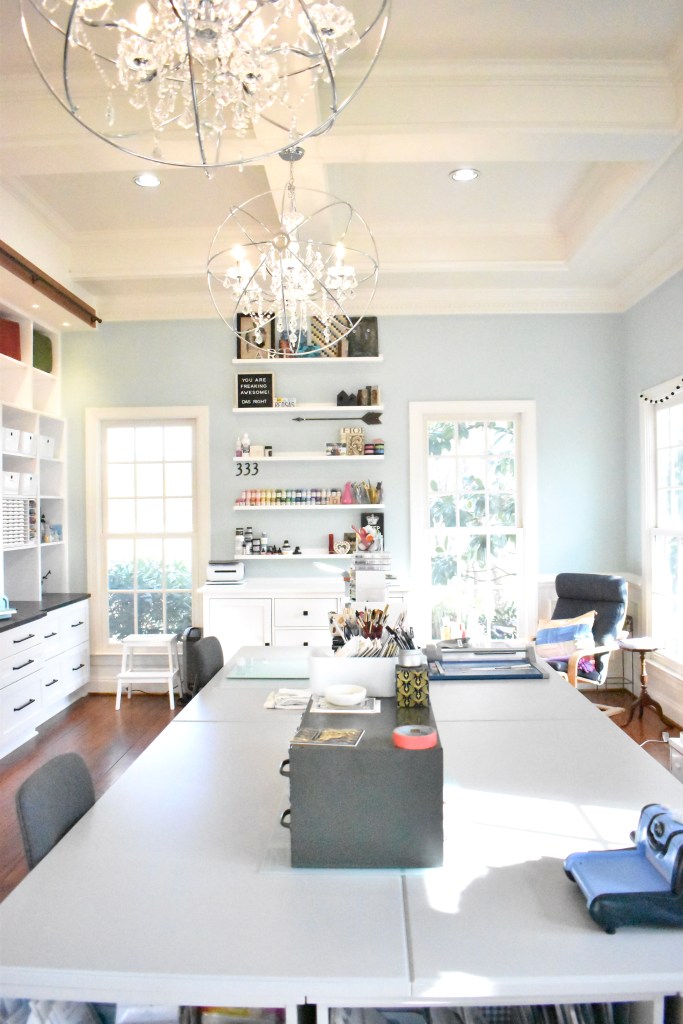
Here’s a look down the table to the other end of the room where I have additional storage and a little sitting area. To be honest, I only ever sit there to do Sudoku. I have terrible eyesight, so it’s wonderful to have so much light in this room! I added these beautiful orb chandeliers for an element of beauty as well as functionality.
Here’s a look at the additional storage. These five picture ledges are from Ikea and house art that I’ve created, paints, some pastes and various knick knacks. Inside both doors are paper storage and the drawers house foils, a laminator, some other paints and a few other odds and ends. The top is home to the Gemini Jr., which sits atop a Totally Tiffany Rotating Design Board, and the Glimmer Hot Foil Machine.
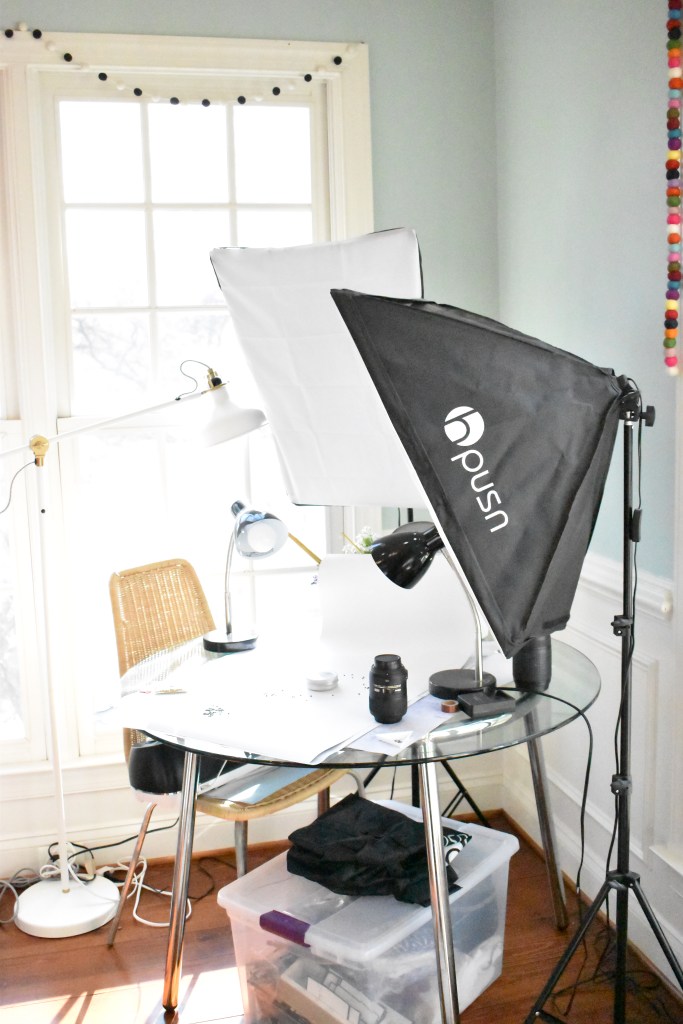
This is an ugly little corner to the room, but there’s really no way to make it pretty. This is where all of the photography happens. Lots of natural light, as well as direct light and diffused light from the professional lights. Light! Light! Light!
That wraps us this tour of the studio! I hope you’ve enjoyed taking a peek into my happy place! Don’t hesitate to ask if I left something out! Have an absolutely wonderful day and don’t forget to stay awesome!
Product Links:
- Ikea Kuggis Box with Lid: 10 1/4 x 13 3/4 x 6
- Ikea Kuggis Box with Lid: 7 x 10 1/4 x 3 1/4
- Ikea Kuggis Box with Lid: 5 x 7 x 3 1/4
- Variera White Box: 13 1/4 x 9 1/2
- Variera White Box: 9 1/2 x 6 3/4
- Mosslanda Picture Ledge 45 1/4″
- AmHoo 5 Tier Acrylic Spice Rack
- OrganizeMore Ink Storage
- Wireless Charger 3 in 1
- Canvas Bulletin Board
- Femeli Spice Drawer Organizer Insert
- Brother Wireless InkJet Printer
- HP OfficeJet 6700 Printer
- Brother Scan N Cut
- Femeli Nail Polish Wall Rack
- Embellishment Storage
- Bergshult Shelf 31 1/2 x 7 7/8
- Morabo Metal Leg
- BINO 4 Drawer Makeup Organizer
- STORI Clear Plastic Stackable Makeup Storage Cube
- STORI Clear Plastic Vanity Makeup Organizer
- Orb Chandelier
- Poäng Armchair
- Ottoman
- Totally Tiffany Rotating Design Board
- Photography Lights
Just as a note, none of these are affiliate links. They are strictly informational.
Latest Posts
- Simon Says Stamp Grungy Dewdrop Daisy

- Simon Says Stamp Pastel Birthday Wishes

- Simon Says Stamp Best Fish

- Simon Says Stamp Circle Thanks

- Simon Says Stamp Glowing Daisies

tsurutadesigns1
oh Tracy, your design studio is absolutely gorgeous. Thank you for sharing!!!!!
LikeLike
macimbalo
Wow, this is spectacular!!!! Loved the chance to see everything! It’s dreamy!!!
LikeLike
tracyware333
Thanks so much Angie! Wish we were neighbors so that we could have play dates 😄
LikeLike
Dilay Nacar
Beautiful space my friend!!! #goals
LikeLike
tracyware333
Thanks so much Dee! So wish we were going to be neighbors!
LikeLike