Simon Says Stamp Floral Garden Watercolor

All the Feels Release

Hello Crafty Friends! Simon Says Stamp new release, All the Feels, release is live! I’m playing with the Floral Garden stamp set today, and this is such a beautiful stamp, and really, a beautiful release! I’ve had so much fun coloring and watercoloring different versions of this stamp!

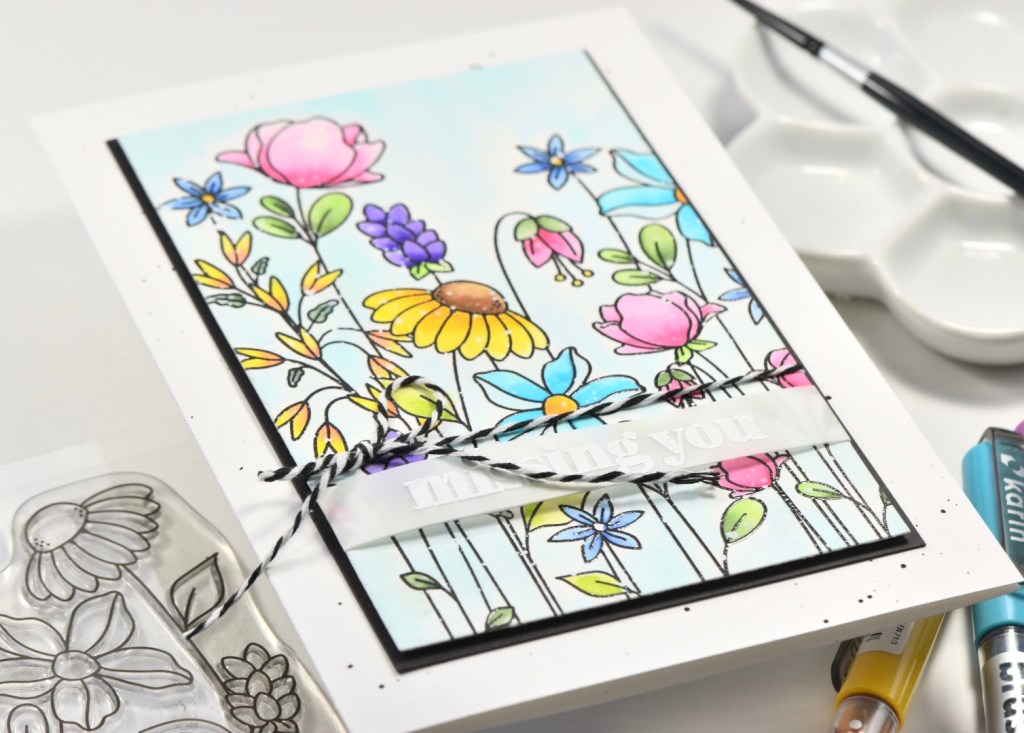
I had to put my Karin Brushmarkers to work on today’s project. To begin, I stamped the Floral Garden image on a piece of Fluid Hot Press Watercolor Paper with VersaFine Onyx Black ink and heat embossed it using Ranger Clear Embossing Powder. I taped my image down to a board using masking tape to prevent warping. My board just happens to be a $2.19 clipboard from Target .. but hey, it gets the job done!
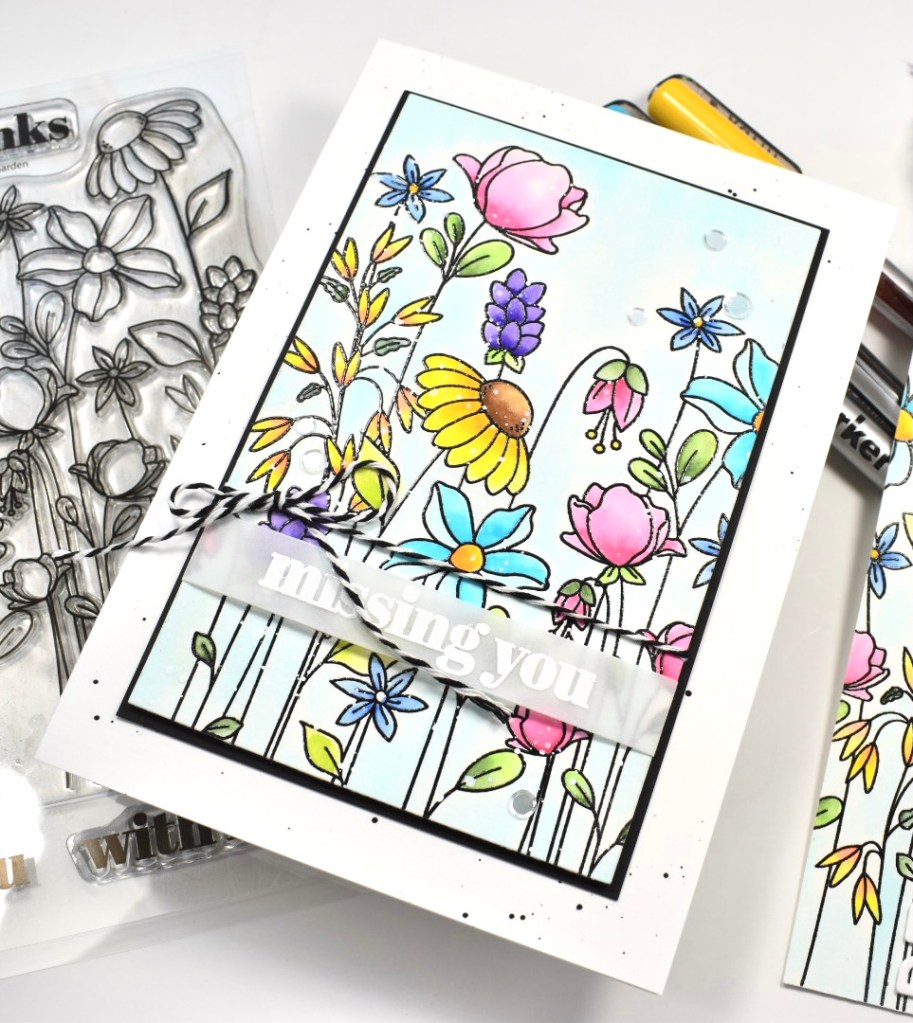
I have to be the world’s slowest colorer! It doesn’t matter if it’s markers or watercolors .. I’m SLOW! That’s just all there is to it. I got my Karin markers down off the shelf and brushed them off and got busy. I ended up using a Black Velvet Silver No. 2 brush for this project. The small brush helps me to have more control over the amount of water and ink .. and Mama needs control!
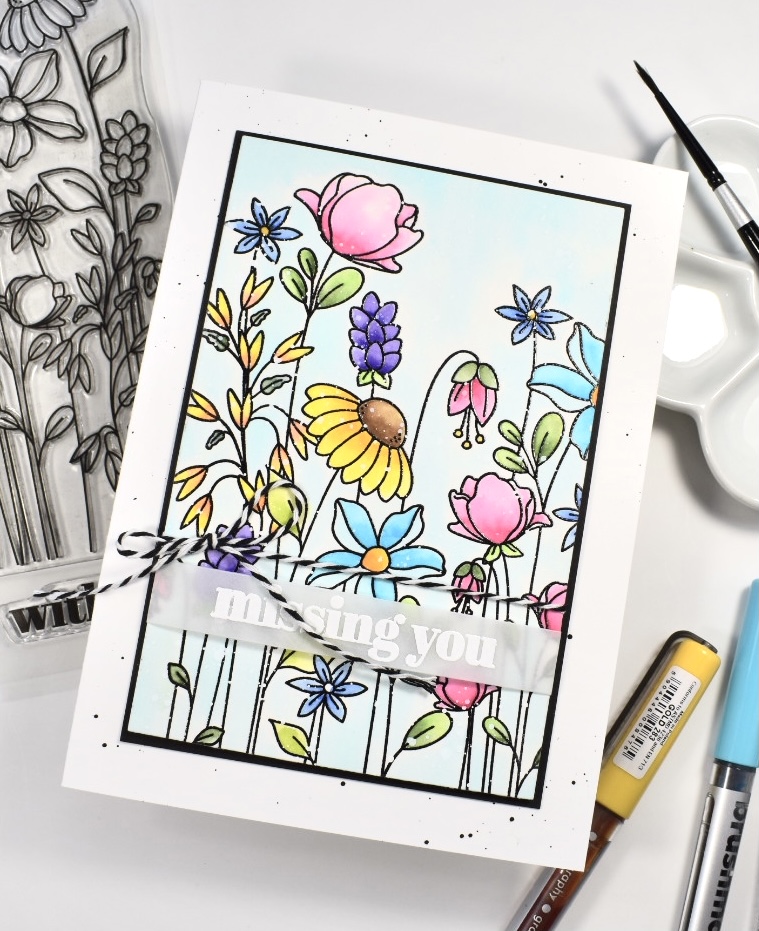
Once my image was completely dry, I trimmed it down and did some white splatter using Royal Talens Titanium White Acrylic Ink. I love this ink for splatter because the consistency is PERFECT! I have some in gold as well, and it’s pretty dang awesome too! Need to get some in black! While that was drying, I worked on my sentiment. I chose the Missing You sentiment from the Floral Garden stamp set and stamped that on vellum with VersaMark ink and heat embossed it using Simon Says Stamp Detail White Embossing Powder. I die cut the sentiment using the Simon Says Stamp Sentiment Labels Die. I actually die cut another piece of vellum so that I could double them up.

I wrapped my vellum sentiment around my floral panel and adhered it to the back using Craft Tacky Glue. I also tied a piece of black and white twine around the panel as well. I adhered my floral panel to a black cardstock panel using 3M Foam Tape, because I really like the contrast that it provides. I then adhered my panel to my card base, which is Neenah Classic Crest 110lb, that I had previously lightly splattered with thinned black acrylic paint.
I didn’t want to waste the leftover piece of my watercolor panel, so I decided to just make it into a super cute bookmark! I added an eyelet and some tassels, along with the word Read. I used the Simon Says Stamp Rounded Alphabet Small to die cut the letters three times from Neenah 110lb and adhered those together using glue. I think it turned out kind of cute!

That’s it for this project. I hope you enjoyed it, and I hope it inspires you to get crafty! You can check out the entire All the Feels release HERE. Thanks for stopping by!

Don’t forget to stay awesome!

Supply List:

*Affiliate used at no cost to you. Thank you for your support!

Latest Instagram Posts

Fabulous Floral Hugs

Alex Syberia Design

Hello! Hello! Alex Syberia’s March release is live, and it is AMAZING! Head on over to her Etsy shop to check out all of the awesomeness she has in store for you!

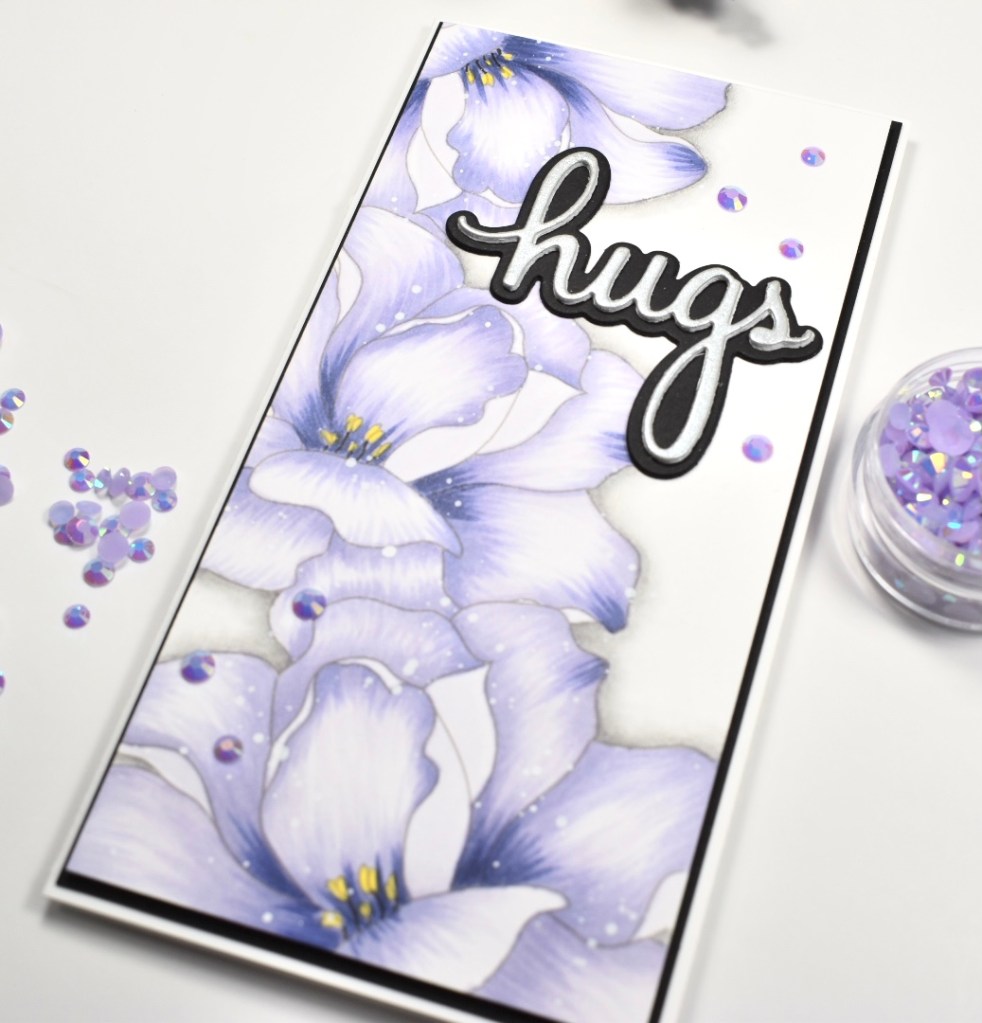
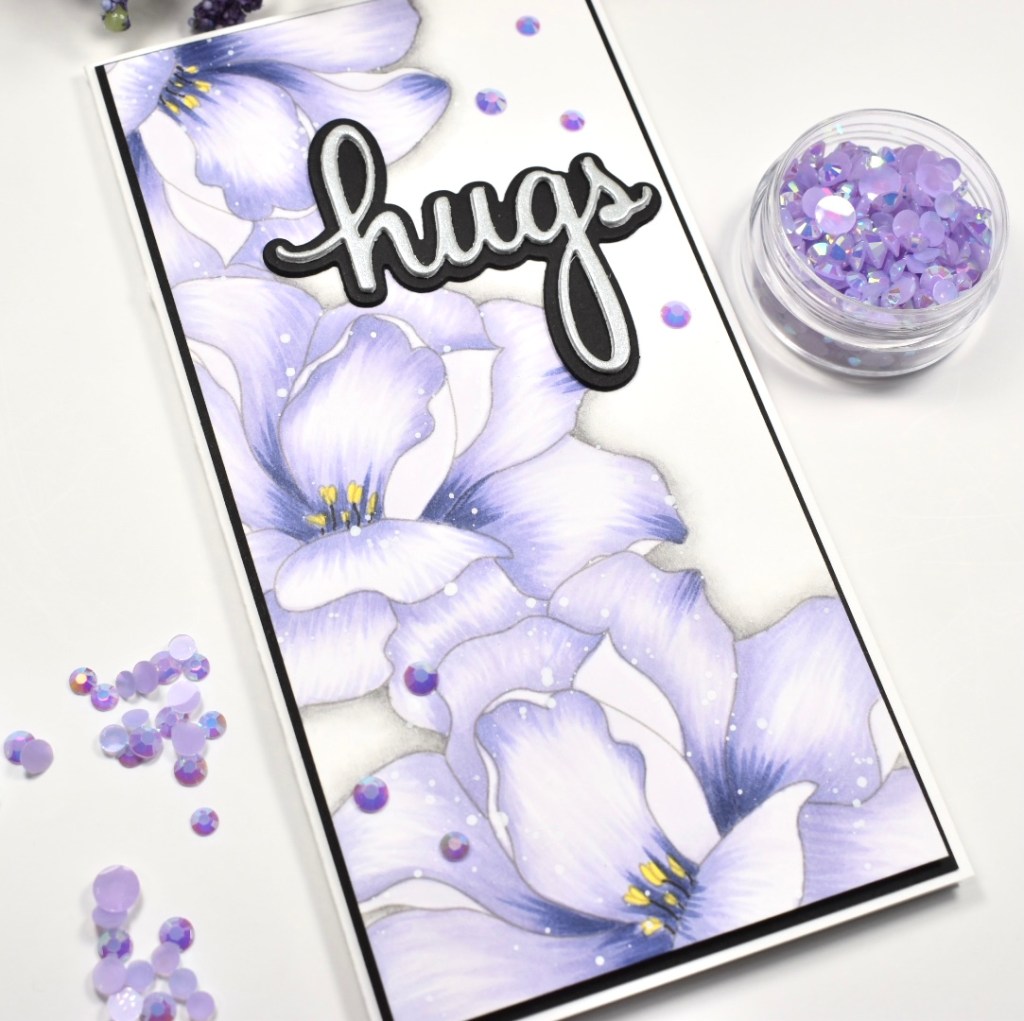
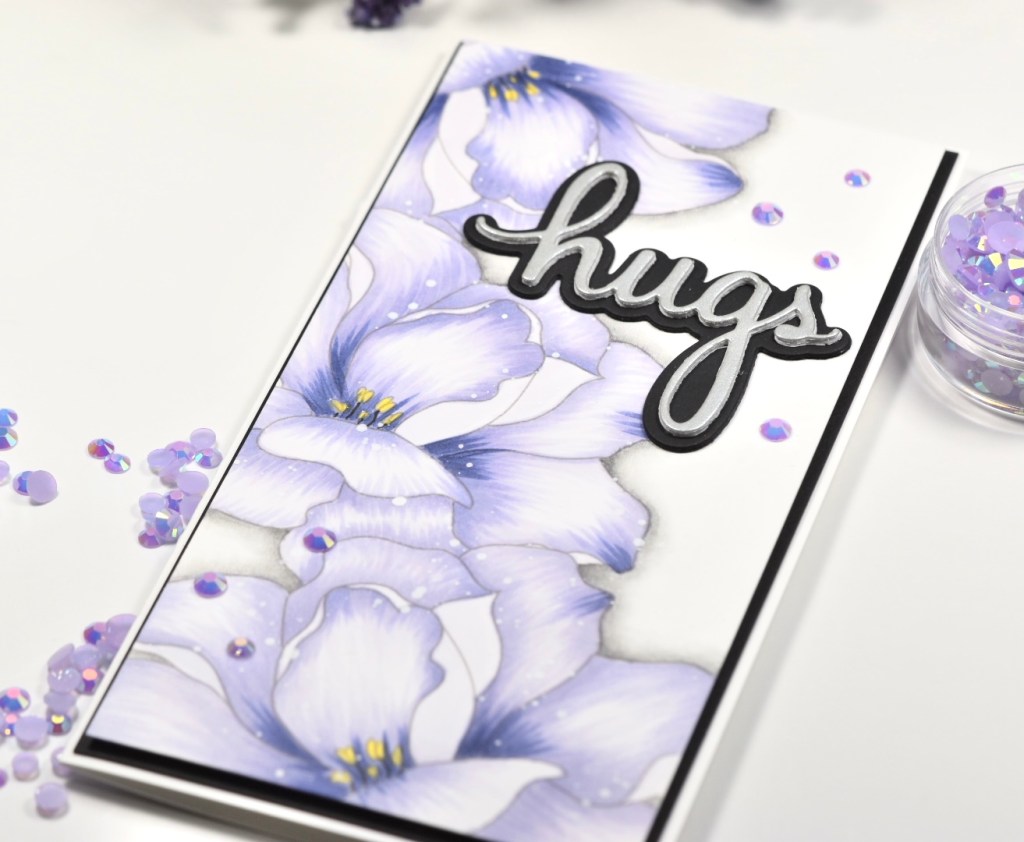
For today’s project, I’m using the Fabulous Floral Slimline Card Panel. This is a beautiful image that’s a regular slimline size, however, I resized mine to be a mini slimline. So let’s get started!

Once my image was printed on Neenah Classic Crest 110lb cardstock and trimmed down to size, I broke out the Copic markers and started coloring! This ended up being a small batch of Copics for me! The colors used were: BV0000, BV000, BV00, BV01, BV02, BV04 and Y15.

After all of the purples were colored, I went in with a black Copic Multiliner 0.3 to add the filament (Yes! I had to look that up) back in so that it was visible. I then added the yellow to the anther of the flower. You guys, I’m learning things about flowers!

I love to do shading around the edges of my flowers, and this was done using a graphite pencil, along with a blending stump to soften the edges. I think it just adds a little something. I used Royal Talens Amsterdam Titanium White Acrylic Ink to add some splatter to my panel.

For my sentiment, I used the Hugs from the PinkFresh Studio Sending Phrase Builder set. Because dimension is life, I cut the main sentiment once from Tonic Luna Silver cardstock and twice from Neenah 110lb. I also cut the shadow twice from black cardstock. I adhered all of those pieces together using Craft Tacky Glue, and then adhered the sentiment to my panel.

There always has to be embellishments! I don’t know how to make a card without embellishments! I’m sure it can be done .. but I don’t know how! Anyhoo, I used the PinkFresh Studio Jewels Mix to add some purple bling.

I then adhered my colored panel to a black cardstock panel using 3M Foam Tape, because I like the contrast that it provides and it pulls the black together. Those were then adhered to a Neenah Classic Crest 110lb card base.

That does it for today’s project. I’m so glad that you stopped by! I hope that this card inspires you to get crafty as well. There’s an Instagram hop going on today to celebrate Alex’s new release, so head over there to check it out and comment for your chance to win a giveaway! Giveaways are always cool! You can also head to Alex’s Etsy shop to snap up your own digital stamps!

Have a wonderful day and STAY AWESOME!

Supply List:

*Affiliate links used at no cost to you. Thank you for your support!

Latest Instagram Posts

Birthday Bouquet

PinkFresh Studio Joyful Bouquet

Hey there! It has been way too long, I know! I’m new at this and am working to find myself a groove! Anyhoo, I’m glad you stopped by!

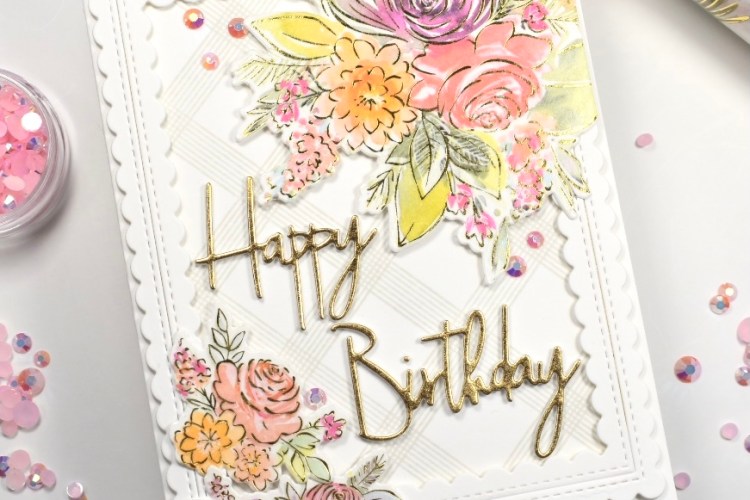
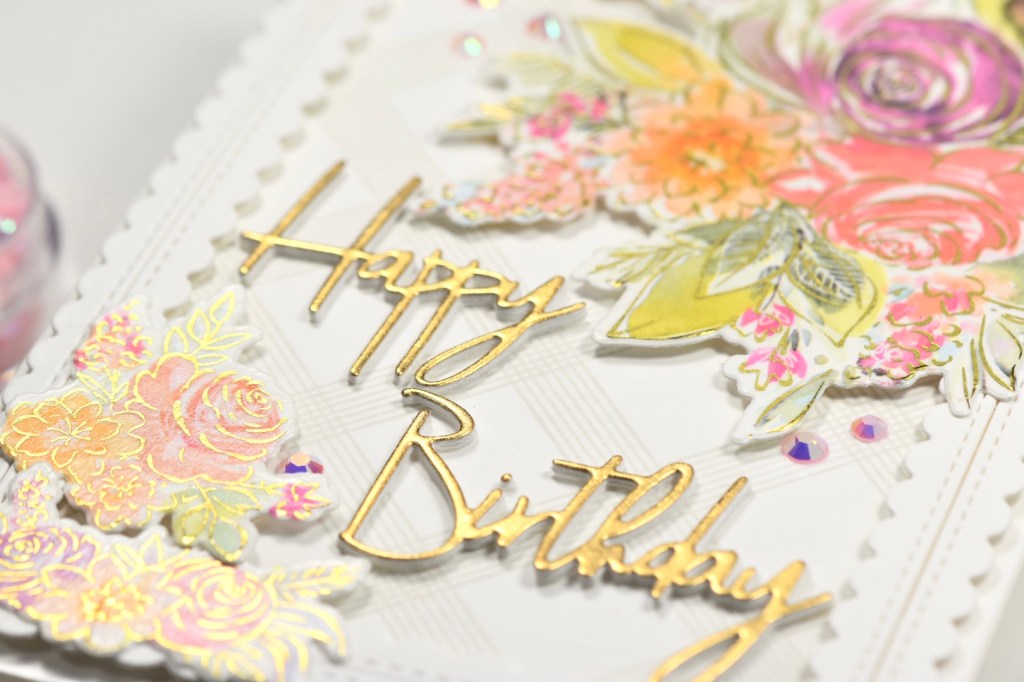
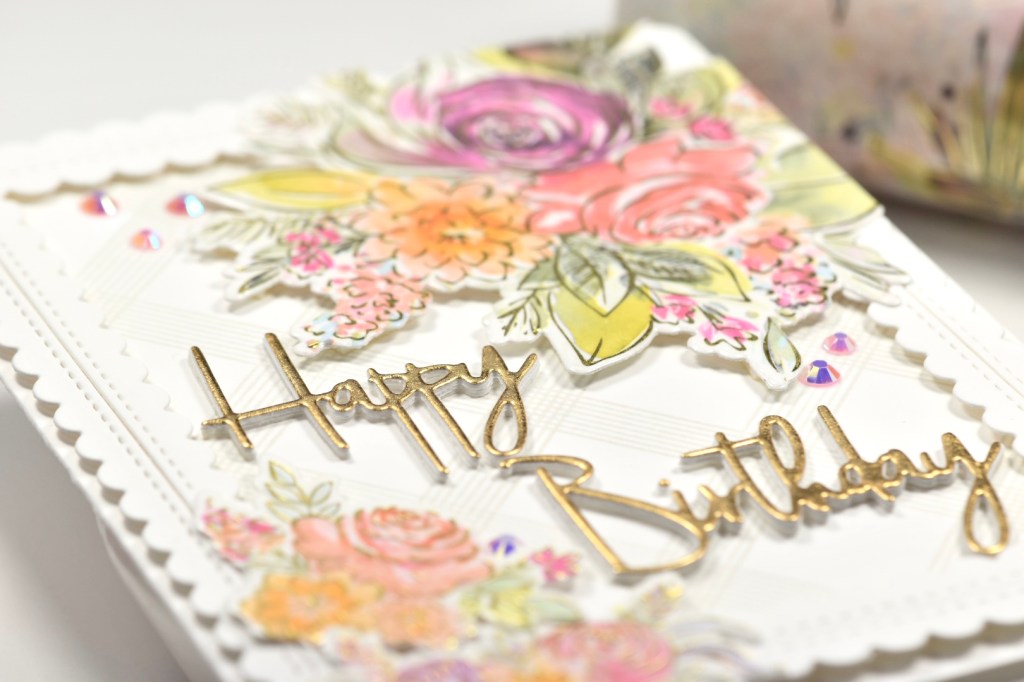
I just received my PinkFresh Studio shipment, which included the new Joyful Bouquet stamp, die and washi set, and I had to play right away! To begin my project I rolled out this beautiful washi onto some Neenah Classic Crest 110lb cardstock and used the coordinating die to cut all of the pieces out.

I used the PinkFresh Studio Stitched Scallop Rectangles to cut a panel of 110lb cardstock and die cut the Happy Birthday sentiment from the Classic Words die set. I cut the sentiment three times from 110lb cardstock and once from gold cardstock. Why? Because dimension is life! I will never stop saying that! I adhered all of my sentiment pieces together using Craft Tacky Glue.

I needed a background for my frame, so I stamped the PinkFresh Studio Diamond Tiles on a piece of 110lb cardstock using Misty Coast ink. Once that was done, I trimmed my stamped panel a tad bit smaller than my frame, and adhered those together using 3M Foam Tape.

I just need to say … This washi is GORGEOUS! Moving on, I played around with the positioning of my sentiment and flowers to get the perfect placement and then adhered my sentiment to the panel using Craft Tacky Glue and adhered my floral pieces using foam tape. I trimmed the excess off with scissors.

My panel was then adhered to my card base, which is Neenah Classic Crest 110lb cardstock. And as we all know, no card is complete without some bling, am I right? I used the PinkFresh Jewels Mix to add that needed sparkle to my project.

That does it for my project today! I’m so glad that you stopped by and I hope this inspires you to get crafty in your space.

Don’t forget to stay awesome!

Supply List:

*Affiliate links used at no cost to you. Thank you for your support!

Latest Instagram Posts

Simon Says Stamp Lots of Welcome

Hello Beautiful Release

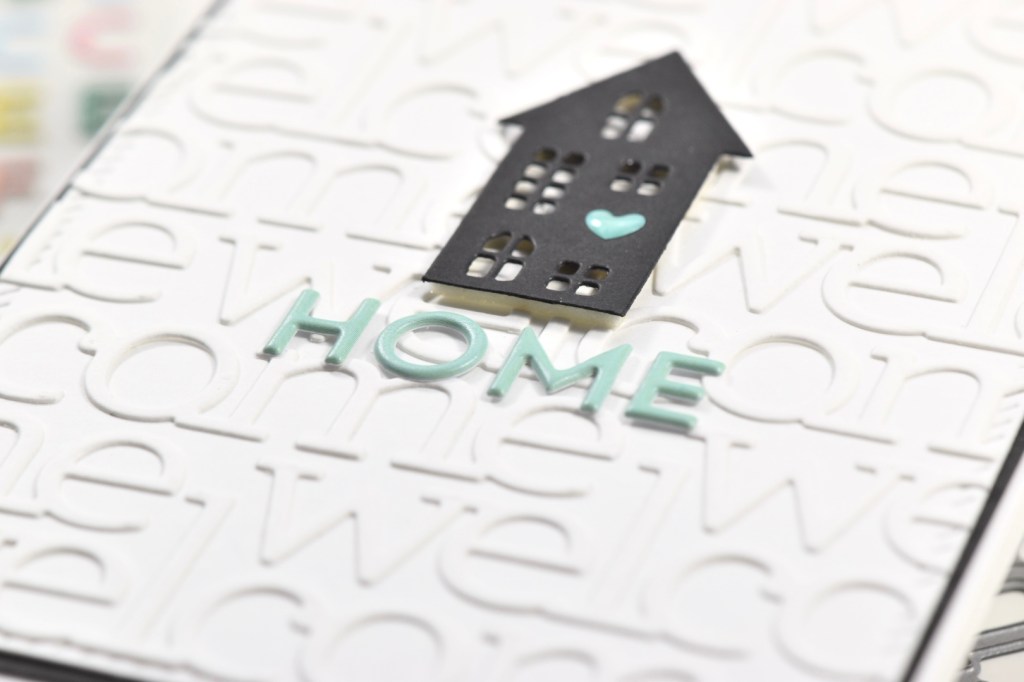
Hey! Hey! Hey! How’s it going? Today I’m sharing a Welcome Home card featuring the new Welcome die from Simon Says Stamp’s new release Hello Beautifu!

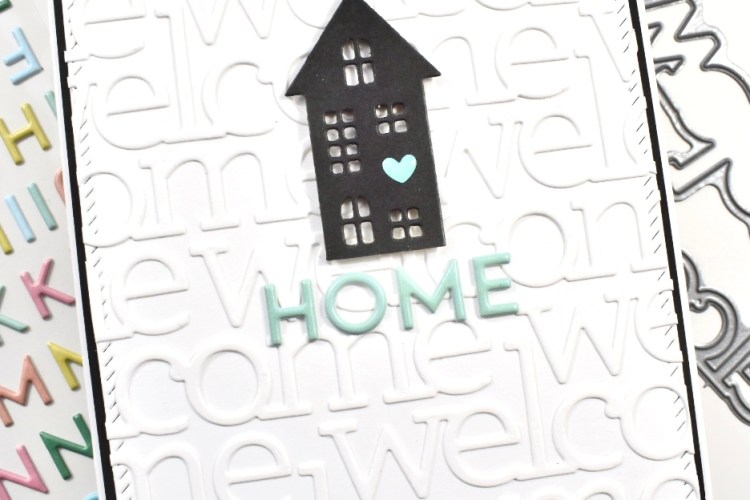
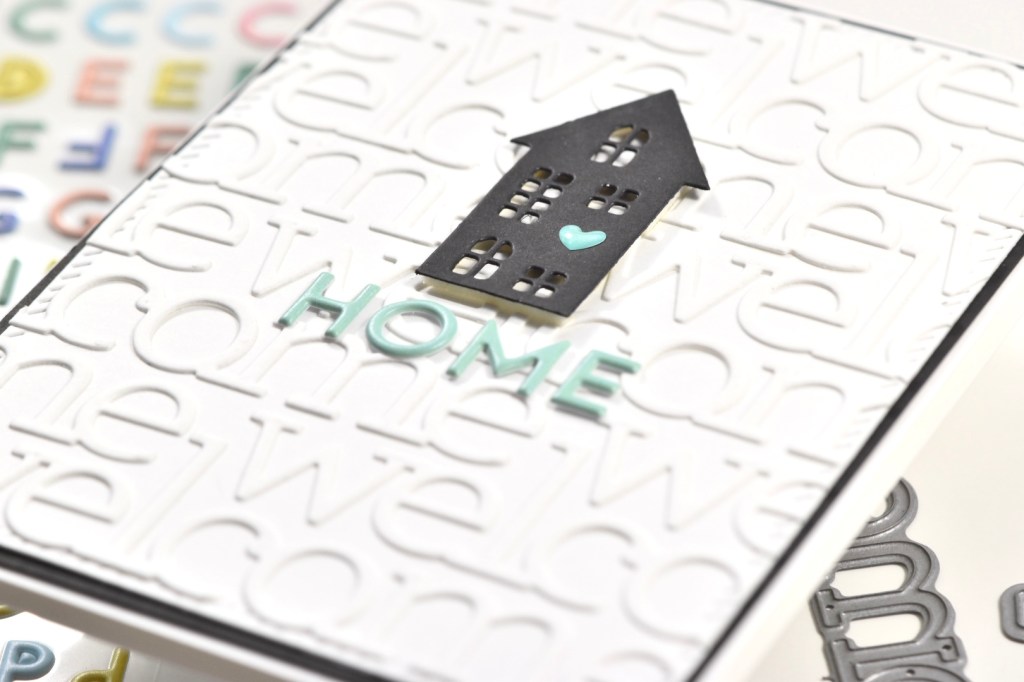
Let’s jump right into it! I began by cutting a panel of Neenah Classic Crest 110lb cardstock using the PinkFresh Studio Diagonal Stitched Rectangles die, and then I die cut my SSS Welcome sentiment eight times. While I was cutting, I went ahead and cut the house from the SSS Village die from black cardstock in my stash.

I centered up my first Welcome die cut at the bottom of my panel and adhered it using Craft Tacky Glue. Working around the tall part of the “L”, I started adhering the other Welcome sentiments. Once the Welcome sentiment was adhered, I would trim off the rest of the sentiment and add it to the other side of the “L.” Hopefully that makes more sense as you look at the pics.

Taking a look at the row just above the bottom Welcome .. I positioned the next Welcome just to the right of the tall part of the “L.” Then, I trimmed off the excess on the right side of the panel and added it to the same row on the left side of the “L.” Maybe that makes more sense! Anyhoo, I continued that pattern until I reached the top of the panel.

I adhered the black house somewhat in the center using 3M Foam Tape, and positioned the letters for HOME just below that. These letters are from PinkFresh Studio and they are the Mini Puffy Alpha Stickers from their Let’s Stay Home Collection. Super cute!

For the final steps, I added a Heart-Fetti Shape from Doodlebug Designs to the house, I adhered my card panel to a black panel just slightly larger for some contrast, because I like my contrast, and I adhered those to my card base, which is Neenah Classic Crest 100lb cardstock.

I enjoyed the power of repetition on this card! A simple sentiment made a big visual impact just by repeating the pattern!

Thanks so much for stopping by today! I hope you enjoyed this project and it gives you some inspiration to try some repetitive elements on your projects. Don’t forget to check out the new SSS Hello Beautiful release!

Stay awesome!

Supply List:

Latest Instagram Posts

Simon Says Stamp Welcome Baby

Hello Beautiful Release

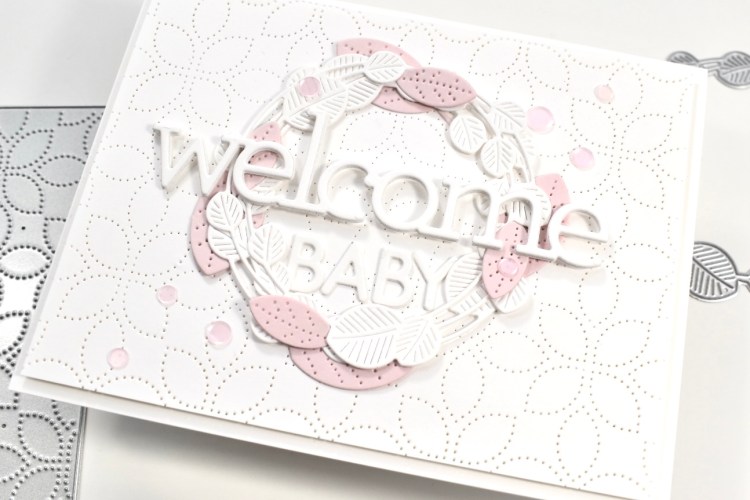
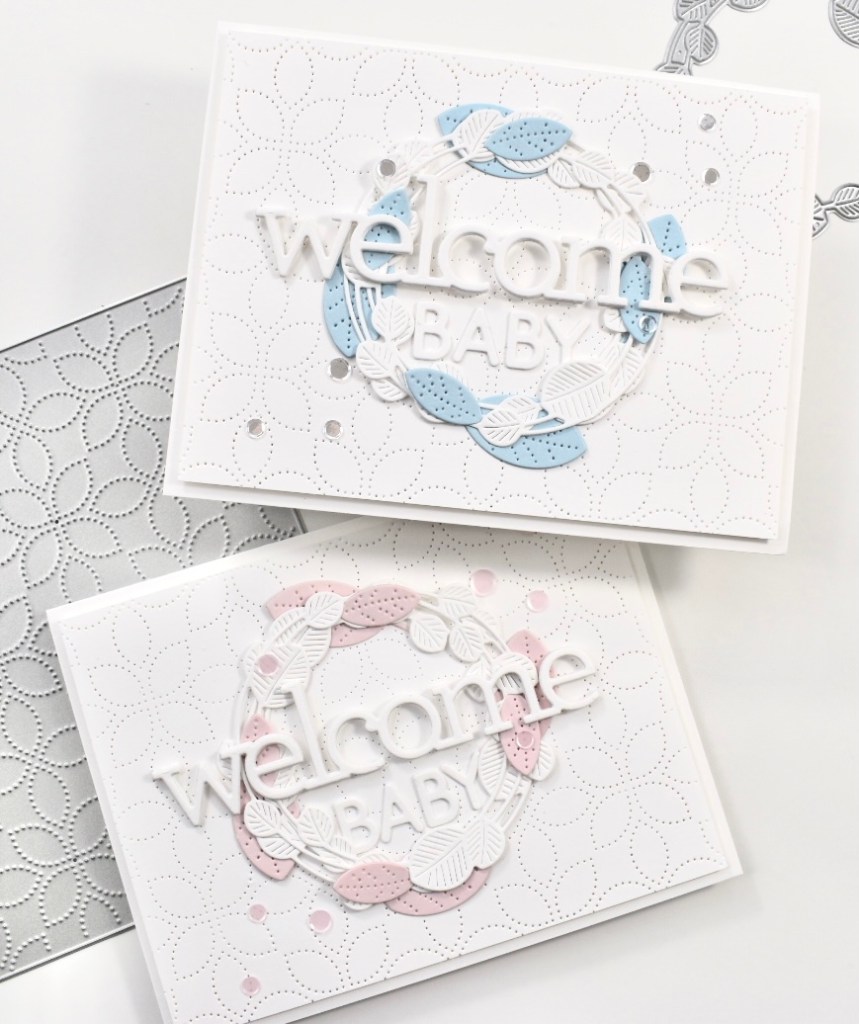
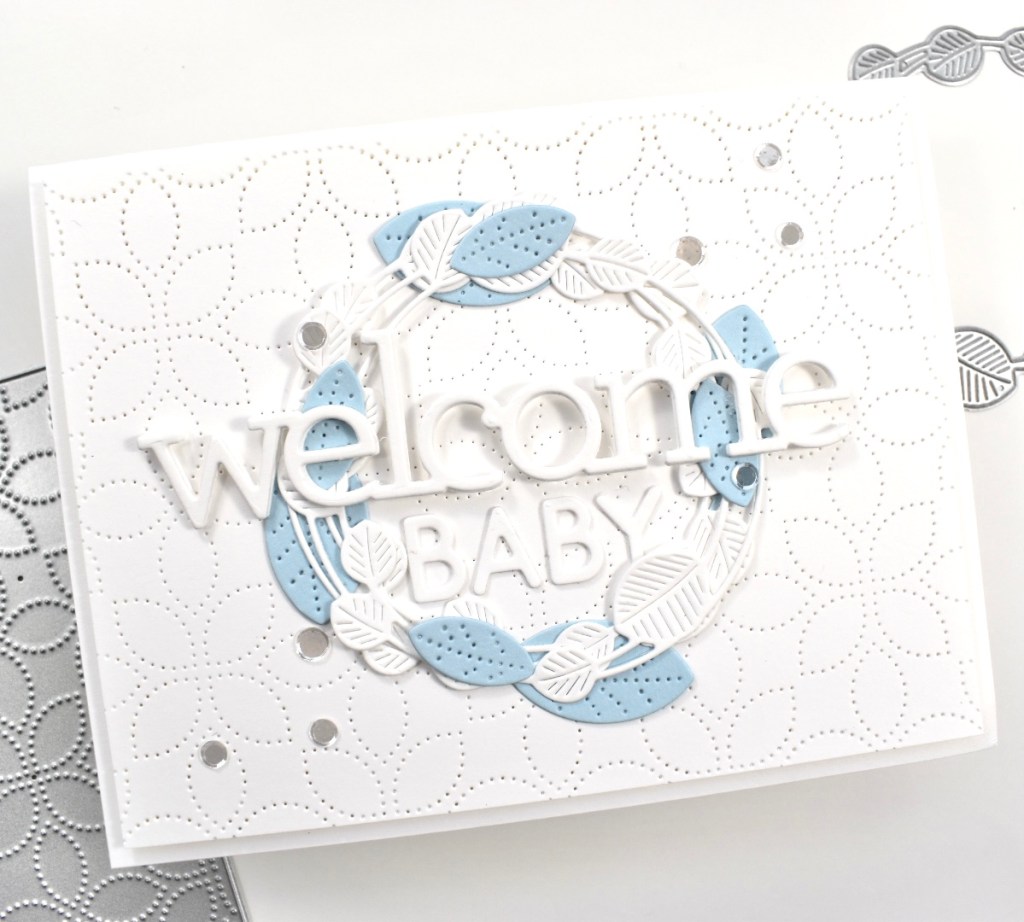
The Simon Says Stamp Hello Beautiful release is amazing, and I’m loving my Welcome die! I really can’t stop playing with it! I rarely, and I mean rarely, ever make baby cards, but I think these turned out super cute!

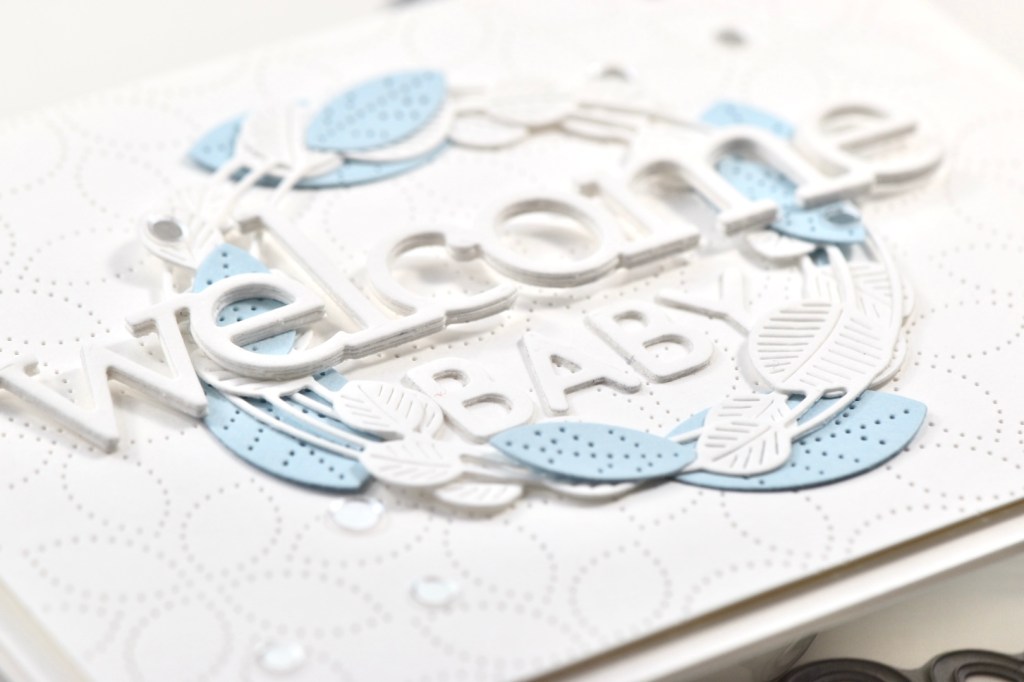
I ended up making two baby cards, because you know, I wanted one in pink and one in blue! As you can see, both cards are made exactly the same way, so I’m only going through making one card. So what are the details? Lemme tell you! First off, it’s a lot of die cutting, make no mistake about that! I began by cutting a panel of Neenah Classic Crest 110lb cardstock using the SSS Detail Petal Plate. Actually, all of the die cutting used is Neenah 110lb, except for the pink and blue leaves. Moving on .. I die cut the Etched Eucalyptus Wreath twice, and the Detail Elm Leaves four times from pink or blue cardstock in my stash. I used the SSS Rounded Alphabet Small to cut the letters for Baby, and I cut those two times each.

See what I mean? A lot of die cutting! I adhered the four Welcome die cuts together using Craft Tacky Glue, and the two letters for Baby. Once I figured out the placement of the Etched Eucalyptus Wreath, I glued those two together using only four points. I wanted to be able to tuck the Detail Elm Leaves in the nooks and crannies of the wreath.
Of the Detail Elm Leaves cut, I used the smaller leaf and the medium leaf. While my wreath was lying on top of my card panel, I figured out the placement of the medium Elm leaf and glued those underneath the wreath. I then adhered the wreath to the card panel with Craft Tacky Glue using only four points again. I didn’t want anything on this project adhered flat.

I placed a small amount of glue on the smaller Elm leaf and tucked those into the wreath. I then adhered the letters for Baby inside the wreath, towards the bottom. Cutting four of the Welcome die might seem a bit like overkill, but I wanted it to be sturdy, because the Welcome is only adhered to the wreath at the letters E and M.

To finish, I adhered some pink sequins from the SSS Strawberry Shortcake pack to the pink card, and some sequins from the SSS Moonshine Confetti pack to the blue card. And my last step was to adhere my card panel to my card base, which is Neenah Classic Crest 110lb, using 3M Foam Tape.

Thanks for stopping by! I hope you enjoyed this project, and hopefully, it inspires you to get crafty! Do you have any favorites from the Hello Beautiful release? I’d love to know what they are!

Stay awesome!

Supply List:

Latest Instagram Posts

Simon Says Stamp Welcome to the Neighborhood

Hello Beautiful Release

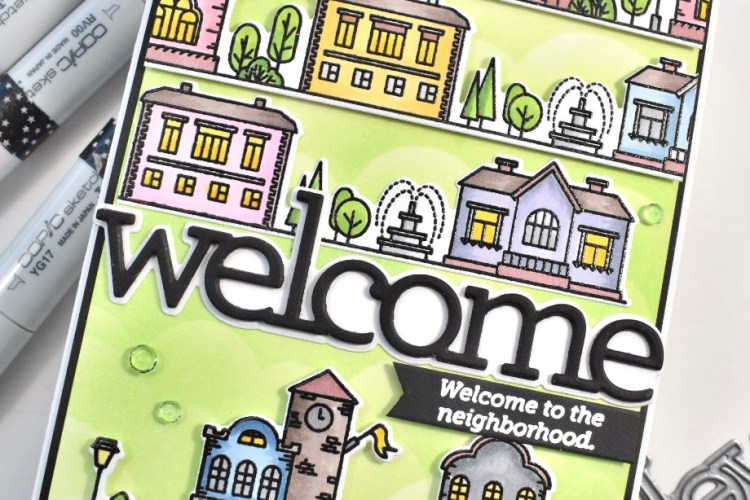
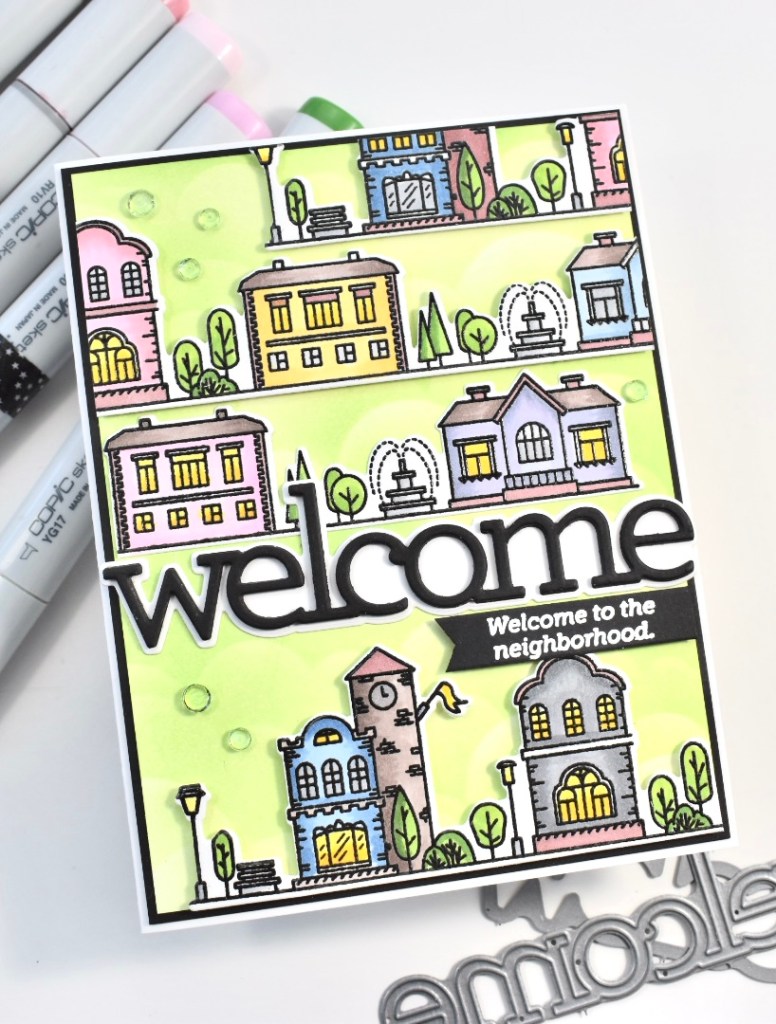
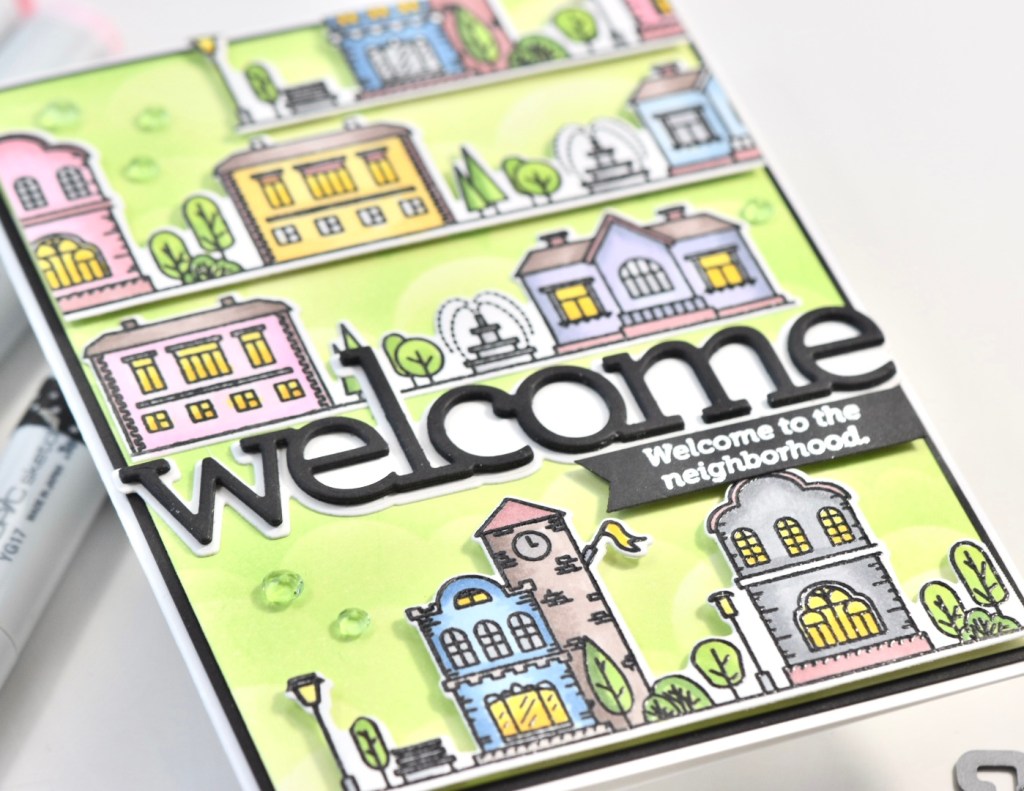
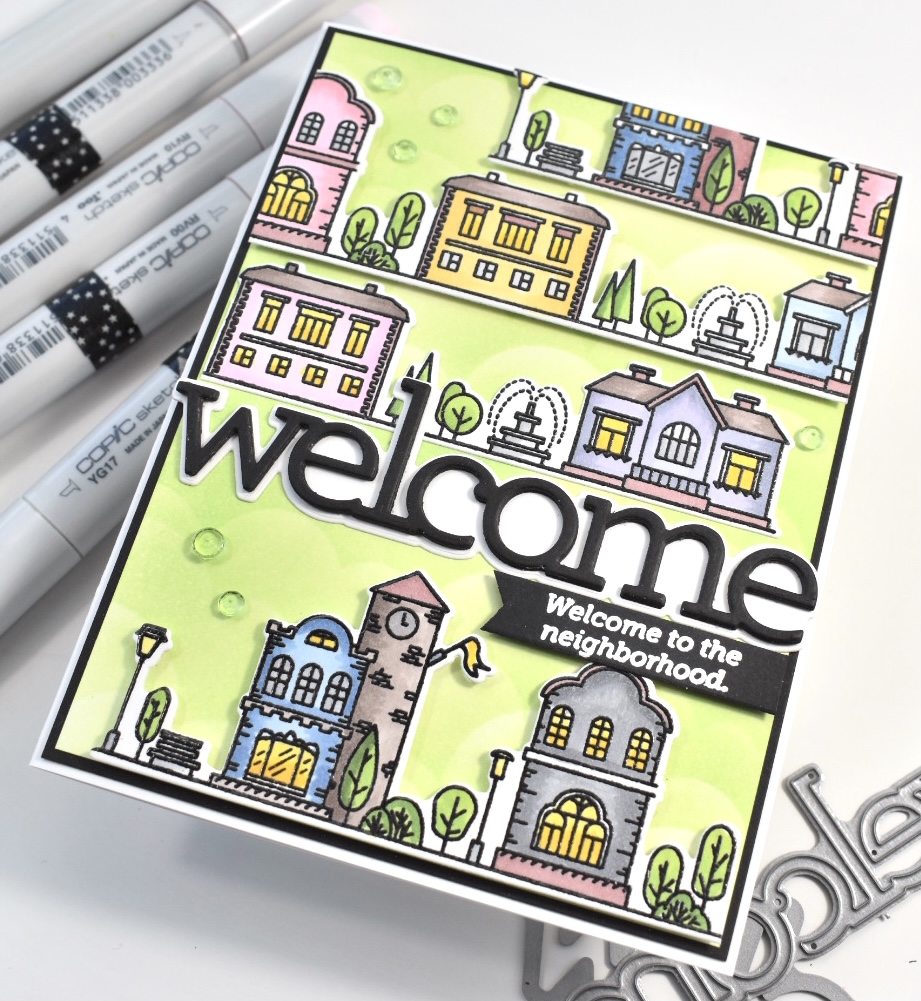
Hello Friends! Isn’t the new Hello Beautiful release gorgeous? There’s literally something for everyone! I’m super excited to be sharing the Welcome die cut with you! I had a ton of fun creating this card and thought that it turned out kinda cute!

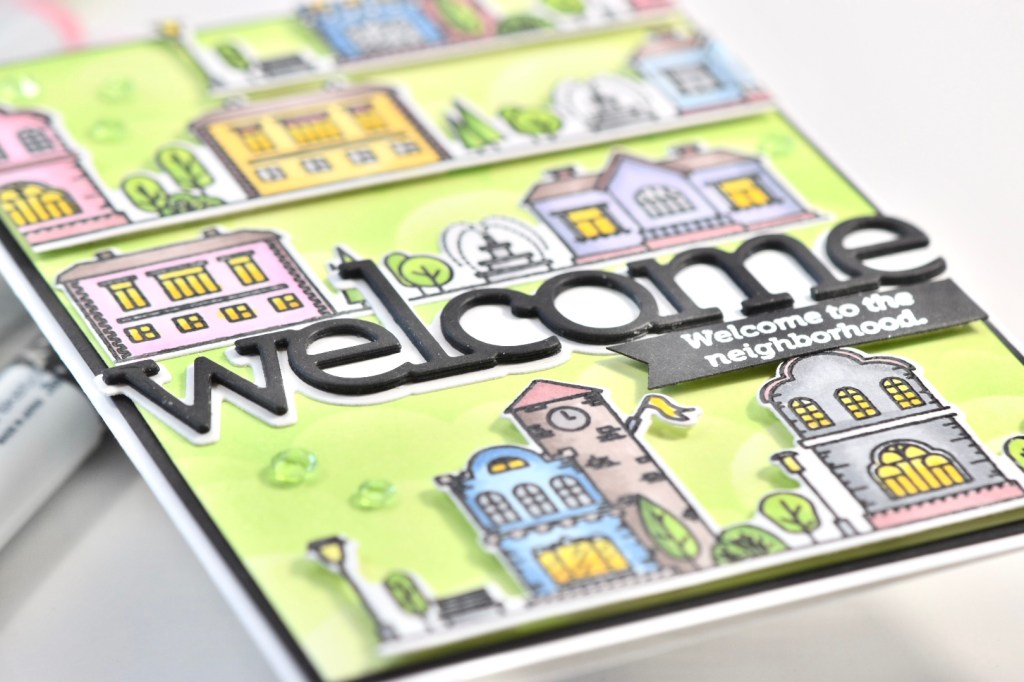
To begin, I cut an A2 card panel from Neenah Classic Crest 80lb, and ink blended Distress Oxide Mowed Lawn using the SSS Clouds for Days stencil. Unfortunately, the cloud detail doesn’t really show in the pics. Anyhoo, moving on .. Next I stamped the houses from the Home Sweet Home set in VersaFine Onyx Black ink and embossed it with Ranger Clear Embossing Powder. I actually stamped and embossed the houses twice because I was pretty sure that I was going to need two strips of houses to cover my card panel. I also stamped my little sub-sentiment with VersaMark Ink on black cardstock and embossed with SSS Detail White Embossing Powder.

Now that everything is stamped, it’s time to get coloring all of my cute little houses. The Copic Markers used were: YG03, YG13, YG17, YG67, N0, N2, N3, N4, RV00, RV02, RV10, RV11, E04, E70, E71, E74, Y08, Y15, B34, B41, B45, B91, B93 and BV23. I know that’s a lot of markers, but I wanted all the houses to be unique!

Now for some die cutting! I used the Home Sweet Home coordinating die to cut out the houses, and I used the SSS Sentiment Labels Die to cut my sub-sentiment. On a side note, I use that Sentiment Labels Die ALL THE TIME! I wasn’t sure that I would, but it’s been a great investment! Back to it .. I die cut the Welcome sentiment three times from black cardstock and adhered those together using Craft Tacky Glue, and I cut the shadow once from Neenah Classic Crest 110lb cardstock and adhered those together.

Now for the hard part! Figuring out the placement of everything! I say hard part only because I knew that I was going to be cutting my little strips of houses, and I REALLY didn’t want to mess those up .. that coloring took me quite a bit of time! Even after I had figured everything out, I was STILL nervous about cutting my houses!

As you can see from the pics, I ended up with four rows of houses around my sentiments. The bottom and two top rows of houses were adhered to my card panel using 3M Foam Tape. The row above my sentiment was adhered directly to the panel with glue, as well as the Welcome sentiment. I did however, pop my sub-sentiment up with foam tape because dimension is life!

To finish up my card, I adhered my card panel to a black panel for some contrast, and I adhered those to my card base, which is Neenah Classic Crest 110lb cardstock. No card is complete without some bling, am I right?! I added some green jewels from the PinkFresh Studio Jewels Mix.

I hope you’ve enjoyed this project, and I hope you’ll check out this new release! You can catch the whole release HERE. Also, don’t forget to check out #ssshellobeautiful over on Instagram for lots of inspiration from the team! Thanks so much for stopping by!

Stay awesome!

Supply List:

Latest Instagram Posts

Simon Says Stamp Welcome Home

Hello Beautiful Release

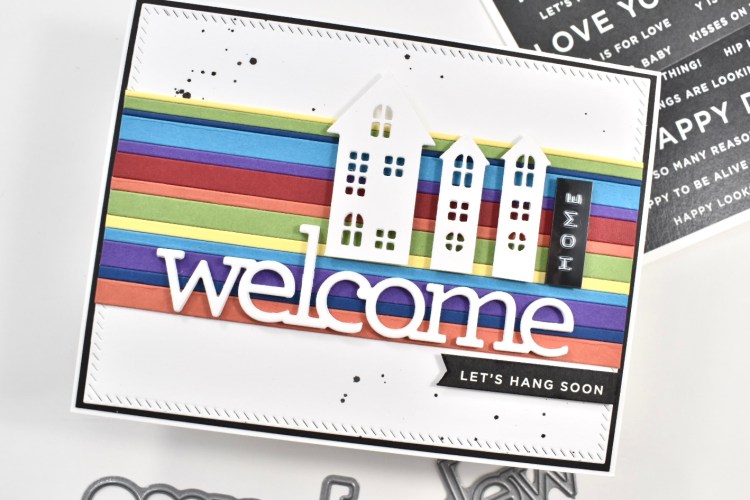
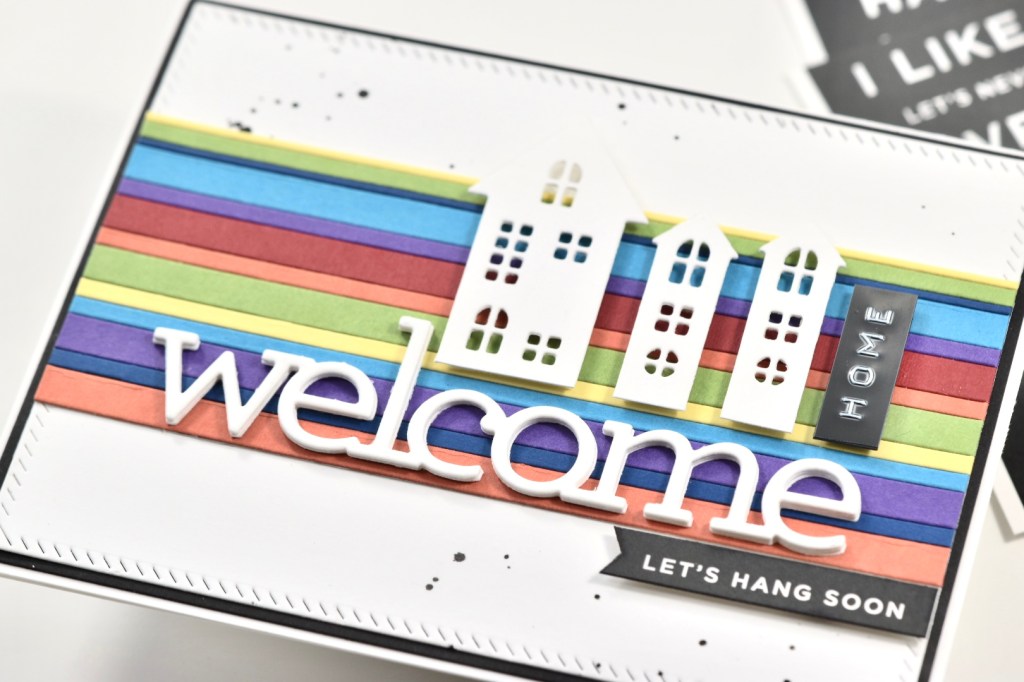
Hello! Hello! I’m back with another card featuring the new Welcome die cut from the brand spanking new SSS Hello Beautiful release! What are your favorites of the release? You can check out the whole release HERE.

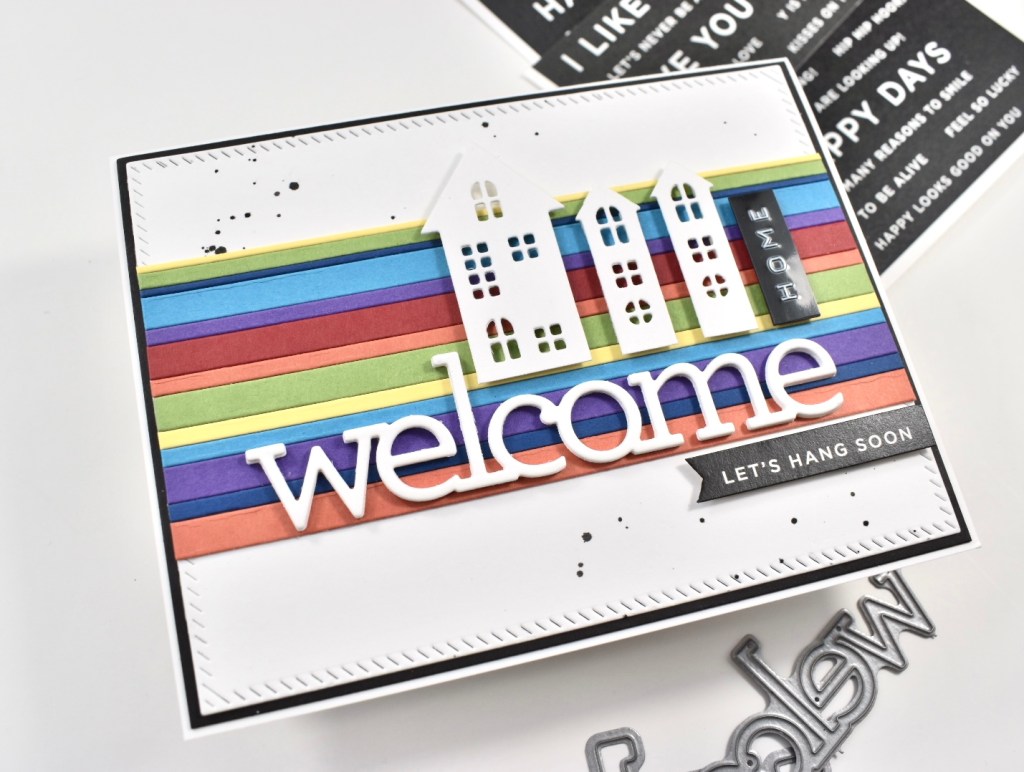
Alright, let’s get into the deets of this card. I first cut a white card panel from Neenah Classic Crest 110lb cardstock using the Diagonal Stitched Rectangles from PinkFresh Studio. I then pulled out my Simple Strips die from Pretty Pink Posh and got to die cutting a bunch of strips from various colored cardstocks in my stash. I think most of these are SSS cardstock, but I can’t be sure on that!

While I was over die cutting, I went ahead and cut my Welcome sentiment four times and the houses from the SSS Village set once from Neenah Classic Crest 110lb. I then used some tape runner on a thin piece of white paper and began adhering my strips to that. If we’re being honest here, I messed up my rainbow and then just had to mix them up .. you know, to look like it was on purpose!

Once I thought I had enough strips, I started playing with the layout on my card panel and finally decided on the layout that you can see here in the pics. Before I proceeded any further, some black splatter needed to happen .. Just a little to pull all of the black elements together. I glued down my little panel of strips to my card panel using Craft Tacky Glue, and adhered all four of my Welcome die cuts together and then adhered that to the bottom of my strip panel. I added 3M Foam Tape to the backs of the houses and positioned those just above my main sentiment.

So I knew that I wanted this card to say Welcome Home, but I searched and searched for a “home” word stamp to no avail. What was I to do? To solve this dilemma, I busted out the handy, dandy label maker! I made my tiny label and positioned it next to the house, and I was pleased with the way it looked. Then I decided that I wanted a cute little sub-sentiment, so I scoured through my bajillion Reverse Sentiment Strips and settled on this one. I trimmed it using the SSS Sentiment Labels die and popped it up on some foam tape. I adhered my card panel to a black panel of cardstock for some contrast and adhered all of that to my card base, which is Neenah Classic Crest 110lb.

There you have it! I enjoyed this card because I really like working with strips, and it came out bright and fun! I hope you enjoyed this project and that it inspires your creative juices! Don’t forget to check out the Hello Beautiful release, and definitely check out #ssshellobeautiful over on Instagram! That’s where you’ll find tons of inspiration!

Thank you so much for stopping by today!

Stay awesome!

Supply List:

Latest Instagram Posts

Simon Says Stamp Welcome Floral Frame

Hello Beautiful Release

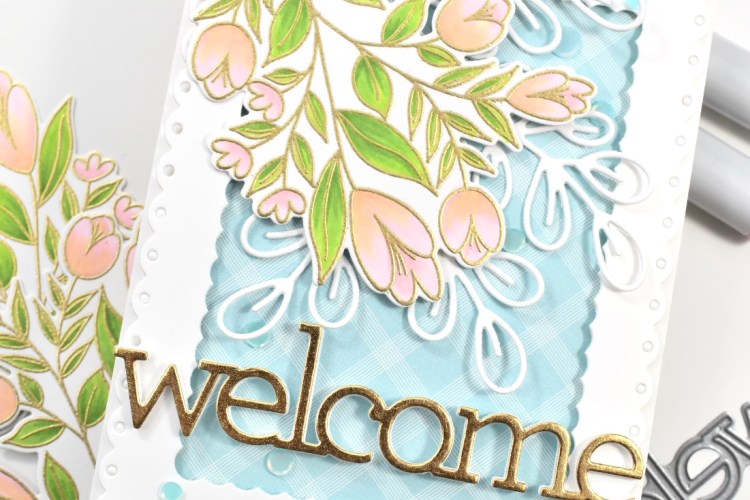
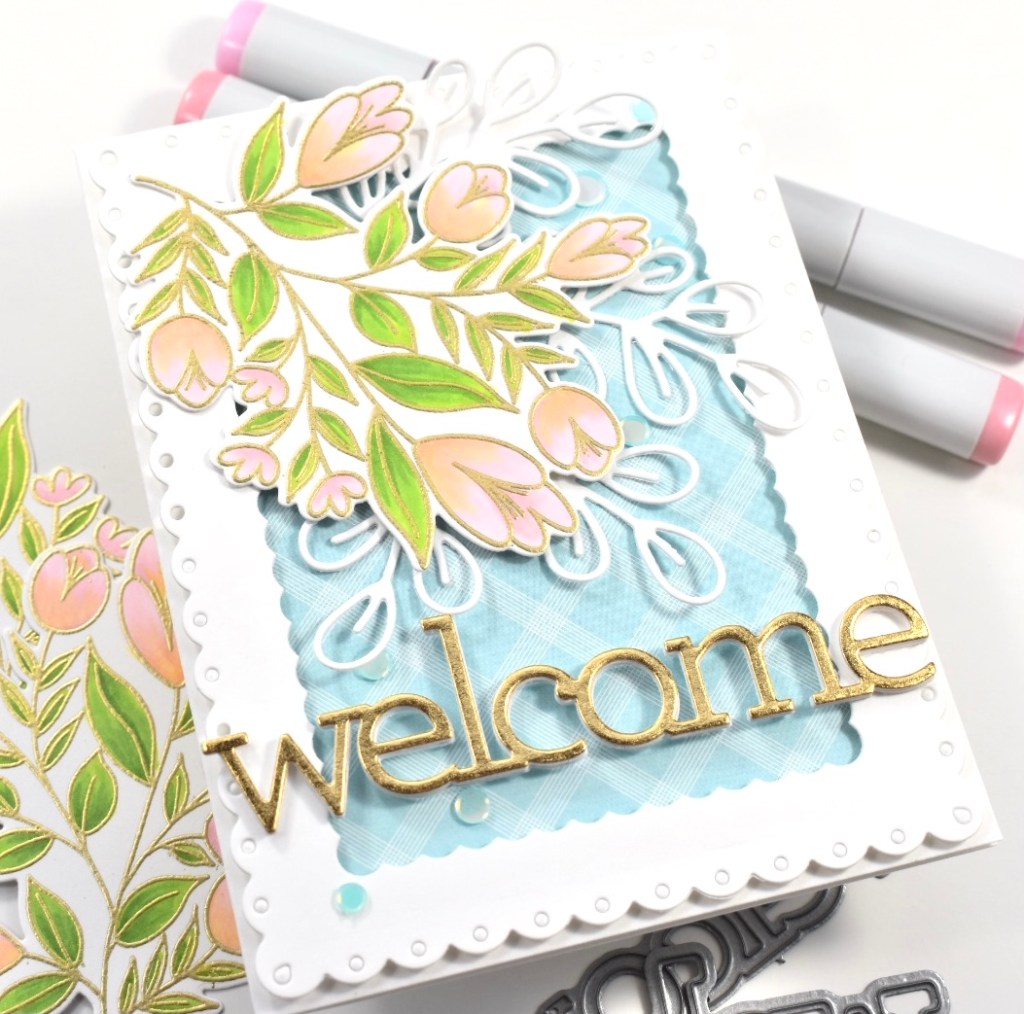
Welcome Back! Get it ..Welcome? Yeah, that was cheesy, I know! I just love all of the detail and elements of this card! I’m so glad that you stopped by to check it out!

Now for the deets! I started by stamping the flowers from the SSS Best Friend Ever set with VersaMark ink on Neenah Classic Crest 110lb cardstock and embossing it with Ranger Princess Gold Embossing Powder. Then I got to coloring with my Copic Markers! The colors I used are: YG03, YG13, YG17, RV00, RV10, RV11 and Y11.

Once the coloring was done, it was time to do some die cutting. I used the SSS Best Friend Ever Die set to cut the flowers. I cut the Welcome die once from gold cardstock from my stash and four times from Neenah 110lb. I also used the 110lb to cut the Fancy Scalloped Rectangle Stackable frame from Lawn Fawn and the SSS Simple Stem four times.

I needed something behind the frame that would work well with my flowers. I opted for this piece of beautiful, blue plaid paper from PinkFresh Studio, which is in their My Favorite Story Collection. I trimmed it down and mounted it behind my frame using 3M Foam Tape. Before I adhered the flowers with foam tape, I decided the placement for the SSS Simple Stem and adhered those to the blue panel with Craft Tacky Glue.

This card is almost done!! I adhered all of my layers of the Welcome die together using Craft Tacky Glue. Remember that was four layers out of Neenah 110lb cardstock and once out of gold cardstock! That’s a crazy amount, but I needed it to be sturdy, because the Welcome sentiment is only attached to the frame at the letters W and E.

Just look at that dimension!! Love, love, love it! As always, I had to add some blingy sequins to finish it up.

Well, there you have it! My floral welcome card showcasing the new Welcome die from the Simon Says Stamp HELLO BEAUTIFUL release. Thanks so much for stopping by and I hope you found some inspiration to get crafty!

Stay awesome!

Supply List:

Latest Instagram Posts

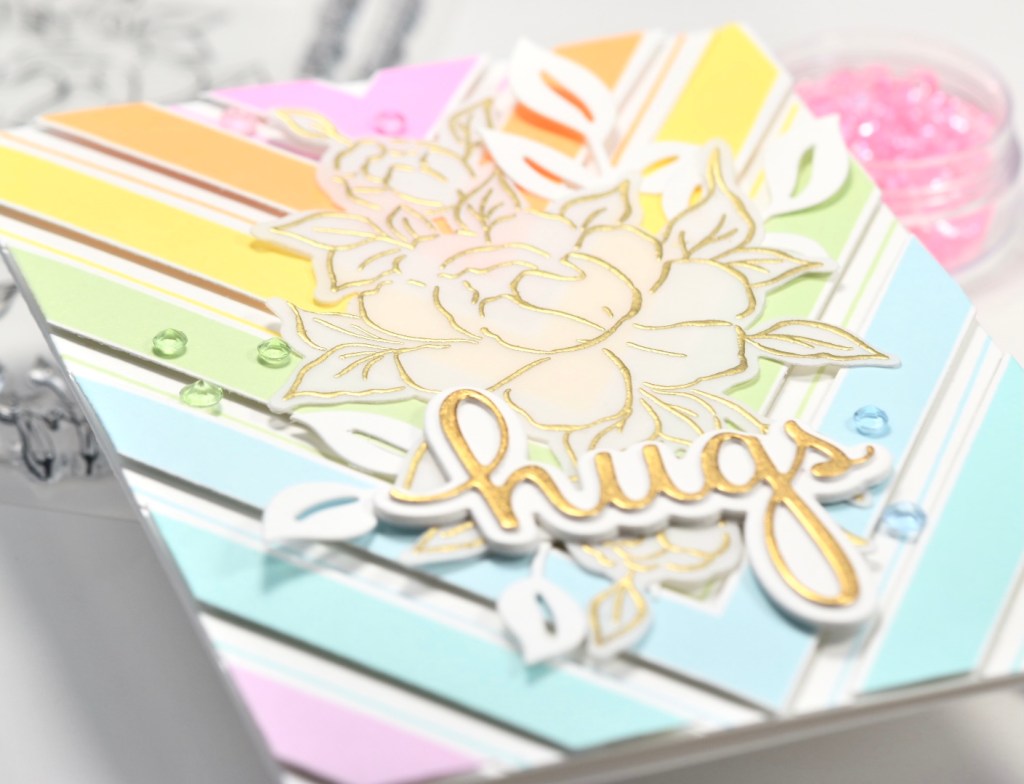
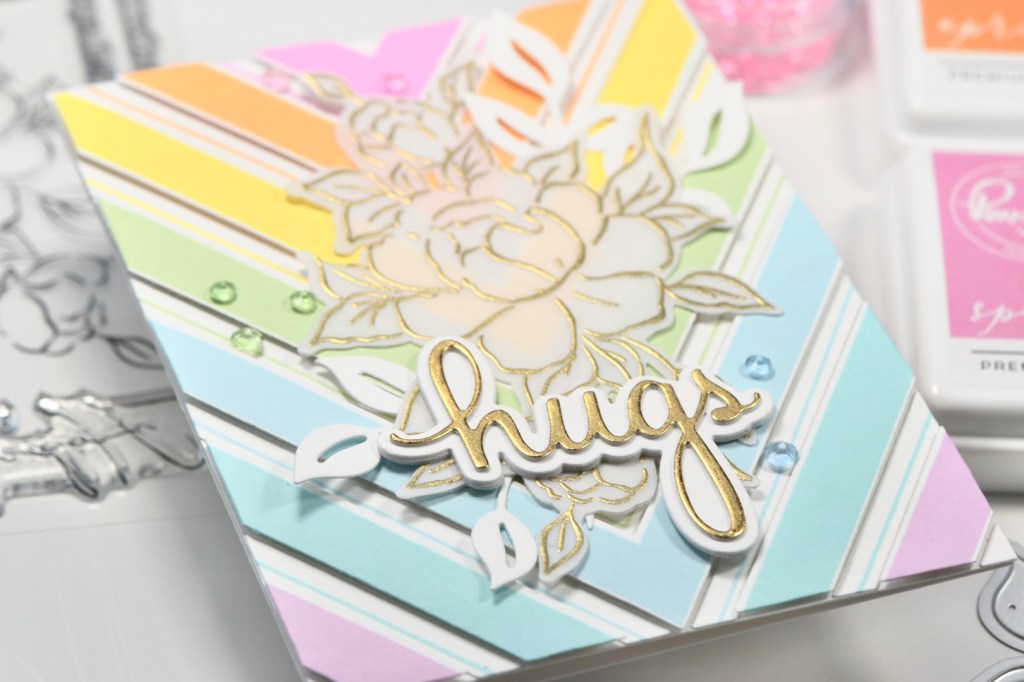
Chevron Hugs

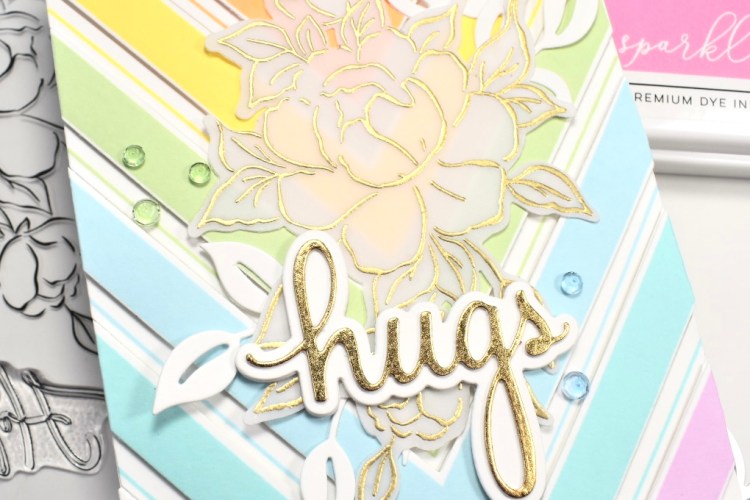
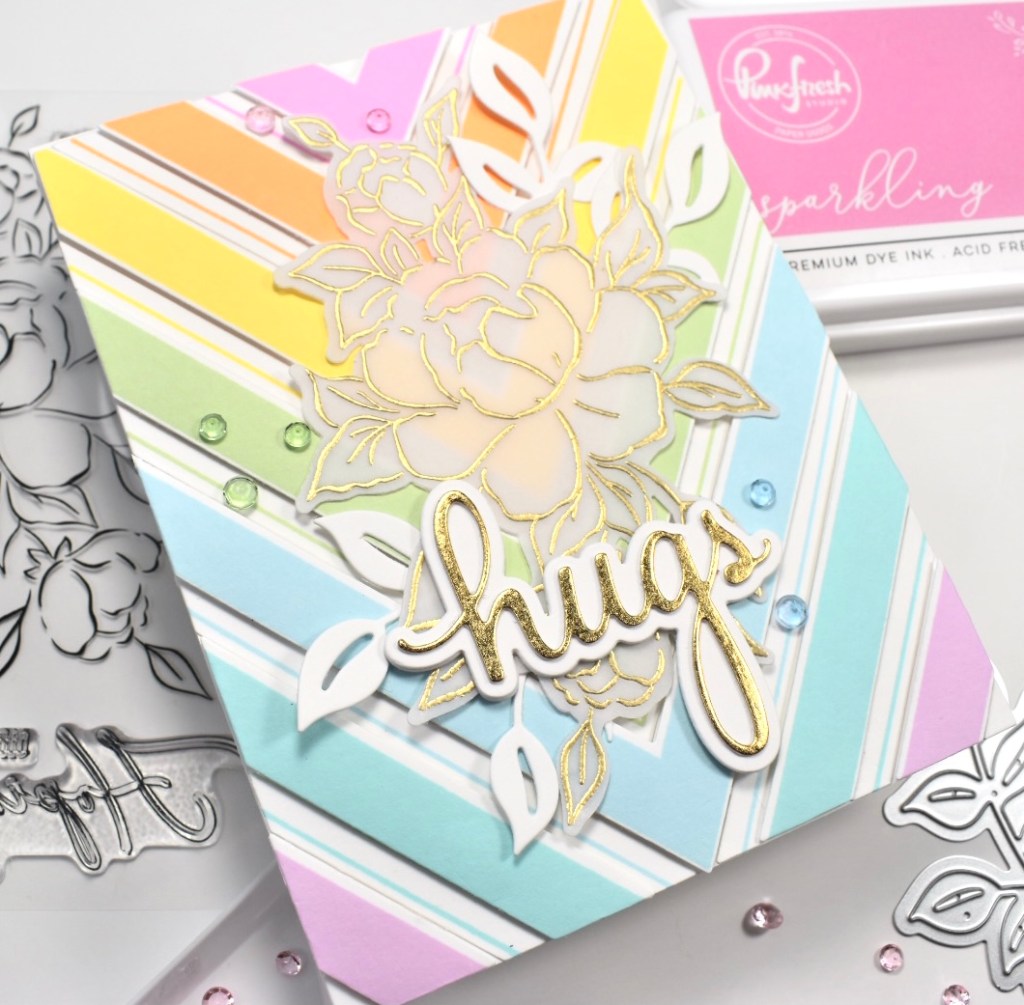
Hello and welcome back friends! I’m so glad you stopped by! For today’s card I’m using the PinkFresh Studio Nested Chevron stamp and coordinating die to create a rainbow-ish look. I’ve had this set for a little bit, and finally decided to take it for a spin! The pop-out feature of this stamp, any many of their others, offers so many possibilities! To be honest, I wasn’t quite sure if I was going to like it, but dang, it’s pretty awesome! So glad that I went ahead a bought a few of the other sets when I bought this one!

For my rainbow stamping, I chose PinkFresh Studio dye inks in Sparkling Rose, Apricot, Lemon Whip, Fresh Pear, Sky Blue, Ocean Breeze and Soft Lilac. I trimmed a piece of Neenah Classic Crest 80lb cardstock large enough to fit into my Misti and positioned my stamp in the middle of that. You can stamp different sections with different inks at the same time, but since I’m a newbie to these pop-out stamps, I stamped each section individually .. ya know, because I wasn’t really in the mood for messing something up!

This stamp is cool, because it has a frame which allows you to position the pieces correctly and straight .. which I need! So once all of my stamping was done, I die cut my Nested Chevron with the coordinating die. I cut another piece of Neenah 80lb to adhere my Chevron pieces to. I adhered the thin striped pieces to my panel using Craft Tacky Glue, and I adhered the solid stripes to the panel with 3M Foam Tape .. because as we all like to say, dimension is life!

Moving along .. I stamped the new Choose Hope floral image using VersaMark ink on vellum twice, and embossed both of those using Simon Says Stamp Detail White Embossing Powder. Once those were cut with the coordinating die, I then glued those two pieces together and positioned them over my chevron to decide if I was happy with the look.

I decided that the white just wasn’t doing it for me, so I stamped the floral again, embossed it using Ranger Ink Princess Gold Embossing Powder and die cut it. That was so much better! Thank goodness! So I went ahead and adhered the gold floral to the white floral piece.

Back to the die cutting machine I go! I decided to use the Hugs sentiment from the PinkFresh Studio Sending Phrase Builder set, so I cut the shadow three times from Neenah Classic Crest 110lb cardstock and the detail sentiment once from Neenah 110lb and once from gold cardstock. While there, I went ahead and cut a few leaves from the new Curvy Leaves set as well. I adhered all of the sentiments together and determined the placement on top of the chevron pattern. Before gluing down the vellum piece, I tucked in some of the Curvy Leaves and adhered those. I then adhered the vellum piece to the chevron panel and the hugs sentiment on top of that. My finished panel was then adhered to my card base, which is Neenah 110lb. Of course you have to have embellishments, so I added a few PinkFresh Studio Crystals Mix.

So there’s my pretty little chevron rainbow-ish card! I hope you like it, and I hope it inspires you to get crafty today!

Thanks so much for stopping by and don’t forget to stay awesome!

Supply List:

Latest Instagram Posts

Hello Lovely Floral

PinkFresh Studio Celebrate

Hey there crafty friends! I hope you are all doing well and staying healthy! I have so much beautiful patterned paper in my stash and sometimes I like incorporating it in to my projects, and today’s card does just that! I recently bought a bunch of patterned paper from PinkFresh Studio, and let me just tell you, they are beautiful!

My card panel on this project is a sheet of patterned paper from the PinkFresh Studio Celebrate 6×6 paper pad. I trimmed it down using the PinkFresh Studio Diagonal Stitched Rectangles set, and added a few white splatters with watered down acrylic paint. The pink splatters were already part of the design on the patterned paper. I thought the Fancy Oval Frame, also from PinkFresh Studio, would look super awesome over the floral design of the paper.

I trimmed the oval frame using Neenah Classic Crest 110lb cardstock. While I was at the die cutting machine, I went ahead and did the rest of my cutting. I cut the Hello Lovely sentiment, which is from the PinkFresh Studio set Hello Phrase Builder, once from gold cardstock from my stash and once from Neenah 110lb cardstock. For the shadow portion of the sentiment, I cut that three times from the 110lb cardstock.

I also cut some leaves from the new Curvy Leaves set from the 110lb. Now for some assembly! I placed 3M Foam Tape on the back of the Fancy Oval Frame and positioned it over the central floral image to determine where I wanted to place my Curvy Leaves. Once I decided that placement, I adhered the leaves to my card panel using Craft Tacky Glue. I then adhered my oval frame over those leaves.

I adhered all of my sentiment shadow pieces together using that same Craft Tacky Glue, as well as adhering the rest of the sentiment pieces together. So much adhering!! Anyhoo, I “glued,” ha ha, see I switched it up there, the Hello sentiment to the card panel and glued the Lovely part of the sentiment to the oval frame. As if you couldn’t tell, I REALLY like dimension! Next, I added my card panel to an additional panel of yellow cardstock from my stash, before adhering that to my card base, which is Neenah Classic Crest 110lbo. And no card is complete without some bling! So, of course, I had to add some jewels from the PinkFresh Studio Jewel Mix to finish it up!

That’s my card for today! All of these PinkFresh Studio elements are new to me, and I can honestly say I’m loving them!

Thanks for stopping by and taking a peek at my card today! I hope it inspires you to get in your crafty space and start creating, whatever that may be!

Stay awesome!

Supply List:

Latest Instagram Posts