Spellbinders Delightful Darlings

Hello Crafters and welcome back! For today’s project, I’m featuring a card using the new Darling Bouquet stamp set, which is from a series of four sets illustrated by Mayline Jung. These are super cute and super fun! So, let’s get into today’s project.

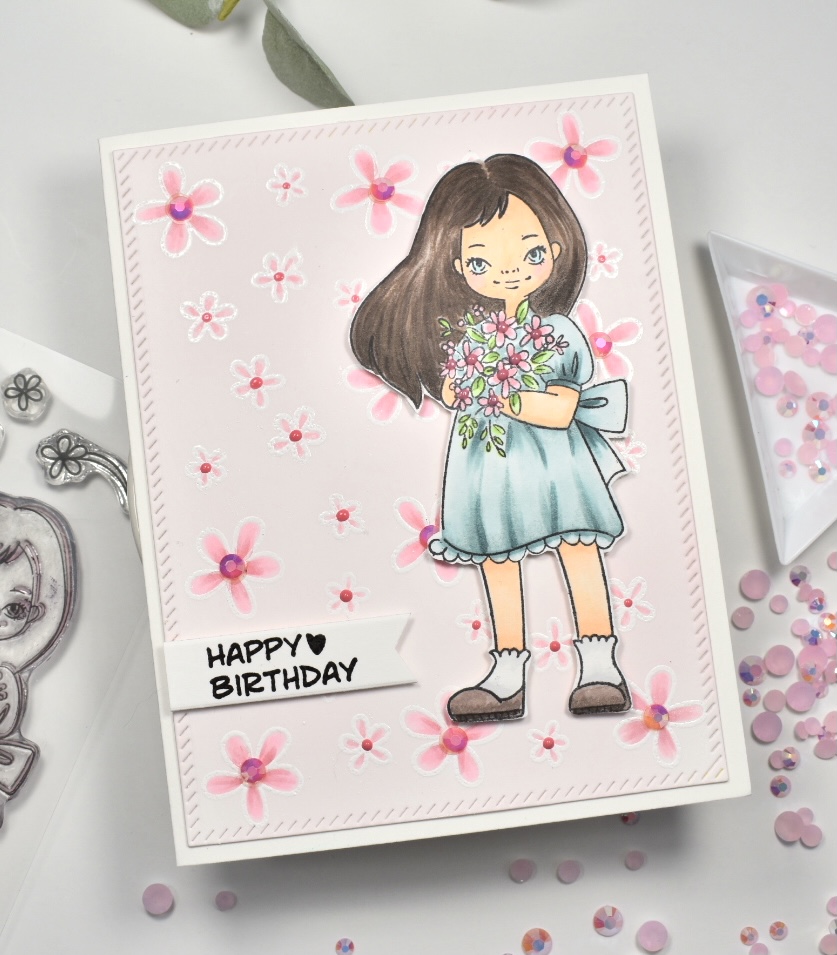
To begin, I die cut a panel of Neenah Classic Crest 110lb cardstock using the PinkFresh Studio Diagonal Stitched Rectangles and placed that in my Misti. There are three small flowers in this set, and I decided to create my own background with those. I positioned the stamps and stamped them using VersaMark Ink and heat embossed them using Simon Says Stamp Detail White Embossing Powder. I rotated my panel for additional stamping and repositioned the stamps towards the end to fill the remaining space.

I very lightly ink blended Distress Oxide Spun Sugar over the entire panel and began coloring the stamped flowers using Copic Markers RV00, RV10, RV11 and RV32. I went back to my Misti and stamped the girl using Memento Tuxedo Black Ink and colored that image using E000, E00, E70, E71, E74, E79, N0, YG11, YG13, B00, BG70, BG72, BG75. As a note, I used the same pinks to color the bouquet that I used for the background. Once the coloring was done, I fussy cut the image for mounting.

I stamped the Happy Birthday sentiment on Neenah 110lb using VersaFine Onyx Black Ink and heat embossed that using Ranger Clear Embossing Powder. I trimmed that out using the Simon Says Stamp Sentiment Label Dies, and mounted the sentiment as well as the girl on my background panel using 3M Foam Tape.

I added pink jewels to the larger flowers using PinkFresh Studio Jewel Mix, and I added small dots of Nuvo Crystal Drops Carnation Pink to the smaller flowers on the background and the bouquet. I then mounted my panel to a card base, which is Neenah Classic Crest 110lb cardstock.

That finishes today’s project! I hope you enjoyed it, and I hope it inspires you to get crafty! Thanks for stopping by!

Have a wonderful day, and stay awesome friends!

Supply List:

*Affiliate links used at no cost to you. Thank you for your support!

Latest Instagram Posts

Alex Syberia Design Love You Daffodils

Hello there Crafty Friends! I hope you’re doing well, and I thank you for stopping by today! I’m featuring the new Alex Syberia Design Daffodils A2 Card Panel for this post. Alex has a new release, and you should definitely check out her Etsy shop for all the digi stamps and loads of inspirations!

To begin my project, I printed the Daffodils on a sheet of Neenah Classic Crest 110lb cardstock and began coloring the image using Copic Markers Y06, Y08, Y11, Y13, Y15, YR27, YG13, YG17, YG91, E71 and B0000. I continued to add shading and more details, such as the leaf veining using my PrismaColor pencils.

I didn’t want to lose too much of the image, so I trimmed my panel down to 3.75″ x 5.75″ and mounted it onto a panel of black cardstock that’s just slightly larger using 3M Foam Tape. I die cut the Lawn Fawn I Love You Border sentiment once from gold cardstock and twice from the same black cardstock and adhered those together using Craft Tacky Glue. This sentiment actually says I Love You, but I trimmed it down, because I only wanted the love you portion.

I die cut the Altenew Hanging Garden die twice from gold cardstock and prepared my card base by splattering it with Royal Talens Amsterdam Oxide Black Acrylic Ink. I love this ink because it’s such a perfect consistency for splatter! I positioned my panel over the card base to determine the placement of the gold leaves, and adhered those using glue. I then glued my panel atop the leaves to finish up my card.

This was a super fun card panel to color! Don’t forget to stop by Alex’s Etsy shop to check out all of the new images!

Stay awesome friends!

Supply List:

*Affiliate links used at no cost to you. Thank you for your support!

Latest Instagram Posts

Waffle Flower Simple Stem Sending Hugs

Hello! Hello! And welcome back! I’m sharing another card that I created using the new Waffle Flower Simple Stem Combo from their April 2021 release! Yes, I had to place an order myself for that new Stitched Flower Panel and the Oversized Smile Combo! Gah .. I’m dying over the inspiration projects using that flower panel! So beautiful! Anyhoo, let’s get into today’s project.

I started by stamping a bunch, and I mean a bunch of leaves from the Simple Stems set on Neenah Classic Crest 110lb cardstock using VersaFine Onyx Black ink, and then heat embossing the images using Ranger Clear Embossing Powder. I then set out to color all of my leaves with Copic markers. And, I knew the exact color combo that I wanted to use! This is one of my favorite combinations that an Instagram friend, Bonnie Crane, told me about a while back and I’ve loved it ever since. You should definitely check out Bonnie’s Instagram, you won’t be disappointed. The Copic combo that I used was BG70, BG72 and BG75. The other one that goes well is BG78, however I did not use that one on this project.

Once everything was colored, I die cut all the pieces using the coordinating dies, and then began the tedious task of cutting all those little slivers of 3M Foam Tape to put on the back of them. I die cut a black cardstock panel using the Honey Bee Deckle Edge A2 dies and splattered it with Royal Talens Amsterdam Titanium White Acrylic Paint. I love this little jar of paint because the consistency is fabulous for splatter!

I began adhering all of my leaves to my black panel, and decided that a holographic sentiment would look nice with these shades of blue green. I die cut the Oversized Hugs once with holographic cardstock and twice with 110lb cardstock and adhered those together using Craft Tacky Glue. I then adhered the sentiment directly to my leaf panel using the same glue. I wanted a sub-sentiment but didn’t actually have a Waffle Flower sentiment, so I oped to bust out the Dymo 3D Label Maker and make one myself, and there you have the “sending.” I glued that directly to my panel as well.

My favorite bling choice is PinkFresh Studio Jewels Mix, so I added a few of those and mounted my panel on a Neenah Classic Crest 110lb card base.

That finishes today’s project! I hope you found some creative inspiration! There’s still time to join the blog hop celebrating Waffle Flower’s April 2021 release to win some prizes! You can check out my post from Monday, or you can head to the Waffle Flower Blog for all the details!

Thanks so much for stopping by and stay awesome!

Supply List:

Latest Instagram Posts