Simon Says Stamp Praying for Peace
Hello Crafty Friends and welcome back! In today’s post, I’m featuring a new stamp set from the StampTember release called, Raindrops. What a cute set this is! I’ve also made another card using the raindrops as flowers! That was super fun! So let’s get into the details!

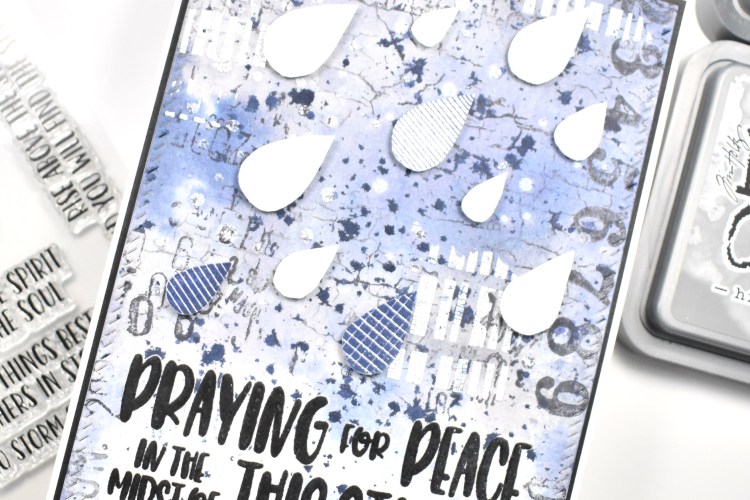
I don’t do mixed media cards very often, but I have to say that I really enjoy the process when I do take time to do them! So, for this card, I started with a panel of watercolor paper and Ranger Crackle Paste through the SSS Falling Snow Stencil. Once the paste was dry, I pulled out the Distress Oxide inks in Hickory Smoke, Black Soot and Chipped Sapphire. I smooshed the ink on my glass work surface and spritzed it with water and smooshed my paper in it. I did only do one color at a time though.

The blue wasn’t quite bright enough so I spritzed some Distress Spray Stain Chipped Sapphire on the panel, working with it until I was satisfied. When the panel was dry, I used the PinkFresh Studio Diagonal Stitched Rectangles to trim it down. I then popped it in the Misti and stamped the sentiment from the SSS Raindrops stamp set on the bottom using VersaFine Onyx Black ink and heat embossing it using Ranger Clear Embossing Powder. I repeated that stamping again, but using VersaMark ink for the second time and heat embossed again. By heat embossing it twice, it gave the sentiment a nice glossy shine.

I pulled out some of the raindrops from the set and stamped some of them using Distress Oxide Chipped Sapphire ink and some using VersaMark ink to heat emboss those with Ranger Holographic Embossing Powder. Once the raindrops were stamped, I did fussy cut all of those.

The background was ready for some stamping and more stenciling now! I used the Tim Holtz Stencil 102 and more crackle paste and left that white. For the background stamping, I used the SSS Crackle Background stamp, along with some elements from the Tim Holtz Ultimate Grunge stamp set with Ranger Archival Black ink. I used the wand of the Distress Oxide Chipped Sapphire Spray to add some splatter to the panel as well.

Once I was satisfied with how the panel looked, I arranged and added the raindrops diagonally across the panel using foam tape. This panel was then adhered to a black panel using foam tape again, before being adhered to the card base, which is Neenah Classic Crest 110lb.

That finishes up this mixed media project for today! I hope you enjoyed it, and I hope it inspires you to get crafty as well! Stop by and check out the entire StampTember release, and don’t forget about all of the amazing collaboration sets that will be released all month long! Have a wonderful day!

Supply List:

* Affiliate links used at no cost to you. Thank you for your support!

Latest Instagram Posts

Waffle Flower Leafy Smile

Hello Crafters and welcome back! Waffle Flower has monthly challenges and I’m super excited to be co-hosting week one with my special friend Rachel! This week’s theme is Leaves, which is just perfect for the upcoming fall weather. You can head over to Waffle Flower for all the challenge details! So let’s get into my project!

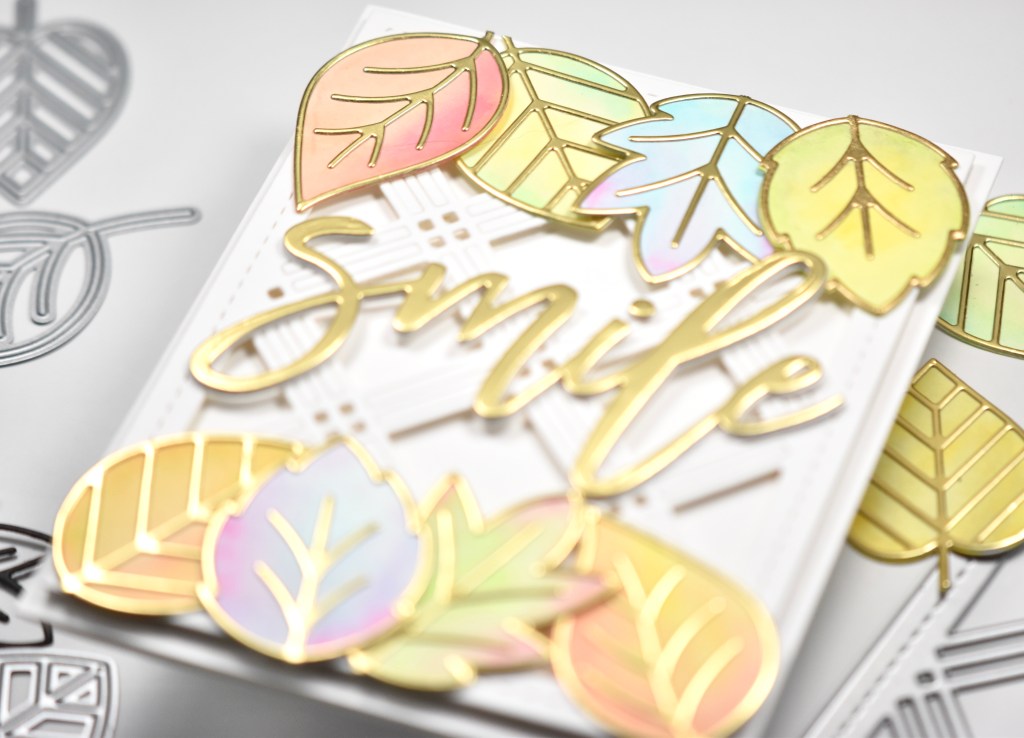
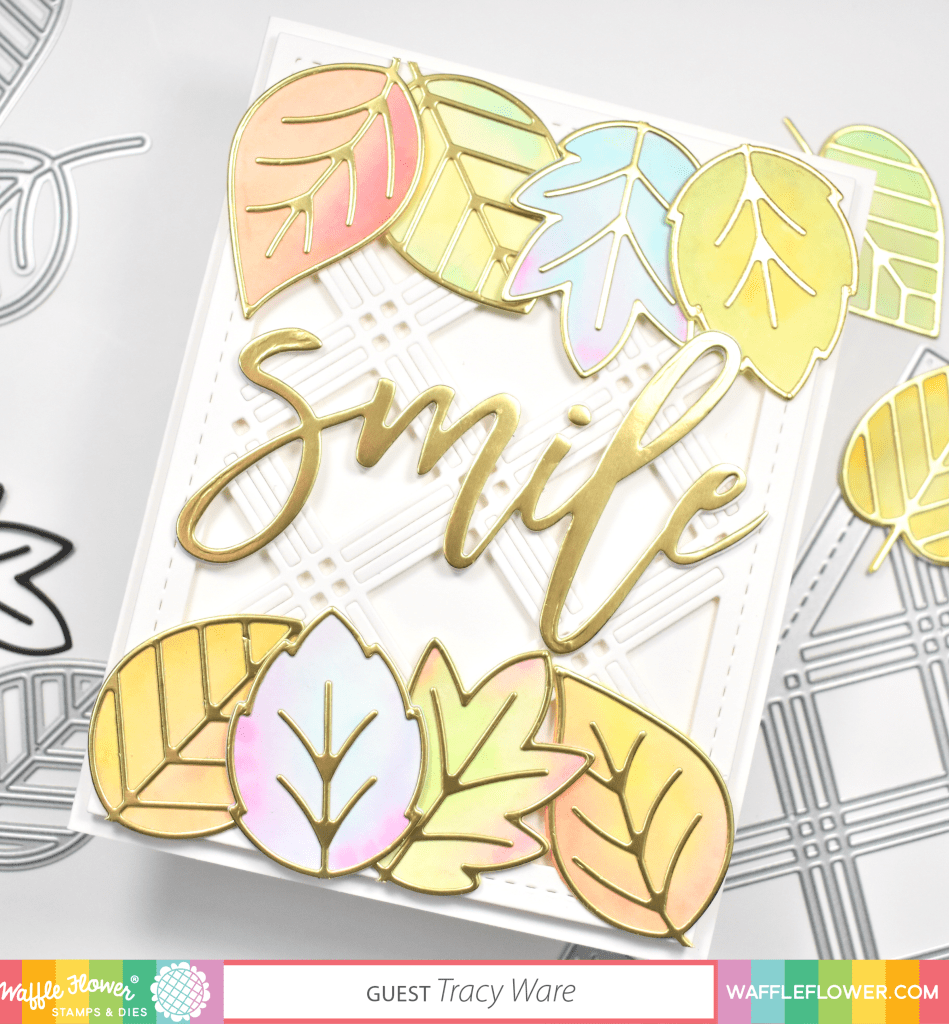
For my project, I opted to use the Fall Leaves Die set, along with a couple of other Waffle Flower products. I began by cutting the solid leaf dies from watercolor paper twice. I got out a water brush and my Karin Brushmarkers to do a little bit of watercoloring on them. Very quick and simple technique of adding water to the leaves and dropping in color from the markers. Once satisfied with the colors, I set them aside to dry.

While those were drying, I went ahead and cut the leaf detail for all of the leaves from mirror gold cardstock. I also went ahead and cut the Triple Line Diamond Panel Die from Neenah Classic Crest 110lb cardstock, and placed foam tape strategically on the back of it.

I adhered the gold leaf detail to the solid leaves using liquid glue. Now that I had the panel cut and the leaves ready to do, I needed to decided on a sentiment. The Oversized Smile Word Die fit within the space that I had to work with, so I cut it once from that same mirror gold cardstock and three more times from Neenah 110lb cardstock and glued all of those together.

I began adhering the leaves to the die cut panel using glue, creating a row at the top and the bottom. Once those were all done, I trimmed off the stems. Since I had previously put foam tape on the back of the die cut panel, I went ahead and adhered that to the card base, which is Neenah 110lb as well.

The only thing left to do was glue the sentiment in the center of the panel. I didn’t even add bling to this card! Can you believe that? I can’t, actually! I hope you enjoyed this project, and I hope you’ll join us in the challenge! Leaves is such a great theme for this month! Have a wonderful day and don’t forget to stay awesome friend!

Supply List:

* Affiliate links used at no cost to you. Thank you for your support!

Latest Instagram Posts

Simon Says Stamp Interlocking Leaves

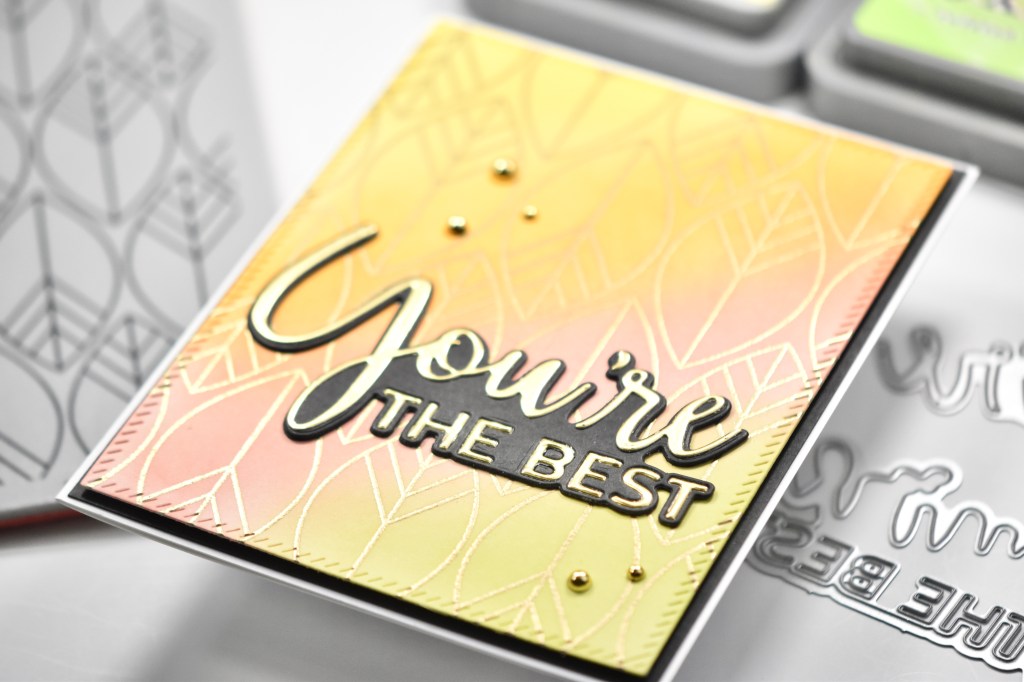
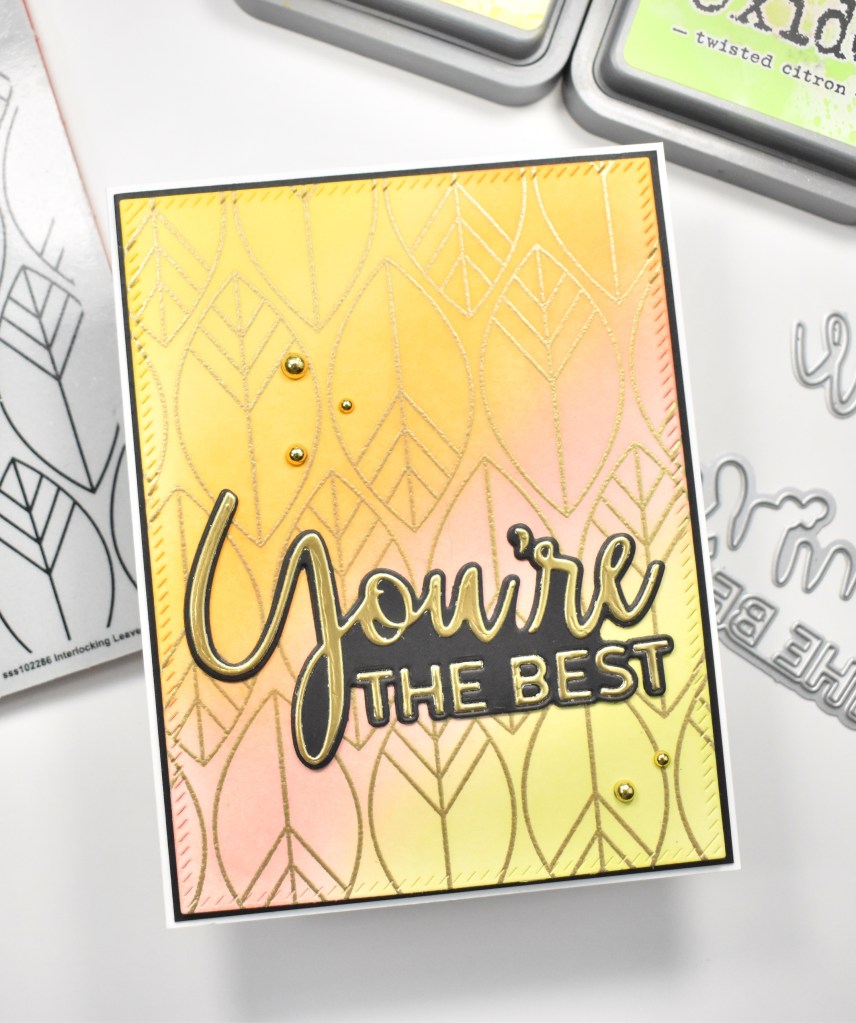
Hello Lovelies! I hope you’re doing well! Thanks so much for stopping by. StampTember is always so exciting with all of the new products! What are your favorites from the release? Today’s project is featuring the Interlocking Leaves Background stamp, so let’s just get right to it!

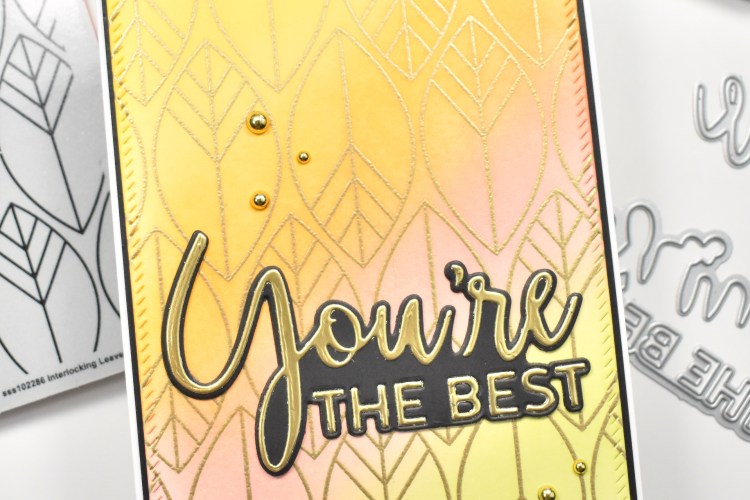
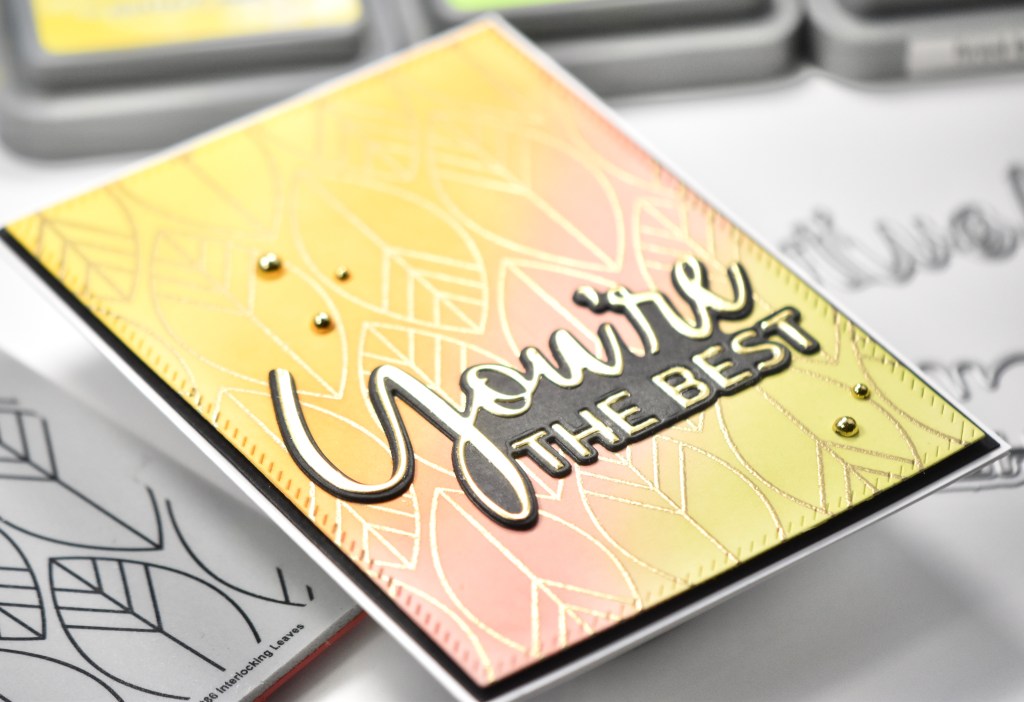
I began this project by stamping the Interlocking Leaves on a panel of Neenah Classic Crest 110lb cardstock using VersaMark ink and heat embossing it using Ranger Princess Gold Embossing Powder. I then pulled out some fall-ish colors for some ink blending.

The Distress Oxide inks that I used were Mustard Seed, Carved Pumpkin, Fired Brick and Twisted Citron. Once the ink blending was complete, I cut the panel out using PinkFresh Studio Diagonal Stitched Rectangles, and started on the sentiment.

I opted for the SSS You’re the Best die. I cut it twice from black cardstock and once from Mirror Gold cardstock. I removed the letters for “the best” on one of the black die cuts, and inlaid the gold letters in their place using liquid glue. I adhered the rest of the sentiment to the shadow and glued it to the ink blended panel.

This panel was then adhered to a black panel using foam tape for dimension, and everything was then adhered to the card base, which is also Neenah 110lb. No card is complete without embellishments, so I added a few PinkFresh Studio Gold Metallic Pearls to finish it up!

That does it for this card! Have you checked out the entire StampTember line up yet? Do you have any favorites? My wallet is screaming right now! Thanks so much for stopping by and don’t forget to stay awesome friend!

Supply List:

* Affiliate links used at no cost to you. Thank you so much for your support!

Latest Instagram Posts

Simon Says Stamp Just A Card

Happy StampTember! Thanks so much for joining me today! I hope you’re having a wonderful day! Have you checked out the entire StampTember release yet? What are your favorites? I’m looking forward to seeing all of the collaboration sets for the month! Today’s card is featuring the new Raindrops stamp set, but used in a different way! Let’s jump right in!

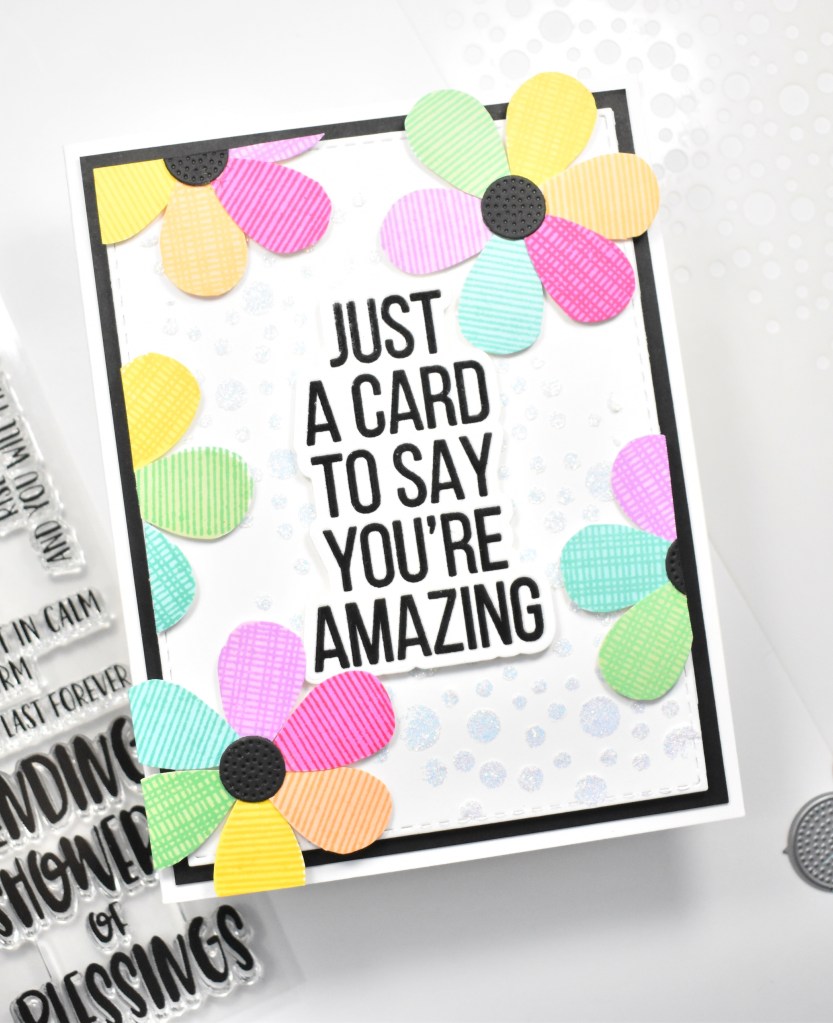
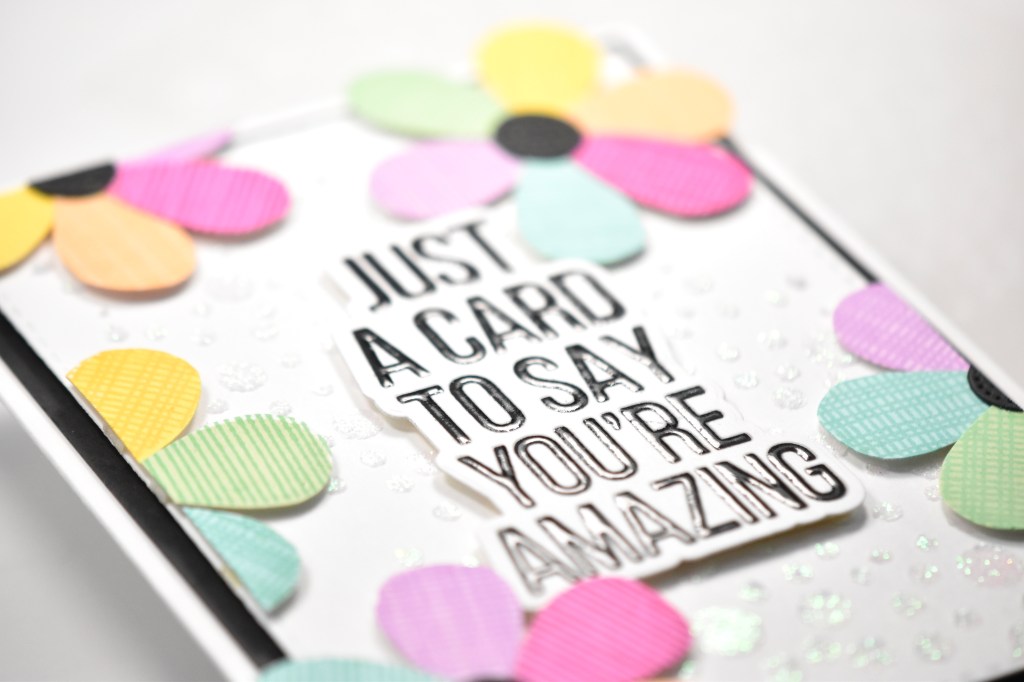
When I first saw the Raindrops Stamp set, my brain saw flowers! So that’s the direction that I went! To begin, I pulled out a panel of Neenah Classic Crest 110lb cardstock and attached the SSS Fading Tiny Dots Stencil to it using masking tape, and applied a good layer of Gina K Iridescent Glitz Glitter Gel. That was then set aside to dry.

Next, I took one size of the solid raindrop stamps and the coordinating detail stamps and began stamping. For the solid stamp, I used PinkFresh Studio inks in Bubble Gum, Peach Fuzz, Sunshine, Fresh Pear, Ocean Breeze and Soft Lilac. I think that I stamped each color three times using the solid stamp. Next, I took the detailed stamps and stamped over each coordinating color using the next darkest shade of ink, which were Raspberry Bliss, Apricot, Sweet Mustard, Meadow, Aquamarine and Lavender. Once I had all of the petals stamped, I fussy cut them all.

I used the SSS Stitched Daisies die set to cut a few centers from black cardstock, and then adhered the petals to the back using liquid glue, in rainbow order. For the sentiment, I opted to use one from the SSS XL Greetings 2 set. I stamped the sentiment using VersaFine Onyx Black ink and heat set it using Ranger Clear Embossing Powder. I then repeated the stamping and embossing two more times, but using VersaMark ink on those. I do it this way because my paper always warps slightly during the embossing process, and by stamping in VersaMark, you don’t see any mistakes if it doesn’t line up perfectly correct the second and third time because of the warping.

I used the SSS XL Greetings 2 coordinating die to trim out the sentiment, and cut it a second time for stacking purposes. I trimmed the Tiny Dots panel using Taylored Expressions Stitched Rectangle die and adhered the sentiment in the center using foam tape. I then placed foam tape on the back of the flowers and adhered those around the sentiment, trimming off any excess. The panel was then adhered to a black panel using foam tape, and then to the card base, which is Neenah 110lb.

That finishes up this project! I hope you enjoyed it! I quite like using these “raindrops” as flowers! Stop by and check out the entire StampTember release and let me know your favorites! Have a great day and don’t forget to stay awesome!

Supply List:

* Affiliate links used at no cost to you. Thank you so much for your support!

Latest Instagram Posts

Simon Says Stamp Kindness Matters

Hello Crafty Friend, and happy StampTember! This is my second StampTember, and it’s always so exciting to see all the new products and all the new collaboration sets! Have you taken a look at the release yet?! There’s 150 Simon brand products released today, can you believe that?? Today’s card is featuring the new Leaves Wreath Stencil with some ink blending, so let’s get right into it!

I began this project by attaching the first stencil to a panel of Neenah Classic Crest 110lb cardstock, using masking tape. I used my usual rainbow line-up of Distress Oxide inks, Picked Raspberry, Spiced Marmalade, Mustard Seed, Twisted Citron and Broken China, for the ink blending. I removed the first stencil, and attached the second stencil for the detail.

For the second stencil, I smooshed a VersaMark ink pad over the entire stencil to get a good coating, and then heat embossed the detail of the leaves using Ranger Princess Gold Embossing Powder. Once done with the panel, I splattered it using Royal Talens Amsterdam Light Gold Acrylic Ink, and set it aside while I worked on the sentiment.

For the sentiment, I chose the SSS Kindness Matters die and I cut that twice from black cardstock and once from Gold Mirror cardstock. I made sure the letters stayed in one of the black die cuts, and popped them out of the second black die cut. This is because, I’m going to inlay the gold letters atop the black ones. I put foam tape on the back of the black die cut to ensure that the letters stayed in place and then adhered the second black die cut to it using glue. I then inlaid the gold letters using glue as well.

I adhered the sentiment to the center of the ink blended leaves using the foam tape that I had already put on the back. I then used PinkFresh Studios Gold Metallic Pearls to adhere to the dots that the stencil creates. I then adhered the panel to a black panel using foam tape, because I always love to use black on my cards. It just gives a lovely contrast in my opinion. Everything was then adhered to the card base, which is also Neenah 110lb.

That finishes this project! I hope you enjoyed it, and I hope it inspires you to get crafty! Let me know your favorites from the new StampTember release in the comments! Stay tuned for tomorrow’s blog party! Have a wonderful day and don’t forget to stay awesome!

Supply List:

* Affiliate links used at no cost to you. Thank you so much for your support!

Latest Instagram Posts

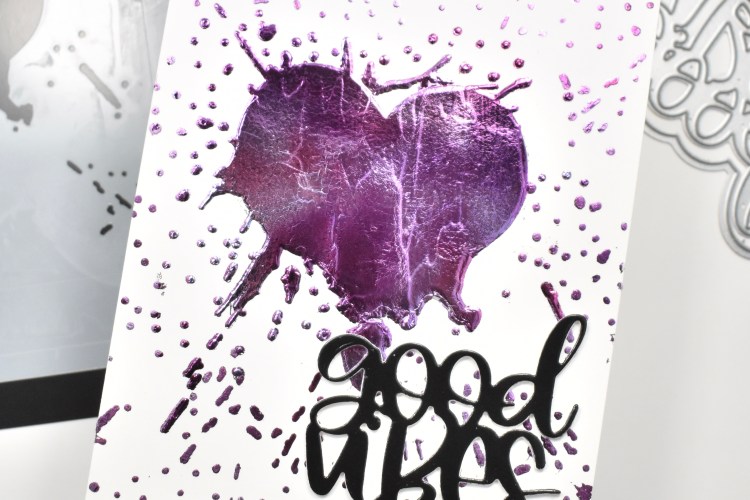
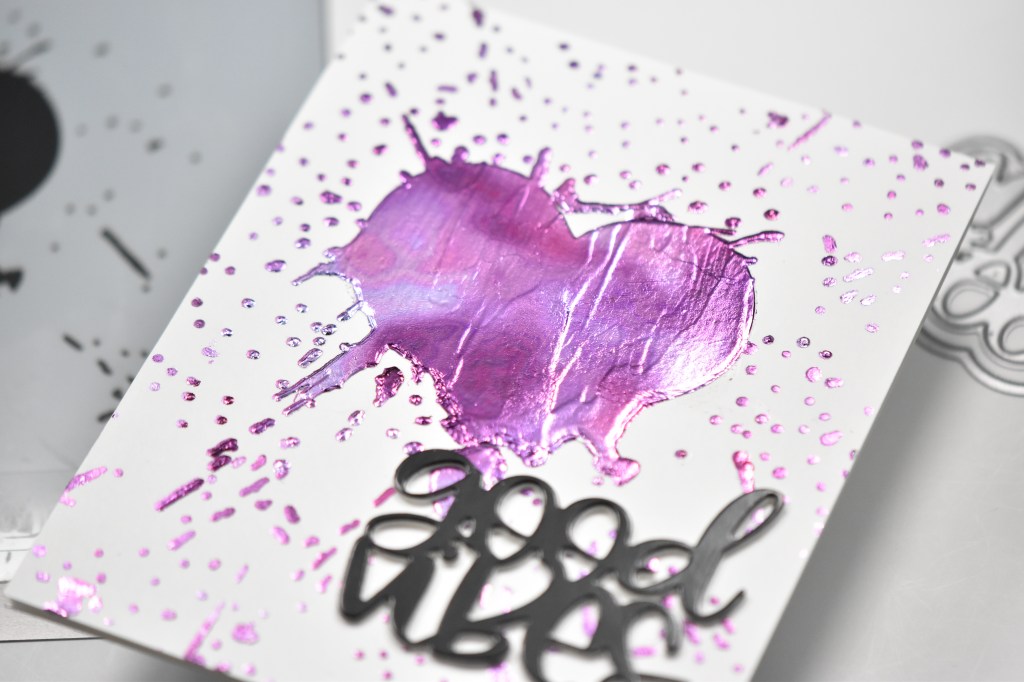
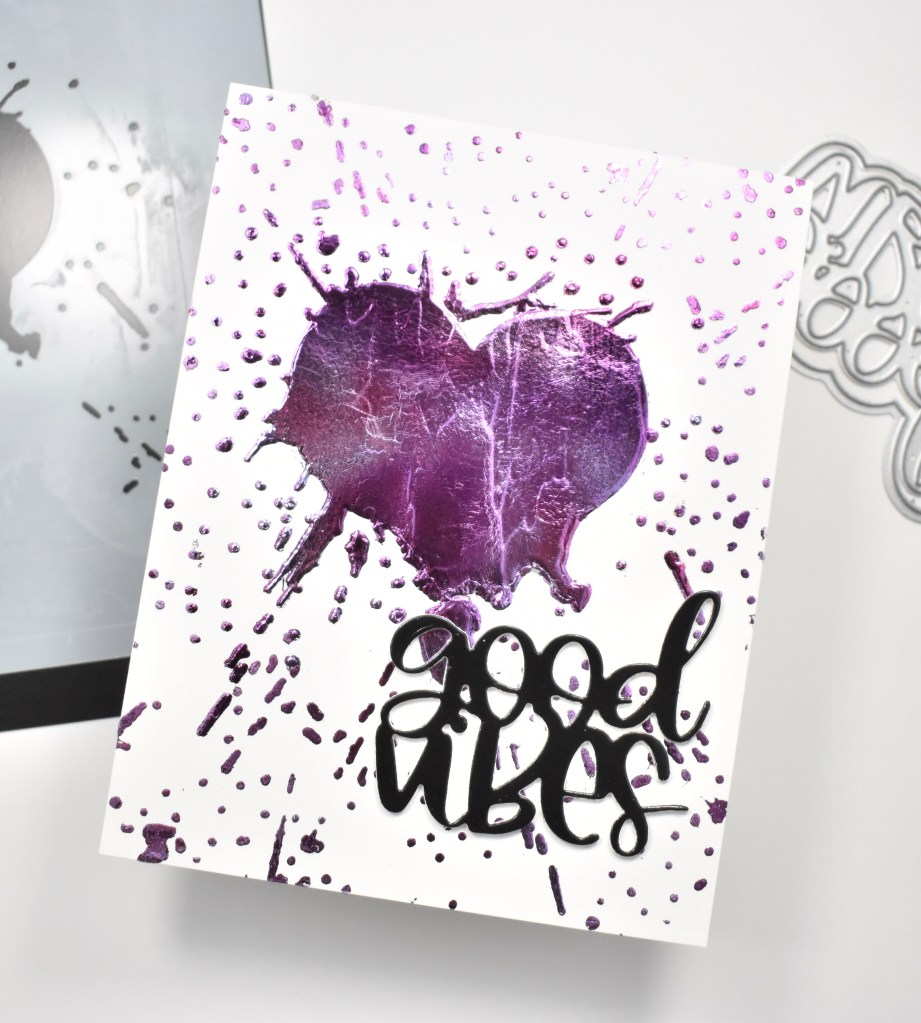
Erin Lee Creative Graffiti Heart Vibes

Hello and welcome back! I’m so glad that you stopped by! I’m still playing with my Erin Lee Creative goodies, and today’s card is featuring the Graffiti Heart Stencil along with the Good Vibes Layering Die. Let’s not waste any more time and get right to the deets!

To begin, I cut a panel of Neenah Classic Crest Solar White 110lb cardstock to an A2 size and adhered the Graffiti Heart Stencil to it using masking tape. I then used Deco Foil Transfer Gel Duo to give it a good coat, and then set it aside to dry.

Once the gel was dry, I applied a sheet of Deco Foil Amethyst Watercolor and ran it through the die cutting machine. This stencil does not cover a full card panel, so I carefully used the smaller splatter portions of the stencil to repeat the process.

I could really only repeat the process on two small sections of the panel at a time, so that’s what I did! I applied the gel, set it aside to dry and then added more foil. I don’t remember how many times this was repeated, but I wanted the whole panel covered.

A mistake that I made while making this card, was not putting a clean piece of paper over the previously foiled heart, so it picked up marks and such from my die cutting plate. With that being said, I had to re-apply gel to the heart and re-foil it. The second time around, I didn’t get it quite smooth enough, but I just went with it anyhoo! We’re just going to say that it adds to the graffiti character! I hate making mistakes, but it’s part of life, and now I know for the next time!

I die cut the Good Vibes sentiment once from Glossy Black cardstock and twice from Neenah 110lb and adhered those together using liquid glue. My panel was then adhered to the card base, which is also Neenah 110lb, using foam tape for dimension.

That finishes up this card! I hope you like it and I hope it inspires you to get crafty! This was my first time using the Deco Foil sheets, and I quite like this way of foiling! I’ll definitely be doing this more in the future! Thanks again for stopping by and don’t forget to stay awesome!

Supply List:

*Some affiliate links used at no cost to you. Thank you for your support!

Latest Instagram Posts

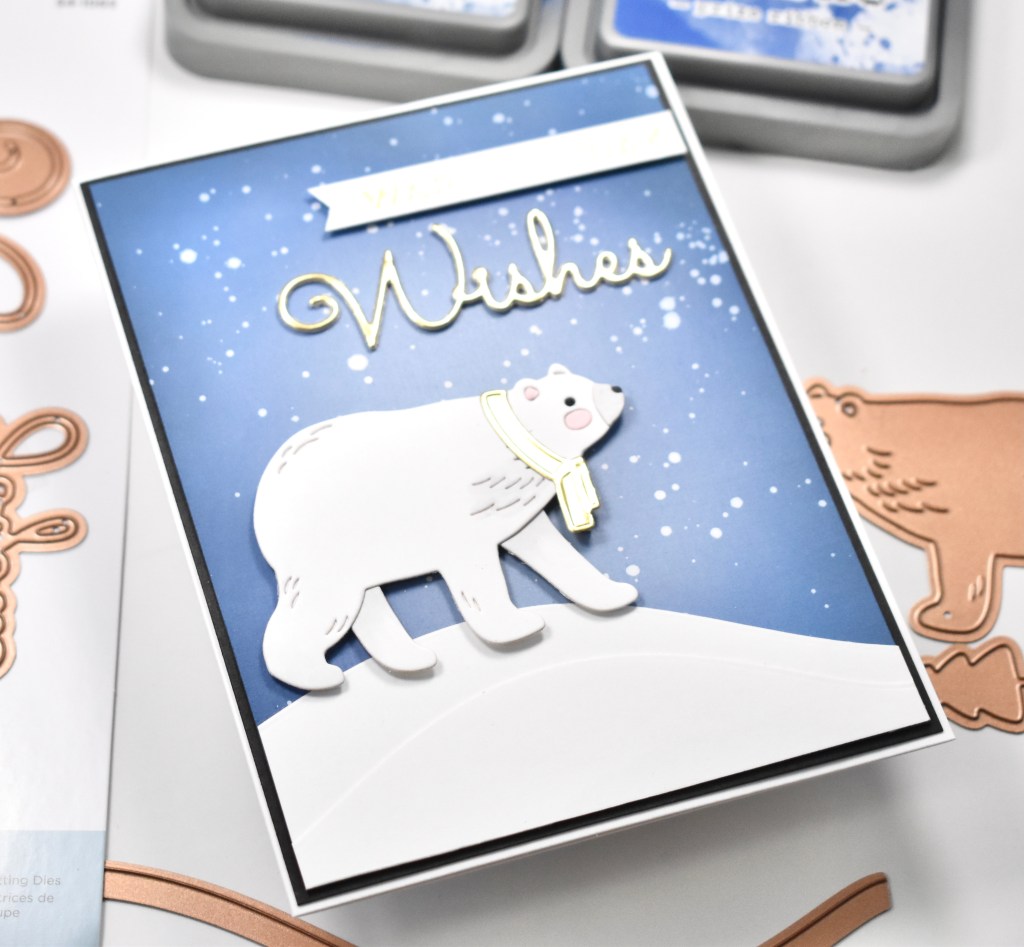
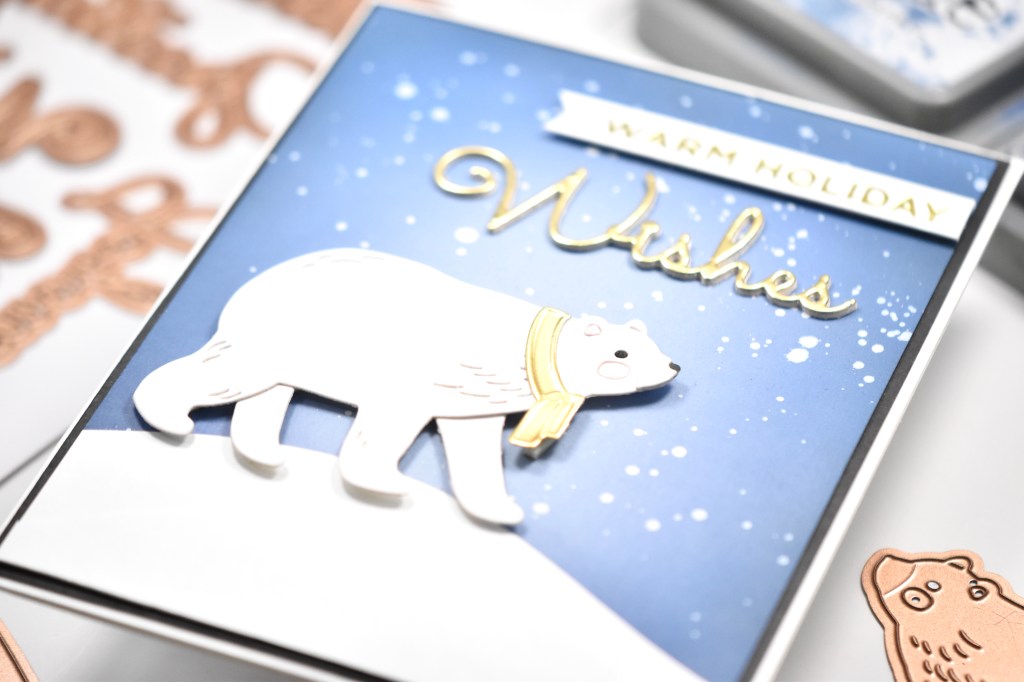
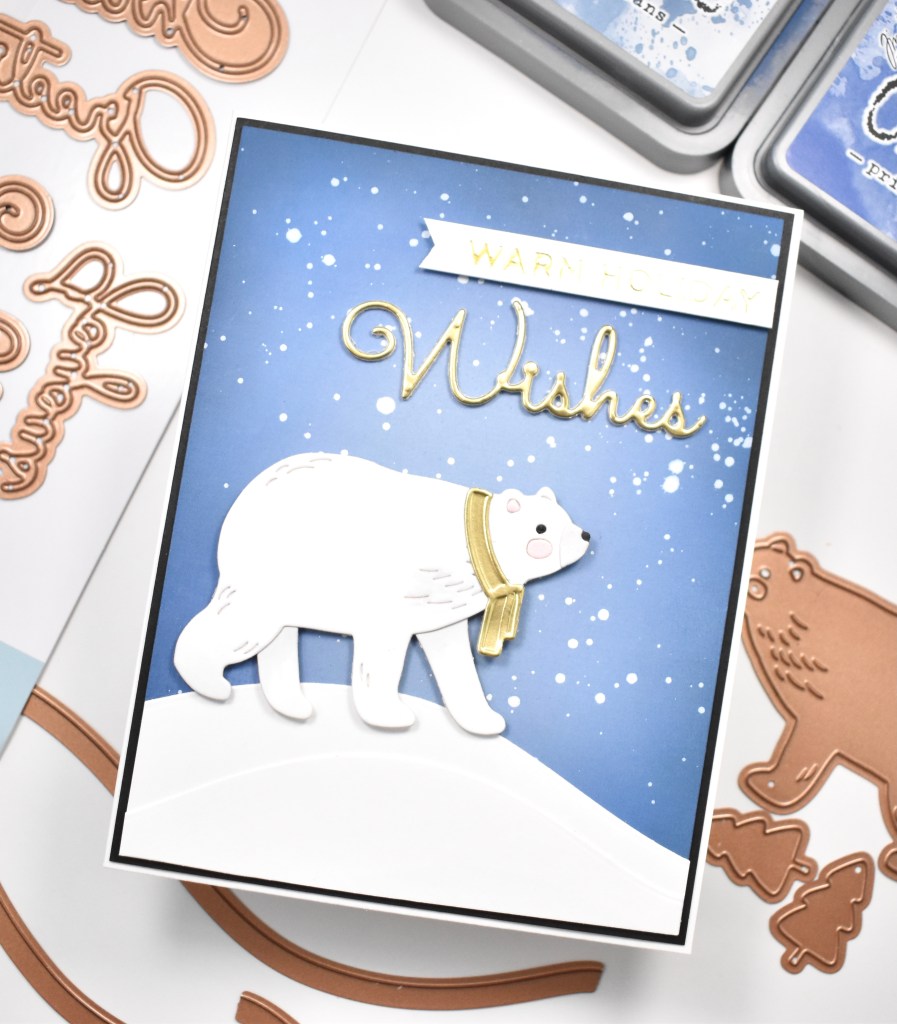
Spellbinders Chill Bear Warm Holiday Wishes

Hello and welcome back! Thanks so much for stopping by! I hope you’re having an awesome day! How cute is this polar bear?! I was so excited to play with the new Spellbinders Chill Bear dies and couldn’t wait to get my hands on them! So let’s just get right to it with the details of the card.

To begin, I pulled out a piece of light blue cardstock from my stash and trimmed it just smaller than an A2 card. I was going for a night sky type of effect, but I didn’t want it too dark. I ink blended around the edges of the blue panel using Distress Oxide Faded Jeans, Prize Ribbon and Black Soot, and then did some white splatter using Royal Talens Amsterdam Titanium White Acrylic Ink.

While the splatter was drying, I die cut the Chill Bear from Neenah Classic Crest 110lb cardstock. I also die cut just the face with pink cardstock from my stash, as well as, black cardstock so that I could inlay those tiny pieces. I cut two additional legs and adhered those using liquid glue. I also die cut the snout and used Copic Markers C00, N0 and 110 black to color it.

I used the Spellbinders Color Block Scenic Scape dies to cut some “hills” and adhered those to the bottom of the blue panel using glue. I put foam tape on the back of the bear and adhered it atop the hills. I used the Spellbinders Holiday Sentiments Series 2 foil plates to gold foil the sentiment strip. The foiled sentiment actually says, Warm Holiday Wishes, but I trimmed off the wishes part, because I wanted to use a different wishes.

The gold wishes sentiment is from the Spellbinders Christmas Mix & Match Sentiments. I die cut the Wishes once from Spellbinders Mirror Gold cardstock and twice from Neenah 110lb and glued them all together. I adhered the sentiment strip to the panel using foam tape and adhered the wishes portion underneath using glue. While I was die cutting sentiments, I decided to die cut the scarf in gold as well. The panel was then adhered to a black panel before adhering to the card base, which is also Neenah 110lb.

That does it! I thought this card turned out super cute! I hope you enjoyed it and I hope it inspires you to get crafty! Stop by the Spellbinders website to check out all the new Christmas and holiday goodies! Have a wonderful day and don’t forget to stay awesome!

Supply List:

*Affiliate links used at no cost to you. Thank you so much for your support!

Latest Instagram Posts

Reverse Confetti August Release Blog Hop

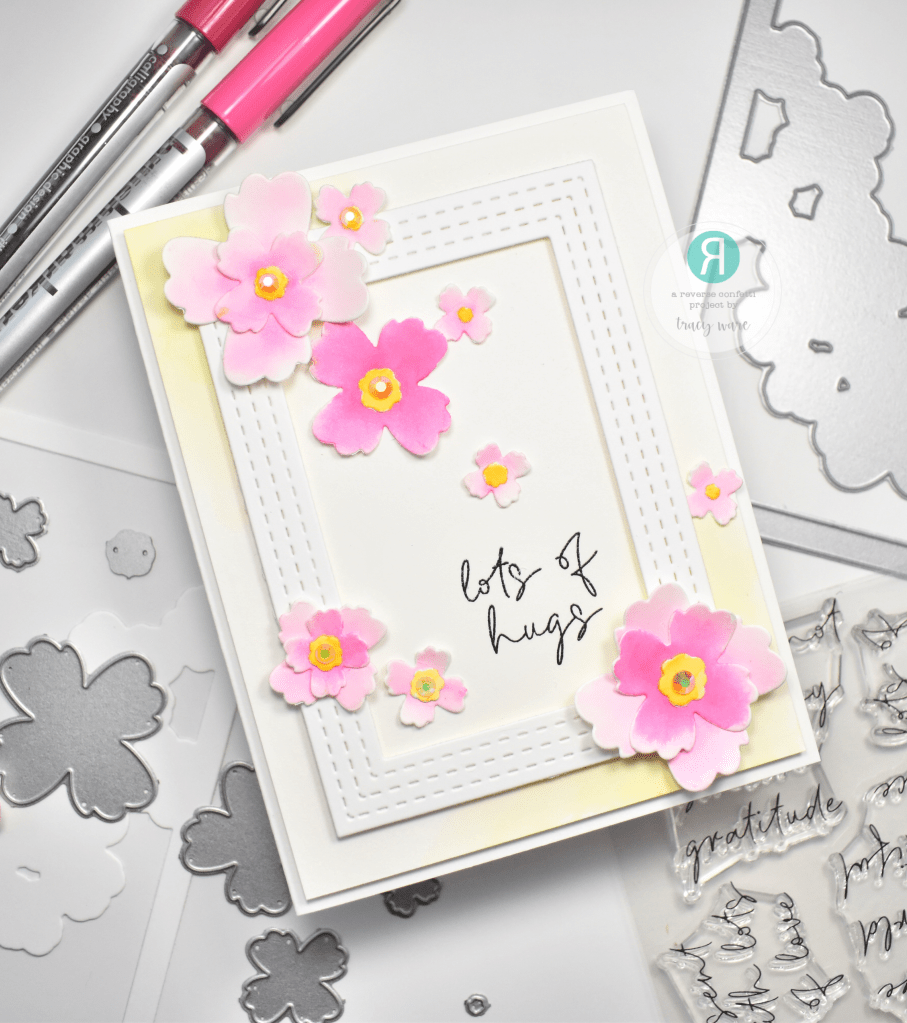
Hello, Hello and welcome back! Today’s the day! The new Reverse Confetti August mini release is live! To celebrate, we are having a blog hop with tons of inspiration from the team! You don’t want to miss it! The hop list will be posted below! I’ve got two cards for you today featuring the Floral Chain Cover Panel and the Scripty Sentiments stamp set! Let’s not waste any more time and jump right into the details!

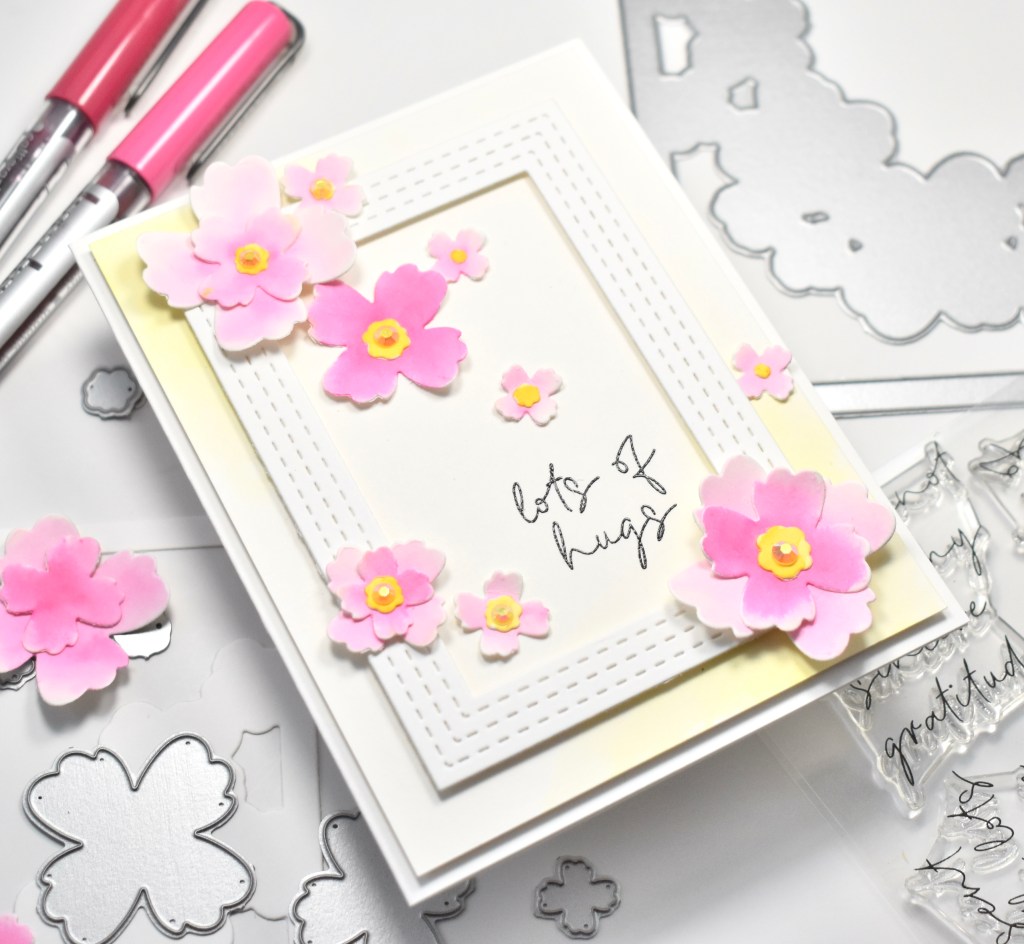
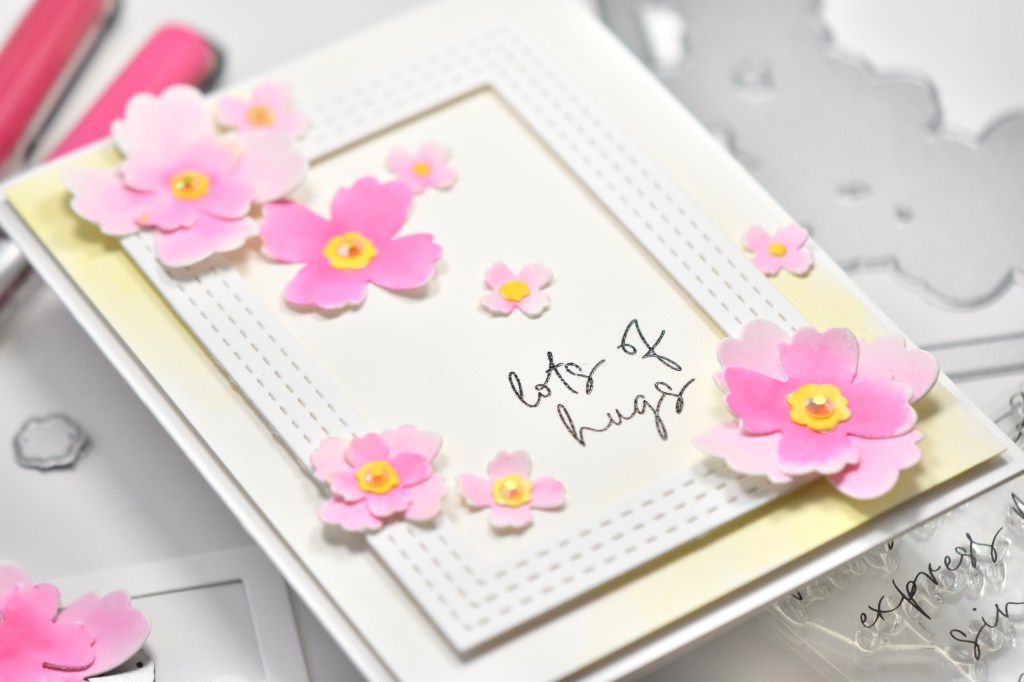
For both of these cards, I opted not to use the frame portion of the die, and just use the flowers. By not using the die as it was intended, it’s a great way to stretch your supplies. For the first card, I pulled out a sheet of watercolor paper and die cut several of the flowers, along with their centers. I also pulled out my Karin Brushmarkers and a water brush. I wet the flowers and dropped in the color using the markers, thinning out for lighter colors and adding more for darker colors. I set those aside to dry while I worked on the rest of the card.

I cut a panel of Neenah Classic Crest 110lb cardstock just smaller than an A2 card base and did some light ink blending on the corners using Distress Oxide Mustard Seed. I knew that I wanted to add a frame to the card, so I die cut the Reverse Confetti Stitched Note and Frames from Neenah 110lb and placed foam tape on the back of it.

I popped the ink blended panel in the Misti and stamped the sentiment from the new Scripty Sentiments set using VersaFine Onyx Black ink and heat embossed it using Ranger Clear Embossing Powder. I adhered the frame to the panel and began adhering the flowers together using liquid glue.

I adhered the flowers atop the frame and the card panel using glue as well, before attaching the panel to the card base using foam tape. To finish up, I added a few PinkFresh Studio Jewels to some of the flowers for some added bling!

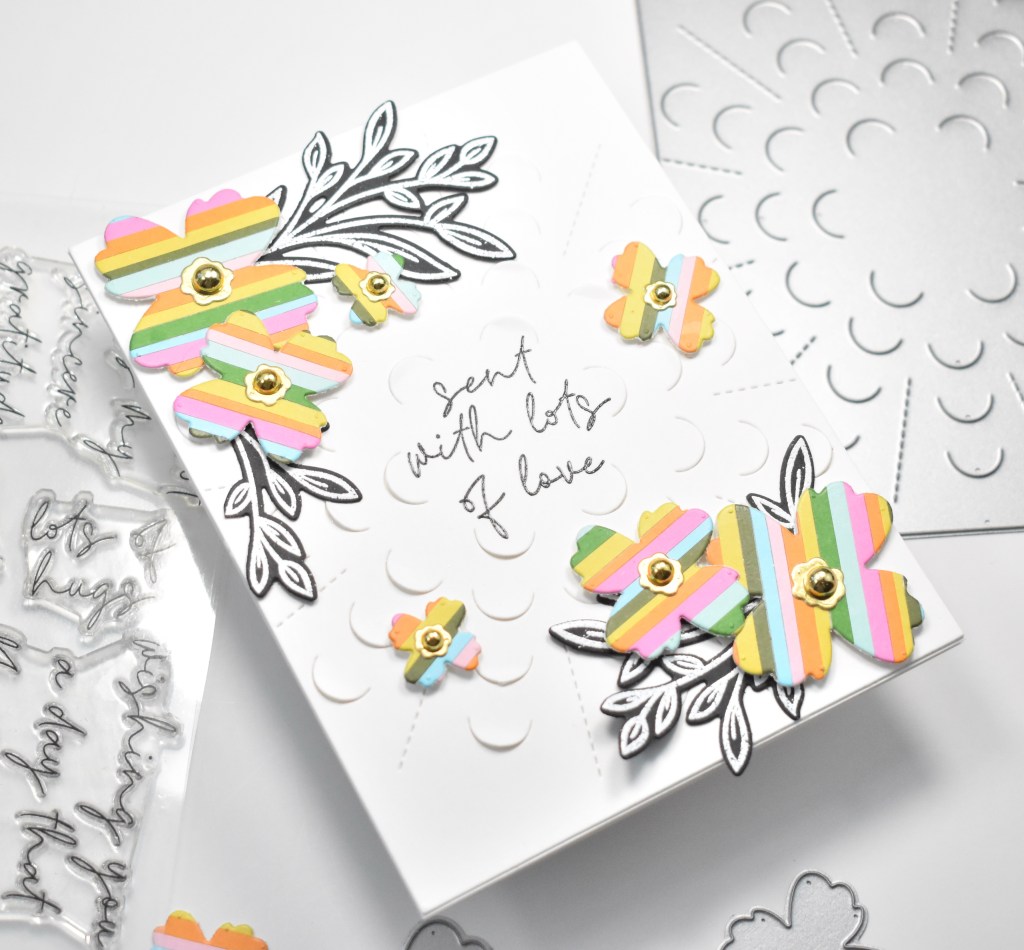
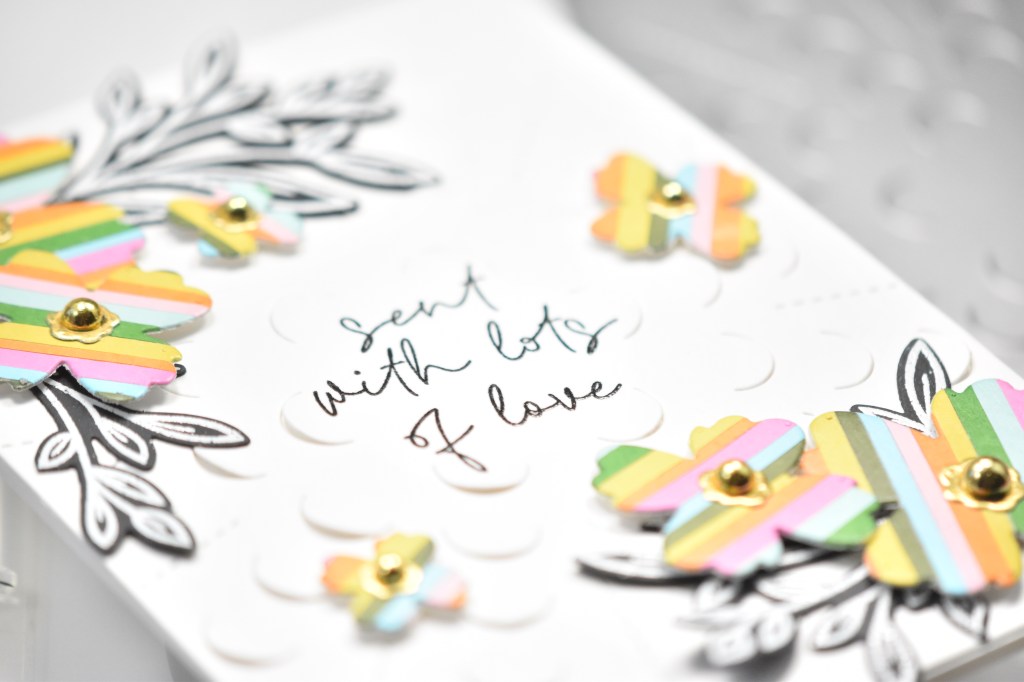
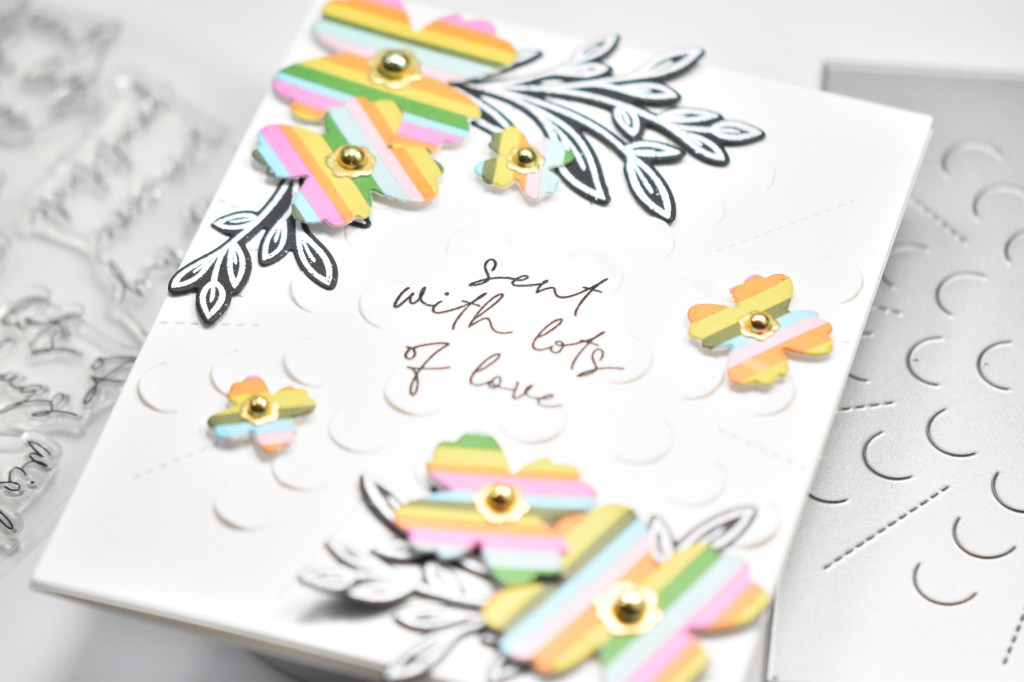
For my second card, I used the same floral dies to make striped flowers this time. I cut a bunch of strips in varying sizes using cardstock from The Stamp Market, and adhered those in rainbow order to a scrap of Neenah 80lb cardstock using double-sided tape. When all of that was complete, I die cut a few of the flowers using the striped panel.

I went ahead and die cut a panel using the Reverse Confetti Peekaboo Cover Panel and popped it in the Misti and stamped the sentiment from the Scripty Sentiments set, using the same black ink and embossing powder.

The card felt like it needed some leaves so I used one of the leaves from the Reverse Confetti Peony stamp set and stamped that using VersaMark Ink on black cardstock and heat embossed them using SSS Detail White Embossing Powder. I also used the coordinating die to cut those out.

I played with the placement of the leaves and flowers before adhering them down using a combination of foam tape and glue. Once that was done, I added some PinkFresh Studio Gold Metallic Pearls and popped up some of the peekaboo elements on the panel.

To finish up this card, I adhered it to a card base, which is Neenah 110lb, using liquid glue.

That does it for these two projects! I hope you enjoyed them, and I hope it inspires you to get crafty in your space! I had a lot of fun making these, mainly because I really enjoy flowers and leaves, but it’s such a versatile set with the frame! I hope you’ll stop by the Reverse Confetti website to check out the new release!

Don’t forget to hop along for tons of inspiration from the team using these new products! The hop list is below! Have a wonderful day and don’t forget to stay awesome!

Reverse Confetti Blog

Amy Kolling

Tricia Barber

Amy Rohl

Lisa Henke

Becky Roberts

Tracy Ware

Cheiron Brandon

Dilay Nacar

Jeanne Jachna

Heather Ruwe

Audrey Tokach

Jenny Colacicco

Candice Fisher

Rachel Alvarado

Amy Tsuruta

Joe Sysavath

Supply List:

*Affiliate links used at no cost to you. Thank you so much for your support!

Latest Instagram Posts

Reverse Confetti Countdown to Confetti Day Two

Hello Fetti Friends and welcome back! So glad that you stopped by for the Reverse Confetti Countdown to Confetti Day two! This is such a cute release with beautiful floral cover panels and a sweet sentiment stamp set! To celebrate the release, we are having a blog hop, so hop along and leave comments for your chance to win a gift certificate! More details and the hop list are below. Please note that new product links will not be active until the release goes live on August 8th. Let’s get into the details for today’s card.

This card is using the new Hello Daisy Cover Panel, and I opted to use it as it was intended. To begin the card, I pulled out a panel of Fluid Hot Press Watercolor Paper and some Distress Oxide Spray in Spun Sugar. I sprayed the ink on my glass mat and spritzed it with water and proceeded to do some ink smooshing. Once I was satisfied with how it looked, I set it aside to dry and began some die cutting.

I die cut the cover panel from Neenah Classic Crest 110lb cardstock and did some light ink blending using Distress Oxide inks Spun Sugar, Mustard Seed, Twisted Citron, Tumbled Glass and Dusty Concord. I went ahead and die cut a bunch of the included flowers using Sizzix cardstock in various colors and adhered those together using liquid glue.

Once the ink smooshed panel was dry, I popped it in the Misti and stamped the sentiment, which is from the new Scripty Sentiments Stamp Set, using VersaFine Onyx Black ink and heat embossed it using Ranger Clear Embossing Powder. I then adhered the frame to that using foam tape for dimension. I began adhering the colored flowers using a combination of foam tape and glue.

I adhered the flowers in their designated spaces on the cover panel, as well as, adding some around the panel and on the frame itself. To finish up, I adhered the panel to a Neenah 110lb card base, and added some PinkFresh Studio Jewels to some of the flowers.

That does it! I hope you enjoyed this project, and I hope it inspires you to get crafty! Don’t forget to hop along and leave comments by noon central time on August 7th for your chance to win a Reverse Confetti $15 gift certificate! The hop list is below! Happy hopping!

Reverse Confetti Blog

Amy Kolling

Tricia Barber

Lisa Henke

Tracy Ware

Dilay Nacar

Jeanne Jachna

Audrey Tokach

Candice Fisher

Rachel Alvarado

Amy Tsuruta

Joe Sysavath

Supply List:

*Affiliate links used at no cost to you. Thank you so much for your support!

Latest Instagram Posts

Spellbinders August Card Kit of the Month Inspiration

Hello Friends and welcome back! A new month brings new Club Kits from Spellbinders, and this month’s kits are amazing! I was super excited to play with the August Card Kit of the Month, Art School! This was such a fun kit to work with! If you’ve never tried a Spellbinders Card Kit, you receive everything that you need to create at least ten cards! There is cardstock, card bases, envelopes, patterned paper, a stamp set, a die set, stickers and tons of ephemera pieces to play with! So let’s jump into the details for the cards!

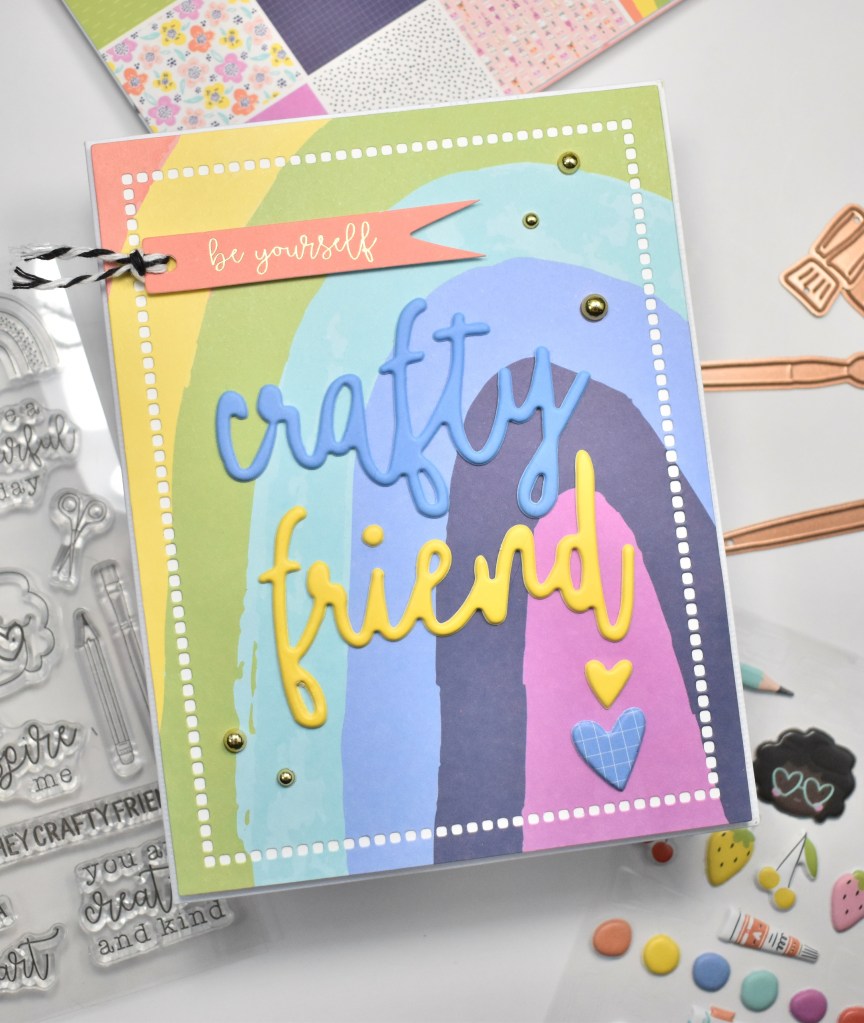
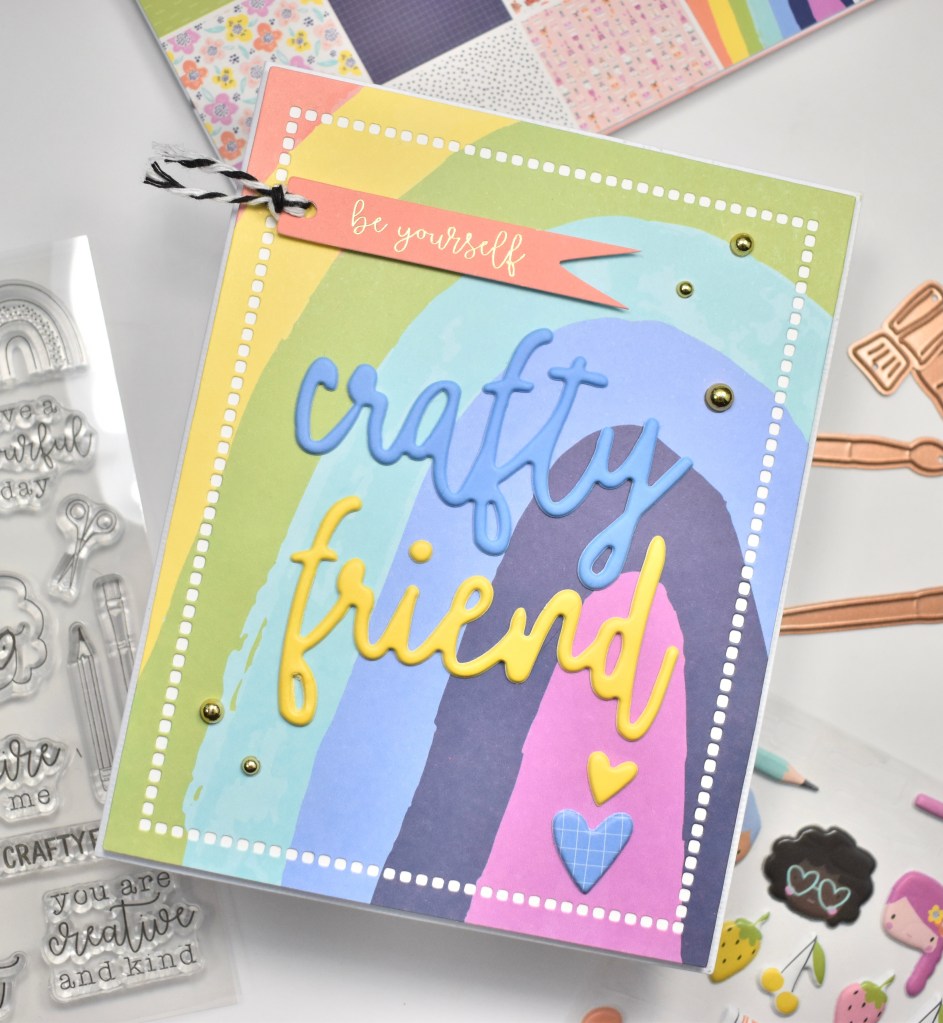
I created five cards using this month’s kit, and there’s so much left to create with! For my first card, Crafty Friend, I used the Spellbinders Hemstitch Rectangles die to trim a piece of rainbow patterned paper and mounted that atop a panel of Neenah Classic Crest 80lb cardstock for more stability. I added some black and white twine to one of the ephemera flags, which says, “be yourself,” and adhered that to the top left corner of the panel using foam tape.

I loved the word stickers included in the kit, so I opted for “Crafty Friend” for this card. I also added some of the dimensional hearts, along with some Spellbinders Gold Mix Color Essentials Gems for added interest.
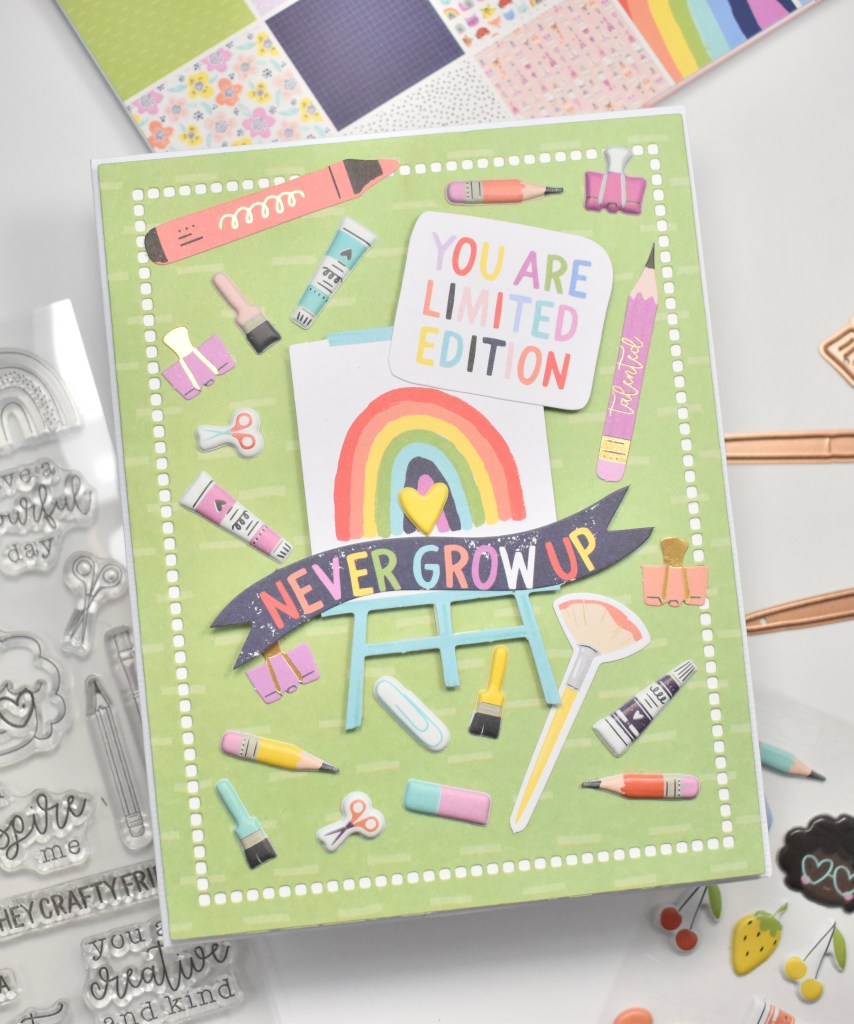
For my second card, I once again used the Hemstitch Rectangles to trim out a piece of the patterned paper. There are tons of adorable puffy stickers in this kit, and I wanted to create a card that used tons of the art related stickers. The focal point of this card ended up being a few of the ephemera pieces that I adhered using foam tape.
I positioned all of the art related stickers around the focal point, adding in some other art related ephemera that I had to adhere using glue. The panel was then adhered to the card base with foam tape.

For the third card, I opted for more ephemera pieces! I adhered these with a combination of glue and foam tape. I also die cut three flowers, using the included die cuts, with mirror gold cardstock, which is also included, and added those around the other flowers.

I felt the card needed something, so I cut a couple of strips from the mirror gold cardstock, and adhered those to two of the corners, just for some added interest, along with a few gems. The panel was then adhered to another color coordinating panel, and then to the card base.

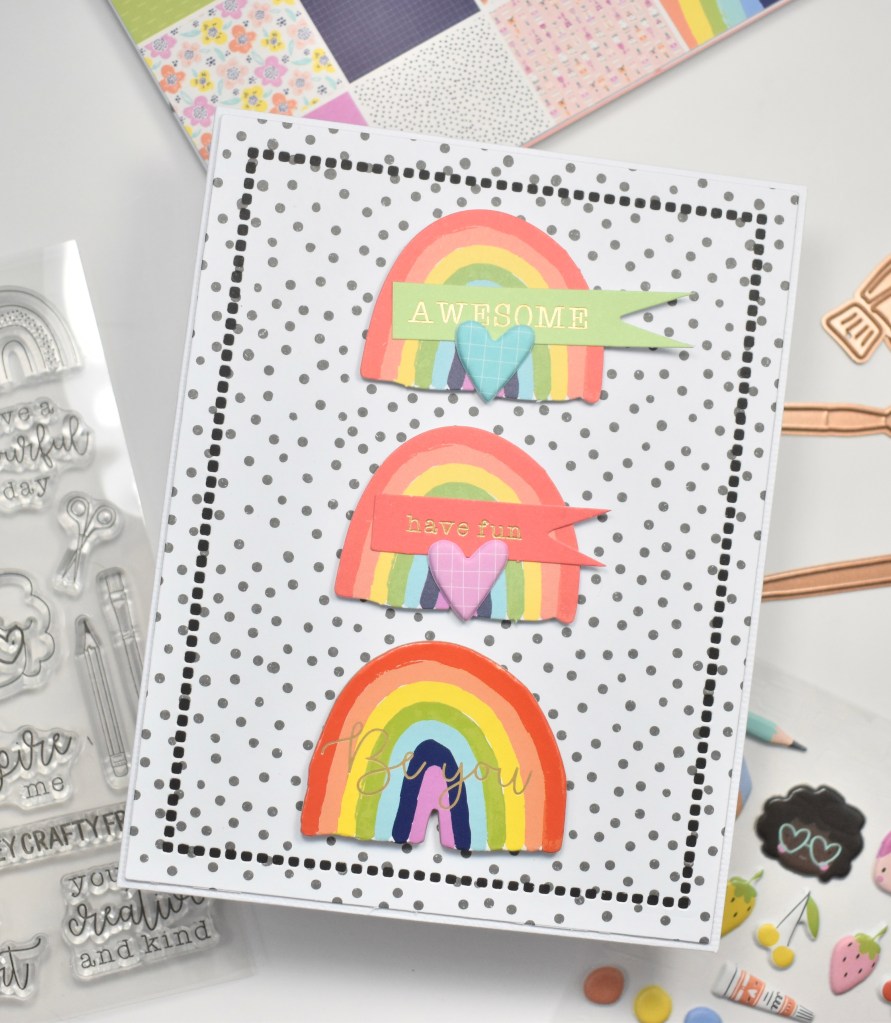
The fourth card was made using the Hemstitch Rectangles yet again to cut a piece of the patterned paper. This was then adhered to a black cardstock panel. The bottom rainbow is a chipboard sticker that I adhered using foam tape for dimension, along with the other two ephemera rainbows.

I pulled out two of the flags and adhered those to the rainbows using some of the puffy heart stickers. Everything was then added to the card base.

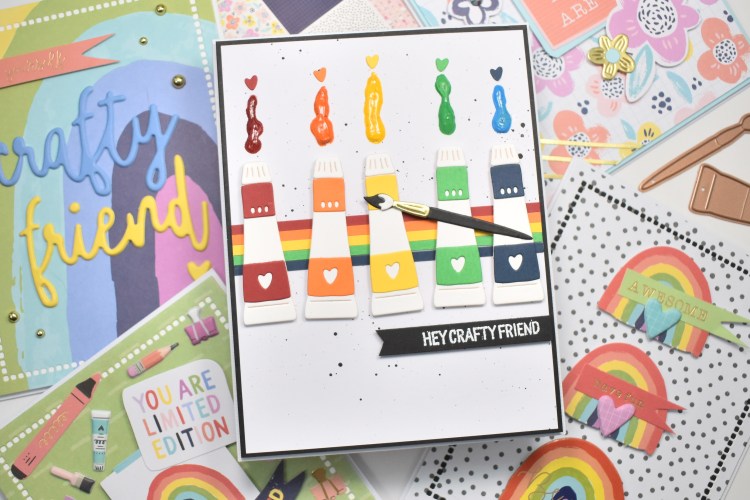
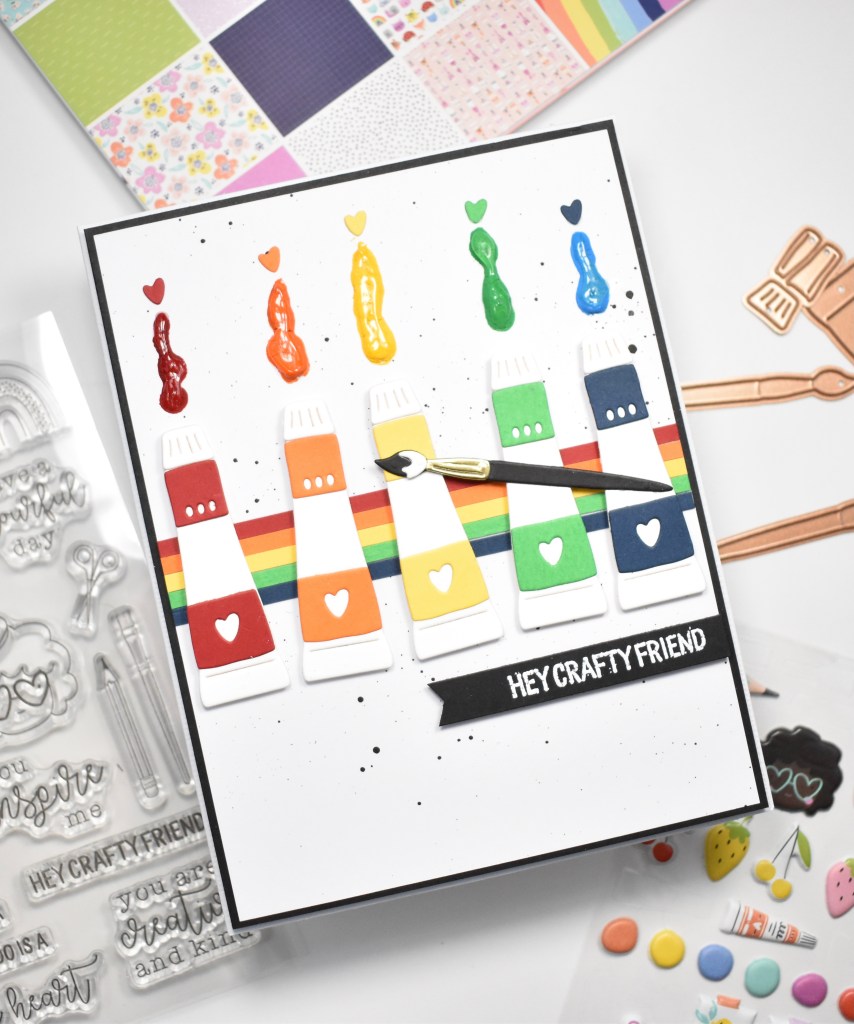
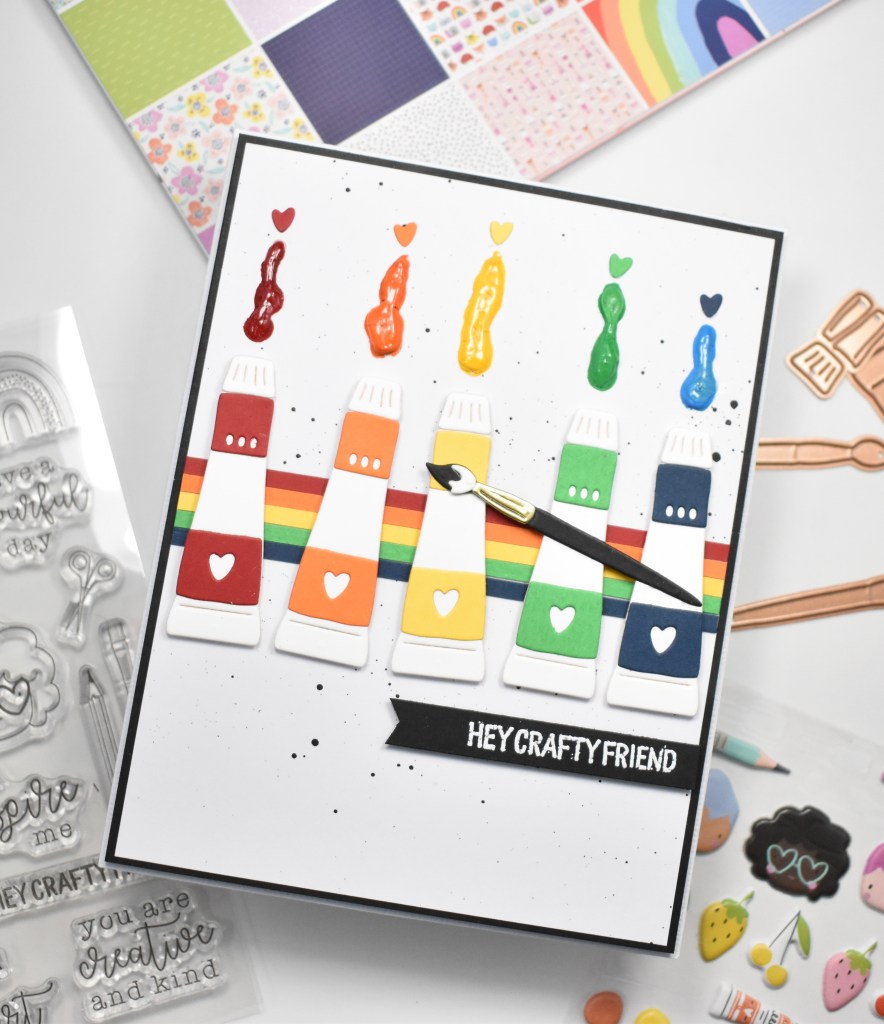
For the fifth and final card, I used the included die cuts along with the included cardstock to cut the paint tubes and paint brush. I cut strips of the colored cardstock and adhered those to a black splattered panel. I assembled the paint tubes and paint brush using liquid glue and adhered them to the panel using foam tape.

I used the included stamp set to stamp the sentiment on black cardstock using VersaMark Ink and heat embossed it using SSS Detail White Embossing Powder. I trimmed that out and adhered it the panel using foam tape as well. Everything was then adhered to a black cardstock panel before adhering to the card base.

But .. I felt the card still needed something, so I pulled out some gouache from my stash and squeezed some of the paint onto the card with it’s coordinating color. Once that dried, I did add some Glossy Accents on top of the paint to give it a shiny finish.

That finishes my projects using the Spellbinders August Card Kit of the Month! I had a lot of fun making these, and as you can see, some of these cards come together so quickly because everything is already cut for you! Plus, I still have a ton of stuff left over to keep making cards using this kit! Stop by the Spellbinders website to check out all of the Club Kits! There are so many to choose from and you an combine Clubs for better pricing!

Thanks so much for stopping by and don’t forget to stay awesome!

Supply List:

*Affiliate links used at no cost to you. Thank you so much for your support!

Latest Instagram Posts