Simon Says Stamp Slay Every Day

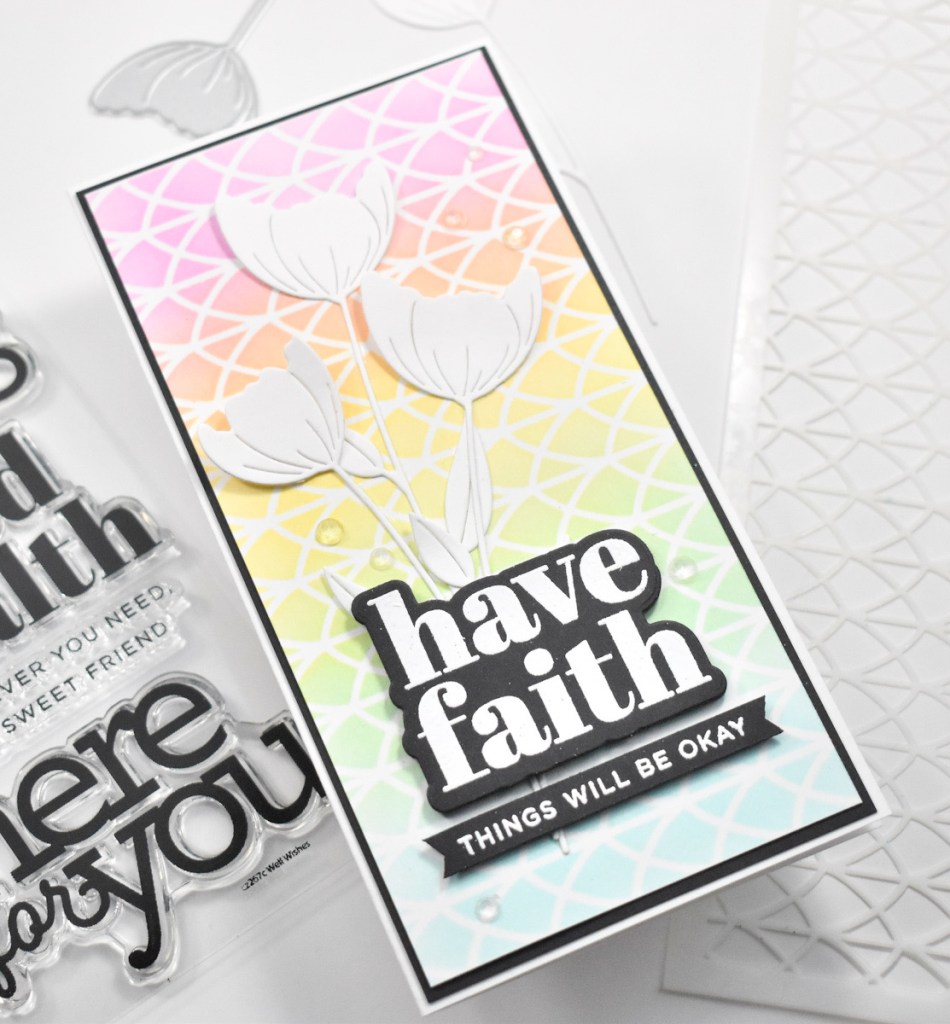
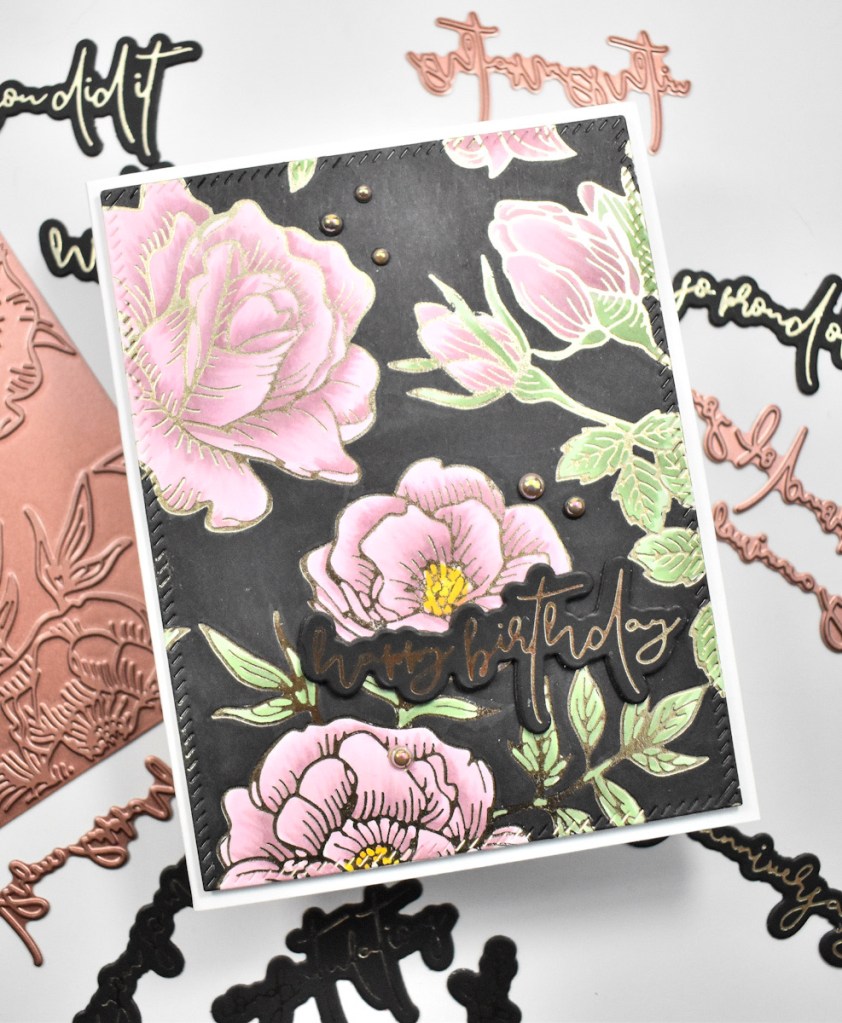
Hello and welcome back! I’m so glad you stopped by! Today’s project is featuring the new Blossom Vine from Simon’s latest release, Dream Big. I always love floral die cuts and this one was no exception! Let’s get into the details, shall we?

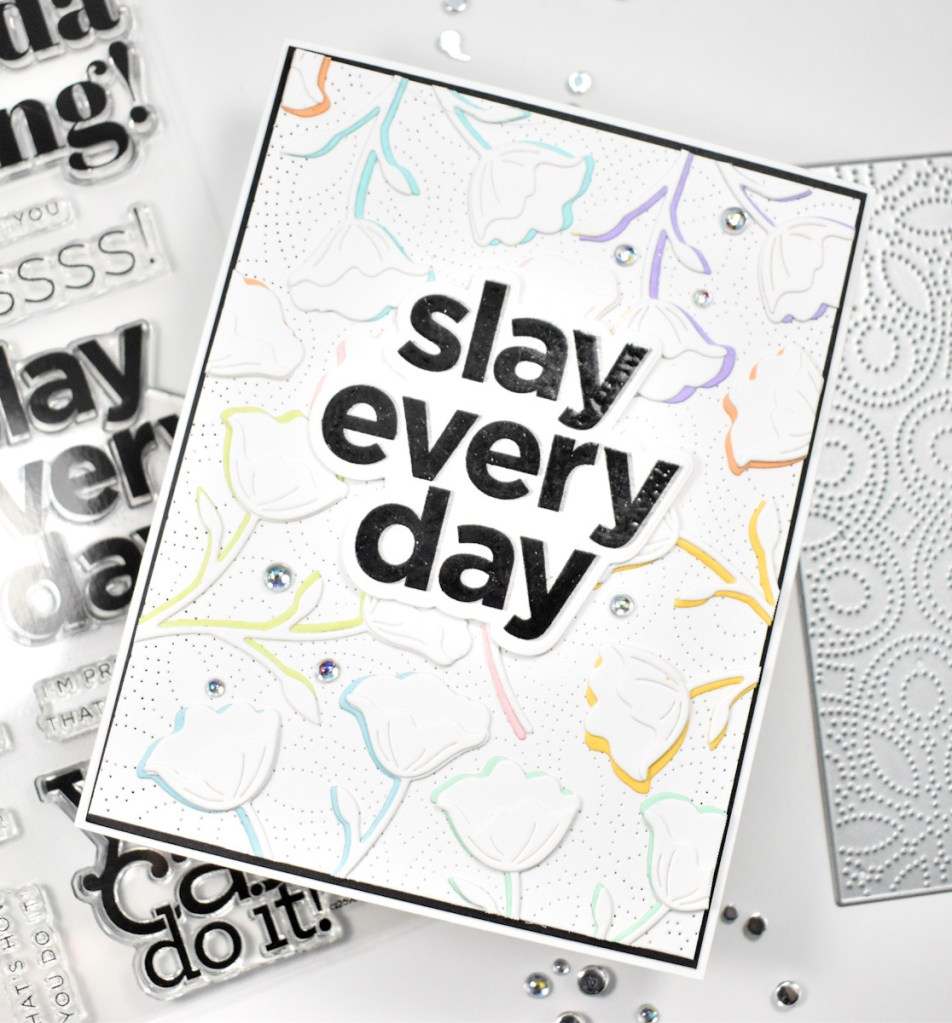
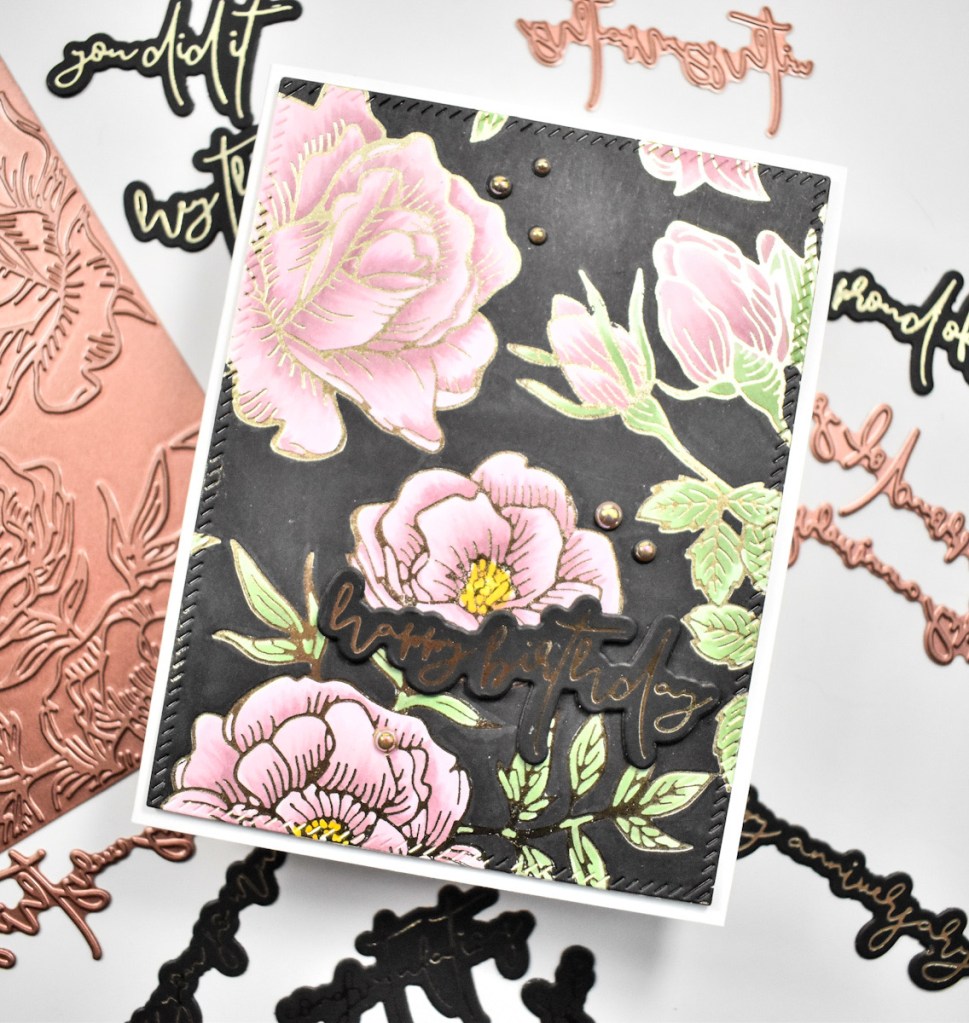
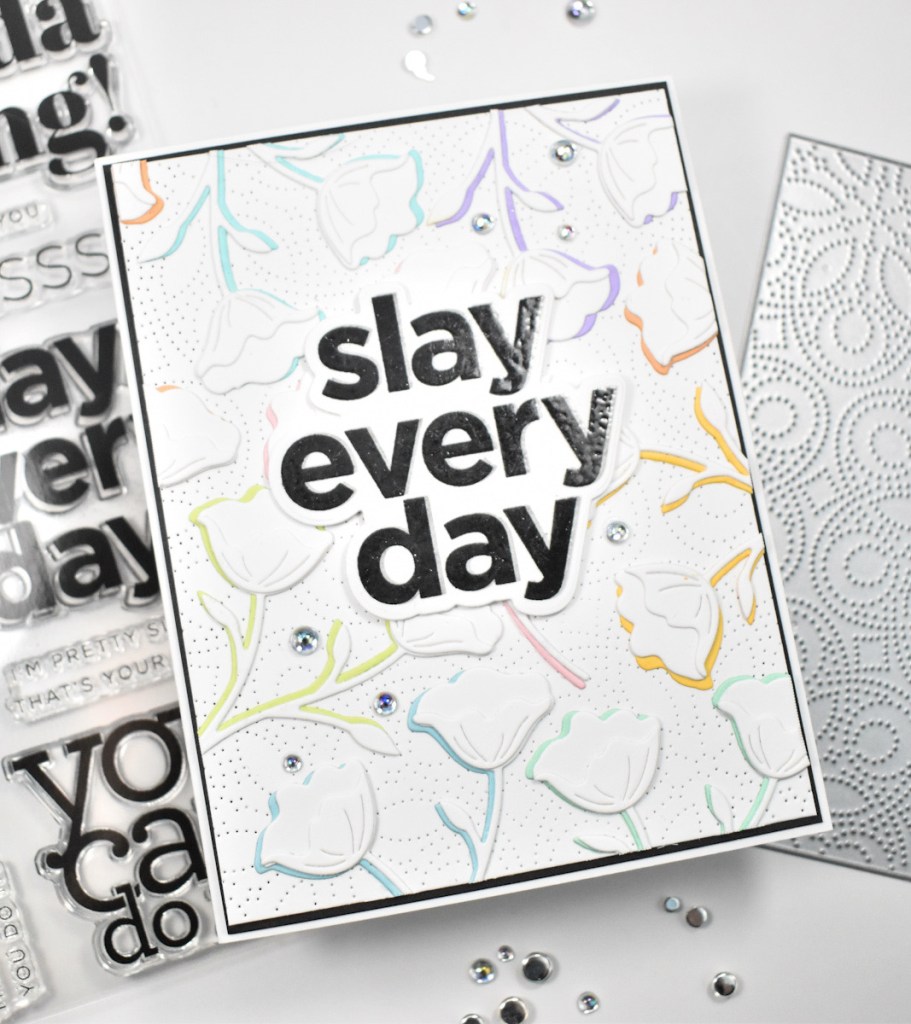
To start, I die cut the SSS Blossom Vine a bunch of times from Neenah Classic Crest 110lb cardstock. A bunch meaning eight times maybe. Then I pulled out an assortment of rainbow colored cardstock and die cut the floral from all of those as well. Yes, lots of die cutting! But, I do love making my own backgrounds using die cuts.

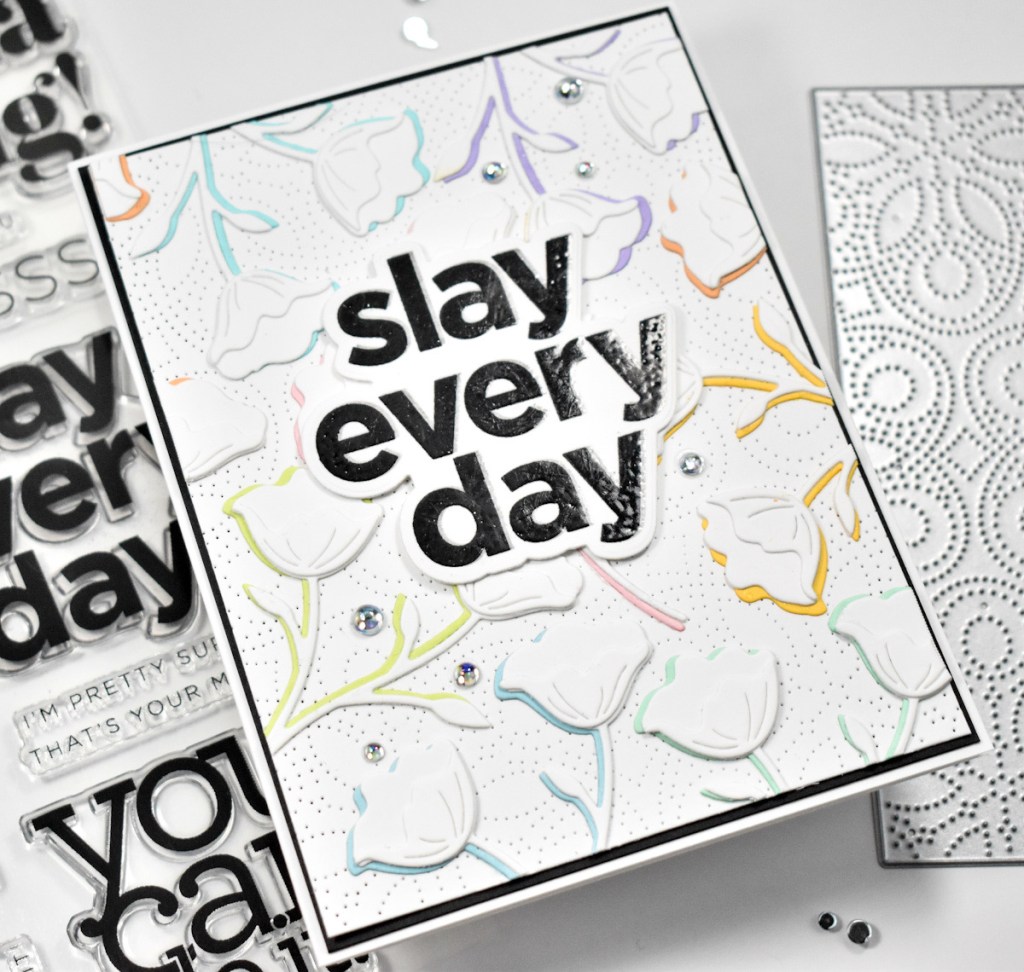
Once all of those were cut, I adhered them together using liquid glue, offsetting them just slightly so that you could see the colors beneath. I used the SSS Detail Bohemian Plate to cut a background for the flowers and glued the flowers atop that trimming off the excess.

I used the Slay Every Day sentiment from the SSS Yay You set and stamped that using VersaFine Onyx Black ink and heat embossed it using Ranger Clear Embossing Powder. I did heat set it a couple of times to give it a smoother finish. I then used the coordinating die to trim it out, and cut an extra to glue to it for more stability. The sentiment was then glued to the floral panel.

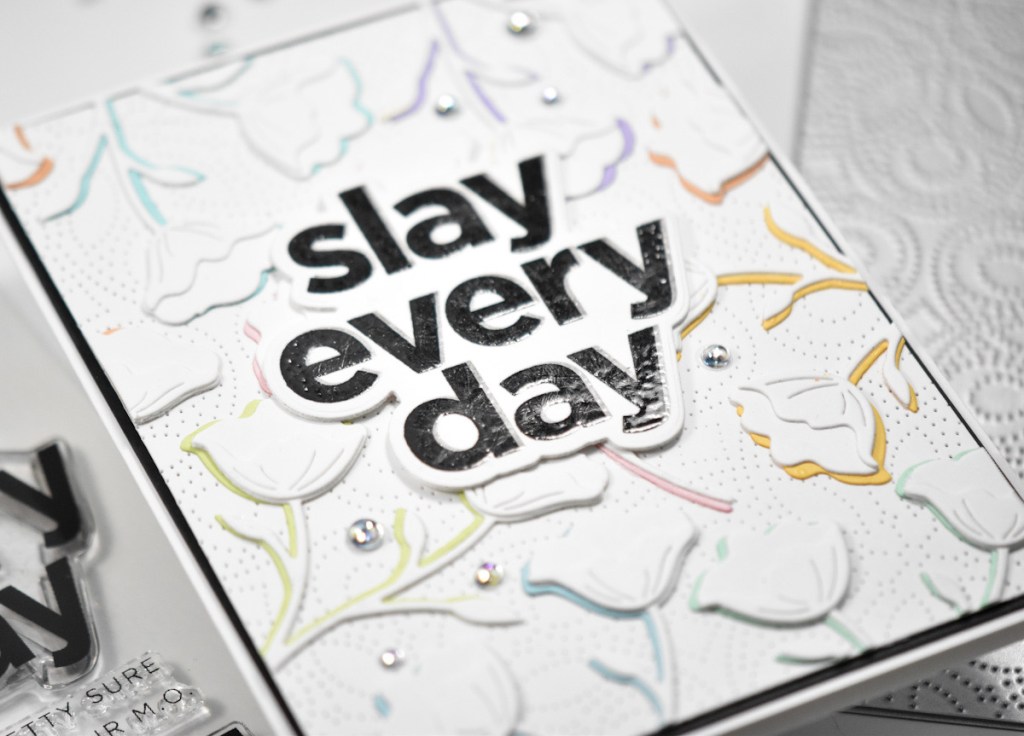
That panel was then adhered to a black panel using SSS Dot Tape Runner before being adhered to the card base. I added some PFS Iridescent Clear Drops for a little shine and sparkle to finish up.

That does it for this one! I hope you enjoyed it and I hope it inspires you to get crafty making your own backgrounds! Don’t forget to check out the entire Dream Big release over on Simon’s website. Have a wonderful day and stay awesome!

Supply List:

* Affiliate links used at no cost to you. Thanks so much for your support!

Latest Posts
Latest Instagram Posts

Simon Says Stamp Sunshine Crocus

Hello Friends, and welcome back! The new Simon release, Let’s Chill, is live and boy is it a fun one! Today’s card is featuring the Hello Sunshine die in a repeat pattern. Let’s go through the details, shall we?

I began this project by die cutting the SSS Hello Sunshine twice from four different shades of yellow and orange. I did twice because I wasn’t sure how many it was going to take. I cut a panel of Neenah Classic Crest 110lb cardstock using the SSS Stitched Whirl Background, and began adhering the sentiment die cuts using liquid glue. I began at the top and worked my way down the panel.

Once all of the sentiments were adhered, I trimmed the panel down to the size of the sentiments. Moving along, I used the SSS Etched Crocus Stems to cut a few flowers from Neenah 110lb, and those were then glued directly atop the sentiments.

I splattered my card base using Royal Talens Light Gold Acrylic Ink and then adhered the panel using foam tape for dimension. No card is complete without bling, so I added a few pearls to finish up this project.

That does it! Simple card, but I love stretching my supplies and creating backgrounds from stand-alone sentiment dies. I hope you enjoyed it and I hope you’ll stop by and take a look at the entire Let’s Chill release. Have a wonderful day and don’t forget to stay awesome!

Supply List:

* Affiliate links used at no cost to you. Thanks so much for your support!

Latest Posts
Latest Instagram Posts

PinkFresh Studio Rainbow Floral Birthday

Hello Friends! I hope you’re having a wonderful day! Thanks so much for stopping by! I made today’s card a bit ago, but just haven’t gotten around to writing or posting it. To be honest, I’ve been kind of lazy and lacking in motivation. It happens to all of us .. I think! Anyhoo, this card is featuring the PFS Rainbow Floral Washi, and I just have to say that I’m in love with it! Let’s go through the deets!

I began by adhering the PFS Rainbow Floral Washi to a panel of Neenah Classic Crest 110lb cardstock and using the coordinating die to trim out all of the pieces. I actually made a few panels so that I had lots of pieces to work with.

The background texture of the card panel was made using the PFS Diagonal Stitched Plaid. I love using these types of plates on white, because it just adds the slightest bit of detail and interest without distracting from the focal point of the card.

I used the PFS Stitched Scallop Circle dies to cut two of those. One of the smaller and one of the larger circles. I glued the circles together and adhered them to the panel using foam tape. I then arranged some of the rainbow pieces around the circles using a combination of liquid glue and foam tape for support.

It needed some extra leaves, of course, so I cut a few using the PFS Leafy Branch die and tucked those under the edges securing with glue. I had previously made the sentiment using the PFS Perfect Sentiments Hot Foil Plate, along with Spellbinders Champagne foil. This sentiment is stacked three high for additional support. I glued the sentiment in the center of the smaller circle and added a few PFS Gold Metallic Pearls for good measure. Everything was then, of course, adhered to the card base.

These washi tapes make it so easy to create beautiful cards with minimal effort! If you haven’t tried them, I highly encourage you to do so. Thanks again for stopping by. Don’t forget to stay your awesome, wonderful self!

Supply List:

* Affiliate links used at no cost to you. Thanks so much for your support!

Latest Posts
Latest Instagram Posts

Simon Says Stamp Mother’s Day Peony

Hello Crafty Lovelies and thanks for stopping by! Have you checked out the newest Simon release, Yay You? What are your favorites? If you know me, I always love florals and sentiments! So, today I’m playing with the Sketched Peony Blossom Foil and Cut set. Let go through the details, shall we?

I ended up making this card for my Mom for Mother’s Day, and of course, she loved it! I began by foiling the Sketched Peony Blossom on a panel of hot press watercolor paper using Spellbinders Champagne Hot Foil. I always end up foiling a few, but only used one in this case, so I have some to use on another project in the future. While I had the machine hot, I also used the PinkFresh Studio Solid Hot Foil Plate to foil the negative of the flower as well.

Once the foiling was complete, I used Zig Markers in 025, 032 and 040 to do some watercoloring. I also used Copic Markers in Y00 and Y08 to add some yellow to the center of the flower. I then used the included, coordinating die to trim the flower out along with the solid foiled flower as well. Those were then adhered together, slightly off center, using liquid glue.

For the background, I used the SSS Stitched Whirl Background and trimmed that from a panel of Neenah Classic Crest 110lb cardstock. I also used the SSS Olive Leaves to cut a couple of those from Neenah 110lb, as well as some gold cardstock.

I went ahead and worked on the sentiment and use the Happy Mother’s Day sentiment, which is from the SSS Better With Mom set. I stamped the sentiment using VersaMark Ink on a scrap of Neenah 110lb and heat embossed it using Ranger Princess Gold Embossing Powder. When that was complete, I used the coordinating die to trim it out.

To assemble the card, I adhered the whirl background to the card base using SSS Dot Tape Runner and glued the leaves to the panel, while adhering the flower using foam tape for dimension. The sentiment was also adhered with foam tape. And, of course there has to be bling, so I used some PinkFresh Studio Gold Metallic Pearls for that.

That finishes this one up! I hope you enjoyed it and I hope it inspires you to get crafty! Have a wonderful day and don’t forget to stay awesome!

Supply List:

* Some affiliate links used at no cost to you. Thanks so much for your support!

Latest Posts
Latest Instagram Posts

Simon Says Stamp Good Day Peony Blossom

Hello Friends and thanks for stopping by! The newest Simon Says Stamp release, Yay You, is a gorgeous one, and I’m playing with the new Sketched Peony Blossom Foil and Cut set! Have you jumped on the foiling band wagon yet? I did a while back, and I just love it! Let’s run through the details for today’s card, shall we?

To begin, I foiled the Sketched Peony Blossom several times on some Neenah Classic Crest 110lb cardstock using Spellbinders Rose Gold Foil and colored them using Copic Markers R00, R11, R20 and E02 and a Multiliner to add the black detail to the centers of the flowers. While I was foiling, I went ahead and used the PinkFresh Studio Solid Hot Foil Plate to foil the negative pieces as well. Once all the peonies were done, I used the included, coordinating die to trim them all out.

I used the SSS Privet Branch and cut some of those from blue cardstock, as well as some vellum. The background needed some interest so I opted for the PinkFresh Studio Simply Diamonds and adhered that directly to the card base using liquid glue.

To assemble the card, I glued the solid foiled peonies to the colored peonies. I adhered the leaves to the card base using glue, and adhered the peonies atop those using foam tape for dimension.

The SSS Sentiment Strip was glued directly to the flower and I added some pearls to finish it up.

That does it for this card! I hope you enjoyed it, and I hope it inspires you to get crafty in your space! Don’t forget to stop by and check out the entire Yay You release. Have a wonderful day and stay awesome!

Supply List:

* Affiliate links used at no cost to you. Thanks so much for your support!

Latest Posts
Latest Instagram Posts

Simon Says Stamp Have Faith

Hello Crafty Friends and thanks for joining me! Simon’s latest release Yay You is live and it has so many awesome goodies! Today’s card is featuring the new Arches stencil, so let’s run through the details!

To begin, I secured the Arches stencil to a panel of Neenah Classic Crest 110lb cardstock and began ink blending using SSS Pawsitively Saturated Inks in Carnation, Lemonade and Seafoam. Once the ink blending was done, I trimmed the panel down to a mini slimline size and adhered it to a black panel using SSS Dot Tape Runner.

I used the SSS Well Wishes Stamp set for the sentiment and stamped the have faith sentiment using VersaMark Ink on black cardstock and heat set that using SSS Detail White Embossing Powder. I also stamped the sub-sentiment using the same. I used the coordinating die to trim out the main sentiment and a paper trimmer to trim the smaller sentiment.

I die cut the SSS Etched Crocus Stem three times from Neenah 110lb cardstock and adhered those to the ink blended panel using liquid glue.

I adhered the sentiments using foam tape for dimension, and added a few jewels for some bling. Everything was then adhered to the card base using SSS Dot Tape Runner to finish up.

That does it for this project! It was super simple, but I always love rainbow colors on a card. Thanks again for stopping by and don’t forget to check out the entire Yay You release! Have a wonderful day and stay awesome!

Supply List:

* Affiliate links used at no cost to you. Thanks so much for your support!

Latest Posts
Latest Instagram Posts

Simon Says Stamp Floral Thank You

Hello Friends and thanks so much for stopping by! I’m still playing with goodies from Simon’s latest release, Happy and Joyful. There are so many beautiful florals in this release, and today’s card is featuring the new Lisianthus stamp set. Let’s run through the details for this card!

I began by stamping the floral image on a panel of Neenah Classic Crest 110lb cardstock using VersaMark Ink and then heat set it using SSS Detail White Embossing Powder.

I was going for an emboss resist technique so I used PinkFresh Studio inks in Soft Lilac and Lavender, as well as Simon’s Aspen Pawsitively Saturated Ink for the ink blending on this panel. When the ink blending was complete, I used the new SSS A2 Marquee die set to trim it down. I cut the marquee an additional two times and adhered all of those together using liquid glue for added dimension without the bulk. This is such a cool die, and I just love the detail that it adds! I also added some white splatter to the panel using Royal Talens Titanium White Acrylic Ink before moving on.

For the sentiment, I used the SSS Clean Line Gratitude stamp and die set. I stamped thanks using VersaFine Onyx Black ink and heat set that using Ranger Clear Embossing Powder. I trimmed it out using the coordinating die and placed foam tape on the back. I searched my SSS Sentiment Strips to find a sub-sentiment that worked well and added foam tape to that as well.

The sentiments were added to the panel along with some pearl accents before being added to the card base using SSS Dot Tape Runner.

Super simple card, but I love the soft airy feeling to it. I hope you enjoyed it, and I hope it inspires you to get crafty! Don’t forget to check out the entire Happy and Joyful release, and let me know your favorites! Have a wonderful stay and stay awesome!

Supply List:

* Affiliate links used at no cost to you. Thanks so much for your support!

Latest Posts
Latest Instagram Posts

Sketched Floral Hello

Hello Friends and welcome back! I’ve been playing with goodies from the latest Erin Lee Creative release, and made another card using the new Sketched Floral Foil Cover Plate. So let’s run through the details!

All too often I get caught up in the thought that everything needs to be colored. Guess what? It doesn’t! I quite like this white and gold simplistic design on this one! Anyhoo, I began this project by embossing the Sketched Floral Foil Cover Plate onto a panel of Neenah Classic Crest 110lb cardstock. That provided just a tad of underlying detail.

I foiled the same plate using Spellbinders Gold Hot Foil and fussy cut those images and placed foam tape on the back. When adhering them to the embossed panel, I offset them just the slightest little bit so that you could still see the embossed details. I also added some gold splatter using Royal Talens Light Gold Acrylic Ink for some added interest.

For the sentiment, I cut the Hello Word Die once from gold cardstock and four more times from Neenah 110lb and adhered all of those together using liquid glue. I made the sentiment so thick because it was going atop the flowers that were adhered with foam tape, and I needed it to be quite sturdy.

The sentiment was glued atop the flowers and the panel was adhered to the card base using SSS Dot Tape Runner. Of course I had to add a little more bling, so I added a few PinkFresh Studio Gold Metallic Pearls to finish it up.

That does it for this one! I hope you enjoyed it. It’s hard for me not to color all the things, but white and gold are beautiful too! Have yourself a wonderful day, and don’t forget to stay awesome!

Supply List:

* Affiliate links used at no cost to you. Thanks so much for your support!

Latest Posts
Latest Instagram Posts

Sketched Floral Birthday

Hello Crafty Lovelies and thanks for stopping by! Erin Lee Creative had an awesome release this past Friday with gorgeous floral plates and sentiments, and I’m super grateful and honored that Erin asked me to play with a few of the new products! I’m a little late to the party because I was away visiting my mom, but I got right to playing when I returned home. Today’s card is featuring the gorgeous Sketched Floral Foil Cover Plate along with the Script Sentiments 2 Foil Die Combo, so let’s run through the details for this one!

I began by foiling the Sketched Floral on a panel of Neenah Classic Crest 110lb cardstock using Spellbinders Champagne Hot Foil. Once the foiling was done, I trimmed the panel using PinkFresh Studio Diagonal Stitched Rectangles, and began coloring the piece. The Copic markers that I used were RV10, RV91, RV93, RV95, G21, G24, G85, Y08, Y17 and Special Black 110. Coloring the background black is a technique that I saw Yana Smakula do a long time ago, and I just love the drama and contrast that it provides.

The Script Sentiments 2 set is gorgeous and this font is so unique! I foiled a few of the sentiments on black cardstock using the same Champagne foil and trimmed them out using the included coordinating dies. I opted to go with the happy birthday sentiment, because you can never have enough birthday cards in my opinion. I went ahead and trimmed that sentiment two more times from black and adhered all of those together using liquid glue.

The sentiment was glued directly to the panel, along with some PinkFresh Studio Champagne Metallic Pearls. The panel was then adhered to the card base using foam tape for a little added dimension.

That finishes up this beauty! I hope you enjoyed it, and I hope it inspires you to get crafty! Stop by and check out this gorgeous releases over on Erin’s website! Thanks again to Erin for letting me play with these beautiful products! Have a wonderful day and don’t forget to stay awesome!

Supply List:

* Affiliate links used at no cost to you. Thank you so much for your support!

Latest Posts
Latest Instagram Posts

Simon Says Stamp Take Care Lisianthus

Hello Crafty Friends! Thanks so much for stopping by! Today’s card is featuring the new Lisianthus stamp from Simon’s newest release, Happy and Joyful. This is such a gorgeous release, but I say that about all of their releases! So, let’s run through the details of this project!

I began by stamping the floral image from the Lisianthus set on a panel of cold press watercolor paper using VersaMark Ink and heat embossing it using SSS Detail White Embossing Powder. Once that was done, I began to watercolor the image in a very loose manner.

The mediums used were Distress Ink ReInkers in Kitsch Flamingo and Mustard Seed. I also used Concord and 9th’s Oceanside liquid watercolor. When the painting was done, I used the PFS Diagonal Stitched Rectangles to trim it out.

For the sentiment, I chose to use the SSS Take Care. I die cut the sentiment three times from black cardstock and adhered all of those together using liquid glue, and then glued it directly to the watercolored panel.

The panel was then adhered to black cardstock using foam tape. I opted to use foam tape to keep the panel from warping once it was on the card front. The panel was adhered to the card base using SSS Dot Tape Runner. To finish up, I added a few PFS Jewels to give it a little bling.

That does it for this project! Super simple, but I love the look of loose watercolors. I hope you enjoyed it and I hope it inspires you to get crafty! Have a wonderful day and don’t forget to stay awesome!

Supply List:

* Some affiliate links used at no cost to you. Thanks so much for your support!

Latest Posts
Latest Instagram Posts