PinkFresh Studio Golden Sunflower Hello

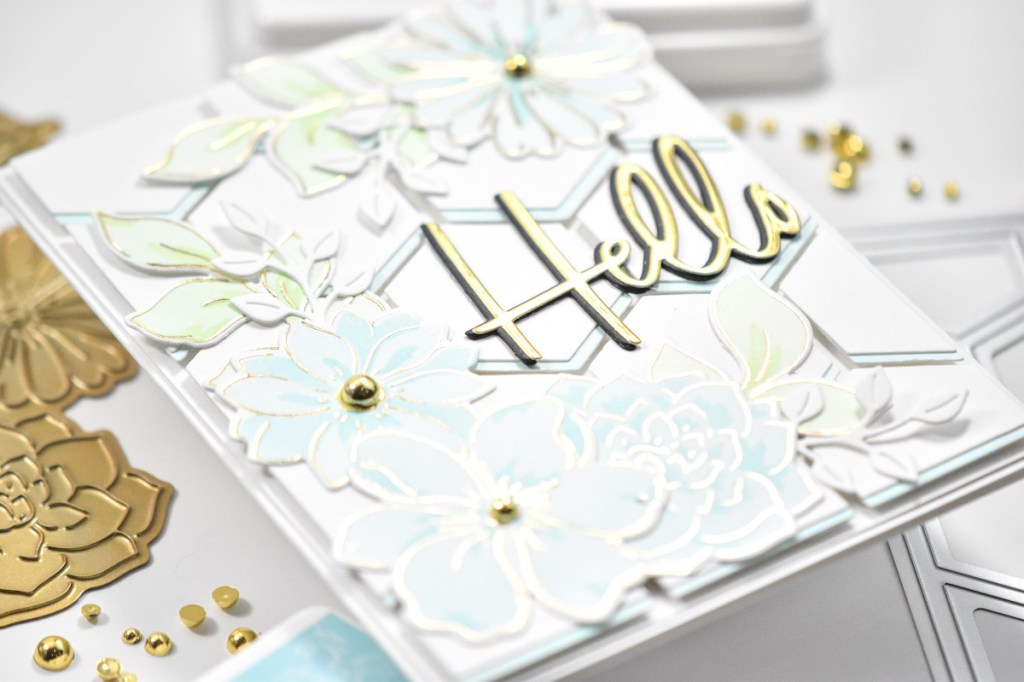
Hello Crafty Friends and welcome back! I hope you’re having a great day! Today’s project is featuring the PinkFresh Studio Sunflowers Washi! I love all of the washi tapes that PFS has to offer, and this one is no different! They are just a great product for making quick, yet beautiful cards! Let’s run through the details shall we?

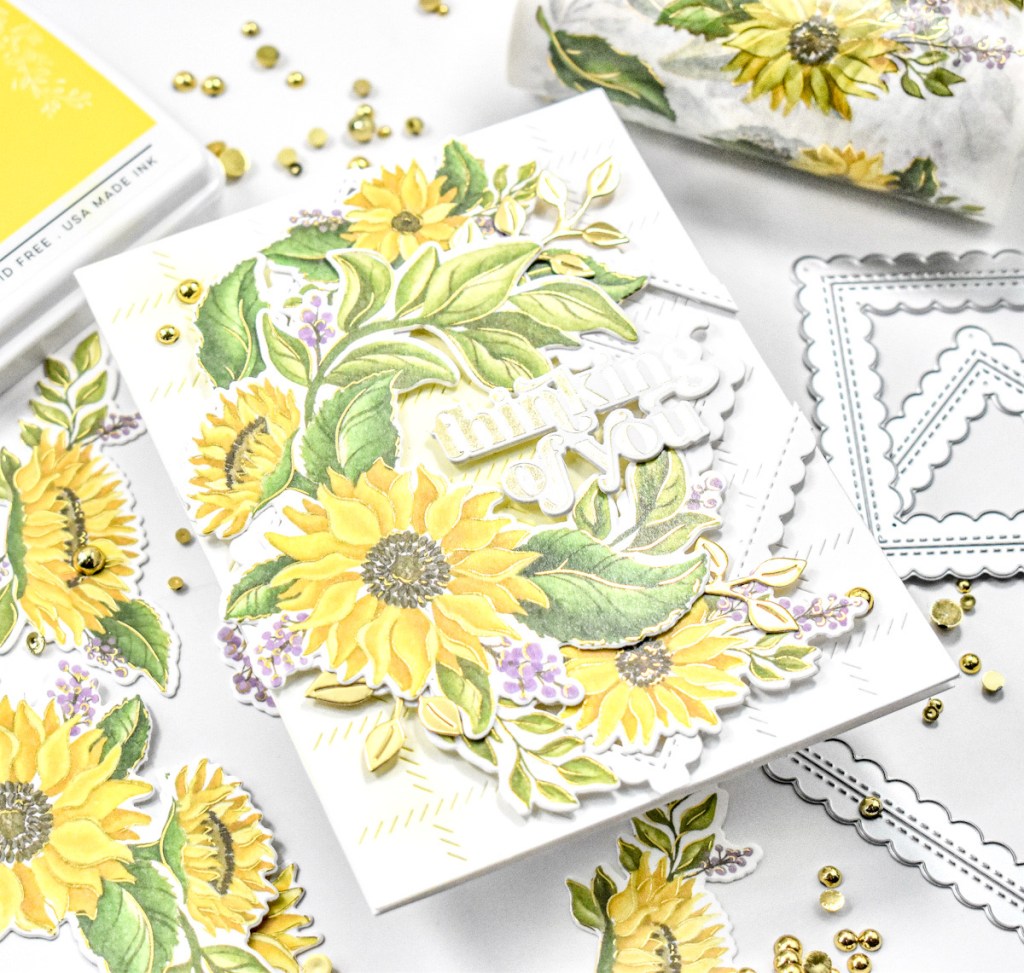
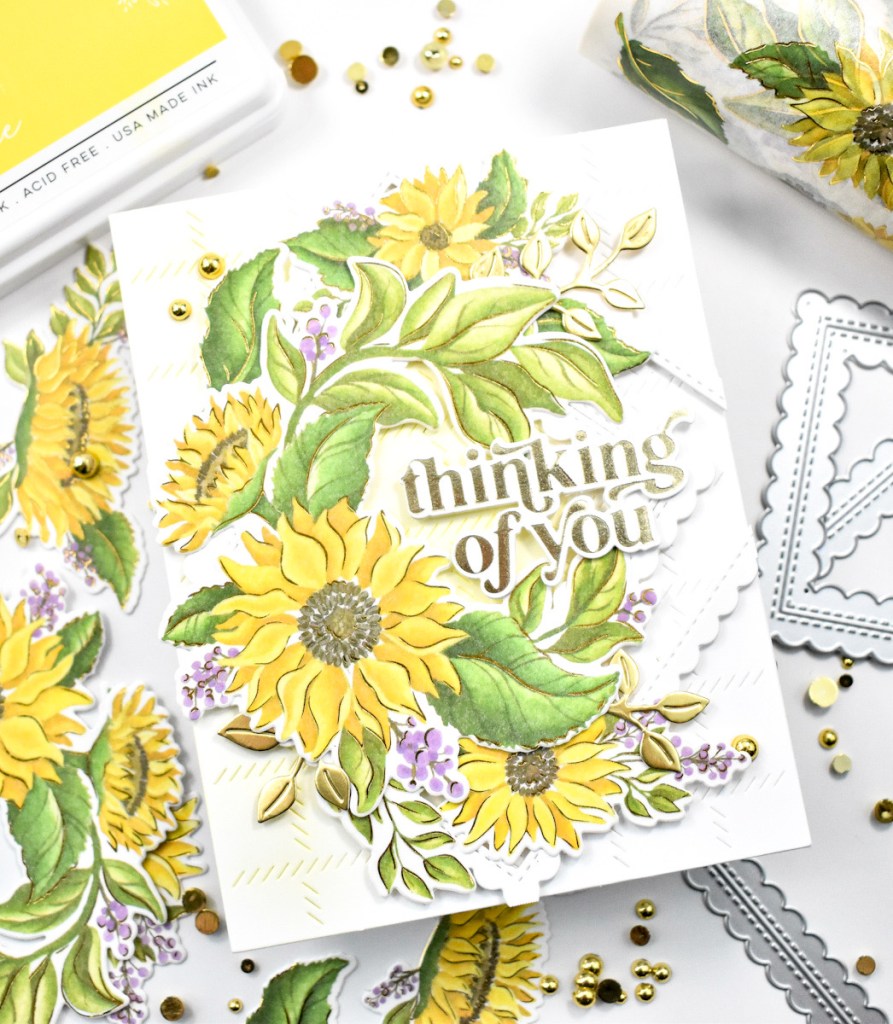
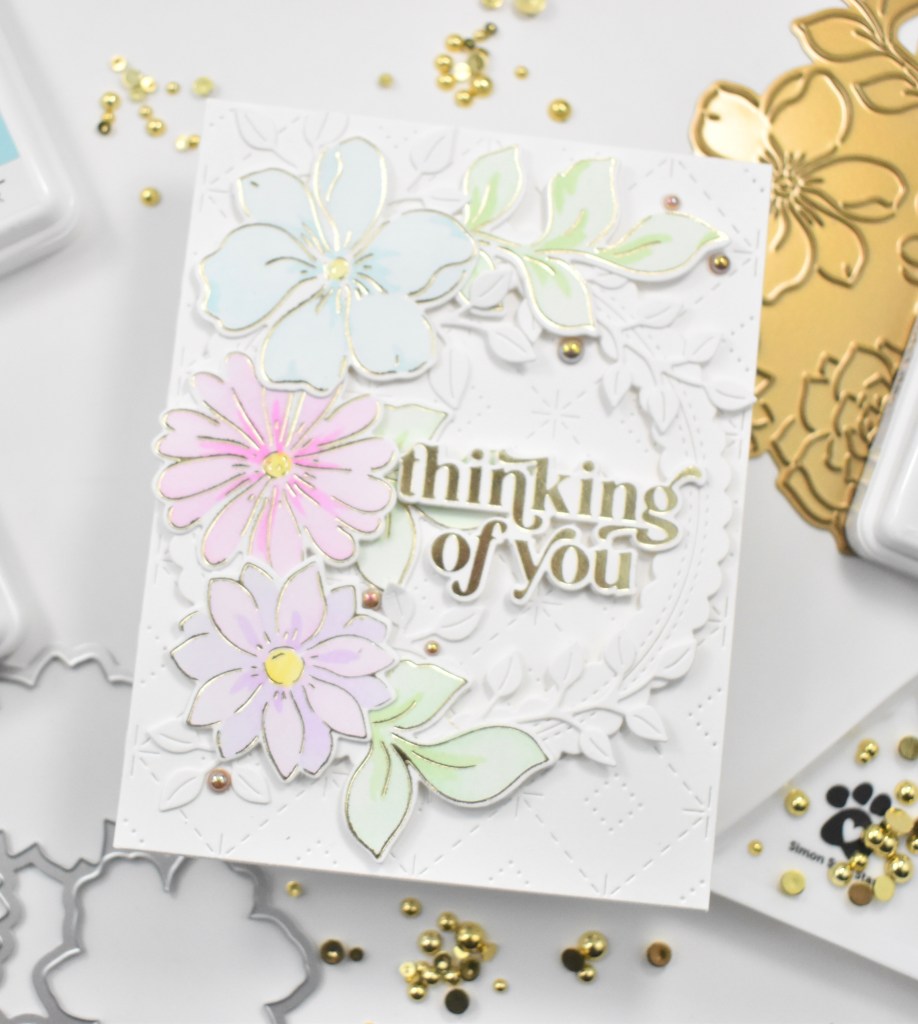
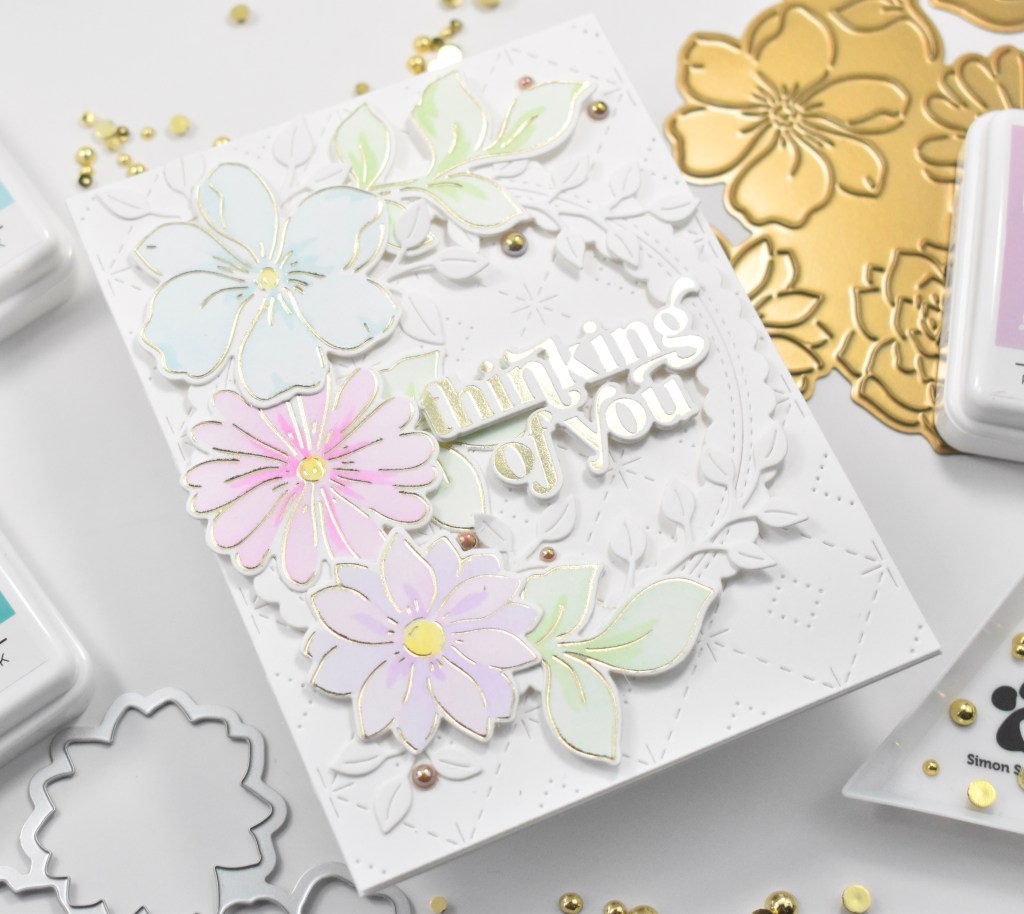
To begin, I rolled out a panel of PFS Sunflowers Washi Tape onto a panel of Neenah Classic Crest 110lb cardstock and ran that through the die cutting machine using the coordinating die. You end up with so many pieces of gorgeous flowers and leaves .. enough to make at least two cards worth!

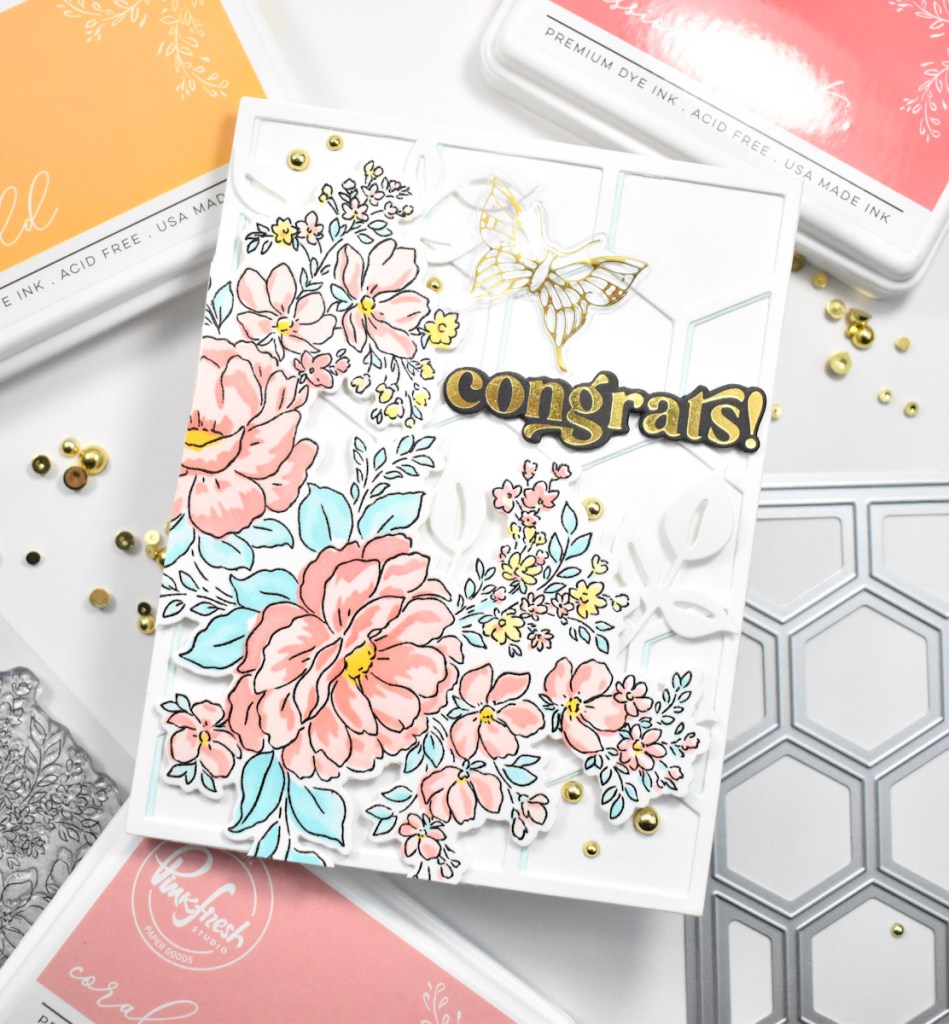
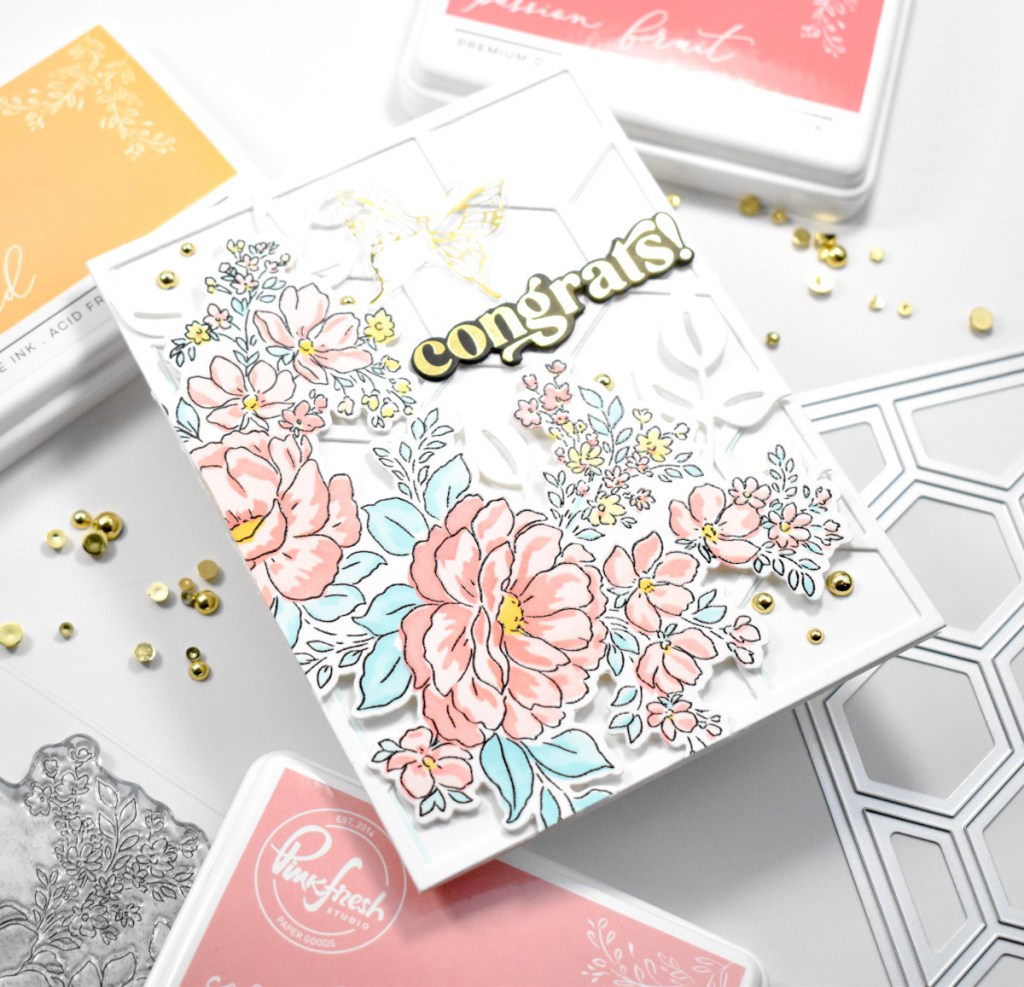
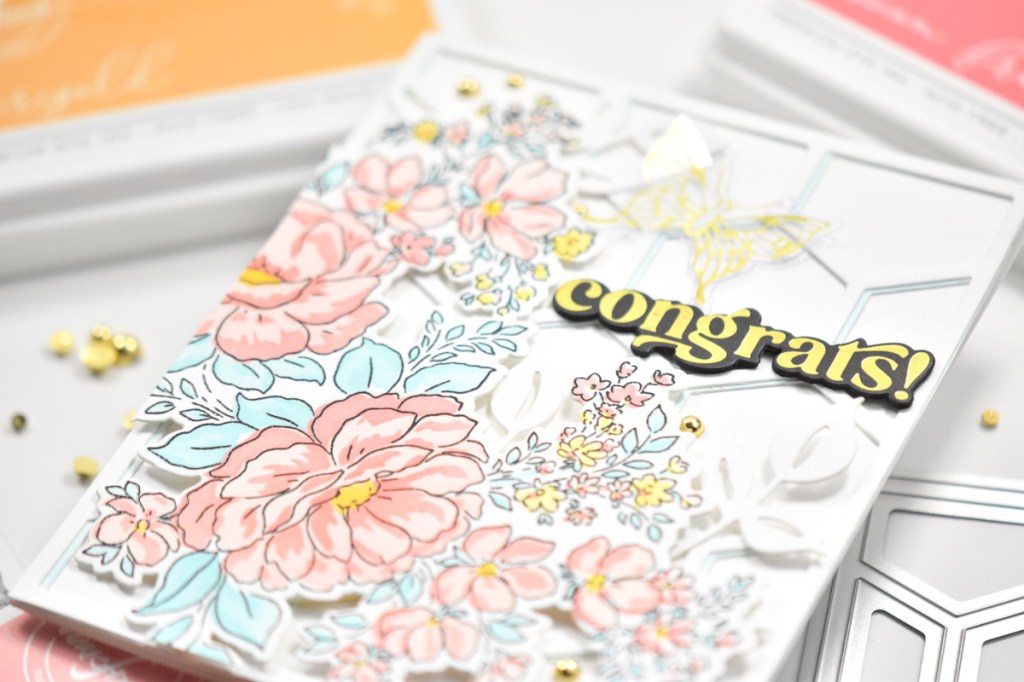
For the background, I used the SSS Detail Pincushion Plate. I used the embossing mat and embossed the panel onto purple cardstock, and then die cut the panel from Neenah 110. I added some liquid glue to the back of the white panel and popped it right into place over the purple panel. It fits so nicely and looks like you spent a ton of time inlaying all the beautiful pieces.

I played around with the placement of the flowers and leaves and guess what, I determined that I needed some additional leaves! I’m not kidding, I think every card that I make needs additional leaves! Anyhoo, I used the PFS Leafy Branch die to cut some of those from gold cardstock.

The sentiment is from the PFS Perfect Sentiments product suite. In this case, I used the hot foil plate to foil the sentiments onto a panel of Neenah 110lb using Spellbinders Gold Foil, and used the coordinating die to trim them out. I did cut it two more additional times and adhered those together using liquid glue.

I began arranging and assembling the flowers and leaves using a combination of glue and foam tape for support, tucking leaves under as necessary. The sentiment was then glued atop the flowers and the whole panel was adhered to the card base using SSS Dot Tape Runner.
That finishes up this project! I hope you enjoyed it and I hope it inspires you to get crafty! If you haven’t tried any of the PinkFresh Studio washi tapes, I definitely recommend them! Have a wonderful day and don’t forget to stay awesome!
Supply List:
- PFS Sunflowers Washi Tape and Die
- PFS Leafy Branch
- PFS Perfect Sentiments Hot Foil Plate, Die, Stamp
- SSS Detail Pincushion Plate
- SSS Dot Tape Runner
- Spellbinders Mirror Gold Cardstock
- Spellbinders Gold Hot Foil
- Spellbinders Glimmer Hot Foil System
- Spellbinders Platinum 6
- Tim Holtz Scissors
- Neenah Classic Crest Solar White 110lb Cardstock
- Purple Cardstock
- Bearly Art Glue
- 3M Foam Tape
* Affiliate links used at no cost to you. Thanks so much for your support!
Latest Posts
- Simon Says Stamp Braided Greetings

- Together By Design Color Cube Floral

- Simon Says Stamp Cute Duckling

- Simon Says Stamp Watercolor Wild Rose

- Simon Says Stamp Striped Missing You