Reverse Confetti Countdown to Confetti Day Two

Hello Fetti Friends and welcome back! So glad that you stopped by for the Reverse Confetti Countdown to Confetti Day two! This is such a cute release with beautiful floral cover panels and a sweet sentiment stamp set! To celebrate the release, we are having a blog hop, so hop along and leave comments for your chance to win a gift certificate! More details and the hop list are below. Please note that new product links will not be active until the release goes live on August 8th. Let’s get into the details for today’s card.

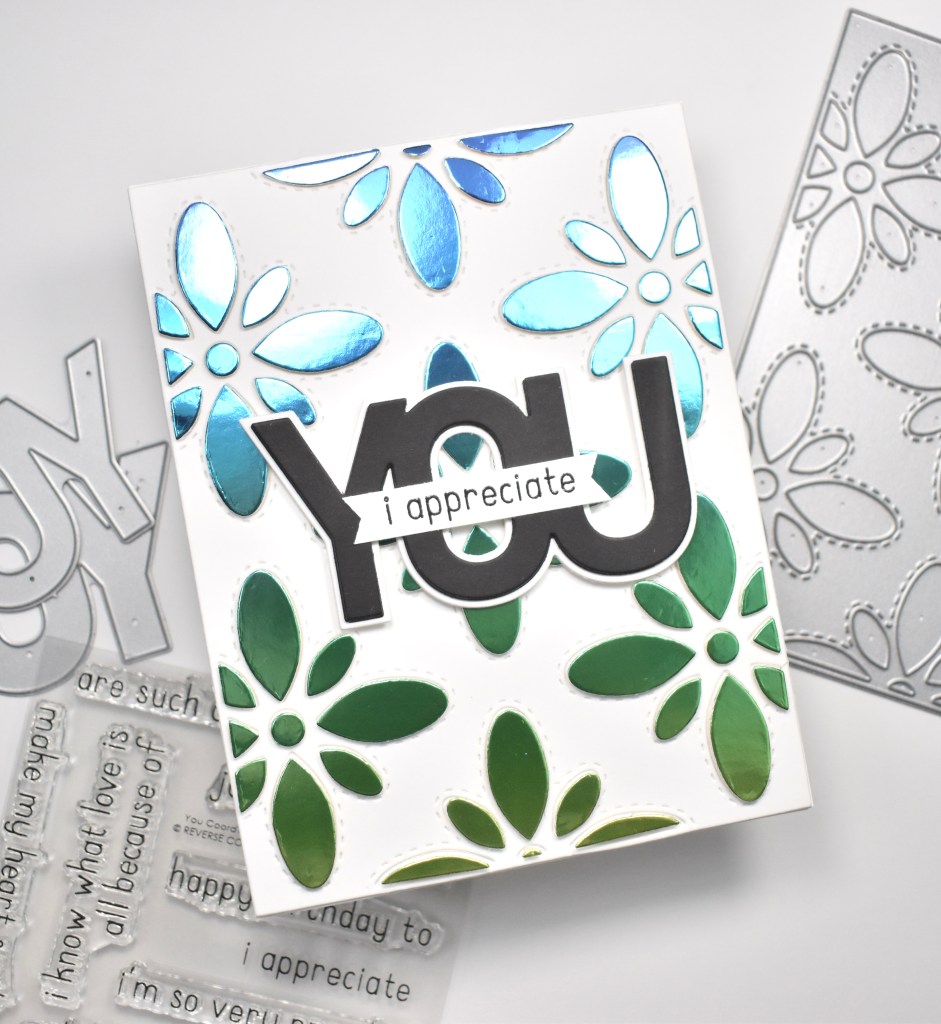
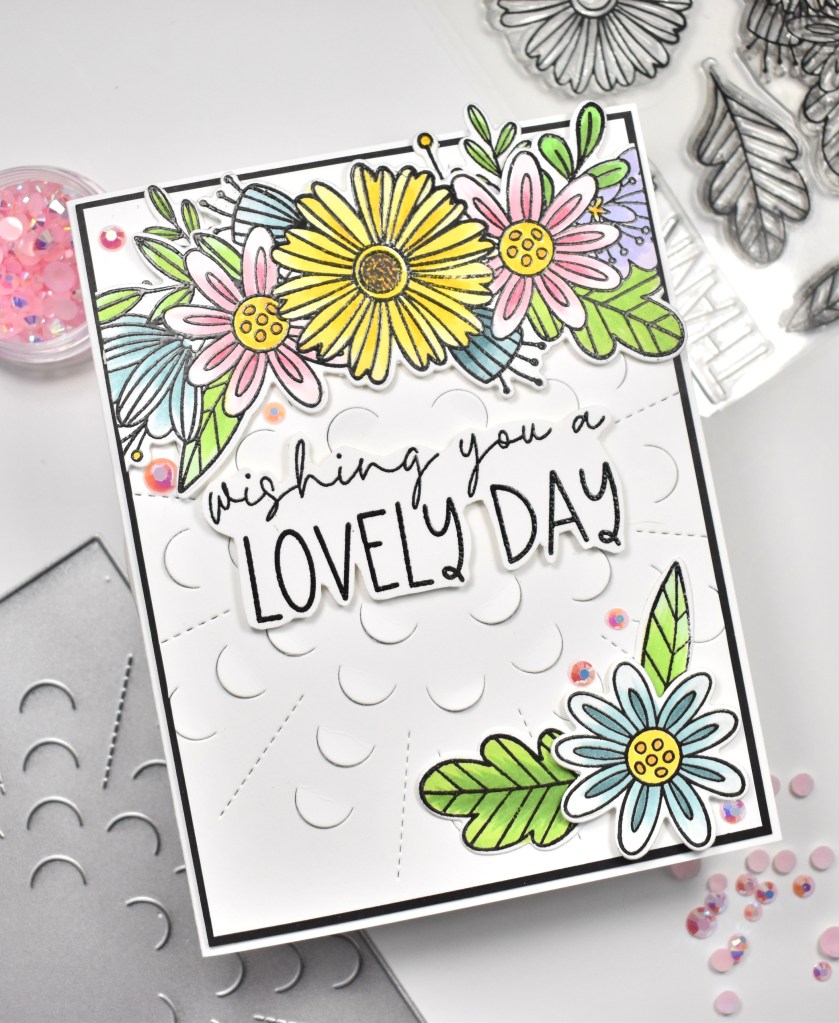
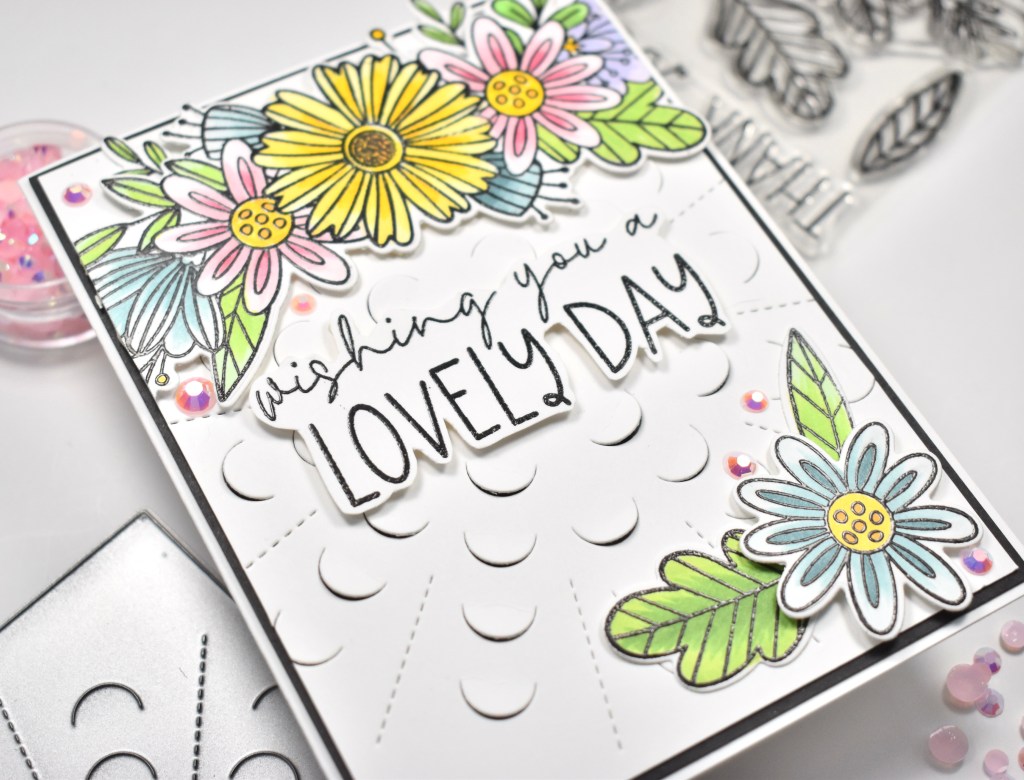
This card is using the new Hello Daisy Cover Panel, and I opted to use it as it was intended. To begin the card, I pulled out a panel of Fluid Hot Press Watercolor Paper and some Distress Oxide Spray in Spun Sugar. I sprayed the ink on my glass mat and spritzed it with water and proceeded to do some ink smooshing. Once I was satisfied with how it looked, I set it aside to dry and began some die cutting.

I die cut the cover panel from Neenah Classic Crest 110lb cardstock and did some light ink blending using Distress Oxide inks Spun Sugar, Mustard Seed, Twisted Citron, Tumbled Glass and Dusty Concord. I went ahead and die cut a bunch of the included flowers using Sizzix cardstock in various colors and adhered those together using liquid glue.

Once the ink smooshed panel was dry, I popped it in the Misti and stamped the sentiment, which is from the new Scripty Sentiments Stamp Set, using VersaFine Onyx Black ink and heat embossed it using Ranger Clear Embossing Powder. I then adhered the frame to that using foam tape for dimension. I began adhering the colored flowers using a combination of foam tape and glue.

I adhered the flowers in their designated spaces on the cover panel, as well as, adding some around the panel and on the frame itself. To finish up, I adhered the panel to a Neenah 110lb card base, and added some PinkFresh Studio Jewels to some of the flowers.
That does it! I hope you enjoyed this project, and I hope it inspires you to get crafty! Don’t forget to hop along and leave comments by noon central time on August 7th for your chance to win a Reverse Confetti $15 gift certificate! The hop list is below! Happy hopping!
Supply List:
- Reverse Confetti Scripty Sentiments Stamp Set
- Reverse Confetti Hello Daisy Cover Panel Confetti Cuts
- Neenah Classic Crest Solar White 110lb Cardstock
- Fluid Watercolor Paper
- Sizzix Cardstock
- Neenah Classic Crest Solar White 110lb Cardstock
- VersaFine Onyx Black Ink
- Ranger Clear Embossing Powder
- Distress Oxide Spray Spun Sugar
- Distress Oxide Ink: Spun Sugar, Mustard Seed, Twisted Citron, Tumbled Glass, Dusty Concord
- PinkFresh Studio Jewels
- Craft Tacky Glue
- 3M Foam Tape
- Anti-Static Powder Tool
- Blender Brushes
- Misti
- Gemini Jr.
*Affiliate links used at no cost to you. Thank you so much for your support!
- Simon Says Stamp Grateful Heart

- Simon Says Stamp Braided Greetings

- Together By Design Color Cube Floral

- Simon Says Stamp Cute Duckling

- Simon Says Stamp Watercolor Wild Rose